I’m back … been very busy! Had a fun “Coffee Break” class with another group of fabulous ladies!! I have a cute card to share with you.
Also been up at the hospital … it’s OK, in fact it’s awesome! My granddaughter delivered a sweet little boy yesterday!! I’m GG again! Here we are …
He’s not too happy with everyone snapping pictures! He didn’t even get his bath yet!! So after he got cleaned up, his mommy put him in a cute little outfit …
Today after work I will be picking up his big brother (2 yrs. old) so they can formally meet and hang out!!
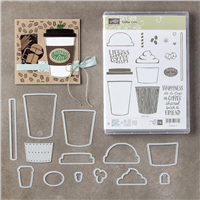
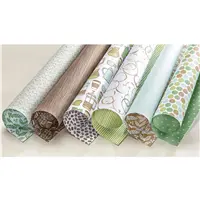
Time for a coffee break … We began with a simple card that turned out so cute! We began with the Coffee Break Designer Series Paper … this pattern is so fun and really let’s you know it’s all about the coffee!
We also stamped and cut out the cup and the lid. The little cup gripper was die cut and it actually dies the embossing at the same time …
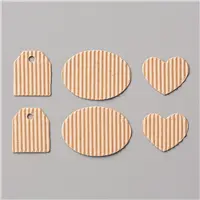
Our little greeting is stamped in Garden Green and is attached to the grip. We also used the Corrugated Elements to say “Hi” and to add a little touch of fun and texture.
This is really a fun set to use and is for much more than a “coffee” bundle!
And Hello August! Wow.. this summer is going by so fast! Hope you’re out enjoying it. I’m looking forward to a mini get-away with my sister Eileen to Door County to see Tonic Sol-fa
Tonic Sol-fa is an a cappella group from the Minneapolis–Saint Paul region. With a largely pop-music-oriented repertoire, their CDs have sold over 1,000,000 copies, and the group has toured throughout the US and abroad.
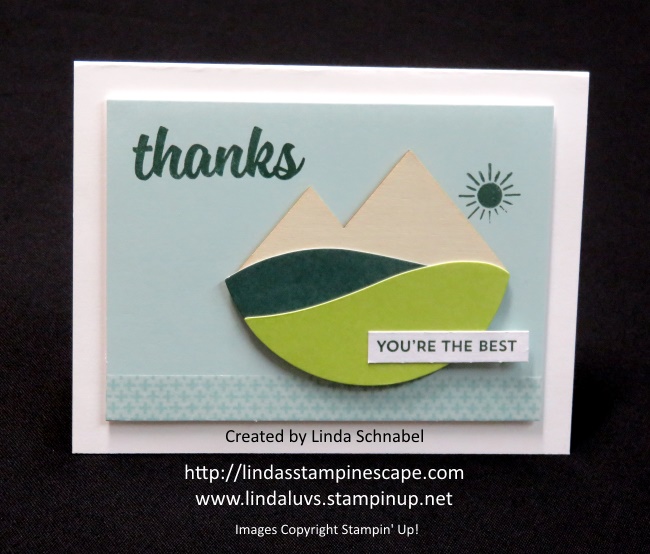
OK … back to stamping! As promised, I have another alternative to the July 2017 Paper Pumpkin kit … a bit more man!
I simply used the mountain scene as I did in the original design but did not tuck it behind the circular window but put it boldly in the forefront to create a focal point.
I cut the notecard in half and stamped the thanks which came from the exclusive stamp set that is included in the kit, as dose the cute little sun and mounted it all on the front. I then mounted that piece onto the white card.
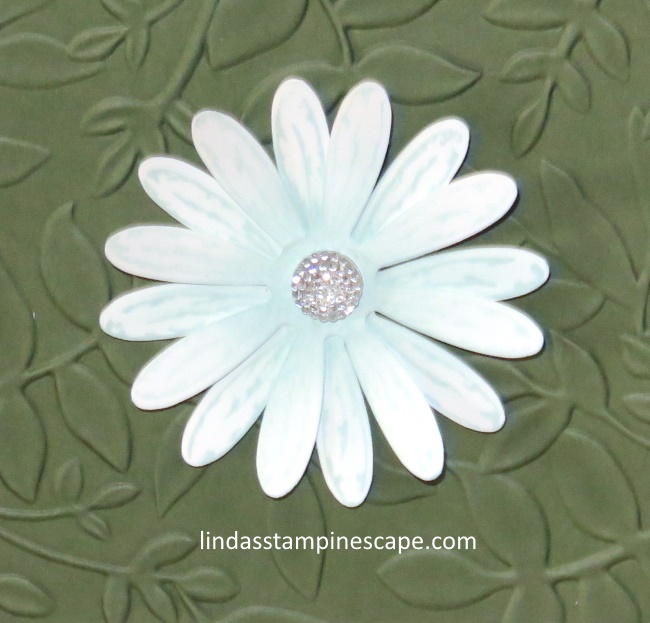
Today I have a simply beautiful card to share with you. This is just one of the cards we made in my Delightful Daisy class… Simple yes, but oh so pretty …
The beautiful background was created with the new Layered Leaves Dynamic Impressions Folder. I love how this folder creates so much texture and depth to your card. It’s best to give it a little spritz of water to soften the fibers in the cardstock … it will give you the deepest impression.
Our daisy was inked, then stamped off with the delicate color; Pool Party. I wanted the softest look of the stamped image … then we gently sponged a little more Pool Party in the center of the daisy.
The nearly white daisy with the touch of Pool Party really makes your flower POP against the Always Artichoke background. We finished off the daisy with one of the new clear Faceted Gems. My class attendees will get the Faceted Gems FREE with their purchase of the class bundle!
Our greeting was simple as well … a Thank You from the Daisy Delight stamp set (The bundle is currently unavailable to order, but should be back around August 1st).
This was a popular one in class, one comment was “This is so pretty and easy to make … I could make a ton of these!”
So I hope you enjoyed todays card as much as we did, and I THANK YOU for stopping by today!
Enjoy your Saturday ~
Today’s Stampin’ Supply List: (Daisy Bundle will be available after Aug.1st … Sorry for any inconvenience)
Today I have Card #2 of my March Madness: Sale-a-bration Celebration! I also have some important updates to share with you concerning the Sale-a-bration gifts. Stampin’ Up! has added some new items, that is exciting, however … two of the previously released items have so to speak “sold out”. The supplies have been depleted and are no longer available. (See Below)
Today’s card is featuring the beautiful “Floral Boutique” Designer Series paper and the “Stitched Shapes Framelits” dies, and one of my favorite techniques “Dazzling Diamond Dust”. The card is easy to make and can be done in a variety of Designer Papers and greetings!
Remember … you will get step by step instructions and the card dimensions when you choose this card and a qualifying purchase.
STAMPIN’ UPDATES:
Sale-A-Bration has flown by! Times flies when you’re having fun, though, right? Only a few days are remaining during Sale-A-Bration— the year’s biggest promotion. We have added additional products for you to earn and enjoy. Don’t forget you have until March 31 to earn free the products.
* Please note, to receive one of the Sale-A-Bration final day’s products for free, you will need to use the item code noted below and not the regular item code.
Item Number
Description
147361
2016-2018 In Color 8-1/2” x 11” Cardstock
147365
Party Animal Designer Series Paper
147363
Succulent Garden Designer Series Paper
147364
Tasty Treats Specialty Designer Series Paper
147362
Party Animal Designer Washi Tape
147360
Seaside Textured Impressions Embossing Folder
147356
Sparkle Textured Impressions Embossing Folder
Thank you so much for stopping by. Please let me know if you have ANY questions on the March Madness promotion (this promotion is only available thru me, Linda Schnabel) or the new products Stampin’ Up! has added to your Sale-a-bration items.
Let me say “there is nothing easier than your Paper Pumpkin kits”. Today I’m here to share some cute alternative projects that I made using the 2017 January Paper Pumpkin kit.
The first project I have to share is similar to the little Hostess Gift that I gave to Kathie for hosting an at home Stampin’ Party. I like to spoil my hostesses because they introduce me to some awesome people and we get to stamp!
This cute gift box was easy to create … Simply use a punch, I used the heart punch, secure a piece of window sheet on the inside to create a window and so the treats don’t fall out. The little white heart is included in the kit as is the heart stamp that I used to put a little color around the edge of my heart, before stamping the greeting (also included in the kit).
The only thing that I added to my gift box that are not included in the kit was the “heart” from the Metallic embellishments. It really ties all the gold together and looks cute!
My second project is a card. Super simple … the base is Whisper White and the front is Blushing Bride – it matched the stripped vellum banner that came in the kit. I used the round Metallic embellishments this time to anchor my banner. I created a background by stamping hearts all over the front… You could “step it up” and emboss the front with the “Happy Heart” embossing folder, that will add more texture.
Next, I used a white heart from the kit but this time I used VersaMark to stamp on the heart and embossed it with Gold – coordinating the gold embossing on the banner (it comes that way in the kit)
The hardest part of creating this card was “where” to place the heart … by the banner, or near the bottom! Which do you like better?
Both of these cute projects were created in just a few minutes. Don’t forget, you can always just make your Paper Pumpkin kit per the instructions … I just want you to know there are many other options out there for you. If you order your Paper Pumpkin before the 10th of the month … You will receive that month’s kit.
Hope you enjoyed today’s projects, and please let me know which way you like the card best.
Here’s the video in case you missed it …
* Paper Pumpkin is on sale during Sale-a-bration!! Now is a great time to try out Paper Pumpkin and to get FREE Sale-a-bration items!
3-Month Prepaid Subscription (137859) $59 $55 Save on a 3-month prepaid subscription and instantly qualify for a FREE Sale-A-Bration item!
12-Month Prepaid Subscription (137861) $215 Take it to the next level with a 12-month prepaid subscription. Save over $2/month with the everyday awesome price, earn Stampin’ Rewards, and get 4 FREE Sale-A-Bration items!
This offer will end on March 31, 2017 at 11:50 PM (MT).
Let me know if you have any questions on the Paper Pumpkin kits @ lindaluvs2stamp@aol.com or just click one of the links below and start your Paper Pumpkin adventure!
Thanks for taking time out of your Sunday to share it with me.
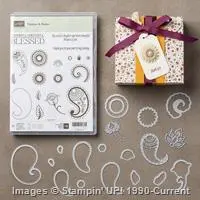
Yesterday I said I would share a card created with our Petals & Paisleys product suite that can be found on pages 46 and 47 of the Holiday Catalog. I never really considered myself much of a “paisley” person but the beautiful cards I have seen with this product suite inspired me to create this card for you.
I love combining products that we already have with our new goodies! Today I have used the “Floral Affection” embossing folder with our Paisleys. You will want to emboss first and then stamp your greeting.
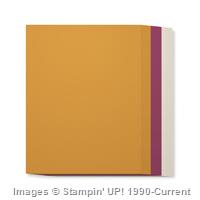
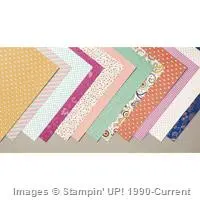
Our color pallet consists of Night of Navy, Delightful Dijon and Very Vanilla. The beautiful designer paper is the “Petals & Paisleys” Specialty Designer paper…. Special because of the two sheets included that have been embossed with beautiful Copper highlights!
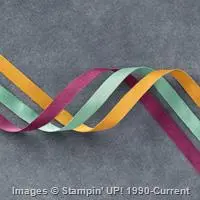
I used the “Ribbon Trio Pack” to finish the edge of my designer paper. It is so pretty in “real life” … it has a bit of a shimmer to it – just gorgeous! Of course the pretty die cut posies are from the Paisley framelits (which I have listed below in the bundle) We attached those with Glue Dots and topped them off with a pearl.
You cannot make this pretty of a card without putting something on the inside, so I chose the beautiful saying “My world is brighter and more beautiful because of you”, which is included in this stamp set (bundle) … and again the pretty stamped posies are also included in the stamp set.
I’m keepin’ my post short and sweet today just because it’s Monday … I hope this card brightened your day! Thanks so much for stopping by.
Happy Saturday … and for some of us, an extra long weekend! No work on Monday 🙂 Happy Face!! I love when I can spend more time in my stamping room and play with my new stampin’ stuff.
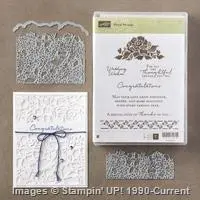
Today, I have a beautiful card to share with you. We made this card during my “Floral Phrases” class. The focus of the class was to illustrate the different ways that you could use this awesome bundle.
This card was simple to make but looks extravagant. We begin with the Night of Navy cardstock – cut lengthwise. The inside white and white for the front are both cut at 4″ x 5-1/4″.
Place one of the white sheets on the the New BigShot platform and topped with the Precision Base Plate. The Precision Base Plate will deliver improved performance with this detailed die, giving you the extra fine cut. Place each of the floral dies at the end of the cardstock … there will be a space between them.
Once cut, I used the Die Brush to remove the small cut pieces from the dies. I applied the cut piece to the front of the card using my Multi-Purpose Liquid Glue.
I stamped my greeting from the stamp set onto a 1″ strip of Whisper White and attached it directly to the card. Add a few Pearls and your done with the front … that quick and easy, with beautiful results.
The inside of the card has a strip of the coordinating Designer Series Paper – Floral Boutique and another of the greetings/verses that come with the Floral Phrases stamp set. This is the first bundle that caught my eye when I first got my annual catalog … I love it!
Thanks so much for joining me today!
Have a wonderful day, and enjoy the beautiful sunshine (I hope it’s shining by you too).
It’s Monday again! Hope you had a wonderful weekend.
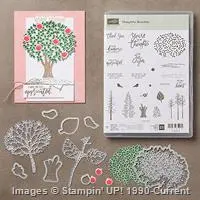
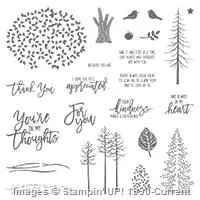
Today I’m hosting one more “Thoughtful Branches” classes and I wanted to send out a reminder that this versatile stamp set and coordinating framelits ends this Wednesday. It will be so sad to see it go.
I will say it again … If you use “Lovely as a Tree” for your go to stamp set, you will really love the Exclusive Limited Time “Thoughtful Branches” Bundle. If you purchase this bundle on-line by August 31st, I will send you the 3 cards that we made in my class.
It’s so fun to be able to create a seasonal card … you can watch it go from summer to fall to winter!
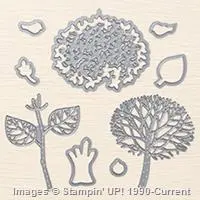
Below is another one of the tree’s included in the bundle … so pretty.
Below you can see the same tree branches I used above in the background with the die cut tree as your focal point. These are both beautiful cards that showcase the versatility of this bundle.
If you would like to purchase this bundle before it officially retires after Wednesday … just click on the icon below.
Thanks for stopping by today, I hope that you have a wonderful week.
Click on imaged to purchase this fabulous bundle …
Thank you for your patience! I had several unexpected visitors yesterday … pleasant visitors. First my granddaughter brought over my great-grandson to visit, then my oldest daughter came over with my grandson … don’t get to see them much so it was pure pleasure!
Onto my tips for stamping with the “Thoughtful Branches” stamp set!
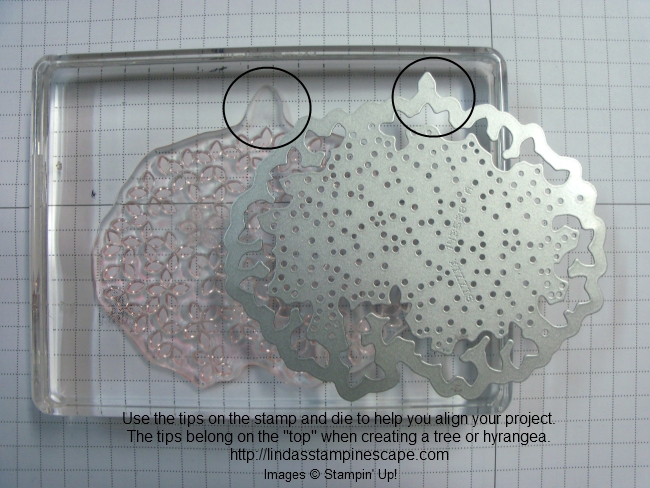
First, I want to show you the “tips” or “tabs” or “notches” that are on your stamps and die …
These are here to help you position your images. They should be used at the “top” when stamping and cutting. You will also notice an indent in the bottom image / die – this also helps in the alignment, especially when you place the die over your stamped image.
Next, when I stamp large images, I like to flip my block over and ink from the top. This gives you much more control when inking, especially with the new ink pads and you can see if the entire image is inked up.
I like to tell my stampers … “Show it who the boss is!”
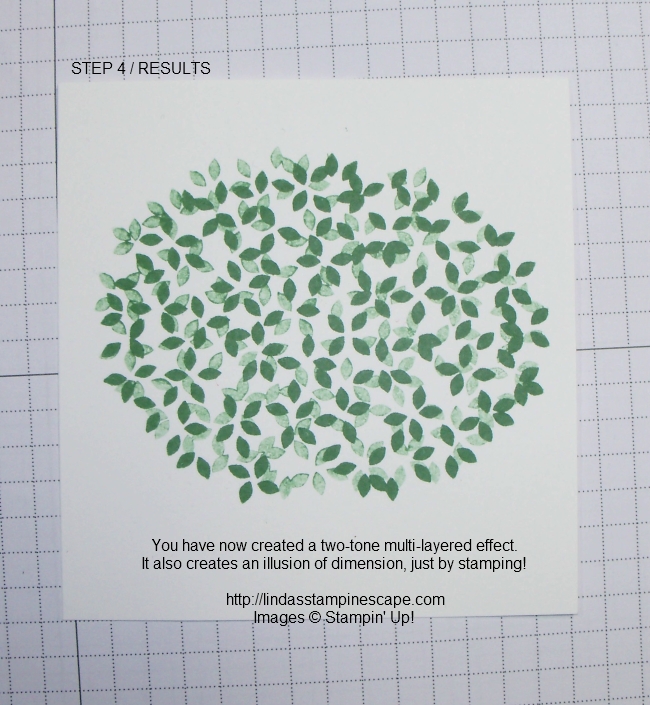
Now we are going to create a two-tone image. Stamp your image with the “tip / tab” to the top of your cardstock. Then pick it up and turn it slightly to the right (without re-inking) and stamp again.
This created a beautiful two-tone effect, and by moving the stamp to the right, it creates a wonderful layering effect that gives your card the illusion of dimension, just by stamping.
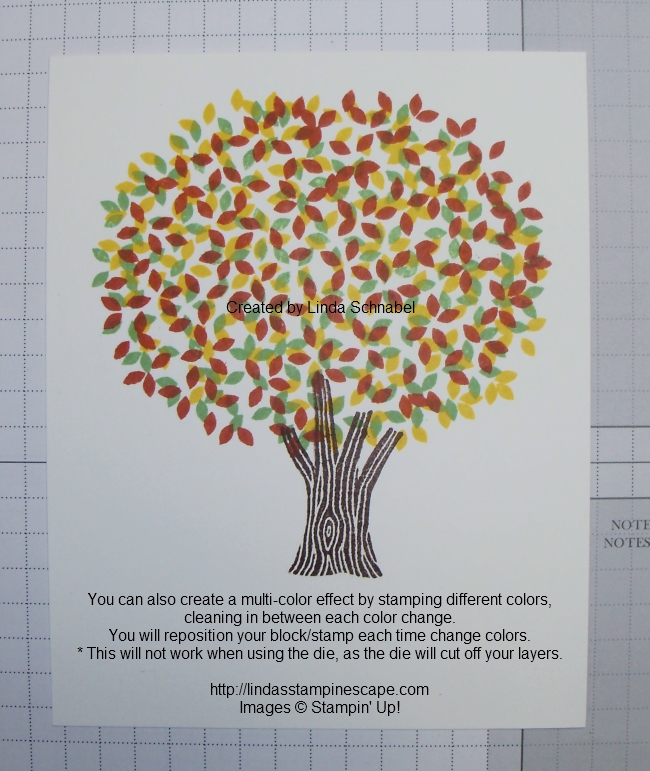
You can also create multiple colors …
Once your first color is stamped, clean, ink with new color and slightly turn your block/stamp to the right, then stamp image, and repeat with a different color. Each time you stamp a new color … you will move the block/stamp to the right each time. For example (if using the numbers on a clock) Your first color would be at 12 o’clock … the tab to the top, the second color somewhere between the 1 and 2, and the third color at 3.
Once you begin using the stamp, you will see how easy it is to arrange your stamp to create this multi-color effect.
Now … just add some cardstock and a bit of ribbon (SNEAK PEEK from the Holiday Catalog) and you have created a beautiful card!
I hope you enjoyed this tutorial and if you have any questions on this technique please leave me a message below or you can reach me by e-mail … just click the link at the top right of this page.
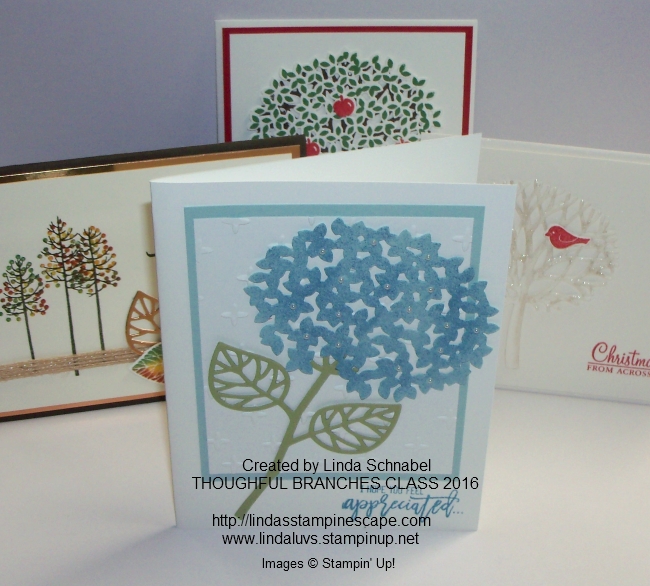
I recently held a class on the beautiful “Thoughtful Branches” bundle. This is an exclusive, “limited time only” stamp set and framelit dies. I’ll share more about the class tomorrow. Today, I wanted to share another card created with this bundle …
The neutral colors with the pop of red really make this card stand out. I love the subtle waterwash of blue behind the trees.
If “Lovely as a Tree” is your “go to” set – your favorite stamp set, then you will definitely want to order the “Thoughtful Branches” bundle. It is so versatile and the possibilities are endless.
I can’t wait to share even more cards with you, as this stamp set is simply amazing. In our class we made a summer, a fall and a Christmas card!
Thanks for stopping by today …
Have a wonderful day.
If you would like to purchase this exclusive stamp set and die, click on your choice …
June is a great time to gather your friends and family for a stamping party! Don’t have time to pull together a get together? Then do a book show, or we can do a virtual party over facebook! Give it a try!
One of the beautiful stamp sets you can get for FREE with your hostess $$ dollars is the beautiful “Gift of Love” stamp set … I can’t resist the beautiful flowers and words in this set…
So simply done with the water color wash background. This is a two-step stamp set which makes your card making quick -n- easy.
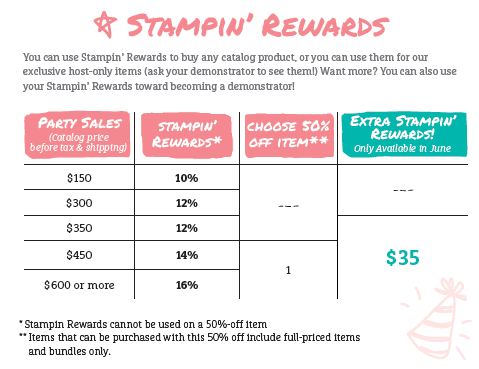
I love our hostess stamp sets because they stretch your Hostess $$ dollars even further, just remember when your party/order is $350 or more in June, enjoy an extra $35 in hostess rewards (in addition to the rewards shown in the chart below)! Spend your Stampin’ Rewards $$ on hostess sets or on anything in the catalog!
Gather your friends or orders from them (I can help you with a hostess code for everyone to order online), or, place your own shopping spree order to enjoy the extra rewards!
Remember.. ALL orders of $150 or more enjoy the Stampin’ Rewards (Hostess $$) to spend any way you wish!
Contact me … I’d love to help you get all the Hostess goodies on your wish list!
Thank you for coming to visit my blog today, hope yours is a good one.
Today I’d like to share with you 5 fabulous cards, highlighting 3 new stamp sets. You can create cards for all occasions with these fun new stamp sets … and they’re FREE!
Let’s start with the fabulously FUN “Pun Intended” stamp set …
You can easily make these fun cards … or we can make them together! These cute cards come from one of our newest Hostess Sets. Stamp sets you can get for FREE with your hostess $$ dollars when you host a qualifying stampin’ party.
One of my favorites is the beautiful “Gift of Love” stamp set … I can’t resist the beautiful flowers and words in this set…
So simply done with the water color wash background. This is a two-step stamp set which makes your card making quick -n- easy.
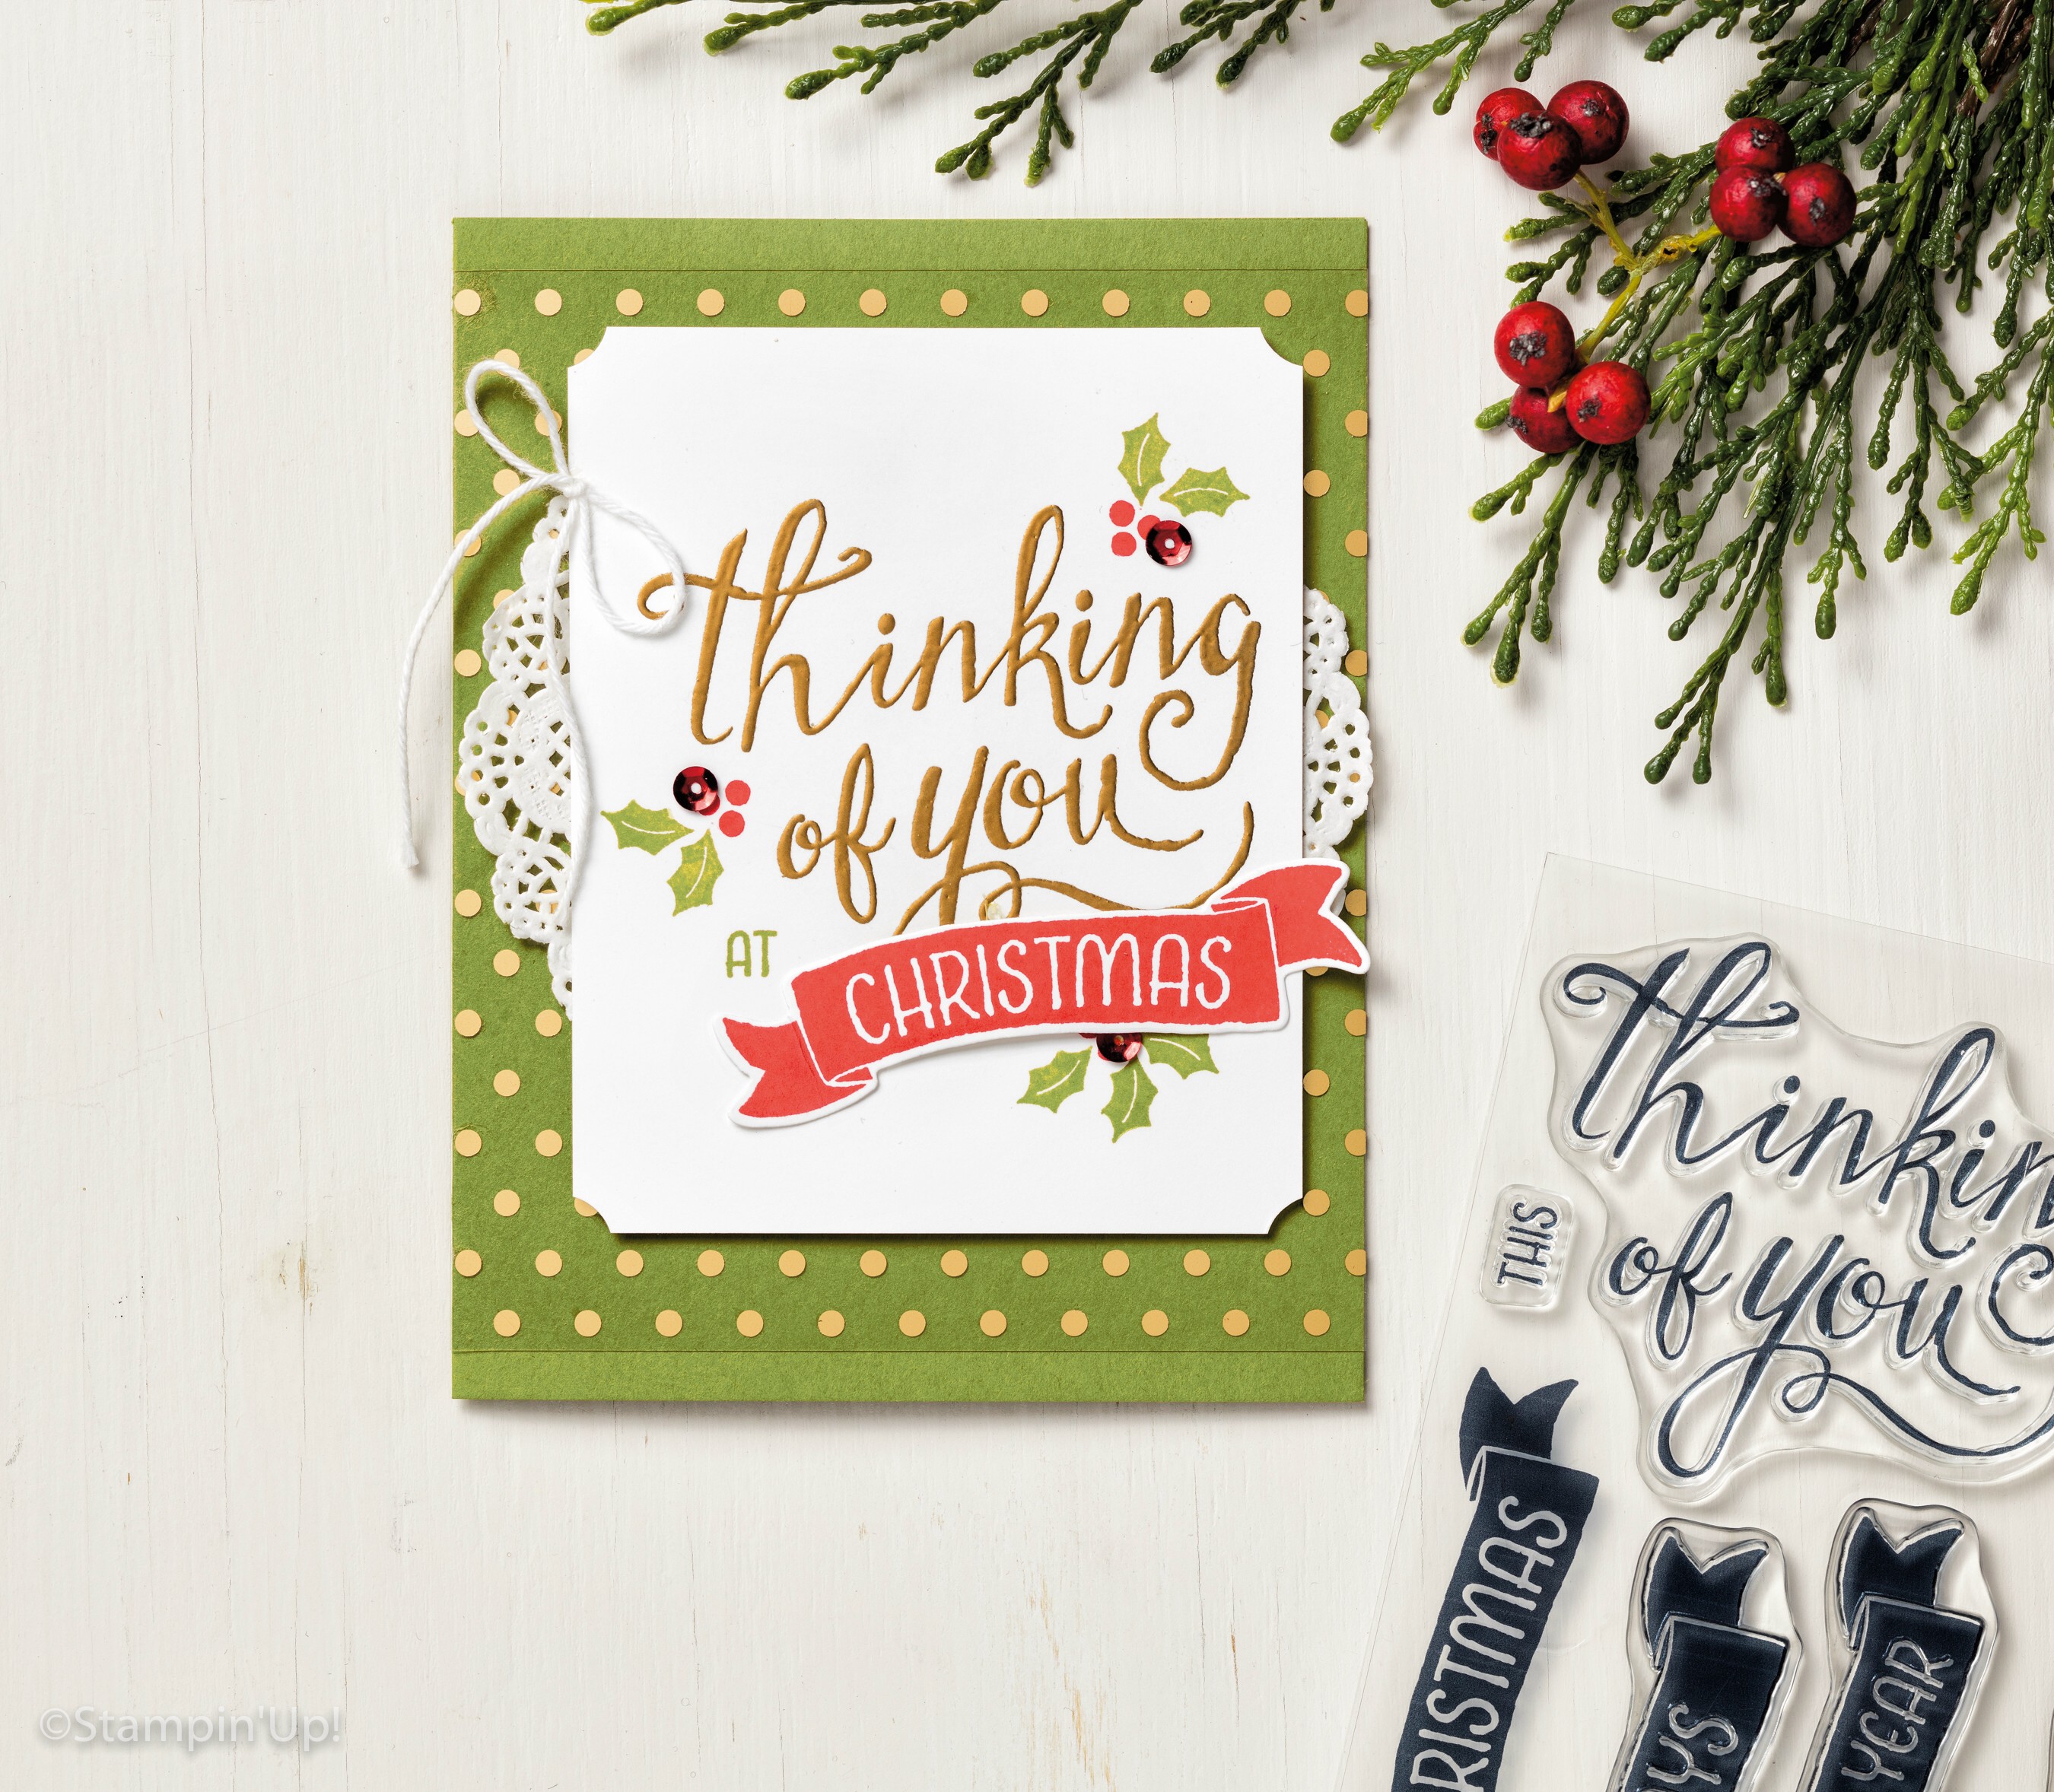
The next two cards in this showcase are from the stamp set “Time of Year” … which simply states you can use this stamp set all year long. Let’s begin with Spring (something we’ve all been waiting for) …
Simple, pretty and done in some of our new In-Colors … again, I can help you and your friends make any of these cards at your party. Why stop there? Let’s move into one of our biggest cardmaking times of all … Christmas!
Told you this was a versatile stamp set. Now … think about combining any of these stamp sets together, the possibilities are endless.
I love our hostess stamp sets because they stretch your Hostess $$ dollars even further, just remember when your party/order is $350 or more in June, enjoy an extra $35 in hostess rewards (in addition to the rewards shown in the chart below)! Spend your Stampin’ Rewards $$ on hostess sets or on anything in the catalog!
Gather your friends or orders from them (I can help you with a hostess code for everyone to order online), or, place your own shopping spree order to enjoy the extra rewards!
Remember.. ALL orders of $150 or more enjoy the Stampin’ Rewards (Hostess $$) to spend any way you wish!
Contact me … I’d love to help you get all the Hostess goodies on your wish list!
Thank you for coming to visit my blog today, hope yours is a good one.
Today I’d like to share with you a card that my Technique Clubs did this May. They learned how to create a “Tunnel Card” and we also used the “masking” technique for the front to create a soft focal point for our birds.
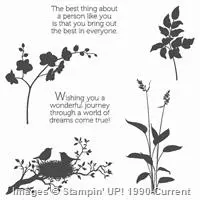
Let’s begin with the front of the card and the World of Dreams stamp set …
I found a card on pinterest using the “masking” technique and loved the color pallet that was used. It was created by Dena Rekow … I cased her basic design.
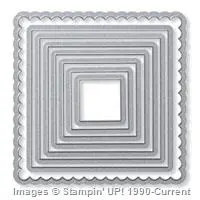
The template was created with the Squares Collection Framelits so that we could sponge multiple cards. The top right of the square is sponged with Soft Sky and the bottom left is sponged with Pear Pizzazz … it is then stamped with the bird silhouette stamp using the Black StazOn in pad. It’s very dramatic.
The pop of black cardstock behind the stamped front and the Basic Black Stitched Satin Ribbon really pull the card together and give it an elegant look.
The inside of the card is using the “Tunnel” to create a very dramatic look. The white cardstock is double stamped in the Pear Pizzazz to give it some dimension. We stamped the same on the inside, along with the greeting in Black StazOn.
The tunnel itself is easy to create with just a few folds and a framelit of punch to create the opening. Stop back tomorrow for a step by step tutorial on how to create the Tunnel Fold.
Thank you for sharing a part of your Sunday with me …
Hope you are having a good day. Sorry for the delay … computer issues last night! Ugh … time to bite the bullet and get a new one!
Today I would like to share with you a beautiful card I received from a wonderful friend as a Thank You for placing an order for her … how sweet is that!
I love when my stampin’ friends send me cards, first … it lets me know they are using the products that they purchase! (I hate to hear when they are still in the bag or in the closet) I use my stamping time as my escape from the harsh realities of life (kind of like that Calgon commercial … some of us will remember) And secondly … because I like to share with everyone how talented you all are with your stamps! Wow 🙂
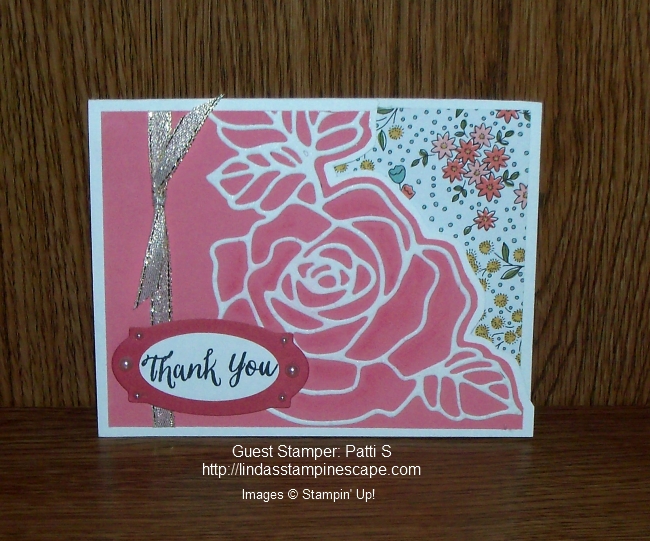
So today’s card share comes from Patti S.
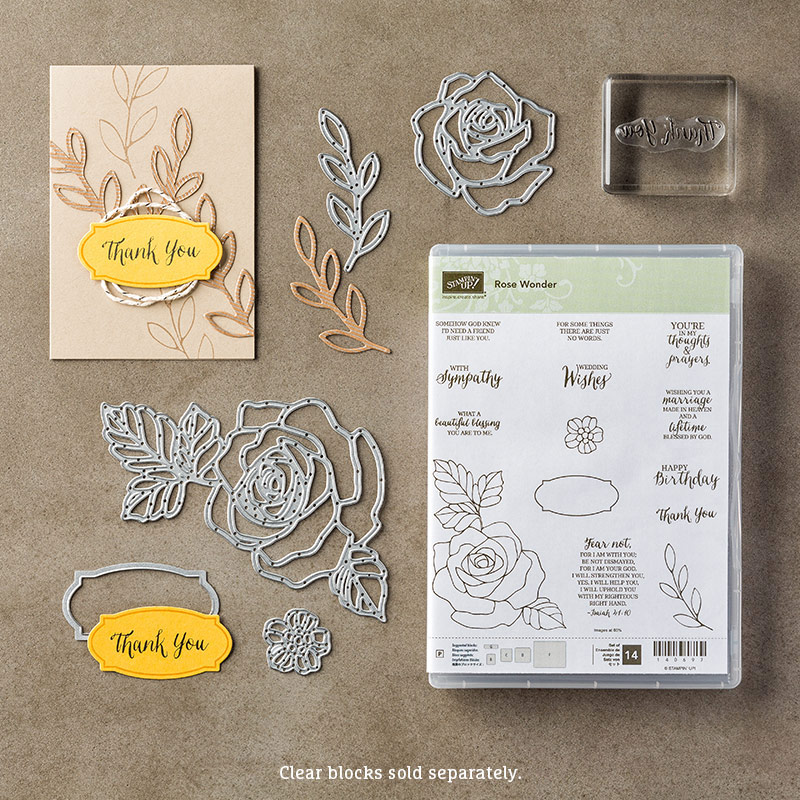
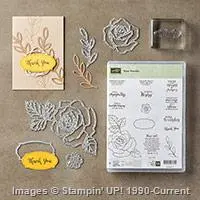
Patti used the beautiful Rose Wonder Stamp Set and Rose Garden Thinlits … This is the set you need for life’s major events—birthdays, weddings, sympathy. And for the everyday—thanks, friendship, encouragement. Make a stack to keep on hand and you’ll never be unprepared.
I wanted to show you Patti’s little stampin’ tip … she cut the designer paper on the inside of the card, creating a shadow effect … brilliant! And there’s still plenty of room for you to write your message.
Yes, she hand cut both in designer paper and the section of the front of her card, but as our attendee’s learned at our Spring Stamping Retreat … it really doesn’t take that long and it’s pretty easy to follow that line.
Thank you Patti for sharing your talent and this beautiful card with me, and thank YOU for joining me on my blog today.
It’s a beautiful day here in Wisconsin, hope you all get to enjoy the day, no matter where you are in the world.
Happy Friday ~
TODAY’S FEATURED PRODUCT:
You can click on the photo for more information or to begin your purchase. Thank you!
I hope you had a wonderful weekend! A bit drab and rainy around here, but I had a Stamp Club Saturday morning and was busy working on my stamping projects and website so I didn’t mind staying in.
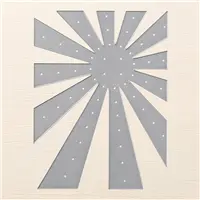
Speaking of Stamp Clubs … our technique / product showcase this month was the “Sunburst Thinlits Die”. The groups loved the cards I designed for them, and I was telling them that they could cut 2 and do a slight twist … well, let me just show you!
I cut out two sunbursts, one in Very Vanilla and the other in the Gold Foil – they are so pretty together. I set the Vanilla on top of the gold and gave it a little twist so the gold peeked out. I then mounted the entire piece onto my Very Vanilla base. HINT: I use a lot of dimensionals on the back … you don’t want sections of the rays to drop down.
For my greeting, I opted out of the bundle and chose the “Suite Sayings” and the Thanks for Being You. Sometimes you have people who do wonderful things for you and you just have to say Thanks! A friendship that is golden … thus my color choices for my card.
I heat embossed my greeting in gold and punched it with the 1-3/4″ Circle Punch and matted it with the Gold Foil punched at 2″.
I couldn’t leave the inside plain, I had to continue with the “feeling” of the card so I chose the “Feel Goods” stamp set and heat embossed the “Those who bring Sunshine into the lives of others cannot keep it from themselves” in gold. What a beautiful verse and how fitting … it really ties in with the theme of my card.
It may appear simple but it is a card packed full of thought and emotion. From the sunburst die to the sunshine verse … what a beautiful way to say Thank You!
Hope you enjoyed my card today. I love sharing different ways to use a product, it makes them much more versatile for you, and it won’t sit on the shelf (that is not good).
If you have a product you would like to see showcased on my blog … just add a comment below and hopefully I have it because I’d love to help you out.
Thanks for stopping by today, hope it’s a good one.