Something Bewitching for You!

Hello Stampin’ Friends ~

How did you like those weekly deals yesterday?  Awesome right!

Well today I something bewitching for you. Have you seen the September Paper Pumpkin kit yet?

Watch to see how fun and simple this kit is to put together. Wonder what the surprise will be next month? Learn more / Sign up Here!

Those treat filled witches brooms are so stinkin’ cute! I love opening my Paper Pumpkin each month, and making the projects inside is always fun, but what I really love is the fact that we get an exclusive stamp set each month! And the cute little “spot” (mini stamp pad) is like the cherry on top!

000_2584

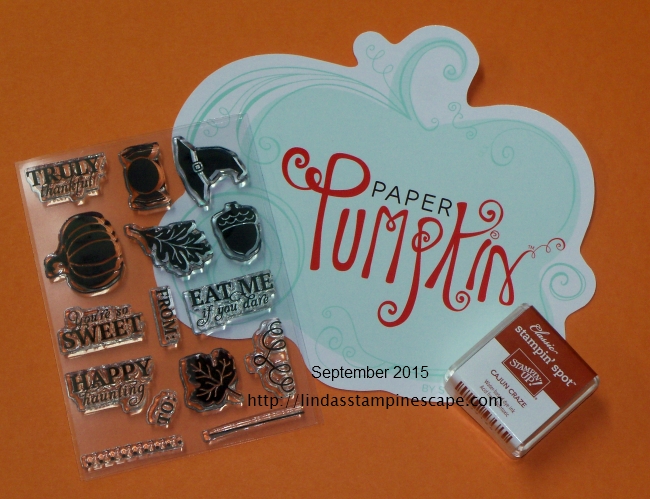
Did you know that each month they send a different color “spot” ink pad? These are what I take with me when I take my stampin’ to go … much lighter and take up less room than the big pads do.

I also want to remind you of our current promotion …


To show our support for Breast Cancer Awareness Month, we’re going PINK . . . or at least our October boxes are! And because we know our subscribers want to share the love too, we will be making a donation on their behalf to the Breast Cancer Research Foundation (BCRF).

Stampin’ Up! will donate

  • $1 for every active Paper Pumpkin subscriber.
  • Plus, an additional $1 for every new subscriber.

Together, we will make a difference!

As a special perk for Paper Pumpkin subscribers, Stampin’ Up! offers a selection of past kits and refill kits for purchase, while supplies last. We just added new kits to the offering.

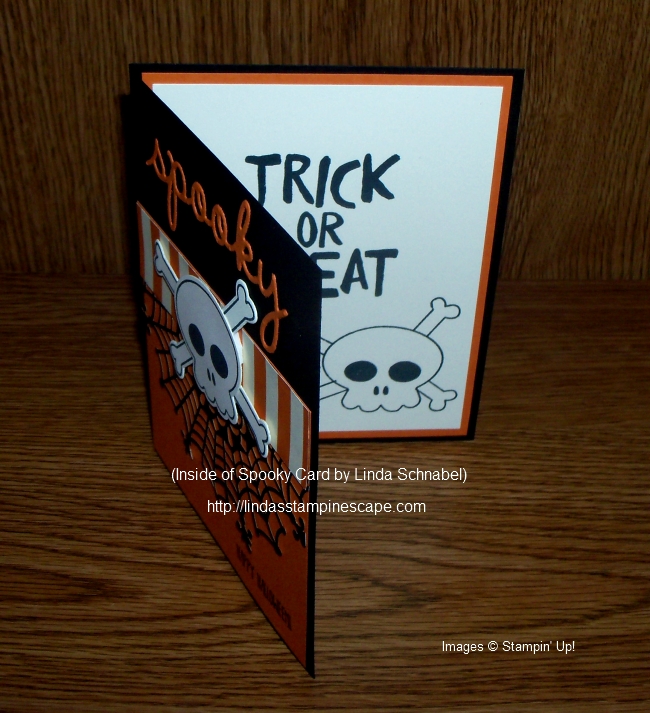
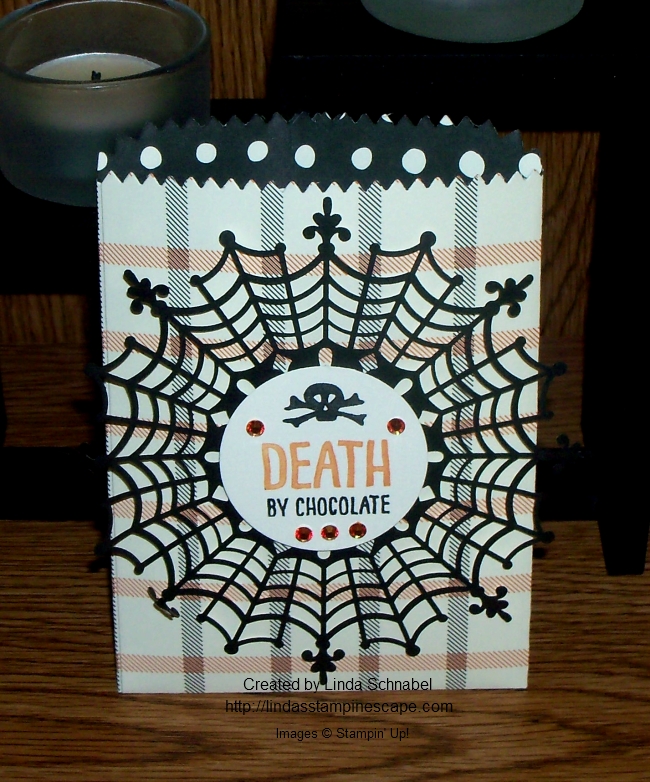
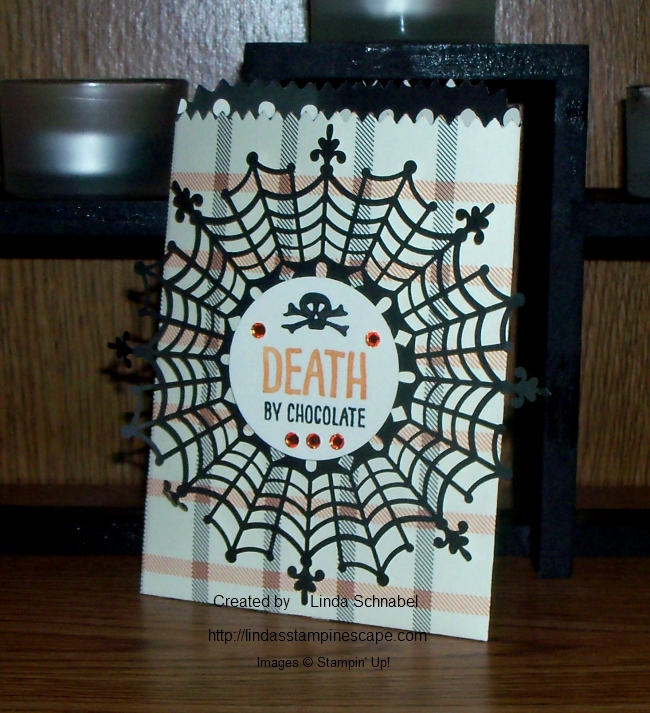
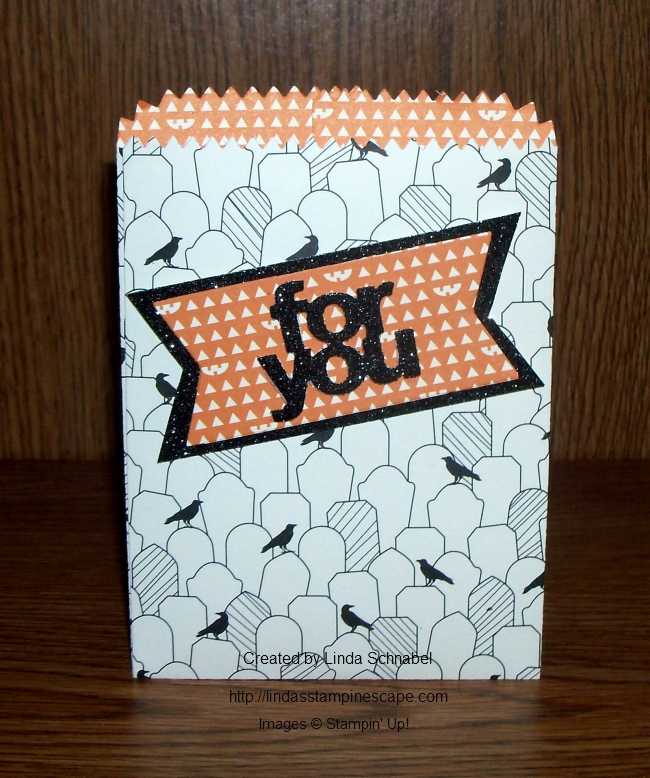
I’d like to invite you back tomorrow to check out what I came up with using the cute stamps inside this months Paper Pumpkin!

Till then … Have a great day!

blog-closing-small


Weekly Deals …

Hello Stampin’ Friends ~

Before I share the Weekly Deals with you, I’d like to welcome my newest blog followers!! It’s so rewarding to know that my fellow stampers enjoy my blog enough to follow me … Thank You!!

Every Tuesday Stampin’ Up! brings you amazing deals on select products. The product offering changes each Tuesday, so be sure to you order what you like before they change.

Today I have the latest of deals for you from Stampin’ Up! and I think you will like what you see. I just ordered a bolt of the Gold Ribbon, but with Christmas just around the corner, I will get a few more! I also think you will like the stamp set “Remarkable You”  ….

CM100100B

Brights Sequin Assortment by Stampin' Up!
Price: $5.00 $3.75
Gold 1/8 Ribbon by Stampin' Up!
Price: $5.00 $3.75
Gold Stampin' Glitter by Stampin' Up!
Price: $4.00 $3.00
Lucky Stars Textured Impressions Embossing Folders by Stampin' Up!
Price: $7.50 $5.63
Ornate Tag Topper Punch by Stampin' Up!
Price: $23.00 $17.25
Remarkable You Clear-Mount Stamp Set by Stampin' Up!
Price: $33.00 $24.75
Stars Framelits Dies by Stampin' Up!
Price: $27.00 $20.25

What are my favorites … Well, anything STAR’S of course! But I’ll admit, I have all of these in my stampin’ collection.

You can view more details about the product by clicking on the product name, that will take you to my website, where you can begin shopping. You may also CLICK HERE to view Weekly Deals or begin shopping.

I’ll be back tomorrow with a really cool card share!

Thanks for checking out my blog today ~

Enjoy the beautiful day!

blog-closing-small

Spooky Halloween …

Hello Stampin’ Friends ~

I’m back today with another Halloween card! It’s right around the corner and I want to share as many samples with you as I can. Can you believe how fast this year has gone! It’s almost spooky!

Today’s card uses the Howl-o-ween stamp set and Boo To You framelit bundle

I had to make at least one card with the skull and cross bones, and I’m glad they’re not too scary.  Once I stamped it and cut it out, I knew that I had to use those Spider Web Doilies again (just luv ’em). It really adds that “Halloween” touch to the card.

000_2579

My “spooky” comes from the “Seasonal Frame” Thinlits, another cool framelit set! Click HERE to view.

A pop of color was needed so I used another pattern from the “Happy Hauntings” designer paper. It’s just enough to pull the whole card together. My Halloween greeting comes from the “And Many More” stamp set.

000_2576

The inside was stamped with another skull -n- cross bones and “Trick or Treat” as a promise of a sweet things to come!

I love playing with stamp sets and their coordinating framelits … it’s easy to make and your cards looks so polished! Can’t by that at any store!!

000_2579

Thank you for visiting my blog, I hope you enjoyed my spooky little card.

Have yourself a great day!

blog-closing-small

TODAY’S STAMPIN’ SUPPLY LIST …


Simply Sunday: Silent Night

Hello Stampin’ Friends ~

Today I’d like to share with you a simply beautiful card that I did at with my technique clubs this month. We focused on the “Woodland” embossing folder and some fun techniques that you can use with them to create a “WOW” card.

I paired up the Woodland folder with the beautiful “Wonderland” and “Happy Scenes” stamp sets…

000_2568

To create this beautiful card, you simply stamp directly onto the Woodland embossing folder with the pines from the Wonderland stamp set. Be sure you stamp on the “raised” side of the folder (the trees will be recessed on the side you stamp on).

Silent Night is stamped on vellum in Mossy Meadow and tucked behind your embossed front … I also used Mossy Meadow to mat the front and highlight the beautiful color.

000_2571

For the inside of the card, we stamped the trees from “Happy Scenes” into the corner and the verse from “Wonderland” into the center. I love how many of the stamp sets from Stampin’ Up! coordinate together.

Hope you enjoyed my card …

000_2568

 and I hope you have a beautiful day!

Thanks for stopping by ~

blog-closing-small

TODAY’S STAMPIN’ SUPPLY LIST …


Death by Chocolate!

Hello Stampin’ Friends,

Death by Chocolate!?  If we have to go … what a way to go! I simply could not resist sharing another treat bad with you. I am again using the “Happy Haunting” Designer Series paper in yet another pattern… Plaid!! Plus it has a cute polka dot pattern on the other side so it worked perfect for my treat bag.

000_2565

This treat bag went together … 1 – 2 – 3! Once the bag was secured with my Fast Fuse, I simply popped on one of our “Spider Web Doilies” … they are soooo cute!

I then grabbed my greeting from the “Sweet Hauntings” stamp set and with the use of my markers I decided I only wanted the words and not the frame around it… this way I could punch them out (which I did) with the 1-3/4″ circle punch and place it nicely into the center of my doily!

Last but definitely not least … I grabbed a Sharpie™ and colored my Rhinestones to match my designer paper and greeting.  I love it when everything matches … lol. Then used my dimensionals to adhere my greeting and give the bag even more dimension.

000_2562

I can’t wait to stuff it with candy! And if you take a walk on Main Street in West Bend, Wisconsin you will see this cute little treat bag, along with some other stamped projects in the Candyman on Main’s Halloween window display. I should have that done by the end of the month!

I thank you for stopping by, it was so sweet of you!

Have a delightful day!

blog-closing-small

TODAY’S STAMPIN’ SUPPLY LIST …


More Treat Bag Fun for You!

Hello Stampin’ Friends ~

As promised, today I have a treat bag with a window! Let’s have a little fun here today … I’m using the  Treat Bag Thinlit and Happy Haunting Designer paper. I’ve chosen a different pattern of paper today so I can show you that this is not just for Halloween.

For those of you who know me well, you know I love Star’s!! Here they are in full force, and to top it off … our thinlit die has a star in it too! I used it to cut out my window and make another star to bring in the orange color from the inside of the bag (reverse side of paper).

000_2556

You simply place the star or other shape that you would like to use to create a window in the center of the largest die. If you want to fill your treat bag with smaller goodies, simply adhere a window sheet inside before assembling your treat bag. (Too hard to do once it’s all put together).

So … if you want to treat someone that “rocks” with a fun little gift, what would you give them? Why “POP ROCKS” of course.  So clever (or fun) … Pop Rocks + Star paper = Rock Star!

000_2560

What a quick and simple way to brighten someones day! Hope you enjoyed!


I also have something special to share with you …

BCRF_Demo_Header_0915

To show our support for Breast Cancer Awareness Month, Stampin’ UP! is going PINK . . . or at least our October Paper Pumpkin boxes are! And because we know our subscribers want to share the love too, Stampin’ Up! will be making a donation on our subscribers behalf to the Breast Cancer Research Foundation (BCRF).

Stampin’ Up! will donate

  • $1 for every active Paper Pumpkin subscriber.
  • Plus, an additional $1 for every new subscriber.

Together, we will make a difference!

Here’s how you can help:

  1. Subscribe! If you’re new to Paper Pumpkin, click here to get started. Your first kit will arrive in a limited-edition pink box that you’ll want to hold onto forever-and we’ll donate $2 because you’re new!
  2. Stay active if you’re a subscriber so we can donate $1 for you. Only those who receive the October shipment will be counted for the donation.
  3. Spread the word! Help us get as many new subscribers as possible. Every current subscriber adds $1 and for new subscribers it’s doubled, so let’s get the word out and raise as much as possible.

The Breast Cancer Research Foundation (BCRF) advances the world’s most promising research to eradicate breast cancer. Founded by Evelyn H. Lauder in 1993, BCRF has raised more than $550 million to fuel discoveries in tumor biology, genetics, prevention, treatment, survivorship and metastasis, making it one of the largest non-governmental funders of breast cancer research in the world.  For more information, please visit: www.bcrfcure.org.

Thank you for visiting with me today.

blog-closing-small

TODAY’S STAMPIN’ SUPPLY LIST …


Halloween Treats For You!

Hello Stampin’ Friends,

Today I made you a cute little treat bag from the Mini Treat Bag Thinlits that are currently on Sale during our Weekly Deals (ends Monday).

With Halloween just around the corner, I thought it would be fun to team up the Treat Bag Thinlits Dies with the Happy Haunting Designer Series Paper and the beautiful Black Glimmer paper! When cutting out your bag … you want to make sure the pattern is going in the same direction. Easiest way is to keep the “zigzag or pinking” edge up when placing your dies onto the paper.

000_2552

Don’t you think this designer paper is cute? If you look closely … you will see that those crows are actually sitting on gravestones! And the other side of this paper? Well take another close look … you will see little jack-o-lantern faces! Too cute.

137547G

I cut the banner (which is included with the dies) out of the left over piece of designer paper. The “For You” (also included) I cut from a 1-1/2″ wide strip of Black Glimmer paper. I kept it in the center so I could put the banner over the top ( No Waste! ) then I simply trimmed the ends to match the banner.

How simple was that!? I used Fast Fuse to adhere my edges because it’s a bit stronger than the Snail and much easier that the old sticky strip. Then a few dimensionals to pop up my words and I was done!

000_2550

I like it because it fits a Gift Card in … but a candy bar would be good too! Oh yes, and you could give them a sneak peek by cutting a window into your treat bag. Would you like to see a sample of that tomorrow?

Hope you enjoyed my little project today! And don’t just think of Halloween … You could use these as a table dressing for Thanksgiving or to tuck the gift cards in for a Tree of Giving at Christmas. The possibilities and gift giving opportunities are endless!

Thank you for sharing a part of your day with me!

Hope your today is wonderful ~

blog-closing-small

TODAY’S STAMPIN’ SUPPLY LIST …


Beautiful Butterflies!

Hello Stampin’ Friends ~

Just a quick post today! I’m going to bring a couple of my cards that highlight the Butterfly Framelit Dies that were listed on the Weekly Deals yesterday.

137360S

I made this one for my Mom’s birthday … She loves butterflies and really loved this card. Isn’t that why we hand stamp cards – to make others happy! Besides … it’s a great stress reliever.  I’ve been in my Stampin’ Studio creating for my upcoming Holiday Retreat! Click on link tab at top to get more details!

000_2068

This card I had a little fun with … creating potted plants that attracted a passing butterfly!

000_2128

Both cards are from previous posts, but I’ll be back tomorrow with some new goodies!

Thanks for stopping by!

Have an awesome day ~

blog-closing-small

Weekly Deals …

Hello Stampin’ Friends!

Before I share the Weekly Deals with you…

I’d like to say “WELCOME” to my newest blog followers. I love to see when new people begin “following” my blog. I hope you find it an “escape to creativity” with great samples, stampin’ tips, deals and more.

I also love to hear your comments … What did you think about the card, how will that tip help you, it gives me an idea what you like! On that note, I want to surprise my Top 3 commenters!!  By the end of this week or early next week – You will find a surprise in your mailbox!!

These three blog followers will receive a little bag of goodies from me for sharing their thoughts and ideas on my posts. WHEN YOU GET YOUR GOODIES … PLEASE POST A COMMENT. Not required but I thought it would be fun. I was lucky enough this time to know the addresses as they also purchase their products through me (either on-line or direct). Could this be YOU?!

Well Tuesday isn’t Tuesday if I don’t share the Weekly Deals with you …

CM100100B

Oh WOW … I Love the items on sale this week!! My favorites are the Mini Treat Bag and the Butterflies Thinlit Dies! And who doesn’t love buttons & ribbon… best embellishments ever!!

Brights Designer Buttons by Stampin' Up!
Price: $8.00 $6.00
Butterflies Thinlits Dies by Stampin' Up!
Price: $25.00 $18.75
Early Espresso 1/4 Cotton Ribbon by Stampin' Up!
Price: $6.00 $4.50
Fringe Scissors by Stampin' Up!
Price: $10.00 $7.50
Gold Basic Metal Buttons by Stampin' Up!
Price: $8.00 $6.00
Mini Treat Bag Thinlits Dies by Stampin' Up!
Price: $40.00 $30.00
Whisper White 5/8 Satin Ribbon by Stampin' Up!
Price: $7.00 $5.25


I’ve been asked if I purchase from the Weekly Deals and my answer is YES! I know what a good value they are that the regular price, so if I don’t have them or I want more … like ribbons and buttons, I snatch them up! It’s an economical way to use the products for my classes, clubs and retreats! Who doesn’t love to save a bit of money … right!

I’ll be sharing some cute projects this week with the thinlits dies from this weeks “Weekly Deals”, so be sure to stop back!

Thank you so much for stopping by my blog today, and remember … I love to hear from you!

Have a terrific Tuesday!

blog-closing-small


Touch of Autumn in the Air …

Hello Stampin’ Friends ~

Today I have another card created with the “Woodland” embossing folder! This is such a fun one to play with… I’m sure you’ll come up with more great ideas too.

I teamed it up with the “Happy Scene’s” stamp set … I inked up the fall image with the Momento Ink pad and then did a combination of watercoloring with my blender pen and sponging to soften it up a bit.

000_2543

I created a unique focal point of that image by cutting it out with the “Leaflets” framelit dies and then matted it with the Tangelo Twist to make it pop even more.

I used one of the other leaves for my greeting which came from the “Petite Pairs” stamp set. Just a fun little twist to an autumn card.

000_2541

Thank you for dropping by today. I’ll be back tomorrow with the Weekly Deals.

I hope you have a wonderful week.

blog-closing-small

TODAY’S STAMPIN’ SUPPLY LIST …


Simply Sunday: Grateful for cool tools!

Hello Stampin’ Friends,

I’m back with a pretty card that showcases some of my favorite tools for cardmaking. Have you ever thought … what did I do before the BigShot? Me too!! I love using my BigShot and all the tools for cutting and embossing.

Maybe someday I’ll show you some of my first cards … I think we all giggle when we look back. But we had to start somewhere right! That was 15 years ago.

On to today’s card …

000_2532

I began with the thought of using the “Into the Woods” Designer Series paper. I wanted to highlight the pretty flowers so I punched some out with the 2″ circle punch. Did you know the designs on this set of designer paper was hand painted by our designers? Watch this quick video to learn more (Into the Woods is the 3rd highlighted) …

Once I punched out the flowers I chose my color pallet … Whisper White, Rich Razzleberry and Mossy Meadow. I used the Razzleberry for my base and mat behind the flowers to make the razzleberry flowers pop in the bouquet of flowers. The mat was cut with the Circle Framelit Dies.

It’s so easy to create beautiful backgrounds with our embossing folders, and I wanted to use the new “Woodland” folder, it coordinates so well with the “Woodland” theme of this card.

000_2536

Finally my greeting … a simple choice! I used the “Seasonal Framelit Dies” and chose the grateful die cut and adhered it with the new Fine Tip Glue Pen. If you don’t have this yet, you will really need to get it on your wish list. I works so nice!

000_2532

Thanks so much for joining me today. I hope you enjoyed the fun tools (punches, folders & framelits) that were used to create today’s Simply Sunday card.

Hope  you are having a wonderful weekend.

blog-closing-small

TODAY’S STAMPIN’ SUPPLY LIST …


10 Reasons I Love the Watercolor Wishes Card Kit

Hello Stampin’ Friends ~

Today I’m going to re-post the “10 Reasons I Love the Watercolor Wishes Card Kit” from our Stampin’ Up! Inspired by blog. I can’t help but share these cute cards and the wonderful reasons why this kit is so cool …

The giftable Watercolor Wishes Card Kit includes preprinted cards for the perfect artistic look without the mess. Includes supplies for 20 unique cards in 3 sizes and an exclusive stamp set. Make one when you need it, or make them all and use them later. Makes 20 unique cards.

You provide the adhesive; we’ll provide the rest, including the stamp set, clear stamp block, and ink.

Watercolor-Wishes

10 Reasons I Love the Watercolor Wishes Card Kit

  1. It’s so quick and easy to assemble.
  2. There’s something for anyone—male or female.
  3. I love the hand-painted look and the watercolor washes.
  4. The stamp set is super-versatile. Once the kit is made, I can still use the stamps for so many other projects.
  5. The kit comes with detailed instructions; it’s also easy to change it up and make it my own. The photos I’m sharing are alternate designs.
  6. The colors are fantastic—Watermelon Wonder, Pool Party, Night of Navy, Crushed Curry, and Tip Top Taupe.
  7. It has some of my favorite embellishments—washi tape, sequins, and wood elements.
  8. It’s all-inclusive! That’s ink, paper, die cuts, Stampin’ Dimensionals, envelopes, embellishments, and stamps.
  9. The box is cute, which makes it so “giftable.” Add a bow and it’s all ready to share with someone.
  10. I need cards! And sometimes I need them in a hurry. With this kit, it will look like I spent hours handcrafting a beautiful card, when in reality, it was quick to assemble.

Hello-Watercolor-Card

Just-a-Note-Watercolor-Card

Thanks-Watercolor-Card

You're-Amazing-Watercolor-Card

Another thought that came to mind while I was playing with this kit was all of the other Stampin’ Up! products that might compliment it. I thought it was fun to bring in some other ink colors. I would suggest Pool Party, Calypso Coral, or even Old Olive.  And what project doesn’t need some Baker’s Twine?!

What do you love most about the Watercolor Wishes Card Kit (item # 140406)?

Jen C.
Concept Art

Thank you for checking this out.

Have a great Saturday … See you tomorrow for my Simply Sunday post!

blog-closing-small

Cool Technique with Embossing Folders!!

Hello Stampin’ Friends ~

I am excited that the weekend is here, and today I kick off a new season of my Stampin’ Technique Clubs. Our September technique will focus on different ways you can use your embossing folders… and I chose the new “Woodland” folder.

Today I will show you something fun to do with your folders (they’ll make 2 more!) I can’t show them to you yet because it will spoil their fun. I began my card by embossing the trees using Soft Sky cardstock

000_2528

Using the “White Stampin’ Chalk Marker” – I colored the trees and branches to highlight them even more. Wow … it looks so cool and it’s so easy to do!!

I colored in the indented areas of the tree with my Soft Suede marker to coordinate with the base of my card. Don’t you think it makes the tree more realistic looking? I love White Birch … I think it’s my favorite tree!

000_2530

I added a simple greeting (I think this one got past my purging of discontinued sets) and then added one of the new “Snowflake Elements” to add texture and continue the “woodland” feel of the card.

I didn’t want a lot of glimmer on this card, so I added just a touch with a rhinestone in the center of the wooden snowflake. You could easily add glitter to the branches to create a shimmery snow effect!

000_2525

What a simple way to make an impact (the WOW effect) on your card… just by coloring the embossed area.  Hope you enjoyed today’s technique tip!

Thank you for taking time to visit with me today.

I hope you have a wonderful weekend ~

blog-closing-small

Remembering the anniversary of 9-11-01. We will never forget.

TODAY’S STAMPIN’ SUPPLY LIST …


Some “Throw Back Thursday” Fun!

Hello Stampin’ Friends,

We are over the hump and heading into the weekend … it’s a good day! I thought it would be fun to share some scrapbook pages that I created many years ago when I first started demonstrating.

Times and embellishments have changed greatly since then, but the photos and memories we save will always touch our hearts. I admit, I prefer the “hands-on” approach to scrapbooking vs. computerized.

In the spirit of “Throw Back Thursday” … do you remember Button Bear!! Very, very popular when I started stamping.  Here he is helping my grandson celebrate his birthday!

000_2518

Not sure AJ would want me scrapbooking him with Button Bear anymore … he’s more into BMX bikes!

Here is another page done with a camping stamp set. Now I would use the “Project Life: Let’s Get Away”. One of the sayings in that set is “To Live is to Travel” … I think Shayla would agree to that. I think I instilled the love of traveling into her.

000_2512

I really do miss that swirl stamp for my pages though … I always thought that looked so cool!

My last page is another birthday … Cassie’s first! I haven’t done a monochromatic page in a while, and now most of my pages are done in the 12 x 12 format.

000_2514

With so many birthday stamp sets to choose from, it wouldn’t be hard to create a page. Two of my favorites are “Birthday Yay” because of the numbers and “Sweet Stack” just because I think it’s so much fun.

I think it’s time to begin sharing a little more scrapbooking here on my blog! It’s not something I’ve done much of. Any of these pages could easily be done on a 12 x 12 layout or the Project Life style (where you just pocket photo’s, cards and embellishments.

You can watch this short video to learn a little more about Project Life …

I’ve shared the links to the products I mentioned in the post with you below. Just click on them for more information.

I definitely need to share some updated scrapbook pages … two of these grandchildren are in high school and the other has graduated to make me a great grandma! How times flies.

Thanks for stopping by ~

Happy Thursday!

blog-closing-small

SUGGESTED PRODUCT LIST …


Cheer All Year—Really!

Hello Stampin’ Friends ~

Today’s card share is a cute card that was shared by our Stampin’ Up! home office.

Our Cheer All Year Stamp Set gives your projects some seasonal flair. Celebrate the holiday season from start to finish. From autumn to Halloween to Christmas, this set will bring cheer to your projects.

But you don’t have to put it away at the end of the year. On this card, we just used “Hello” to create a fun feathery card you can share all year long! You can also use this tip with the Season to Season Wreath Project Kit. Embellish it with different stamp sets and colors to switch it up for any event or season.

Hello Card

Can you see the different techniques used here?  The first feather was inked up (on the left) then stamped off then kissed with the textured stamp. The center feather highlights the “Rock -n- Roll” technique, and the third (on the right) was tipped with heat embossing.

Yesterday I share the WEEKLY DEALS with you (click to view) and today I’d to let you know that Stampin’ Up! has released “more” items into the CLEARANCE RACK!

Shop in both … it’s a great way to save on your holiday cards & projects! HOLIDAY CATALOG!

Thanks for dropping in on me today!

Have an awesome day ~

blog-closing-small