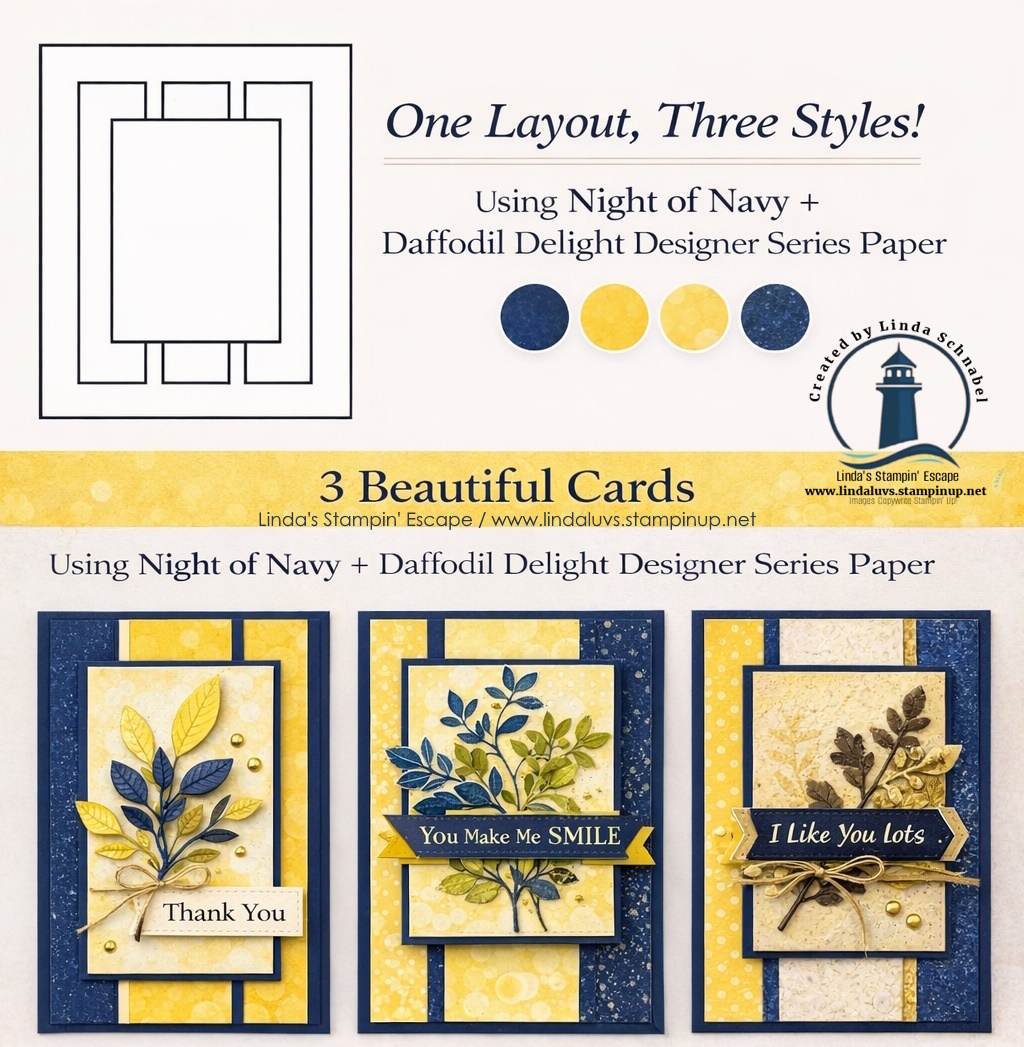
I just love showing how one simple layout can completely transform depending on the Designer Series Paper you choose! 💙💛 These cards highlight the Nature’s Symphony bundle … it’s perfect for all and any occasion.
For these cards, I paired Night of Navy + Daffodil Delight Designer Series Paper and added a touch of the soft, dreamy Bokeh paper to complement the look. Same layout. Same measurements. Totally different personalities!
From the classic “Thank You,” to the bold “You Make Me Smile,” to the rustic “I Like You Lots” — each card feels unique simply by changing the paper placement and patterns. Isn’t that the beauty of great design? 🙌
These samples actually inspired one of the stunning cards we created at my Nature’s Symphony class — and my ladies LOVED seeing how easy it was to recreate the look with their own twist! I hope they inspire you as well!!
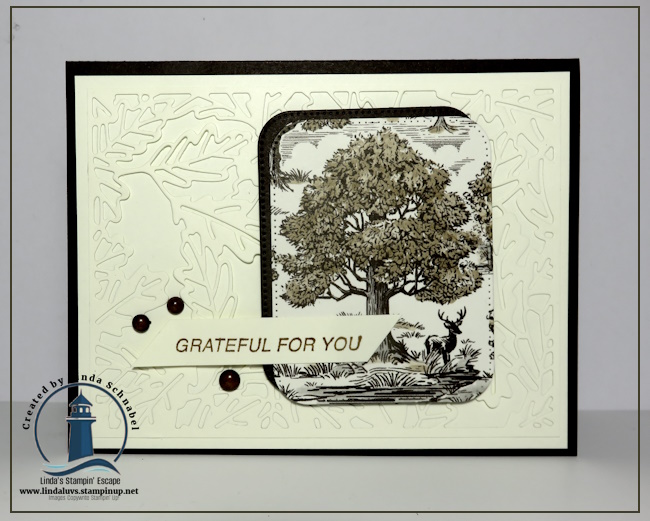
Are you ready for another way to showcase the Autumn Toile Suite? Today’s card is all about subtle elegance with just the right amount of detail. I love how the products in this suite give you the flexibility to create everything from bold and dramatic designs to soft and sophisticated layouts. This time, we’re letting texture take center stage with a leafy background that is both understated and beautiful.
For the front of my card, I cut the intricate leafy background die from Very Vanilla cardstock and adhered it directly onto a Very Vanilla layer. This tone-on-tone technique creates a soft, textured backdrop that looks rich without being overwhelming. I mounted this layer onto an Early Espresso card base for a striking frame.
Next, I die cut a piece of the Autumn Toile Designer Series Paper, along with an Early Espresso mat, using the Nested Essentials Dies. This creates the perfect focal point, balancing the detailed background with the warmth of patterned paper. For the greeting, I stamped in Early Espresso ink to keep the look cohesive and finished the card with a touch of sparkle from the Streaked Dots embellishments.
It’s amazing how the suite comes together—whether you want a bold metallic die cut, a patterned focal point, or a simple textured background like today’s card, the Amber Autumn Bundle and Autumn Toile Designer Paper give you endless options. By now, you’ve seen several styles of cards with this suite, and I hope you’re as inspired as I am! Imagine all the possibilities waiting in your stamp room when you add this suite to your collection—it’s a fall crafting essential.
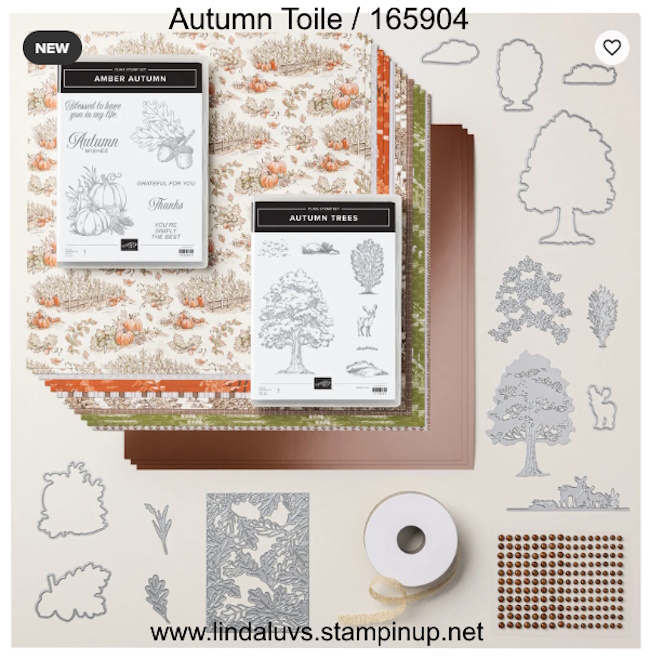
Bring an air of sophistication to your fall crafting with the Autumn Toile 12″ x 12″ Designer Series Paper. My Simply Sunday post is the perfect time to showcase how easy it can be to create beautiful cards when you have paper this stunning. With its intricate imagery of trees, pumpkins, animals, and more, this collection instantly elevates any project. Inspired by traditional toile wallpaper, each sheet carries a timeless elegance that’s both classic and seasonal—making it ideal for harvest gatherings, Thanksgiving greetings, or simply sending a touch of autumn warmth to someone special.
For today’s cards, I let the Autumn Toile Designer Series Paper take center stage. The detailed patterns are so striking that little else is needed—just a coordinating sentiment or die-cut accent, and you have a card that looks like it took hours to make. This is what I love about Simply Sunday projects: minimal effort, maximum beauty. The paper practically does the work for you, allowing you to spend more time enjoying the creative process and less time fussing over details. Whether you’re a beginner or a seasoned crafter, these designs open the door to quick, elegant cards that feel sophisticated and heartfelt.
If you’ve been searching for a way to refresh your fall crafting, the Autumn Toile Designer Series Paper is a must-have. Its timeless patterns pair beautifully with the season and add a touch of elegance that’s hard to resist. Imagine how lovely your handmade cards, scrapbook layouts, or even 3D projects will look when dressed in these graceful designs. Don’t wait—add this stunning paper to your collection today and bring the warmth and elegance of Autumn Toile to all of your harvest-season creations.
Thank you for checking out these quick -n- easy cards today.
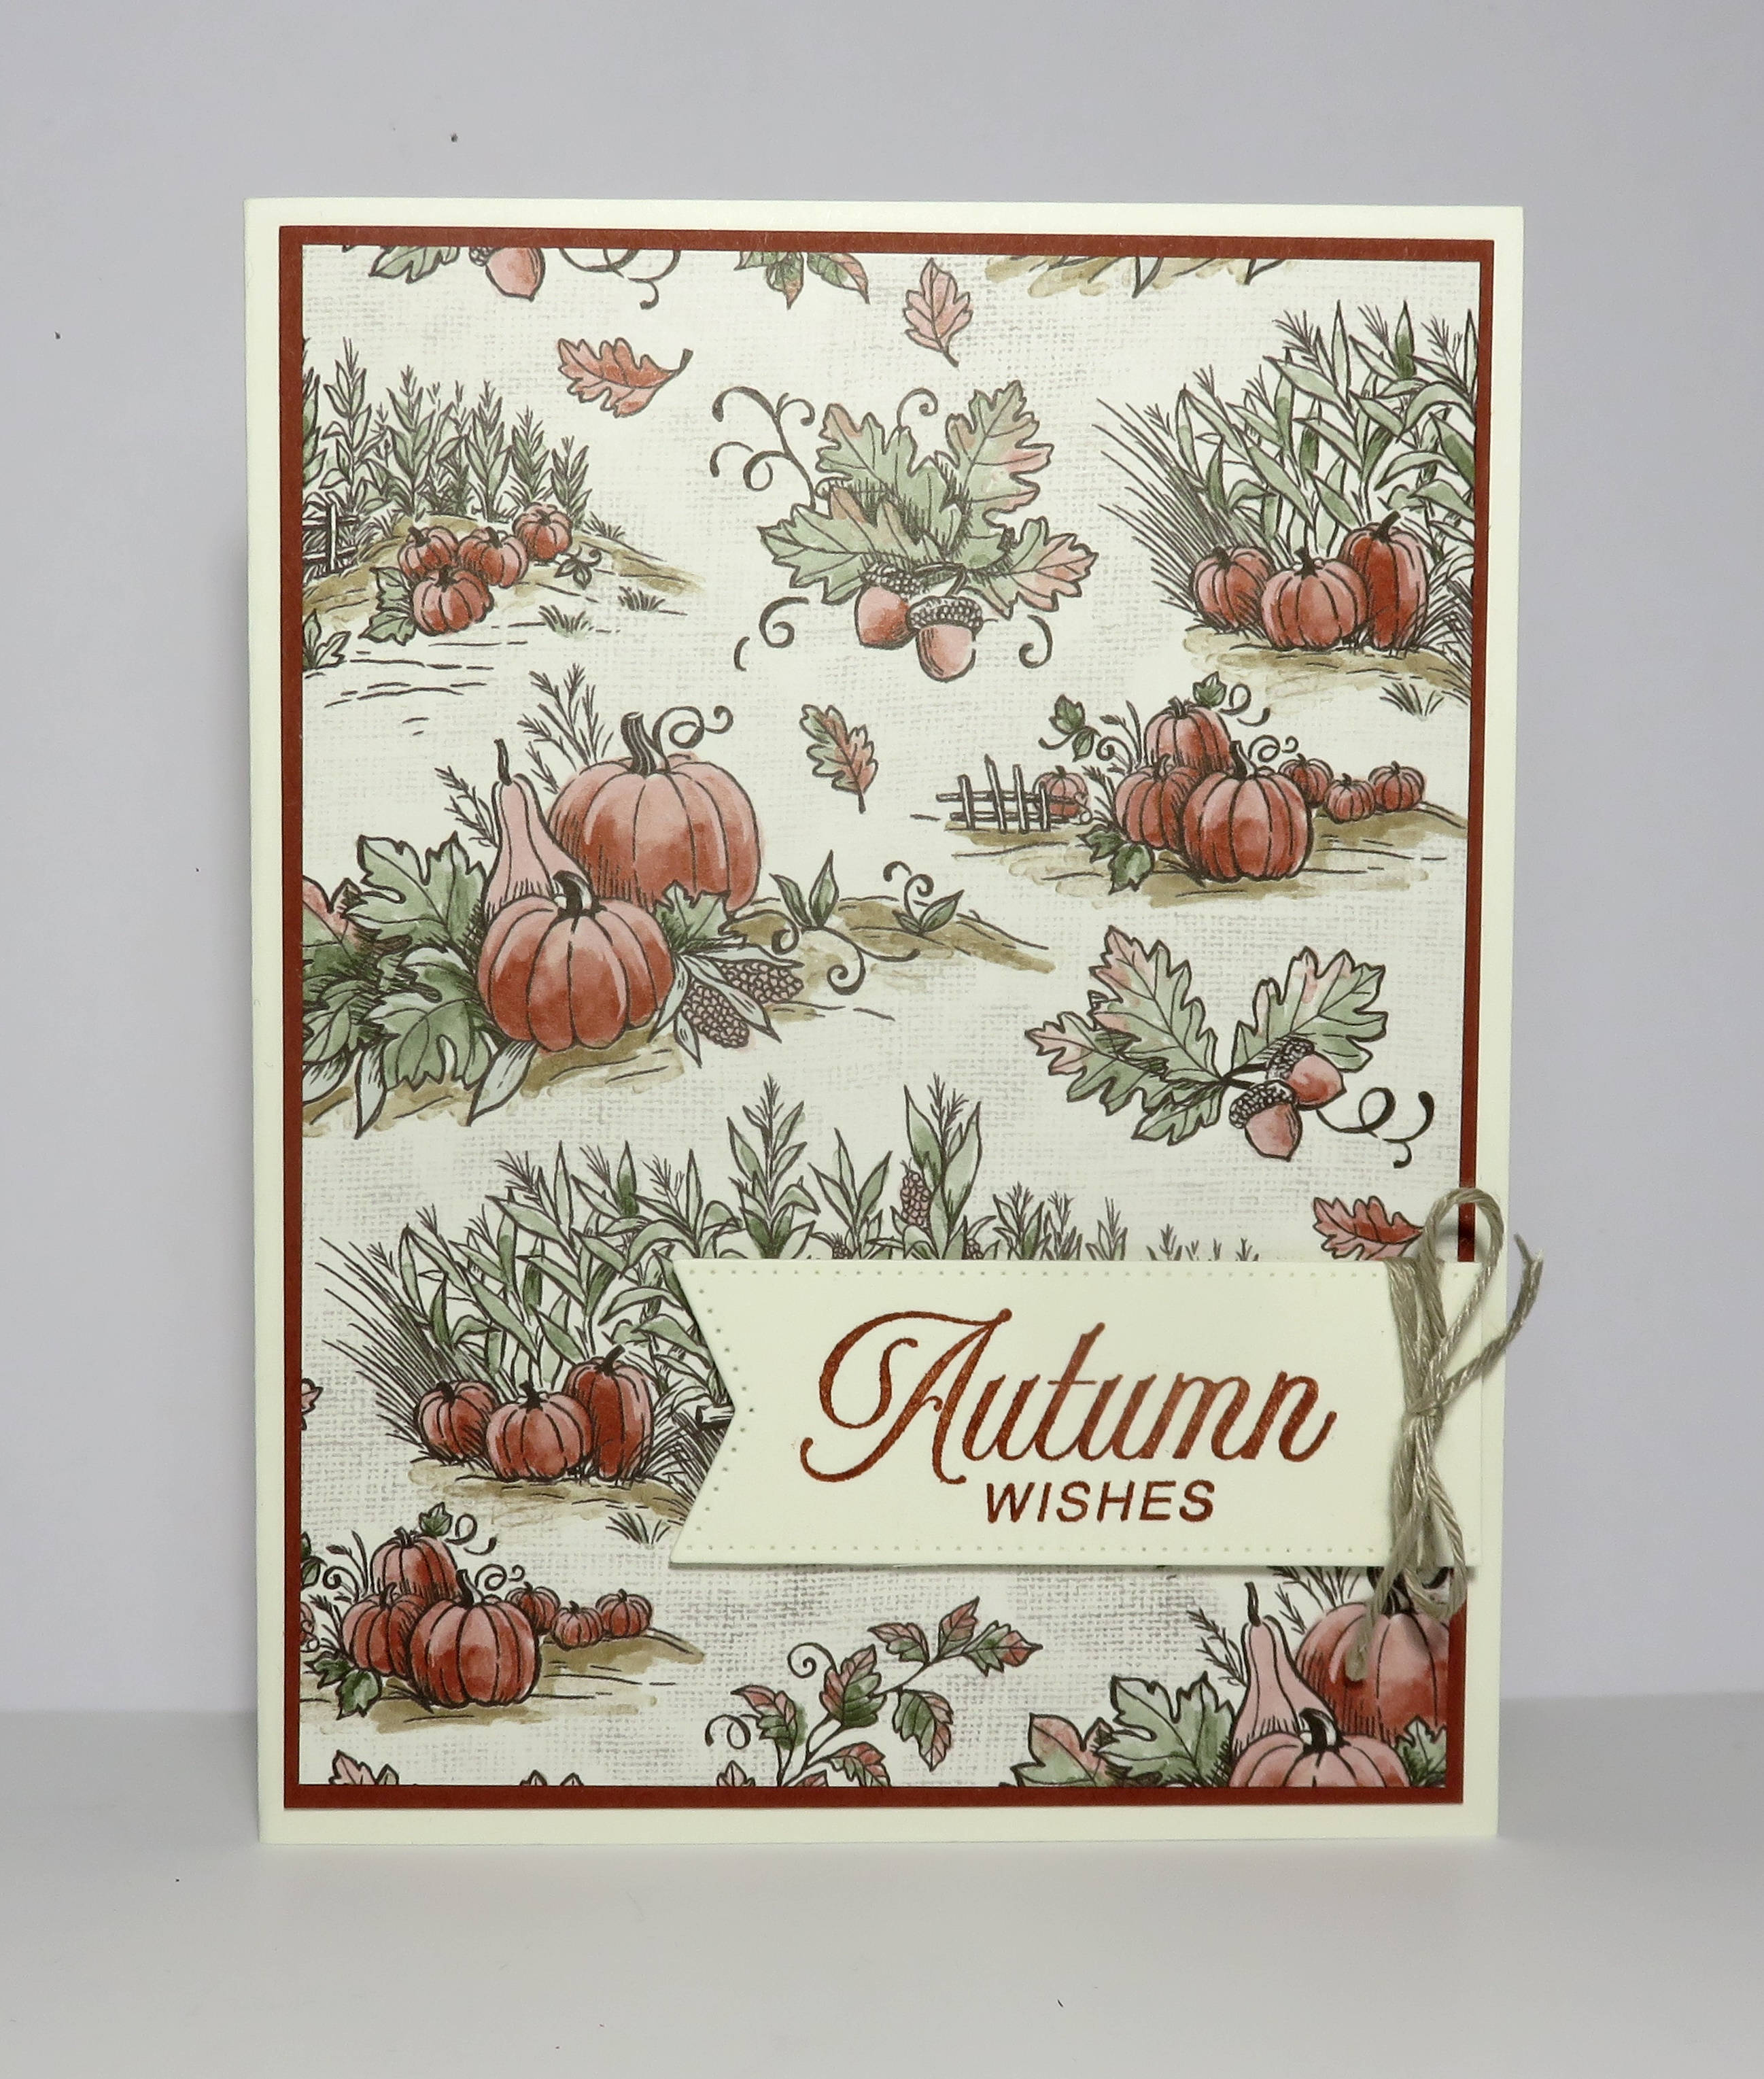
Autumn is sneaking in, and there’s no better way to welcome its warm tones than with gorgeous stamping fun! Today I’m so excited to share a simple, satisfying technique using the Autumn Toile Suite from Stampin’ Up! — one of my favorite new collections. This suite is full of rich, forest-inspired imagery (leaves, acorns, deer, pumpkins) paired with coordinating dies, patterned and metallic papers, trims, and embellishments that all work together so beautifully.
If you want to create cards that feel cozy, rustic, and elegant without a ton of fuss, you’ll love what I’m about to show: the Color-on-Color technique using Crumb Cake cardstock and ink. It’s effortless, very forgiving, and a great way to let the stamps in this suite shine.
Using the oak leaf and acorn stamp, ink the image in Crumb Cake and stamp it onto the Crumb Cake card front. Stamp it again on a separate piece of Crumb Cake cardstock, which you’ll die cut. Next, mat your stamped card front with Early Espresso cardstock and mount it onto a Crumb Cake card base. Cut a circle of Early Espresso cardstock to layer behind the die-cut leaves and acorn, then stamp your greeting on Very Vanilla cardstock and attach it to the card front. For the finishing touches, add a simple bow with Very Vanilla Baker’s Twine to pull everything together, and a couple Streaked Dots to embellish!
And there you have it — a quick, beautiful card all using the same color (Crumb Cake) stamped on itself, layered up with Early Espresso for contrast, and tied together with Very Vanilla and baker’s twine touches. Using the Autumn Toile Suite makes it even more fun, because everything matches so effortlessly: the stamps and dies, the designer papers, trims, and metallic papers in rich, earthy palettes.
If you’ve been wanting to add a touch of rustic charm to your cards or send some warm seasonal greetings, this suite is a must-have. Whether you go all in with the full Autumn Toile Suite or just grab the leaf/acorn stamps and a few coordinating pieces, you’re going to fall in love with creating this look. Stop back tomorrow for another sweet -n- simple card using the Autumn Toile suite!
Happy stamping — and don’t forget, the best way to learn is to just stamp, layer, play, and enjoy every mark!
If you loved my last post featuring the Storybook Friends Bundle, then you’re in for a treat today! I have two more enchanting cards to share, along with some quick tips and techniques that will make your card-making even easier.
This enchanting suite is perfect for bringing charming characters and whimsical scenes to life. The best part? You can create stunning cards in less time by using the coordinating Designer Series Paper and die cuts—no fussy cutting required on today’s cards!
💡 Technique Highlight: It’s an oldie but a goodie! To create a background that appears to have texture, just “scrunch” up some wax paper, dab it onto your ink pad and pounce it onto your cardstock! This little touch makes a big difference!
Time to let the designer paper do all the work … layering different patterns makes it easy to craft a complete scene. You’ll see I used the Everyday Arches when adding the blue patterned paper … I showcased this in my last post. (Seen Here) With just a simple die cut and layering, this card comes together in minutes!
The greeting wishing you a Happy Easter, comes from the Greetings for All Ephemera pack. This set features a wide range of precut sentiments in a variety of styles, perfect for saying thanks, hello, congratulations, and more. The simple black and white colors ensure you’ll have a perfect fit for any design style.
My second card encompasses more of our suite as I highlight the coordinating die cut frame and stamp set.
The second card features one of my favorite “simple” techniques—layering die-cut elements. By combining the stamped images with pre-printed die cuts, you create depth and interest without a lot of extra work. I began with this adorable designer paper pattern – it gives us the framework for our creation – the strawberries!
So many stampers are already falling in love with the Storybook Friends Bundle, and it’s easy to see why! Whether you’re crafting for Easter, birthdays, or just because, this suite makes it simple to create charming, heartfelt cards in no time.
With Easter just around the corner, now is the perfect time to add this bundle to your collection and start crafting something truly special. Don’t miss out on the chance to create with these sweet characters!
Are you as enchanted by this suite as I am? I’d love to hear which card is your favorite! 💕
Imagine the magic of bokeh light, fluttering butterfly wings, and soft, dreamy colors coming together to elevate your paper crafting projects. The Beautiful Bokeh Suite Collection is a stunning new addition that’s perfect for creating gratitude, birthday, and all-occasion cards, scrapbook pages, gift tags, and more. If you’re looking to take your crafting from ordinary to extraordinary, this suite is exactly what you need—and I’ve got a video to prove it!
This collection features the Beautiful Butterfly Bundle, which includes a gorgeous stamp set, coordinating dies, and the game-changing Beautiful Butterfly Hybrid Embossing Folder. The hybrid folder embosses while cutting intricate butterfly designs, giving you stunning textured details with minimal effort. The suite also includes the Beautiful Bokeh Designer Paper—a 6″ x 6″ collection of dreamy patterns in a soft color palette of Balmy Blue, Berry Burst, Calypso Coral, Daffodil Delight, and Fresh Freesia. And let’s not forget the Itty Bitty Bokeh Mix! These adorable embellishments add the perfect finishing touch, with their light-catching sparkle and playful variety.
In my latest video, I share three unique card designs that showcase the versatility of this suite. Whether you’re new to stamping or a seasoned crafter, you’ll find inspiration in these projects. Each card highlights a different way to use the products:
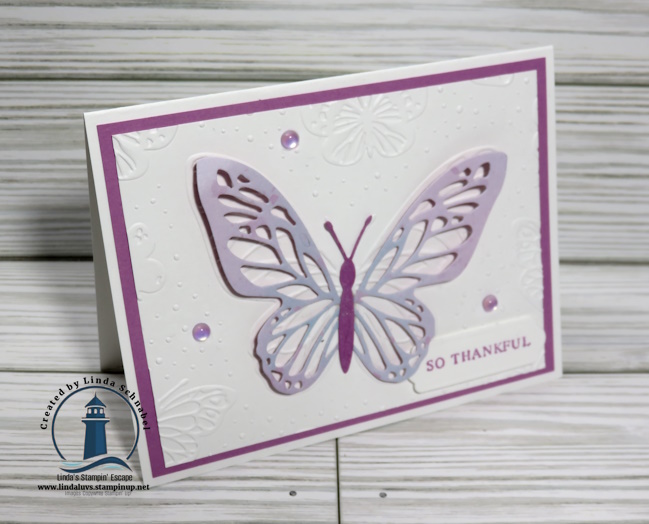
Card 1: A clean and simple design that lets the butterflies shine as the focal point, using the detailed butterfly die. The hybrid folder creates breathtaking dimensional accents, perfect for expressing my gratitude. The half dome elements in the Itty Bitty Bokeh mix match perfectly with the Fresh Freesia Bokeh paper and mat.
Card 2: A layered card that incorporates the soft, bokeh-patterned paper and vibrant embellishments to add depth and interest. I used the die in combination with the Embossing Folder to expose the Bokeh paper and the detailed butterfly shines adding texture and dimension!
Card 3: Simple elegance, layered white on white and the butterfly cut from our card shown above, was used to added dimension to our card … just a little hello!
These projects demonstrate just how versatile and captivating the Beautiful Bokeh Suite is. You’ll love how effortlessly the elements coordinate, giving you polished, professional results every time.
Ready to bring the magic of butterflies and bokeh into your crafting? If you’d like to purchase the Beautiful Bokeh Suite or any individual items, click the links below or visit my shop today. The Beautiful Bokeh Suite Collection is your ultimate tool for creating elegant, light-filled designs that will leave a lasting impression on any project!
Thank you for joining me today… and join me LIVE tomorrow on my Facebook page where I will show you another stunning card (and the magic of the Hybrid folder). CLICK HERE!
Are you ready to fall in love with this NEW bundle? Today, I’m showcasing the Heart Shaped Bundle and sharing three simple yet stunning techniques to help you make the most of this versatile set. Whether you’re creating for Valentine’s Day, anniversaries, or just sending a little love, these ideas will inspire you to use every component of the bundle to its fullest.
Let’s dive into these heartwarming cards!
Card #1: Basic Stamping highlighted with Dies
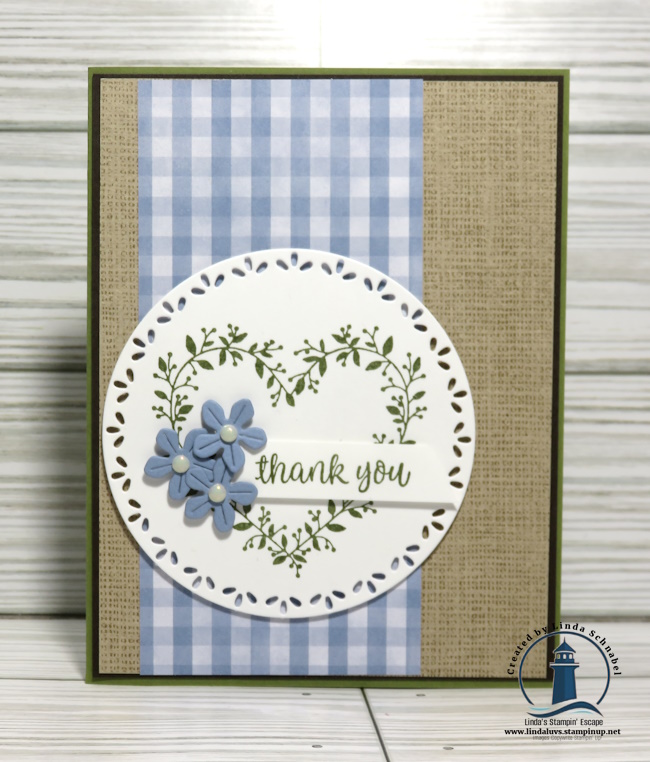
To kick off our creative journey with the Heart Shaped Bundle, I started with a simple yet impactful basic stamping technique. Using Old Olive ink, I stamped the heart and paired it with one of the beautiful greetings from the bundle. This clean and classic approach lays the foundation for a truly timeless design, and the Old Olive card base ties everything together for a cohesive look.
The circle die comes from the Spotlight on Nature bundle and encircles the stamped images to tie everything together, while the edging adds a beautiful touch of texture.
To add depth and color, I turned to the gorgeous Floral Delight and Timeless Plaid Designer Papers. These patterns work beautifully together, creating a vibrant yet natural background that perfectly highlights the stamped heart and flowers. The mix of texture and plaid strikes a balance between elegance and warmth, making this card ideal for any occasion that calls for a heartfelt touch… change the greeting, change the occasion; Valentines, wedding, new baby and more!
Stay tuned as I layer in more techniques to show you just how versatile this bundle can be! 💖 Let’s take a look at the video where I created 3 card, and tomorrow I’ll bring you the detailed photos of the second 2 cards …
Reminder … this video is a replay of my Countdown to Sale-a-bration event. This Host Code is no longer available, however I do have the links for the bundle and more below.
The Heart Shaped Bundle is perfect for creating cards, scrapbook pages, and even home décor projects. If you haven’t added it to your collection yet, now is the time! Visit my online store to shop this bundle and get started on your next project.
I can’t wait to see what you create! Be sure to share your projects with me on my Facebook page, Linda’s Stampin’ Escape, or tag me on social media. Let’s spread the love—one handmade card at a time!
First, let me welcome my NEW Subscribers; welcome to our creative community! I’m excited to have you …. and excited to share today’s card with all of you!! It’s simply stunning and so simple to recreate … let’s begin!
This project proves that sometimes, less is more, and simplicity can absolutely shine! Using a rich palette of Very Vanilla and Gold, this card exudes elegance and warmth—perfect for my “thank you” … the upcoming season or any occasion that calls for a touch of class.
The card starts with a classic A2 card base in Very Vanilla. The magic begins with a 4” x 5-1/4” piece of Very Vanilla cardstock embossed using the Changing Leaves Hybrid Embossing Folder. This will be attached directly to the base. If you haven’t used a hybrid folder before, you’re in for a treat! It’s called “hybrid” because it embosses and cuts images with the coordinating dies—such a clever and time-saving design.
To add dimension and interest, I die-cut some delicate leaves using the coordinating dies from the bundle. These layered onto the embossed background create a look that’s both understated and elegant. For the sentiment, I turned to the Changing Leaves Stamp Set. Everything in this bundle works seamlessly together—the stamps, the dies, and the embossing folder! Using VersaMark Ink, I stamped the sentiment onto Very Vanilla cardstock and heat-embossed it with our new Gold Embossing Powder. The metallic finish adds such a stunning and cohesive touch to the design.
The sentiment was die cut —you guessed it— using the coordinating die from the bundle! A few of the Woven Golden leaves and gold Opal Rounds were added around it to draw the eye and provide just the right amount of embellishment. I kept the card simple to let the embossed details and gold accents shine, proving that with the right tools, you can create something truly exquisite without spending hours at your craft table.
You can order the Changing Leaves Bundle directly from me—just click here to shop. And don’t forget to grab the Gold Embossing Powder while you’re at it! Remember, the “embossing folder” is included in the bundle. If you have any questions or need help placing your order, I’m always here to assist you. I’d love to see what you create with this bundle, so feel free to share your projects or tag me on social media.
Happy stamping, and remember: with the right tools, anything is possible!
I’m so excited to give you a sneak peek of the Nests of Winter Suite from the upcoming Holiday Mini Catalog! This suite is an absolute gem, perfect for cozy, winter-themed projects and versatile enough to use all year long. ❄️ Whether you’re making holiday cards, thank-you notes, or winter birthday greetings, this suite has you covered.
Today, I’m sharing a replay from my LIVE session on Tuesday, where I demonstrated how to create two quick and easy cards from a single sheet of the beautiful pattern paper in this suite. 🌟 The sheet I used is perfect for making six cards, and I’m showing you two designs to get your creative juices flowing. The patterns are stunning and make creating gorgeous cards a breeze!
For the first two cards, I used a sheet featuring a serene scene with the bird and pussy willows. The beauty of this design is that you can easily cut it into 4″ x 5 1/4″ sections, creating multiple cards with minimal effort. The colors are soft yet bold, with a mix of gray, whites, and reds that capture the essence of a peaceful winter day.
Here I used the Stylish Shapes to highlight my greeting. The second card has a banner cut from the Stylish Shapes and then I fussy cut around the greeting to create a bit of a focal point.
Card 3: Featuring the Coordinating Dies ✨
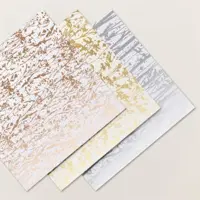
The third card is all about showcasing the fabulous coordinating dies that come with the suite. I used the Winterly Trees dies, which perfectly match some of the birds (and more) in the paper pack. These intricate dies add a lovely touch of dimension and elegance to any project. I highlighted one of the bird pairs by die-cutting it from a piece of the pattern paper and layering it over a piece of the Naturally Gilded Specialty Paper. The result is a stunning card that’s sure to impress! Oh yes … and off camera, I tucked some silver cord behind the greeting.
This suite is much more than just holiday-themed suite; it’s a versatile collection that you can use throughout the year for various occasions. From winter wonderlands to beautiful cards to show how much you appreciate your friends, the possibilities are endless! 🏞️
Add It to Your Wish List! ✨📝
I hope these projects inspire you to add the Nests of Winter Suite to your wish list. It’s a must-have for anyone who loves creating beautiful, seasonal cards and projects. And if you’re interested, I’m considering hosting a class to dive deeper into this suite and explore all its creative possibilities. Would you like to join? Let me know in the comments!
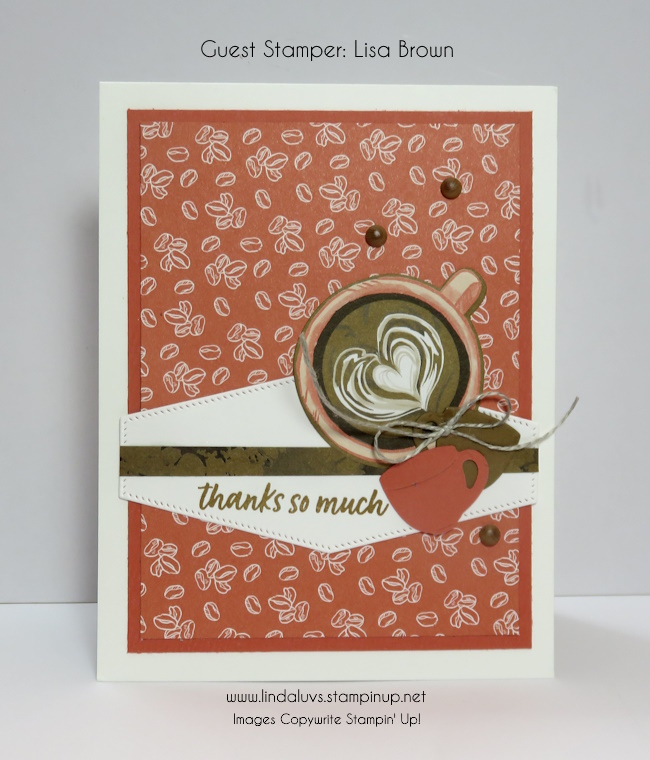
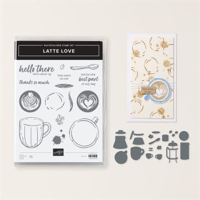
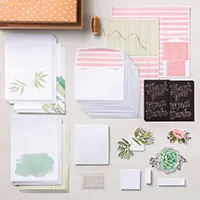
There’s nothing quite like the warmth and comfort of a perfect cup of coffee, and now you can bring that cozy vibe to your paper crafting projects with the delightful Latte Love Bundle. This bundle includes the charming Latte Love Stamp Set and the versatile Latte Love Dies, designed to help you spread love and gratitude through fun, coffee-themed imagery and heartfelt sentiments.
Today’s cards are were created by my friend, stampin’ sister and accountability buddy … Lisa Brown. We met on the Stampin’ Up! Incentive Trip to the Greek Isles. We stay connected, chat virtually and cheer each other on in our stamping businesses and support each other in our personal lives as well. We’ve been swapping cards with bundles that each other doesn’t have … so our card collections are more complete, and to share with our stampin’ friends! Man … I love this job!!
With the Latte Love Stamp Set, you can create delightful projects that brighten someone’s day. Make the mug design the centerpiece of your card front and fill it with beautifully stamped coffee or hot chocolate designs. The set also includes images of coffee beans, coffee drops, and spoons, which you can stamp repeatedly to create fun backgrounds or add as charming accents to your cards, perfect for all the coffee lovers in your life. The possibilities are endless, and you’ll adore the warm, inviting feel this set brings to your crafts. Simply choose your favorite color palette and coloring tools, and you’re ready to create!
But that’s not all—let’s make breakfast extra special with the Latte Love Dies! These dies include a French press, mug, spoon, and other breakfast accessories, perfect for adding intricate die cuts to your projects. Imagine creating a rich breakfast table scene, complete with a steaming cup of coffee and all the delightful details. Combine the outline and full beverage images for a complete look, and add extra touches like the cup or coffee bean designs to make your projects stand out. These die-cut elements can also be used as fun accents on card backgrounds, adding depth and layers to your creations.
Don’t miss out on this amazing opportunity! During our Bundle Sale, you can get the Latte Love Bundle with an additional 10% off the already discounted price. But hurry, there are only 4 days left to take advantage of this fantastic deal.
Embrace the cozy vibes and start creating with the Latte Love Bundle today! I know Lisa’s lovely cards are an inspiration.
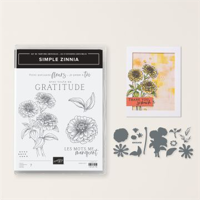
As the seasons shift and spring blooms into full swing, our crafting hearts are drawn to the vibrant hues and lively patterns that reflect the beauty of nature. Stampin’ Up! never fails to captivate us with its delightful array of crafting supplies, and their Simply Zinnia bundle is no exception. With its versatile stamp set, coordinating dies, and complementing Designer Series Paper, the Simply Zinnia bundle offers endless creative possibilities for both seasoned crafters and beginners alike.
If you’d like to add an extra layer of charm and sophistication to your projects, check out the Flowering Zinnia’s 12 x 12 Designer paper. The paper showcases an array of stunning zinnia-inspired patterns, from bold florals to subtle textures, all expertly curated to complement the stamp set beautifully. Whether you’re creating backgrounds, borders, or accents, this Designer Series Paper is sure to elevate your crafting creations to new heights.
For the card, I’ve let the enchanting Designer Series Paper take center stage. I’ve selected a vibrant floral pattern from the Simply Zinnia collection and paired it with coordinating cardstock: Old Olive and Melon Mambo and the hand stamped greeting from the stamp set done in Mossy Meadow. The result is a simple and fun card that effortlessly captures the essence of spring and the gratitude you have towards the recipient of the card.
The second card is not as bold but conveys our thoughts of “Thinking of You” with a beautiful bouquet of flowers already gathered and displayed for you. It’s topped off with a pretty little bow that brings out the yellow centers of our flowers.
Whether you’re a seasoned crafter or just beginning your creative journey, the Simply Zinnia bundle from Stampin’ Up! is a must-have addition to your crafting arsenal. With its versatile stamp set, coordinating dies, and captivating Designer Series Paper, the possibilities are endless. So, embrace your creativity, unleash your imagination, and let Simply Zinnia inspire your next crafting adventure.
I will return tomorrow with a simple yet beautiful card that highlights the stamp set and our NEW 2024-26 In Colors! You won’t want to miss it!
Thanks for joining me today, and if your ready to pick this bundle from our garden (online store) I have the links below. You’ll also note that select “Retiring Products” are now on sale!!
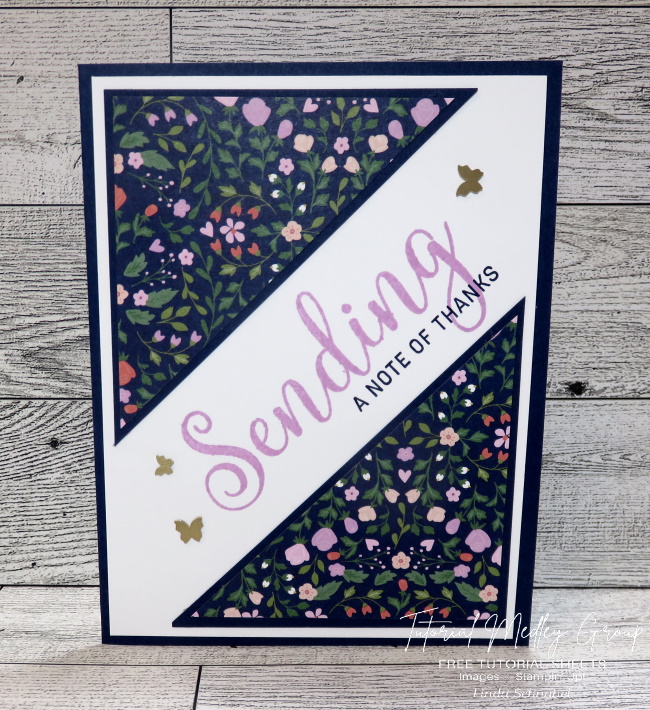
Today I’m sharing with you my Note of Thanks card that I created for my Tutorial Artist’s Group. I did the split card technique so I will include step by step directions to create this card.
Measurements:
Night of Navy: 8 ½” x 5 ½” and 3 ¼” x 3 ¼”
Basic White: 2 – 5 ¼” x 4” (One for inside)
Delightfully Eclectic: 3” x 3”
Instructions:
Cut designer paper and Night of Navy square diagonally from corner to corner
Glue the cut designer paper onto cut Night of Navy leaving a border around edges
Glue the diagonally cut pieces onto white cardfront in opposite corners.
Stamp the (Sending) sentiment in Fresh Freesia into the center of your “split”
Stamp (thanks) sentiment with Night of Navy in alignment with the Freesia Greeting
Attach card front onto Night of Navy cardbase.
Split cards are so easy and fun to make … and they look cool. So grab your supplies and get creative! Enjoy your Sunday.
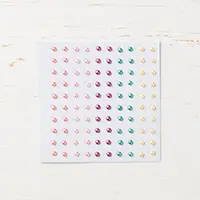
Today I’m sharing a fun “Faker Shaker” card … Last week I shared the cards from the Saying Thanks Card Kit and during my demonstration (will share the video replay below) that I would create a card using those left over hearts that came off of one of the cards in the kit.
If you’ve seen the video, just bypass it because you know exactly what I’m talking about … If you haven’t grab a cup of coffee, sit back and enjoy.
I really love this kit … as it states, it’s perfect for NEW Crafters / Cardmakers, Busy Moms or Grandmas! Great to craft with your kids (thanks Barb) and they are nice to have on hand when you need a quick card!!
OK … Let’s get to this cutie! I used a “clear” medium envelope to create my shaker card, and all those hearts you see below, they will now be “inside” as the “shaker” for my card.
I cut the front of the cardbase used for the “heart” card down to 4″ x 5-1/4″ … it’s so colorful and coordinates with the envelopes from the KIT perfectly. Then I tucked it inside the “CLEAR” envelope … make sure that the adhesive flap goes towards the back.
You can save the back that was cut off for another card. Next I tucked all them hearts inside the envelope “in front of” the card front. The fact that they are white, really makes them stand out from the watercolor background.
You will need to wrap the excess of the envelope to the back. I use the Stampin’ Seal Plus as it lays nicely on the clear envelope and really holds it in place. Now you can remove the backing from the adhesive flap and pull that around the back as well. This encloses your hearts.
I wanted to add a ribbon behind my greeting so I used the Fresh Freesia Open Weave Ribbon. I attached the ends to the back of my “shaker” and then tied a bow and attached it with a Mini Glue Dot. I chose the Merci as my “thank you” … the greetings in the “Saying Thanks” Kit come in four different languages so it’s fun to find a way to use them as well. I attached the greeting over my ribbon using the Stampin’ Dimensionals.
Then I stamped the “FOR ALL YOU DO” from the Happiness Abounds stamp set … I used my Stampin’ Write Marker to lay color only on those words as it is a larger sentiment. Once inked up, I stamped it on Basic White and cut it out myself. Using the edge of my stampin’ dimensionals I popped it up to match the greeting height.
Now that the “shaker” card front is done, you can mount it onto your card base … I used a Basic Black card base to pull the black out of the greeting and creating a focal point. It draws your eye to it even though it is mounted onto such a colorful background. Interesting!! To finish off my card, I added 3 Fresh Freesia embellishments from the Opaque Adhesive Backed Gems.
Even though the kits were designed for NEW stampers, those of us who are avid stampers also like to have quick & easy cards on hand … and if we want, we can JAZZ them up a bit!!
I have the links listed below so you may add these products to your stamp collection. We only have 1 week left to qualify for our FREE / Exclusive Sale-a-bration items, so if you need some adhesive, cardstock or embellishments now would be a good time to pick them up, and grab a FREEBIE!!
I want to “Thank You” for joining me today. I hope you have a wonderful day.
Here are those links that I promised …. Feel free to contact me if you have any questions.
Make sure to join me LIVE tonight (Tuesday, Feb.21st) on myFacebook Linda’s Stampin’ Escape Page… I will be showcasing the NEW Hello, Irresistible Suite Collection
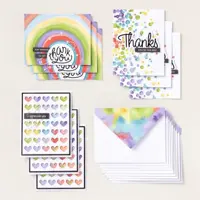
Today I will be sharing the replay of my Facebook LIVE last night where I highlighted the Saying Thanks Card Kit and will show you making them is Easy Breezy! These kits include everything you need to create the cards and even include coordinating envelopes. Then I’m going to use one of the card bases and add some stamping to it!! Oh … I can’t wait to show this to you!
First, lets take a look at the video …
I really love this kit … as it states, it’s perfect for NEW Crafters / Cardmakers, Busy Moms or Grandmas! Great to craft with your kids (thanks Barb) and they are nice to have on hand when you need a quick card!!
As you look at these three cards, you could change up the “occasion” with just a little simple stamping! Turn the polka dots into a “birthday” or the hearts into “I Love You” or “I’m Here For You” card … anything you can imagine!
Now … let’s talk about that rainbow card. The minute I saw it, a stamp set came to mind and I know I had to try it out. I normally don’t really change up my “Kit” cards but I didn’t think swapping out a greeting / sentiment would hurt.
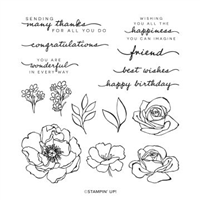
When I saw the Covered in Sunshine stamp set, well … I had to have it. Look at the samples in the Mini Catalog (page 37/ below) and you can see why I was tempted to purchase this one… It’s different! It’s happy and encouraging and fun! Stampin’ Up! did a great job on these samples.
So … look at the rainbow card above, and you’ll see where I got my inspiration from for my Saying Thanks Kit card. I thought it was the perfect time to do a “Mash Up” of products and see how it turns out.
Here you go ….
I love the way it turned out! It almost looks hand written, cool right, and perfect to send to a friend. And I told you in the video that I would be using up those hearts, and this is just the beginning. Let me share with you how I got the sentiment so perfect.
Oh, those of you who own the Stamparatus already knew where I was going with this ….
Using the Stamparatus allows you to align your sentiment perfectly and then “repeatedly” stamp it until you get the depth of color you want. I do believe I stamped my greeting 4 times to get it nice and dark so that it really showed up on such a colorful background.
They really do go together nicely … don’t they? Those cute little confetti embellishments that come in the kit are shiny so I thought I would add my Wink of Stella to my heart so that it sparkled too!!
I have the links listed below so you may add these products to your stamp collection. The Saying Thanks Kit, Covered in Sunshine Stamp Set and Wink of Stella “almost” gets you to a FREE Sale-a-bration item, so if you need some adhesive, cardstock or embellishments now would be a good time.
I want to “Thank You” for joining me today. I hope you have a wonderful day.
Here are those links that I promised …. Feel free to contact me if you have any questions.
I hope you had the chance to check out my post from yesterday where I introduced the Notes of Kindness Card Kit and shared an alternative project to those shown in the kit. Today I have 2 more alternative projects to share with you. Here are the four original designs …
Today I am going to feature the card with the leaf background … it’s in the upper right-hand corner above and my alternative is below ~
I used the same flower that was used in the kit layout but instead of adding the big die cut “Thank You” … I added a few of the die cut strips to add some color and then I stamped my greeting directly on the pink one. This is truly a quick and simple card to make. I did add the pretty “Share What You Love” Artesian Pearls.
My next card is the last of the four backgrounds … the color wash (I love it)!!
Who said you cannot say Thank You in any language … and why not French, it’s so pretty. On this card I decided to use the die cut “Merci” as my greeting … it actually highlights the floral arrangement.
I began my arrangement by looping the pretty cord behind my flower. The cord is secured with dimensionals and then attached to the pink and white die cut strip. Although this strip has adhesive on the back … I wanted it raised, so I added 1/2 of the leaves sheet and then popped it up with Dimensionals.
I finished off the card with a few pearls … quite easy to make and oh so pretty.
Thanks for joining me this Monday! I hope it is a good day for you.