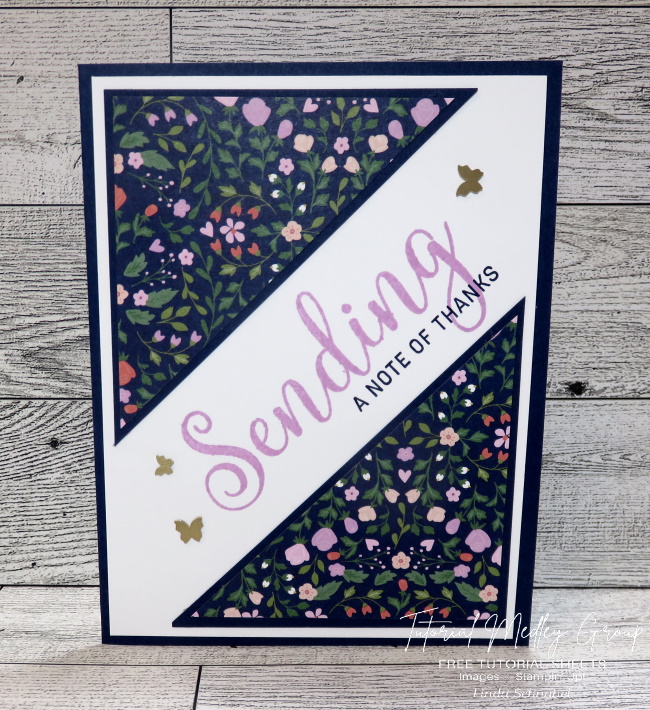
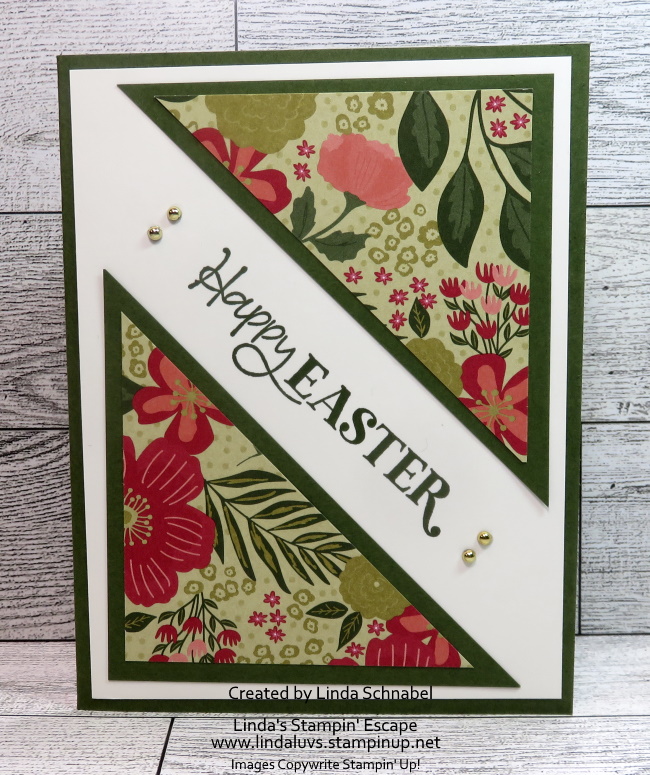
Today I’m sharing with you my Note of Thanks card that I created for my Tutorial Artist’s Group. I did the split card technique so I will include step by step directions to create this card.
Measurements:
Night of Navy: 8 ½” x 5 ½” and 3 ¼” x 3 ¼”
Basic White: 2 – 5 ¼” x 4” (One for inside)
Delightfully Eclectic: 3” x 3”
Instructions:
Cut designer paper and Night of Navy square diagonally from corner to corner
Glue the cut designer paper onto cut Night of Navy leaving a border around edges
Glue the diagonally cut pieces onto white cardfront in opposite corners.
Stamp the (Sending) sentiment in Fresh Freesia into the center of your “split”
Stamp (thanks) sentiment with Night of Navy in alignment with the Freesia Greeting
Attach card front onto Night of Navy cardbase.
Split cards are so easy and fun to make … and they look cool. So grab your supplies and get creative! Enjoy your Sunday.
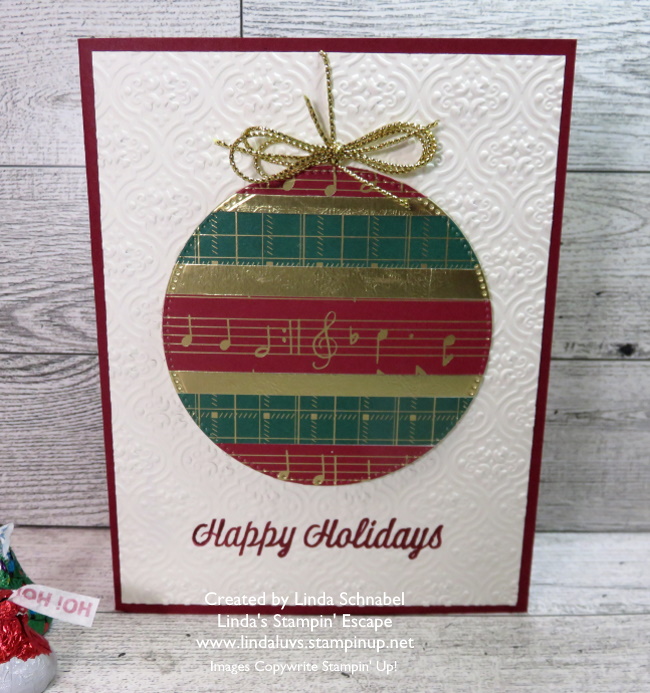
Join us on a creative journey as we make stunning Christmas Ornament Cards using simple materials and your leftover paper scraps. Gather your window sheets, leftover designer paper scraps, and a die-cutting machine. Ensure you have a variety of scrap papers in complementary colors and patterns, allowing for a mix-and-match design on your Christmas ornament cards.
Begin attaching strips of designer paper onto the window sheet. This is a fantastic opportunity to use up those beautiful but leftover paper pieces from previous projects. Once you’re satisfied with your paper arrangement, run the window sheet through the die-cutting machine, I used the largest circle in the stylish shapes dies. While your machine is out … add some texture to your card by embossing the card front, just be sure you stamp your greeting first, then emboss.
Now that you have your beautifully crafted ornament, it’s time to attach it to the front of your card. Use your favorite adhesive to secure the ornament, ensuring it stands out as the focal point. The transparent window sheet adds a touch of elegance, giving the illusion that the ornament is floating on the card.
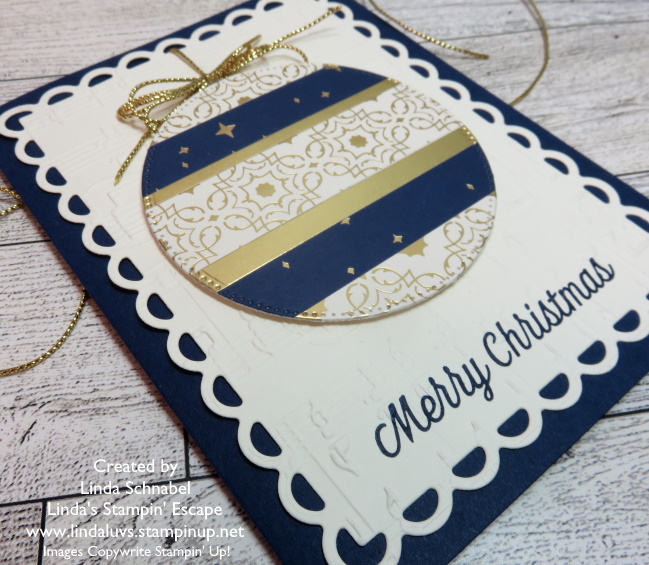
To enhance the festive vibe, add a ribbon or twine bow to the top of the ornament… I used the metallic twine to coordinate with my designer paper. This small embellishment can add texture and dimension to your Christmas card. Don’t be afraid to get creative!
Creating Christmas Ornament Cards from scraps not only allows you to repurpose materials but also results in unique, handmade cards that will surely stand out during the holiday season. Don’t you just love spreading joy while showcasing your creativity, and your friends and family love when you hand craft their cards!
Thanks so much for joining me today … Remember, you can use this technique on any die cut shape you want.
Great news, crafters! Stampin’ Up! is spreading holiday cheer with a fantastic deal: FREE Shipping for YOU! Gather your wishlists, and get ready to enjoy the joy of creating without the worry of shipping costs. It’s time to sprinkle a little extra joy into your crafting world! 🌟 December 14th marks a special day for all crafting enthusiasts as Stampin’ Up! unwraps a delightful gift: FREE shipping on orders totaling $75 or more! 🚚✨
To make this fantastic offer even better …. You will receive a FREE Gift from ME as well. Your purchase must be $75 or more to qualify for the FREE Shipping, all you need to do is use my December Host Code: HJ2ENVG4 to receive the Gift from ME!
Wave goodbye to shipping costs eating into your crafting budget! 📦 It’s the perfect chance to stock up on crafting essentials, explore innovative tools, or indulge in that wish-listed item you’ve been dreaming of. 🛍️💖 Let me know if you need any help, or have any questions.
Thanks so much ~
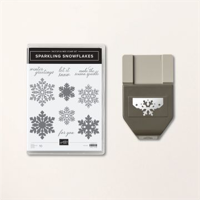
What inspires YOU? This card was inspired by the snowflake marshmallows I found at the store!! Who knew … and yes, they even had purple. So my card is created with the SPARKLIKNG SNOWFLAKE BUNDLE using Gorgeous Grape, Tahitian Tide and Blueberry Bushel. The tag punch highlights our sentiment. Inspiration can be found anywhere!
The card & marshmallows also inspired me to create this cute gift …. Perfect for teachers, co-workers, and friends. I bought the cute mug at the $$tore, added a Hot Chocolate stick and Candy Cane, then tucked in that marshmallow, bagged it up (also found at $$tore) and tied a pretty bow on it. Have FUN and Happy Holidays. Linda
Today I’ll be sharing my Twelve Weeks of Christmas: Week 10 Video along with the individual cards, including a brand new one not shown during the video!! I’m highlighting the amazing and versatile Garden Walk Designer Series paper. You’ll see quick cards, split cards and ways to highlight it. Teamed with the designer paper is the Throughout the Year stamp set. Grab your coffee and let’s take a look at the video ….
Yesterday I shared the poinsettia card, here is a reminder …
Just to help you see different patterns from the designer paper and different styles of cards! Next up is a collage of banners that’s backlit with some brushed color ….
You got to hear how each of these were made so I won’t be covering that here. Our next 2 cards were created when I cut down the 6 x 6 designer paper into 4 – 3 x 3 sheets. Our first is super simple to create and is a great layout when you need to make many cards quickly ….
Next is the second of those 4 – 3 x 3 inch squared and is created with one of my favorite / simple card techniques: Split Cards! Simply cut from corner to corner diagonally ….
And lastly … this card was created with the help of the Patchwork Pieces dies. Don’t ever be afraid to pull out those dies and experiment! You just may fall in love with your creation ….
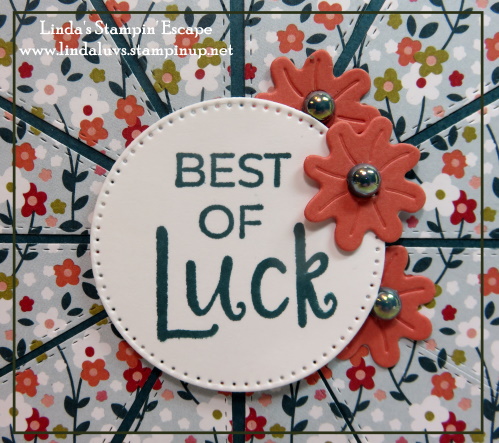
With yet another pretty pattern, your creativity can soar and choosing a color pattern is easy, just follow what’s in the paper. My card base is the Calypso Coral which was embossed with the Timeworn Type embossing folder. I wanted some texture on my card, and this made it easy.
Once I die cut the Garden Walk designer paper with the Patchwork Pieces dies, I mounted it onto Pretty Peacock cardstock … I wouldn’t have put these two colors together myself, but they sure do look good together.
My greeting was stamped in Pretty Peacock and die cut with the Stylish Shapes dies. I then grabbed a flower from another die set to embellish my card.
Creating all of these cards with the combined elements of Garden Walk Designer paper and the Throughout the Year stamp set brings out the magic of both the paper and stamp set. Add these to your wish list and let your creativity flow!
Thank you for joining me today … I hope you enjoyed this showcase
Don’t forget …. FREE SHIPPING on Thursday for all orders over $75. Plus, I have a FREE Gift for all who use the Host Code: HJ2ENVG4
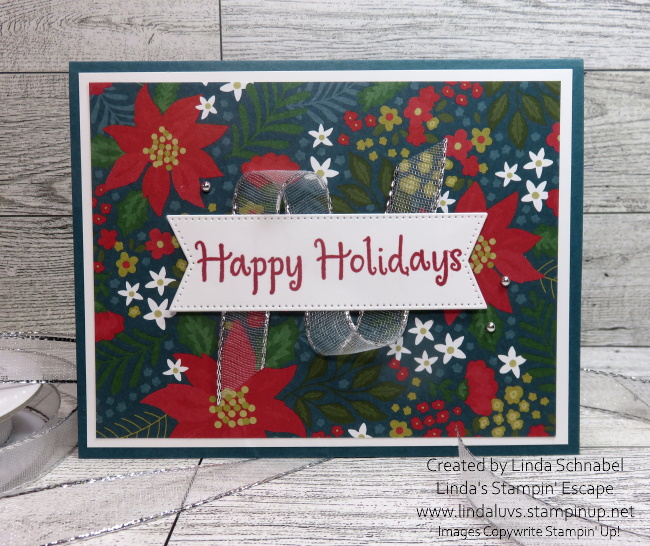
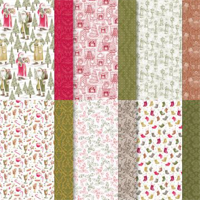
December 12th marks a delightful celebration – National Poinsettia Day! What better way to honor this festive occasion than by creating a beautiful card adorned with the Garden Walk Designer Paper? This versatile paper collection is a treasure trove of patterns perfect for all occasions and holidays, making it an ideal choice for your crafting endeavors.
Teaming up this splendid paper with the “Throughout the Year” stamp set elevates your creations to a whole new level. This stamp set is a true companion to the Garden Walk Designer Paper, offering a range of sentiments suited for different times of the year. Whether you’re celebrating holidays, sending heartfelt messages, or marking special occasions, this stamp set has you covered.
Creating a card with these combined elements brings out the magic of both the paper and stamp set. Imagine a stunning Poinsettia-themed card, adorned with rich reds and lush greens from the Garden Walk Designer Paper. Pair it with a warm and thoughtful sentiment from the “Throughout the Year” stamp set, and you have a heartfelt creation ready to spread joy.
I chose Pretty Peacock for my base to pull that beautiful rich color out of the designer paper, then I framed the Garden Walk Designer paper with the basic white. I enhanced my greeting with the Silver & White Sheer ribbon … dressed it up like a Christmas present, then added a few Silver embellishments from the Festive Pearls. So, whether you’re making cards, scrapbook pages, or other paper crafts, let this combination be your inspiration for spreading happiness and warmth throughout the year.
If you’re “looking” for inspiration, join me tonight on Linda’s Stampin’ Escape at 6:30 pm Central Time … LIVE with this combination of the Garden Walk Designer Series Paper and the Throughout the Year Stamp Set. Looking forward to seeing you there! Till then, have a great day!
YIKES … I’ve been AWOL for 5 days! Still dealing with my daughters “unknown” illness (it’s been two months) hopefully we will get some answers or something DONE on Thursday. Geez … even the weathermen have a better track record than these doctors, and emergency room technicians.
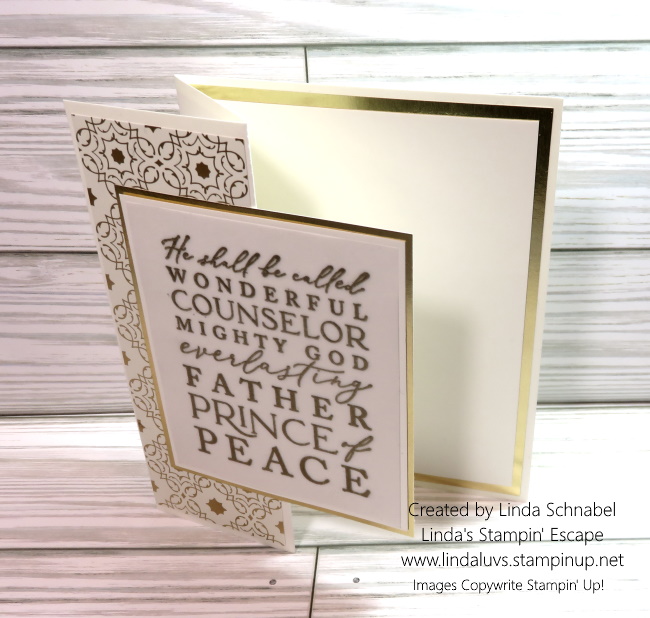
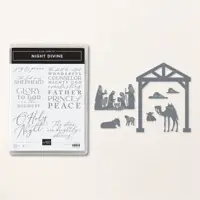
Anyhow … on with the good stuff!! Today I have a beautiful card for you: The Night Divine stamp set, a beacon of elegance, it shines brilliantly in today’s spotlight. Join us as we explore its grace and the stunning Z-Fold creation, marrying Very Vanilla and Gold in a symphony of sophistication.
The Night Divine stamp set is a testament to the beauty of this holiday season and the birth of our Lord. Even in this cards simplicity, the message shines through as it is the focal point of our card when heat embossed in Gold.
The choice of Very Vanilla cardstock sets a tone of refined grace, providing the perfect canvas for the gold accents to shimmer and captivate.
The Z-Fold card highlights our sentiment and places it center stage, adorned in the regal hues of Very Vanilla and Gold. The Z-Fold, known for its dimensional appeal and captivating layout, perfectly complements the elegance of the Night Divine stamp set.
Let the Night Divine bundle guide you to create awe-inspiring cards that celebrate elegance and grace. Thank you for joining me today …. I have a surprise for you!
Surprise! It’s time for FREE SHIPPING! On 14 December 2023, you can shop and save on all qualifying orders of $75 or more. What a great way to stock up on all your favorite products from the catalog, Online Exclusives, kits, and more!
Please keep in mind that because of the Christmas season, the distribution center may fall behind typical shipping timeframes. We will do all we can to return to our regular service levels as quickly as possible. Any orders placed during this promotion are not guaranteed to arrive before or by 25 December.
Let me know if you have any questions, or if you need help placing an order. Thanks again, and have a wonderful day.
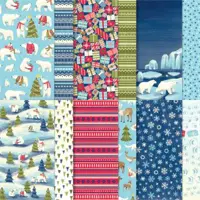
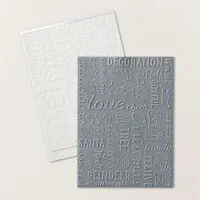
Winter brings with it a magical aura, and there’s no better way to capture its essence than with the Winter Meadows Designer Series Paper from Stampin’ Up! This collection isn’t just a celebration of the season; it’s a canvas of versatility waiting to unfold.
Today I’m sharing my video replay of my Facebook LIVE where I create 6 quick & simple cards from one beautiful sheet of the designer paper. Grab a cup of coffee, sit back and relax as I go through how I created these 6 cards.
One of the most striking features of the Winter Meadows Designer Series Paper is its adaptability. The gorgeous grey tone design serves as a perfect backdrop for a myriad of occasions. Its neutral yet captivating pattern allows for a versatile approach in crafting, making it a staple for a variety of celebrations.
Let’s delve into the magic of quick and effortless card-making! Here are six simple yet stunning card ideas utilizing the Winter Meadows Designer Series Paper, promising to spark creativity …
Classic Christmas Charm: Layer the grey tone pretty paper with a Pretty Peacock, add a simple ‘Let it Snow’ sentiment for a simple and pretty holiday card.
2. Winter Wonderland: And a sentiment of ‘Make the Season Sparkle’, pair it with Lost Lagoon cardstock, add a touch of Wink of Stella and adorn with Iridescent Rhinestone embellishments for a serene winter scene.
3. Father’s Day Sophistication: I cut the designer paper to 3 3/4″ x 5″, this card I used the Misty Moonlight to mat it, it’s earthy tone and wrap one corner with Bakers Twine for some texture. You’ll stamp with a ‘Happy Father’s Day’ sentiment to create a refined touch.
4. Birthday Bliss: Next I used the Blueberry Bliss as a backdrop for a colorful birthday card, surrounded by coordinating bakers twine and embellishments. The greeting was created from the Curved Occasions Bundle
5. Holiday Elegance: Trim the designer paper as the others, layer it on the soft Moody Mauve cardstock, add some Wink of Stella and stamp a ‘Happy Holidays’ sentiment. Time to embellish it with Festive Pearls.
6. Winter Season Beauty: Create a layered look with your designer paper with the Snowflake Magic on the Smoky Slate card base, adding a versatile sentiment that suits any occasion. Plus we’re adding a few Festive Pearls to complete our look.
The Winter Meadows Designer Series Paper isn’t just a seasonal delight; it’s a crafting essential that transcends boundaries. Its adaptability and charm make it an invaluable addition to any crafter’s arsenal. With just a few creative tweaks, it effortlessly transitions from Christmas to birthdays to Father’s Day and beyond, promising endless possibilities for beautiful creations.
Thank you for hanging out with me today. If you’ve enjoyed the video / cards, then please press the LIKE button or leave me a comment. Enjoy your day.
As the holiday season unfolds, there’s a unique joy in expressing the magic and significance of this time through heartfelt greetings. In the realm of creative card-making, Stampin’ Up!’s Oh Holy Night Product Suite stands out as a testament to the beauty and reverence of the season, and today’s card is a stunning reflection of the season.
I began with the idea of a fun fold; the Book Binder fold which lends itself beautifully with this suite. The focal point of my card is the Die-cut manger scene from the Gold Foil which also mats the Christmas theme. The sentiment “Oh Holy Night” was heat-embossed in Gold and forms the soul of the card. It’s more than just a design; it’s a visual hymn, speaking volumes about the cherished moments of this special time.
The Oh Holy Night Designer Series Paper and Gold Foil complement the scene flawlessly, adding depth and texture to the overall composition. The combination of these elements creates a visual symphony. I believe when we make cards for our loved ones, it’s much more than stamps, ink and paper … it’s the love we feel for our recipients and the holiday we celebrate.
The magic doesn’t stop there. The card is further elevated with thoughtful touches like the adhesive-backed star trinkets, which sparkle like celestial bodies against the night sky. These stars serve as gentle reminders of hope and wonder, guiding us through the festive season, and carries over into the inside of my card.
Let’s not forget the Night of Navy & Gold Glitter Ribbon, gracefully woven around the card. Its deep hues and shimmering accents enhance the visual appeal and completes the card like a bow on a present. This this card speaks a universal language—one of hope, love, and the spirit of the season.
Thank you for joining me today. I will be back with you tomorrow sharing yet another Fun Fold and card from the beautiful Oh Holy Night Suite.
Let’s step away from the “Christmas” cardmaking for a bit and take a Sneak Peek into the BEE MINE SUITE! Let’s step into a world of whimsy and charm with the Bee Mine Suite Collection from Stampin’ Up! Get ready to infuse your crafting projects with a dash of sweetness and versatility that goes beyond the confines of Valentine’s Day. At the heart of this delightful collection lies the Bee My Valentine bundle, a must-have for every crafter looking to add a buzz of creativity to their repertoire. This suite will be available January 4th, when our Spring Mini Catalog goes LIVE!
While the Bee My Valentine bundle is perfect for crafting heartfelt love notes and romantically whimsical gestures, its versatility extends far beyond February. The adorable bee-themed stamps and coordinating dies are your ticket to creating cheerful, uplifting designs suitable for a myriad of occasions. Add a pop of color and love with these adorable hearts and flowers! Easy to use with adhesive backing. 💖🌸
The Bee Mine Designer Paper boasts lively patterns infused with cheerful colors and adorable bee-inspired designs. Mix and match these papers to add depth, texture, and a touch of whimsy to your projects. Imagine the joy on someone’s face when they receive a handmade card or gift adorned with these charming bee-themed elements. 🌼🐝
Let your imagination take flight as you craft heartfelt, adorable, and stunning projects. Is this on YOUR Wish List?? Don’t forget to tell your loved ones that I have GIFT CERTIFICATES available for you, your friends, family … spread the word because you will want to get your BEE MINE suite collection right away.
This BEE MINE suite is going to have people buzzzzing 💌🌼🐝 I had a lot of fun creating these cards at a Stampin’ Up! event, love getting together with my stampin’ sisters. Care to join us?
Thank you so much for spending a bit of your Sunday with me. Have a great day, and please let me know if there is anything I can do for you during this Holiday season.
Are you looking to add a touch of whimsy and color to your holiday cardmaking? Look no further than the delightful Festive & Fun stamp set, coupled with the versatility of Stampin’ Blends markers! Specifically designed for ease and creativity, these tools can transform a our cute giraffe stamp into a vibrant, eye-catching focal point.
One of the standout features of the Festive & Fun stamp set is its charming giraffe illustration. This adorable character becomes a joy to color using Stampin’ Blends. These alcohol-based markers offer smooth and seamless blending, allowing both novice and experienced crafters to achieve professional-looking results effortlessly.
The secret to achieving stunning color depth lies in the layering and blending capabilities of Stampin’ Blends. Begin by selecting your desired shades for the giraffe’s body: Lemon Lolly & Medium Naturals. I used the Real Red, Shaded Spruce and Balmy Blue to color the rest. With the fine and brush tips of the markers, apply the lighter shade as the base layer and gradually add depth by layering the darker shade. I go over again once I lay down the darker color which really blends them and creates a visually appealing finish.
I used the Nested Essentials and Stylish Shapes Dies to highlight my images that are layered upon our festive Beary Christmas Designer Series Paper. I have another card to share … the Designer paper is retired however I wanted to share this fun layout.
Unleash your creativity and bring this adorable giraffe to life with the vivid hues of Stampin’ Blends markers. Even a subtle change in designer papers and layer can add to the festivities! Don’t forget that Wink of Stella on your Star and ornaments!!
Time to grab your Festive & Fun stamp set, Stampin’ Blends markers, and Nested Essentials Dies, and embark on a colorful crafting escapade today!
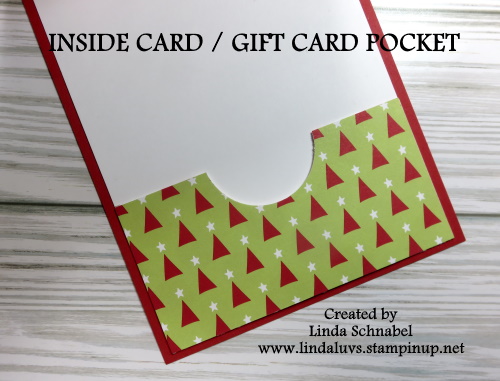
Welcome back, fellow crafters! Today, I am thrilled to dive into the delightful world of Stampin’ Blends and the charming rhino from the Gift of Giving Stamp Set. Remember that feeling when creativity meets functionality? Well, I’ve transformed this adorable rhino into an incredible gift card holder!
The versatility of this stamp set is truly remarkable. With a touch of artistic flair and the magic of coloring techniques using Stampin’ Blends, the rhino comes to life in vivid, eye-catching hues. The seamless blending and shading capabilities of Stampin’ Blends add depth and character to every stroke, making the finished product an absolute delight to behold.
What sets this stamp apart is its versatility. Beyond the artistry, it transforms into a functional delight—a pocket, ingeniously crafted to hold the most beloved of holiday presents: gift cards. With a touch of creativity and a dash of festive cheer, this stamp becomes the vessel for heartfelt gifting, embodying the true spirit of giving.
Let’s celebrate the joy of giving and the magic of creativity intertwined in this wonderful crafting journey. Stay tuned for more creative inspirations and let’s continue to spread the joy of crafting together!
Thank you for joining me today. *The designer paper used on this card has SOLD OUT from our discontinuing products. I have listed the links to these products & substitutes so you can begin sharing the joy with this adorable Gift Card.
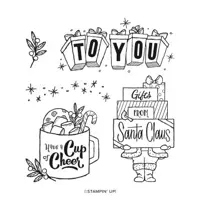
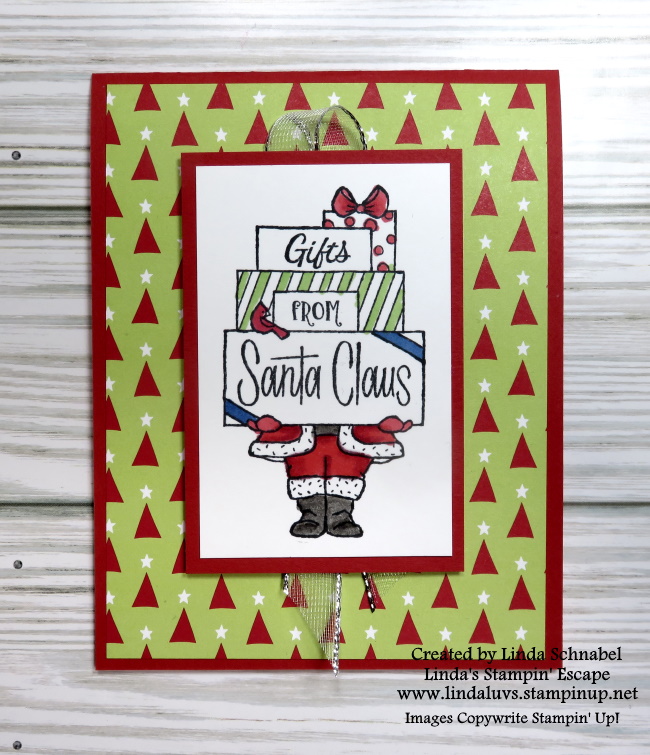
Today I’m highlighting the ‘Gift of Giving Stamp Set’ this gem encapsulates the essence of the season—Santa himself, adorned in vibrant hues courtesy of our Stampin’ Blends. The Stampin’ Blends make coloring a breeze! Just goes to show, you do not have to color every nook and cranny to make your card attractive.
The centerpiece of this set, Santa’s image, is more than just a stamp; it’s an embodiment of joy and tradition. Colored meticulously with Stampin’ Blends, this jolly figure pops with vivid reds, rich greens, and the warmest of whites, reminiscent of the classic imagery adored by all ages during this magical time.
What sets this stamp apart is its versatility. Beyond the artistry, it transforms into a functional delight—a pocket, ingeniously crafted to hold the most beloved of holiday presents: gift cards. With a touch of creativity and a dash of festive cheer, this stamp becomes the vessel for heartfelt gifting, embodying the true spirit of giving.
So today and throughout the season, let the magic of Santa’s image remind us of the true essence of this wonderful season—love, joy, and the gift of giving.
Thank you for joining me today. *The designer paper used on this card has SOLD OUT from our discontinuing products. I have listed the links to these products & substitutes so you can begin sharing the joy with this adorable Gift Card.
Today I will be sharing the LIVE presentation I did for my Twelve Weeks of Christmas. This is Week 8 and I’m sharing how to create the Shutter Card Technique … it is fun and easy! You won’t think that looking at the card, but when I show you how quickly it goes together … you’ll be heading into your craft room to get your stampin’ groove on!!
Check out the card first, and then the video ….
The first two cards are created with the Winter Meadow Designer Series paper …
Just to recap … I used the second (smaller) square die to create the “anchor” to my Shutter Card, then you can layer it as desired. Don’t forget that Wink of Stella on the berries of our Moody Mauve card because it really adds that touch of Christmas glimmer to your card.
What I did not realize is that the Snowflake Foil Specialty paper has already SOLD OUT from the Retiring List, but use this quick and easy technique I shared with “any” designer paper that has a pattern the can be used in any direction.
The two pattern option is really fun and gives your card a wonderful twist. I hope you try out this technique, it really is much simpler than it looks, and I think my demonstration showed that to you.
Thank you so much for stopping by my blog today. I appreciate that.
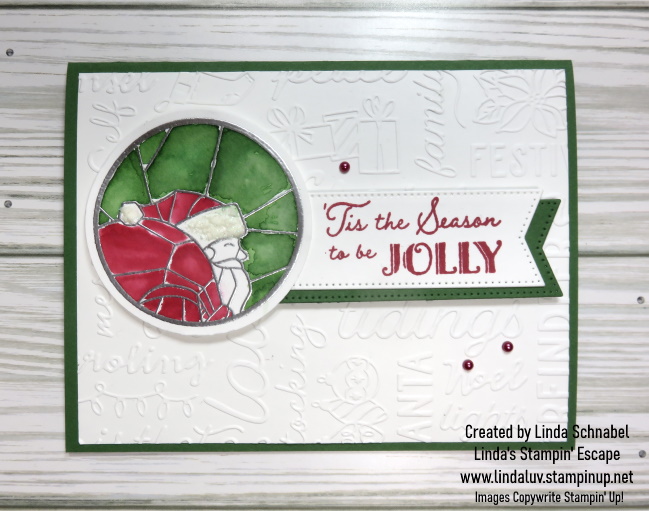
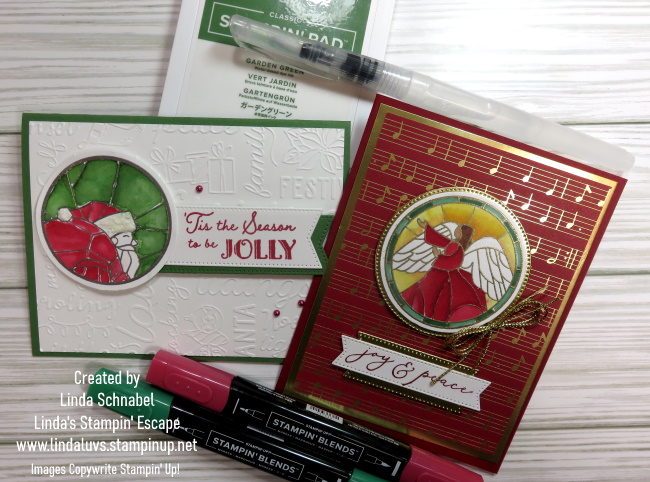
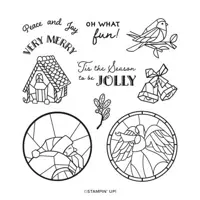
We continue to party over on my FACEBOOK page and I extend an invitation to you to join me in Santa’s Workshop for a spectacular Holiday Stamping Extravaganza! We’ve kicked off our LIVE Demonstration with the So Very Merry Stamp Set in the OnLine Exclusives …. This beautiful set was demonstrated using different coloring techniques.
Our Santa card features the Christmas Tidings embossing folder. Santa is done in the water-coloring technique using or classic ink and Water Painter. We embossed the image in Silver with helps to contain the color when using this technique. I think this watercolor technique lends itself well to the stained glass look of the stamp set.
The second card is the stunning angel and was colored using the Stampin’ Blends and was paired with the “Joyful” Designer paper and Gold Foil …
I showcased several coloring techniques including our Watercolor Pencils … it was a fun stamp session that kicked off several more. The party continues throughout the day tomorrow with a LIVE demonstration at 6:30pm.
Join us virtually at Linda’s Stampin’ Escape Facebook page [CLICK HERE] for live-streamed demonstrations and virtual participation in games and prize opportunities.
Get ready to immerse yourself in a day of creativity, inspiration, and holiday cheer at the Holiday Stamping Extravaganza. Let’s make this season extra special by crafting heartfelt cards, exploring new techniques, and sharing the joy of creativity together.
Hope to see you on my Facebook page!
Here is the list of basic supplies used for these projects …