Hello Stampin’ Friends ~
I hope you had a wonderful weekend! It was a stormy Saturday by me, but my craft room is in the basement … so I was safe! lol Hope you were too.
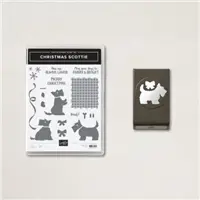
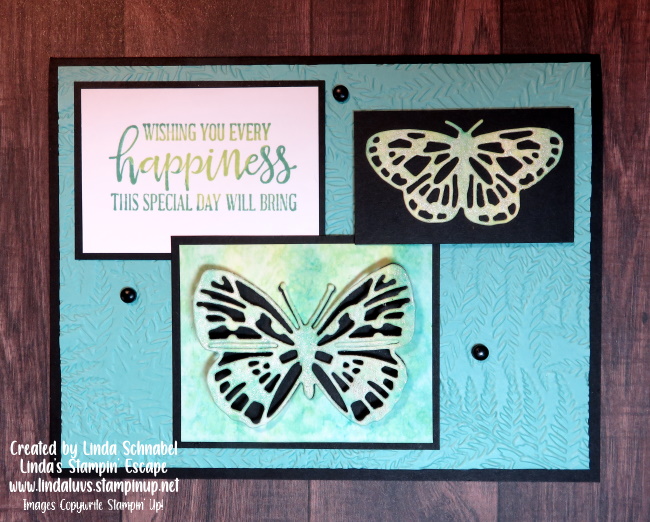
I’m thrilled to share today’s card with you. If you are a puppy lover … then you are going to love this simple, fun Amazing Scottie Card! It was created by one of the design team members in the group that I belong to and I just fell in love with it …

We start with our cardbase in the landscape / horizontal position. You’ll attach the Gingham Cottage Designer Series paper onto the black mat, and then secure that to your cardbase. Using the “Deckle Rectangle” die, cut out a piece in Basic White for our greeting.
Stamp the sentiment from the Amazing Phrasing stamp set on the rectangle using Calypso Coral ink. Bend the stamp so that it curves before adding it to the clear block. Then, add the white rectangle to the card front as shown …
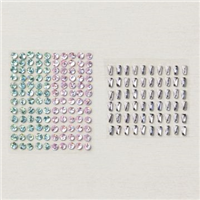
Punch a dog using the black cardstock scrap and the Scottie Dog Punch. Cut a small piece of gingham ribbon and add it to the dog’s neck using mini glue dots to hold it on the back. Add the dog to the card using black Stampin’ Dimensionals, and one little gem to the collar for our scottie dog!
You can find the Christmas Scottie Bundle in the July – December Mini Catalog and the Amazing Phrasing stamp set in the Sale-a-bration catalog. See … just because it’s in the mini doesn’t mean it’s just for Christmas! It’s a mission to show you how to maximize the value of your stamping supplies!
Thank you for stopping by this Monday. Have a wonderful week.

Here is a list of the products that were used to create the card. Don’t forget … It’s Sale-a-bration, and you can earn FREE products with qualifying purchases.