Hello Stampin’ Friends ~
Happy Sunday! Today’s project brings together two of my favorite things from the Holiday Mini Catalog—the Traditions of Christmas Specialty Designer Series Paper and the Traditional Labels Bundle. These two pair beautifully to create timeless cards that capture the spirit of the season while staying easy and fun to make.
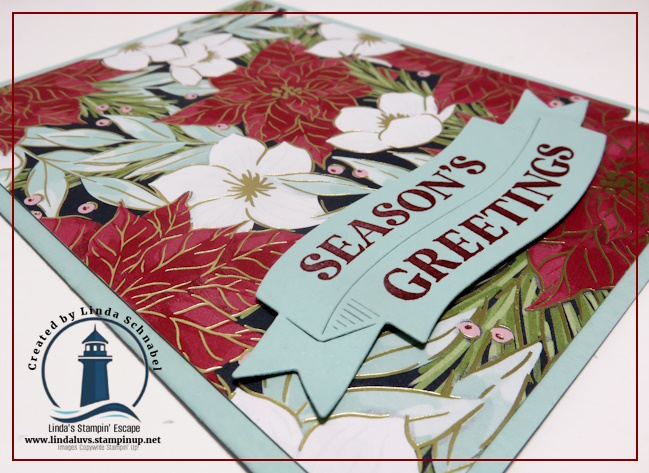
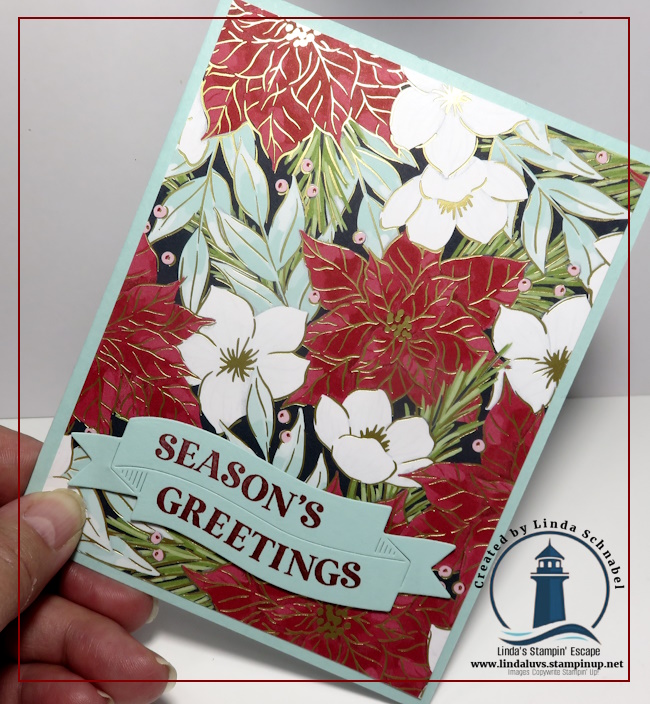
The Traditions of Christmas Designer Paper is a classic choice for holiday crafting. With bold poinsettias, delicate white flowers, and lush greenery accented with gold foil, it offers a warm and traditional palette that feels just right for Christmas. Pair that with the Traditional Labels Bundle, which includes versatile greetings and perfectly sized dies, and you have everything you need for cards that are both elegant and effortless.

For today’s card, I chose patterned paper featuring red poinsettias, white flowers, and hints of Pool Party and Old Olive greenery upon a Secret Sea backdrop. The base of the card is Pool Party cardstock (8 1/2″ x 5 1/2″, scored and folded at 4 1/4″), which makes those seasonal colors pop. I die cut the double label banner from the Traditional Labels in Pool Party cardstock and stamped my greeting in Cherry Cobbler ink to tie in with the poinsettias.
Popping the sentiment up with dimensionals adds just the right amount of depth and texture. Although I didn’t, I suggest a few embellishments finish it off. Even this simple layout, our card still shines.
What I love about this design is that it’s perfect for beginners while still looking polished enough to impress. The die-cut label gives it that “next level” look without adding any complicated steps, so it’s a win for both new and experienced stampers alike.
Thanks so much for joining me for this Simply Sunday inspiration! I hope today’s project encourages you to reach for the Traditions of Christmas Designer Paper and the Traditional Labels Bundle as you craft your holiday cards. These products are truly timeless and will help you create keepsakes that capture the magic of the season.
Until next time, happy stamping!


Price: $16.50