Hello Stampin’ Friends ~
If you’re craving a little creative time that feels easy, joyful, and totally stress-free, you’re going to love today’s Simply Sunday card. 🌸 This project highlights the Easter Time Mix & Match Ephemera Pack, and it truly is as quick as a bunny’s hop to put together. If your craft table has been calling your name—or if you just need a moment of calm—this is the perfect place to start.
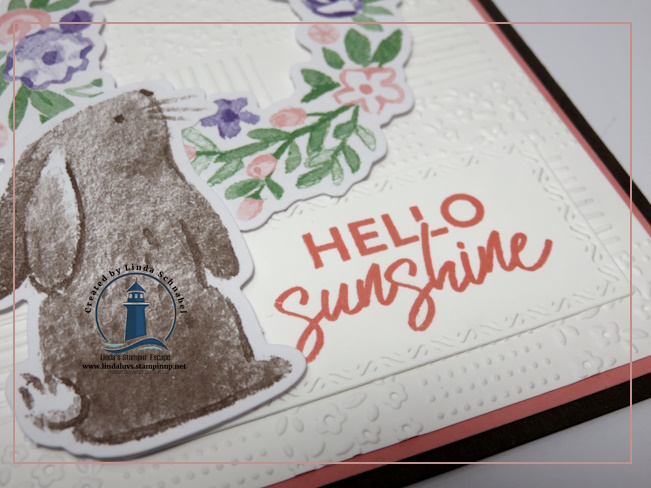
Springtime creativity comes to life with the Easter Time Mix & Match Ephemera Pack, filled with soft pastel colors and charming imagery that instantly makes you smile. Tulips, sweet bunnies, floral wreaths, classic wicker Easter baskets, and blooming water cans make mixing and matching effortless. For today’s card, I chose one of the floral wreath and an adorable bunny, letting the ephemera do all the heavy lifting while still creating a card that feels thoughtful and handcrafted.
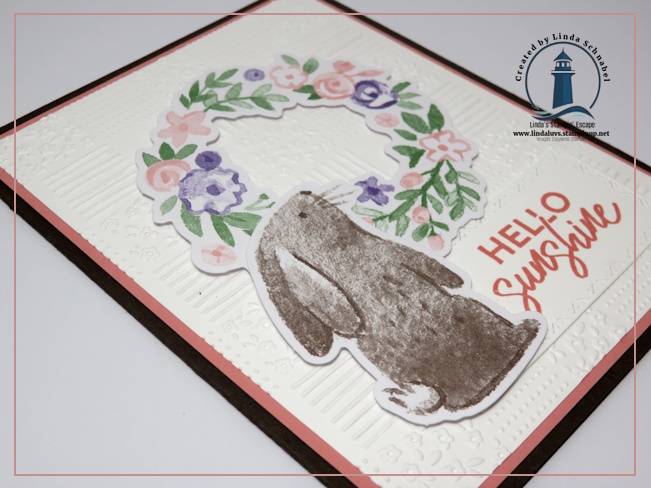
To add texture and visual interest, I used the All in a Row Embossing Folder, which is a favorite when I want subtle structure without overwhelming the design. The beautifully embossed grid pattern includes florals, stripes, and dots with deep texture that gives the card such a lovely tactile feel. It’s one of those details that really shines when you see it in person—and makes a simple layout feel extra special. If texture is something you love in your cards, this folder is definitely one to take a closer look at.
The layers for this card are clean and classic, creating the perfect base for our spring focal point. The A2 card base is Early Espresso, measuring 8 1/2″ x 5 1/2″ and scored at 4 1/4″. I added a Flirty Flamingo mat cut to 5 1/4″ x 4″, followed by embossed Basic White at 5 1/8″ x 4 7/8″. These simple layers frame the ephemera beautifully and allow the soft spring colors to really stand out. If you enjoy designs that are easy to recreate but still have that “wow” factor, this layout is one you’ll want to save.
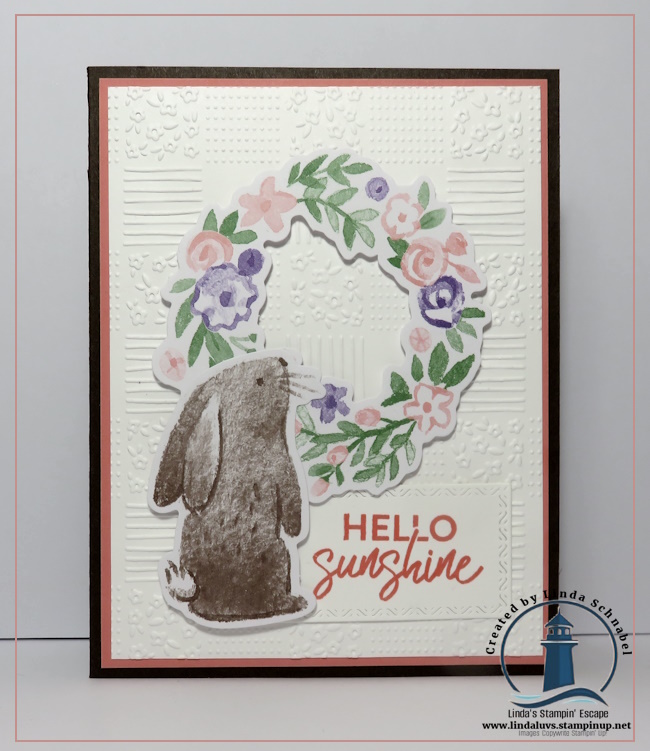
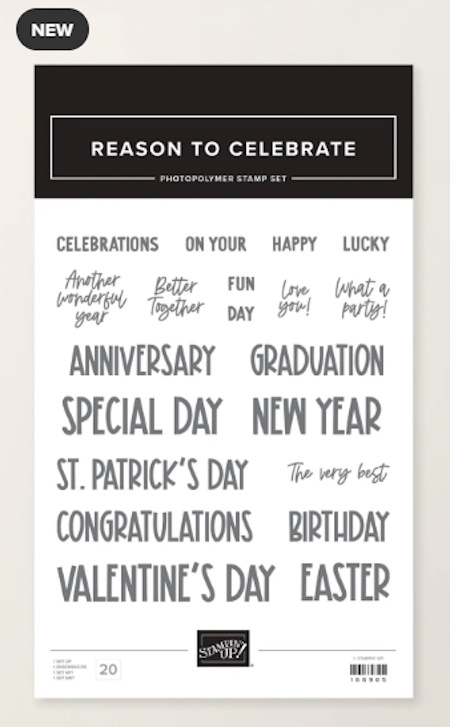
Once the wreath and bunny were in place, all that was left was the greeting. I reached for the Exploring Nature Stamp Set, which is intended as a companion to the scrapbook kit—but I absolutely love using it on cards, too. These sentiment-only stamps are all about embracing adventure, soaking in the sunshine, and celebrating the great outdoors. I framed the greeting using the Textured Notes Die, which adds just the right finishing touch without stealing attention from the main elements.
This sweet little card is wonderfully versatile—it works beautifully for Easter, spring greetings, or even a birthday. That’s one of the things I love most about Mix & Match ephemera: it makes creating fast, fun, and flexible projects so easy. If this card inspired you, I’d love for you to try something similar at your own craft table and see how quickly it comes together.
Thanks so much for stopping by for today’s Simply Sunday inspiration. 💕 Be sure to leave a comment and let me know how you would use this card—and don’t forget to check out the supplies if they’ve found their way onto your wish list.
Until next time, happy stampin’ and enjoy every little moment of spring creativity!