Yesterday I shared some different ways to use our Embossing Folders, so today I thought I would share another use! I simply emboss my Designer paper! Using an embossing folder to compliment and add texture to your designer paper is a great way to elevate your card.
Today’s card highlights the upcoming Fancy Flora Designer paper and the Painted Texture Embossing Folder that is in our Annual Catalog ….
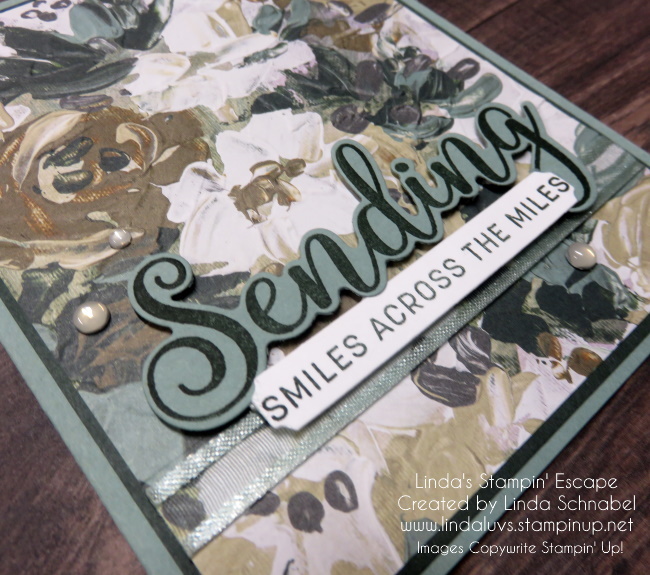
I love the texture that the Painted Texture embossing folder really highlights the brush strokes on our “painted” designer paper. I can’t wait for you to be able to order on January 5th … you will want this paper in your stamp room.
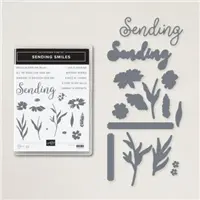
My cardbase is Soft Succulent and the mat for the designer paper is the Evening Evergreen. I used the Sending Smiles bundle for my greeting … it is stamped in Evening Evergreen onto the Soft Succulent cardstock. This bundle is in the Annual Catalog and this is the first time I’m actually playing with it. I popped up greeting with Mini Dimensionals and secured it over the Soft Succulent Open Weave Ribbon.
The card was finished off with 3 of the white Adhesive Backed Milky Dots that are in the new Jan-April Mini Catalog that will be available January 5th. These are the same embellishments and designer paper that I used on Wednesday’s Card …
Stop back tomorrow as I share an “elevated” take on today’s Soft Succulent card. Until then … Have a great day!
Thanks for joining me today ~
Here is a list of supplies that I used in today’s card. It does not show the Designer Paper or Adhesive Dots as they are not available until January 5th.
Today I’m sharing different ways to use your embossing folders. There are so many possibilities when it comes to using embossing folders. They are a special crafting tool that can’t be forgotten!
Concept artist Leana used the Elegant Eucalyptus Embossing Folder on white cardstock and colored in the raised embossed image with Stampin’ Blends. This technique gave her card a unique center piece!
Concept artist Christa used the Merry Melody Embossing Folder on gold foil. She then cut it into strips and made it an eye-catching accent on her card front!
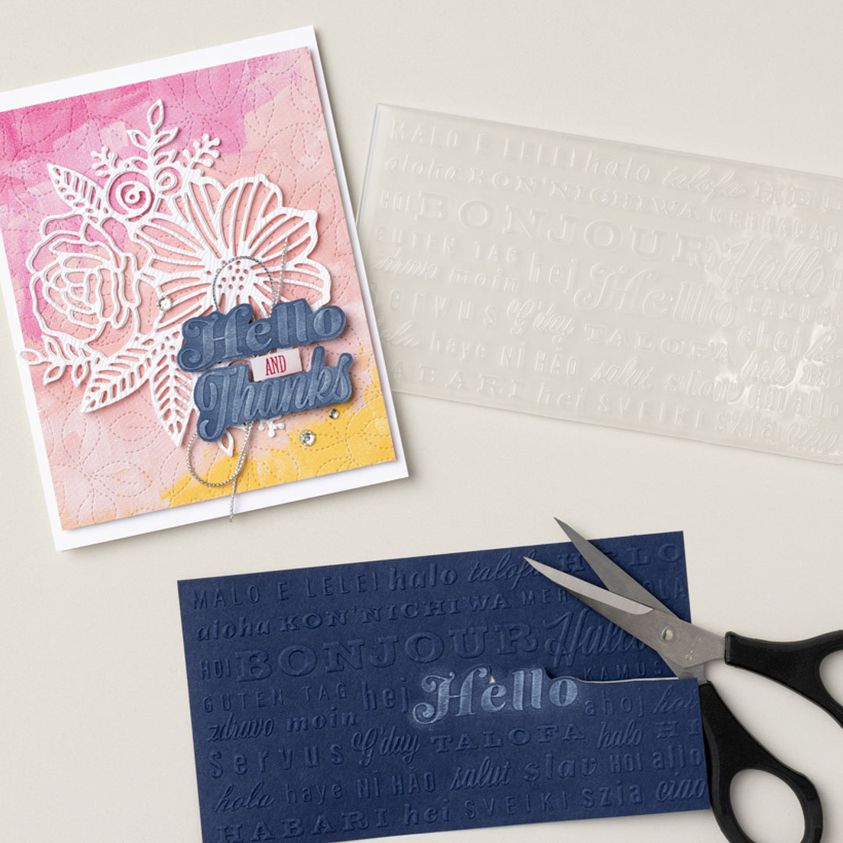
Did you ever think of using an embossing folder as a sentiment for your card? Our concept artist Rebecca used the Thanks & Hello Embossing Folder and a sponge dauber to highlight the embossed words. She then chose her favorite part of the folder, fussy cut her sentiment, and made it the center of her card.
Most people think embossing folders are only good for card backgrounds, but they hold so much more potential! How will you transform an embossing folder into something new? Share in a comment below!
Thanks for taking time out of your day to stop by! Enjoy your day ~
I’m excited to share a Sneak Peek with my Celebrating You Card today. It’s a fun combination of what’s in our Annual Catalog with some of our beautiful NEW items in the Jan-April Mini Catalog.
If you joined me for my Facebook LIVE yesterday you would have gotten a good look up close to some of these ….
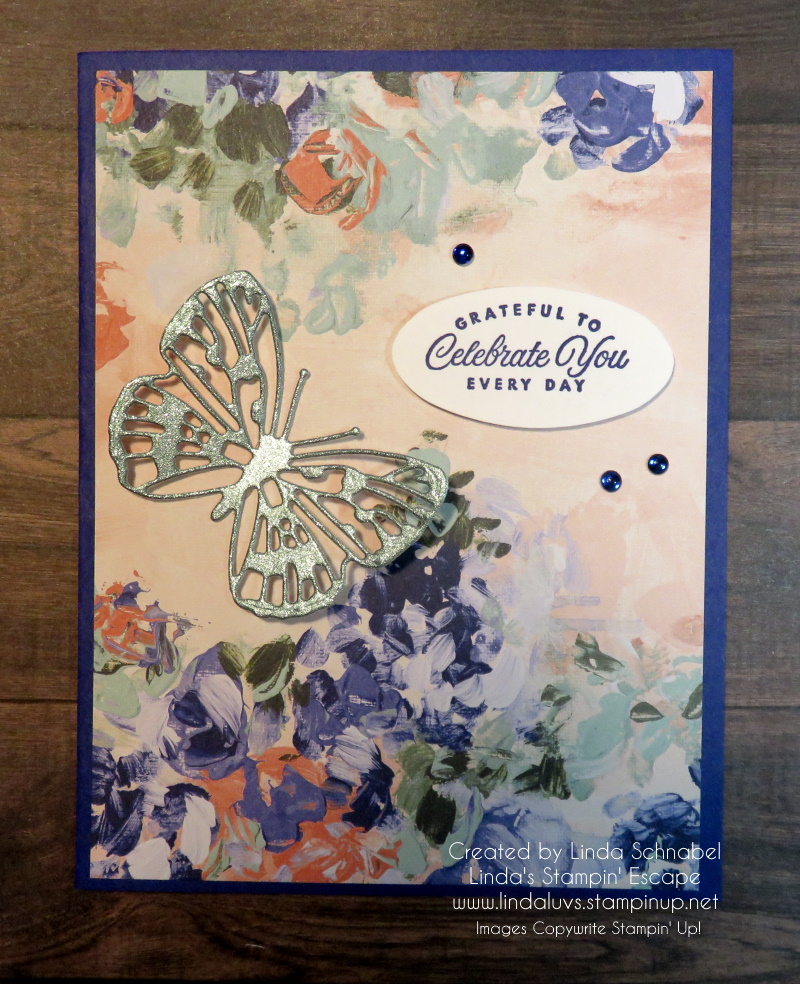
I couldn’t wait to get my hands on the beautiful “Fancy Flora” 6 x 6 Designer Paper (160413) it’s so pretty and I love the painted look of it. I paired this pattern with Starry Sky even though the coordinating colors are Night of Navy and Orchid Oasis … I thought it made a bolder statement, and with the varying shades of blue I though it matched well.
Now, let’s talk about that butterfly – I chose one from the Brilliant Wings dies and had to try the NEW Fine Shimmer paper (160428). I misquoted you the colors last night, they are actually Soft Succulent, Fresh Freesia, and Gold … that makes much more sense!! AND it coordinates with the Fancy Flora designer paper I used (it’s even on the same page in the Mini Catalog).
I’m hoping those butterflies don’t fly away when the Annual Catalog retires in April … if you don’t have them already, you will want them in your dies collection.
I had to get a close up to show you the FINE glimmer on this paper… it really is stunning. My lighting does it no justice (I see an investment in some new lighting equipment needed – lol). You will also see the Adhesive Backed Milky Dots … I love those colors!!
I used the greeting from our Celebrating You stamp set and punched it with the Double Oval Punch. You could also stamp directly onto the paper but I didn’t want to loose that greeting because your eye is drawn right to the butterfly.
I hope you enjoyed this quick sneak peek and if you’d like to see the REPLAY of last nights “Walk Through” you can head over to my Facebook page or I’ll have it posted tomorrow on YouTube.
I’m inviting you to join me tonight on my Linda’s Stampin’ Escape Facebook page for a PEEK into the NEW Sale-a-bration and Mini Catalogs. There will only be ONE Sale-a-bration event this year … 2023. I know we’ve had two in past years but Stampin’ Up! decided to introduce everything all at once! Fun!
You will get a close up look at the stamps, dies, designer papers and more! I’ll be sharing ideas, maybe even a sample or two … I hope you can join me, you just never know what’s in the box and what will be your favorite.
Can’t wait to see you!! CLICK HERE for the link to my Facebook page!
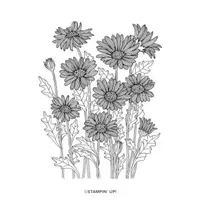
Tired of the cold? I’ve got the perfect card to warm you up … bright and colorful highlighting the Daisy Garden Stamp set and the Spotlight Technique! This little cutie will make you yearn for Spring!
*** I love this technique – It’s a great way to add a pop of color to images that one would think needs the entire image to be colored, so it’s quick and easy and still beautiful.
Measurements:
Parakeet Party: 5 ½” x 8 ½”, scored at 4 ¼”
Polished Pink: 4” x 5 ¼”
2 pieces of Shimmery White: 3 ¾” x 5”
Instructions:
Stamp the Daisy Garden Stamp on 2 separate pieces of Shimmery White cardstock. (Use the Stamparatus to ensure that you have a nicely stamped dark image. If a part of the image is not stamped nicely on the cardstock, you can re-ink and stamp it again.)
Use the 3 smallest sizes of the circle dies from the Stylish Shapes Dies cut out pieces from the 2nd stamped Shimmery White cardstock.
Colour the flowers and leaves that are in the cut-out circles using Stampin’ Blends. (Tip: I used the Light Pool Party Stampin’ Blend to fill all the “white space” on the circles.)
Use the Wink of Stella Glitter Brush to add shimmer to the flower petals.
Add a piece of ribbon to the fully stamped Shimmery White cardstock. Take a smaller piece of ribbon and tie a knot on the right hand side of the card.
Add the Stitched Circles on top of the cardstock using Dimensionals.
Adhere the Shimmery White cardstock to the Parakeet Party cardstock.
Add the layers to the card using Stampin’ Seal Adhesive.
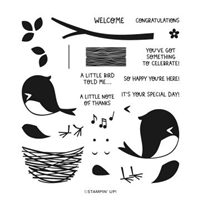
Stamp the greeting from Sweet Songbirds stamp set on a small piece of Shimmery White cardstock using the Polished Pink ink. (I cut the cardstock to the correct size after stamping it)
I hope this card inspires you to try out this technique … it really is quite simple, and can really add a pop of color! What a great way to warm someones day when it’s so cold outside (at least it is where I am) lol
Thanks for joining me today, hope your day is a good one.
Here is a list of supplies used to create this card ….
I hope everyone is fairing well in this crazy weather … I’m not the biggest fan of snow and cold, but it’s crazy cold here! I had to take a little break to warm up so I made some “Christmas Poke” Cake and Deviled Eggs for the family get together.
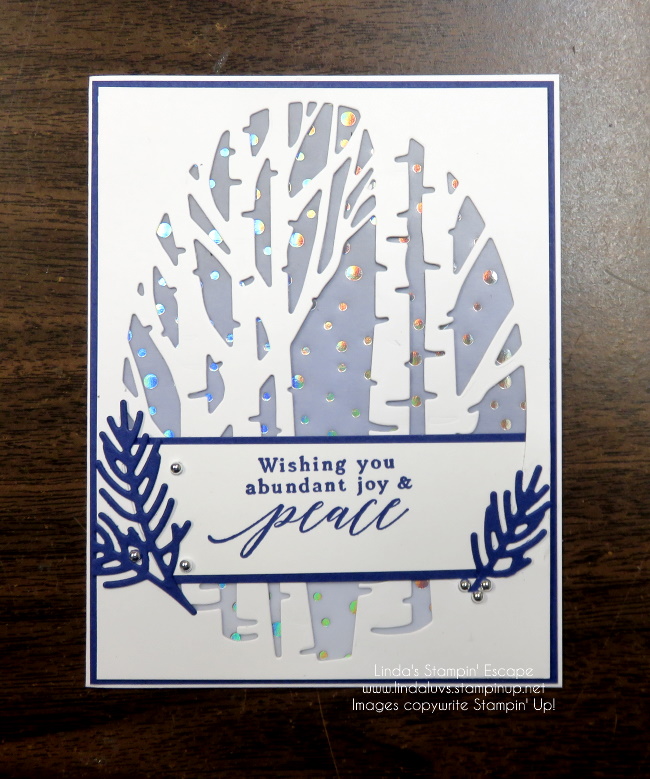
Today I’m highlighting the “Perched in a Tree” bundle. Let’s get started 🙂 The first card was cased from Pinterest and I just loved the cool color and blue and paired with white.
Cardbase is your A2 size (8-1/2″ x 11″) and the die cut piece was cut to 4″ x 5-1/4″ and so was the pretty Snowflake Specialty Vellum, which is also on the Last Chance List 😦 The blue is the Starry Sky … so pretty. This is a great card choice if you like layers but need something on the simple side to get your Christmas cards done quickly.
My next card I changed up to show this beautiful bundle can be kept in your stamp collection all year long ….
With a simple change of sentiment you can change the entire feel of your card, and easily turn this from a Christmas card to a Birthday Card!
Thank you for spending a part of your day with me, enjoy this holiday with your family and friends ~
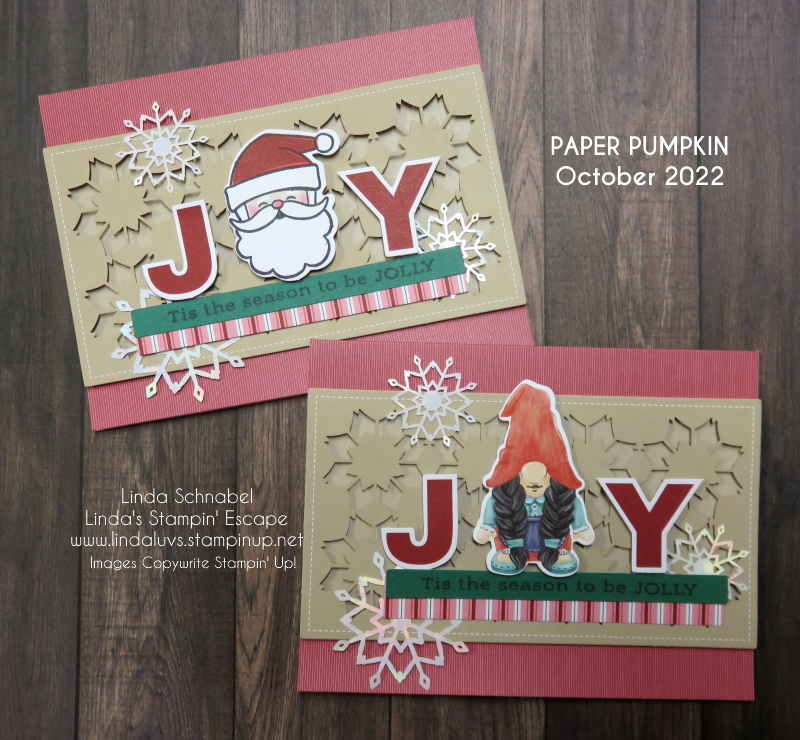
I was assembling my October kit and noticed a bag of “Gnomes” that I had pre-die cut so … I thought what more fun than a sleigh ride than invite my die cut gnomes to join Santa Claus!! lol Here are the original cards from the kit (upper left hand) and my Gnomes cards (lower right).
Let’s begin by sharing a little JOY ….
The kit had 3 different designs so on my next card “Santa Clause is Comeing to Town) I did change up the layout a little bit ….
Just a little change on the next card …. Have a Merry Christmas my friends!
Just in case you wanted to view the video … I added it for you to see ….
The clock is ticking—it’s your last chance to save up to 60% on retiring items! On 4 January 2023, the Last Chance Products promotion will come to an end.
Before then, be sure to stock up on your favorite products before they’re gone for good! Don’t delay—this selection of Last Chance Products is only available while supplies last.
For all the details about this steal of a deal—and the information you need to promote these products to your customers—visit My Page Here
I’d be happy to help you with any of your stamping needs … just message me below.
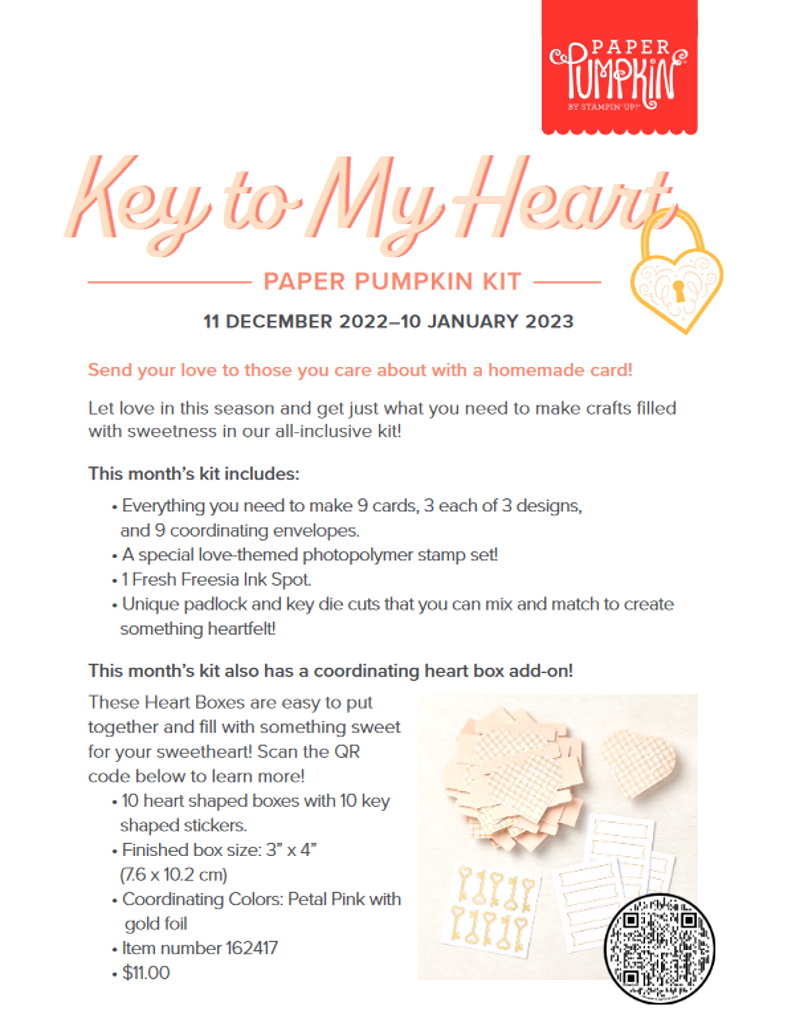
Today I have the December Paper Pumpkin …. Create fun gift card holders to help you celebrate your special occasions all year long! Personalize each gift with these reversible boxes and paper bands for a unique design every time. No matter what the occasion or who the recipient is, this is a coordinated paper craft that everyone will love and appreciate!
This kit includes:
*Good Things Come in Small Packages Photopolymer Stamp Set *Garden Green Classic Stampin’ Spot *16 gift card holders: 2 each of 8 reversible designs *Precut paper pieces, twine, and belly bands to customize all your crafts. *Enough adhesive for each project! *Finished box size: 3-5/8″ x 2-1/2″ x 1/2″ (9.2 x 6.4 x 1.3 cm)
Plus, this month you can take your crafting even further with a special add-on! Give a gift card and a personalized card with the Good Things Cards & Envelopes add-on. You get 20 cards (5 each of 4 designs) and 20 coordinating envelopes. Add-ons are only available while supplies last so make sure to get yours today.
Our January Paper Pumpkin kit and is available to subscribe to now …
With the holidays upon us, are you ready for the Good Feelings and Peaceful Moments? Well … I’m combining these two stamp sets to create a fun and happy Birthday Card! I made this card for my Demonstrator Design Team this month.
The Tahitian Tide Designer Paper makes this card bright and fun! Check it out. I’ll be sharing instructions and the dimensions with you as well …
To create this card I am listing the measurements and instructions, plus the supplies needed … they are listed below and linked to my store so you can learn more about the product.
Measurements:
Card Base: Thick Basic White: 8-1/2” x 5-1/2”; score at 4-1/4”
Layer #1: Tahitian Tide Designer Paper Cut with Largest Scallop Die
Layer #2: Vellum Cardstock Die cut with second largest Scallop Die
Layer #3: Scrap for Greeting and Daisy (punch twice)
Instructions:
Cut and fold card base as listed above..
On Layer #2 (Card Front) Tahitian Tide paper: Using Scallop Contour Dies cut with largest scallop die and attach directly to card front.
Using Layer #2: Die cut vellum using second largest scallop die.
Ink greeting with White Craft ink and sprinkle with White Embossing Powder – Heat set with Heat Tool. (Option: Use Embossing Buddy prior to stamping to help prevent powder from sticking onto vellum cardstock).
Attach Layer #2 Card front to Layer # 1 Card Base using Multipurpose Liquid Glue. (STAMP TIP: I lightly added glue behind the embossed words to hid it and keep it from showing through vellum)
Punch 2 Daisies out with Medium Daisy punch and adhere with Liquid Glue – making sure the petals are off set from each other. Attach with a Dimensional.
Stamp Happy Birthday greeting on piece of scrap and cut ends at an angle.
This sweet and fun card is sure to bring a smile to anyone’s face … young or old. And if you’re like me, you sure don’t mind a little sunshine when there is blizzard warnings lurking about!
Thanks for the visit today … I hope you feel inspired to create a little sunshine today!
Here is my supply list for you …. If you don’t have some of the supplies, you can click on them for more information or to add it to your shopping cart. Thank you.
Today I’m going to share my replay of this Quick & Easy Fun Fold and all the dimensions and instructions with you because it highlights one of our beautiful designer papers that resurfaced in our Clearance Rack!! If you already have this pretty paper then here is a video and the two cards I made.
Let’s take a look at the video now …
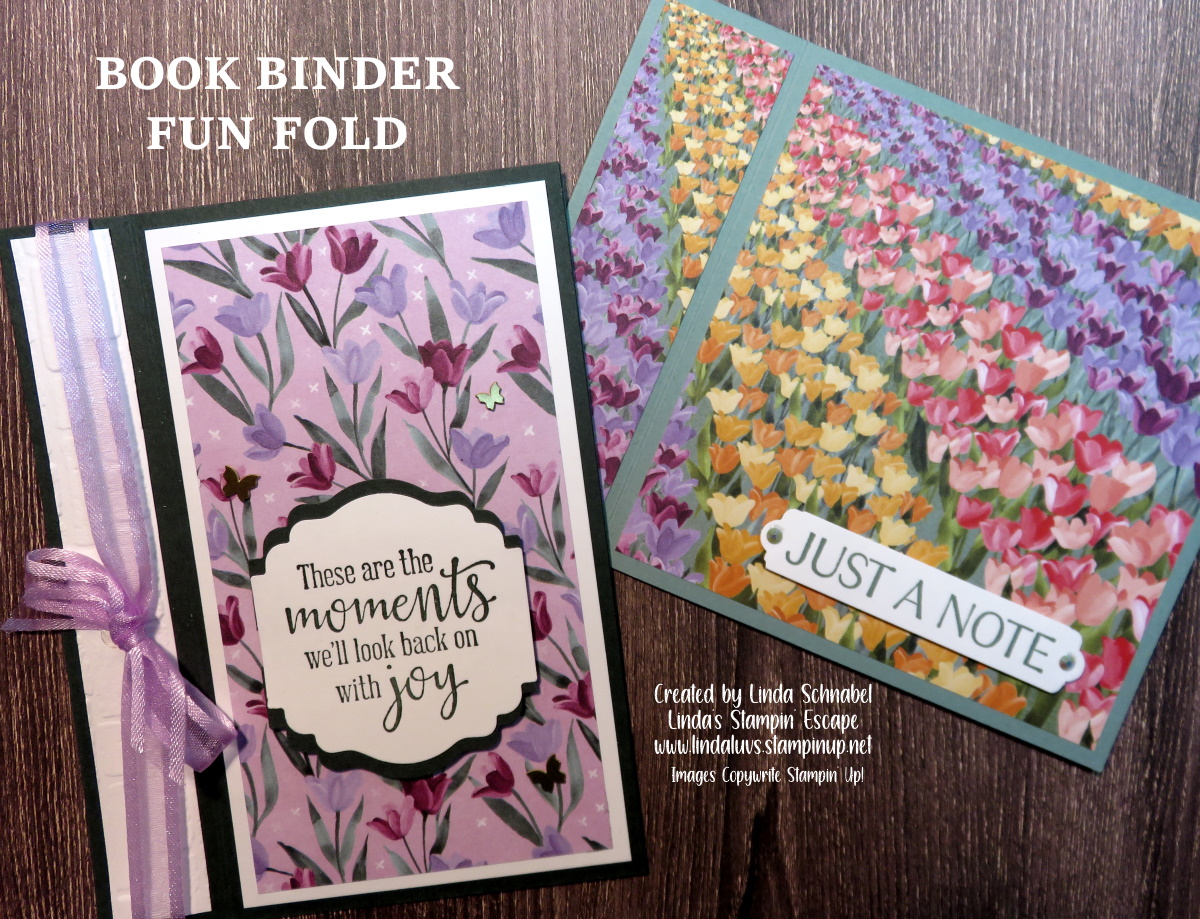
Book Binder Fun Fold … Super Simple!
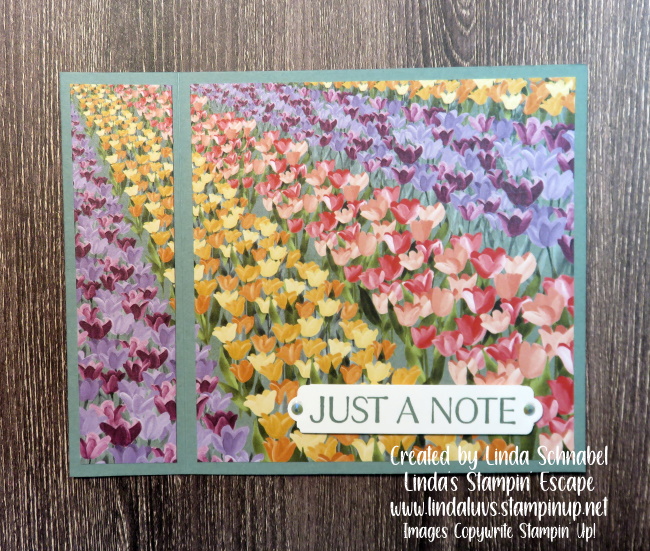
HORIZONTAL PROFILE (Above) How It’s Made
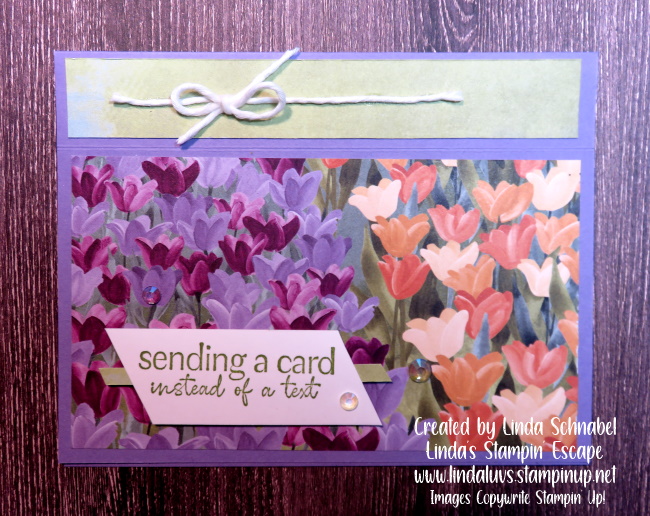
Cut a 4-1/4 x 11″ piece of Soft Succulent cardstock for the card base. Score at 5-1/2 and 4-1/4. Crease folds and add adhesive to the inside of the two scored lines. The 4-1/4″ score line should be facing out on the front of the card.
Cut a 4 x 4″ piece of Designer Paper (or cardstock) and adhere to card front.
Cut a 1″ x 4″ strip from the tulip design designer series paper and adhere to the left side margin on the card front.
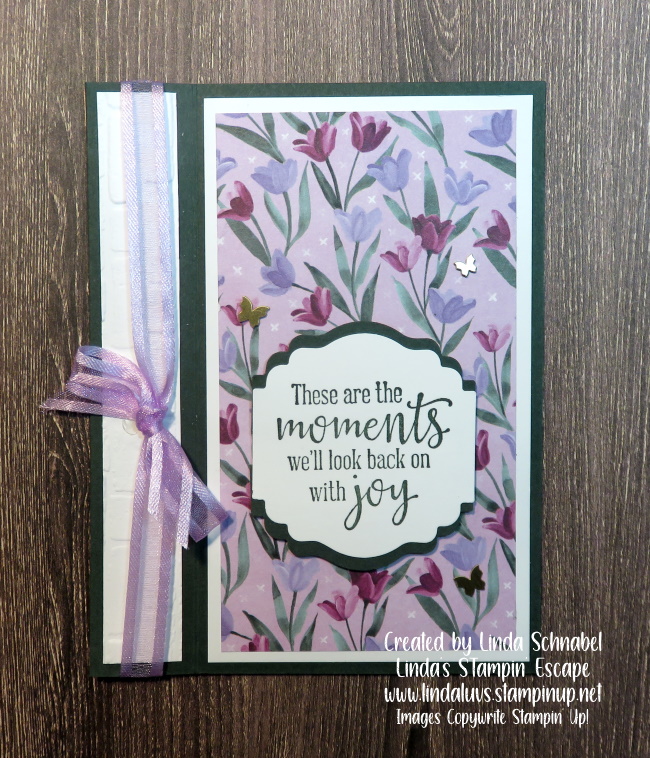
PORTRAIT PROFILE (Above) How It’s Made
Cut a 5-1/2 x 8-1/2″ piece of Evening Evergreen cardstock for the card base. Score at 4-1/4” and 5-1/4”. Crease folds and add adhesive to the inside of the two scored lines… You can add your ribbon at this time.
To layer card front; cut Basic White 5-1/4” x 3” (Cut 2: one for inside and one for mat on front) Cut Designer paper to 5” x 2-3/4” to layer on top of white.
Binder area is cut in Basic White at 5-1/4” x 3/4” and I embossed with “Brick” embossing folder for some texture.
Cool … right! Now, let me share another layout you can use when creating the Book Binder Fun Fold. It’s another portrait however the card stock is cut at the usual 8-1/2″ x 5-1/2″ and it is scored at the 4-1/4″ and 5-1/4″ … now you will just position your “binder” to the “TOP” of your card.
The designer paper is cut at the same dimensions as well … however, you need to make sure you are “cutting” to the designer of the paper. On this card, my “binder” actually has the same designer paper, I just flipped it over. The greeting also comes from the Flowing Flowers stamp set, same as we used on our first card.
Enjoy making this fun fold … it’s really easy, and you’re going to have a blast creating with all your beautiful designer papers. Don’t forget, you can add in your embossing folders, die cuts or hand stamped items!
TODAY’S STAMPIN’ SUPPLY LIST … If you liked the products used in today’s projects, I have links for you below. Just click on the item you would like more information on, or to begin your shopping. It will take you directly to my website. Thank you ❤
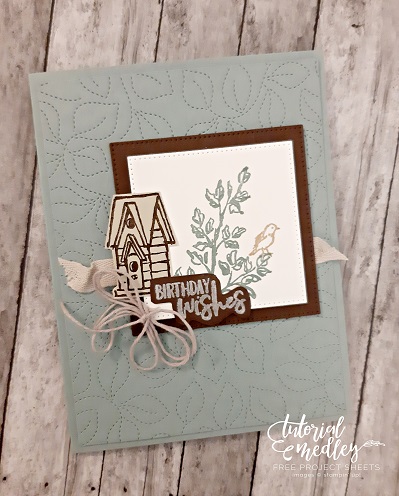
I’ve got the cutest card to share with you today along with a full set of dimensions and the step by step instructions!! If you don’t have the Garden Birdhouse stamp set, substitute it with something else because this is a “great layout”!
Measurements:
Card Base: Soft Succulent – 5 ½” x 8 ½”
Cardstock #2: Soft Succulent – 4” x 5 ¼”
Cardstock #3: Early Espresso – 3 ½” x 5”
Cardstock #4: Basic White – 2 ¾” x 2 ¾”
Cardstock #5: Sahara Sand – 1 ½” x 2 ½”
Instructions:
Cut a 5 ½’ x 8 ½” Soft Succulent card base. Fold in half.
Cut a 4” x 5 ¼” Soft Succulent panel and die cut using the Stitched Greenery die.
Adhere the panel to the card front.
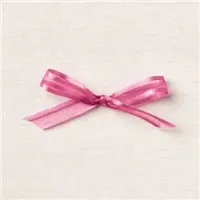
Cut a 4 ¼” piece of Sahara Sand ribbon and adhere to the center of the card front.
Cut a 2 ¾” x 2 ¾” Early Espresso stitched square and adhere to the card front using Stampin’ Dimensionals.
Cut a 2 3/8” x 2 3/8” Basic White stitched square.
Stamp the top of the tree onto the square using Soft Succulent ink.
Stamp the bird onto the leaves using Sahara Sand ink.
Adhere the stamped square to the card front using Stampin’ Dimensionals.
Stamp the birdhouse onto Sahara Sand cardstock using Early Espresso ink. Cut.
Adhere the birdhouse to the square.
Stamp the sentiment onto Early Espresso cardstock using Craft White ink. Let dry completely. Cut.
Adhere the sentiment to the square.
Wrap the Baker’s Twine 3x around two fingers and tie in a knot.
Gently remove the twine and adhere to the frame using a glue dot.
Thank you my friends for joining me today. Have a wonderful Sunday ~
Here is a list of the items used in today’s card ….
I thought we’d step away from “Christmas” and I would share a nice Masculine card created by one of my Design Team members …. I’m also including the Step by Step instructions.
Instructions:
Fold the Cajun Craze card base in half and burnish the fold.
Adhere the two pieces of DSP together with Stampin’ SEAL.
Adhere the DSP layer to the Early Espresso Cardstock with Stampin’ SEAL.
Adhere the Early Espresso layer to the card base with Stampin’ SEAL.
From a scrap of Crumb Cake Cardstock, die cut the largest tag from the Tailor Made Tags Dies.
Stamp the car/sentiment image on the die-cut tag is Early Espresso ink.
Add Crumb Cake ink around the edges of the tag using Crumb Cake ink and a Sponge Dauber.
From a scrap of Cajun Craze Cardstock, die cut the small tag detail from the Tailor Made Tag Dies and adhere to the top of the die-cut tag with liquid glue.
Run a piece of Early Espresso Faux Suede Trim throughout the top of the tag and then tie a piece of Crumb Cake baker’s twine around ribbon in a bow, as shown.
Adhere the two stars (from the die-cut sheets in the He’s the Man Specialty DSP) to the tag with liquid glue. Accent the stars with Wink of Stella.
Adhere the tag to the card front at an angle with Stampin’ Dimensionals.
Trim the ends of the Early Espresso ribbon at an angle.
Add two large Brushed Metallic Adhesive-Backed dots to the card front, as shown.
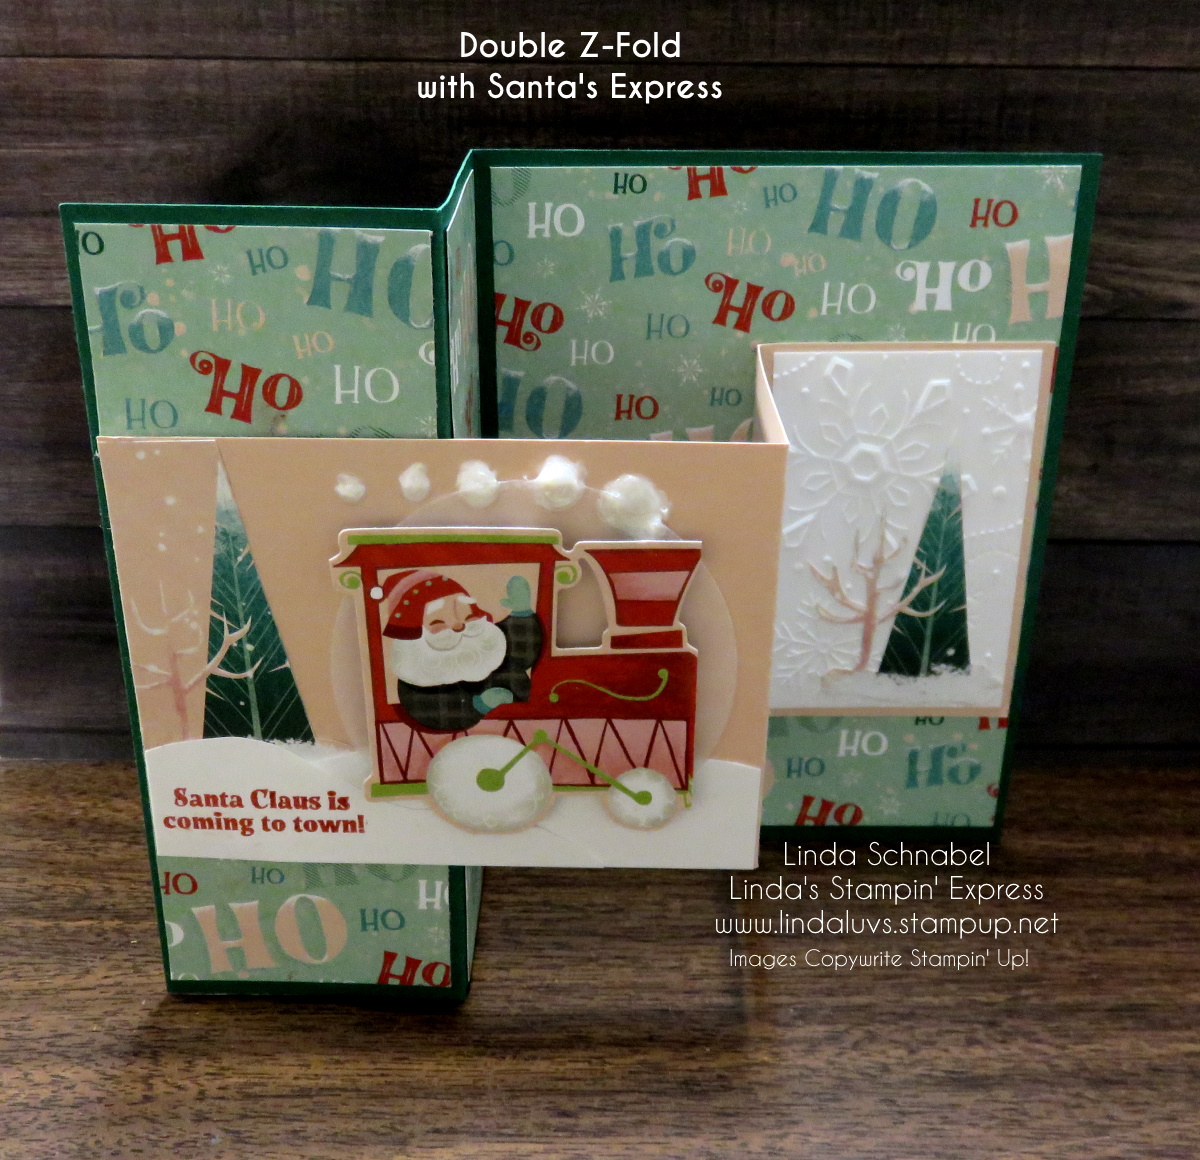
I’m thrilled to share with you my “finished” cards from last nights Facebook LIVE presentation. I will not be sharing the video here today, not my best moment! Right before I went Live … I dropped all the parts to my card, so let’s just say “I had a few pieces missing” and I was a bit flustered BUT the cards turned out awesome and I can’t wait for you to see them!
Let’s begin with our first card … and I will include the measurements!
My card base is Shaded Spruce and is cut 8-1/2″ x 5-1/2″ … Score at 2-1/8″ and 4-1/4″. You will fold the card in half at the 4-1/4″ score and then fold the front “back onto itself” at the 2-1/8″ score line. The first two panels were cut to 2″ x 5-1/4″ and then cut your designer paper to 5-1/4″ x 4″ for the larger area.
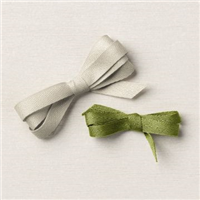
Your second “Z” is Petal Pink and cut 8-1/2″ x 3″ and will be scored at 4-1/4″ and 6-3/8″ (or use the dimensions above … just flip it around). From a piece of scrap … I cut some snow on the bottom of my larger front panel and then glued a piece of the designer paper (with tree) into the upper left hand corner.
I die cut the Santa and the vellum circle behind him. Sink of Stella was added to the snow on the ground and on my trees. Then I stamped my greeting into the corner with Poppy Parade. My smoke puffs were created using the Pearlized Enamel Effects.
The two Basic White panels are cut to 2-7/8″ x 1-7/8″ for the smaller panels and the one of the far right is embossed with the Wintry Embossing Folder and I fussy cut a tree to match the one on the front panel. The center panel was left plain so you could write your sentiments in there.
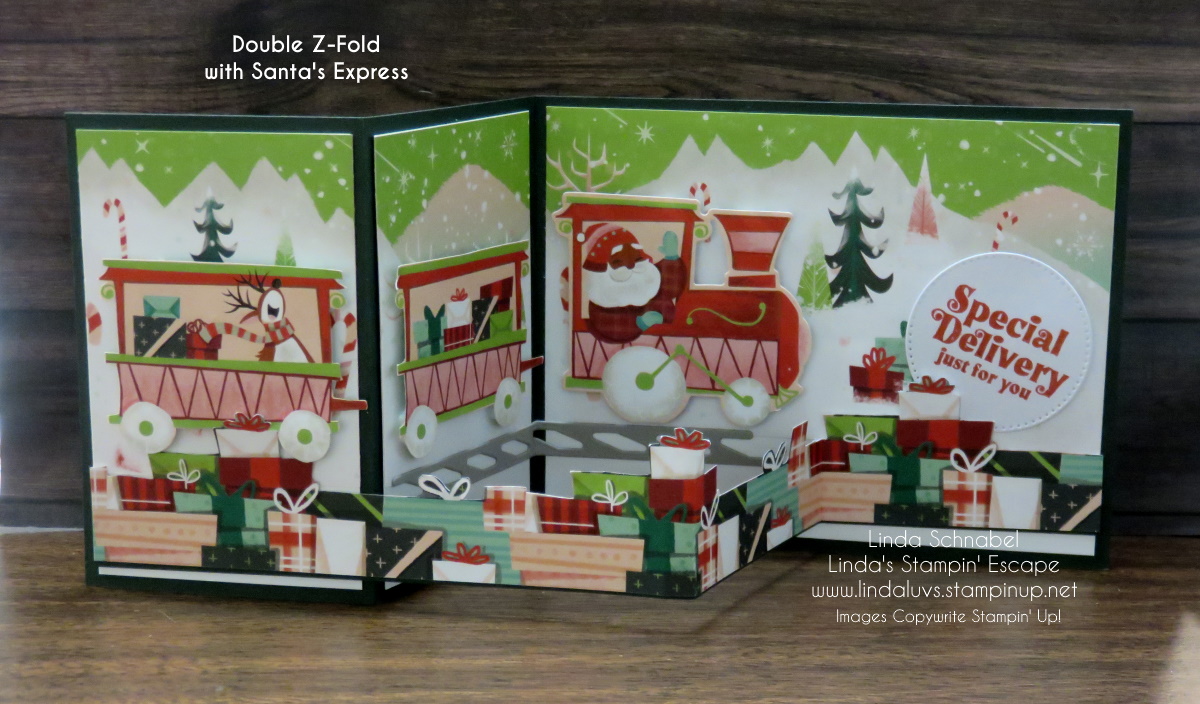
My second card has the card base cut lengthwise on the 11″ x 4-1/4″ ….
The card base is Shaded Spruce and scored at 2-3/4″ and 5-1/2″. I began with cutting panels for my card … two at 4″ x 2-1/2″ for the two smaller panels and the two at 4″ x 5-1/4″ … one for the front and one for the back if you’d like to write a note to the receiver.
I used the designer paper that has the four backgrounds … it cuts to 3″ x 12″. I cut it down starting from the “right” because I liked the pattern better!! With 3″ tall, I made my first cut at 4″, then the next two panels to 2-1/2″ Now you can secure them to the panels aligning from the top. The gap will be covered by your second “Z” which is placed near the bottom, where as our first card we centered the “Z”.
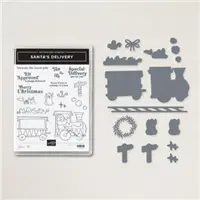
The second “Z” is cut to 11″ x 3/4″ … then our “Presents” Designer paper is fussy cut to about 1-1/4″. Then attach it to your second “Z”. I then die cut the 3 train parts from the Santa’s Express designer paper and the train tracks. The train cars are all popped up to give it some dimension and then I added the tracks.
I stamped my greeting Poppy Parade and die cut it and tucked it behind my “Z”. Looks like Santa has some fun coming down those tracks … even his reindeer is along for the ride!! The Santa Express Designer Paper is sooo fun to create with. It’s ON SALE for Only $7.20!! Don’t wait to get yours, it will be gone. Grab it now while we have FREE SHIPPING … Today Only.
I can’t promise it will arrive before Christmas but it’s a great time to enjoy some savings. Let me know if you would like some help.
Thank you for joining me today, I enjoyed sharing these cards with YOU!
Here is a list of supplies used to create today’s cards …. Click on the image for more information on that product or begin your purchase.