Hello Stampin’ Friends ~
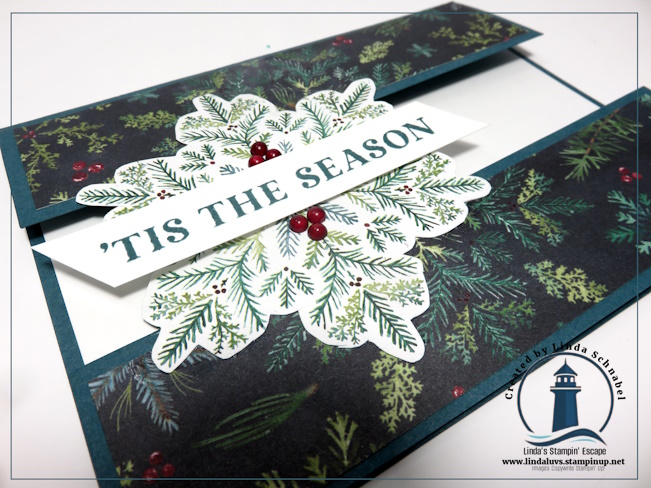
One of my favorite things about card making is how a simple change can completely transform a design—and today’s card is the perfect example of that! This project uses similar measurements and fun fold I shared in my previous post, but with one key twist: instead of using designer paper in the center, I switched it out for cardstock. The result? A totally different look that still delivers that WOW factor while beautifully highlighting the Made with Love Designer Series Paper.
Using cardstock in the center panel creates a wonderful focal point and gives the eye a place to rest, while still letting that gorgeous designer paper shine. It’s an easy way to stretch your supplies, change up the feel of the card, and get even more mileage out of a fold you already know and love. This version feels a little more classic and polished, as I embossed it with the 3-D Eyelet Embossing Folder!
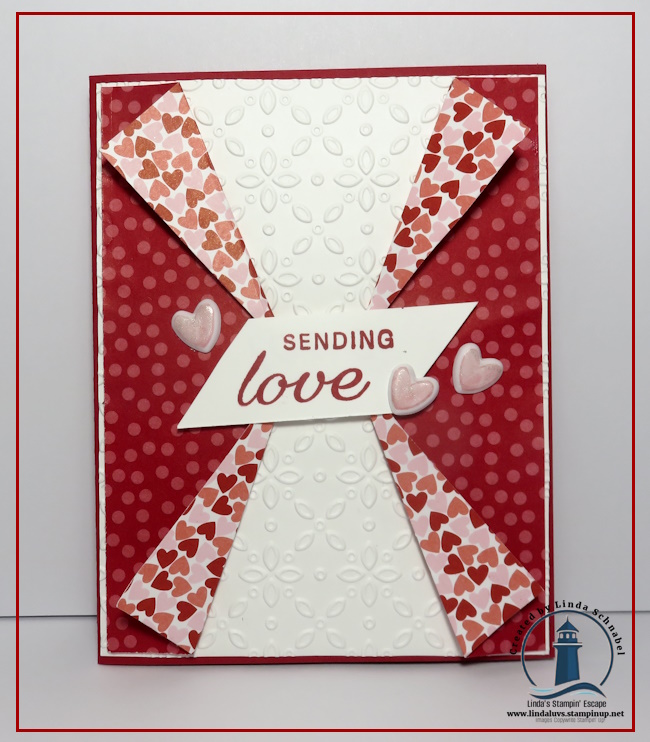
Measurements • Card Base 8 ½” x 5 ½” score at 4 ¼” • Mat / Contrasting Cardstock: 4 ⅛” x 5 ⅜.” • Designer paper 2 @ 1 ¾” x 5 1/4″. The only thing I really changed is the embossing the mat and eliminating the center designer paper!!
If you’re using the Made with Love Designer Series Paper, this layout is a fantastic way to let those patterns do the heavy lifting. Pairing it with cardstock in the center allows the paper to frame the design and truly stand out, making each card feel intentional and thoughtfully designed.
If you missed the original version of this fun fold, be sure to go back and check it out—and stay tuned, because I have even more ideas coming your way using this same amazing designer paper. Great layouts, big impact, and lots of creative fun—that’s what crafting is all about!
Happy stampin’, my friend! 💕✂️ Linda


Don’t forget my Spring Mini Catalog party is going on now, on my Facebook page! CLICK HERE

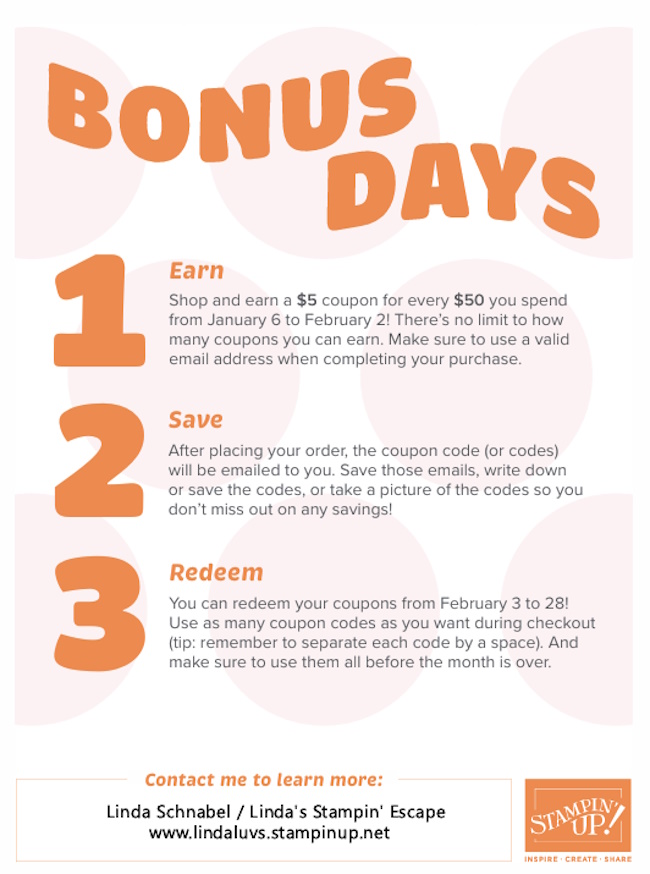
BONUS DAYS HAPPENING NOW ….