10 Reasons I Love the Watercolor Wishes Card Kit

Hello Stampin’ Friends ~

Today I’m going to re-post the “10 Reasons I Love the Watercolor Wishes Card Kit” from our Stampin’ Up! Inspired by blog. I can’t help but share these cute cards and the wonderful reasons why this kit is so cool …

The giftable Watercolor Wishes Card Kit includes preprinted cards for the perfect artistic look without the mess. Includes supplies for 20 unique cards in 3 sizes and an exclusive stamp set. Make one when you need it, or make them all and use them later. Makes 20 unique cards.

You provide the adhesive; we’ll provide the rest, including the stamp set, clear stamp block, and ink.

Watercolor-Wishes

10 Reasons I Love the Watercolor Wishes Card Kit

  1. It’s so quick and easy to assemble.
  2. There’s something for anyone—male or female.
  3. I love the hand-painted look and the watercolor washes.
  4. The stamp set is super-versatile. Once the kit is made, I can still use the stamps for so many other projects.
  5. The kit comes with detailed instructions; it’s also easy to change it up and make it my own. The photos I’m sharing are alternate designs.
  6. The colors are fantastic—Watermelon Wonder, Pool Party, Night of Navy, Crushed Curry, and Tip Top Taupe.
  7. It has some of my favorite embellishments—washi tape, sequins, and wood elements.
  8. It’s all-inclusive! That’s ink, paper, die cuts, Stampin’ Dimensionals, envelopes, embellishments, and stamps.
  9. The box is cute, which makes it so “giftable.” Add a bow and it’s all ready to share with someone.
  10. I need cards! And sometimes I need them in a hurry. With this kit, it will look like I spent hours handcrafting a beautiful card, when in reality, it was quick to assemble.

Hello-Watercolor-Card

Just-a-Note-Watercolor-Card

Thanks-Watercolor-Card

You're-Amazing-Watercolor-Card

Another thought that came to mind while I was playing with this kit was all of the other Stampin’ Up! products that might compliment it. I thought it was fun to bring in some other ink colors. I would suggest Pool Party, Calypso Coral, or even Old Olive.  And what project doesn’t need some Baker’s Twine?!

What do you love most about the Watercolor Wishes Card Kit (item # 140406)?

Jen C.
Concept Art

Thank you for checking this out.

Have a great Saturday … See you tomorrow for my Simply Sunday post!

blog-closing-small

Cool Technique with Embossing Folders!!

Hello Stampin’ Friends ~

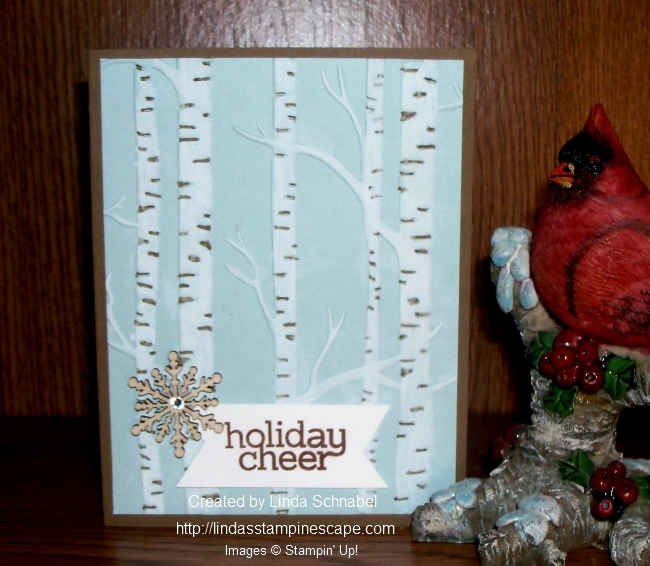
I am excited that the weekend is here, and today I kick off a new season of my Stampin’ Technique Clubs. Our September technique will focus on different ways you can use your embossing folders… and I chose the new “Woodland” folder.

Today I will show you something fun to do with your folders (they’ll make 2 more!) I can’t show them to you yet because it will spoil their fun. I began my card by embossing the trees using Soft Sky cardstock

000_2528

Using the “White Stampin’ Chalk Marker” – I colored the trees and branches to highlight them even more. Wow … it looks so cool and it’s so easy to do!!

I colored in the indented areas of the tree with my Soft Suede marker to coordinate with the base of my card. Don’t you think it makes the tree more realistic looking? I love White Birch … I think it’s my favorite tree!

000_2530

I added a simple greeting (I think this one got past my purging of discontinued sets) and then added one of the new “Snowflake Elements” to add texture and continue the “woodland” feel of the card.

I didn’t want a lot of glimmer on this card, so I added just a touch with a rhinestone in the center of the wooden snowflake. You could easily add glitter to the branches to create a shimmery snow effect!

000_2525

What a simple way to make an impact (the WOW effect) on your card… just by coloring the embossed area.  Hope you enjoyed today’s technique tip!

Thank you for taking time to visit with me today.

I hope you have a wonderful weekend ~

blog-closing-small

Remembering the anniversary of 9-11-01. We will never forget.

TODAY’S STAMPIN’ SUPPLY LIST …


Some “Throw Back Thursday” Fun!

Hello Stampin’ Friends,

We are over the hump and heading into the weekend … it’s a good day! I thought it would be fun to share some scrapbook pages that I created many years ago when I first started demonstrating.

Times and embellishments have changed greatly since then, but the photos and memories we save will always touch our hearts. I admit, I prefer the “hands-on” approach to scrapbooking vs. computerized.

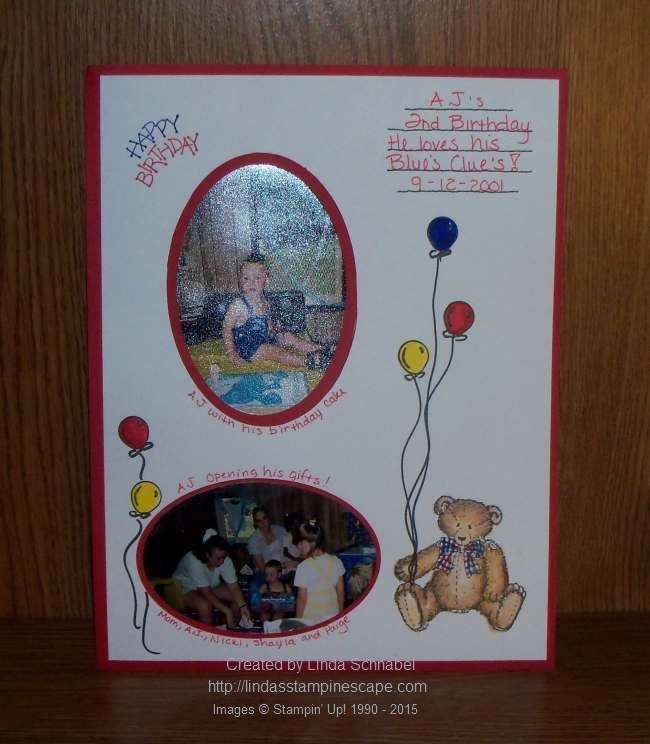
In the spirit of “Throw Back Thursday” … do you remember Button Bear!! Very, very popular when I started stamping.  Here he is helping my grandson celebrate his birthday!

000_2518

Not sure AJ would want me scrapbooking him with Button Bear anymore … he’s more into BMX bikes!

Here is another page done with a camping stamp set. Now I would use the “Project Life: Let’s Get Away”. One of the sayings in that set is “To Live is to Travel” … I think Shayla would agree to that. I think I instilled the love of traveling into her.

000_2512

I really do miss that swirl stamp for my pages though … I always thought that looked so cool!

My last page is another birthday … Cassie’s first! I haven’t done a monochromatic page in a while, and now most of my pages are done in the 12 x 12 format.

000_2514

With so many birthday stamp sets to choose from, it wouldn’t be hard to create a page. Two of my favorites are “Birthday Yay” because of the numbers and “Sweet Stack” just because I think it’s so much fun.

I think it’s time to begin sharing a little more scrapbooking here on my blog! It’s not something I’ve done much of. Any of these pages could easily be done on a 12 x 12 layout or the Project Life style (where you just pocket photo’s, cards and embellishments.

You can watch this short video to learn a little more about Project Life …

I’ve shared the links to the products I mentioned in the post with you below. Just click on them for more information.

I definitely need to share some updated scrapbook pages … two of these grandchildren are in high school and the other has graduated to make me a great grandma! How times flies.

Thanks for stopping by ~

Happy Thursday!

blog-closing-small

SUGGESTED PRODUCT LIST …


Cheer All Year—Really!

Hello Stampin’ Friends ~

Today’s card share is a cute card that was shared by our Stampin’ Up! home office.

Our Cheer All Year Stamp Set gives your projects some seasonal flair. Celebrate the holiday season from start to finish. From autumn to Halloween to Christmas, this set will bring cheer to your projects.

But you don’t have to put it away at the end of the year. On this card, we just used “Hello” to create a fun feathery card you can share all year long! You can also use this tip with the Season to Season Wreath Project Kit. Embellish it with different stamp sets and colors to switch it up for any event or season.

Hello Card

Can you see the different techniques used here?  The first feather was inked up (on the left) then stamped off then kissed with the textured stamp. The center feather highlights the “Rock -n- Roll” technique, and the third (on the right) was tipped with heat embossing.

Yesterday I share the WEEKLY DEALS with you (click to view) and today I’d to let you know that Stampin’ Up! has released “more” items into the CLEARANCE RACK!

Shop in both … it’s a great way to save on your holiday cards & projects! HOLIDAY CATALOG!

Thanks for dropping in on me today!

Have an awesome day ~

blog-closing-small


Weekly Deals are here …

Hello Stampin’ Friends ~

Today I have some great savings on some wonderful products you can stock up on for the Holidays. I love it when the Glimmer Paper; At last–a no-mess way to add glitter accents! This paper is embedded with small pieces of glitter. Glitter won’t brush off or flake off so there’s no clean up.

Confetti Hearts Border Punch by Stampin' Up!
Price: $22.00 $16.50
Metallics Sequin Assortment by Stampin' Up!
Price: $5.00 $3.75
Pearl Basic Jewels by Stampin' Up!
Price: $5.00 $3.75
Pink Pirouette 1/2 Seam Binding Ribbon by Stampin' Up!
Price: $7.00 $5.25
Scalloped Tag Topper Punch by Stampin' Up!
Price: $23.00 $17.25
Silver 5/8 Satin Ribbon by Stampin' Up!
Price: $7.00 $5.25
Silver Glimmer Paper by Stampin' Up!
Price: $5.00 $3.75

Crafting without punches? Inconceivable! Punches are a quick and easy way to add interest and depth to your projects. And there’s no better way to cut out stamped images—many of our stamp sets have coordinating punches. And the Scalloped Tag Topper is perfect for making your gift tags for the holidays, or birthdays or more!!

You can get full details on the products by clicking on the links … there you will get full details or begin your shopping.

Thank you for visiting my blog today. Please let me know if you need anything.

Have a great day ~

blog-closing-small


Season To Season Wreath Project Kit

Hello Stampin’ Friends,

Happy Labor Day!!  Today I have another fun 3-D project to share with you …

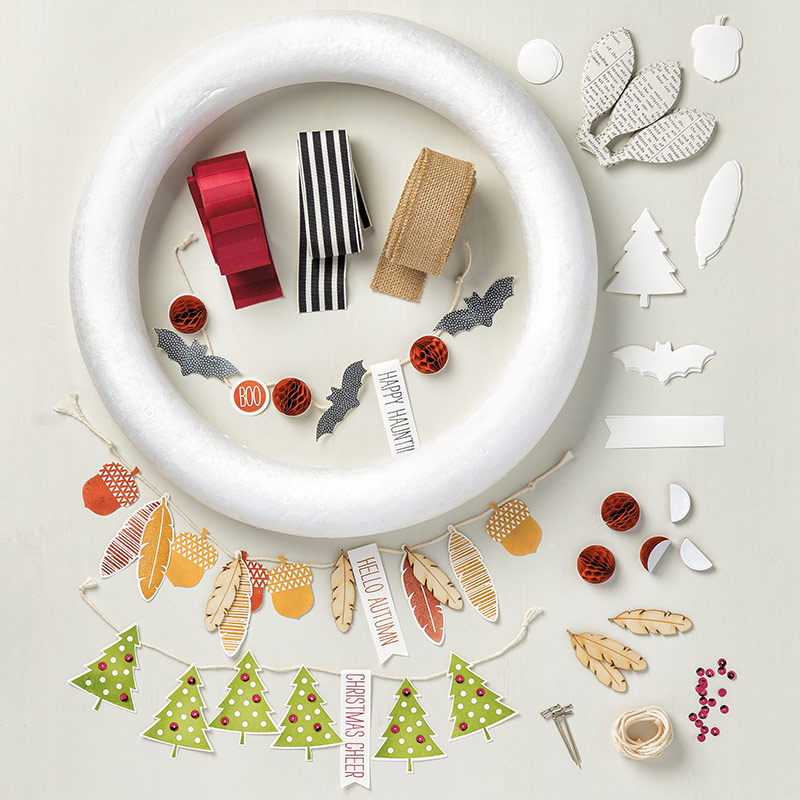
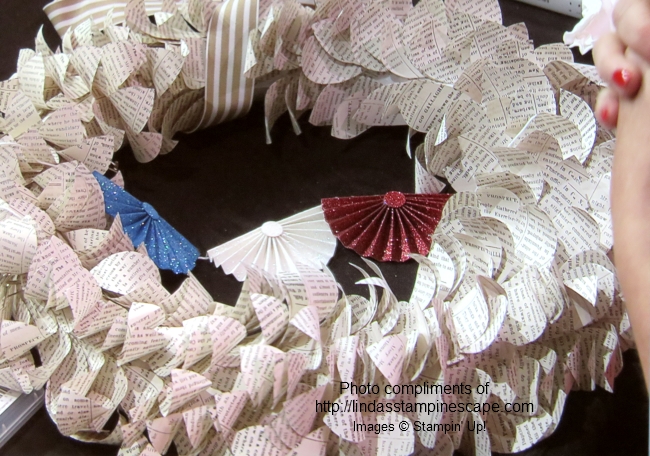
It’s a wreath for all seasons. Change the banner from season to season, and create your own for birthdays and holidays using your favorite stamp sets and dies. Makes one wreath with materials for creating three changeable banners: autumn, Halloween, Christmas.

139645O1 139645Sb

Complete the kit using the Cheer All Year Stamp Set (item 139839). Stamps, ink, and adhesive sold separately. Instructions are included.

I have a video for you demonstrating how to make the wreath along with some tips for you.

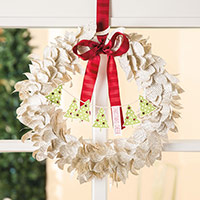
Below is a wreath that was showcased at Convention! I think it’s perfect for Labor Day… don’t you!

IMG_0281

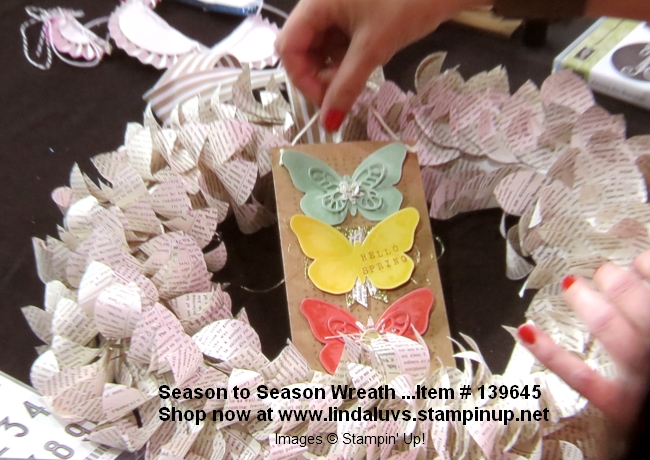
You can decorate this any way you’d like … Here’s some butterflies for spring! Also a convention photo.

IMG_0279

How would you decorate your wreath?  I’d love to hear from you.

Thank you for stopping by today, hope yours is a great one!

blog-closing-small

TODAY’S STAMPIN’ SUPPLY LIST …

Simply Sunday: Ghostly Greetings

Hello Stampin’ Friends,

Hope you are enjoying your holiday weekend! Did you get a chance to see yesterday’s post and the cute Witches Hat!? Well today, I have a bit more Halloween for you for my Simply Sunday card share.

The quickest and easiest way to create a cute card is to begin with cute paper (or a beautiful card with beautiful paper). Stampin’ Up has many flavors of designer paper to fit your needs.

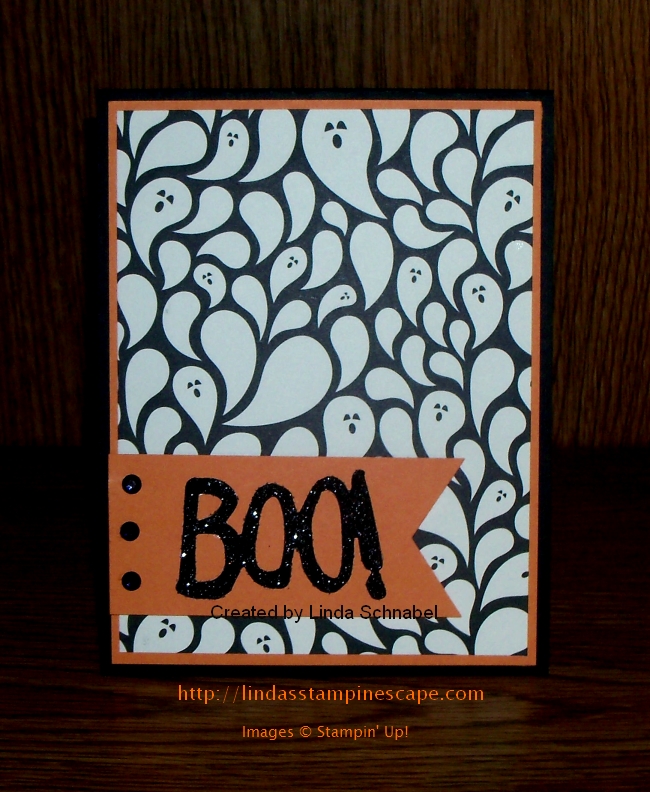
Today I have chosen the “Happy Haunting” designer paper, and another simple choice is the “Happy Haunting” cardstock pack. These colors were picked to coordinate with your designer paper!

000_2506

There are soooo many cute patterns in the “Happy Haunting” designer paper but I just had to use the ghosts first! And what does a ghost say when he wants to scare you? Boo! I cut the “Boo” out of the new “Black Glimmer” paper. Don’t forget that you can bundle the “Boo to You” framelit dies with the “Howl-o-ween” stamp set and save 15%.

I wanted to highlight my greeting so I used a banner created with the “Triple Banner” punch. Then I grounded my banner with the Rhinestones – coloring them with a black Sharpie™ marker. The finished banner was mounted with the dimensionals to give the card “dimension!”

000_2504

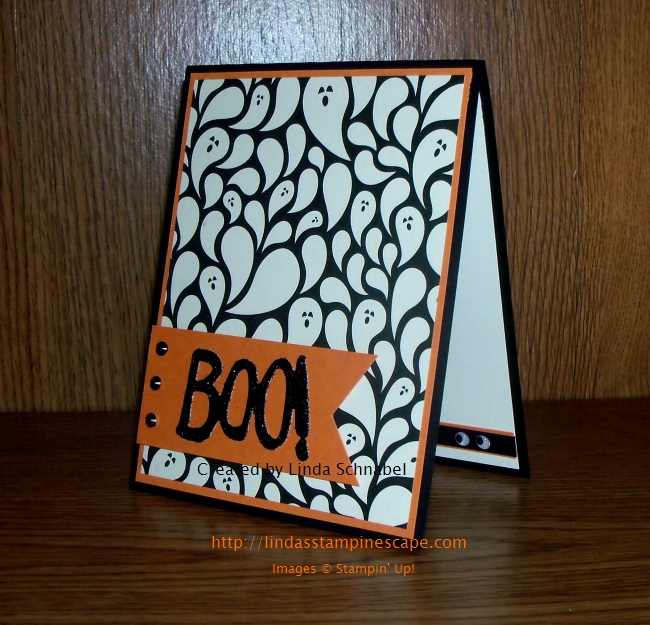
Now … did you catch my ghostly guy inside the card? I created the little eyes with the “White Perfect Accents” that are found in our main catalog (pg. 161) in the embellishments. I colored them with a Sharpie™ marker as well.

Keepin’ my Sunday’s simple with Designer Paper and a few helpful accessories. I hope you enjoyed it.

Thanks so much for taking time out of your holiday weekend and spending it with me.

Have a wonderful day & continue to have a safe and happy holiday weekend.

blog-closing-small


Totally Wicked Halloween Project …

Hello Stampin’ Friends ~

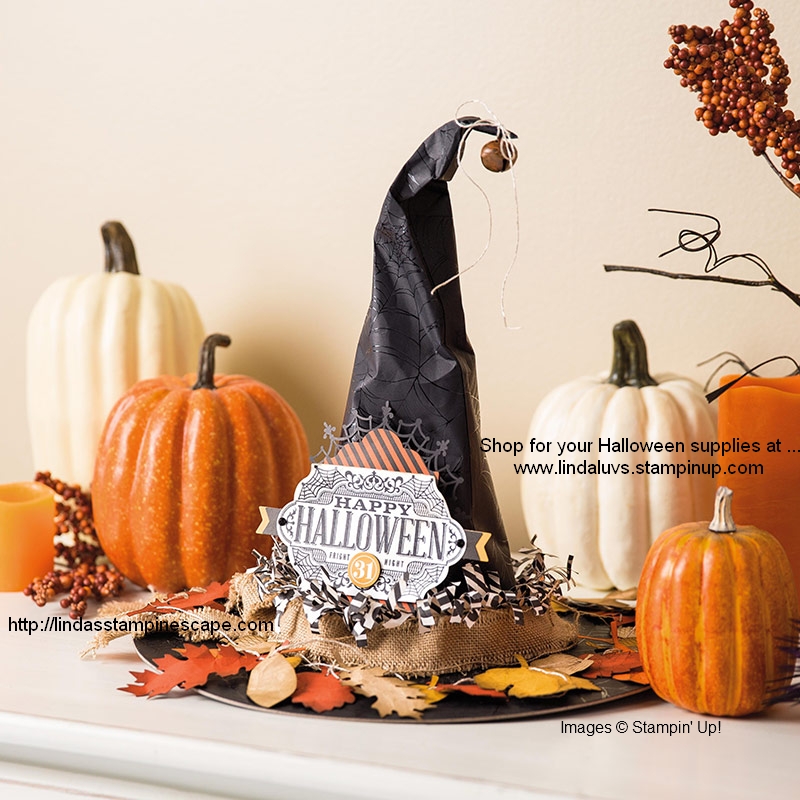
It’s the witching hour, and you’ve set the mood with a witch hat centerpiece. Everyone thinks you spent hours creating it, but you know how easy it was, thanks to the Witching Décor Project Kit...

140969O1


Watch how you can make this fun centerpiece with the Witching Décor kit.

Would you like to get together to create this fun Halloween project? Let me know …

Thanks for checking in today & I’ll be back with a “Simply Sunday” project tomorrow!

Have a great day!

blog-closing-small   

TODAY’S SHOPPING SUPPLY LIST …


Only ONE week left …

Hello Stampin’ Friends,

I just wanted to share with you that there is only ONE week left to get your Paper Pumpkin at 50% Off your first two months!!  This is a great time to “try it out” … you can cancel at anytime or continue.

Let me share with you the August projects …

bf3ee6f24d8dbe5b2ae26fbfbfd92047

CLICK HERE to view many alternative projects created by fellow demonstrators and Paper Pumpkin subscribers!  So many projects / cards to look at from so many different kits.  Sit back and take a good look.  Let me know which are your favorites … Can you find mine on the Stampin’ Up! boards!??

PaperPumpkin
There’s just ONE week left for first-time subscribers to skip to the savings with 50% off their first two months!

 Visit PaperPumpkin.com to join! Use promo code: HALFOFF and sign up by Thursday, September 10, 2015, at 11:50 PM (MT). Please chose my as your demonstrator (Linda Schnabel)
*For first-time subscribers only, not valid on prepaid subscriptions. Discount applied to one kit per month for the first two months of a new subscription. Offer ends September 10, 2015 at 11:50 PM (MT).

You can CLICK HERE to sign up … be sure to use promo code: HALFOFF

Thanks for taking time out of your day to stop in and check out my blog.

Have a wonderful day ~

blog-closing-small


Natural Expressions …

Hello Stampin’ Friends ~

Today I want to share with you a post from the Stampin’ Up! blog “Inspired By”. The beautiful projects were created by fellow demonstrator Teneale Williams who was on our Artisan Design Team 2014-15.  She is very talented & I’ve enjoyed reading her blog as well.

Please enjoy …

Natural Expressions

Today I’m (Teneale Williams) sharing some ideas on adding a little rustic charm to your projects.

1

Our Expressions Natural Elements (item #138395) feature wood veneer words and come with five of each greeting.

2

To enhance the wooden texture of the Expressions Natural Elements, apply a few strokes of ink across the grain of the wood using a Stampin’ Write Marker. I used Soft Suede and Early Espresso from the Neutrals Stampin’ Write Markers collection (item #131261). (It is fine to leave small sections without ink.)

3

Lightly sand the surface; I used a nail file.

4

Leaves are the second element in my projects. I clear-embossed on Mossy Meadow Cardstock (item #133676) using the Vintage Leaves Photopolymer Stamp Set (item #138802). For a look more rustic look, I shaped the leaves using a Bone Folder (item #102300) by rolling it over the surface and applying pressure to the midrib of the leaf. For best results, do this on a soft surface, like the Stampin’ Pierce Mat (item #126199).

5

6

Bringing together the previous elements, here is the first card. I’ve looped Linen Thread (item #104199) and used it to frame the leaves with the wooden greeting sitting on top.

7

For the second card, I used the larger maple leaf from Vintage Leaves. I clear-embossed the leaf, then cut it out and shaped it using the Bone Folder. This time I stepped up the design by adding a piece of Mossy Meadow 5/8″ Striped Cotton Ribbon (item #138419) and Home for Christmas Enamel Dots (item #140536) in Very Vanilla.

8

For the final item I clear-embossed the maple leaf on a Takeout Box (item #135827) and tied a bow around it with Mossy Meadow 5/8″ Striped Cotton Ribbon (item #138419).

9

Teneale Williams

Artisan Design Team 2014–2015

I would like to thank Teneale Williams for sharing her projects on the “Get Inspired” blog by Stampin’ Up!  Didn’t you just love her projects? My favorite is the Maple leaf … What is yours?

Thanks for stopping by ~

I hope you have a great day!

blog-closing-small

STAMPIN’ SUPPLY LIST …


Delicate Ornaments …

Hello Stampin’ Friends,

With the release of the new 2015 Holiday Catalog, I wanted to share with you some of the amazing new products! I’ve already shared sneak peeks of Fall and Halloween cards, so today I’m going to bring you Christmas …

I want to focus on the Delicate Ornament Thinlits Die and the new Precision Base Plate. This steel plate delivers improved performance with more detailed dies, giving you extra fine cuts.

Grab a cup of coffee and sit back to watch this video explaining how it works …

The beautiful card shown in the video is the same card as shown in the Holiday catalog on page 14 – there is where you’ll find the Precision Base plate.

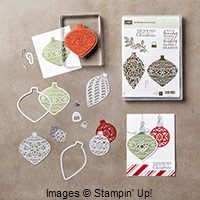
The Delicate Ornament Thinlit Dies are on page 15, and can be bundled with the Embellished Ornaments stamp set to save 15%. You’ll be seeing more of these in upcoming blog posts.

140857S

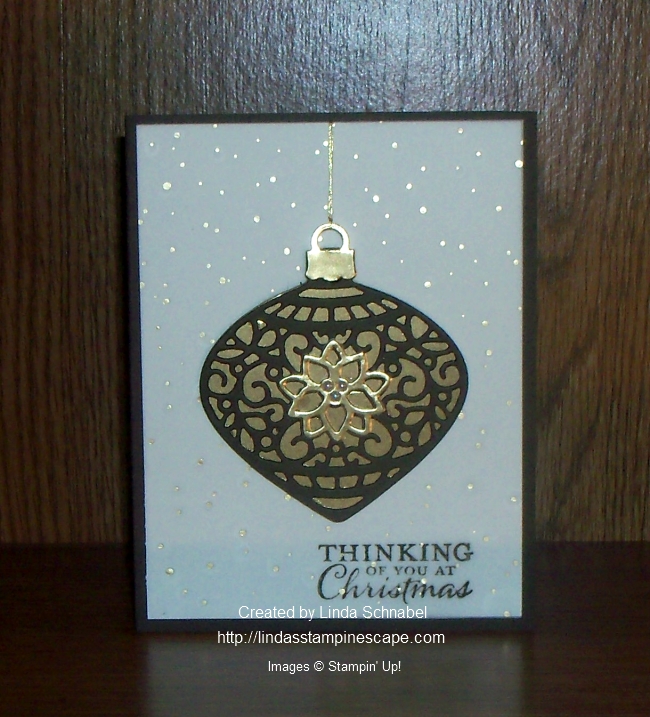
Today I’m using the Delicate Ornament Thinlit Dies with the beautiful Winter Wonderland Designer Paper stack and Embellished Ornaments stamp set.

I wanted to use Early Espresso cardstock with my gold paper, but please note that you may need a shim to cut out the delicate ornament even with the Precision Base plate … it is a lot thicker and each BigShot is different. So this is just a “heads-up”.

000_2501

I cut the gold paper with the solid image to back my Espresso … the color really gets pulled out when combined with the Winter Wonderland Designer Paper stack. I really loved building this ornament, can’t wait to sit down and “really” play with these.

The fine tip glue pen works wonders when layering these images! I even used it to adhere my designer paper… just put a dot of glue behind the dots on the designer paper. Once dried you can bearly see it.

The greeting comes from the Embellished Ornaments stamp set and stamped in Early Espresso. I then popped up my ornament to give the card some dimension, the ornament itself give you beautiful texture.

I finished it off with a couple of little pearls and the gold thread. I love the way this card turned out!
000_2501

I hope you enjoyed today’s card share and video.  If you like my blog … share it with a friend!

Have a wonderful day ~

blog-closing-small

TODAY’S STAMPIN’ SUPPLY LIST …


Holiday Catalog goes Live!! Plus Weekly Deals …

Hello Stampin’ Friends ~

What a great day it is today!! Our fabulous Holiday Catalog goes live today … that means for those of you who have been patiently waiting, you can now order all those goodies that have been calling your name!

TH_Holiday2015_US

Just click on the catalog to view!

Please let me know if I can help you in any way, or CLICK HERE to begin shopping.

Now onto our new Weekly Deals …

Every Tuesday Stampin’ Up! brings you amazing deals on selected products. The product offering changes each Tuesday; be sure to check what’s on sale.

CM100100B

2014-2016 In Color Stampin' Write Markers by Stampin' Up!
Price: $15.00 $11.25
Boys Will Be Boys Clear-Mount Stamp Set by Stampin' Up!
Price: $18.00 $13.50
Brights Candy Dots by Stampin' Up!
Price: $6.00 $4.50
Everyday Chic Designer Washi Tape by Stampin' Up!
Price: $8.00 $6.00
Fun Frames Textured Impressions Embossing Folders by Stampin' Up!
Price: $8.50 $6.38
Rhinestone Basic Jewels by Stampin' Up!
Price: $5.00 $3.75
Whisper White 1/2 Seam Binding Ribbon by Stampin' Up!
Price: $7.00 $5.25

Just Announced … Stampin’ Up! is posting new items to the Clearance Rack today!

CM100300B

You can shop for Clearance Rack product in the Online Store under “Clearance Rack.” These items are only available while supplies last–get your order in before they’re gone!

Let me know if I can do anything for you  …

Have yourself a fabulous day ~

blog-closing-small

Dropping in to Say HI …

Hello Stampin’ Friends ~

I hope you had a wonderful weekend! I had the chance to spend time with my granddaughter and her little guy … He’s so cute!

Today I’d like to share with you the last of my “sneak peeks” into the Holiday Catalog because tomorrow it goes live!! Yes, you can finally order from this fabulous catalog.

For those of you who can’t wait … you should consider becoming one of my Star’s! There’s no obligation to sell (unless you want to make some money) you only need to keep yourself active to be able to see the catalogs early and order early … just one of the fun perks. Let me know … we’ll talk.

Here’s my card …

000_2493

I started with the fabulous “Into the Woods” Designer Series paper. Our designers actually hand painted the designs, how pretty, and it coordinates with several of our stamp sets.

I choose the “Acorny Thank You” stamp set because I felt like dropping in on you to say Hi! I think that is so cute. I love all the acorns too! Oh yes … it has a coordinating punch, which you can bundle and save 15% … gotta love that!

I highlighted my punching it out with the “Decorative Label” punch … you will recognize that one. It’s in our main catalog and I use it quite a bit.

I also wanted to add some texture to my card so I created a banner with the Burlap Ribbon. I don’t know, I think burlap looks great on fall cards. What do you think?

000_2496

Hope you enjoyed today’s card … I’d really love to hear what you think. You can comment below on this card or any of the “sneak peek” cards I have shared with you.

I’d also like to THANK all those who participated in my “Free Stamp Special” … I hope you enjoy you stamps. Thanks again!

Hope you all have a wonderful day … I’ll be back tomorrow with some new “Weekly Deals”.

Take care ~

blog-closing-small

Simply Sunday … BOO!

Hello Stampin’ Friends ~

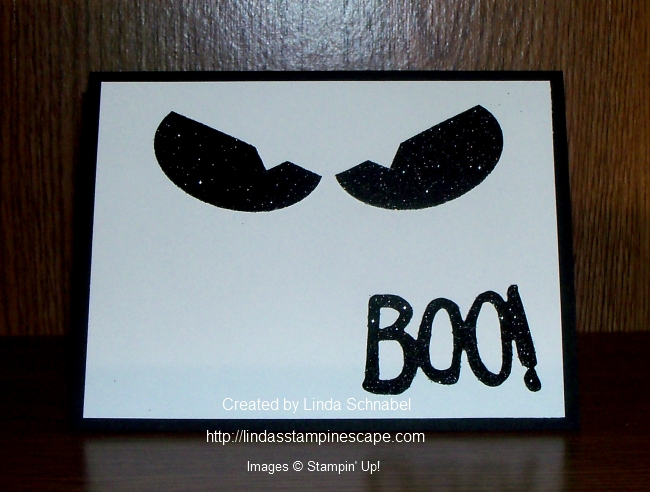
Today I have a fun Halloween card to share with you… A simple black and white card.

I am using the “Boo to You” Framelit Dies again today (pg. 49 / Holiday Catalog) along with the”Black Glimmer Paper” (pg.47 / Holiday Catalog).

000_2488

The eyes were created by simply punching out two “Extra Large Ovals” out of the Black Glimmer paper. I then faced the glitter sides together and cut a slant across the top… Now your eyes will both slant in.

To create the pupil of the eye, I simply cut a notch out of the eye with a scissors … if your a perfectionist, you can use the corner of a square punch.

000_2490

I used the new “Fine-Tip Glue Pen” (pg.43 Holiday Catalog) to adhere my “BOO!” greeting to the card front. I hope you had a chance to see my tips for using the glue pen in yesterday’s blog post.

The items in the Holiday Catalog will be available to you soon … Sept. 1st, 2015! If you don’t have a demonstrator or a catalog, I’d be happy to get one to you … just leave a comment below.

Thank you for popping in today ~

I hope yours is a good one!

blog-closing-small

TODAY’S STAMPIN’ SUPPLY LIST …


Wonderfully Wicked …

Hello Stampin’ Friends ~

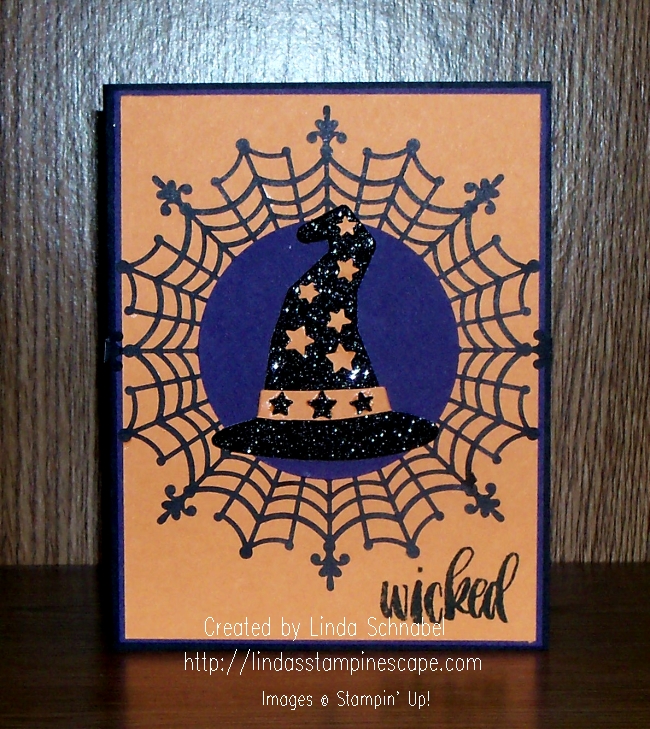
Wooo … ran into technical difficulties again! But we got them worked out and I can share the “Wickedly Cute” card that I have made for you today.

For those who know me … you know I love Halloween and all things “Fall”, so I’m going to grab the coolest items out of the new Holiday catalog to show you! I knew the minute I saw the stamp set Project Life’s “Seasonal Snapshot 2015 … and the stamp Wicked” that I had to team it up with the “Boo to You” Framelit Dies! And really … would you use anything else but the “Black Glimmer Paper”?!!

000_2484

The Project Life’s “Seasonal Snapshot 2015 Stamp set is so fun and versatile … It’s starts you out with “Back to School” and carries you through, well January (snowflakes) and everything in between! And it is bundled with the Card Collection and Accessory Pack … See Page 38 of your Holiday Catalog.

000_2470

So … what do you think of the “Spider Web Doilies”? They are so much fun and easy to use … and you get 24 of them for only $4.50! I used the new “Fine-Tip Glue Pen” (pg.43) to adhere my spider web doily to the Pumpkin Pie paper.

I have some tips for you for using your “Fine-Tip Glue Pen” …

First, before trying to use your glue pen, remove the cap and pull off the protective cover.  I can’t tell you how many times I’ve tried to use my Crystal Effects without pulling the tab off of it before cutting the tip bigger (oh my … we all learn the hard way! LOL)

000_2472

Secondly, there is a “pin” built into the cover of your glue pen to keep the tip from clogging up! Use your finger to guide the pin back into the glue tip.

000_2477

I also used the “Fine-Tip Glue Pen” to attach my stars to the hat … can you see where the star’s came from?

000_2483

To create some fun on the inside of my card too, I used the “Confetti Star’s Border” punch and punched out a bottom border. I then used the stars to add color to my hat on the front.

I created my focal point by punching a 2-1/2″ circle of Elegant Eggplant behind my had. The hat is popped up with dimensionals to create some additional dimension.

Sounds like a lot of steps (not really) but it was super simple and fun to make…

000_2484

I hope you found my card wickedly cute! I have a lot more Halloween cards up my sleeve and can’t wait to share with you.

Thank you for hanging out with me!

Enjoy your day ~

blog-closing-small

TODAY’S STAMPIN’ SUPPLY LIST …

The items highlighted from the 2015 Holiday Catalog will be available to order / http://www.lindaluvs.stampinup.net on September 1st, 2015 / Here are the items from the current catalog …