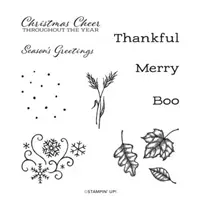
Today I have a beautiful fall card to share with you today created with the Soft Seedlings and Go To Greetings Stamp sets…
NOTE: For best image quality, use Sponge Daubers to ink up the stamps. This technique works when your ink pads are new or too juicy.
Stamp the maple seeds across the top and bottom of the card base using Cajun Craze ink. Then you will adhere the DSP strips, centering the Crushed Curry on the card base and placing the other two 1/4″ above and below.
Stamp maple leaf/seeds using Mossy Meadow, Crushed Curry, and Cajun Craze ink on Cardstock #2. Adhere stamped image to the Cajun Craze mat, then attach to card with dimensionals. Use Dark Cajun Craze and Light Mossy Meadow Blends to color the Textural Element and adhere to card.
Heat emboss greeting in white on Cajun Craze strip of cardstock. Trim as desired and cut banner end. Adhere to card with dimensionals.
On Thursday I shared a couple cards that are easy to make, and oh so pretty …
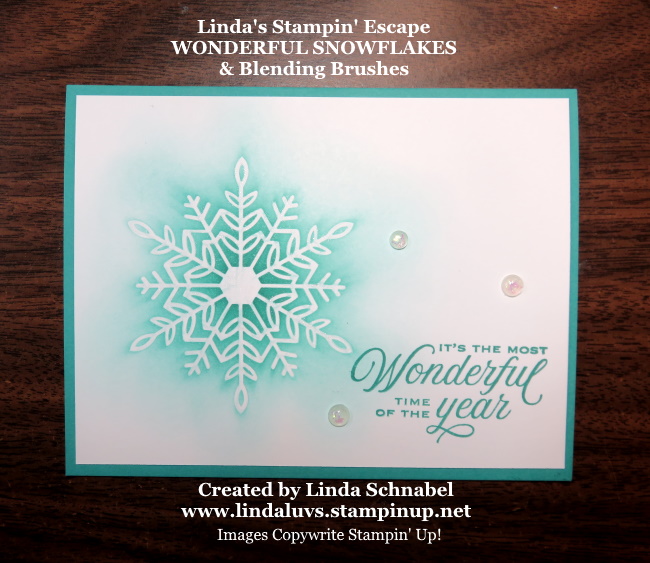
Today, I will use the Wonderful Snowflakes again … I’ll show you how your Blending Brush magically transforms your Snowflakes and Cards in my video!! These are great Christmas Cards for anyone on a budget! .
Let’s start with the first cards created by using our Snowflake and Blending Brushes to leave a negative images. Once you see all the cards, the video will show you exactly how they were done ….
I wish you could see the Wink of Stella on this card, it really highlights the snowflake. Make sure you watch the video so you can see all the tips and techniques.
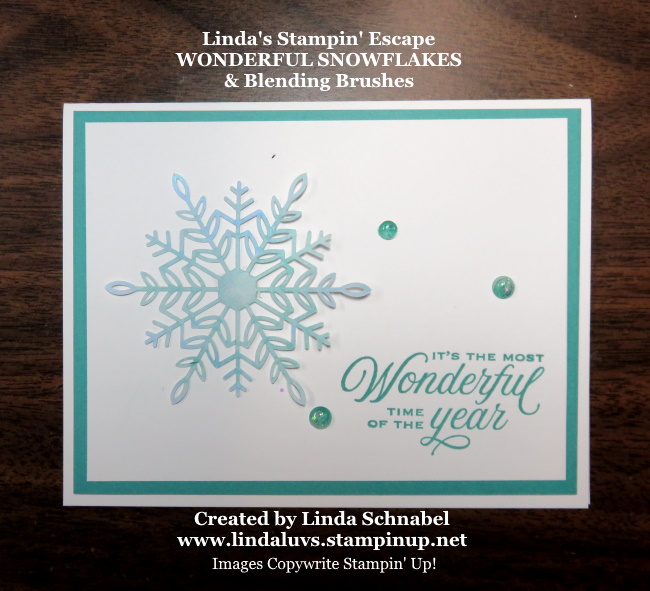
The second card was created with the Wonderful Snowflake that was used for our last card. This way you will get 2 cards from every snowflake … or 48 cards. And the pack of 24 Wonderful Snowflakes is only $6.00 (it’s a steal)
The last card is for those of you who want to make a clean and simple card that is pretty and ready to send in just minutes. You’ll get 24 cards using this method …
You will want to watch the video as it shows you how simple the cards are to create, and how budget friendly this layout truly is. I even talk about how you break down the costs.
Enjoy the video and please let me know if you have any questions …
Thank you for stopping by and spending a part of your day with me. I hope the rest of your day is wonderful ~
TODAY’S STAMPIN’ SUPPLY LIST … If you liked the products used in todays projects, I have links for you below. Just click on the item you would like more information on, or to begin your shopping. It will take you directly to my website. Thank you ♥
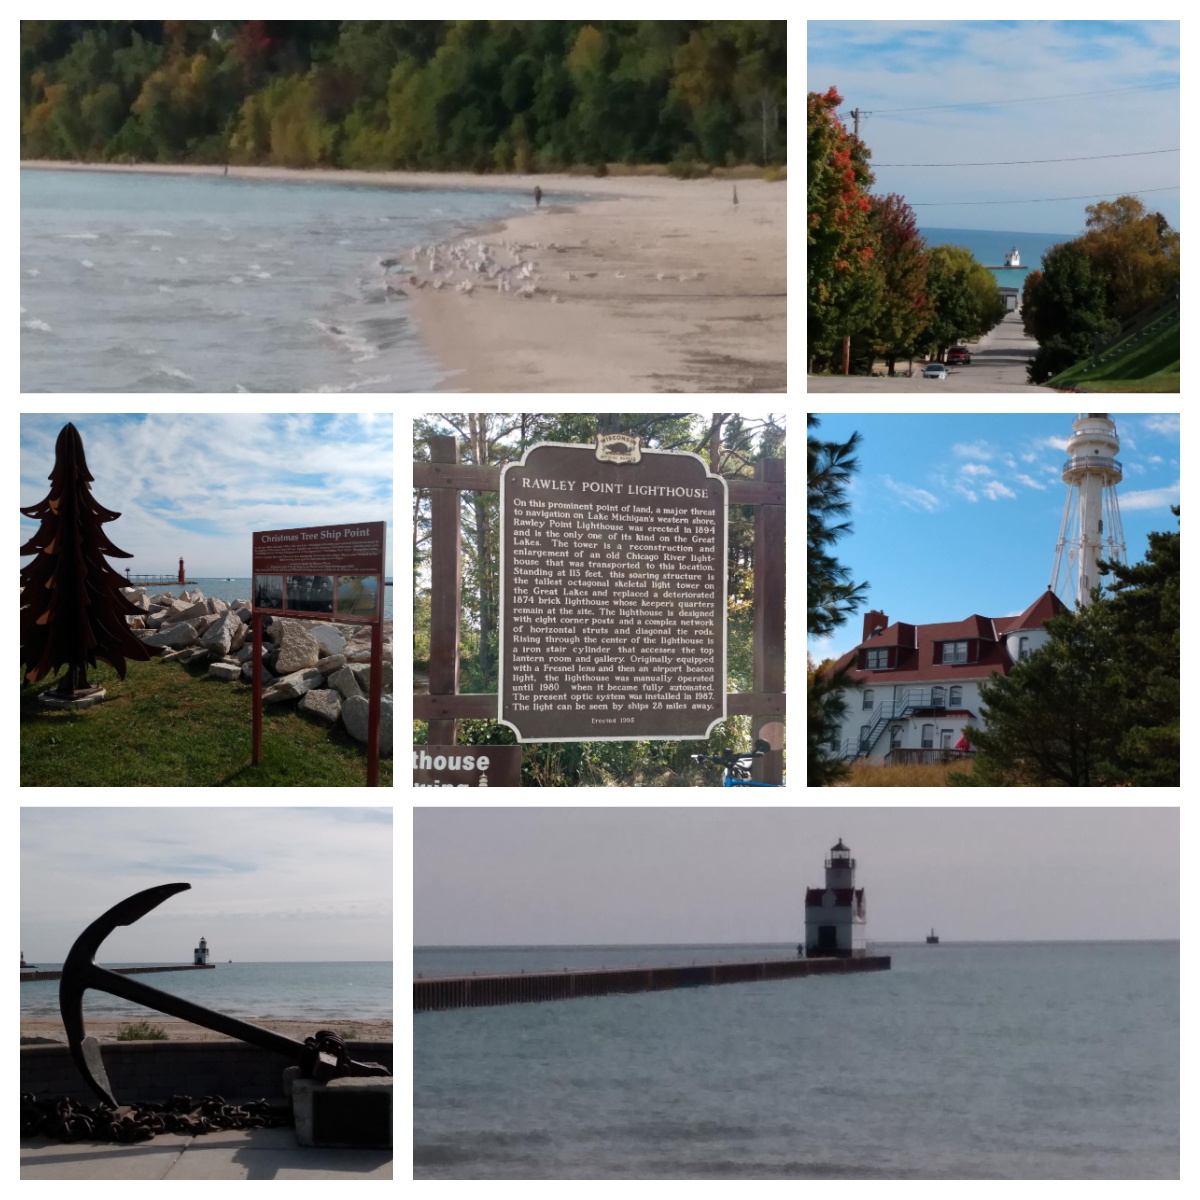
Wooo Hooo it is Friday and we are heading into the weekend. I hope you have something fun planned … I am back to working on my Stamping Retreat. I had Wednesday off from my “other job” and decided to take a road trip with my daughter. We took the scenic road following Lake Michigan and stopped in Kewaunee, Algoma and then headed to Rawley State Park.
It was a beautiful day to check out the changing leaves and sandy shores! We had a great time and it was just what I needed to kick in those creative juices! I’m rejuvenated and ready to make my retreat special for my guests. I like that I can just take the day off when I want.
Now back to business, or play in our stamping world ….
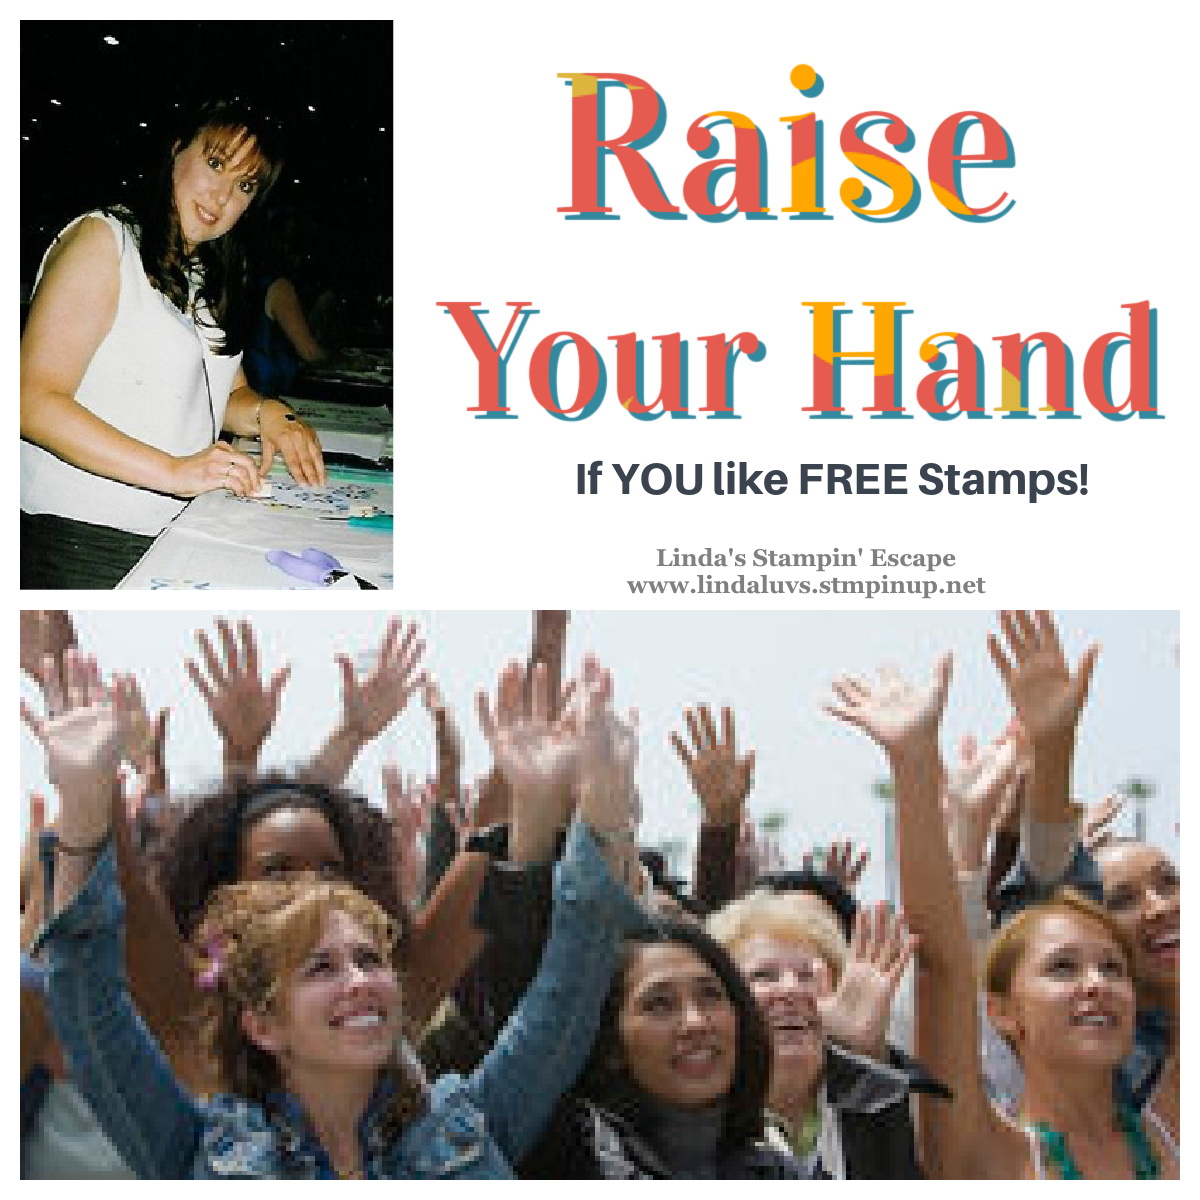
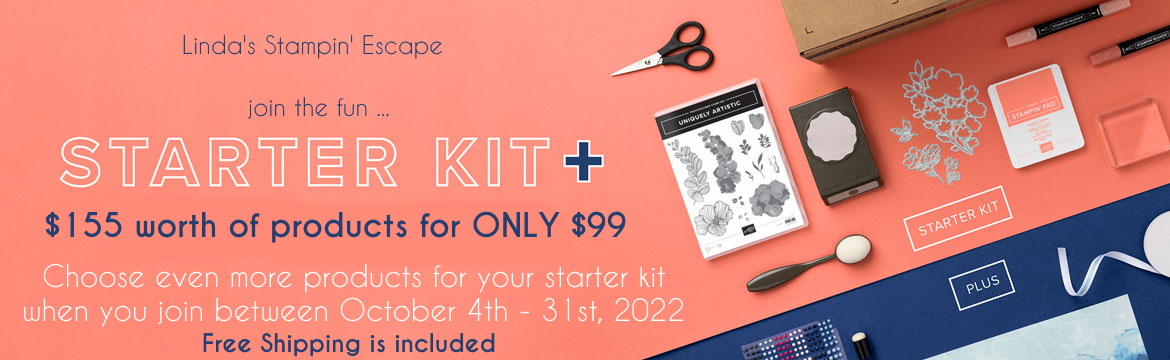
If you like a good deal … if you like to save money …. It’s an exciting time to join our community of stampers. Right now, it’s even more exciting because when you sign up between now and October 31st and become a part of my Stars teams and the Stampin’ Up! community, you will get $155 worth of your choice of products for only $99 + free shipping + free business supplies + all the fun being a part of our fantastic community!
It was over 22 years ago I began my journey “to get the discount” to save money on the stampin’ supplies my sister Eileen and I wanted, but … I stayed because of all the friendships (you, my team & fellow demonstrators) that have kept me here for 22 years. The travel and flexible schedule isn’t too bad either! lol
So … why would you join my team / Stampin’ Up! in the first place? Good question … so I asked my Stars by Design Team.
They joined for a variety of reasons. They join to make money, they join to save money. The discount! We like it because we want to use the product for our personal use. Some joined for the social connections; they wanted to feel part of the community and make new friendships. Some for the ability to create your own schedule and work around their family. And then of course, love of stamping and loving the products!!
I loved hearing all of these reasons my team members joined, it helps me serve the needs of each one so they can enjoy the most benefits. So what is your reason? Save money … Love the product, make some money, be part of the community & make new friends or all of them?
It truly is the friends we meet along the way that help us appreciate “and enjoy” the journey. Are you ready to start … CLICK HERE
The Starter Kit is $99 (Free Shipping) Choose $155 in product and design your own kit with your favorite products. If you are new and need help, contact me at lindaluvs2stamp@aol.com
We’re another day closer to the weekend and hmmm … Christmas! It’s sneaking up fast and I have been busy creating for my Fall Holiday Stamping Retreat, so Christmas cards are second nature to me right now.
Many of us would love to send out hand-made Christmas cards but do not have a lot of time, so I’m here to help with an … oh so cute, and quick & easy card you can recreate in no time at all …
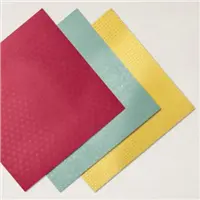
Two simple colors of cardstock; Basic White and Balmy Blue. I used the Time of Giving Stamp Set (now retired) for the snowflake swirls inside the card and to decorate my envelope.
I used the Wintry 3-D Embossing Folder on the Balmy Blue for both my cards. Then the Wonderful Snowflakes … they are iridescent so the color just dances across them.
If you’re looking for just a little more color … you can use any one of our Stampin’ Blends and color your Snowflakes … and best of all, that iridescence shines right through.
You can create these pretty snowflake cards with ease and in no time at all. It’s a card base with a contrasting piece that measures 3″ x 4-1/4″. I hope you try out this simple layout.
Thank you for visiting my blog today. A simple layout so you can create your Christmas Cards with ease … fun for the whole family!
Enjoy your day ~
TODAY’S STAMPIN’ SUPPLY LIST … If you liked the products used in today’s projects, I have links for you below. Just click on the item you would like more information on, or to begin your shopping. It will take you directly to my website. Thank you ♥
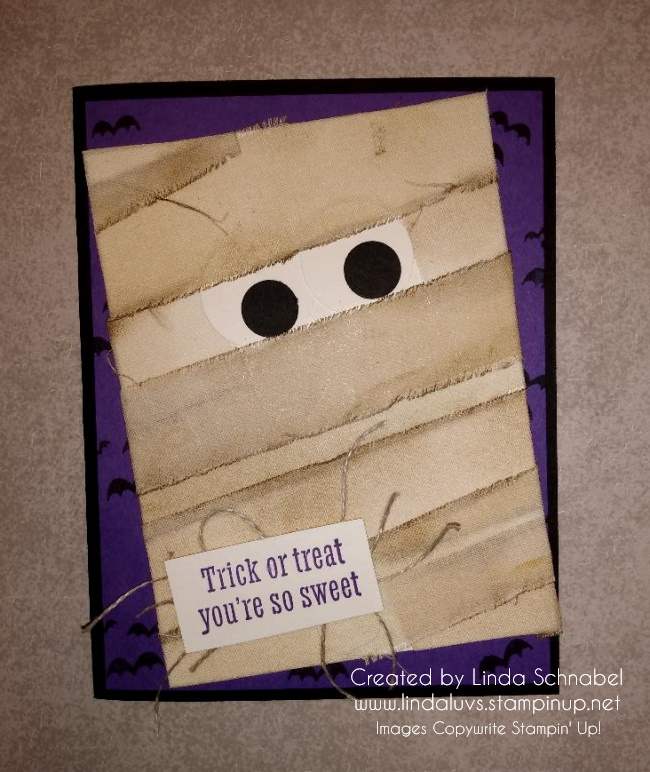
Today I am sharing the Linen Mummy Card that I made during my Facebook LIVE last night and his twin! I have included the card dimensions in the video so you can get started making yours right away. Grab a cup of coffee, relax and watch the replay of last nights LIVE.
Here is a close up of my Mummy ….
If you think this one is cute, take a look at his twin!! I changed up my assembly a bit … I laid down one strip of linen first, and “THEN” added my eyes on top because then I didn’t have to try a “wrap” around the eyes. You will also notice that his linen wrap is going in different directions to create more drama and texture. And I added designer paper for a different background.
I hope you enjoyed watching and feel inspired to create your own mummy … I think the kids would have a ball making these.
Thanks for hanging out with me today, hope yours is a good one!
Today I have some great news to share with you. Stampin’ Up! has announced FREE SHIPPING – TODAY ONLY. It’s a great time to save some money while getting all the supplies you need for your Christmas card making … or better yet, start your Christmas shopping for the crafters on your Christmas list!
You can enjoy FREE SHIPPING on all purchases over $75 / Plus you’ll get a special little “hand stamped” Gift for ME!! You can CLICK HERE to start your shopping and savings!
The second big announcement I have to share is the new JOIN promotion that begins today! I wouldn’t feel right if I did not share this amazing opportunity with you my friends … you know I love this or I wouldn’t have been doing this for 22 years. Many of my team just hang with me for the discount and the card sharing! I love the friendships that I’ve built.
It’s always an exciting time to join our community of crafters and stampers. And right now, it’s even more exciting because when you sign up between 4–31 October to become a part of my Stars teams and the Stampin’ Up! community, you will get $155 worth of your choice of products for only $99 + free shipping + free business supplies + all the fun being a part of our fantastic community!
Feel free to contact me with any questions CLICK HERE or if your ready to join in on the fun and my team of Stars by Design, then CLICK HERE … I will contact you and welcome you into our group, and introduce you to the team ❤ and 40,000 of our closest friends! 🙂
I want to thank you for joining me today. I hope you can enjoy this beautiful weather we are having here (in Wisconsin) or where ever you may be ❤
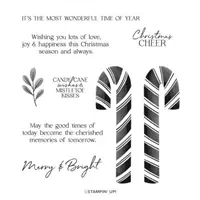
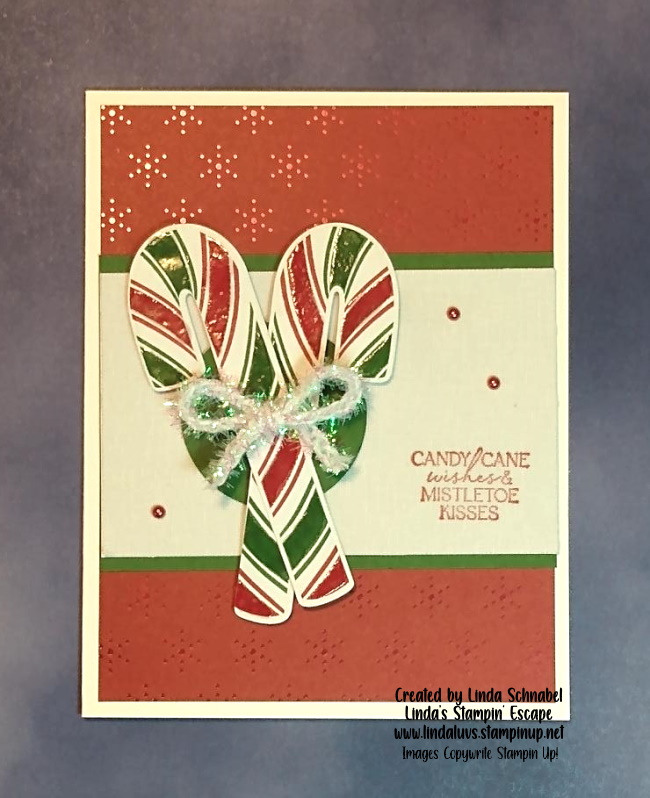
If you missed my LIVE presentations on World Cardmaking Day, I have one of the video replays for you today. I shared the Sweet Candy Cane Christmas Bundle and demonstrated how to turn it into a bright and colorful Autumn card … to maximize your investment. We’re thinking “outside” the holiday and create with your stamp sets all year long!
Let’s take a look at the replay ….
The video explains what you need to do to get the cross hatch design and also shares the dimensions with you so you can easily recreate this card.
I think you could have a lot of fun with this pattern to celebrate many occasions: Red, White & Blue for 4th of July, shades of pink or blue for baby cards, your school colors … you get the idea! Here I used Cajun Craze, Old Olive and Crushed Curry.
I also used the dies for the “mistletoe” and turned them into Oak leaves. This was an easy and fun card to make.
Thank you for joining me today. Have a great day!
Here is a list of supplies that I used for my two cards today ….
I just want to give a shout out to all the amazing ladies who took time out of their day yesterday to spend World Cardmaking Day with me … what a FUN day!! And as I promised them, I would share my Linen card right here on my blog.
On my first Linen card, I used the “Masking Paper” to create the card front. I cut out butterflies from Brilliant Wings out of the Masking paper and then adhered it directly onto the Linen paper.
Then with alcohol in my Spritzer and about 5 drops of Bermuda Bay ink … I spritzed the color onto the Linen paper. The alcohol helps to dry the ink faster, and what it leaves behind when you remove the “butterfly masks” is a soft beautiful “dyed” Linen paper.
For the second card, I used the Stampin’ Write Markers in Flirty Flamingo, Coastal Cabana and Highland Heather and laid down the ink directly onto the block … then spritzed it with alcohol until wet … then stamped that onto the Linen paper.
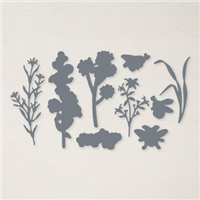
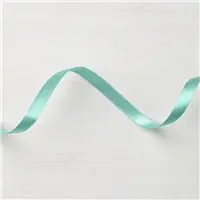
I used the Honeybee Blooms dies in Basic Black to create my silhouettes which were adhered to the Linen paper using the Multipurpose Liquid Glue … it holds best on the Linen paper. I mounted the card front onto Basic Black. I then added Pool Party Shimmer Ribbon and made a simple bow. My greeting comes from the Charming Sentiments stamp set and was stamped with Momento Ink.
To complete my card I added 3 Iridescent Rhinestones … I love that they pick up the color of the pink and blue hues. You will be able to view the replay on my Facebook Page or YouTube Channel.
I am grateful to my stampin’ friends for the fun day we had yesterday, and I thank you for joining me today. Have a beautiful Sunday.
Here is a list of supplies that I used for my two cards today ….
Card Base: Thick Basic White – 5 ½ x 8 ½, scored and folder at 4 1/4
Cardstock #2: Blushing Bride – 4 x 5 ¼
Cardstock #3: Basic White 3 x 3, plus scrap for sentiment
Cardstock #4: Basic Gray 3 1/8 x 3 1/8, plus scrap for matting sentiment
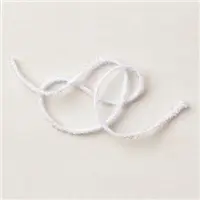
Accessories: Crinkle Seam Binding, 3 – 5” pieces to wrap around card layer, 3 – 7 ½” pieces to make bow
Instructions:
Use Bone Folder to burnish the fold on the card base
Take the 4 x 5 ¼ piece of Blushing Bride and run it through the Cut & Emboss machine using the Dots & Spots die.
Using Dark Pool Party, color a 5” and a 7 1/2” piece of Crinkle Seam Binding. Follow the same steps using Dark Smoky Slate and Petal Pink Blends.
Take the 3 – 5” pieces and wrap them around the Blushing Bride card base, securing the ends around the back of the layer with Stampin’ Seal.
Using Mini Dimensionals, adhere the Blushing Bride card layer to the front of the card base.
Take the 3 x 3 piece of Basic White cardstock and run it through the Cut and Emboss machine using the 2 5/8” circle die.
Take the 3 1/8 x 3 1/8 piece of Basic Gray cardstock and run it through the Cut and Emboss machine using the 2 ¾ Scallop Circle Die.
Using Basic Gray Ink, stamp the image on the Basic White Circle
Using Light Pool Party Blends, color the leaves on the chair. Use Dark Pool Party Blends to color the legs and the front arms of the chair. Use Light Smoky Slate Blends to color the cat. Highlight the cat with Wink of Stella.
Adhere the stamped Basic White Circle to the Basic Gray Scallop Circle using Stampin’ Seal.
Attach the circle layer to the top left of the Blushing Bride layer.
Take the 3 pieces of 7 ½ colored Crinkle Seam Binding and make a bow. Fan out each piece of seam binding on the bow part so that each color is visible. Trim the ends.
Using a Glue Dot, adhere the tied bow to the right side of the Blushing Bride layer, making sure it doesn’t hang past the right edge of the card.
Using a scrap of Basic White cardstock, stamp the ‘Missing You’ sentiment in Basic Gray Ink. Fussy cut the sentiment.
Layer the stamped sentiment on a piece of scrap Basic Gray cardstock and fussy cut around the Basic White cardstock.
Adhere the sentiment using Mini Dimensionals
Thank you for stopping by! I hope to see you tomorrow for my World Cardmaking Day Event.
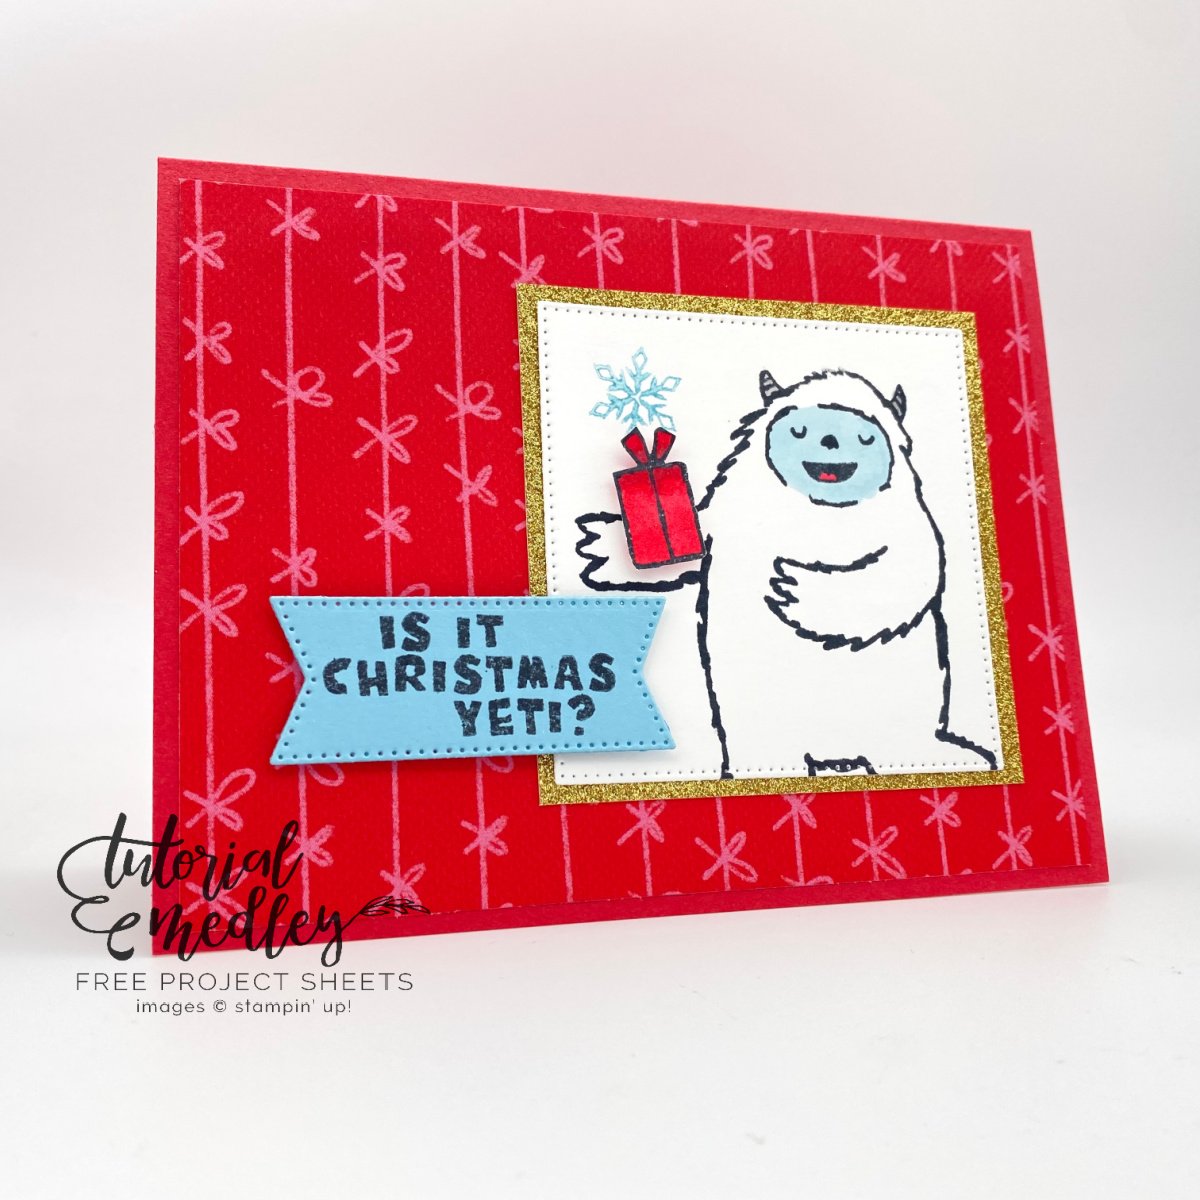
Today I have the cutest card from the Yeti to Party stamp set. It was created by one of design team members and I couldn’t resist sharing it with you today… Is is Christmas Yeti? It sure feels like it! We have “frost advisories” … What? It’s only Septemburrrr!! lol
This fun and easy card is so festive and cute, it’s sure to put a smile on anyone’s face …
Measurements:
Card Base: Sweet Sorbet- 5 ½” x 8 ½”
Cardstock #2: Basic White- approx. 3” x 3” and a small scrap piece
Cardstock #3: Balmy Blue- 2 ½” x 1 ¼”
Designer Paper #1: Glimmer Paper- 3” x 3”
Designer Paper #2: Celebrate Everything- 5 ¼” x 4”
You’ll begin by scoring the card base at 4 ¼” and folding it in half. Add the Celebrate Everything Designer Series Paper to the card front . Die-cut the largest stitched square from the Stylish Shapes Dies in Basic White cardstock and stamp the Yeti on the square in Memento Black ink. Then, stamp the snowflake in Balmy Blue. (Tip: The snowflake was stamped off to get a lighter look)
Next, color the Yeti’s face, horns, and tongue with Stampin’ Blends. Then, attach the Yeti square to the glimmer paper square using liquid glue, then add it to the front of your card.
Die-cut a Balmy Blue banner from the Stylish Shapes dies and stamp the sentiment using Memento Black ink. Add the sentiment to the card front using Stampin’ Dimensionals.
Lastly, stamp a present on a scrap piece of Basic White using Memento Black ink. Color the present using Stampin’ Blends in Sweet Sorbet. Add the present to the Yeti’s hand using one Stampin’ Dimensional. Decorate inside as desired.
Easy … Quick …. Cute! That’s the makings for a great Christmas card.
Thanks so much for stopping by. Have a wonderful day.
Here is a list of supplies used to make this card ….
Today I’m sharing the replay of last nights Facebook LIVE; a quick tip for Heat embossing your designer paper and taking it to another level … amazing! For those who watched last night, you will see a change to my card!!
Here is the video replay ….
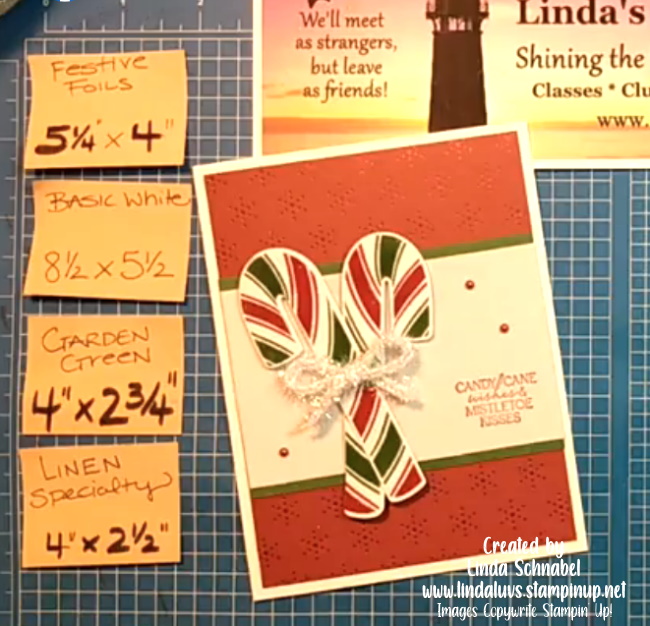
Don’t those candy canes just look YUMMY!! Here is the original version of the card ….
I did put the dimensions for the card in the video but here they are again (above) for quick reference . I will list the ingredients for the card below … the Festive Foils Specialty paper and the Iridescent Trim are both on the Weekly Deals through midnight September 28th.
Now lets take a little peek at what I did to the card after the camera was turned off. Remember the punched circles I had as back up??
I used the Garden Green circle behind the candy canes to make them pop even more! It also really highlights our Iridescent bow. Even though the parts to my card belong with other “suites” doesn’t mean that they don’t look good together.
The quick tip to embossing our candy canes was made easy with the use of the “Embossing Additions Tool Kit’ … very handy!! You’ll want to add that to your wish list ❤ I think this is just a fun way to embellish your designer paper and take it to the next level.
Give this technique a try … enjoy your day!
Thank you for hanging out with me.
Here is a list of ingredients used to today’s card ….
I’m back!! I’ll admit, I got caught up in my cardmaking for my upcoming retreat, World Cardmaking Day, Stamp Club and Gnome class!! Whew … but what fun I was having … I hope you join me on World Cardmaking day …
BUT …. I do have the cutest card for you today!
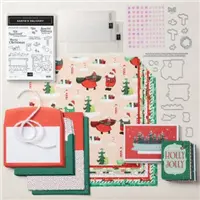
You’ve seen my Book Binder Fold card just recently (Click Here to see Full Post). So today I’m sharing the same layout but sharing the magic of Christmas with the Santa Express Suite. Hop aboard and join me on this fun ride You’ll see I used the Sweetest Christmas Designer paper from my last card but added SANTA from the Santa Express Designer paper.
I love that Stampin’ Up! has dies that cut out elements from our designer papers because they are just sooo cute! The Santa comes from all over the world. I also used the dies for the train tracks … they thought of everything!!
Did you notice the smoke puffs coming out of the train?? Hmmm … I’m going to be sharing how I made them during my LIVE presentation on World Cardmaking Day. I’ll be sharing a lot of fun tricks & tips to jazz up your Holiday Stamping!!
This card is full of texture and dimension, yet so quick and easy to make. Using designer paper in your cardmaking gives you a great pop of color without having to “color” and makes creating as simple as adhering it to the cardstock.
I hope you enjoyed today’s card and add my World Cardmaking Day event to your calendar this Saturday.
Take time to enjoy your day, and thank you for the visit!!
Here are the core products used to create today’s card ….
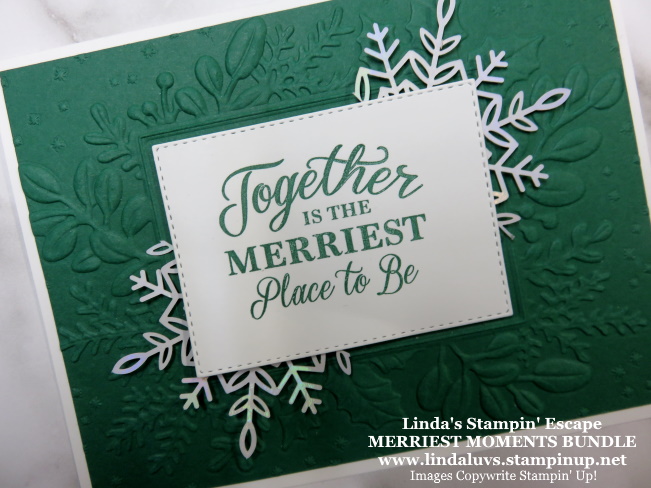
And a HAPPY Saturday to you all. Today I have a card from the amazing Merriest Moments stamp set and the Hybrid Embossing Folder. I was thrilled to see these amazing products back in the Mini Catalog this season as one of the returning favorites!! It’s surely a favorite of mine.
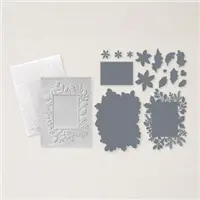
You can create unique and festive frames with the Merriest Frames Hybrid Embossing Folder. It comes with one embossing folder and one set of dies. This hybrid embossing folder will add a unique touch to your Christmas and winter cards.
The dies fit around the embossed image in the folder, allowing you to emboss and cut with one run through the machine. Or choose to use the folder and the dies separately; the choice is yours … I chose to just the the embossing folder on my card.
This is a simple and easy card to make. I used Basic White as my card base … the Evening Evergreen card front is 4″ x 5-1/4″ and is embossed with the Merriest Frames Hybrid Folder.
I complimented the embossed card front with the Wonderful Snowflakes in the Mini Catalog. You’ll find them on page 45 in the Mini Catalog … you get 24 Snowflakes for only $6 and you can stretch that even further by cutting them in half as I did here.
The greeting comes from the Merriest Moments Stamp set …
The greeting was stamped onto Basic White cardstock in the Evening Evergreen and die cut with the die included with our bundle … it fits perfectly in the framed space!
I told you this special team of products would be so fun to use! There are so many different ways you can use the stamps, dies and embossing folder. Be sure to keep an eye out, as I will be sharing more in the future.
Thank you for joining me today. I hope you have the “merriest” of weekends ~
TODAY’S STAMPIN’ SUPPLY LIST … If you liked the products used in today’s projects, I have links for you below. Just click on the item you would like more information on, or to begin your shopping. It will take you directly to my website. Thank you ♥
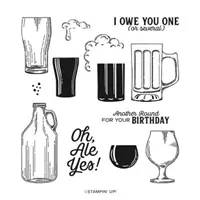
It’s another FREE Tutorial Friday and if your from Wisconsin that also means it’s time for a Friday Night Fish Fry … and what goes better with your Fish Fry than a nice cold brew!! Today’s card tutorial features the Brewed for You stamp set.
Measurements:
Card Base: Crushed Curry 5 ½” x 8 ½”
Cardstock #2: Basic White 4” x 5 ¼”
Instructions:
Cut a 5 ½’ x 8 ½” Crushed Curry card base. Fold in half.
Cut a 4” x 5 ¼” Basic White panel.
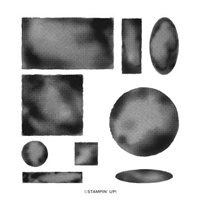
Stamp (3) large and (4) small Watercolor Circles onto the Basic White panel using Crushed Curry ink.
Lightly spritz a little water to soften the edges. Let dry completely.
Using a Water Painter, add Crushed Curry ink to the brush and tap to speckle ink all over the panel as desired. Let dry completely.
Adhere the panel to the card front.
On a scrap piece of Basic White, stamp the glasses and foam using Jet Black Stazon ink.
Color the glasses using Crushed Curry ink and a Water painter. Cut.
Cut a ¾” x 2 ½” strip of Basic White cardstock.
Stamp the sentiment using Jet Black Stazon ink. Cut the right edge to form a banner.
Adhere the sentiment to the top of the card using Stampin’ Dimensionals.
Cut a 2 ¾” Crushed Curry circle.
Cut a 2 1/8” Basic White circle.
Stamp the sentiment onto the circle using Jet Black Stazon ink.
Adhere the sentiment to the Crushed Curry Circle.
Adhere the circle to the card front.
Adhere the glasses to the card front using Stampin’ Dimensionals.
I think this is a perfect card for a Friday FREE Tutorial, Oh, Ale Yes!! Enjoy your Friday and enjoy your weekend.
Thank you for hanging out with me for a cold one today!
Here is a list of supplies used to create this card ….