Christmas Town …

Hello Stampin’ Friends ~

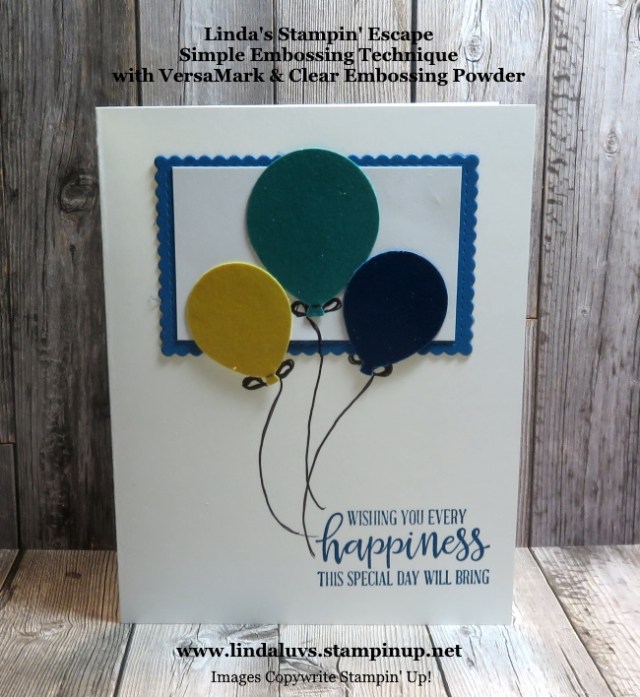
Today I would like to share with you a very special suite, and one that I showcased last weekend at my Holiday Catalog Virtual Retreat Party. Over the next couple days I will share some that will give you a glimpse into this versatile suite …

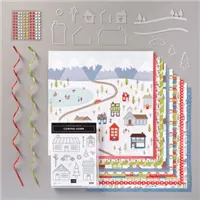
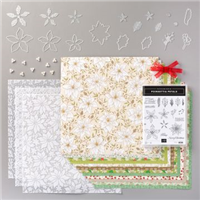
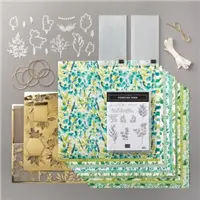
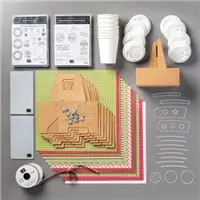
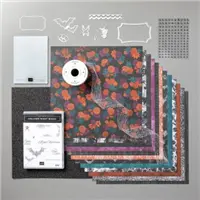
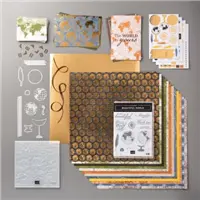
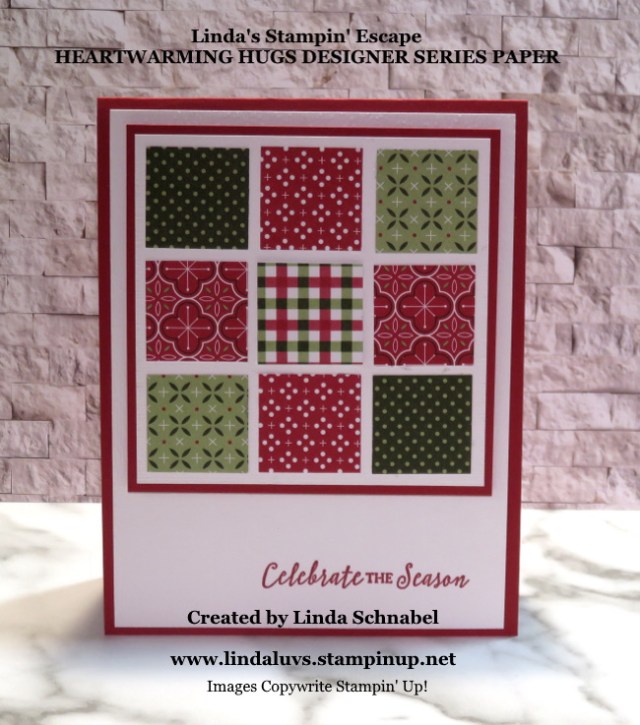
Capture the feel of a hometown holiday with the whimsical imagery and coordinating trimmings in the Trimming the Town Suite Collection.

The Trimming the Town Suite Collection includes:

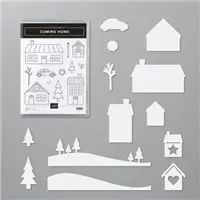
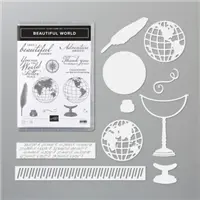
  • Coming Home Photopolymer Stamp Set (10% off)
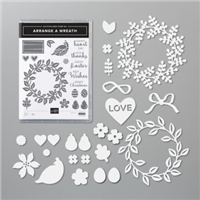
  • Home Together Dies (10% off)
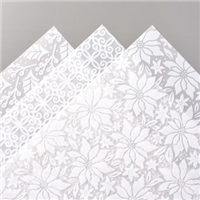
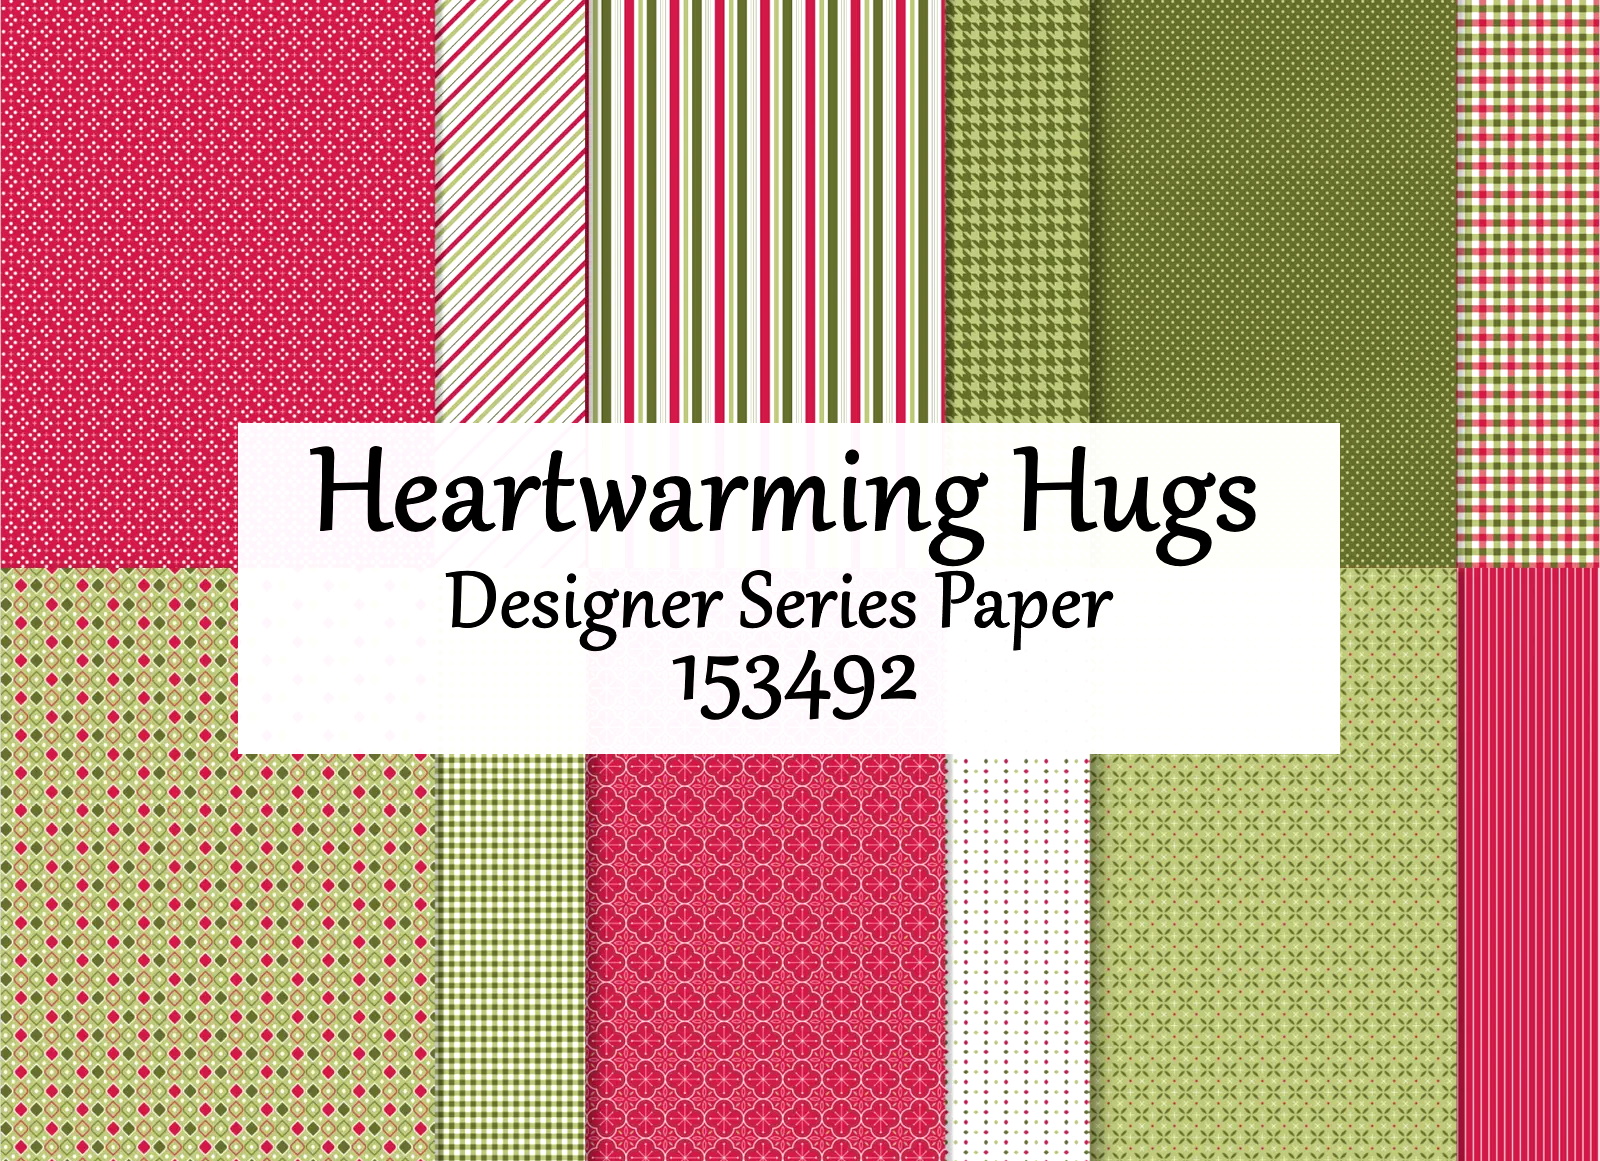
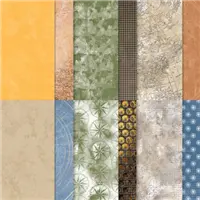
  • Trimming the Town Designer Series Paper
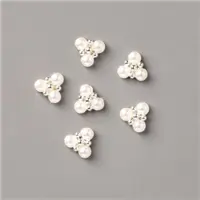
  • All the Trimmings Embellishments
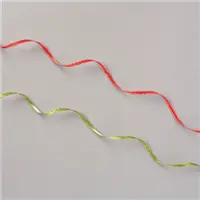
  • All the Trimmings Ribbon Combo Pack

Product colors: Early Espresso, Misty Moonlight, Old Olive, Pool Party, Poppy Parade, Whisper White

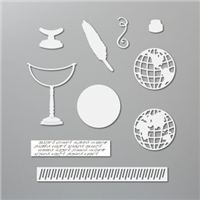
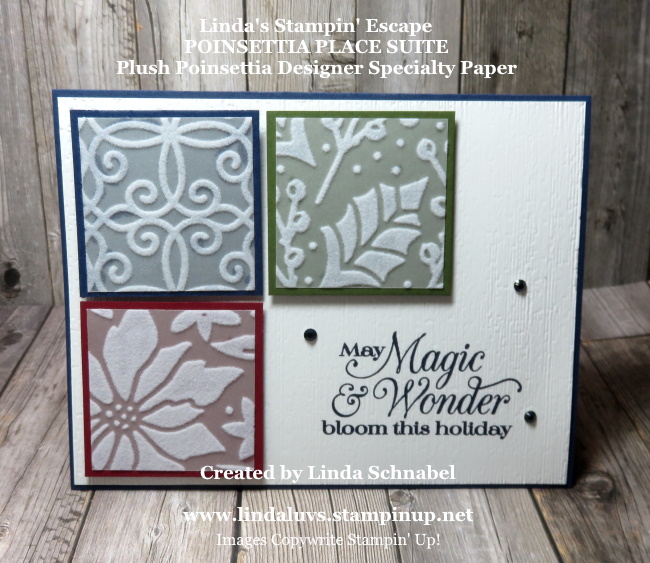
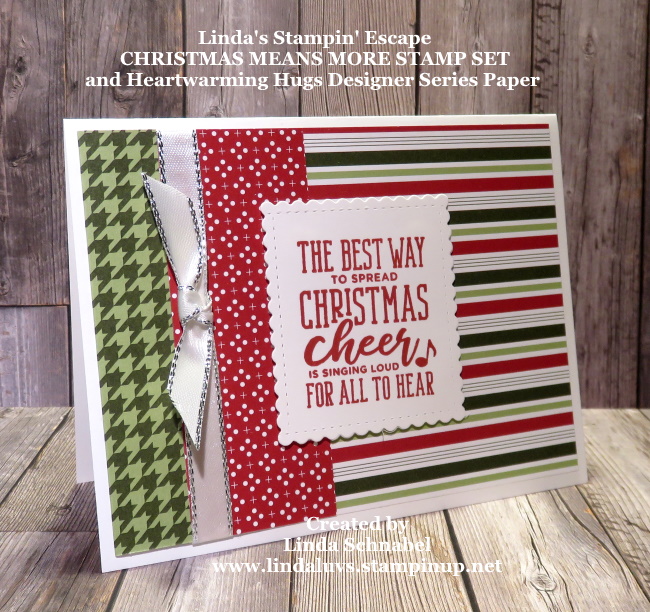
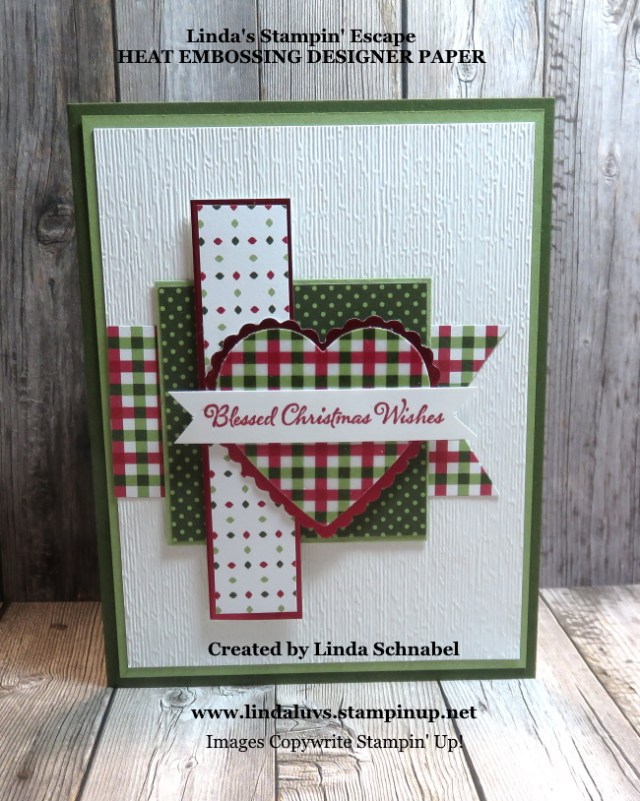
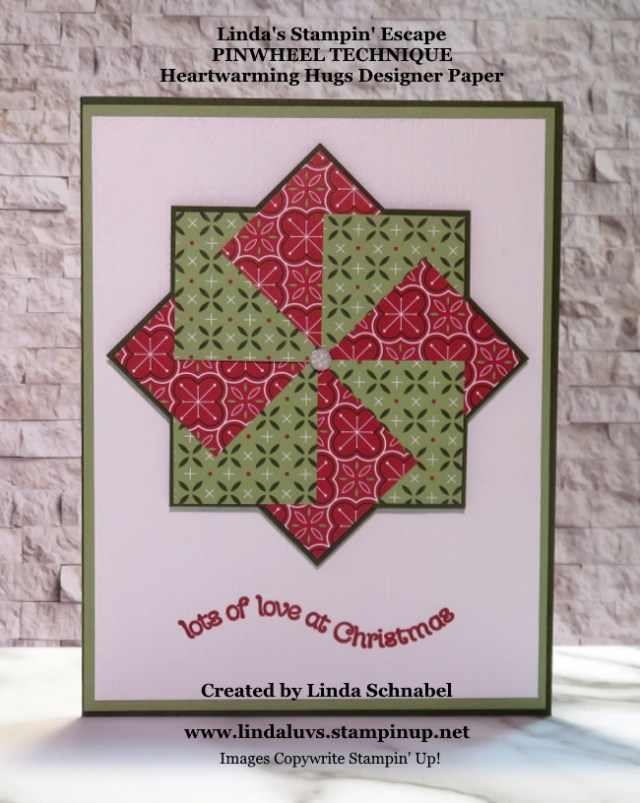
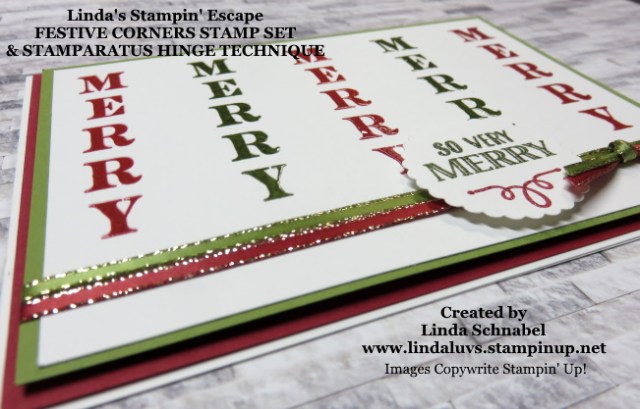
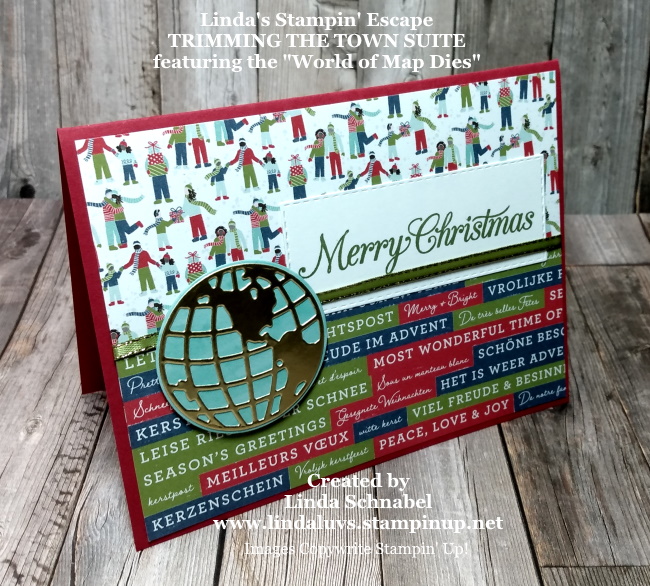
This Christmas card features two patterns from this heartwarming designer paper and since the bottom design featured holiday wishes from all over the world … well, I thought I would add the “world”. I put a piece of Pool Party behind the Gold Foil die cut to create a more worldly effect!

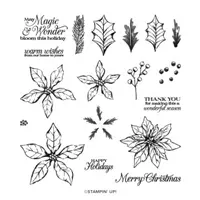
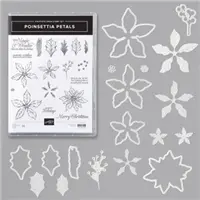
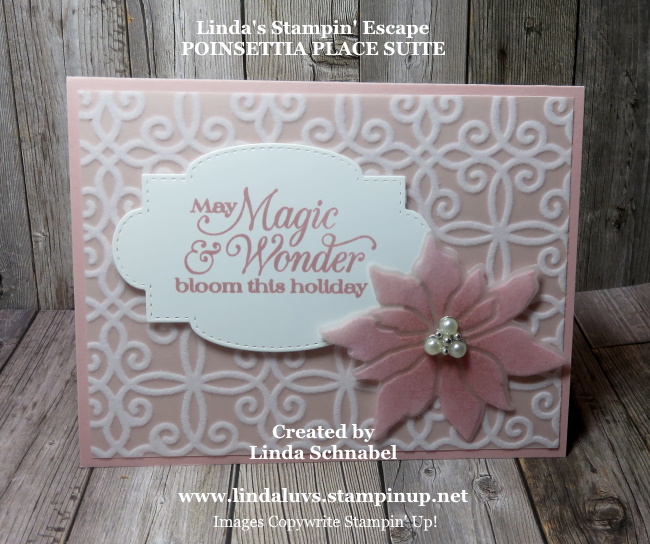
The greeting was stamped from the Poinsettia Petals stamp set and die cut with the Stitched Rectangle dies. All the pieces were brought together with the pretty “All the Trimmings” Olive ribbon, edged in gold.

Whether you purchase the Coming Home Stamp Set individually or as a part of a bundle or suite collection, $3** will be donated to charities devoted to adoption, foster care, and infertility. You will be making a difference in the lives of those who benefit from these charities.

You will receive from me a very special “Thank you” card from me for your purchase.

Thank you for hanging out with me today, I’ll see you here tomorrow for another of my “Trimming the Town” suite.

Have a great day, and enjoy this beautiful weather.

TODAY’S STAMPIN’ SUPPLY LIST … If you liked the products used in today’s projects, I have links for you below. Just click on the item you would like more information on, or to begin your shopping. It will take you directly to my website. Thank you ♥ 

Wednesday Wow: Poinsettia Petals Card

Hello Stampin’ Friends ~

I hope you enjoyed the video yesterday, as I’m back today with the stunning card featured in the video. My attendee’s were so excited with the Brightly Gleaming Specialty paper from that product showcase that I carried it into the Poinsettia Petals showcase … the results were nothing short of amazing!!

We’ll begin with our card base … Pretty Peacock which coordinates with our Brightly Gleaming Specialty Paper; enhanced with a mat of Copper Foil.

The focal point of our card is the stunning poinsettia embossed and cut with the specialty dies included in the Poinsettia Petals Bundle! I also hope you caught my tip on how to keep your dies aligned (it’s in the video).

It’s easy to see the beautiful texture and dimension these dies can created. And we finished off our poinsettia by adorning the center with the “Elegant Faceted Gems”… they are more stunning in person as they have a champagne color to them which really complements the Copper Foil Poinsettia.

Our poinsettia sits upon a piece of Very Vanilla cut from the Tasteful Labels dies and stamped in Pretty Peacock. Don’t ever be afraid of mixing and matching your bundles … they really can enhance your stamping experience.

For those of you who missed the LIVE presentation, don’t fret … I will be hosting another “All Day Stamp Party” on November 28th, 2020 – Small Business Saturday! I will have LIVE demonstrations, deals, prizes and a full day of fun!!

Thank you for joining me today,

Have a great day!

TODAY’S STAMPIN’ SUPPLY LIST … If you liked the products used in today’s projects, I have links for you below. Just click on the item you would like more information on, or to begin your shopping. It will take you directly to my website. Thank you ♥ 

A Magical Transformation …

Hello Stampin’ Friends ~

I hope you got a chance to see yesterday’s card … the Poinsettia Place Suite and featured the Plush Poinsettia Specialty paper. I shared how easy it was to color the flocking on the paper so you could expand the use of your paper.

I thought it would be fun to see how different colors transform the look of the Plush Poinsettia Specialty paper...

I used 1-3/4″ squares of each of the three patterns of the Plush Poinsettia Specialty paper and then backed it with a 1-7/8″ mat of Night of Navy, Cherry Cobbler and Mossy Meadow.

I then stamped the greeting in Night of Navy onto a piece of Whisper White and ran it through the Stampin’ Die Cut and Emboss machine using the Subtle embossing folder ….

The blocks were popped up with Stampin’ Dimensionals and arranged onto the card, and then to complete my card, I added the blue Rhinestones from Holiday Rhinestones.

I hope you will be joining me and your fellow stamping enthusiasts at my Holiday Catalog Virtual Retreat Party. Bring your friends along with you! Enjoy in the comfort of your own home! (Information below).

If you would like to join in on the FUN … Copy this link: https://www.facebook.com/groups/1497489893793307/   and put it in the Search Box … then request to be a member! I would love to have you join us! There will be LIVE Demonstrations, Games, Exclusive Specials and PRIZES!! It’s going to be a party!!

Thank you for joining me today, I hope you have a wonderful day ~

Coloring Flocked Paper

Hello Stampin’ Friends ~

Happy Wednesday!! Today I’d like to share with you my card and video of the technique I shared LIVE last night on Facebook. The technique is “Coloring Flocked Paper” … and I used the beautiful Plush Poinsettia Specialty Paper from the Poinsettia Place Suite.

Grab a cup of coffee or your favorite tea and sit down and relax while you watch this short video on how to color the flocked specialty paper….

When pictures are a thousand words … then videos hit the jackpot! I love being able to show and tell you how to make cards. The base was cut 8-1/2″ x 5-1/2″ and scored at 4-1/4 to fold in half. The Plush Poinsettia Specialty paper with the scrolls was cut 4″ x 5-1/4″.

The poinsettia was trimmed from the paper and the die cut with the coordinating die from the Poinsettia Bundle. The greeting also comes from the bundle and was die cut from the Stitched So Sweetly Dies.

The stunning Beaded Pearls are part of the entire product suite … you will find the Poinsettia Place Suite on pages 14 through 16 in the Holiday Mini Catalog.

I will be sharing another card with you tomorrow that features the Plush Poinsettia Specialty Paper. I will also be highlighting the Poinsettia Place Suite at my Holiday Catalog Virtual Retreat Party. I hope you plan on joining me (see information below).

If you would like to join in on the FUN … Copy this link: https://www.facebook.com/groups/1497489893793307/   and put it in the Search Box … then request to be a member! I would love to have you join us! There will be LIVE Demonstrations, Games, Exclusive Specials and PRIZES!! It’s going to be a party!!

Thank you for joining me today, I hope you got inspired to think outside of the box and change up a product and make it the focal point of your card.

Have yourself a wonderful Wednesday ~

TODAY’S STAMPIN’ SUPPLY LIST … If you liked the products used in today’s projects, I have links for you below. Just click on the item you would like more information on, or to begin your shopping. It will take you directly to my website. Thank you ♥ 

Christmas Wishes …

Hello Stampin’ Friends ~

We made it through Monday!! I have a beautiful card to share with you that I have created while working on my Holiday Catalog Virtual Retreat Party. Today’s card features the Arrange a Wreath Bundle and Toile Christmas stamp set.

Beautiful layers of Seaside Spray and Whisper White cardstock are the base colors for the card. To create a “wintery” look, I used the Old World Paper 3-D embossing folder and added a touch of Wink of Stella onto the raised areas.

My wreath pieces were cut in Seaside Spray, Silver Foil and Whisper White … these were layered together and secured with the Tombo Liquid Glue. The Seaside Spray leaves have Wink of Stella on them and then they were all popped up with Stampin’ Dimensionals to create more depth to the card.

I stamped the greeting which comes from the Toile Christmas and cut it out with the Christmas Cardinal dies. The banner has Stampin’ Dimensionals on the back for a lift over the wreath. To complete the card I added Adhesive Backed Snowflakes.

So what do you think about todays card? I’m hoping you enjoyed it … there will be a “Special” announced on during my Holiday Catalog Party for the Arrange a Wreath Bundle …. this will include the PDF / Full Color instructions to create 4 beautiful All Season Cards!

If you would like to join in on the FUN … Copy this link: https://www.facebook.com/groups/1497489893793307/   and put it in the Search Box … then request to be a member! 🙂 I would love to have you join us! It’s going to be a party!!

Don’t forget to meet me on my Linda’s Stampin’ Escape for a LIVE presentation for my Technique Tuesday event.

Thank you for stopping by, enjoy the rest of your day!

TODAY’S STAMPIN’ SUPPLY LIST … If you liked the products used in todays projects, I have links for you below. Just click on the item you would like more information on, or to begin your shopping. It will take you directly to my website. Thank you ♥ 

A Treat Box for Every Reason …

Hello Stampin’ Friends ~

Today I’m sharing some cute treat / gift boxes that are super easy to make! These boxes will be celebrating Halloween, Christmas and a time for friends. One 12 x 12 sheet of designer paper will make 2 boxes. Once you start making these boxes … you’re going to want more paper!

This very first box was created with the Forever Greenery Product Suite. The cute little stitched circle die cut comes from the Heartwarming Hugs bundle and the leaves were cut directly from a wreath cut using the Arrange a Wreath Bundle.

Grab a cup of your favorite beverage and join me while I take you step by step creating this simple box …

So easy right? I will also be sharing the dimensions with you, as promised in the video. I thought it would be fun to share the box made in this video along with the card I made in last weeks video. You can find all my videos on my Linda’s Stampin’ Escape YouTube Channel … please subscribe while you are there 🙂

The next little treat box celebrates Christmas … I used the Heartwarming Hugs Product Suite. With so many amazing papers in this package, it was hard to choose one … hope you like it!

The “For You” badge was fun to make … first I stamped it in Real Red on Whisper White and die cut it with this die that cuts out the center as well. The cool die that mats the circle is a fun shape to work with. The tree was stamped in Mossy Meadow on Pear Pizzazz.

I wrapped a ribbon around the top and tied a bow on … you don’t always need a handle! The next treat box I want to share is my Halloween one …

My Oh My … I had fun with this one!! I wrapped the top and created the handle with Pretty Peacock cardstock … along with a piece die cut with the fun shape from the Heartwarming Hugs! Using that die I also cut a piece from the Black Glitter paper… together they make a fun design behind the greeting.

I blinged out the handle with more of the Black Glitter paper and those lovely Iridescent Pearls. The next treat box was created with the same Magic in this Night suite … No handle!

This one was created with the help of the September 2020 Paper Pumpkin. The greeting, the hat, the flower and the mini doily are all from the Paper Pumpkin kit! I’ll be sharing more about the upcoming Paper Pumpkin soon.

Here are the dimensions for our treat / gift box ….

I hope you have enjoyed today’s project share … they were really fun to make. I wasn’t kidding when I said that once you start making them that you’ll want more paper ….

Don’t forget that 15 of our designer papers are 15% Off until the 31st of this month. The deadline is coming up soon. Let me know if you need any help placing your order.

Thank you for joining me today …

Have a wonderful day!

TODAY’S STAMPIN’ SUPPLY LIST … If you liked the products used in today’s projects, I have links for you below. Just click on the item you would like more information on, or to begin your shopping. It will take you directly to my website. Thank you ♥ 

Christmas Means More

Hello Stampin’ Friends,

Yesterday I shared the “I Believe” card (shown below) and today I’d like to share another card that I made during World Cardmaking Day using the same simple design.

I began with a Whisper White card base and 4″ x 6″ sheet of the Heartwarming Hugs Designer paper. I scored the designer paper at 5-1/4″ and folded the pretty polka dot side over onto the top of my plaid paper… No cutting!

Instead of using a piece of cardstock, I used another piece of the Heartwarming Hugs designer paper …

These fun designer papers look so great together and add such a fun core to the card. I’ve added the Silver Edge Ribbon to add a touch of bling to the card.

The focal point of my card is the Christmas Means More stamp set …

This is such a fun stamp set and really works well with any of our Holiday Designer Papers.

I did not get my video made yesterday but I will share it with you as soon as it’s done… and I’ll demonstrate how easy the cutting and embellishing the card is.

Thanks for coming back today … I’ll be back tomorrow this another pretty card.

TODAY’S STAMPIN’ SUPPLY LIST … If you liked the products used in today’s projects, I have links for you below. Just click on the item you would like more information on, or to begin your shopping. It will take you directly to my website. Thank you ♥ 

Simply Sunday: Designer Paper Fun

Hello Stampin’ Friends,

Today I’d like to share a sweet -n- simple card that I made during World Cardmaking Day last weekend. It’s simple design makes it easy to create multiple cards … and with Christmas coming, that’s a good thing!

I began with a Whisper White card base and 4″ x 6″ sheet of the Heartwarming Hugs Designer paper. I scored the designer paper at 5-1/4″ and folded the pretty polka dot side over onto the top of my plaid paper… No cutting!

I found a piece of scrap in Real Red so I used the Wrapped in Texture embossing folder with the dots… I then added the Tulle Polka Dot Ribbon … it adds some fun and dimension to the card.

I used the Pine Tree Punch to punch out my Christmas tree … this piece was “Heat Embossed” with clear embossing powder from a demonstration I did LIVE for my Technique Tuesday on Facebook. Don’t want to waste anything and with the embossed tree, it really highlighted the designer paper on my card.

The greeting comes from the Christmas Means More stamp set. This stamp set was a must have on my Wish List. I BELIEVE … do you?

I hope you enjoyed today’s Simply Sunday card, I will be demonstrating this SIMPLE cardmaking technique tomorrow with yet another version of this card.

Thank you for joining me this Sunday, and I look forward to hanging out with you tomorrow.

TODAY’S STAMPIN’ SUPPLY LIST … If you liked the products used in today’s projects, I have links for you below. Just click on the item you would like more information on, or to begin your shopping. It will take you directly to my website. Thank you ♥ 

A World of Good …

Hello Stampin’ Friends ~

First and foremost I want to send a BIG THANK YOU to all of you who joined me yesterday for my All Day “Virtual” World Cardmaking Event … I had so much fun. The best part were the cards that we made together, and I’m here to share those with all today.

You can’t do World Cardmaking Day without using the World of Good Suite …

You will simply fall in love with this beautiful suite … it’s perfect for scrapbooking your travels and making beautiful cards! We stepped out of the box yesterday and created Christmas cards with this amazing suite. Let’s begin with the “Gold” card …

We began with the beautiful World of Good Specialty Designer Series paper … this is part of the entire suite or can be purchased along with the bundle (but you’re going to want it all!) It’s hard to see but the designer paper has a Gold Foil mat behind it.

Next, we sponged Balmy Blue and Pear Pizzazz onto Whisper White Cardstock and die cut with the detailed globe die. These were then glued onto Gold Foil paper to tie in the gold in the World of Good Specialty Designer Series paper.

Once we attached our “world” we wanted to make them look like Christmas Ornaments so we added bows, using the Old Olive ribbon from the”All the Trimmings” Ribbon Combo pack. This added a cute touch to the card and gave us the “ornament” look we were going for.

Next up… our greeting which comes from the Itty Bitty Christmas stamp set. I embossed it with Gold Embossing Powder onto a piece of scrap paper that was previously watercolored from my Technique Tuesday LIVE on Facebook. My stampin’ friends and I were very happy with the way this turned out, so we moved onto our next card ….

We started this card with our globes … Stamped with Tuxedo Black Momento Ink and sponged with Balmy Blue and Pear Pizzazz. Then they were die cut with the coordinating dies from the bundle. Wink of Stella was added on the sponged areas … and then they were embossed with Clear Embossing powder … WOW!!

For the backgound we choose the Old World Paper embossing folder …

The Old World Paper embossing folder is included in the product “suite” … I will have the suite and the bundle along with the other products listed below for you. During our stamping session, I let the attendees of my presentation pick out the background color … the winner was Old Olive …

I had to share this angle with you so you could see that the Wink of Stella shows through beautifully with the clear embossing … it also makes the black stand out! They are stunning! To keep with the ornament them, I used the Black Bakers Twine that was included with the September 2020 Paper Pumpkin kit!

The greeting comes from Itty Bitty Christmas and was die cut using the cirlcle dies. The little banner behind it was hand cut and used to pop the greeting.

I hope you enjoyed these two beautiful cards the I created with the help of my stampin’ friends on World Cardmaking Day. It was a blast!!

Thank you for joining me today, I hope you have a beautiful day ~

TODAY’S STAMPIN’ SUPPLY LIST … If you liked the products used in todays projects, I have links for you below. Just click on the item you would like more information on, or to begin your shopping. It will take you directly to my website. Thank you 

The Magic of Heat Embossing

Hello Stampin’ Friends ~

Today I’ll be sharing my short video on the Magic of Heat Embossing … this simple technique probably dates back many years. I’ve been stamping and a demonstrator (Yes, I was not a cardmaker before I signed up!!) for 20 years, and heat embossing is what caught my attention!

I will be showing you how amazing a VersaMark pad and Clear embossing power is in transforming your projects. Grab your favorite beverage and sit back for a short video as I show you three (3) different items to emboss …

I must admit … not my best presentation but I hope you saw the magic in the technique. Here’s the the first card that I made on the video …

but I’ll also be sharing the two cards that I promised. Lets begin with the balloons ….

The balloons were created as shown in the video. In the video I said I prefer the “strings” on my balloons versed the hand drawn strings so I found some Bakers Twine and added them to my balloons.

Since we I shared the upcoming Designer Paper Sale with you, I thought I would use one of them for a background. I’m using the “In Good Taste” Designer Series paper on this card …

In fact, I have been using the “In Good Taste” Designer Series paper as my backgrounds for all my photo shoots for posting my cards right here!! All of those beautiful wood patterns, brick and tiles all come from this package, including this rustic wood which is probably my favorite!

Let’s move on to the Heartfelt Hugs designer series paper we embossed …

I love the look of the Heartwarming Hugs Designer paper, and embossing it created a stunning new look. When I punched it out with the heart (Heartwarming Hugs paper … get it! lol) I knew exactly where I was going with this card. Create layers of this designer paper to highlight the heart.

In the video you can see how lovely the designer paper is embossed so I decided to mat the heart with the new Red Foil from the Mini Catalog. The shine on both of these creates an amazing focal point to the card …

The only thing I would add to this card is “Red Rhinestones” … might add a little balance on the right side. BUT … I still love the way this card turned out.

Hope you enjoyed the video and the final cards created with this simple and fun technique … there truly is magic in heat embossing!

Here is a list of the Designer Papers on Sale starting tomorrow …

Thank you for joining me today, I’ll be back tomorrow to share the “Sunflower” card with you!! Till then …

Have an amazing day ~

TODAY’S STAMPIN’ SUPPLY LIST … If you liked the products used in todays projects, I have links for you below. Just click on the item you would like more information on, or to begin your shopping. It will take you directly to my website. Thank you 

From Scraps to Splendid … Cards!

Hello Stampin’ Friends ~

Yesterday I share two card layouts with you that are perfect for using up your scraps of designer paper!! Our first layout uses 9 – 1″ squares ….

The Whisper White piece that holds these 9 designer paper pieces measures 3-1/2″ x 3-1/2″ and the Real Red mat behind it is 3-3/4″ x 3-3/4″.

The card base is Real Red and measures 4-1/4″ x 11″ and the Whisper White measures 4″ x 5-1/4″ … both white pieces were embossed with the Subtles Embossing Folder. Before embossing it, the greeting was stamped from the Itty Bitty Christmas stamp set.

OK … Here’s the fun part. I’m sharing they layouts and I would like to see what you come up with!! You can post them on my Linda’s Stampin’ Escape Facebook pagewe’ll have a contest!!

Our second layout …

Strips of Designer Paper and a bow is all you need to create with this layout, but I did add a little more! The base of the card is Blackberry Bliss and the Basic Black mat was embossed with the Old World 3-D Embossing Folder.

The strips of designer paper come from the Magic in this Night Designer Series paper and a strip of the Black Glitter Paper. I did stamp my greeting directly onto the Blackberry designer paper … it comes from the Festive Corners stamp set.

I’ll post a notice on my Facebook page and then make sure you share cards. We’ll do a SPIN 2 WIN on all the entries. Let’s have some FUN this Friday!

See you on my Linda’s Stampin’ Escape Facebook page!

TODAY’S STAMPIN’ SUPPLY LIST … If you liked the products used in today’s projects, I have links for you below. Just click on the item you would like more information on, or to begin your shopping. It will take you directly to my website. Thank you ♥ 

Pinwheel Technique & Heartwarming Hugs!

Hello Stampin’ Friends,

Today I have two cute cards for you created with the Heartwarming Hugs Designer Series paper and the Pinwheel Technique. This technique is a great way to use up your designer and / or paper scraps!

This paper crafting technique is much, much easier than it looks … quite simple in fact, and I’d like to show you today …

How did you enjoy the demonstration and do you think it’s as easy to make as I said it would be? I think this technique is one of those timeless cards that we can keep bringing back!!

This first card is the one I demonstrated and includes the Heartwarming Hugs designer series as a background and the Light Me Home stamp set used for the greeting. I also tipped the Pinwheel to look a little more like a star.

The second card …

This was designed for those stampers who like the “less is more” look … a clean, crisp look. The Pinwheel really stands out against the white background.

The greeting comes from the “Itty Bitty Christmas” stamp set, and with the aid of my Stamparatus … I could stamp it 3 times to get it bold and bright. Once stamped, I embossed it with the Subtle 3-D embossing folder.

Here is the template with dimension for the Pinwheel card …

I hope the card samples inspire you and the layout helps you picture your next card! As promised in the video, I have a PDF File attached that you can download and print.

CLICK HERE TO DOWNLOAD PINWHEEL PDF

Thank you so much for joining me today. Stop back tomorrow as I will be sharing an alternative layout to the Pinwheel card.

Have an amazing day ~

TODAY’S STAMPIN’ SUPPLY LIST … If you liked the products used in today’s projects, I have links for you below. Just click on the item you would like more information on, or to begin your shopping. It will take you directly to my website. Thank you ♥ 

Simply Sunday: Quilt Pattern Card

Hello Stampin’ Friends ~

Today’s card is fun and easy to create and it’s done with our stunning designer series paper. Yesterday I talked about layouts and patterns, and how we can utilize them to help us create …

Well, I had saved a “Quilt” piece on my Pinterest page and was surprised to see how many times this simple design had been saved. I saved it as inspiration for a card …

Simple … right? But there is something about this simple pattern that catches your eye. Is it the colors or the pattern, not sure but I’ve taken the pattern and used it for today’s card.

I decided I wanted to make a Christmas card with the beautiful Heartwarming Hugs designer series paper ….

My designer paper strips are cut 4″ x 1″ and matted the woven pieces onto a 4″ x 4″ block. Now I know that Quilters have cut these into different sizes but it is “Simply Sunday”! You really have to respect the artistry and work that goes into a quilt.

I used my grid paper (available in catalog) to help me align my designer paper strips. Just added a touch of glue within the 1″ block and adhered my strip. The glue allows you a little more movement.

Once you have woven the pieces together and glued the ends down, you can finish gluing the pieces down. I then attached the entire 4″ x 4″ piece onto a piece of Whisper White measuring 4″ x 5-1/4.

The greeting was stamped with Mossy Meadow ink … it came from the “Light Me Home” stamp set. I finished off my card with a bow created with the Real Red Sheer ribbon … oh my, this ribbon is beautiful, and comes from the Poinsettia Place suite.

With a little help from your grid paper, this sweet Christmas card is easy to make and reflects the old age craft of Quilting. Use any pretty paper and you could create cards for all Occasions!

Thank you for sharing a part of your Sunday with me. Enjoy the rest of your weekend.

TODAY’S STAMPIN’ SUPPLY LIST … If you liked the products used in today’s projects, I have links for you below. Just click on the item you would like more information on, or to begin your shopping. It will take you directly to my website. Thank you ♥ 

So Very Merry Christmas …

Hello Stampin’ Friends,

Wow … Yesterdays blog post was full of amazing announcements! Today I’d like to share the photos and video from my Facebook LIVE demonstration on “How to emboss any color ink” and the Stamparatus “Hinge” technique!

Today’s card was embossed in Real Red and Old Olive …

I used the Stamparatus to align my words perfectly straight and even. The video will show you how to align your stamp on the stamparatus plate. The Whisper White piece of cardstock measures 5″ x 3-3/4″, the Old Olive is 5-3/8″ x 3-7/8″ and the Real Red measures 5-1/4″ x 4-1/8″ and the A2 card base = 5-1/2″ x 8-1/2″.

Watch and see how I emboss the two different colors and layer my cardstock ….

So how do you like the simple instructions on “how to” apply your stamps to your Stamparatus plates? If you enjoy these tips, I invite you to join me each Tuesday on Facebook LIVE!!

I cut my ribbon about 6-1/2″ – 7″ so that I have enough ribbon to wrap around the back of the card… cut your smaller pieces long enough to tie, usually 4″ – 5″ in length. The ribbon is the “All the Trimmings” Ribbon Combo pack from the Trimming the Town product suite.

I used my Old Olive and Real Red ink pads to create a multi-colored greeting from the Warm Hugs stamp set which comes from the Heartwarming Hugs product suite. I punched it out with the 1-3/8″ Scallop Circle punch.

After the ribbon was applied, dimensionals were added to the back and then placed onto the Real Red cardstock ….

The Real Red is adhered directly onto the Whisper White base. I think this is such a fun card, and quite easy to create! The embossing brings texture and a richness to the card … and our ribbon adds that holiday sparkle.

I want to thank your for taking time out of your day to hang out with me for a while. My wish is that you learned a little more about your Stamparatus, or put it on your wish list! What would you like to see in an upcoming Technique Tuesday? Write it in the comments below 🙂 Thanks!

Have a great day ~

TODAY’S STAMPIN’ SUPPLY LIST … If you liked the products used in today’s projects, I have links for you below. Just click on the item you would like more information on, or to begin your shopping. It will take you directly to my website. Thank you ♥ 

Toile Christmas Wishes …

Hello Stampin’ Friends ~

I hope you had a wonderful weekend. We were graced with an amazing Leaders Summit … so many ideas and information shared. I can’t wait until our OnStage event because then we get sneak peeks into the January thru June Mini Catalog!!

But … let’s not jump the gun yet because we have an incredible Annual Catalog and a Mini Catalog full of stunning new stamp sets, dies and kits! One of my favorite stamp set and coordinating dies came back and I was thrilled … Toile Christmas. Who doesn’t LOVE Cardinals!?

I love Cardinals and I love this card! It is full of depth and texture … the base is Whisper White with a Old Olive mat and a Whisper White background embossed with the Subtle 3-D Folder. The Soft Suede is die cut with the Stitched so Sweetly Dies and embossed with the Wrapped in Texture Embossing folder.

My images from the Toile Christmas stamp set were stamped with Tuxedo Black Ink and die cut with the Christmas Cardinal dies. I used the Cherry Cobbler, Old Olive and Soft Suede Combo packs to color the Cardinal and the branch. I have a video on coloring with Stampin’ Blends HERE: Stampin’ Blends Tutorial.

The sentiment was stamped with the Itty Bitty Christmas Stamp Set in Old Olive ink … then punched out with the 1-1/2″ Circle Punch. I also covered it in Wink of Stella!!

The greeting, cardinal and branch were all popped up using both the regular Stampin’ Dimensionals and the Mini Stampin’ Dimensionals. Even though there is a lot of texture to the card, popping up the images really draws your eye to an already stunning card.

This was my first go at using the Toile Christmas stamp set and I am thrilled with the way it turned out.

Thank you so much for visiting me this Monday. If you liked my card today, please click the LIKE button on the bottom of this post.

Have yourself a beautiful day!

TODAY’S STAMPIN’ SUPPLY LIST … If you liked the products used in today’s projects, I have links for you below. Just click on the item you would like more information on, or to begin your shopping. It will take you directly to my website. Thank you ♥