Hello Stampin’ Friends ~
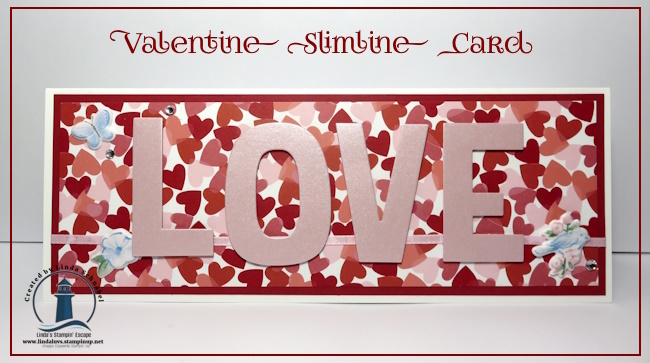
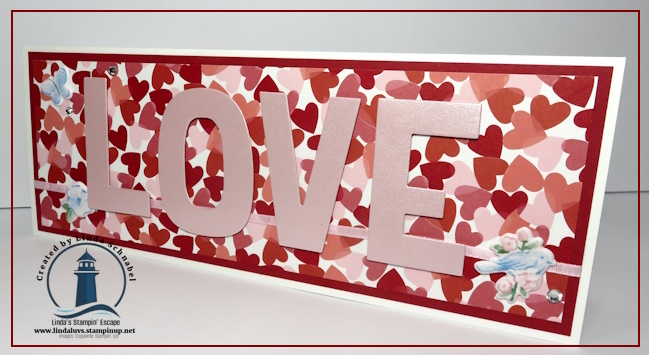
Sometimes it’s fun to take a closer look at those tools in our craft rooms that feel like a bit of an investment—and really explore all the ways they can work for us. Today’s card does exactly that by shining the spotlight on the Party Alphabet Dies in a completely different way. These dies aren’t just for birthdays or big celebrations… they’re perfect for everyday cards, heartfelt messages, and yes—even hugs and kisses!
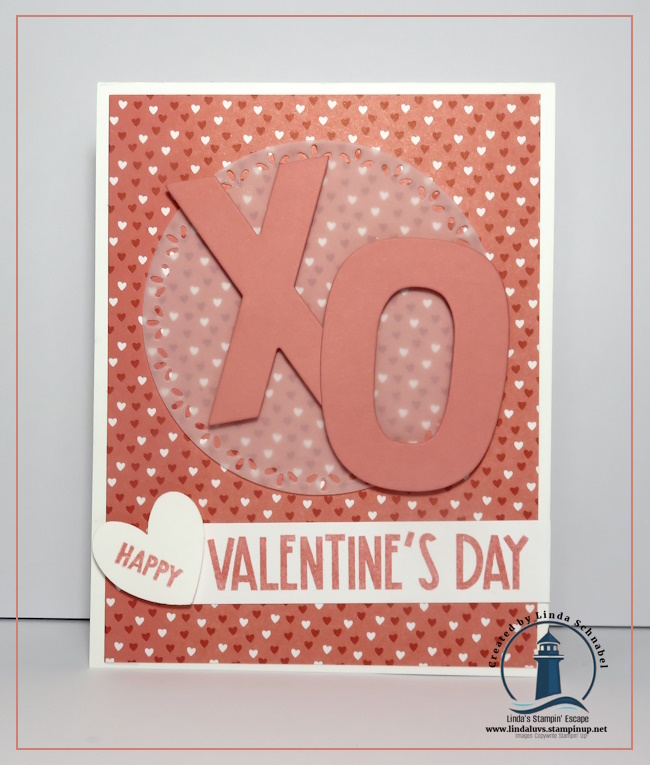
For this project, I started with a classic A2 tent-fold card base, cut to 11″ x 4 1/4″ and scored at 5 1/2″. This simple fold is always a favorite because it’s easy, sturdy, and gives you plenty of room to let your layers and focal point shine. I selected a different pattern from the Made with Love Designer Series Paper and cut it to 4″ x 5 1/4″, mounting it directly to the card front. The delicate pattern instantly sets the tone and makes the card feel cheerful and fun.
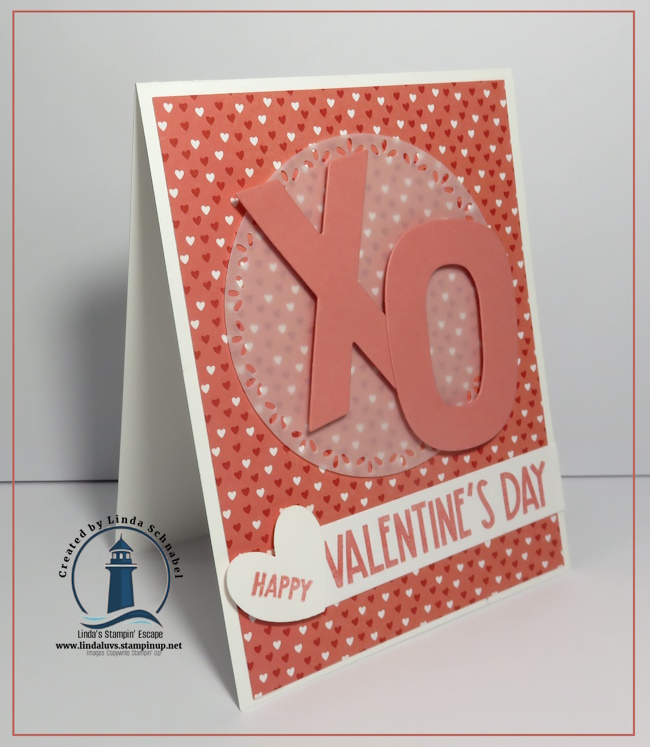
Because the designer paper is such a statement on its own, I wanted the focal point to stand out without competing with the background. A soft vellum circle, cut using the Spotlight on Nature Dies, was the perfect solution. Vellum is one of my favorite tricks for grounding a focal point—it softens the busy background while still letting that gorgeous paper peek through.
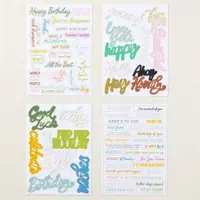
Next came the stars of the show: the X and O, die cut from Flirty Flamingo cardstock using the Party Alphabet Dies. Simple, bold, and full of meaning—who doesn’t love sending hugs and kisses? I popped them up with Stampin’ Dimensionals to add depth and draw the eye right to the center of the card. This is a great example of how these alphabet dies can be used beyond words and names to create symbols, sentiments, and playful focal points for any occasion.
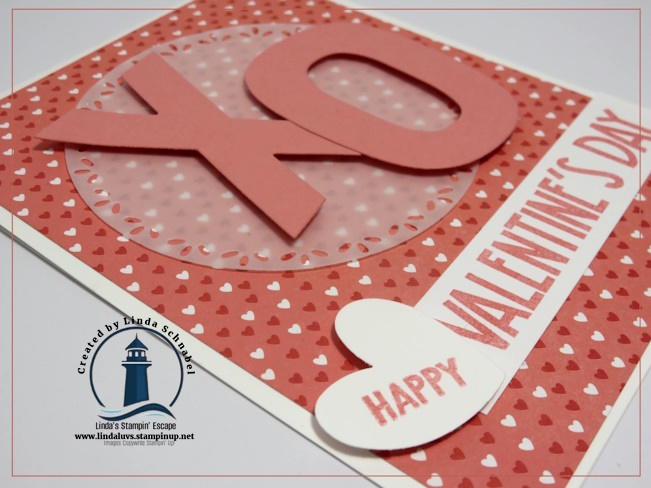
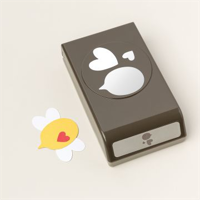
For the greeting, I reached for the sticker sheet that comes with the Made with Love Designer Paper pack. I stamped a sentiment from the Reason to Celebrate stamp set directly onto one of the sticker sections and placed it on the card front. To finish the greeting, I punched a heart using the Bee Builder Punch—how cute is that? It’s such a fun and creative way to use the blank space on the sticker sheet while adding just the right touch of sweetness. Take a peek at the video below …
This card is a perfect reminder that versatile products truly earn their place in your craft room showing up again and again in fresh, unexpected ways. The Party Alphabet Dies are a wonderful example of that kind of versatility—perfect for birthdays, celebrations, Valentine’s Day, everyday greetings, and so much more. And don’t worry… there’s plenty more inspiration coming your way!
If this card made you smile, I hope it inspires you to look at your supplies with fresh eyes and have fun mixing patterns, textures, and simple die cuts to create something special. Sometimes it’s those small, thoughtful details that make a handmade card extra meaningful.


Just a reminder to join for our online party filled with inspiration, fun and prize patrol!!