Sorry I’m a little late with my post today, I have my 16-month old Great Grandson here this weekend … and let’s just say, he’s a handful!! And this GG is not used to 24-7 chasing (my house is not Khari-proof) lol
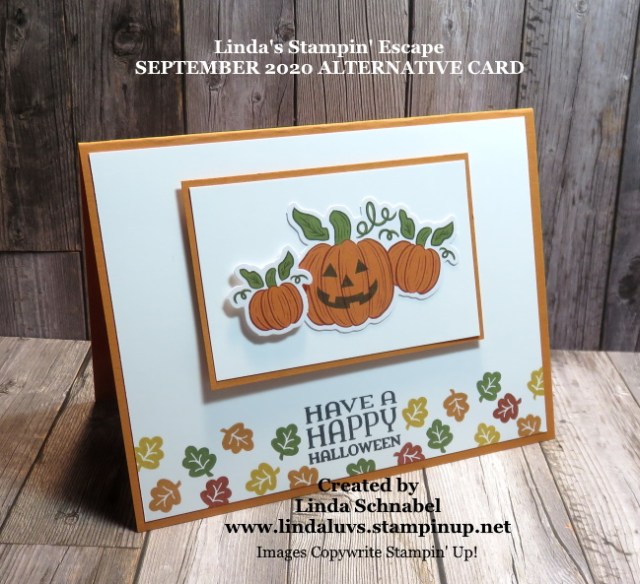
So what is the quickest way to make a card? Grad a card kit or a Paper Pumpkin and your on your way. There are so many cute embellishments in the September Paper Pumpkin kit … I used the Pumpkin embellishments and the leaf and greeting stamps that are included.
I used Crushed Curry, Old Olive, Pumpkin Pie and Cajun Craze (Cajun Craze is included in the kit) to stamp my cute little leaf.
The jack-o-lantern face and greeting were both stamped in the Tuxedo Black Momento ink. The base and mat for my pumpkins are Pumpkin Pie … the perfect Halloween color!
I’m thinking I should have run this through the embossing machine with the “Subtle” embossing folder … this would have given the card some texture along with the dimension … just a thought. What do you think?
I appreciate you stopping back for the visit today….
Hope your day is a good one.
TODAY’S STAMPIN’ SUPPLY LIST … If you liked the products used in today’s projects, I have links for you below. Just click on the item you would like more information on, or to begin your shopping. It will take you directly to my website. Thank you ♥
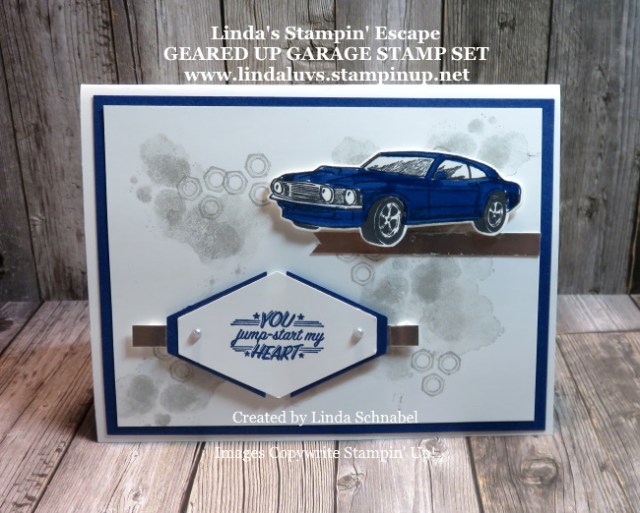
Hope you have kicked off your weekend with some fun festivities! I love this time of year … there is always something fun to do. This Sunday our home town is hosting a car show downtown, so I thought I’d pay tribute to my car lovin’ friends ~
I used the nuts and smudge stamps to create my background which sets the stage for my muscle car … all jazzed up and ready to go! I used Blueberry Bushel as a mat and coordinates with my car. I used the Stampin’ Write Markers to color the car. Both the cardstock and markers are on sale … see below.
The greeting comes from the Geared Up Garage stamp set and was punched with the Tailored Tag Punch. I punched a second piece out and cut it in half so I could create a mat.
The silver strips were scrap pieces I used to highlight my greeting and my car … nice masculine card, or a girl who is into nice cars! Love me a classic.
Hope you enjoyed today’s card, and that you have a wonderful weekend.
Thank you ~
TODAY’S STAMPIN’ SUPPLY LIST … If you liked the products used in today’s projects, I have links for you below. Just click on the item you would like more information on, or to begin your shopping. It will take you directly to my website. Thank you ♥
Happy Friday to you! I hope you have something fun to do today … I’ll be finishing my cutting for my Arrange a Wreath Class! So many cool things going on right now.
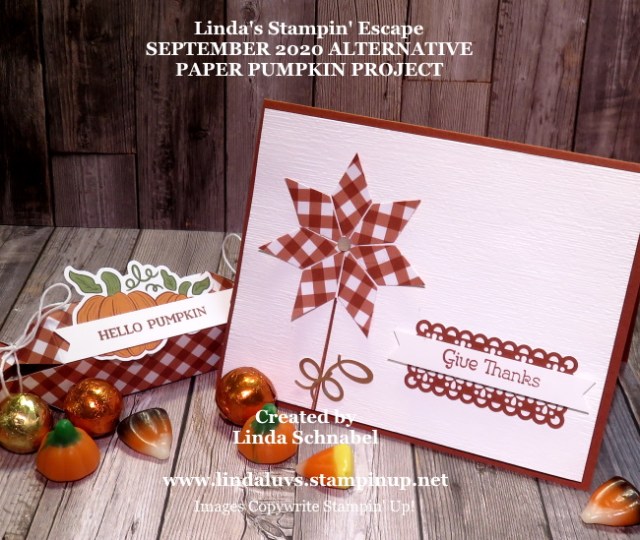
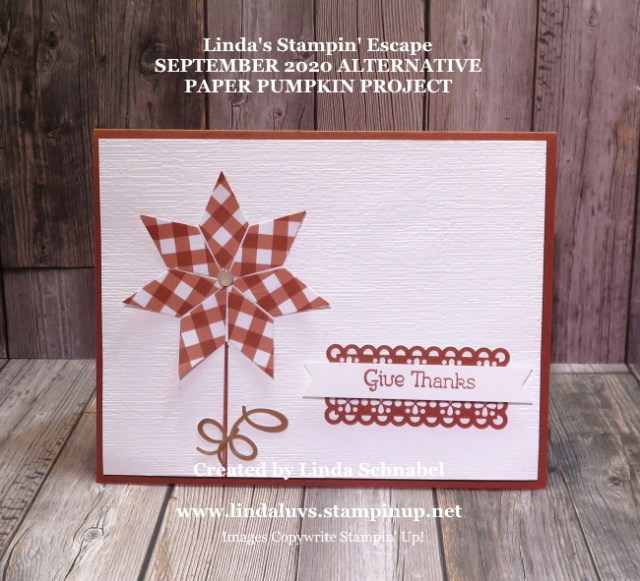
Today I’d like to share with you my alternative project from the September 2020 Paper Pumpkin kit … I shared a quick video with you yesterday. I made up one of the little candy holders to go along with my card …
I made up a couple of the little treat boxes for my grandkids, then I used the little left over pieces from the treat box to create a flower! The background is Whisper White and embossed with the Subtle Embossing Folder and popped up onto a Cajun Craze card base.
The decor element that highlights my greeting comes from the Paper Pumpkin kit, as does the greeting itself. There are so many pieces left over from the kit that you can play with … I’ll be making cards and other projects for a while.
I added one of the Elegant Faceted Gems in the center of my flower. With a few glue dots and some Dimensionals you can quickly put this sweet little card together.
I would like to “Give Thanks” to you for sharing a part of your Friday with me. I hope you enjoyed my Alternative Project.
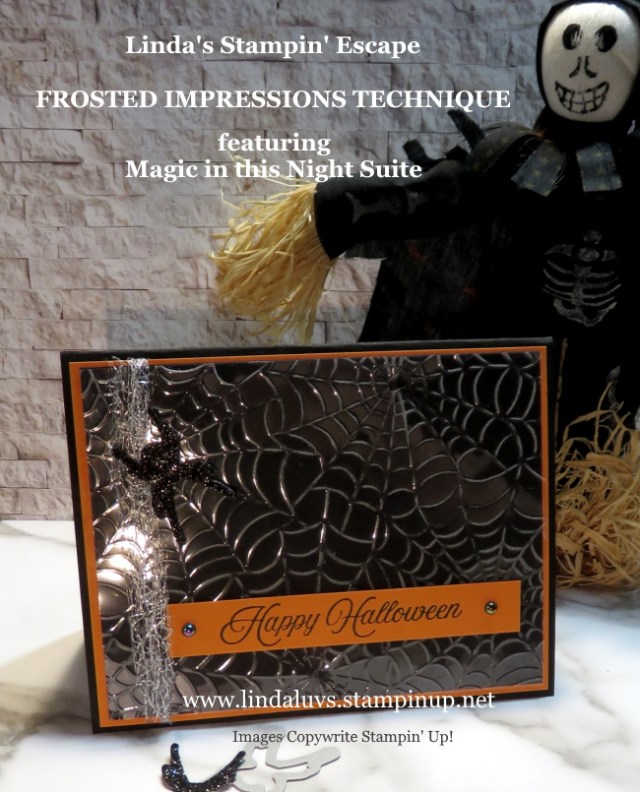
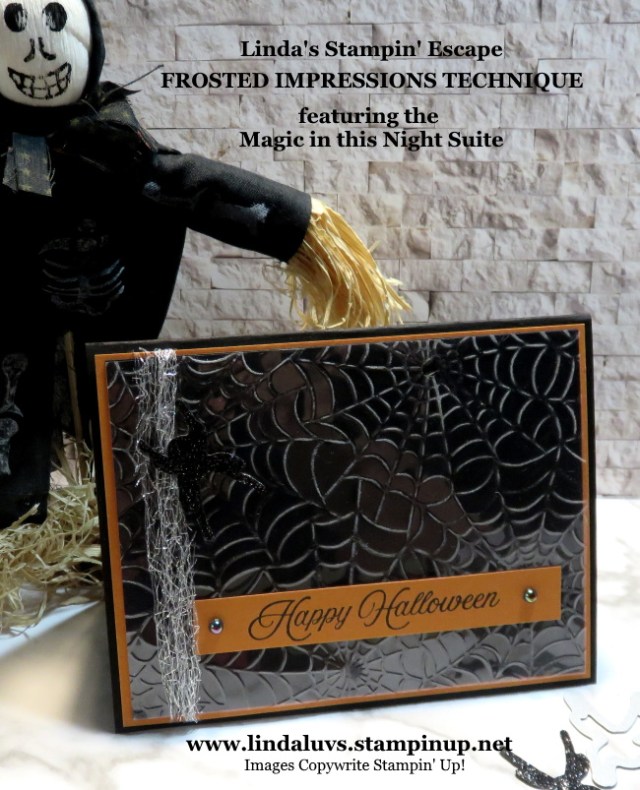
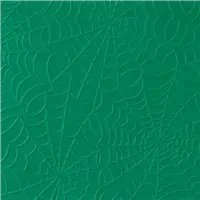
Today I have the coolest technique to share with you, and it is so simple you will ask yourself “why” you didn’t think of it myself? lol This technique is called Frosted Impressions.
You will need your window sheets, an embossing folder and an embossing machine, I tried out the new Stampin’ Cut & Emboss by Stampin’ Up! I love it’s size, the smooth roll and the fact that each plate is numbered (I’ll share more about that another time). I used the “Cobwebs” embossing folder …
I emboss your Window sheet with your favorite folder and then use sand paper to create the “frosted” look. Watch my short video to see exactly how I did this …
Wasn’t that simple? And it’s so cool … Emboss, sand, and you have a cool background!! I thought the spider webs were appropriate for upcoming holiday … but I truly believe those snowflakes in the mini catalog would be stunning.
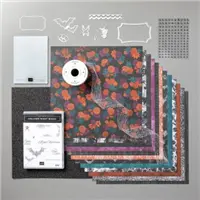
I used the many of the components from the Magic in this Night Suite; I’ll have a list for you below.
Now … a quick reminder that today is our 24 hour Stamp Sale … you’ll want to stock up with this stellar price! For one day only, you can purchase select cling and photopolymer stamp sets at a 15% discount.
Click on this image below for a PDF listing every stamp set that will be on sale … you can view or print off the list!
For 24 hours on 23 September—from 12:00 AM to 11:59 PM (MT) … choose your favorites from the select number of cling and photopolymer stamp sets from the 2020–2021 Annual Catalog that are available for purchase at a 15% discount.
You can place an order through me, or shop directly through my online store. The store will have a category entitled “Stamp Sale” that displays every stamp set on sale to ensure a quick and easy shopping experience.
Click Here to Visit My Store
I hope you enjoyed this fun and easy technique …. give it a try. And let me know if you have any questions or if you need help placing your order.
Thank you so much and enjoy your day!
TODAY’S STAMPIN’ SUPPLY LIST … If you liked the products used in today’s projects, I have links for you below. Just click on the item you would like more information on, or to begin your shopping. It will take you directly to my website. Thank you ♥
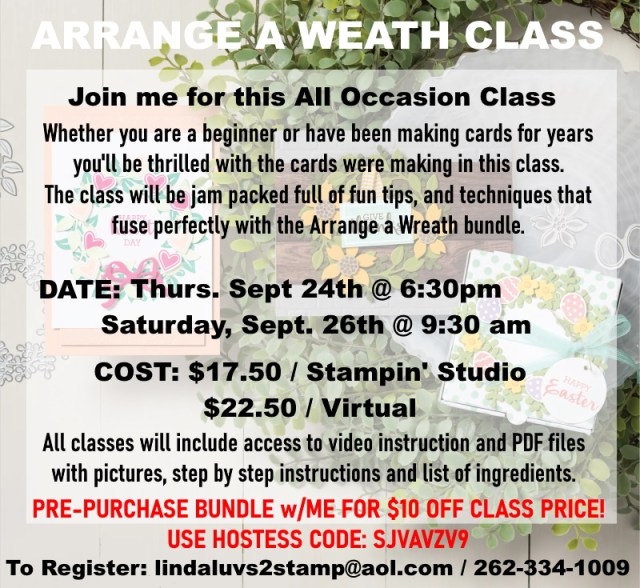
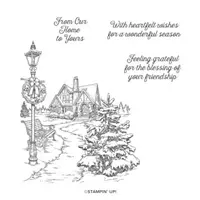
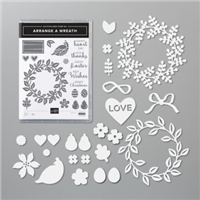
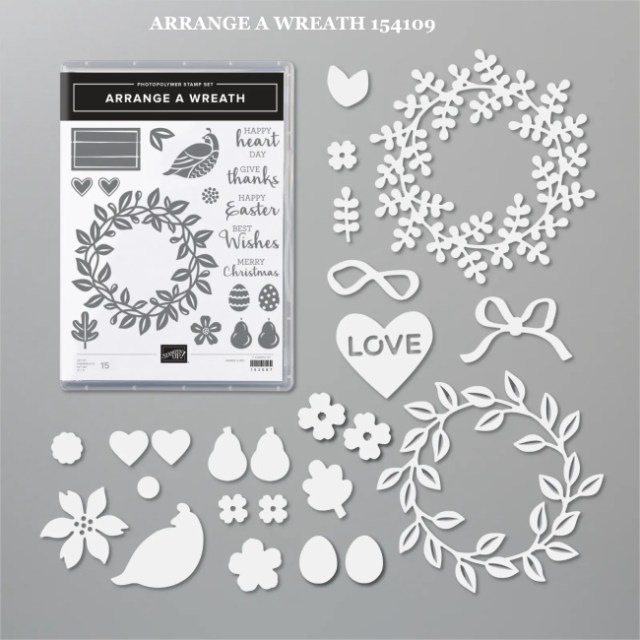
Today I have another card share from the Arrange a Wreath Bundle … this stamp set is so versatile that I had a hard time deciding which four I wanted to use in my class.
Tomorrow is the last day to register for my class …
The Thursday night class is now closed but I do a few spots left in the Saturday Morning class. These four stunning All Occasion Cards will kick off your creative juices again … Both the In-Class and the Virtual Class include PDF files with instructions, pictures and ingredients so you can recreate the layouts with any of your future projects. You will also have access to the video so you can watch “how to” make the cards. Save $10.00 on the class when you purchase the “Arrange a Wreath” bundle! One more note on the class …. if you want to do the “Virtual Class” you can pick up your Card Kit from me, and will not have to pay the “shipping” fee … just the $17.50
You will be able to create Wedding, Best Wishes, Spring, Easter, Valentine’s Day, Mothers Day, Fall, Halloween … Christmas, wow! Doesn’t even stop there …
Someone told me they didn’t find this bundle that interesting in the catalog, but once she saw the samples … she’s in for the Virtual (Card Kits) Class along with 2 of her friends.
Let me know if you have any questions about this class, or anything else. Thank you for stopping by today!
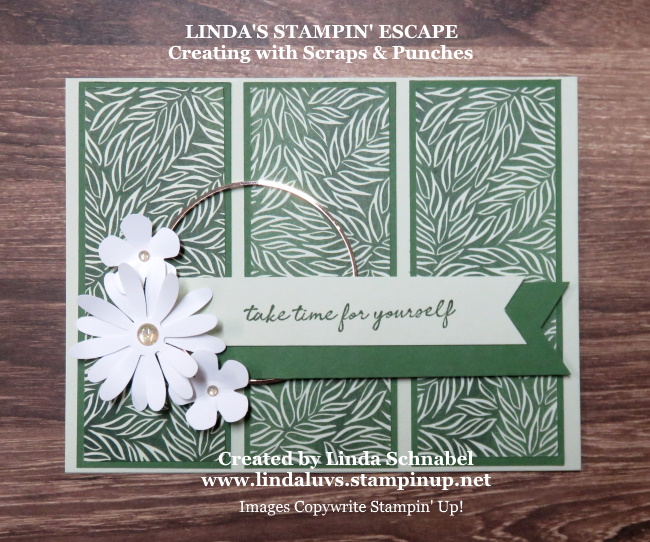
Since we’ve been working with Designer Paper pieces/scraps, banners and simple layouts lately, I have a lovely card created with the Forever Greenery Designer Paper. I am thrilled to share today’s card with you … it turned out so pretty!
I started out with 3 strips of the Forever Greenery Designer Series paper, these were leftovers from cutting my Stampin’ Club cards. The designer paper made it easy to decide my color theme: Garden Green and Soft Sea Foam! The Garden Green was used as a mat for the designer paper, and the Soft Sea Foam was the base of my card.
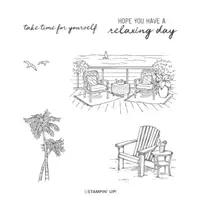
Once I laid out the designer paper, I knew I was going to use the Medium Daisy punch but I needed to add a greeting … this I would create with the Triple Banner Punch in my color scheme. The sentiment comes from the Seaside View stamp set. I showcased this stamp set on June 14th … Click Here to view.
I wanted something inside my Daisy so I chose the Gold Glitter Dots …
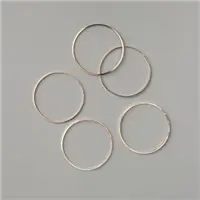
The glimmer dots were not as big as I thought, but they worked … however my sentiment and banner were a little big for one little daisy so I added two small flowers from the Small Bloom Punch. I added one more embellishment to tie everything together … and it took the whole card to the next level!! Let me introduce you to the new Gold Hoop Embellishments!
Don’t you agree? The simple Gold Hoop brings together the flowers, the sentiment and helps create a focal point the makes the designer paper shine!
Simple … and easy to make does not mean your card has to be plain. Remember, this just started with a couple of pieces of leftover designer paper.
Thank you for hanging out with me this Sunday. I hope you have an amazing day!! Meet me back here tomorrow … I have more new goodies!
Here is a list of supplies that I used for today’s card. Click on any one of them for details about the product, or to begin shopping at my online store.
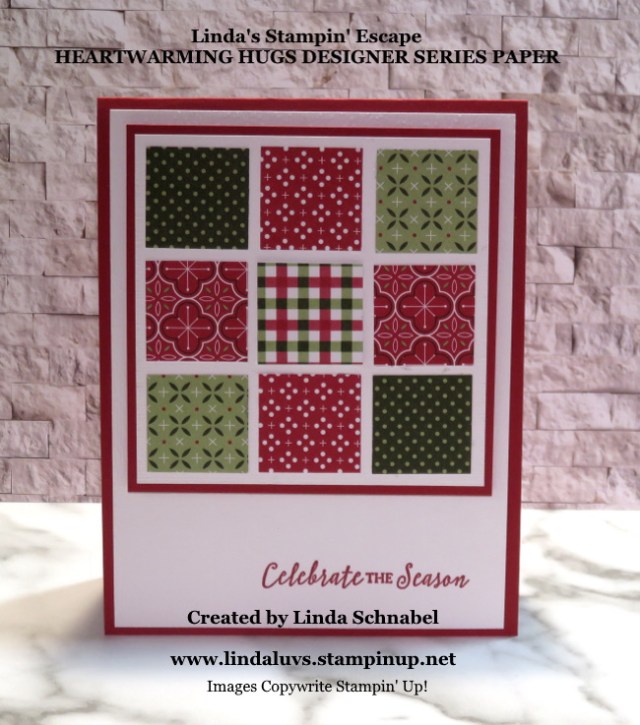
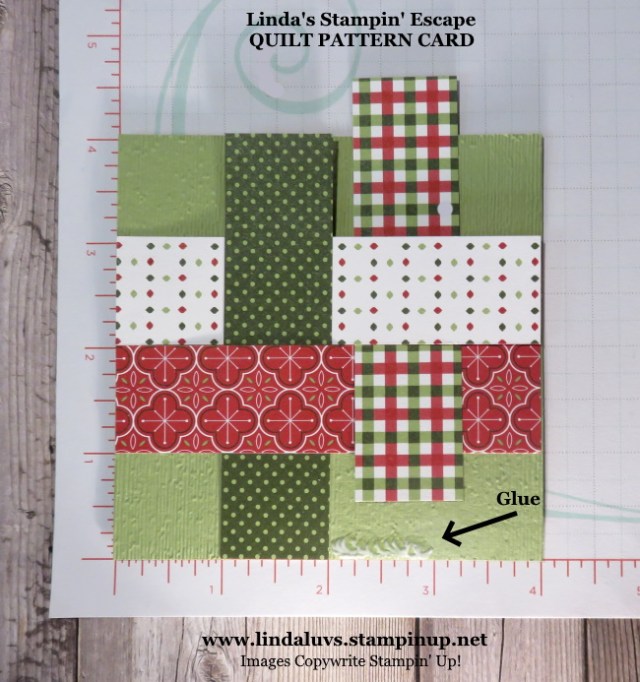
Yesterday I share two card layouts with you that are perfect for using up your scraps of designer paper!! Our first layout uses 9 – 1″ squares ….
The Whisper White piece that holds these 9 designer paper pieces measures 3-1/2″ x 3-1/2″ and the Real Red mat behind it is 3-3/4″ x 3-3/4″.
The card base is Real Red and measures 4-1/4″ x 11″ and the Whisper White measures 4″ x 5-1/4″ … both white pieces were embossed with the Subtles Embossing Folder. Before embossing it, the greeting was stamped from the Itty Bitty Christmas stamp set.
OK … Here’s the fun part. I’m sharing they layouts and I would like to see what you come up with!! You can post them on my Linda’s Stampin’ Escape Facebook page … we’ll have a contest!!
Our second layout …
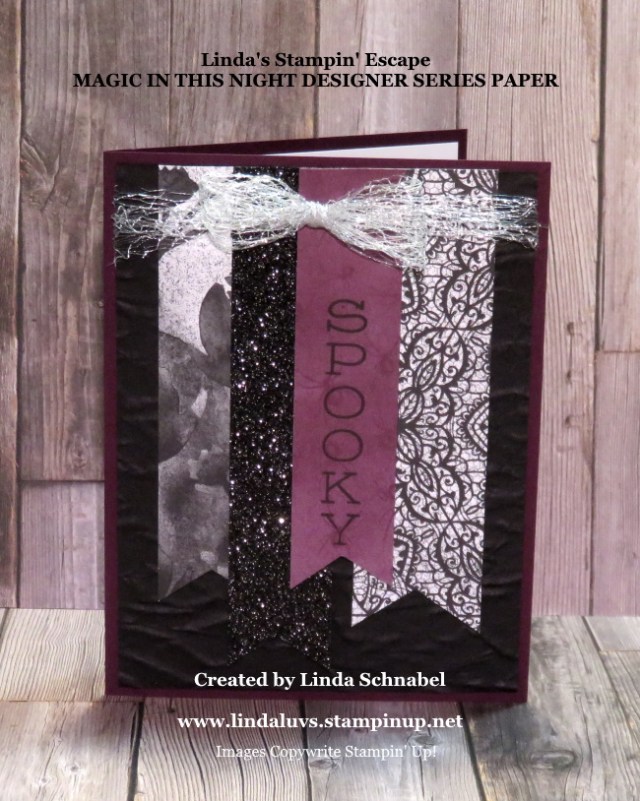
Strips of Designer Paper and a bow is all you need to create with this layout, but I did add a little more! The base of the card is Blackberry Bliss and the Basic Black mat was embossed with the Old World 3-D Embossing Folder.
The strips of designer paper come from the Magic in this Night Designer Series paper and a strip of the Black Glitter Paper. I did stamp my greeting directly onto the Blackberry designer paper … it comes from the Festive Corners stamp set.
I’ll post a notice on my Facebook page and then make sure you share cards. We’ll do a SPIN 2 WIN on all the entries. Let’s have some FUN this Friday!
TODAY’S STAMPIN’ SUPPLY LIST … If you liked the products used in today’s projects, I have links for you below. Just click on the item you would like more information on, or to begin your shopping. It will take you directly to my website. Thank you ♥
How did you enjoy the video for the Pinwheel Technique? Yes, I got a little long at the end but I was excited to share all the fun upcoming events. I also told you I would be sharing a another version on my Pinwheel card!
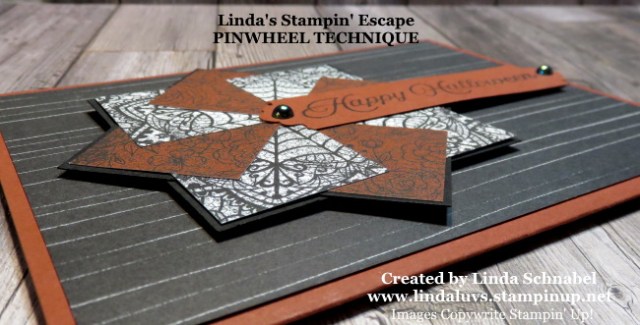
So lets have some fun … One way you can change up your layouts is to change the orientation of the card. Yesterdays card was in the Vertical / Portrait so I changed the orientation to the horizontal / landscape for my Halloween card …
I used the Magic in this Night Designer Series paper for my card. The pinwheel is created in the same way as shown in the video. I love bringing back techniques that many have left far behind and forgot about.
There is something magical about this technique, and the pinwheel alone reminds me of a quilt piece or the Pennsylvania Dutch folk art you see on a barn. That’s why every couple of years I bring it back and introduce it to new stampers.
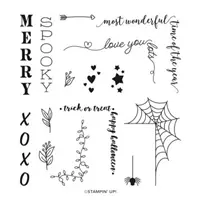
The greeting comes from the stamp set Hallows Night Magic which comes from the same “suite” as our designer paper; Magic in this Night. I created the neat ends were punched from the new … and anchored the ends with the Iridescent Pearls.
I hope you have enjoyed seeing another version of the Pinwheel Technique, and remember … take those layouts and change up the orientation and you’ll have even more ways to play!
Thank you for popping in today … have a great day!
TODAY’S STAMPIN’ SUPPLY LIST … If you liked the products used in today’s projects, I have links for you below. Just click on the item you would like more information on, or to begin your shopping. It will take you directly to my website. Thank you ♥
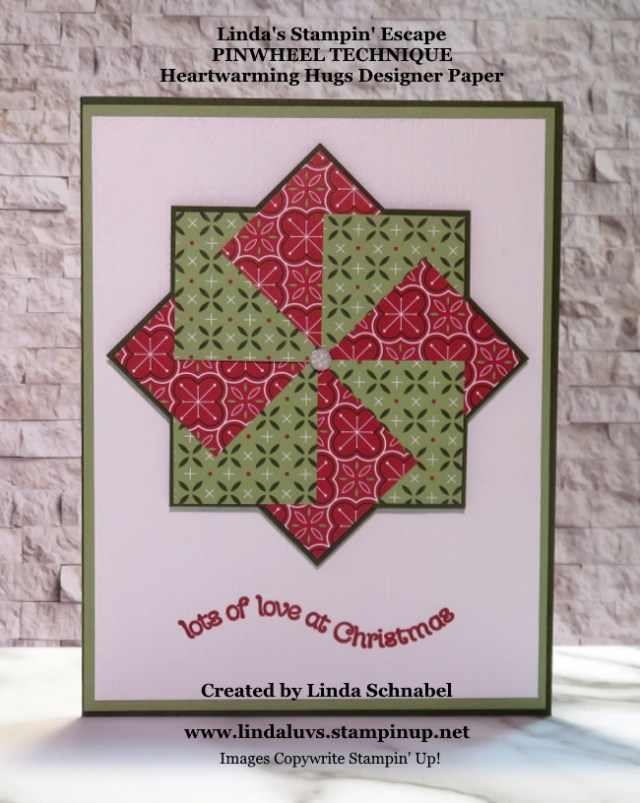
Today I have two cute cards for you created with the Heartwarming Hugs Designer Series paper and the Pinwheel Technique. This technique is a great way to use up your designer and / or paper scraps!
This paper crafting technique is much, much easier than it looks … quite simple in fact, and I’d like to show you today …
How did you enjoy the demonstration and do you think it’s as easy to make as I said it would be? I think this technique is one of those timeless cards that we can keep bringing back!!
This first card is the one I demonstrated and includes the Heartwarming Hugs designer series as a background and the Light Me Home stamp set used for the greeting. I also tipped the Pinwheel to look a little more like a star.
The second card …
This was designed for those stampers who like the “less is more” look … a clean, crisp look. The Pinwheel really stands out against the white background.
The greeting comes from the “Itty Bitty Christmas” stamp set, and with the aid of my Stamparatus … I could stamp it 3 times to get it bold and bright. Once stamped, I embossed it with the Subtle 3-D embossing folder.
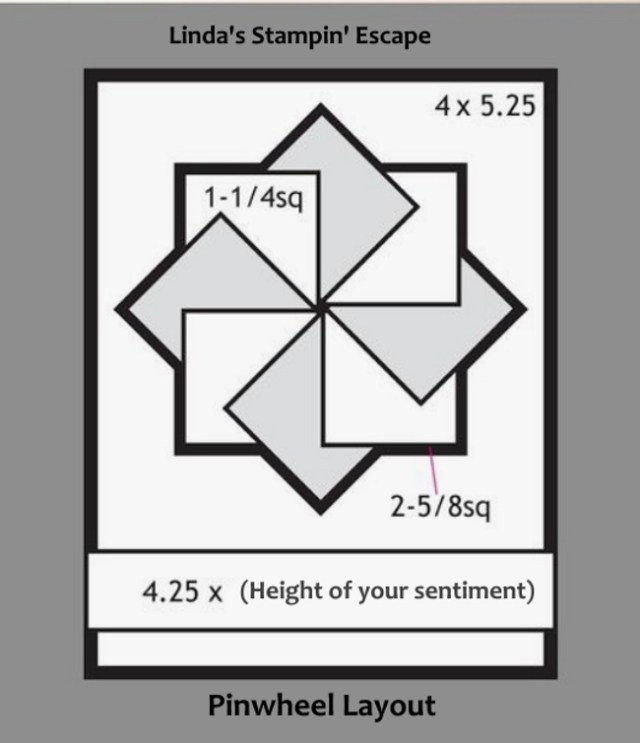
Here is the template with dimension for the Pinwheel card …
I hope the card samples inspire you and the layout helps you picture your next card! As promised in the video, I have a PDF File attached that you can download and print.
Thank you so much for joining me today. Stop back tomorrow as I will be sharing an alternative layout to the Pinwheel card.
Have an amazing day ~
TODAY’S STAMPIN’ SUPPLY LIST … If you liked the products used in today’s projects, I have links for you below. Just click on the item you would like more information on, or to begin your shopping. It will take you directly to my website. Thank you ♥
I hope you enjoyed a wonderful weekend. I’ve been busy having fun planning and creating more cards and stamping events for you! First, I have a masculine card to share … it’s been a while so I thought this one would be a great card to kick off the week.
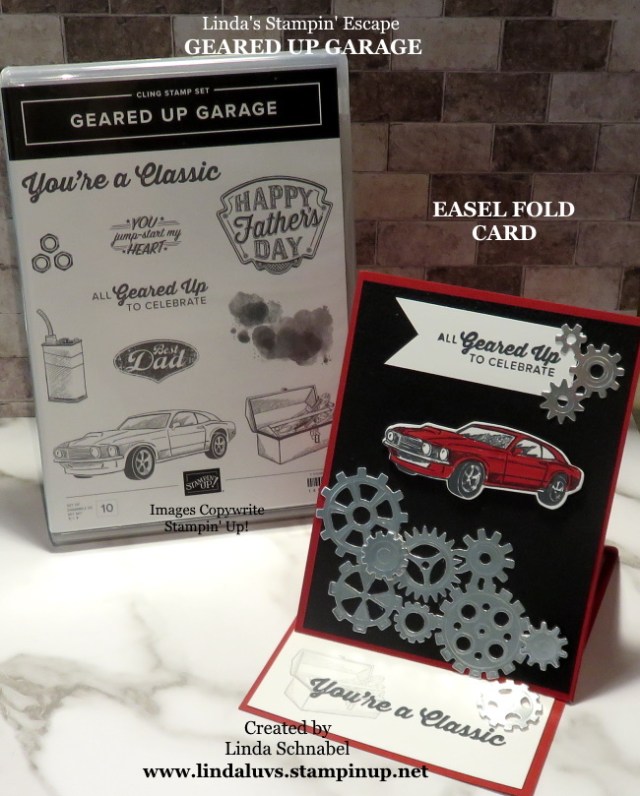
Our masculine card today is designed from the Geared Up Garage stamp set and Garage Gear dies. Not only is it a great masculine card but it’s an “Easel” Fold card. The color pallet is simple: Real Red, Basic Black and Silver… oh yes, and a little Whisper White.
The amazing Garage Gear dies not only cut out the gears but emboss them so they have detail and texture which really jazzes up the card. Everything you need to start working on your cars are included in this duo.
The Easel card fold is simple to create … you don’t even have to measure once you have your 4-1/4″ x 11″ card base cut and scored at 5-1/2″ (half) … now just fold your top piece in half again.
If you prefer: Begin with your card base cut to 4-1/4″ x 11″ and then score at 3-3/4″ and 5-1/2″. Then adhere your card front to the first section (or near the bottom when folded in half) … Only glue that part to the card front. This creates the stand. How you hold the card front up is by using one of the “gears” popped up.
I hope you enjoyed today’s masculine card using the Easel Fold. Now for the some fun upcoming events ….
I am so excited to announce the “Arrange a Wreath” Class. This class was designed for my regular class hosted in my home, or a virtual class. Both classes will include:
Card Kit: All cards will be pre-cut and ready for assembly
PDF Files which include Photos, Step by Step Instructions, and Ingredient List
Access to Video Training! Learn step by step how to create the cards.
Please let me know if you have any questions with the “Arrange the Wreath” class. If interested message me below, by email or give me a call.
Now I have another event planned for you and it’s going to be a blast …
Again … contact me with any questions. I’m here to answer any questions that you may have, or to help you sign up for the class or take advantage of the cost savings by purchasing the “Around the Wreath” bundle. It’s one you’ll be thrilled to use over and over again.
Thanks so much for hanging out with me today. I appreciate the company!
Have a wonderful day ~
TODAY’S STAMPIN’ SUPPLY LIST … If you liked the products used in today’s projects, I have links for you below. Just click on the item you would like more information on, or to begin your shopping. It will take you directly to my website. Thank you♥ PLEASE USE HOSTESS CODE SJVAVZV9When Ordering the Arrange a Wreath Bundle.
Today’s card is fun and easy to create and it’s done with our stunning designer series paper. Yesterday I talked about layouts and patterns, and how we can utilize them to help us create …
Well, I had saved a “Quilt” piece on my Pinterest page and was surprised to see how many times this simple design had been saved. I saved it as inspiration for a card …
Simple … right? But there is something about this simple pattern that catches your eye. Is it the colors or the pattern, not sure but I’ve taken the pattern and used it for today’s card.
I decided I wanted to make a Christmas card with the beautiful Heartwarming Hugs designer series paper ….
My designer paper strips are cut 4″ x 1″ and matted the woven pieces onto a 4″ x 4″ block. Now I know that Quilters have cut these into different sizes but it is “Simply Sunday”! You really have to respect the artistry and work that goes into a quilt.
I used my grid paper (available in catalog) to help me align my designer paper strips. Just added a touch of glue within the 1″ block and adhered my strip. The glue allows you a little more movement.
Once you have woven the pieces together and glued the ends down, you can finish gluing the pieces down. I then attached the entire 4″ x 4″ piece onto a piece of Whisper White measuring 4″ x 5-1/4.
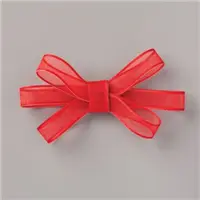
The greeting was stamped with Mossy Meadow ink … it came from the “Light Me Home” stamp set. I finished off my card with a bow created with the Real Red Sheer ribbon … oh my, this ribbon is beautiful, and comes from the Poinsettia Place suite.
With a little help from your grid paper, this sweet Christmas card is easy to make and reflects the old age craft of Quilting. Use any pretty paper and you could create cards for all Occasions!
Thank you for sharing a part of your Sunday with me. Enjoy the rest of your weekend.
TODAY’S STAMPIN’ SUPPLY LIST … If you liked the products used in today’s projects, I have links for you below. Just click on the item you would like more information on, or to begin your shopping. It will take you directly to my website. Thank you ♥
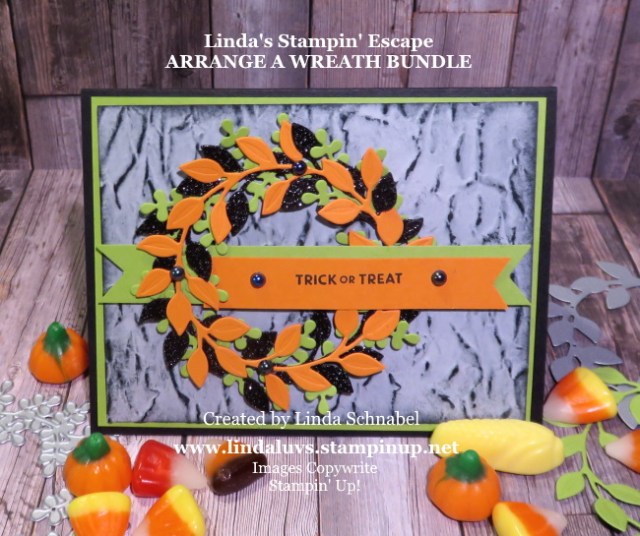
And a happy Saturday to you! I’m sharing a card with your today to illustrate what a difference a background can make! Then I will share the step by step process I used to create the background.
Here is a look back at yesterdays Happy Halloween card highlighting the Arrange a Wreath bundle …
Today we are going to use the very same layout as we did yesterday. Layouts are a great way to help you out when your stamping … it gives you a headstart on how to create your card, a pattern so to speak.
I wouldn’t sew a dress or make a quilt without a pattern so you can see how helpful it can be. You can use the simple layout for any holiday, occasion, and just because it shows a circle doesn’t mean you can’t use a square shape or even a star!
I have just started creating layouts … this one is quite colorful!! lol But it shows the “layering” … our weath, the banner for the greeting, and also shows a textured background.
Let’s see what it looks like in a real card ….
The background was fun and super easy to make …
I began with the Smoky Slate Cardstock
Emboss using the Old World Paper 3-D Embossing Folder
Drag your Momento Black Ink Directly over the embossing
Lightly Sponge some additional Black ink over cardstock to soften the harsh black lines.
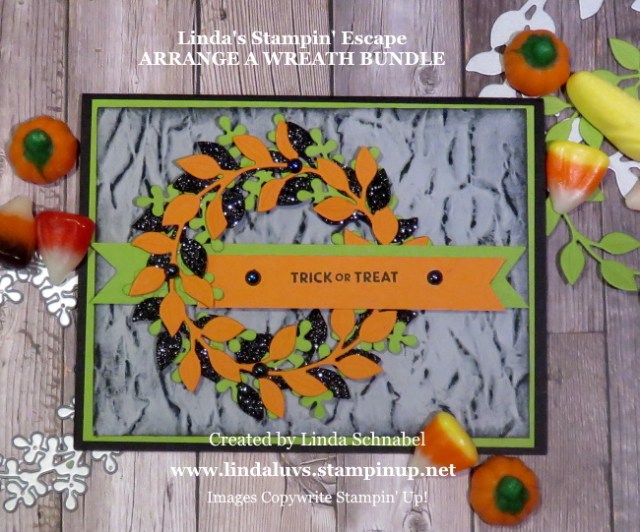
I think this looks so cool and it really defines the dimension on the card! The wreath was made exactly like yesterday except, I layered my greeting this time to add even more color….
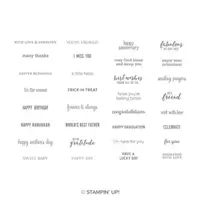
The “Trick or Treat” comes from the Itty Bitty Greetings stamp set in the Annual Catalog. The I added the gorgeous Iridescent Pearls to both the banner and the wreath.
I want you to feel free to copy the card layout “pattern” … just right click on the image and “save” to your files. I’m hoping to make more but right now I’m focusing on “classes” 🙂
Thank you for today’s visit …. enjoy your Saturday. I’ll see you tomorrow for my Simply Sunday post.
TODAY’S STAMPIN’ SUPPLY LIST … If you liked the products used in today’s projects, I have links for you below. Just click on the item you would like more information on, or to begin your shopping. It will take you directly to my website. Thank you ♥
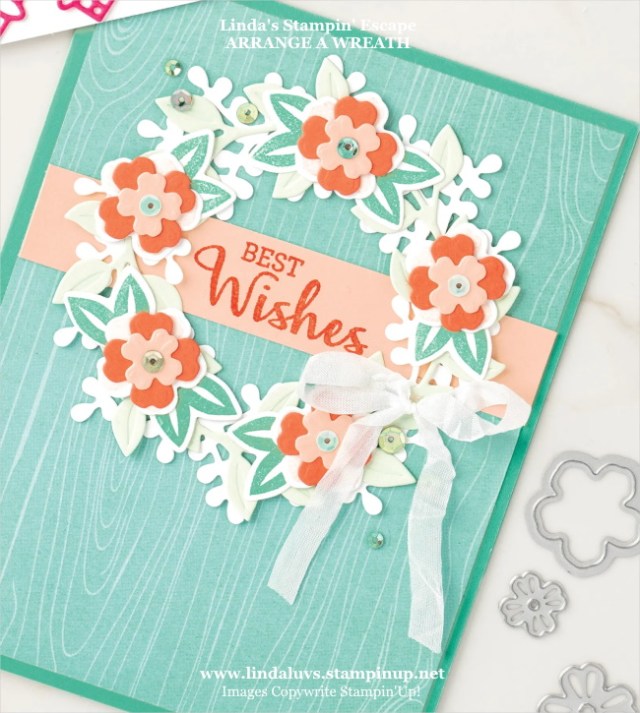
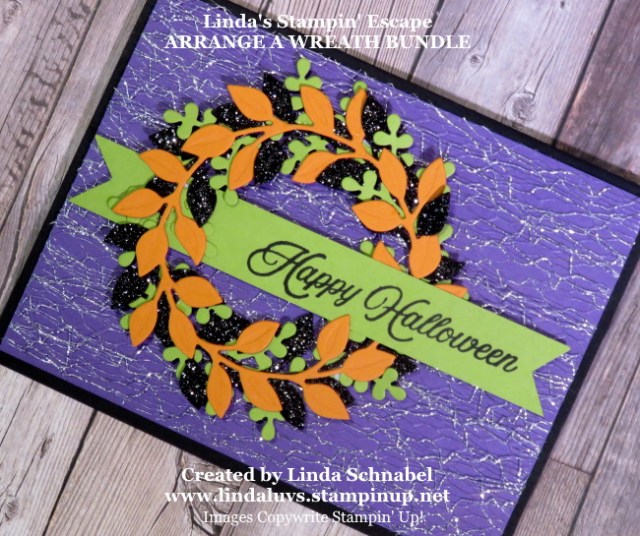
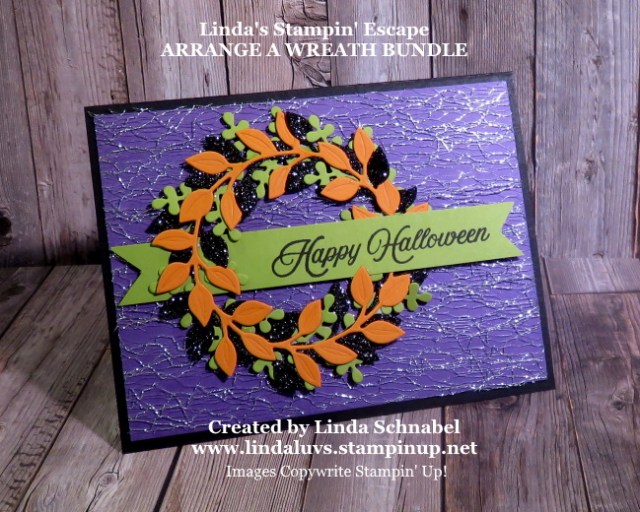
I am thrilled to share my “Arrange a Wreath” card with you today as promised in yesterdays post… I had so much fun playing with this, and I have only begun! I’ll be posting the class details this weekend.
Today’s card uses the wreath dies as the focal point …
The Black Glitter paper and Pumpkin Pie cardstock were cut with the “elm” style leaf and the Granny Apple Green was cut with the “oak” style leaves (this is the best way I can describe them).
The “Happy Halloween” comes from the Hallows Night Magic stamp set and was stamped on Granny Apple Green using my Stamparatus to double stamp it so it appears darker …
The background was fun and super easy to make … I began with the Gorgeous Grape Cardstock and layered the fantastic Metallic Mesh Ribbon over the top … it creates a creepy web looking background.
It adds cool texture and a little sparkle, pairs so sweetly with the Black Glitter paper ….
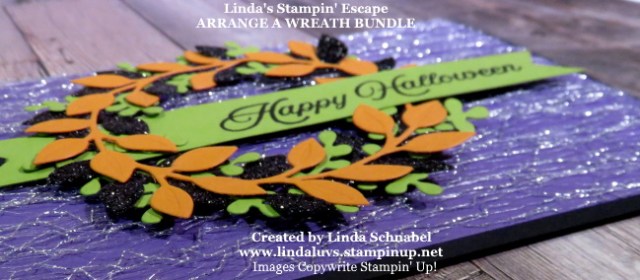
My final step to the card is to attach the wreath. I used the Mini Stampin’ Dimensionals so they would not show through the wreath. It adds another layer of dimension and completes the card …
I love the bright colors from the wreath against the Gorgeous Grape and Metallic Mesh Ribbon, it really does give you that Halloween feel.
I hope you enjoyed today’s card as much as I enjoyed and had fun making it.
Have yourself a great day and enjoy the beginning of your weekend.
Thank you for joining me today ~
TODAY’S STAMPIN’ SUPPLY LIST … If you liked the products used in today’s projects, I have links for you below. Just click on the item you would like more information on, or to begin your shopping. It will take you directly to my website. Thank you ♥
Hope you enjoyed the Watercoloring with Acrylic Block technique yesterday and the cards I shared. With the technique I introduced the Arrange a Wreath bundle …
This bundle is so fun to use and so very versatile! I used the fall leaves for this card but will be sharing so many more with you.
I’ll be sharing several cards in the upcoming weeks but even better, I’ll be hosting a class! I’ll be having an announcement with all the details out by the end of the week.
We’ll be creating “All Occasion” cards in the Arrange a Wreath Class … you’ll work with the new stamps and coordinating dies. More details to come…. just a little enticing to get you ready for the weekend and the announcement!
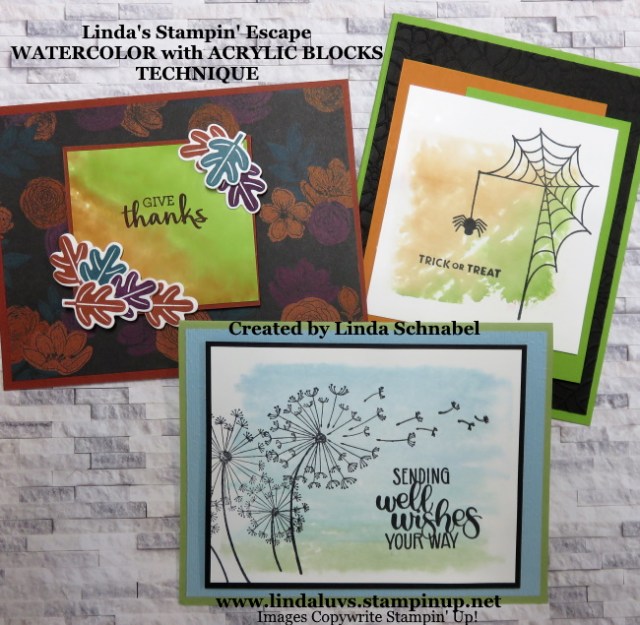
Today I’ll be sharing my Facebook Live presentation of Watercoloring with Acrylic Blocks and the three cards I created using this technique. Last night I shared two of the three cards. Kick back and watch the video, you’ll see how these cards found their beginnings …
The first was my quick -n- cute Halloween card from the Festive Corners stamp set. I used the Stampin’ Write markers to apply the ink to the block and then spritzed it with water.
I’m using the Festive Corners stamp set …. again!!
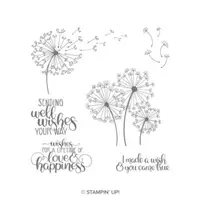
The second card I created using the markers on the Acrylic Blocks features the Dandelion Wishes stamp set and the markers to create a background.
My colors are Balmy Blue, Pool Party, Bermuda Bay and Pear Pizzazz …
I used my Stamparatus for my sentiment, it allows my to ink it several times so it’s nice and dark and becomes the focal point of the card.
The second way to use this “Watercolor” technique on the Acrylic Blocks is to put the ink from the ink pad directly onto the blocks. It is applied thicker so the image will be bolder …
I used the Arrange the Wreath bundle and the Magic in this Night Designer Series paper to create this card. The fall leaves surrounding the greeting creates the perfect focal point for this card. Leaf colors are Pretty Peacock, Blackberry Bliss and Cajun Craze which coordinates with the designer paper.
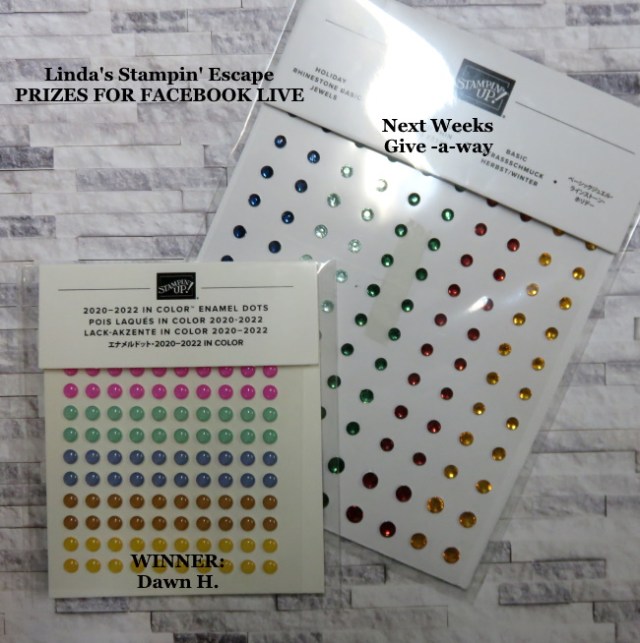
If you watched the video … you know that each week I do a drawing from all the people who watched and commented on the video … I invite you to join us next week Tuesday for another Technique! Here’s the prizes …
I miss meeting with all my stamping friends face to face, so the Facebook Live seems to get me a little closer to my friends!
Here is one last look at the three cards I created with this FUN technique …
The Watercolor technique using Acrylic Blocks can be used for any one, any stamp set … any holiday! Just look, we have a “Get Well”, a “Halloween” and a “Card of Thanks”.
Thank you for joining me today. I’d like to know how you enjoyed today’s cards…
Have a wonderful day!
TODAY’S STAMPIN’ SUPPLY LIST … If you liked the products used in today’s projects, I have links for you below. Just click on the item you would like more information on, or to begin your shopping. It will take you directly to my website. Thank you ♥