Easter Surprise

Hello Stampin’ Friends ~

Today I’m going to share MaryJo Brydens card that she gave to me at the Shreveport OnStage Event. I’ve seen this one before but it is so much cuter in your hand! MaryJo did tell me that she cased this card from one she saw on Pinterest … by hey, we ALL do that!

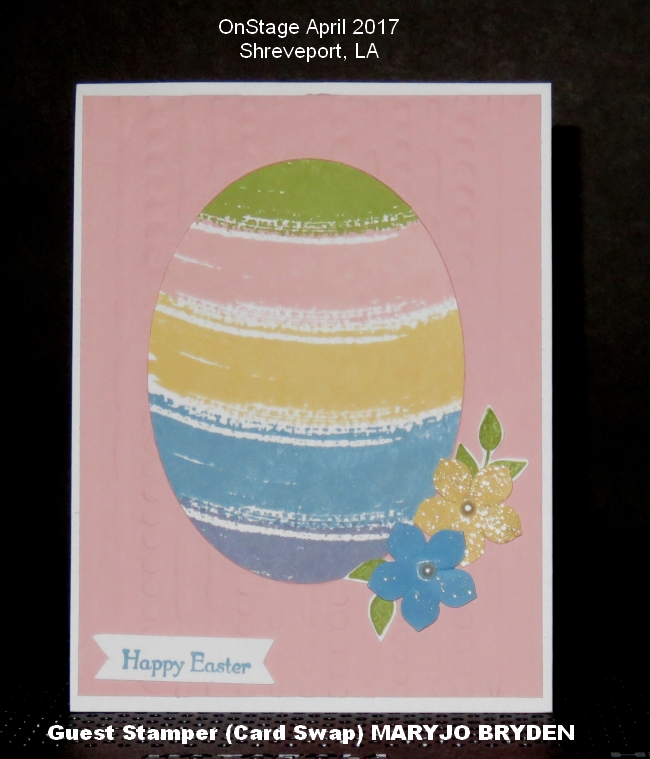
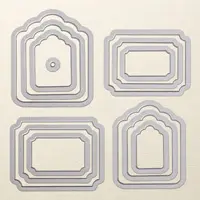
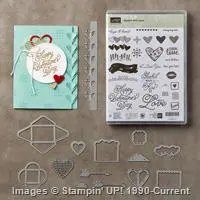
The “SURPRISE” is the cutest egg created by using the Oval Framelits!! Isn’t that a great idea!? Let’s start with the stamp set that MaryJo used to lay down the color for her egg … the “Work of Art” stamp set. Her colors are Pear Pizzazz, Blushing Bride, So Saffron, Marina Mist and I believe Wisteria Wonder.

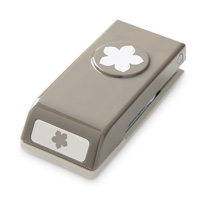
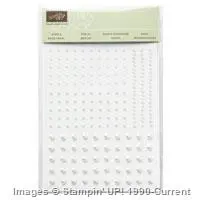
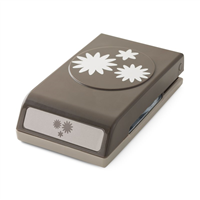
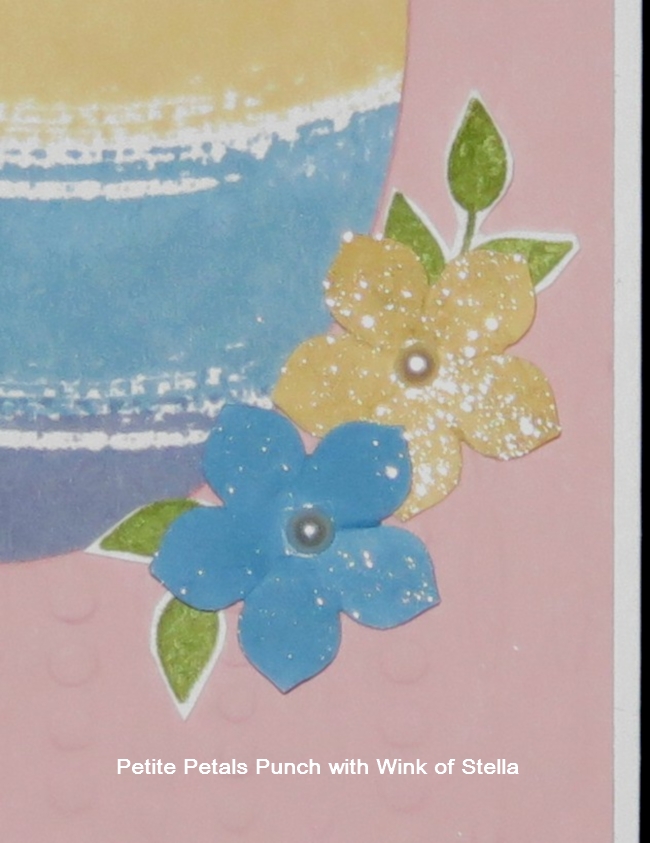
The pretty little flowers were created by using the “Petite Petals” punch and the “Wink of Stella” to give it that pretty sparkle! The pearls add a nice touch.

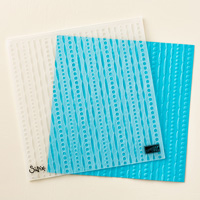
MaryJo added some texture to the pink cardstock by using the “Festive” embossing folder … You can emboss this either before or after you cut out the oval. I prefer embossing with my folders after I cut the image out.

It was so sweet for MaryJo to give me one of her swaps …I love these Stampin’ Up! events! You meet the nicest people. I feel the same way about all the wonderful people I have met who come and stamp with me!

Thank you for sharing a part of your Saturday with me.

I hope you and your family have a wonderful Easter tomorrow. Enjoy the blessings of family, good food and precious friendships.

TODAY’S HIGHLIGHTED STAMPIN’ SUPPLY LIST …


Time for Easter Crafting

Hello Stampin’ Friends ~

While I’m away I’m going to share another fantastic post from our “Get Inspired” blog. This post is from Martha Inchley – 2017 Artisan Design Team member. Her projects are just out of this world cute … You must see!

BY: Martha Inchley / 2017 Artisan Design Team

I’m really excited that Easter is in April this year. Why? Because it means more time for Easter crafting!

I don’t know why, but I absolutely love Easter (even more than Christmas)! Maybe it’s because my birthday is in the spring, or it could be the craftiness of egg painting—or it might even be the challenge of finding every last hidden egg. I don’t know. But either way, it’s fun, colorful, and makes me happy.

Before Valentine’s Day was even over, I had a ton of ideas for the Basket Bunch Photopolymer Bundle (item 144731). The Basket Bunch Stamp Set (item 143186) is absolutely adorable and it just screams “Design a scene with me!” It really does! So I couldn’t resist and decided to make little Easter egg dioramas.

1

Now, before you get too excited, I have to say: I used fake eggs. They don’t break (they actually bounce, if you really want to know), you can cut into them with scissors, and oh yeah, there is no messy center to deal with. So it was the obvious choice. They’re called DIY Easter Eggs and you can find them pretty much anywhere Easter stuff is being sold.

To begin, I drew a “window opening” on my egg, poked a hole with my Paper Piercing Tool (item 126189), and cut it out using my Paper Snips (item 103579). To color my egg shells, I simply used the ink pad of choice and a Sponge Dauber (item 133773) to rub it on the outside. I let them dry overnight.

Now, you’re probably thinking that designing inside an egg is pretty tedious and if I had to guess, I would agree. You see, I didn’t design or assemble my little scenes inside the egg. I designed everything on a cardstock circle, punched using the 1-1/4″ Circle Punch (item 119861). Once my design was complete, I placed the scenery (bottom first) into the egg and turned it.

2

3

I love all the different images in the Basket Bunch Stamp Set and the coordinating Basket Builder Framelits Dies (item 143228)—which make it quick and easy to cut them out. The possibilities are endless with this bundle. You can have a bunny in his carrot garden, a basket of flowers, or even little chickadees hanging out at the farm.

4

5

6

7

To finish off my little egg dioramas I added the Whisper White Mini Pompom Trim (item 141486) to the opening. This trim is absolutely perfect to complete the look.

Thank you for joining me today and Happy Easter crafting!

Martha Inchley
2017 Artisan Design Team

Now do you see why I had to share Martha’s post … These are just the cutest little hand-crafted Easter Eggs I’ve seen. I’d like to thank Martha for sharing these little treasures with us.

Thanks for stopping by today~

Easter Treats for Some Bunny ….

Hello Stampin’ Friends ~

Sometimes things are too good to pass up, like a fine glass of wine or decadent chocolates! Today I have such a blog post to share with you. This is not me … this is from our Stampin’ Up! “Get Inspired Blog” and the talented Paula Dobson from our 2017 Artisan Design Team!

Here is Paula’s post and beautiful creations …

With Easter only a couple of short weeks away, I’ve decided to make a cute Easter project for my daughter using the Basket Bunch Stamp Set (item 143186). I travel two-and-a-half hours once a month to stay with her while I teach classes, so it will be hand-delivered just in time for Easter!

1

One of my passions (besides stamping, of course) is coloring—and this super-cute stamp set is full of line art images to satisfy that need. I stamped a heap of Easter egg images and the cute little bunny rabbit on Shimmery White Cardstock (item 101910) in Basic Black Archival ink (item 140931). Shimmery White Cardstock is perfect for coloring, particularly if you want to watercolor your images without the texture of Watercolor Paper (item 122959), as it can stand up to a fair amount of moisture without pilling.

I used the Watercolor Pencils (item 141709) to color my images and then blended the colors using a Blender Pen (item 102845) to create the shade and fade on each image. I die cut all the images with my Big Shot (item 143263) and Magnetic Platform (item 130658) using the coordinating Basket Builder Framelits Dies (item 143228). P.S. Stampin’ Up! bundled together the stamps and dies as the Basket Bunch Bundle (item 144731), saving you 10% on your purchase of these great products! (I love a bargain!)

2

I added a strip of Designer Series Paper from the Pop of Pink Specialty Designer Series Paper (141648). I love the stark contrast of the black and white zig zag design against all the white. I added color to my background using Sponge Daubers (item 133773), Sahara Sand ink (item 126976), and Soft Sky ink (item 131181). I popped the die cut Easter images up with Stampin’ Dimensionals (item 104430), and the whole piece was finished with the gorgeous Gold 1/8″ Ribbon (item 134583). I love to carry themes to the inside of my cards, as well.

3

No Easter card is complete without chocolate to go with it and I wanted to create my own packaging to tie the whole gift together. I don’t often make 3D items and it can be a bit of a trial for me! I found these cute little chocolate bunnies and wanted to make a simple crate to put them in, using a Window Sheet (item 142314) sleeve to slide over the top so you can still see the bunnies.

4

I designed a template for my crate and used the Stampin’ Trimmer (126889) to cut and score my Sahara Sand Cardstock (item 121043) card. I stamped the card in Sahara Sand ink using the Hardwood Stamp (item 133032) to get a woodgrain effect for the crate.

Then I discovered a wee bit of a problem—my crate template was too big to go through the Big Shot no matter which way I turned it! I fixed that by folding one side of the crate and used that edge as a guide for my square Stitched Shapes Framelits Dies (item 145372) so I didn’t cut too low on the front of the crate.

I used the same design elements from the card to decorate the box sleeve, adding just a few strands of Melon Mambo Thick Baker’s Twine (item 141689) as well. Then I used the Tags & Labels Framelits Dies (item 138282) to die cut the tag topper. Here are a few photos of the process I have described in this post (which I hope you’ll find helpful)!

5

So if YOU are looking for a fun way to create an Easter treat for somebunny sweet—try the Basket Bunch Stamp Set and coordinating accessories! It has everything you need.

Paula Dobson
2017 Artisan Design Team

So … what do you think? Did you not fall in love with this bundle and the cute projects that Paula Dobson created!! I also grateful that she shared her “how to’s” with us. That simple sponging technique that creates the barrier between sky and ground add so much dimension to the the card.

Thank you for checking out my blog today, and I’m happy you got to see Paula’s beautiful projects.

Have a Happy Day!


TODAY’S HIGHLIGHTED PROJECT INGREDIENTS:


Simply Sunday: Easter Gifting Ideas

Hello Stampin’ Friends ~

How are you on this fine day? I’m hoping happy and healthy!

Today I’ve got some fun projects for you and a card! Yesterday I shared the March 2017 Paper Pumpkin with you … today I’m sharing alternative projects. If you haven’t received this kit, or are not a Paper Pumpkin subscriber yet, you can sign up at any time, and when you do, you can purchase “past” kits!

I will tell you this, if you purchase the 3 month subscription by March 31st, you will save $4 and receive a FREE Sale-a-bration item!!  Make sure you activate your subscription before April 10th because we’re all excited that Sara Douglass – Stampin’ Up!s CEO has created the April 2017 kit!!

Ok … let’s get on with the goodies! Here I wanted to show you “my” little bunny as followed by kit instructions. These are so easy … so fun and too cute! As soon as they add the refill kit – I’m ordering more so my grandkids and I can make these up!

Here is a photo of all my projects put together! Did you know that the little 3 x 3 note cards fit nicely into the little bag … How cute is that!! A little gift bag with the little bunny cards.  You could make these into “Thank You” cards and give to the host of your Easter dinner. What a cute little gift.

Next, I know many of my customer love their “full size” cards … so here is my alternative to the kit, a full sized card.  The cute stamps used to create that bag … come in this kit! I love the little eggs and the “I’m glad your my friend can be used all year long!

I used the inside bunny ears to create a flower! These pieces are die-cut and already have the adhesive on them so they are super simple to create with.

The flower is adhered to the front of the gift card … the back half is tucked away so I can use that on another card. This section is popped up from the card front.  I used a “splatter” stamp to add a little color to the vanilla and then added a banner greeting. I cut the little bunny tail in half and glued it to the center of my flower.

I must say, this was a very fun kit to play with! If you want to try out Paper Pumpkin, now is a good time.  Just click on the links below for more information or to begin your purchase, or you can contact me and I will help you out.

Thank you so much for spending a part of your Sunday with me. 

STOP BACK TOMORROW TO SEE MY MARCH MADNESS SPECIAL!!

Have a wonderful day ~


Click on any of the items below to view / more information or to begin your purchase. Don’t forget to select your FREE Sale-a-bration items.

Price: $59.00

NOW $55.00

Plus 1 FREE

Sale-a-bration item

Price: $114.00

Two (2) FREE

Sale-a-bration items

Price: $215.00

Four (4) FREE

Sale-a-bration Items

and

Hostess Benefits!

BUNNY BUDDIES!

Hello Stampin’ Friends ~

Oh my gosh … I got home from work yesterday and found the best thing in my mail box! No bills … just my Paper Pumpkin.  It is so stinkin’ cute!

Check it out, watch the video ~

Our Paper Pumpkin Bunny Buddies are bursting onto the scene just in time for spring! Every March kit comes with nine bunny cards and bags. Watch their personalities emerge as you customize each one with a face, ears, accessories, and a pompom cottontail. They are simply “ear”-resistible!

Stop back tomorrow and check out my alternative to the kits projects … not sure how I’m going to top these cute bunny bags!

Till then … Have a great day!


Throwback Thursday: Happy Easter

Hello Stampin’ Friends ~

Today I’m bringing back a really cute Easter card and a scrapbook page! With the products we currently have in our catalog today, you could easily recreate either of these two projects.

My “technique” that I was teaching when these were created was “Dying your Glimmer Paper”.  I taught my classes how to use your ink refills and either a sponge dauber or the Stampin’ Spritzers to color the Glimmer paper … NOW you don’t have too! With the beautiful colors of Glimmer Paper Stampin’ Up! has brought out for Sale-a-bration all you have to do is punch! No fuss required!

The first is my bunny card …

Both the bunny and the eggs were created with a combination of circle and oval punches … now, I think I would use the Layering Circle and Oval Framelits. You will have a greater choice of sizes this way. The little bunny tail was made with a flower punch.

I used the same format on my scrapbook page as I did on my card.  That is one thing that I have always taught in my classes.  Use what inspires you to create what ever you need.  How do you like the little chick I tucked inside the cracked egg? Again, made with the oval 🙂

OK, I have one more card that I want to share with you that I created using the “Dying your Glimmer Paper” technique …

You could easily recreate this card using the Sale-a-bration Glimmer paper. And you know what … the “Petite Petals” punch that I used to make this card is still in the catalog!!  You know what else would be cute … the Elegant Butterfly punch.

Just because something is old (Created 2014) … doesn’t mean it can’t be new again!

Thank you for stepping back in time with me today, I hope this inspires you to get creative and have some fun!

Have yourself a wonderful day ~


Below is a list of products I used and suggested products to create that projects shown.  You can purchase any of these items by clicking on the item.  Remember that you will receive a FREE Sale-a-bration item with a qualifying purchase of $50 or more.

Parade of Pumpkins …

Hello Stampin’ Friends ~

Yesterday I shared a special announcement from Stampin’ Up! about the April Paper Pumpkin kit that was designed by our CEO Sarah Douglas! For those of you who are not familiar with Paper Pumpkin … it is a monthly Stampin’ Kit that comes directly to your door!

This kit includes everything you need to make the projects enclosed … you may need a little adhesive and a scissors but that’s it.  Your first kit comes with a block for the stamps, of course the stamps, ink spots (small ink pad) and all the card bases, accessories and more! 

So today, I’d like to share some of my Paper Pumpkin pics and alternative projects so you can see how cute and fun these kits are … It’s like having a birthday every month!!


So much fun in a box and delivered right to your door … a stampin’ kit ready to go.  It’s a great way to get together with your friends.

Let me know if you have any questions or if your ready … Click on the link below and purchase a 3 month subscription, just to try it out.  Plus … you’ll get a FREE Sale-a-bration item as well.

CLICK HERE TO VIEW SALE-A-BRATION CATALOG

Thanks for joining me today, hope your day is a good one!


Price: $59.00

$55.00 plus

One (1) FREE

Sale-a-bration item

Price: $114.00

Two (2) FREE

Sale-a-bration items

Price: $215.00

Four (4) FREE

Sale-a-bration items

Simply Sunday: BEST. GUY. EVER.

Hello Stampin’ Friends ~

Sorry for the late post, computer troubles again … but my troubles actually worked out in the long run, because I stayed busy in the stampin’ studio creating more cards!

Today I have 3 cards to share with you!! All with the same layout, all with the same stamp set, and all with the same designer series paper pack! By the title of today’s blog: BEST. GUY. EVER. – you can tell that a “man card” was on my mind.

With Valentine’s Day only 8 days away … you’ve seen several cards already but not one specific for males. In the theme of my Simply Sunday’s, nothing creates a quick card like designer paper, and our “Serene Scenery” Designer Paper has awesome patterns for guys! I chose the antiqued wood look …

000_4050

The Crumb Cake base matches perfectly with this paper! And yes, it is one 4 x 5-1/4 sheet … all the texture and depth is actually in the beautiful photography of that paper! Tomorrow I’ll share another card I created with this paper.

Next I chose the stamp set … the wonderful “Suite Sentiments”.  I love this greeting set, it has a little something for every occasion. Today you’ll see it used 3 times. I wanted the greeting to be the focal point of the card so I used the “Stitched Shapes Framelits”. Once cut, I mounted it with the Stampin’ Dimensionals to give it some height. With the help from the Confetti Hearts border punch, I punched out some hearts from the Pool Party paper and attached them to my greeting with glue dots. Nice & Simple.

This card is a simply sweet card to give to one of your friends. The designer paper pattern (Again, “Serene Scenery” Designer Paper) reminds me of a warm summer day, full of dandelions just waiting to make a wish upon. The greeting is from “Suite Sentiments” and again was die cut using the “Stitched Shapes Framelits”. 

000_4053

My color pallet for this card is Old Olive and Early Espresso. I added the Basic Pearls to draw your eye around the entire card and create balance. Besides, they are pretty and your friend will love them!

Can you see the theme here? The same layout, with the same stamp set:”Suite Sentiments”, all with the same designer series paper pack:”Serene Scenery” and die cut with the “Stitched Shapes Framelits”.

The final card I created uses the Cloudy Sky designer paper, it’s realism reminded me of the Ascension of Jesus so I used it to create an Easter card. Simply and pretty. I used the smallest flower from the “Blossom Punch” to make my flowers, and since I already had the pearls out from the previous card, I used them again in the center of my blooms.

000_4055

I know some of you are already gettin’ in the mood for the Superbowl, but I appreciate taking a minute out of your day to check out my post.  My team is out so if I watch it’s only for the commercials or takin’ a peek at the 1/2 time show.  Best bet is you’ll find me in my stampin’ studio 🙂

May the rest of your day be wonderful and your tomorrow even better.

blog-closing-small        starry-purple-background-vector

TODAY’S STAMPIN’ SUPPLY LIST: A purchase of $50 qualifies you for a FREE Sale-a-bration item and a Loyalty (Virtual) Rewards point from me!


Sealed with Love

Hello Stampin’ Friends ~

Today I want to share with you a card I created using the “Sending Love Suite”. Valentine’s Day is such a sweet holiday … whether is to your soul mate or a grandchild with the bold designs and traditional colors in this product suite it’s easy to send your love.

For today’s card I’m using the “Sealed with Love” bundle which includes the Sealed with Love stamp set, Love Notes Framelits Dies, and the awesome stamp set … Suite Sentiments. You’ve seen this stamp set before on my Friend Card.

000_3943

I began by using the cool edge die that created this beautiful line of hearts.  It’s really easy, just line it up to the edge of the card and run it through the BigShot. I pulled up the inside of the hearts for a dramatic look and added texture.

I chose the designer paper with the pattern I thought looked a bit like stamps because I wanted to use the greeting from the Suite Sentiments stamp set … “Love is in the Air Mail”.  I just thought that was so cute!

The greeting was cut out and matted with the squares from the Stitched Framelit Dies … Good news, they will be available soon … I will keep you posted.

000_3945

If you look closely, you will see the “lips” on the envelope … I didn’t get a shot of the inside but it is stamped with the verse “Sealed with a Kiss” and the lips … too cute! So many great greetings / verses in the Sealed with Love stamp set.

Hope you enjoyed, it was a big hit in my January Stamp Clubs. It was easy to create yet very dramatic.

Thanks for taking time out of your day to visit with me… hope yours is a good one.

Take care ~

blog-closing-small  jan2017-hostess-code


TODAY’S STAMPIN’ SUPPLY LIST …


Creative Fun with Egg Cartons!

Hello Stampin’ Friends ~

Have you seen the cute Mini Egg Cartons in the Occasions catalog?  They are on page 18 and tucked in the upper right hand corner. If you like crafting with your kids / grandchildren you should give these a try.

These fun containers are perfectly sized to hold small goodies. They come in a Natural Cream color and contain 8 cartons – each with 4 sections.  When closed they measure 4″ x 4″ x 2-3/4″ … perfect for little hands and little treats!

occ17_p018a

Here they are teamed up with the “Basket Bunch Bundle” …. Basket Bunch Photopolymer stamp set and the Basket Builders Framelit Dies. This is a fun bundle if your ready for spring or decorating for Easter.

Want to know another fun technique you can use on your Mini Egg Cartons?  Why you can color them by using the Stampin’ Spritzers found on page 180 of our annual catalog and any one of our ink refills.  Just think of all the colors you can make them!!

sab17_p17a

The Mini Egg Carton featured here is not only colored but is teamed up the “Hey, Chick” stamp set from our Sale-a-Bration catalog.  You can get this awesome stamp set FREE with a purchase of $50. You could start with the “Basket Bunch Bundle” … add in a pack of the Mini Egg Cartons, your spritzers and ink refills “any color” and it’s yours!

Let me know if you have any questions on what I’ve shared with you today, what Sale-a-bration is, or anything that comes to mind.

Thanks for stopping by ~

Have a wonderful day!

blog-closing-small  jan2017-hostess-code

TODAY’S STAMPIN’ SUPPLY LIST …

Happy Thanksgiving

Hello Stampin’ Friends ~

I would like to wish you and your family a safe and wonderful Thanksgiving Holiday.

happy-thanksgiving

I would like to take this time to THANK YOU for your loyal readership, sharing your thoughts & kind words, and for you support of my business.

Have a wonderful day ~

Guest Stampers: Trio of Christmas Stockings

Hello Stampin’ Friends ~

Today I want to share with you some more of our Swap Cards from the Holiday Retreat. Our swaps are done by our guests, and when they swap they are entered into the card contest and a chance to win a Gift Certificate from me. It’s a lot of fun, and the best part about swapping … you get to go home with that many more cards!!

All three of the cards I’m sharing with you today were made with the “Hang Your Stockings” Stamp set and Christmas Stockings Thinlits Dies.  This is one you can bundle and Save 10% on.

Let’s begin with Linda S.  This was her first retreat but you would never have guessed it by her swap. 

000_3833

She used the Christmas Stocking Thinlits die to create both the stocking and the greeting. These are highlighted by having the beautiful designer paper behind it. You’ll find several great patterns in the “Warmth & Cheer” Designer Series Paper Stack.

Our next guest stamper is Marge G.  Marge has attended all of our Holiday Retreats only missing the Spring because she was a little snowbird.

000_3830

Marge started her card with the “This Christmas” Designer paper that can be found in the Annual Catalog (our big one) not the Holiday catty.  Marge also used the thinlits to create her card, and then she added a little sponging to really make it pop!  Don’t you love how she used the snowflake cut out from the stocking on her card … no wasted space here. 

The last of the stocking cards was created by Abby H.   This was Abby’s first retreat and she was also our youngest guest (her Mom & Sister have been here many times before).  We have several Mother / Daughter attendee’s … it is a great getaway to have fun together and bond.

000_3828

Abby not only used the thinlits, but she stamped her stockings! Now we get to see how cute the coordinating stamp set is, and what a nice job Abby did stamping and creating her card.  They are all lined up with the Brick background and ready for Santa!

For me … Everyone is a winner because they get to go home with extra cards and each card has a different style than your own.  Oh yes, and I get to keep a set … THANK YOU LADIES!!

000_3826

I hope you have enjoyed the trio of stocking cards today, and that it inspires you to grab that ink, pick up your stamps and begin having some “you” time and releasing your creativity!

Thanks for stopping by …

Have a great day!

blog-closing-small

HIGHLIGHTED HOLIDAY STAMPIN’ SUPPLIES ….

000_3826

Star of Light Trio of Cards …

Hello Stampin’ Friends ~

First let me say “Happy Veterans Day” … a big THANK YOU to all our current and past military men and women who put their lives on the line, and those who sacrificed their lives so that we can enjoy the freedoms here at home. I U.

Today I want to share 3 beautiful cards that we made at our Annual Holiday Stamping Retreat featuring one of my favorite stamp sets from the Holiday Catalog … the Star of Light stamp set and Thinlits.

At Retreat and all my stamping events …. it is my mission to show the versatility of the stamp sets or bundles. Here we went from a simple card to beautiful elegance …

star-of-light-trio

Let’s begin with the center card, created using Elegant Eggplant and Wisteria Wonder. Simple but pretty and it highlights the stamps, ink and greetings with just a touch of bling to draw your eye to the focal point of the card, the star.

The card on the left uses Pool Party and Island Indigo a fun color combination turned elegant when we sponged the background and used the Silver Foil paper for our star, topped with a beautiful die cut. (This card was cased from a fellow demonstrator) I wish the photo would have reflected the silver so you could see how stunning it really is. We also used the new Metallic Enamel Shapes on the card which works so well with the Silver Foil paper … this was one of our “All attendee Gifts”(also known as Pillow Gifts as they get a package of goodies on their beds as a Thank You for joining us)

Our last card on the right seems to be everybody’s favorite. It was really quite simple to make, but so elegant when done in Very Vanilla and Basic Black.  The Enamel Shapes were also used on this card – the package comes with both Silver and Gold.  The designer paper we used comes from the Annual Catalog called “This Christmas”. It’s a specialty designer paper because it is a little thinner than our normal designer paper… but you get more!!

star-of-light-trio

I hope you enjoyed today’s card share, I would love it if you would please “LIKE” this post at the bottom if you did, and then tell me which one is your favorite!! The key ingredients to make these cards are listed below.

Thank you for spending a part of your Friday with me …

I hope you have a marvelous day!

blog-closing-small      november-2016-hostess-code


Today’s Stampin’ Supply List …


Throwback Thursday: Bring On the Holiday’s

Hello Stampin’ Friends ~

Today I’d like to share a few cards from the last two years that are still pretty relevant … meaning the core ingredients are still available in the catalog. Just sit back, relax and enjoy …

The wreath was always a favorite of mine and who can resist the red glimmer paper for Christmas, so pretty!

000_1652-b

My next card is the simplest of cards yet so pretty. Actually you could use this layout for any occasion, but here we focus on Christmas. We have so many pretty holiday papers to choose from this year, you could really go all out this year.

  000_1545

I’ve got more of the beautiful glimmer paper for you … this time in silver, and it coordinates so beautifully with the Delicate Ornaments stamp set and framelits. My tops were made with the Silver Foil Paper and then I added a touch more sparkle with the Rhinestones.

000_2830

Here is a little gift card holder I created many years ago, but it’s still one of the most popular and requested card when someone purchases a gift certificate from me.

santagiftcertcard

We made these little gift card holders at our 2015 Holiday Stampin’ Retreat. The a pretty quick to make and a lot of fun to embellish. If you would like the instructions for this “Gift Card Holder” just place an order of $35 or more using the Hostess Code: JPBU2RN4 

Make sure to add your e-mail to your order and I will send it directly to you.  Remember, any orders over $50 will get you a virtual rewards point. (All order amounts are before shipping & handling)

 000_2841

I would probably be using the Candy Cane Lane product suite, in fact almost any of the holiday stamp sets this year would work great.

Hope you enjoyed the stroll down memory lane … If you have any questions about the products shown today, just leave a message in the comment box, or shoot me an e-mail at lindaluvs2stamp@aol.com

Thanks so much for joining me,

Hope you have a wonderful day~

blog-closing-small           november-2016-hostess-code


STAMPIN’ SUPPLY LIST …


RMHC Day of Change …

Hello Stampin’ Friends ~

Today I have another card parade for you … featuring the “MY HERO” stamp set to honor the Ronald McDonald House Day of Change ….

14720546_10155363940753840_4557430107992624772_n

October 15th is an extraordinary day. It is the day when the entire RMHC global system commemorates the opening of the very first Ronald McDonald House. To celebrate, we rally around our Donation Boxes-our largest fundraiser- to ensure that we continue to keep families close to the care and resources they need to thrive.

Your small change can change lives for Ronald McDonald House Charities … Donate to a RMHC donation box at your local participating McDonald’s.

Today I just wanted to post a recap of all the cards that I created so far, using the NEW My Hero Stamp Set… Stampin’ Up!s exclusive stamp set created for the Ronald McDonald House Charities.  

I will share all 7 with you today …

000_3508

Ronald McDonald House Charities®

Stampin’ Up! partnered with Ronald McDonald House Charities (RMHC). Each year, we design an exclusive stamp set to promote the partnership with RMHC, and donate a portion of the proceeds from the each sale of that set. To date, more than $1,000,000 has been donated from RMHC stamp set sales.

000_3527

Stampin’ Up!’s demonstrators are also encouraged to volunteer their time teaching local Ronald McDonald House guests the creative art of rubber stamping through the Making a Difference program. Demonstrators also create cards at training events which are donated to Ronald McDonald Houses. Those staying at the Houses then use the cards to keep in touch with loved ones while they are away from home.

000_3517

How you can help!

You can help us make a difference. Purchase this year’s set, My Hero, and we’ll donate $3 to Ronald McDonald House Charities for each set purchased.

000_3529

000_3515000_3519000_3521

THE RONALD McDONALD HOUSE

Our homes are filled with more than help, they’re filled with hope

Many families travel far from home and spend several weeks or months to get treatment for their seriously ill or injured children – a long time to be away or to divide a family. And, for children facing a serious medical crisis, nothing seems scarier than not having mom and dad close by for love and support. A Ronald McDonald House is that “home-away-from-home” for families so they can stay close by their hospitalized child at little or no cost.

Our Houses are built on the simple idea that nothing else should matter when a family is focused on the health of

their child – not where they can afford to stay, where they will get their next meal or where they will lay their head at night to rest. We believe that when a child is hospitalized the love and support of family is as powerful as the strongest medicine prescribed.

You can help us make a difference. Purchase this year’s set, My Hero, and we’ll donate $3 to Ronald McDonald House Charities for each set purchased.

I appreciate you staying with me to learn more about the Ronald McDonald House Charities. It’s a foundation that touches my heart, as our children are our future. I’m proud that Stampin’ Up! is a RMHC partner.

Have a safe and wonderful day ~

blog-closing-small         october-2016-hostess-code

You can choose from either a wood mount or clear mount stamp set …