Simply Sunday: Softly Falling Snow

Hello Stampin’ Friends ~

Welcome to my Simpy Sunday series … this is one of my favorite days to post. I love being able to show you how beautiful a simple, easy to make card can be.

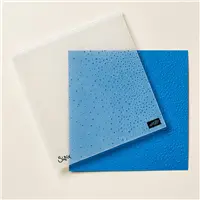
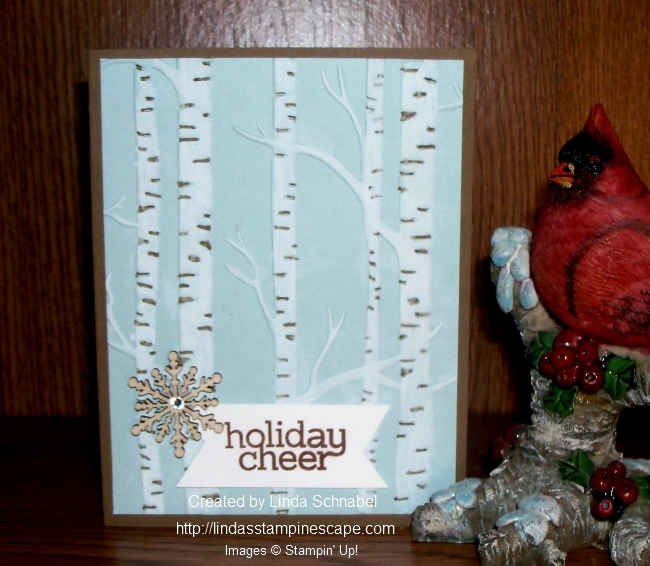
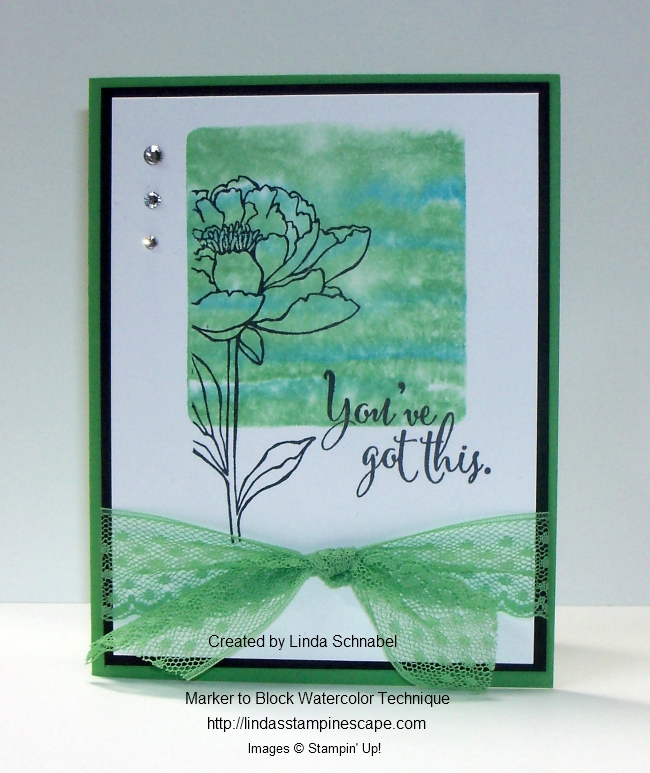
Today our card begins with the new “Thick” Whisper White cardstock… it’s just a bit sturdier than our regular Whisper White but still easy to use.

000_2776

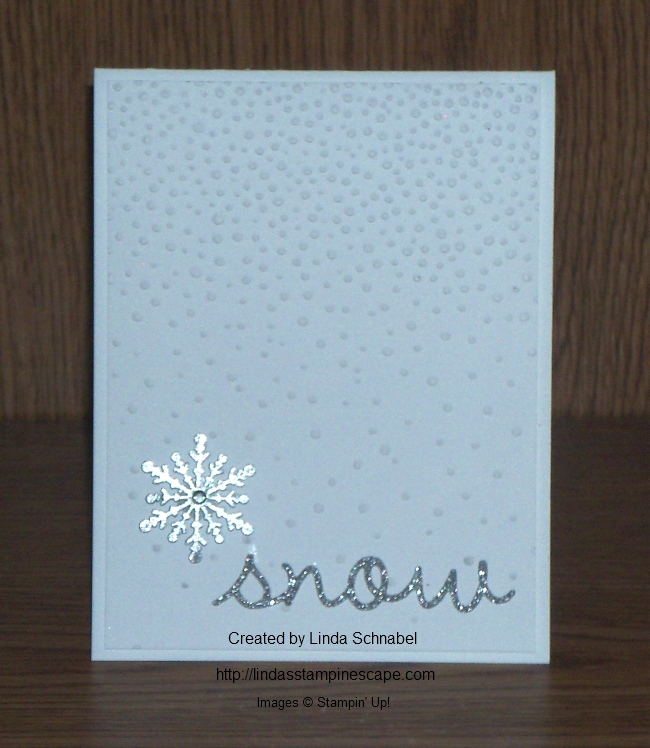
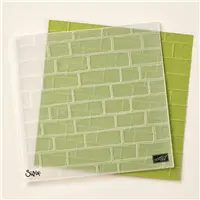
My card front is a embossed with the “Softly Falling” textured embossing folder that can be found on page 24 of the Holiday Catalog. I then popped it up with dimensionals … I like to do that when I make a card with white on white.

000_2771

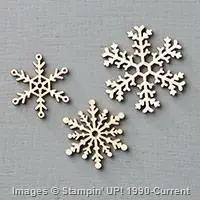
The pretty little snowflake is one of our “Snowflake Elements” embossed with Silver Embossing Powder. On Friday I share that this technique is the one our Technique clubs did this month … so much fun. It was topped off with a Rhinestone.

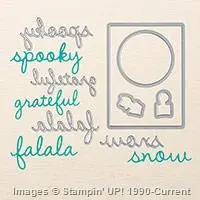
The title or greeting “snow” comes from the framelit set “Seasonal Frame” and was cut from the beautiful Silver Glimmer paper.

000_2776

I hope you had a nice weekend, and I thank you for sharing part of it with me.

Have a great day ~

blog-closing-small

TODAY’S STAMPIN’ SUPPLY LIST …


Falling for You …

Hello Stampin’ Friends ~

OK – there are way too many leaves off the tree’s already … Where did autumn go? This is my favorite time of year and I feel like I was so busy that I missed it!

So I’m hanging on a little longer by creating a card that I’ll keep on my desk till the snow falls! This was a fun card to make, I used the “Baby Wipe” technique to get all this color …

000_2746

I knew I wanted to use the “Sheltering Tree” stamp set, and the “Baby Wipe” technique is the easiest and quickest way to create the explosion of color. I laid out a stack of 4 – 5 baby wipes and began dropping ink from the refill bottles.

I used Old Olive, Cajun Craze, Crushed Curry, Pumpkin Pie and Real Red re-inkers, then pressed the leaves into the inked up baby wipe and stamped it onto the tree which was already stamped in Chocolate Chip.

I added the leaves to create my ground cover and then added a greeting which is included in the stamp set. To jazz it up a bit, I punched the corners with our new Curvy Corner Trio Punch … I love the fun design.

000_2745

A simple card yes, but too pretty to resist.

Thank you for joining me today,

I hope you have a good day.

blog-closing-small

TODAY’S STAMPIN’ SUPPLY LIST …

000_2746


Beware of Black Cats!

Hello Stampin’ Friends ~

Today I have another cute Halloween card to share and just in case you missed them yesterday … the Weekly Deals will also be featured.

My card today highlights the fabulous bundle; Happy Scenes stamp set & Hearth & Home Thinlits Dies, and it that isn’t fun enough … I’ve lured the black cat over from the Festive Fireside Framelits too!

000_2669

I wanted my black cat to be peering out the window on Halloween night, and what would one expect to see but a creepy little spider and a full moon! The full moon was created with the 1-1/4″ circle punch and the masking technique. I sponged on So Saffron, Calypso Coral and Perfect Plum to create my All Hallows Eve effect.

I wanted a nice sturdy house to protect me so I used the “Brick” embossing folder. To create the weathered look of the brick, I simply dragged my VersaMark™ pad across it. So simple but it really creates an awesome effect.

000_2670

 To complete my card I finished off the inside and wished you all a Happy Halloween! And Many More … is the stamp set my greeting comes from.

Thank you for stopping by my Halloween home and meeting my little black cat!

blog-closing-small

Here are the weekly deals and below I’ll have the ingredients for today’s card …

Supply List

Built for Free Using: My Stampin Blog

 TODAY’S STAMPIN’ SUPPLY LIST …

If you liked the card you saw today and would like to purchase the supplies, just click on any of the products to begin shopping.  Thank you!


Simply Thankful …

Hello Stampin’ Friends ~

Hard to believe we are mid-week already! But that means we are closer to the weekend. It is so beautiful this time of year … the leaves are just starting to turn. I hope nature takes it’s time this fall so we can all enjoy the splendor.

Today’s card is a refection of this time of year … the beautiful fall colors, and a time to give thanks for all we have in our lives.

000_2613

I did the “Reverse Masking” technique for this card. I cut out my leaf image using the “Leaflets Framelits” Dies to create my mask and placed it onto my Very Vanilla cardstock.

I then sponged Crushed Curry, Pumpkin Pie and Cajun Craze into the leaf image. When I got the color consistency I wanted … I simply lifted off the mask and revealed the beautiful leaf! I love the dimension that this technique gives.

With our new HOSTESS stamp set “Six Sayings” …. I stamped the Thankful greeting onto my card in Cajun Craze (I think I need to re-ink my pad!) However, I loved the way it turned out. What a beautiful font!! You can find this Hostess stamp set in the back of the Holiday Catalog.

Grab a few friends and do a book or on-line show so you can get this set for yourself (Contact me at lindaluvs2stamp@aol.com) for more details.

I matted my card front with Cajun Craze and then popped it up onto more Very Vanilla.

000_2610

I took a left over piece of bakers twine from my September Paper Pumpkin kit and added the cute little bow to the leaf. I gave it added a bit more texture to the card.

A simple but stunning card. I’ve always loved this technique! Hope you enjoyed the card share today.

I am “Thankful” you stopped by to visit with me …

Have a beautiful day ~

blog-closing-small

TODAY’S STAMPIN’ SUPPLY LIST …


Are You Afraid of the Dark?

Hello Stampin’ Friends ~

Today I’m going to take you to a “spooky” place … the dark side! I showed my Stampin’ Technique club this month a neat way of sponging a background on a colored piece of cardstock …

We began with the So Saffron cardstock and started sponging with the Crushed Curry. I like the way the Curry bring depth to the yellow tones. Next we blending in Tangerine Tango and finally blended our edge in Cajun Craze. It creates a bit of a haunting effect … don’t you think?

000_2595

Now that I had my background complete I wanted to add something new … I’ve been dying to get my hands on the “Sleigh Ride” Edgelits Dies (but why wait till Christmas!)

I used the “trees” die and added it to my background … yes, I liked the look. Hmmm … what next, the Spider Web Doily of course! Yes … I liked that too!

Yes, it’s a bit on the dark side, but I figured even Halloween likes to shine, so I matted my background with the silver glimmer paper and added my “Spooky” greeting also from the silver greeting. You can find “spooky” in with the Seasonal Frame thinlits dies.

000_2594

It’s a bit unique yes, but I liked the way the glimmer paper lighted it all up. A little Hocus Pocus I would say!

Thank you so much for “dropping” in.

I hope you have a fabulous Friday!

blog-closing-small

TODAY’S STAMPIN’ SUPPLY LIST …


Truly Grateful for Autumn …

Hello Stampin’ Friends ~

Yesterday marked the first day of autumn … my favorite season. I love the colors, the warm days and cool night, sweaters, caramel apples and the smell of the leaves. Yup, I love it all.

Today I promised an alternative idea for your Paper Pumpkin kit. Just a little reminder of the stamp set that comes with the kit …

000_2584

I had so many ideas popping into my head with this stamp set. I will share one today, another at a later date, but the rest are reserved for my Paper Pumpkin subscribers … their treat for choosing me as their Paper Pumpkin demonstrator.

You may join my Paper Pumpkin Pals … HERE. Plus, you’ll be helping out Breast Cancer and the same time you treat yourself to Paper Pumpkin.

In honor of the season, I chose the leaves and did the Rock -n- Roll technique – that is why some are two different colors …

000_2588

The Rock-n-Roll technique is very simple … Ink up your image in the lighter of the two colors, and then simply roll the very edges of the image into the darker color ink. Since these were so very small, I just kind of tapped the very edge onto the ink pad instead of “rolling” the image around.

I thought of adding a texture to the background but I really loved the simplicity of this card … it speaks volumes. Sometimes less is more.

000_2590

Hope you enjoyed today’s alternative project … stop back tomorrow, I have some more “spooky” for you! My sister teases me that not everyone loves Halloween as much as I do .. I know, some of you like it more!! lol

Thank you for sharing a part of your day with me, see you tomorrow!

blog-closing-small


Cool Technique with Embossing Folders!!

Hello Stampin’ Friends ~

I am excited that the weekend is here, and today I kick off a new season of my Stampin’ Technique Clubs. Our September technique will focus on different ways you can use your embossing folders… and I chose the new “Woodland” folder.

Today I will show you something fun to do with your folders (they’ll make 2 more!) I can’t show them to you yet because it will spoil their fun. I began my card by embossing the trees using Soft Sky cardstock

000_2528

Using the “White Stampin’ Chalk Marker” – I colored the trees and branches to highlight them even more. Wow … it looks so cool and it’s so easy to do!!

I colored in the indented areas of the tree with my Soft Suede marker to coordinate with the base of my card. Don’t you think it makes the tree more realistic looking? I love White Birch … I think it’s my favorite tree!

000_2530

I added a simple greeting (I think this one got past my purging of discontinued sets) and then added one of the new “Snowflake Elements” to add texture and continue the “woodland” feel of the card.

I didn’t want a lot of glimmer on this card, so I added just a touch with a rhinestone in the center of the wooden snowflake. You could easily add glitter to the branches to create a shimmery snow effect!

000_2525

What a simple way to make an impact (the WOW effect) on your card… just by coloring the embossed area.  Hope you enjoyed today’s technique tip!

Thank you for taking time to visit with me today.

I hope you have a wonderful weekend ~

blog-closing-small

Remembering the anniversary of 9-11-01. We will never forget.

TODAY’S STAMPIN’ SUPPLY LIST …


Cheer All Year—Really!

Hello Stampin’ Friends ~

Today’s card share is a cute card that was shared by our Stampin’ Up! home office.

Our Cheer All Year Stamp Set gives your projects some seasonal flair. Celebrate the holiday season from start to finish. From autumn to Halloween to Christmas, this set will bring cheer to your projects.

But you don’t have to put it away at the end of the year. On this card, we just used “Hello” to create a fun feathery card you can share all year long! You can also use this tip with the Season to Season Wreath Project Kit. Embellish it with different stamp sets and colors to switch it up for any event or season.

Hello Card

Can you see the different techniques used here?  The first feather was inked up (on the left) then stamped off then kissed with the textured stamp. The center feather highlights the “Rock -n- Roll” technique, and the third (on the right) was tipped with heat embossing.

Yesterday I share the WEEKLY DEALS with you (click to view) and today I’d to let you know that Stampin’ Up! has released “more” items into the CLEARANCE RACK!

Shop in both … it’s a great way to save on your holiday cards & projects! HOLIDAY CATALOG!

Thanks for dropping in on me today!

Have an awesome day ~

blog-closing-small


Watercolor Technique: You’ve Got This!

Hello Stampin’ Friends ~

Today I’m sharing a “watercolor technique” card that was shared with us from the Stampin’ Up! home office. It highlights the new Archival Ink.

Archival Ink is permanent and perfect for watercoloring techniques. Use the archival ink pads to stamp your images from the “You’ve Got This” stamp set, and then use Blender Pens or Aqua Painters® to add color.

YouveGotThisCard_SW_Aug2515

Calypso Coral, Crushed Curry and Tangelo Twist Classic Stampin’ Ink® Refills were used in combination with the Aqua Painters to color in the flowers.

Personally … I love the watercoloring technique and I’m so happy that we will be carrying the Archival Ink! You will find it in the Holiday Catalog which goes live September 1st!!

Short post today, but I thank you for stopping by!

Have an awesome day ~

blog-closing-small

Watercoloring Techniques ….

Hello Stampin’ Friends ~

I’m still working on my cleaning but in the meantime I wanted to share to great videos with you from Stampin’ Up! I’m missing my stampin’ friends from my technique clubs, it’s seems like a long time since we meet, but September is right around the corner and we’ll be stamping again soon!

Here is a technique that our clubs did last year – Creating Watercolor Backgrounds using your blocks.

You can create simple but very beautiful cards using this technique. What do you think?

Here’s another video demonstrating; Watercoloring Using Stamps and the Stampin’ Spritzer

So … what did you think? Which is your favorite way to create a watercolor look? I’d love to hear from you.

Thanks for stopping by ~

Have a great day!

blog-closing-small

My Heart Smiles Card

Hello Stampin’ Friends,

Sorry I missed you yesterday … I’m spring (summer) fall cleaning! With 15 years of my business and working my other job, things tend to get tucked away for a later date and before you know it, you begin to look like a hoarder! Too much stuff and not enough room so it’s time for a major overhaul of my home.

Meanwhile I will try to keep up with posts but I  can’t promise as we will be going through the stampin’ studio too. I appreciate you checking back with me … I will try to keep you up to date, informed, and entertained! lol

Today’s card comes right from My Stampin’ Up! Website

HeartSmiles_DBWS_Gallery_08.2015_NA_EU_SP

It was posted by Stampin’ Up! CLICK HERE TO VIEW.  They have a project folder and so do I – so there are many samples to view on my website.

They used the new “Timeless Love” stamp set and teamed it with the “Watercoloring” technique! For this watercolor technique they used the “Aqua Painters.

The Deco Label Collection framelits were used to create the focal point of the card … very pretty!

I have the list of ingredients below. Please let me know if you have any questions, or feel free to post comments below.

Thanks for stopping by and sticking with me!

blog-closing-small

TODAY’S STAMPIN’ SUPPLY LIST …


Samples & Tips from the Stampin’ Up! Convention …

Hello Stampin’ Friends,

Today I’d like to share with you some cute cards and tips that Stampin’ Up! shared with us at Convention.  One of my favorite parts of convention is the main stage presentations where the home office demonstrates new products and techniques ….

6a00d8354941d869e201b7c7b4812d970b-600wi

These cute 2 x 2 note cards were created with the “Watercolor Wishes” kit. Because this stamp set is part of the kit, they demonstrated this cute project as another fabulous way to use the stamps!

You’ll just cute the cardstock into 2″ x 4″ strips and fold in half.  She used one of my favorite paper stacks – Pretty Petals to create the envelopes and embellish with hearts!! The sweet little heart comes from the “Itty Bitty Accents” Punch Pack.

She also showed us how to make the envelopes for our little note cards! I love that she shared this board with us … now I can share it with you! Notice she used the punch board to trim the edges of the card 🙂

Pretty-petals-2x2-envelope-convention-stampin-up

Convention is always a great time … learning how to use the products in more than one way, meeting up with friends from all over the country that you have made over the years, and making new friends!

I hope you enjoyed today’s card share as much as I did watching the presentation and that it inspired you to pull out your designer paper and envelope punch board!

CONVENTION SAMPLES-2

I have a list of ingredients below if you need to order any of the items listed. It will take you directly to my on-line store and give full descriptions of the item.

Thank you for joining me today ~

blog-closing-small

TODAY’S STAMPIN’ SUPPLY LIST …


Now through September 10th …

Hello Stampin’ Friends ~

While at Convention we enjoyed many displays, so I’d like to share a tantalizing group of them with you… some of you may be walking down memory lane as you view these. It’s our Paper Pumpkin review …

IMG_0150

These displays were huge! Inside the highlighted (red) area were the actual ingredients we found in our Paper Pumpkin kits … so here’s the close up as we saw it!

IMG_0151

There were many months featured but I’m showcasing some of my favorites ….

IMG_0152

IMG_0153

Here’s a few more …

IMG_0154

IMG_0156

And then ….

IMG_0158

Here is what the display reads …

WARNING!

PREVIEWING KITS MAY CAUSE ELEVATED EXCITEMENT

DRASTIC DROOLING, AND SPONTANEOUS SMILING.

ENTER AT YOUR OWN RISK!

No camera’s allowed beyond this point!

What!? … I can’t show everyone the next two kits!!  Oh heavens!! Let me just say, you won’t be disappointed, BOTH of these kits are awesome! (August showcases a great technique that my clubs raved over and September is the cutest projects just in time for the fall season).

Stampin’ Up! is offering 50% OFF your next two months  This promo is for new subscribers only

header_PP_demo_6.2015_(1)

If you’ve never tried Paper Pumpkin, now is a great time-get 50% off your first two months. With a deal like this, you’ll want to invite everyone you know to give it a try too!

Offer Dates: Now through September 10, 2015

Offer Details: Use the code HALFOFF to join Paper Pumpkin before September 10, 2015, and get 50% off the first two months! After that, keep the creativity coming for only $19.95 + tax per month (shipping included). CLICK HERE TO TRY IT OUT!

 Former subscribers can sign back up at anytime!

Try out our pre-paid subscriptions …. CLICK HERE 

Choose from 1-month, 3-month, 6-month or 12-month subscriptions.

Thank you for stopping by my today! Let me know if you have any questions with Paper Pumpkin.

You can contact me at: lindaluvs2stamp@aol.com

Have a great day!

blog-closing-small


Sunday Hello …

Hello Stampin’ Friends,

Just a quick note to say “THANKS” to all my new Pinterest followers … I’ll be sure to keep posting my projects & collecting great samples to inspire you.

Hope you are enjoying your weekend. I know I usually post “Simply Sunday” with quick and easy card, but I wanted to share a card with you that I made. The inspiration came from fellow demonstrator Clair Daly … one of our Australia demonstrators.

I changed up the color pallet and wanted my focal point to be the dragon fly … that will bring your eye directly to the “HELLO” greeting which comes from the Tin of Cards stamp set.

My main stamp is the new “Awesomely Artistic” and is it ever.  I really like this stamp set and it will be one of the “featured” sets at my upcoming “Catalog Kick-Off Party”   Click on this link for full details

000_2350

My color pallet consists of Sahara Sand, Whisper White and Early Espresso.  The dragon fly’s are done in Pacific Point, Crisp Cucumber and glitter!! I will admit that the dragon fly’s are “fussy” cut … there is no punch or die for them (I know … so sorry).

The background was created using the “collage” technique … I haven’t done that in a while, so I thank Clair for the inspiration!

Enjoy your day & I’ll be back tomorrow with another cute sample! Maybe something a bit different!!

Thanks for stopping by ~

blog-closing-small


Watercolor Technique In Color

Hello Stampin’ Friends ~

Well … we are over the hump and one day closer to the weekend, and a Holiday weekend too! A perfect time to celebrate.

Today I’m celebrating our new In Colors!! I have teamed them up with a great technique that I taught my Technique Club this past June. The Marker to Block Watercolor Technique … so simple but it can make a dramatic impact!

000_2340

We took one of the clear blocks and colored it with our markers, you can add a second color to create a bigger WOW effect. Then simple spritz it with water until it starts to bead up … then press it onto your cardstock. We used the Whisper White … no special cardstock needed!

It’s an amazing site when the colors create the beautiful watercolor look. Let it dry a bit and then you are free to stamp. We masked the left side of the card so our image looks like it is captured in the block. The stamp set we used is the new “You’ve Got This” stamp set.

Here is the card done in each of our new In Colors. I marked them for you. Check out how nicely the ribbon, cardstock and inks coordinate!  Love it!!

000_2344

I hope I inspired you to pull out your makers and spritzer and create some wonderful watercolor cards.

Thank you for joining me today …

Hope your day is full of color… Have fun!!

blog-closing-small

TODAY’S STAMPIN’ SUPPLY LIST …