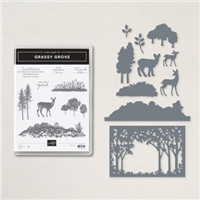
Today I have one last card from the Grassy Grove bundle. This is a simple layout that would be create for our new stampers, or if you are in need of a quick card.
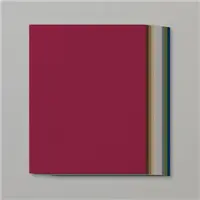
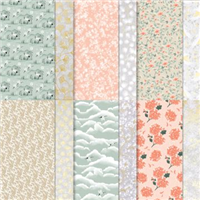
The designer paper used on today’s card comes from the Symbols of Fortune Designer Series Paper. The grassy image was stamped with Old Olive and our deer in Soft Suede.
The designer paper was attached and then our die cut stamped images were popped up. To finish off the card, the greeting was stamped with VersaMark and embossed with White embossing powder and the heat tool.
I hope you have enjoyed the cards I have shared in the past couple of days, here are a few that you have seen ….
Don’t miss out on this versatile duo! Contact me for more information or to purchase your Grassy Grove Bundle with 10% bundled savings.
Thank you for joining me today … Enjoy your day.
TODAY’S STAMPIN’ SUPPLY LIST … If you liked the products used in today’s projects, I have links for you below. Just click on the item you would like more information on, or to begin your shopping. It will take you directly to my website.Thank you ❤
Today I have another card from the Grassy Grove bundle. I don’t usually share “die cut” cards on “Simply” Sunday but with just a couple runs through of the Die cutting machine… this beautiful card is done.
The Grassy Grove Bundle is a nature-inspired set that’s as versatile as it is beautiful. It’s ideal for all-occasion cardmaking, and the best part: the images are perfect for both masculine and feminine cardmaking!
You’ll love how the stamps and dies work together to easily create an ornate, framed panoramas, such as a lone deer or a colorful sunset peeking out from behind a grove of die-cut trees. Here the beautiful background is one of my favorite designer papers; the New Horizons Designer Paper.
The Grassy Grove images pair as well with sentiments from other stamp sets as it does with the four all-occasion greetings that come with the bundle. That means you get even more mileage out of the stamp sets you already have in your collection just by adding this bundle!
Don’t miss out on this versatile duo! Contact me for more information or to purchase your Grassy Grove Bundle with 10% bundled savings.
Enjoy this wonderful Sunday, and thank you for stopping by.
TODAY’S STAMPIN’ SUPPLY LIST … If you liked the products used in today’s projects, I have links for you below. Just click on the item you would like more information on, or to begin your shopping. It will take you directly to my website.Thank you ❤
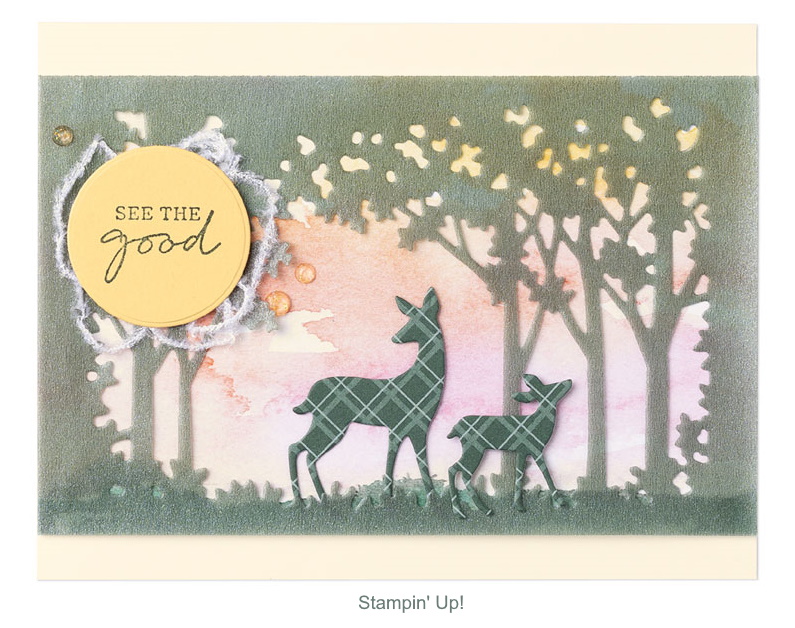
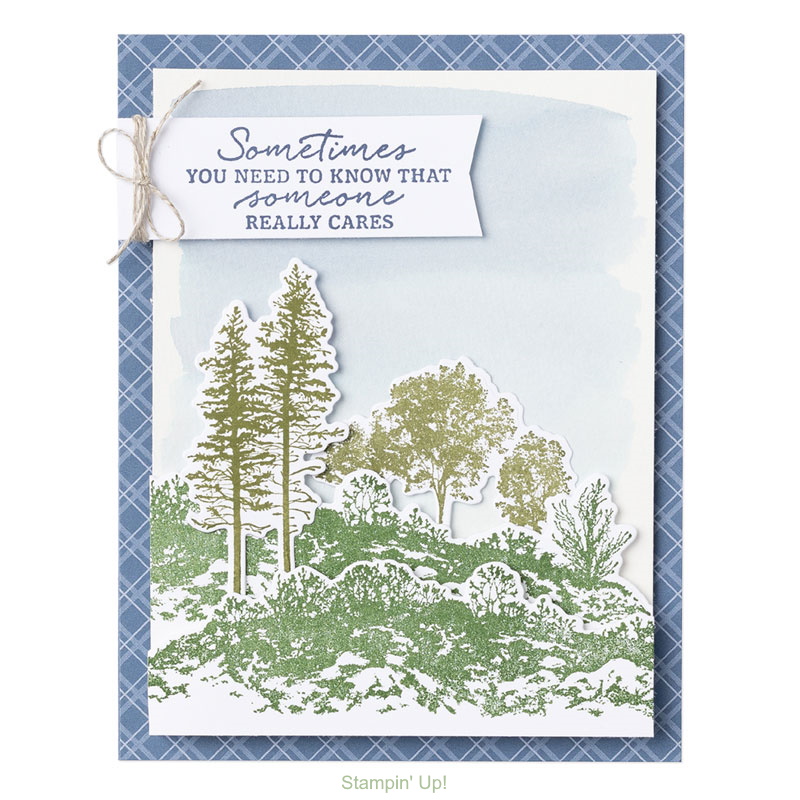
Today I have another card from the Grassy Grove bundle, this one adds the element of watercoloring. This card was created by Stampin’ Up! Designers. Let’s begin with our layers …
Our base is Misty Moonlight … I love this color! The background is the In Color Designer Paper in Misty Moonlight as well. Our next layer is the Watercolor Paper, and this is where the Water Painters were used to apply the Misty Moonlight Ink.
I use a block, take my Misty Moonlight ink pad and tap it onto the block to lay down some color and then I use my Water Painter to blend the ink and water and then apply it to my Watercolor paper. I think the watercoloring adds a nice soft background for our stamped images.
The scenery is stamped in Mossy Meadow (the tall trees), Old Olive; the Maple type trees, and the the foreground in Garden Green. (The colors look a little different on my computer). Then all the images were die cut using the coordinating die set; Grove dies.
The sentiment comes from the Grassy Grove stamp set and was finished off with some Linen Thread. Perfect card for our nature loving friends, the bundle is perfect for creating for them.
Thank you for joining me today, I hope you have a wonderful day!
TODAY’S STAMPIN’ SUPPLY LIST … If you liked the products used in today’s projects, I have links for you below. Just click on the item you would like more information on, or to begin your shopping. It will take you directly to my website.Thank you ❤
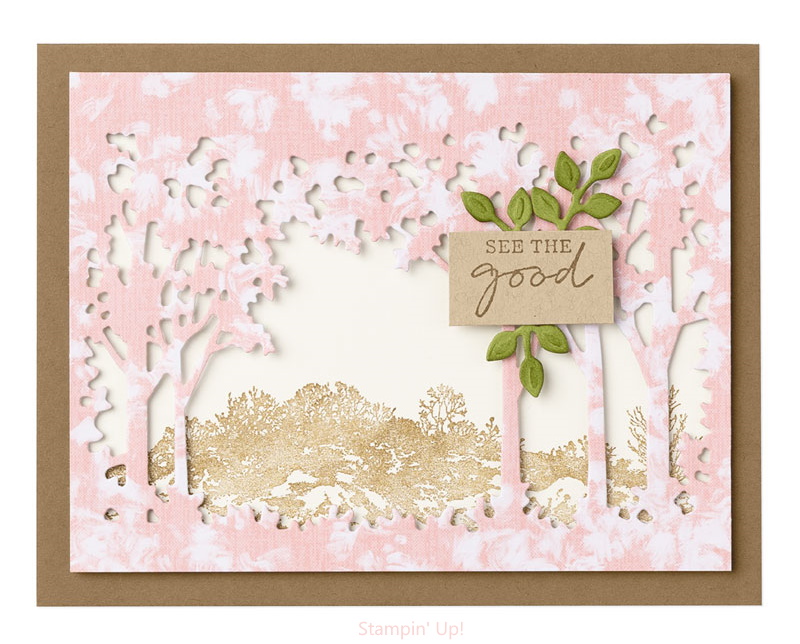
Today I have a card from the awesome Grassy Grove bundle … along with a full tutorial! I have had many requests for samples highlighting this bundle, so let the creativity begin!! I will be sharing more samples over the next few days.
1. Before you start stamping, cut the following paper pieces: • 8-1/2’’ x 5-1/2″ (21.6 x 14 cm) from Soft Suede Cardstock • 3-3/4″ x 5″ (9.5 x 12.7 cm) from Very Vanilla Cardstock • 2″ x 2″ (5.1 x 5.1 cm) from Old Olive Cardstock • 3/4″ x 1-1/2″ (1.9 x 3.8 cm) from Crumb Cake Cardstock • 3-3/4″ x 5″ (9.5 x 12.7 cm) from Symbols of Fortune Specialty Designer Series Paper
2. Fold the Soft Suede Cardstock (8-1/2″ x 5-1/2″) in half to create the card base. 3. Use a sponge dauber to ink the large landscape stamp with the Soft Suede Classic Stampin’ Pad, then stamp the image near the bottom of the Very Vanilla Cardstock (3-3/4″ x 5″). 4. Adhere the stamped piece of Very Vanilla Cardstock (3-3/4″ x 5″) to the center of the card base. 5. Use the detailed grove die to die cut the Symbols of Fortune Specialty Designer Series Paper (3-3/4″ x 5″). 6. Adhere the die-cut image over the top of the Very Vanilla Cardstock (3-3/4″ x 5″) using Mini Stampin’ Dimensionals®. 7. Use the Soft Suede Classic Stampin’ Pad to stamp the sentiment on the Crumb Cake Cardstock 3/4″ x 1-1/2″ (1.9 x 3.8 cm), then cut the cardstock down to size. 8. Die cut the detailed leaf pieces from the Old Olive Cardstock (2″ x 2″; 5.1 x 5.1 cm). 9. Sponge the edges of the die-cut leaves using a Sponge Dauber and the Old Olive Classic Stampin’ Pad, then adhere the leaves to the back of the sentiment piece. 10. Use Mini Stampin’ Dimensionals to adhere the sentiment to card base.
Thank you for taking time out of your day to visit my blog!
Have a great day ~
TODAY’S STAMPIN’ SUPPLY LIST … If you liked the products used in today’s projects, I have links for you below. Just click on the item you would like more information on, or to begin your shopping. It will take you directly to my website. Thank you ♥
Happy St. Patrick Day … The luck of the Irish are with us because I’ve got two cards to share with you today. One highlights one of our favorite products; Wink of Stella! It was a suggestion from Beth, one of my Facebook LIVE viewers! I thought using Stella was a great idea, so I tried it.
Let’s take a look at it now …
The Wink of Stella just adds that subtle shimmer that creates magic on the card … I love it, and when you pair it with the soft color of the Fresh Freesia it just says … WOW.
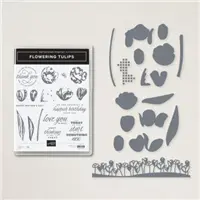
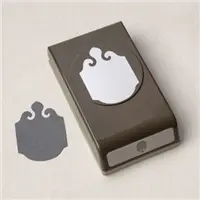
The simplicity of the card just adds to the magic of this card … my greeting comes from the Flowering Tulips bundle and I used the Elegant Punch to create the focal point. Add a pretty bow and In Color gems and your card is done.
My next card highlights the die in a totally different way …
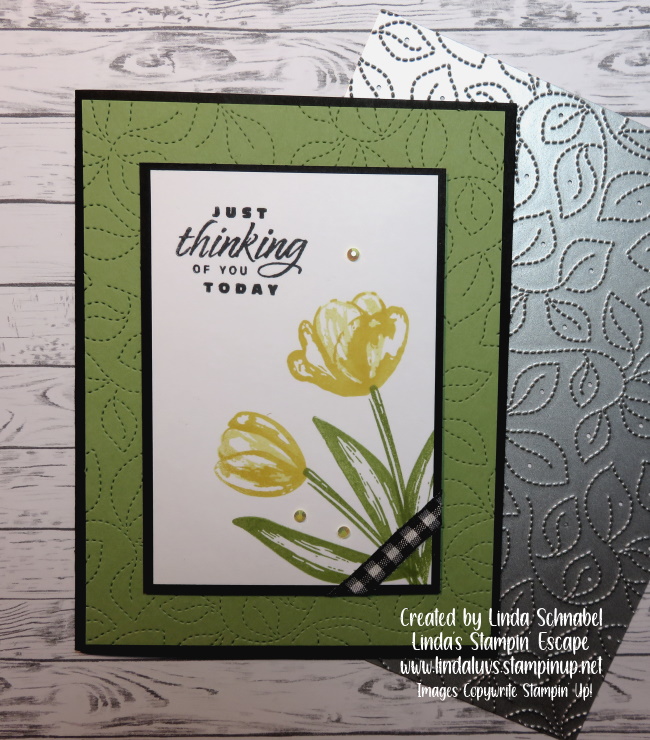
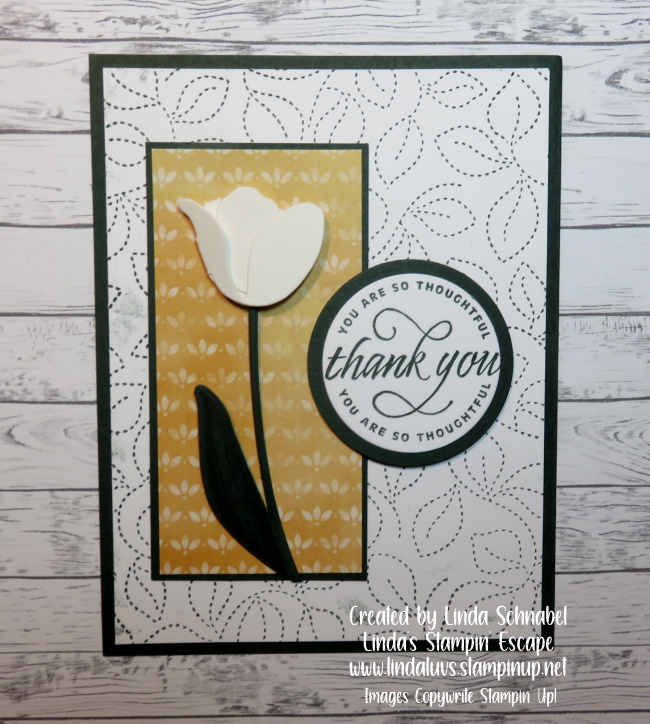
This technique creates a subtle statement but why wouldn’t we want to emboss our designer paper too!! It looks soo cool …. and adds that texture! I kept the same layout as the first card but this time added a piece of the “flip side” of the designer paper.
The greeting also comes from the Flowering Tulips bundle but was punched from the Label Me Lovely punch, and again I added some of those beautiful In Color gems!
So …. which technique is your favorite today? Do you like the Wink of Stella on the embossed White Cardstock or you prefer the embossed designer paper? Do we call it embossed or pierced? Not sure … but it’s pretty!!
Thank you so much for joining me again today. Enjoy the day!
TODAY’S STAMPIN’ SUPPLY LIST … If you liked the products used in today’s projects, I have links for you below. Just click on the item you would like more information on, or to begin your shopping. It will take you directly to my website. Thank you ❤
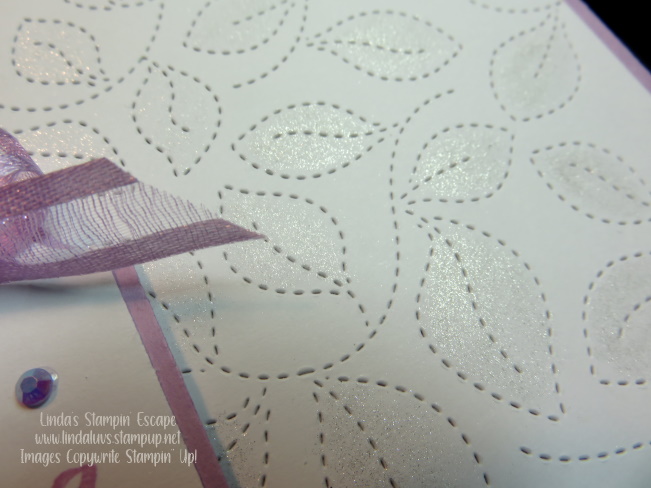
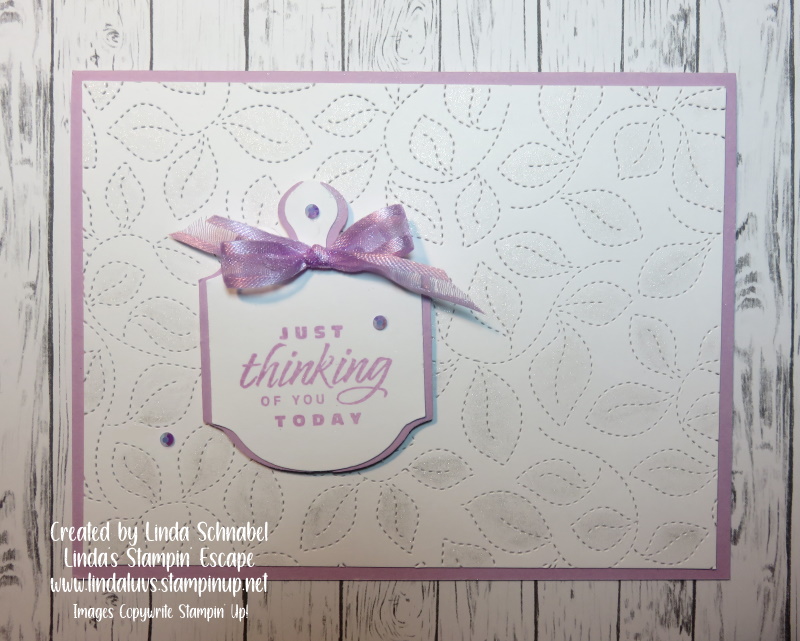
I am happy to share an amazing die that I have fallen in love with along with two cards highlighting the cool look that you get… It’s the Stitched Greenery die. I’m teaming it up with the beautiful Flowering Tulips bundle. I’m having quite a bit of fun playing with this bundle.
Let’s take a look at the video now …
Dimensions:
Card Base / Basic Black : 8-1/2” x 5-1/2” then Score at 4-1/4” and Mat: 4-1/8″ x 2-7/8″
Cardstock #2: Pear Pizzazz: 4″ x 5-1/4”
Cardstock #3: Basic White 4″ x 2-3/4″
The depth and detail of the Stitiched Greenery die is nothing short of stunning, and with all of the beautiful floral stamp sets and bundles, I believe this to be a staple in anyone’s stamping room.
You can just run it through your die cutting & emboss machine and leave it as is … or you can add a touch of color directly to the die as I did on my next card ….
On this card I patted the Evening Evergreen ink pad onto the die and then ran it through the Die cutting & embossing machine. It is a very subtle touch of color but still adds the texture as before. I’m hooked!!
Stop back tomorrow and the next couple of days as I share even more ideas on how you can maximize the use of this die. I know once you get it … YOU will love it! I have the link for you below.
Have fun creating and thank you for hanging out with me today.
TODAY’S STAMPIN’ SUPPLY LIST … If you liked the products used in today’s projects, I have links for you below. Just click on the item you would like more information on, or to begin your shopping. It will take you directly to my website. Thank you ❤
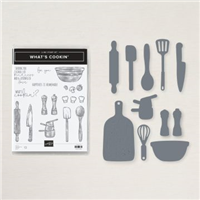
Today I’m going to share a totally amazing card with you. If you have grandchildren or any little one’s in your family … they are going to fall in love with this card. This card highlights the Nuts and Bolts stamp set. I’ll also be sharing the dimensions and step by step directions so you can create this card with ease!
Measurements:
Card Base: Basic White 4.25 x 11” folded to 4.25” x 5.5”
Cardstock #2: Pale Papaya 4” x 5.25”
Instructions:
Cut and score Basic White card base. Fold in half.
Cut Pale Papaya Cardstock to 4” x 5.25”
Using the flower robot stamp, ink the flower gear image only in Pale Papaya ink on the Pale Papaya card stock. Use a post-it note to mask off the robot if needed. Stamp gear flower randomly in background. Mount to card front.
Using the flower robot stamp, Ink and stamp the flower gear image 3 times in Pale Papaya ink on the Pale Papaya card stock.
Using the Strawberry Builder punch (flower image), punch out all three of the stamped flower gears. Curl petal edges slightly with fingers or bone folder. Add an iridescent rhinestone to each punched flower center. Set aside.
Stamp robot in Tuxedo Black Memento ink onto Basic White cardstock. Color using Smoky Slate, Basic Black and Pale Papaya Stampin’ Blends. Use a color lifter to model the gray ink and make it look distressed.
Cut out finished colored robot image.
Stamp Kind Human sentiment in Tuxedo Black Memento ink onto Basic White cardstock. Cut out.
In the top 2/3 of the stamped Pale Payapa cardstock blend a small circle of Pale Papaya ink using a blending brush and Pale Papaya ink. The blended circle should be slightly larger than the size of the robot image. See card for placement example.
Mount Robot using Stampin’ Dimensionals on top of the blended circle. Add sentiment using dimensionals, mount under robot feet.
Die cut the smaller YOU ARE AMAZING from Pale Papaya cardstock using the Amazing Thanks dies. Mount to card in the bottom 2/3 using liquid glue. See card for placement example.
Mount three flowers around robot onto card front using a glue dot.
Don’t you just LOVE this little cutie? Oh my gosh … and I love the “amazing” greeting applied in the same color; it gives you a subtle dimension and texture. Too cute!!
Thank you for stopping by ~
Have a wonderful day!!
TODAY’S STAMPIN’ SUPPLY LIST … If you liked the products used in todays projects, I have links for you below. Just click on the item you would like more information on, or to begin your shopping. It will take you directly to my website. Thank you ❤
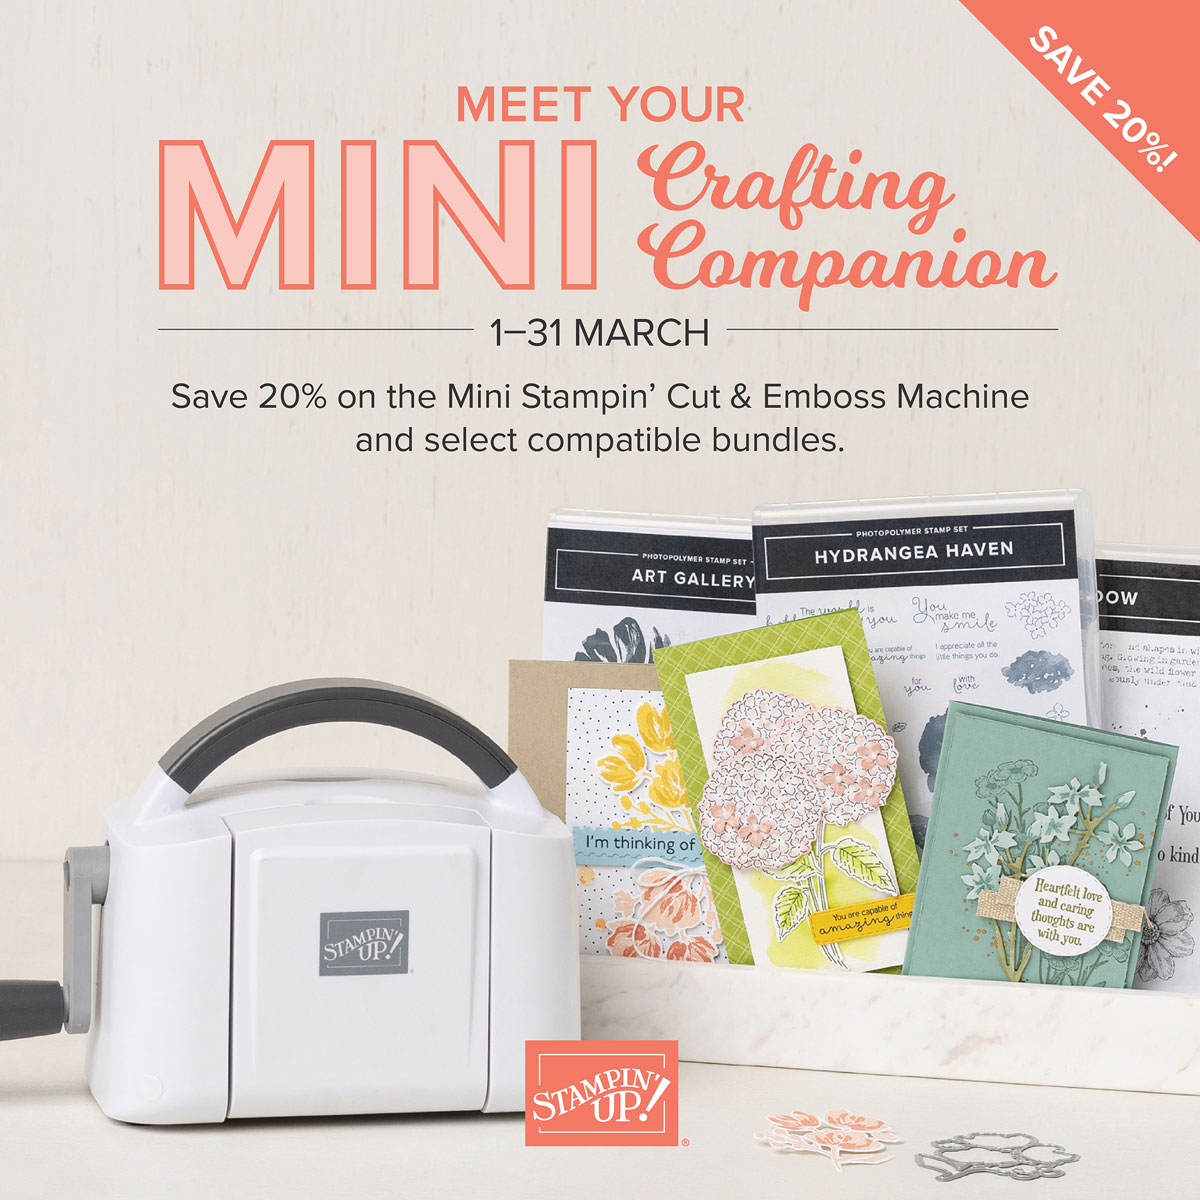
If you haven’t already, it’s time to meet your mini crafting companion: the Mini Stampin’ Cut & Emboss Machine! If this is your first encounter, allow us to introduce you.
This mini—but mighty—machine is durable, portable, and easy to use. It’s the perfect pick for budding beginners who want to branch out, papercrafting pros who want to craft on the go, or those who are short on storage space! With this trusty tool, any crafter can make precise cuts and embossed designs for their projects with one pass.
Starting 1 March, you can snag the Mini Stampin’ Cut & Emboss Machine at a 20% discount! This miniature machine is compatible with a large selection of Stampin’ Up! embossing folders and dies. Build your craft collection and combine the Mini Stampin’ Cut & Emboss Machine with any (or all!) of the select stamp-and-die bundles that are also available for 20% off during the month of March!
Growing through life can also mean growing pains. Whether they’re climbing their career ladder or moving out for the first time—change can be simultaneously thrilling and scary—but isn’t that what makes life beautiful? Because new beginnings, after all, are simply new adventures. Let your loved ones know you’ll be there to support them through all of life’s chapters!
The Change is Beautiful kit contains enough supplies to create 9 stunning cardswith a unique folding technique to commemorate moments of change. The designs are inspired by the natural cycles of change found in nature.
About the Kit
Name: Change Is Beautiful
This kit includes:
Change is Beautiful Photopolymer Stamp Set
Melon Mambo Classic Stampin’ Spot®
Printed card bases
Printed envelopes
Printed, shaped die cuts
Iridescent sea glass
Dimensionals
Card size: 4-1/4″ x 5-1/2″ (10.8 x 14 cm)
Coordinating Stampin’ Up! colors: Balmy Blue, Basic Black, Bermuda Bay, Crushed Curry, Evening Evergreen, Granny Apple Green, Melon Mambo
I’m pretty excited to see the “Iridescent sea glass” that is included in the kit!! Always something cool inside the Paper Pumpkin boxes 🙂
Thank you for the visit today. Let me know if you have any questions about our Paper Pumpkin kits … I’d be happy to help you.
Have a wonderful day ~
TODAY’S STAMPIN’ SUPPLY LIST … If you liked the products used in today’s projects, I have links for you below. Just click on the item you would like more information on, or to begin your shopping. It will take you directly to my website. Thank you ♥
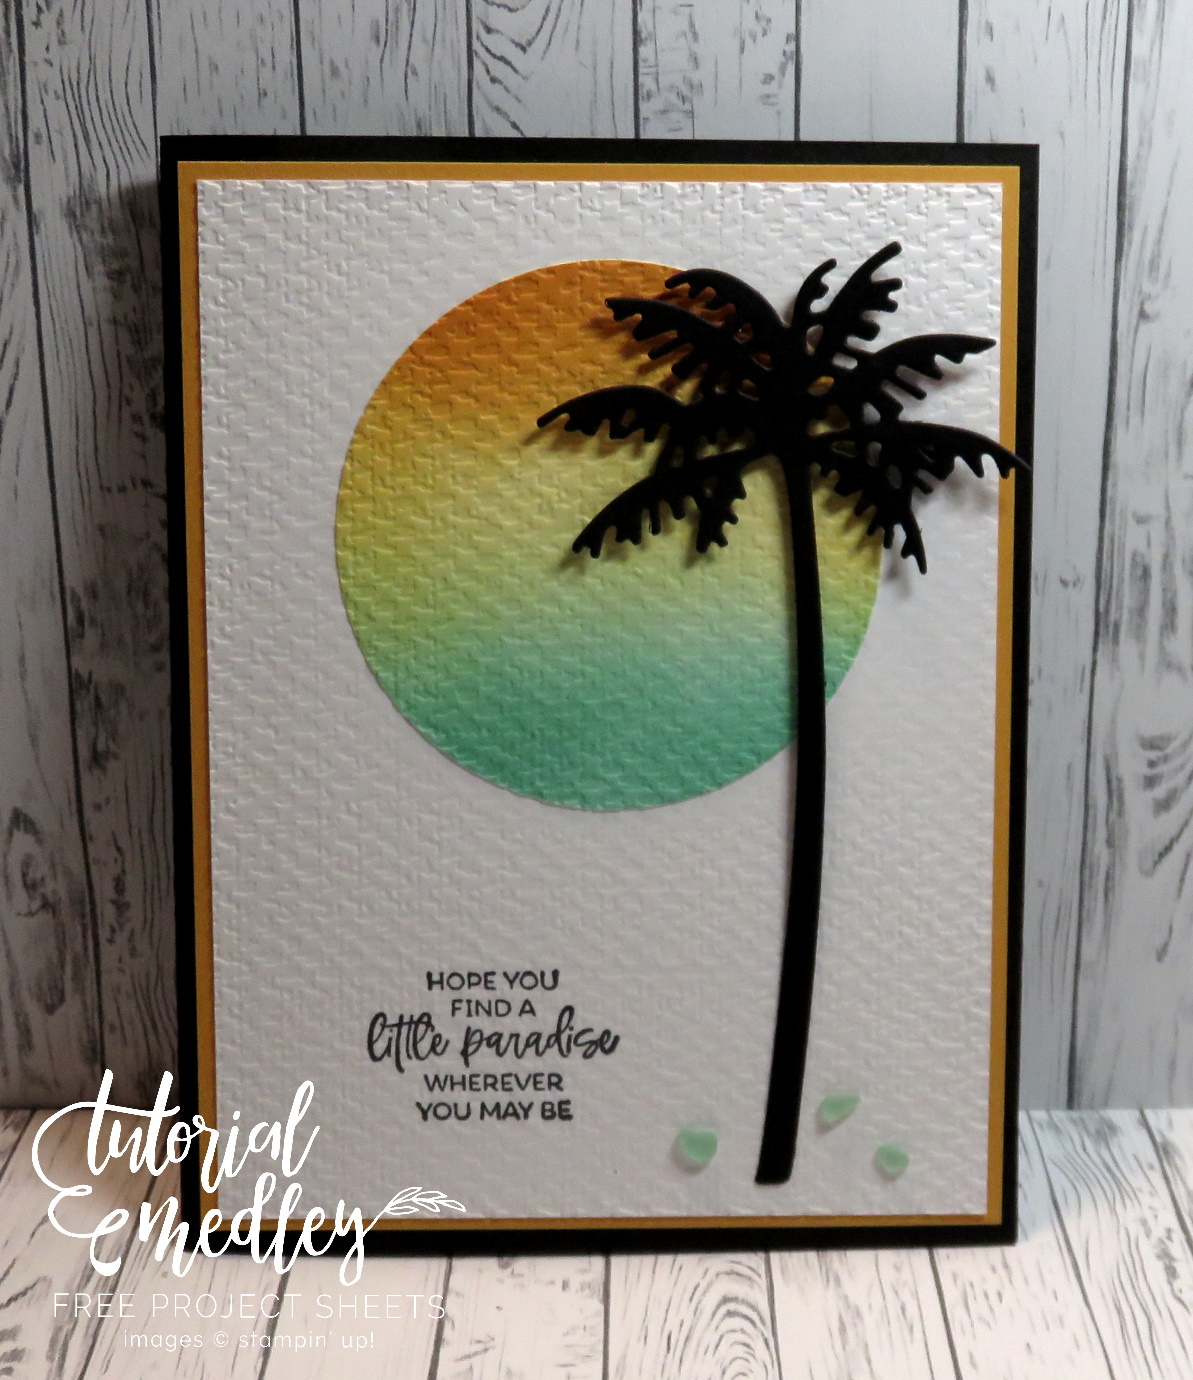
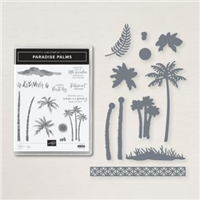
Today I’m going to share my Paradise Palms Card with you. I’ll also be sharing the dimensions and step by step directions so you can create this card and transport yourself (or your friend) someplace warm and relaxing!
Measurements:
Card Base: Basic Black: 8-1/2” x 5-1/2”, Score at 4-1/4” and fold in half. Also need a piece of scrap to die cut palm tree.
Cardstock / Mango Medley: 5-1/4” x 4”
Cardstock / Basic White: 5” x 3-3/4” (front) 5-1/4” x 4” (inside) plus 4” x 4” to color with blending brushes.
Instructions:
Attach the Mango Melody cardstock onto your Basic Black Cardbase.
Using 4” x 4” piece of white and a Blending Brush, apply Daffodil Delight to the center of your card and brush out all the way to each edge.
Repeat the application of color using Mango Medley to the top portion of the card (edge to edge) and blend down into the Daffodil Delight.
Repeat the application of color using Coastal Cabana to the bottom portion of the card (edge to edge) and blend up into the Daffodil Delight.
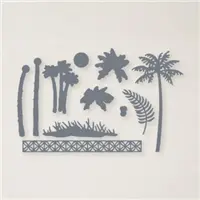
When your cardstock is fully covered with ink, die cut using the () circle die.
Die cut large palm tree out of the scrap piece of Basic Black.
Attach the circle in the upper / center section of the Whisper White.
Stamp greeting with Momento Ink onto Basic White on the left hand side.
Take this assembly and using the Tasteful Textile Embossing Folder, run it through the Stampin’ Cut & Emboss Machine.
Secure die cut Palm onto front of card with a Mini Dimensional on top and adhesive on the bottom.
Attach card front assembly to the base of your card and the 5-1/4” x 4” Basic White to the inside of your card.
Don’t you just LOVE a fully textured card? Oh my gosh … it totally transforms this card. And of course I could not walk away without adding the Faux Sea Glass to my card, it even pulls color from the circle background.
Thank you for stopping by ~
Have a wonderful day!!
TODAY’S STAMPIN’ SUPPLY LIST … If you liked the products used in todays projects, I have links for you below. Just click on the item you would like more information on, or to begin your shopping. It will take you directly to my website. Thank you ❤
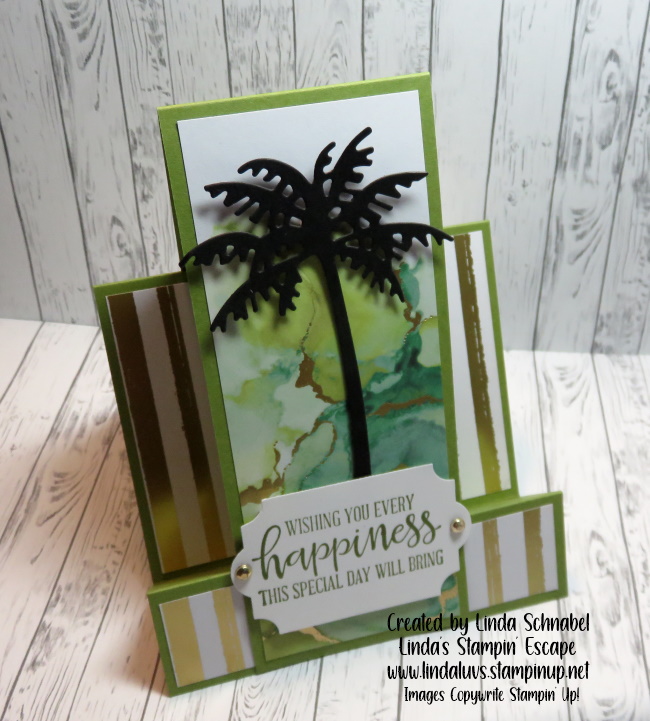
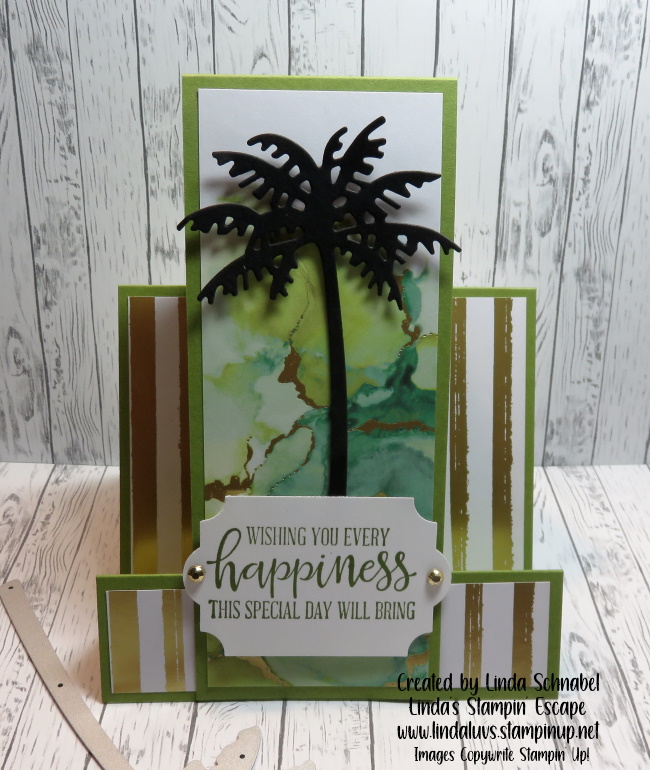
I am excited to share the “FAUX” Step Card that I shared with my Stamp Club in February. I have my Facebook LIVE video to share with you so you can see how easy it is to create this FUN FOLD card. I’m also sharing the dimensions with you.
Let’s take a look at the video now …
Dimensions:
Card Base: Old Olive: 9” x 4-1/4” then Score at 1-1/4”, 2-1/2” and 5-3/4”
Cardstock #2: Old Olive Center Step: 8-1/2” x 2-1/4” then Score and fold at 5-1/2”
Cardstock #3: Basic White 3″ x 4″ for inside of card / Scrap of white for greeting
Designer Paper #1: Expressions in Ink for Center Step 2″ x 5-1/4″ and Striped paper 4″ x 4″ cut off 1″ from bottom so it aligns during assembly
I find it easiest to lay the card base out flat when attaching the designer paper, as shown in the video. Then use your favorite adhesive to attach the center flap … you’ll want to make sure to center and align the front flap to the bottom, then attach to the back.
.
Ahhh … Don’t you just love making quick & easy cards that look like you spent all day cutting and creating!! lol No one has to know that … right! Just image all the different designer papers or dies that you can use with this Fun Fold Faux Step Card.
Have fun creating and thank you for hanging out with me today.
TODAY’S STAMPIN’ SUPPLY LIST … If you liked the products used in today’s projects, I have links for you below. Just click on the item you would like more information on, or to begin your shopping. It will take you directly to my website. Thank you ❤
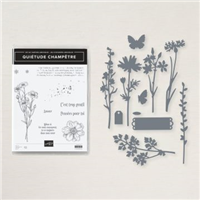
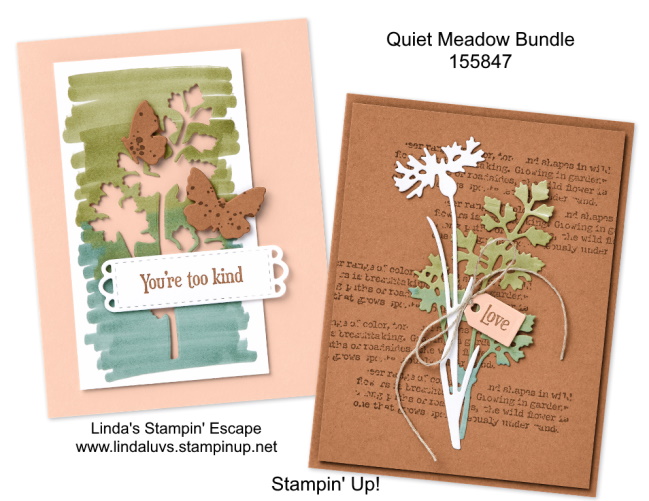
I’ve got two cards to share with you today featuring the Quiet Meadow Bundle … another amazing bundle on sale now. I’ll also be sharing step by step directions so you can create these card.
Instructions: You’re Too Kind Card
1. Cut a piece of Petal Pink Cardstock to 8-1/2” x 5-1/2” (21 x 14.9 cm) and score at 4-1/4” (10.5 cm). This is your card base.
2. On a piece of Basic White Cardstock (2-3/4” x 4-3/4”; 7 x 12.1 cm), use the light shade from the Mossy Meadow Stampin’ Blends Combo Pack to color part of the panel. Stop halfway down the panel, then swap your Stampin’ Blends marker for the dark shade from the Soft Succulent Stampin’ Blends Combo Pack. Color the rest of the panel, starting slightly above the center to create an overlap of the two colors.
3. Use the wide, leafy die from the Meadow Dies to cut the card panel. Adhere the negative piece to the card front using Stampin’ Dimensionals . (Set the die-cut piece aside to use for the next project.)
4. Stamp the “You’re too kind” sentiment from the Quiet Meadow Stamp Set in Cinnamon Cider ink on another piece of Basic White Cardstock (3-3/4” x 1-1/2”; 9.5 x 3.8 cm). Use the scalloped sentiment label die to cut the label, then adhere to the card front with Stampin’ Dimensionals.
5. Stamp the paint splatter image in Cinnamon Cider ink on Cinnamon Cider Cardstock (1-1/2” x 3-1/2”; 3.8 x 8.9 cm). Align both butterfly dies onto the splatter-stamped cardstock, cut, and adhere to the card with Stampin’ Dimensionals.
So …. what do you do with the piece that you die cut? Well … we make a card with it!
Instructions: Gathered with Love Card
1. Cut a piece of Cinnamon Cider Cardstock to 5-1/2” x 8-1/2” (14.9 x 21 cm) and score at 4-1/4” (10.5 cm). This is your card base. 2. On another piece of Cinnamon Cider Cardstock (4” x 5-1/4”; 13.7 x 19.8 cm), add Cinnamon Cider ink to the script stamp from the Quiet Meadow Stamp Set. Stamp five times to build a scattered background. Add Stampin’ Dimensionals to the back and adhere to the card base. 3. Stamp the “Love” sentiment in Cinnamon Cider ink on Petal Pink Cardstock (1-1/2” x 2-1/4”; 3.8 x 5.7 cm). Create the sentiment shape with the tiny tag die from the Meadow Dies, then string a piece of Linen Thread (12”; 30.5 cm) through the hole. Tie a knot, then tie a bow. 4. Cut a silhouette shape from Basic White Cardstock at (1-3/4” x 5-1/2”; 4.5 x 14.9 cm) with the dandelion die. Add Mini Glue Dots to the back of the shape, as well as to the die-cut shape from the previous project. Adhere both pieces to the card front—one on top of the other— to appear as a gathered bouquet.
5. Finish off by using a Stampin’ Dimensional to adhere the tag.
Pretty cool right … and a fun technique to boot! Sometimes the simplest techniques can create some amazing cards.
Thank you for checking out my blog post today.
Have a great day!!
TODAY’S STAMPIN’ SUPPLY LIST … If you liked the products used in todays projects, I have links for you below. Just click on the item you would like more information on, or to begin your shopping. It will take you directly to my website. Thank you ❤
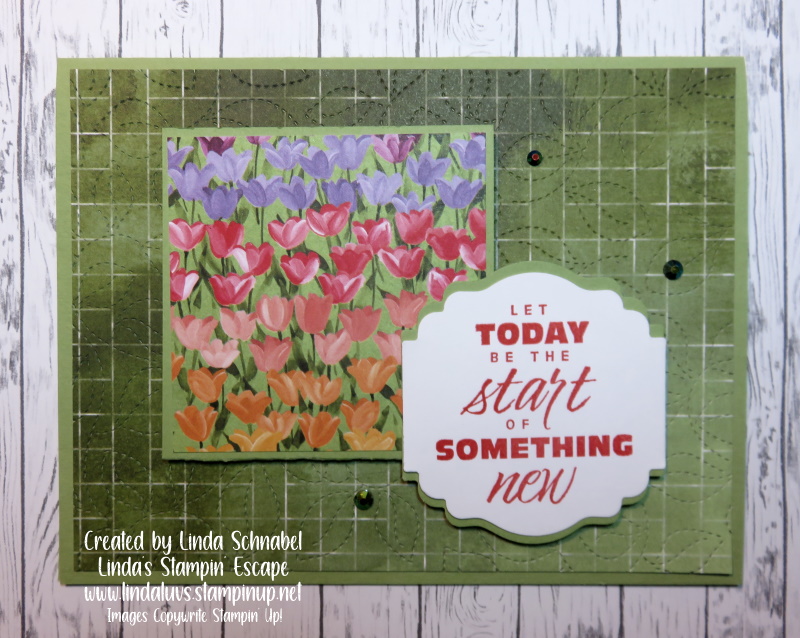
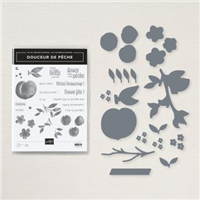
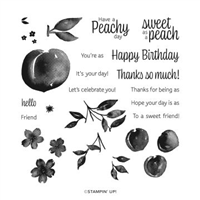
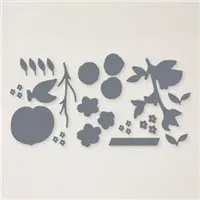
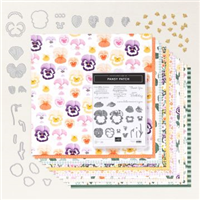
Today I’m going to share a tasty sweet treat of a card from the “Sweet as a Peach” … another amazing bundle on sale now. I’ll also be sharing the dimensions and step by step directions so you can create this card. It’s a happy Monday!
Measurements:
Card Base: Petal Pink- 8 ½” x 5 ½” (score on the long side at 4 ¼”)
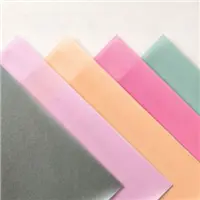
Cardstock: Very Vanilla- 3 ½” x 4” for sentiment and flowers
Cardstock: Soft Sea Foam- small scrap for leaves
Pansy Petals Designer Series Paper: Dotted print is 1 ½” x 5 ½” & plaid print is 1” x 5 ½”
Instructions:
Fold card base in half and attach the dotted piece of designer paper to the card front on the right side along the edge using multipurpose liquid glue. Then, use the scalloped edge die on the card front along the opening about ½” from the edge. Run through the die cutting machine.
Then, add the plaid designer paper to the inside of the card so you can see it along the edge of the opening.
Stamp the trio of larger flowers on your Very Vanilla cardstock using Calypso Coral Ink and Memento Black for the centers and die cut using the matching die. Using the same piece of Very Vanilla cardstock die cut the scalloped square for the sentiment.
Stamp the small or mini trio of flowers in Calypso Coral ink on the card base as shown in the photo. Use second generation stamping where you ink up your stamp then stamp off one time on scrap paper before stamping on your project. This will give you a lighter shade of color.
Stamp the sentiments on the die cut scalloped piece using Memento Black ink.
Attach the sentiment to the card front as shown with Stampin’ Dimensionals.
Add all flowers to the card front popping up the largest one by the sentiment and the medium one at the top with Stampin’ Dimensionals.
Die cut 4 sets of the leaves using Soft Sea Foam cardstock. Use multipurpose liquid glue to attach the leaves near the flowers.
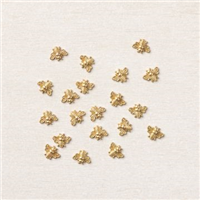
Add 3 Matte Black Dots around the sentiment and one Bumblebee Trinket on your card.
This is such a lovely bundle and makes creating “All Occasion” cards so easy and pretty. I hope you are enjoying the card tutorials, I love inspiring my stampin’ friends and helping you with your stamping needs.
Thank you for stopping by this Monday.
Have a wonderful week!!
TODAY’S STAMPIN’ SUPPLY LIST … If you liked the products used in todays projects, I have links for you below. Just click on the item you would like more information on, or to begin your shopping. It will take you directly to my website. Thank you ❤
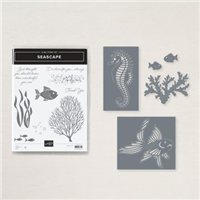
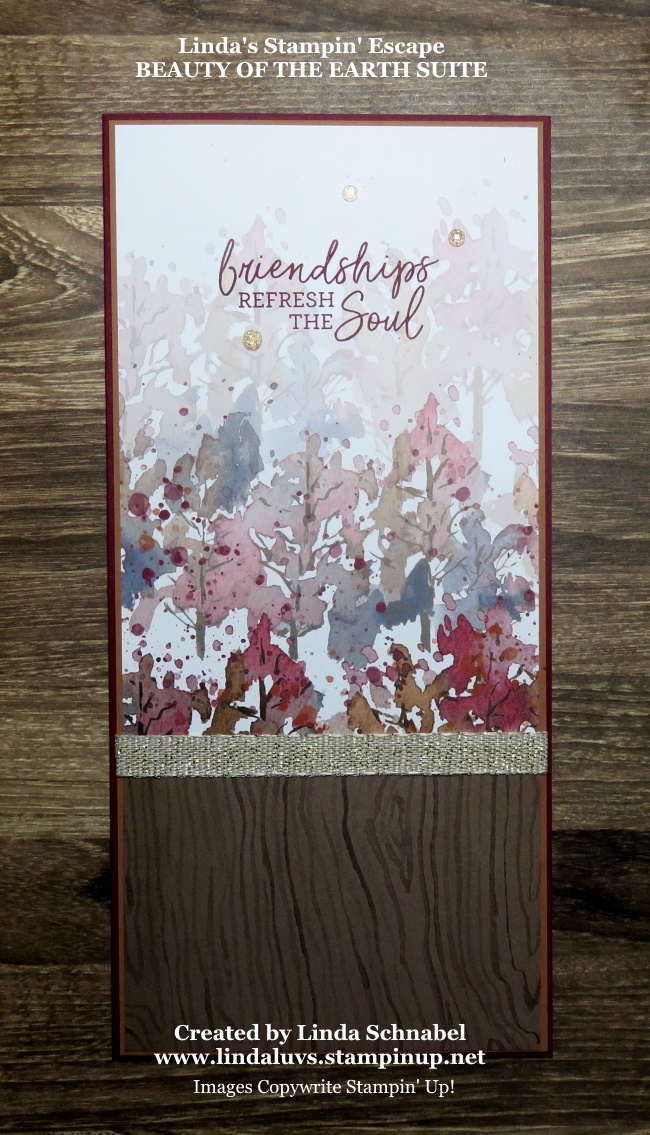
I have a treat for you today … a simple yet beautiful Slim Line card and a parade of other cards that were created from the amazing Beauty of the Earth Suite. I will also be sharing some fun techniques on these cards so, grab a cup of coffee and sit back with me while we go through these creative gems!
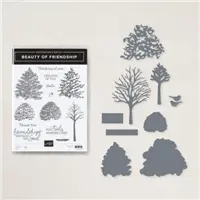
I share these because the Beauty of Friendship Bundle is part of the Savings in Bloom promotion. I will share “all” of the items on sale at the bottom of my post.
First up is my Slimline cards, this card fits in a business size envelope … I’m using two different patterns from the Beauty of the Earth Designer paper and joined them together with the pretty Gold Fine Art Ribbon; it has a touch of sparkle, so I had to add the Genial Gems to keep the sparkle going.
The greeting comes from the Beauty of Friendship stamp set / bundle. I chose the Cinnamon Cider as a mat and Merry Merlot as my card base … they pull those colors out of the designer paper. I find this suite / bundle very gender neutral … who wouldn’t love these cards!
My second card I’m using the same pattern of the Beauty of the Earth Designer Series paper and the Beautiful Trees dies. Another simple card when using your Stampin’ Cut & Emboss machine. The greeting comes from the Beauty of Friendship stamp set included in the bundle.
Ready to see another card using the same paper? The amazing thing is that each one looks sooo different! I used a landscape layout verses the portrait as I did on the first two cards and created this unique card. I also used Night of Navy on this card to pull out the blue in the designer paper.
I created the frame with the Stitched Rectangle Dies … I love this look, it’s new and fresh and highlights the designer paper. I added the tree and greeting from the bundle …
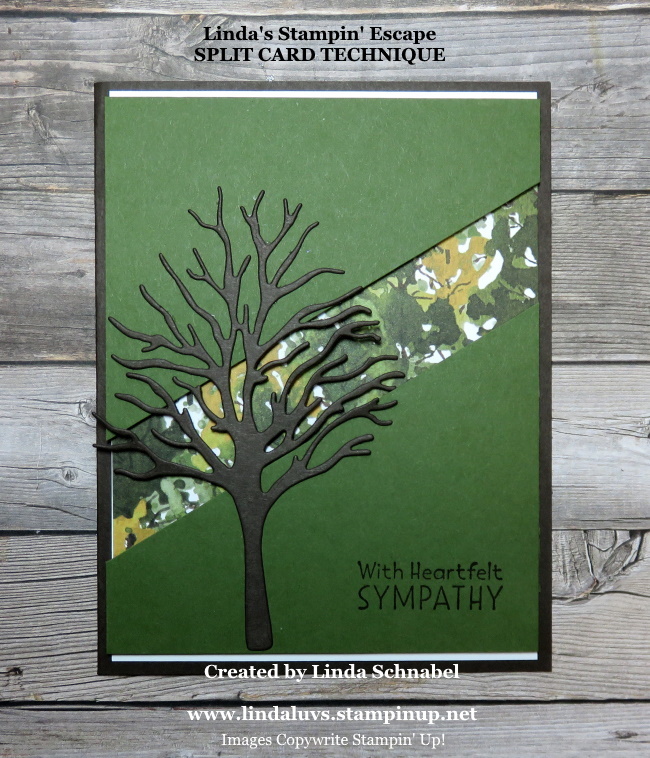
Now lets change things up a little by using a different pattern from our Beauty of the Earth Designer paper and a fun technique … the “Split Card Technique”. I’m using Old Olive and Early Espresso to coordinate with my designer paper. You can watch the video to see how to create this card yourself by CLICKING HERE!
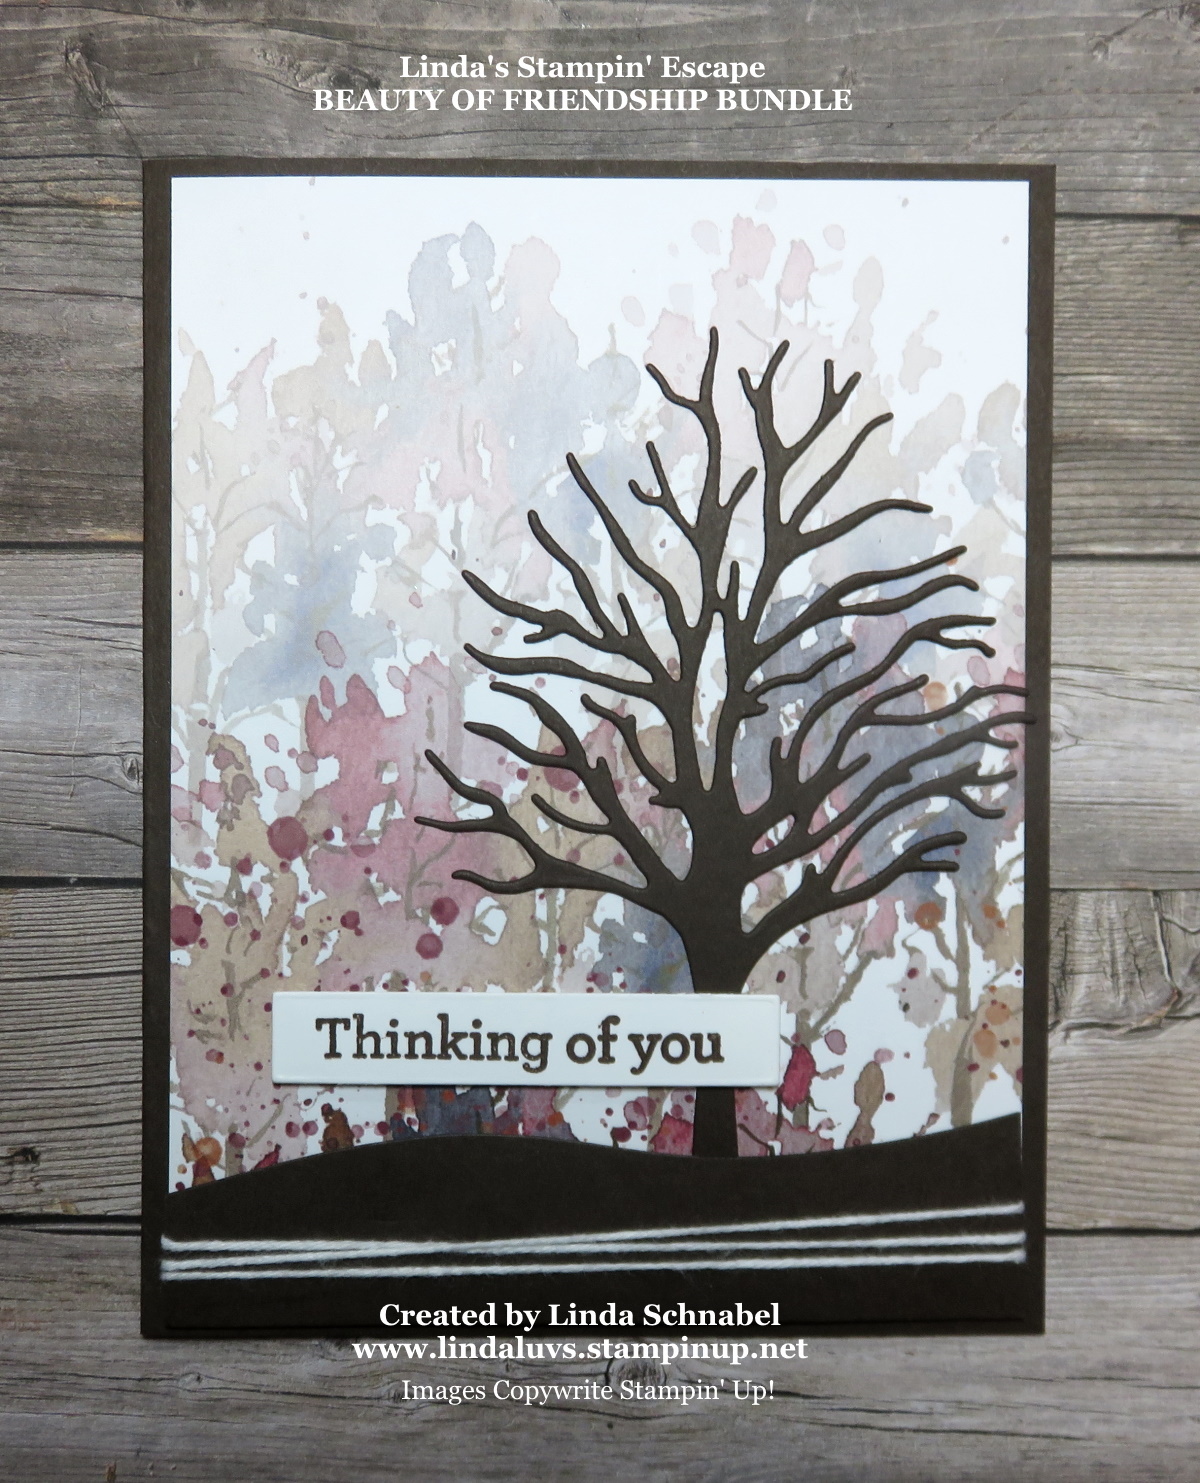
Now I would like to bring in one of the “hottest designer papers” right now, and that is the NEW HORIZONS Designer paper … so many pretty patterns would work perfectly with the dies from the Beauty of the Earth bundle. The watercolor landscapes look so cool with the tree.
The next card I share with you has a card base is Early Espresso …. so is the tree itself, it made the Misty Moonlight designer paper from the Beauty of the Earth Designer paper really pop, and when I added the leaves to the trees … WOW! The leaves on the bottom are just another die cut of the top … just cut up into smaller pieces to lay upon the ground. So pretty!
The last card I have to share with you, has the same watercolor background paper that I used on the “You Inspire Me” card but I’m changing up the seasons. Once the leaves are gone … well, winter comes next, and it makes for the perfect Christmas card …
I just love this card and I used the Chalk pen and Wink of Stella to add snow to my tree! How fun is that! I just wanted to show you that this is not just another tree set, but a bundle / or suite that can be used for any season … or any reason!!
The Beauty of the Earth Suite is still available, but if you are just looking for the bundle … it’s 20% Off right now. I always wonder if Stampin’ Up! will retire a stamp set when they put it on sale … so if this is on your “Wish List”, you may want to consider getting it now and enjoy the extra savings!! You can click on any of the images below for details on the bundles or to begin shopping … it takes you directly to my store.
Thank you for joining me this Sunday for my card parade, I hope you enjoyed the many styles of cards. Please let me know if you have any questions.
TODAY’S STAMPIN’ SUPPLY LIST … If you liked the products used in todays projects, I have links for you below. Just click on the item you would like more information on, or to begin your shopping. It will take you directly to my website. Thank you ♥
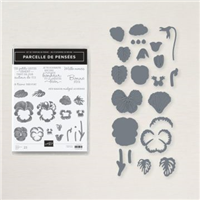
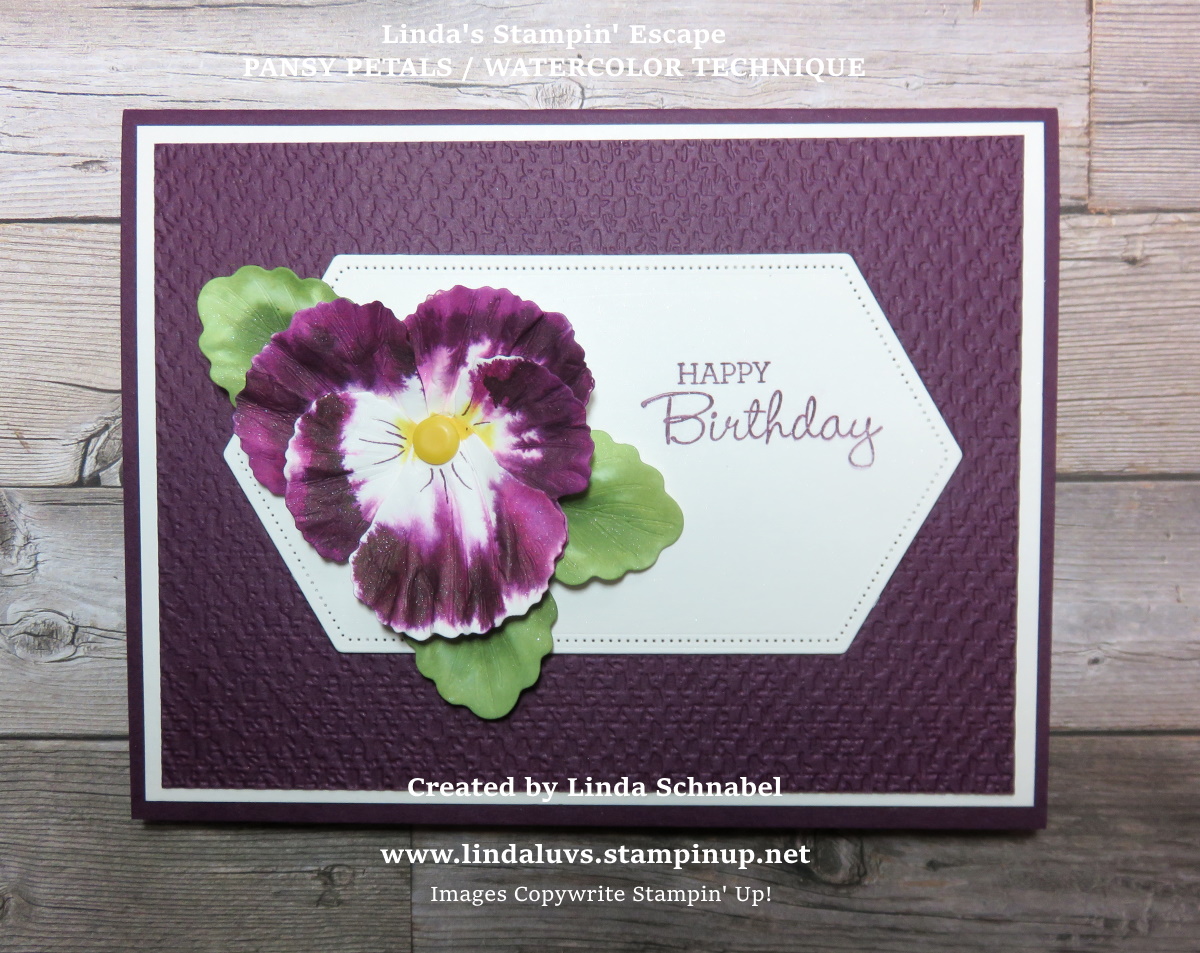
I’m here today with these stunning Pansies!! I am so excited to share this with you today … I have combined an old technique with our new Pansy Petals and the results are stunning!
I have created a video for you from a past Facebook LIVE so you can watch step by step how I created these beautiful flowers so you can recreate this too…. They almost look real don’t they?
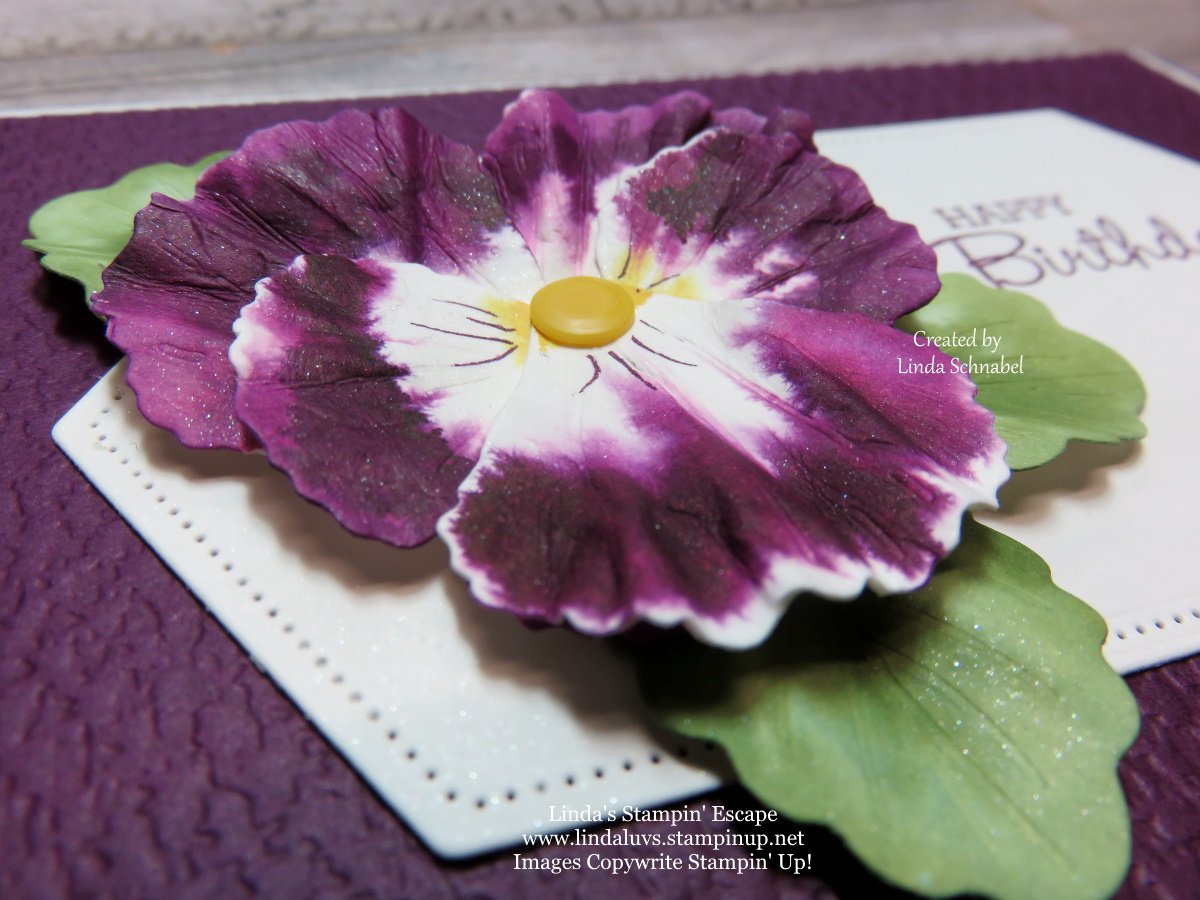
Isn’t that cool … I am in love with this technique! I loved it when I made pansies from the butterfly punch but these are so much more realistic!! It creates so much texture and depth when you “scrunch” your petals.
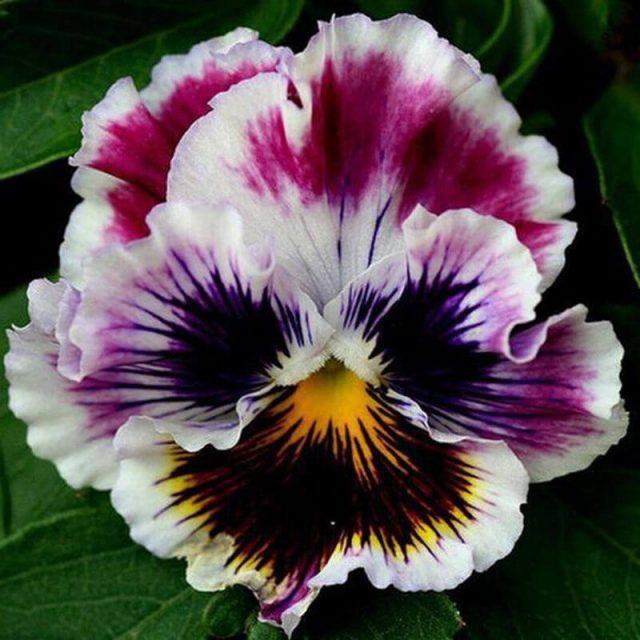
Those little white specs you see are actually the “shimmer” paper making a statement! It really is so pretty and you can do these in any color you’d like! Here is my inspiration to create these amazing pansies ….
Here is another card I made with the other colors of petals that I was experimenting with ….
Not bad for a 2 minute card!! I used the Pansy Petals Designer paper for my background and just added the flowers and my greeting … simple!
I said I was going to share my “inspiration pansy” with you today but I’m saving it for tomorrow … along with another card!! You won’t be disappointed. Thanks for stopping by today!
Hope your day is an awesome one ~
TODAY’S STAMPIN’ SUPPLY LIST … If you liked the products used in today’s projects, I have links for you below. Just click on the item you would like more information on, or to begin your shopping. It will take you directly to my website. Thank you ♥