I’m welcoming the New Year with a fun new class: the Bee Mine Class! Valentine’s Day is around the corner, and what better way to celebrate love than by crafting heartfelt sentiments for your beloved ones? Our Bee Mine Class promises an immersive experience where you’ll explore the versatility of the Bee Mine Suite Collection to design unique Valentines, experiment with fun folds, and craft so much more.
Spaces for this exclusive event is limited, so mark your calendars for our Bee Mine class on Wednesday, January 10th and be sure to RSVP by January 8th, 2024, to secure your spot! Don’t miss out on the chance to learn, create, and spread love through beautiful, handcrafted creations.
You can RSVP by messaging me below, emailing me at: lindaluvs2stamp@aol.com or call me at 262-334-1009 and join me for a fun filled evening discovering the versatility of the Bee Mine Suite. I look forward to stamping with you in 2024.
If you’re as batty about Halloween as I am, you’re in for a treat today. I recently had a fangtastic time at our Halloween class on Wednesday night, where we brewed up some spooky-cute fun with the Them Bones Designer Paper and the Tricks and Treats Bundle.
Today I’ll share my adorable Halloween card featuring candy corn die cuts and the spook-tacular Z-Fold … a super simple fun fold! Start with an 4-1/4″ x 11″ piece of cardstock then score at 2-3/4″ and 5-1/2″ … that simple.
Picture this: a room filled with fellow Halloween aficionados, a cauldron of stamping supplies, a dash of creativity, and a sprinkle of eerie ambiance. That’s exactly what our Halloween class was all about!
Our bewitching adventure began with the Them Bones Designer Paper. 🦇🦴This paper pack is a Halloween dream come true, featuring quirky skulls, spooky spiders, and haunted houses. It’s a perfect backdrop for all your Halloween crafting endeavors, and it set the mood for our ghoulishly delightful evening.
To cast our crafting spell, we enlisted the help of the Tricks and Treats Bundle. 🎃 This bundle is chock-full of charming Halloween-themed stamps and coordinating dies that make crafting a breeze. But the true star of the night? The candy corn die cuts!
So, as you prepare for Halloween this year, don’t forget the magic of crafting. The Them Bones Designer Paper and Tricks and Treats Bundle are your partners in Halloween crafting crime. Give it a try, and who knows, you might just conjure up some Halloween magic of your own!
Until next time, may your cauldron be bubbling and your Halloween crafting be absolutely spook-tacular! 🎃🕷️🌙
I’m excited to share the video, dimensions and the cutting guide for the All About Autumn 6″ x 6″ Designer paper. This is not just a sneak peek, it’s a treat for your senses … I love fall, it’s my favorite season!
Join me, grab the popcorn and a seat and lets watch the video ….
Now lets review the dimensions for the card base … they are quite simple.
CARD BASE: 8” x 5-1/2” then score at 3” … 6” … and 7”.
STEP PORTION: 6” x 3” then score at 4-1/4”
CUTTING DIRECTIONS FOR 6” X 6” DSP (Designer Series Paper)
Cut off ¾” from right side (you do not need this piece)
Cute ¾” off bottom (Measures ¾” x 5 ¼”)
From Left side cut off 2 ¾” and trim down length to 4”
Using the left-over piece / Flip it over to expose the decorative foil side
This beautiful paper makes creating stunning cards easy and now with the dimensions and video instructions, you to can make this card. The mini catalog will go Live on September 6th and in the meantime I’m planning some fun things and adorable to gorgeous cards for you.
Tomorrow I’ll be back with another sneak peek and with a little something old and a little something new. Thanks for hanging out with me today, have a good one!
Today I’m sharing another Delightfully Eclectic Designer Series paper card, a Fun Fold, and yes … the Faux Step card again. I am hooked on this quick & easy fun fold. Ohhhh, wait to you see the pattern I picked for this card …
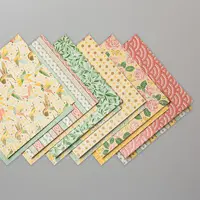
Those pretty pink posies and the stripes look great together and create a fun background. There are so many great patterns in this big bundle of designer paper, picking it up this month while it’s on sale is a smart move and a savings of almost $5.00
You can never have too much patterned paper. And with the Delightfully Eclectic 12″ x 12″ Designer Series Paper, you’ll always have plenty on hand. This extra-generous stack of paper has designs you can use for holidays, birthdays, seasons, and everyday use. Stripes, flowers, dots, grids, geometric designs—there’s a design for every project you want to make!
Side view ….
Card Base: 9″ x 4-1/4″ which is scored at 1-1/4″ … 2-1/2″ … and 5-3/4″.
Center step: 8-1/2″ x 2-1/4″ then score at 3″.
You need 3 pieces of designer paper; 4″ x 3″ … 4″ x 1″ (those will go on the base of the card). The 4″ x 1″ goes on the smallest panel to the front, then skip a panel, and then the 4″ x 3″ piece will go on the 3rd panel. The third measures 2″ x 5-1/4″ which goes on the step portion of your card.
If you have enjoyed this designer paper for the past two days, join me tonight when I share a couple of cuties using the Delightfully Eclectic designer paper on my Facebook LIVE tonight at 6:30 central time …. CLICK HERE to get onto my page. Then “Follow Me” so that you don’t miss out on any of the stampin’ action.
Thank you for hanging out with me today, and I hope to see you tonight.
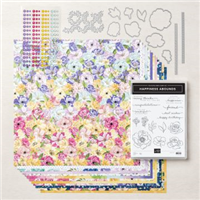
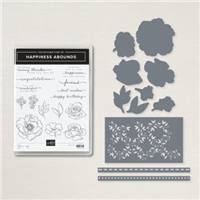
Here’s another beauty that will be retiring, the Happiness Abounds Bundle and the Hues of Happiness Designer paper… going to be hard to let this one go. Today I’d love to share this beautiful card with you that is enhance with the Accordion Z-Fold.
For my birthday card I used the Hues of Happiness Designer paper …
I began with my Night of Navy card base and the Hues of Happiness Designer Series Paper … You can see that I have used the coordinating dies to cut the floral pieces for the front. I will share measurement below so your can try out this car too.
Measurements: Card Base: (Night of Navy) 5-1/2″ x 11″ scored at 1-3/4″, 3-1/2″, 5-1/4″ and 7 on the 11″ side. Hues of Happiness and white embosses panels on accordion: 1-1/2″ x 5-1/4″, DSP on inside: 3-3/4″ x 5-1/4″, Folded mechanism: Night of Navy – 3″ x 6″ scored at 3″ on 6″ side and (3) White squares 2-3/4″ x 2-3/4″, Night of Navy mat for the white inside is cut 3″ square and will be placed onto the designer paper as shown. Use the alignment tip that I shared in yesterday’s video.
I used the Painted Texture embossing folder on the two white panels on the inside of the card. Greetings were stamped from the Happiness Abounds bundle in Night of Navy… and to complete my card, I added a few Iridescent Rhinestones. Who doesn’t love a little sparkle?
I hope you have time this weekend to play with these fun folds that I have shared in the past two days. Have fun and enjoy!!
Thanks for stopping by,
Here is a list of supplies used for today’s Fun Fold Accordion Z-Fold Card …
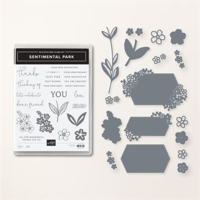
I’m thrilled to share the cards and the cutting pattern from my Facebook LIVE last night. I will share the replay with you which walks you through the cutting pattern, how to assemble and then finished cards created with the Sentimental Park Bundle. Plus you’ll learn a really cool way to use your Sentimental Park label dies.
Let’s watch the video first ….
Pretty cool right? A special Thanks to LeAnne Greff for sharing her Designer Paper pattern with all of us. The Dandy Designs makes picking patterns pretty easy too, and the Sentimental Park bundle … is it on your Wish List now? I love sentiment stamp sets and the fact that we can create so many with this set is amazing, and I love dies that are not like all the rest.
Here is a “cheat sheet” so you can remember the cutting dimensions. Feel free to click on the image and download it so you can keep it in your files.
Between the video and the pattern, I hope you feel inspired enough to make some of these up yourself. I will share the rest of my color pallets with you the next few days but let’s get a better look at the ones I did last night …
On this card I only used 2 of the 4 patterns that I cut. I used the smaller of the two label dies with the flowers (it’s so cute) then I added the Fresh Freesia Opaque Adhesive Backed Gems and a swatch of the Fresh Freesia ribbon.
Next up is the cute flowers, you can use them separately, or layer them as I did …
I used the second smallest circle from the Stylish Shapes dies for my greeting on this card. Can you see the embossing on the flowers in the center… too cute.
Another card for you …..
This is the largest of the dies with the floral pieces on it. I also used the Opaque Adhesive-backed Gems on this card … they were right, but I used my Stampin’ Blends to color them so they popped on the die cut. I also added Wink of Stella to the flowers.
Now we’re going to use this die to cut a piece of Fresh Freesia ….
This one is special because we can tuck the solid die cut label and tuck it into the floral one … I flipped when I figured this out. Image this in whites, it would make a perfect wedding card. Add Gold and turn it into an anniversary card. The possibilities are endless … see why I fell in love with this amazing bundle!?
Love this cute cutting pattern, and trust me, you can use this pattern with any of your favorite designer papers. So I hope you go into your stamp room today and try it out. And if you fell in love with the Sentimental Park bundle, I have the link for you below … just click on it and you can have it in your stampin’ stash soon.
Thank you so much for hanging out with me today.
Have a beautiful day ~
The supplies I used to create today’s card is listed here ….
So, how many of you tried the easy, breezy Basic Z-Fold Card I shared yesterday? Which of the three options did you try? Ready to step it up?? Today I’d love to share this beautiful card with you that is enhance with the Accordion Z-Fold.
For my birthday card I used the Hues of Happiness Designer paper …
I began with my Night of Navy card base and the Hues of Happiness Designer Series Paper … You can see that I have used the coordinating dies to cut the floral pieces for the front. I will share measurement below so your can try out this car too.
Measurements: Card Base: (Night of Navy) 5-1/2″ x 11″ scored at 1-3/4″, 3-1/2″, 5-1/4″ and 7 on the 11″ side. Hues of Happiness and white embosses panels on accordion: 1-1/2″ x 5-1/4″, DSP on inside: 3-3/4″ x 5-1/4″, Folded mechanism: Night of Navy – 3″ x 6″ scored at 3″ on 6″ side and (3) White squares 2-3/4″ x 2-3/4″, Night of Navy mat for the white inside is cut 3″ square and will be placed onto the designer paper as shown. Use the alignment tip that I shared in yesterday’s video.
I used the Painted Texture embossing folder on the two white panels on the inside of the card. Greetings were stamped from the Happiness Abounds bundle in Night of Navy… and to complete my card, I added a few Iridescent Rhinestones. Who doesn’t love a little sparkle?
I hope you have time this weekend to play with these fun folds that I have shared in the past two days. Have fun and enjoy!!
Thanks for stopping by,
Here is a list of supplies used for today’s Fun Fold Accordion Z-Fold Card …
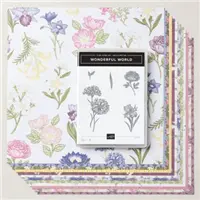
A Wonderful World … Celebrate the natural beauty found around the world with this stamp and paper bundle featuring prominent flowers from across the globe. The stamps and paper are designed to coordinate perfectly for handmade cards as beautiful as Mother Nature herself.
The Wonderful World Bundle includes the Wonderful World Stamp Set and the Wonderful World 12″ x 12″ (30.5 x 30.5 cm) Designer Series Paper. Let me show what a beautiful combination these two are together…
I’m teaming it up with the Corner Flip Fold … an easy Fun Fold that gives your card extra dimension and an additional pop of color by exposing the designer paper we are using on the inside…. Instead of trying to write down all of the instructions, I have created a video from my LIVE presentation during my Summer Sale-a-bration & Mini Catalog Celebration.
I hope that the video explains how to create the fun folds and shows how beautiful this bundle really is. I love the “Distinktive” stamps and how realistic they are…. those sponge daubers add color so nicely to the stamps as well.
Thank you for stopping over today and checking out my blog,
Here is a list of the products I used for my two cards shown in the video ….
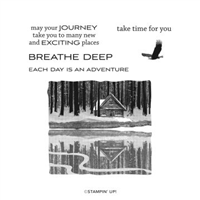
Today I have a beautiful card to share with you created by my friend Lisa Solis Brown featuring the Reflected in Nature Stamp set. I’ll be share all the dimensions and step by step instructions for you too.
Measurements:
Card Base: Night of Navy Cardstock- 4-1/4” x 11”. Score at 2-1/4” and 5-1/2”.
Night of Navy Cardstock Layers: 3-3/4” x 3-3/4”, 3-3/4” x 3/4”.
Balmy Blue Cardstock Layers: 4” x 4”, 4” x 1”.
Basic White Cardstock Layers: 3-1/2” x 3-1/2”, 1/2” x 3-1/2”; 4” x 4” for inside.
Instructions:
Stamp the image in Night of Navy on the 3-3/4” square. Glue this piece to the Night of Navy square, then these adhered pieces to Balmy Blue square.
Fold and burnish with Bone Folder at the 2-1/4” score line on the card base to make a tent fold. Glue the bottom of the image piece the bottom portion of the tent piece as shown.
Stamp sentiment on Basic White strip. Layer this piece with the Night of Navy and Balmy Blue strip.
Glue the 4 x 4 square near the top of the inside of the card.
Using Dimensionals, adhere the sentiment piece just below the 4 x 4 square on the inside of the card. This will be the “bumper” piece to hold the easel fold open.
Apply 5 gems to card front.
I hope you enjoyed today’s card share and tutorial. Thank you for joining me today.
Have a wonderful Sunday ~
TODAY’S STAMPIN’ SUPPLY LIST … If you liked the products used in today’s projects, I have links for you below. Just click on the item you would like more information on, or to begin your shopping. It will take you directly to my website. Thank you ❤
I am excited to share my card with you today! You’ll see how I created the Ombre effect on the pretty True Love Designer Series paper, and then use it while I show you how fun and easy it is to create the Double “Z” Fold card. I’ll be sharing my Facebook LIVE video with you as well as the dimensions for the card…
I really like the way this card turned out, a bit different and whimsical. Join me and sit a bit to watch how I created today’s card. Just click on the > to begin viewing …
Wasn’t that an easy card to make … sometimes watching a video just makes it easier to remember how to do it. Here at the dimensions you will need when cutting your for your card.
You can actually click on this picture and save it! Then you will have the dimensions to make as many Double “Z” Fold cards as you’d like! I love the surprise of a Z Fold card because when you look at the front of the card, it looks like a regular card front ….
You have a nice border all around … you can see the Ombre that we created, the cute daisy and even our colored droplets, but when you open it up … you are greeted with a fun fold that will put a smile on anyone’s face …
I want to thank you for spending part of you day with me today. I hope you enjoyed the video and feel inspired to try your hand at this fun fold … don’t forget to try out the Ombre technique as well.
Have a beautiful day ~
TODAY’S STAMPIN’ SUPPLY LIST … If you liked the products used in today’s projects, I have links for you below. Just click on the item you would like more information on, or to begin your shopping. It will take you directly to my website. Thank you ♥
How are you doing this fabulous Friday? I’m actually doing quite well … I’m back at work but only during the morning hours when the store is closed, so I’m home in plenty of time to get things done! So the studio is cleaned and I got a cute fun fold for you today!
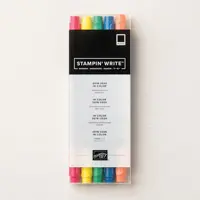
I’ve done this fold before and it’s easy to do and just a little different than sending the same old flat card (those are pretty too!). I used the “Love What You Do” stamp set in Grapefruit Grove … one of the In-Colors that will be retiring this year.
How would you like some instructions? OK … Let’s do this! … oh my!! I forgot to put my Early Espresso Base on!!
Cut your card base (It will be on the next picture) 5-1/2″ x 4-1/4″
Folded (Grapefruit Grove) cardstock: 9-1/2″ x 5-1/4″ then Score at 2-1/2″ and 5-1/2″
Inside (Very Vanilla) cardstock: 5″ x 3-3/4″
Fold Grapefruit Grove piece in have (at 5-1/2″ score line)
Then fold “back” your piece scored at 2-1/2″ so its over the top and the edge is to the left.
Either die cut or punch 2″ through the folded piece (slightly less than 1″ from top) Die cutting is easier than punching!
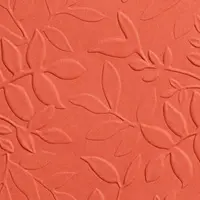
Emboss the front piece (ONLY) Bring your folder to the score line and run it through your embossing machine. I used the Layered Leaves 3D folder.
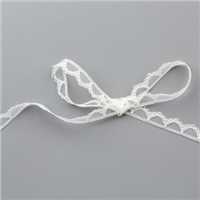
Glue the Scalloped Lace trim onto the back of the embossed edge (Let Dry).
You can either glue the flap down at this time, or leave it open to add a little more drama to your card!
Set your vanilla piece inside (do not glue yet) fold flap over so you can determine where you will stamp your flower. I place my finger there to hold the spot before I fold the flap back over … then stamp. If you are a “perfectionist” … draw a light pencil mark around your punched opening so you know exactly where to stamp. Then erase the pencil line.
Color in your flowers … be careful, I used Early Espresso, this will smear when coloring with the marker. I was just very careful. Otherwise, you can use the Momento ink pad. Add a touch of the Wink of Stella to give it a little sparkle!!
I did not measure my cardstock for the greeting … I stamped it onto a scrap piece and cut it to fit.
Finish card by adhering the vanilla to the inside, and card front onto the Espresso base.
Here is the sample with the Early Espresso base attached…
The Espresso base really makes the card “pop” and it ties in the Early Espresso mat behind your greeting and your stamped image. I forgot in my instructions the Grapefruit Grove Grosgrain Ribbon on the banner. That too will be retiring this year 😦 Love the 2018-20 In-Colors.
I prepared a list of ingredients for you as well …
I can’t believe it’s Mid-April already! The retirement list will be coming out soon, so I like to remind my friends that if they need any of the retiring inks / colors to pick them up before the list goes out. Just the clearance rack … when it’s gone, it’s gone. One more peek at that cute card … with or without the base?? lol
Thank you so much for coming over to my blog today! It’s fun to spend some time with you, just wish it was in person!!
Our “Safer at Home” has been extended to May 26th!! I’ve been practicing on Facebook so I can bring you a live stamping session! There is a video of my stamp room on there from yesterday.
I hope you had a wonderful Easter weekend. Did you spend a lot of time online chatting with family and friends or are you lucky to have your family members with you. Either way, hearts seem to find each other don’t they.
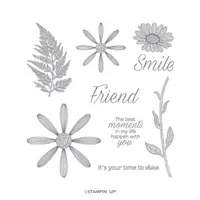
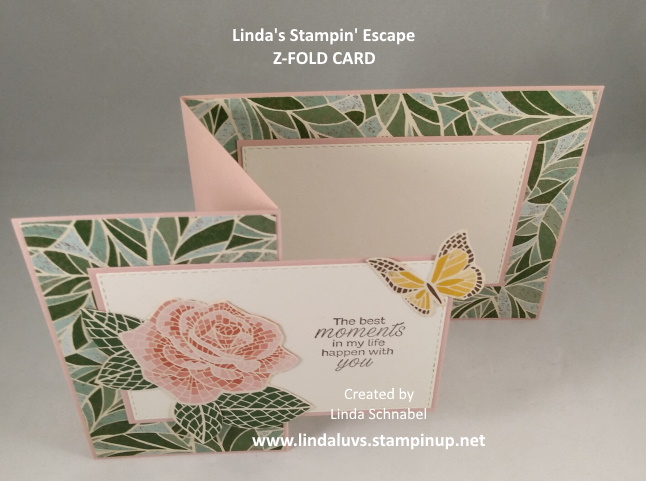
Today I am sharing another Z-Fold card and as promised … I will have Step by Step instructions for you to follow. I’m using the beautiful “Mosaic Mood” Specialty Designer Paper … the pictures don’t always show the “embossed” areas on the paper, it’s so pretty! I had to cut out my rose and butterfly but I find that relaxing.
Let’s start from the beginning … our card base. I used Blushing Bride on this card.
Cut cardstock: 11″ x 4-1/4″ then score at 2-3/4″ and 5-1/2″
Fold cardstock in half, and then at the score line, fold the top back onto itself. This will give you the Z in your Z-Fold Card!
Cut Designer Paper: 2 pieces at 4-1/8″ x 2-5/8″ and 1 piece at 4-1/8″ x 5-3/8″
Adhere your designer paper onto your card base.
Prepare front and inside of your card. Die cut 2 pieces of Very Vanilla with the 3rd Largest rectangle from the Stitched Rectangles Dies. Cut 2 pieces of Blushing Bride at: 4-1/8″ x 2-3/4″ these will mat (bottom layer) of the Very Vanilla
At this step I fussy cut my rose and butterfly from the “Mosaic Mood” Designer paper to prepare it for assembly.
Next step is to stamp the greeting onto the card front. I have not assembled at this point.
Align your cut images into the spots you will want them so you know where to stamp your greeting. My greeting comes from the Daisy Lane Stamp Set.
Now I adhere my Very Vanilla pieces onto the Blushing Bride.
Adhere the unstamped piece of cardstock onto the inside of your card … center it. This will help you align the front piece.
When adhering the front piece, remember your front is “folded back upon itself” so only the left HALF of the stamped piece will get adhesive / glue. If you glue the entire piece … your card will not open.
Final step is to attach your rose and butterfly … feel free to embellish with Rhinestones if you’d like.
Congratulations … you have made it through the Z-Fold. It’s quite simple but a lot of fun to get in the mail!! Stands up nicely too 🙂
Here are all the ingredients used for today’s card …
In the future I will share the “Double Z-Fold” Card … might have to be a Two 4 Tuesday as there can be variances in the Double Z, but that’s what makes them fun.