SPOILER ALERT … February 2017 Paper Pumpkin

Hello Stampin’ Friends ~

Today I’m sharing the February 2017 Paper Pumpkin Video … but first I have a little trivia from the home offices of Stampin’ Up! …

    • As of 2-15-17, over 510 thousand Sale-A-Bration items have been earned! Wow!
    • Top item by quite a bit is Hey Chick.
    • Numbers two and three are neck-and-neck: Avant Garden and the Carried Away DSP.
    • Anyone have a guess on number four?


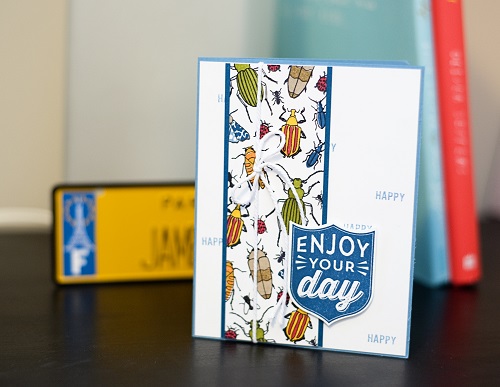
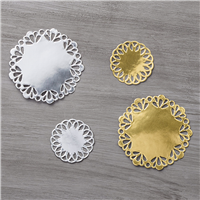
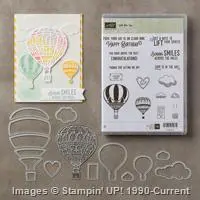
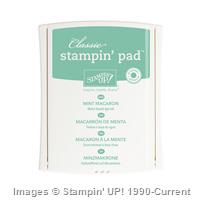
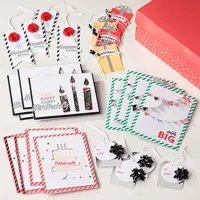
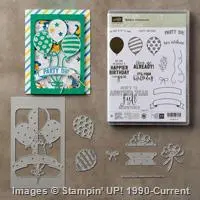
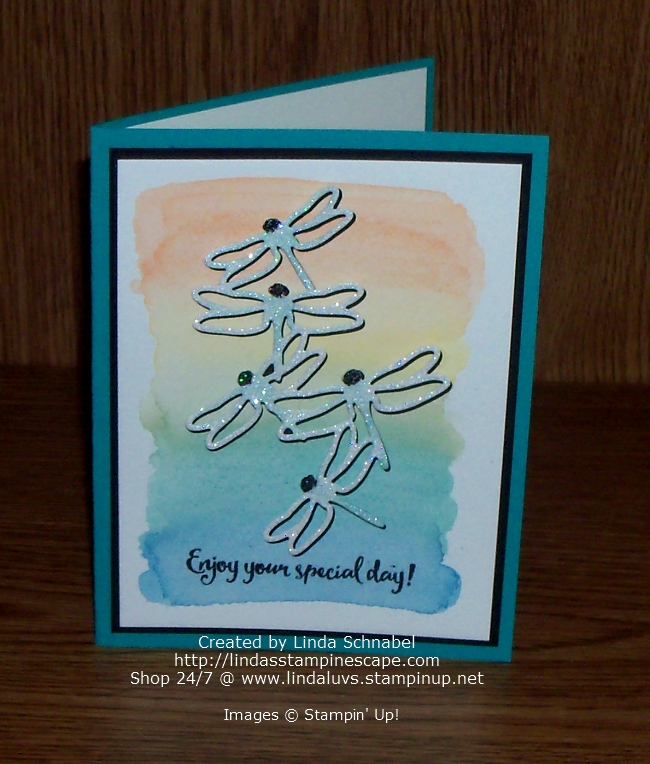
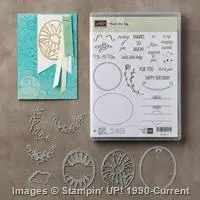
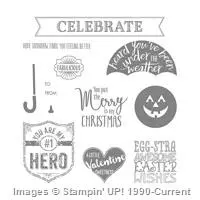
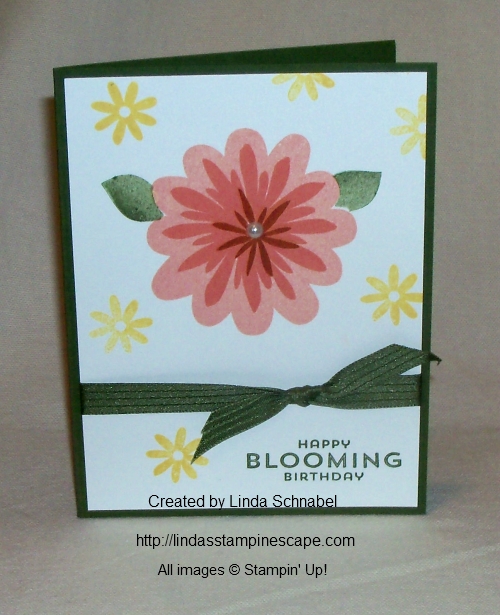
Pull off the perfect party with the Many Happy Birthdays Kit! The pull tab candle cards can be used for invitations, birthday wishes, or as gift card holders. The kit will blow you away with nine cards in three different designs, a versatile photopolymer birthday stamp set, two Classic Stampin’ Spots, and gold glitter candle flames for added flare.

What a cute way to present a “Gift Card” or send an invitation. 

Paper Pumpkin is on sale during Sale-a-bration!! Now is a great time to try out Paper Pumpkin and to get FREE Sale-a-bration items!

3-Month Prepaid Subscription (137859) $59 $55  Save on a  3-month prepaid subscription and instantly qualify for a FREE Sale-A-Bration item!
12-Month Prepaid Subscription (137861) $215  Take it to the next level with a 12-month prepaid subscription. Save over $2/month with the everyday awesome price, earn Stampin’ Rewards, and get 4 FREE Sale-A-Bration items!
This offer will end on March 31, 2017 at 11:50 PM (MT).

As always … you’ll collect Virtual Rewards Points from me as well 🙂

Let me know if you have any questions on the Paper Pumpkin kits @ lindaluvs2stamp@aol.com  or just click one of the links below and start your Paper Pumpkin adventure!

Thank you for taking time out of your day to visit my blog.

Have a nice day! 🙂

blog-closing-small      starry-purple-background-vector

TODAY’S HIGHLIGHTED PRODUCT LIST …


Cute Little Monster

Hello Stampin’ Friends ~

Hope you had time to enjoy the nice weekend we had! So nice to see the sun out again.

Today I’d like to share with you a couple of “monster” projects! These cute projects were created by the “Yummy in My Tummy” stamp set and one of our 2017 Artisan Design Team members Cathy Caines.

When our Artisan Design Team members share their projects on the Stampin’ Up! blog of stamp sets that I don’t have, I like to pass on the creativity to you.

1

The first project consists of this cute monster … a shaker card!!  His tummy is filled with the Sprinkles Embellishments (item 142741) are the perfect thing to use! Cathy even created a fun envelope for her card.

Cathy said “There are lots of options with this stamp set. You could punch out its belly and replace it with so many things including lollipops, mini containers of colored modeling clay, lip gloss, and chocolate eggs. The possibilities are endless and I can’t wait to see what you come up with!”

5

Her next little project used a doily to frame her little monster and turn it into a sweet treat for Valentines day.  How clever!!

Hope you enjoyed these cute little monsters as much as I did.  I am grateful to Cathy for sharing her awesome projects. I think they are so cute.

Thanks for stopping in … and a special thanks to our 2017 Artisan Design Team members Cathy Caines.

Hope you enjoy the day.

blog-closing-small


Beetles & Bugs Stamp Set …

Hello Stampin’ Friends ~

Today I’d like to share with you some really cute cards from one of our 2017 Artisan Design Team members; Shannon Lane.  Shannon took a stamp set that I didn’t look twice at and created these really cute cards that make me want this stamp set: Beetles & Bugs!

I’m not really into bugs, but Shannon takes this to a whole new level with her first project.  She said “Combined with the Hardwood Background Stamp (item 133035), making this display of (faux!) mounted bugs was so easy! Stamping the beetles was a blast; each piece lined up so perfectly and it was quick and easy to do.”

120361b583795661a8962ff0000f7f0e6

Next Shannon has a birthday card with a bright collage of beetles …

36f361b583795661a8962ff0000f7f0e6

And just in case you have a little girl who likes bugs too ….

482361b583795661a8962ff0000f7f0e6


Thank you so much for stopping by today; I really hope Shannon’s cards inspired you to create with the fun stamp set full of bugs! Who knew.

And Thank You Shannon Lane, our 2017 Artisan Design Team member for sharing the fun and coloroful cards. They really are Cute as a Bug!

Have a great day!

blog-closing-small


Enjoy Your Special Day …

Hello Stampin’ Friends ~

Today I’d like to share with you another one of the cards that we did as a Make -n- Take at Kathie’s party. We learned two different types of embossing, watercoloring, and how fun the BigShot is!!

We begin with our color pallet: Whisper White, Tempting Turquoise, and Silver! Sounds like a touch of the Southwest! Our base card is Whisper White and the card front Tempting Turquoise … soon to be embossed with the New “Petal Burst Embossing Folder”.  All you need to do is roll it through the BigShot and it comes out beautifully textured.

000_4042

Our next step and second type of embossing is “heat embossing”. You will need the beautiful dragonfly from the “Dragonfly Dreams” bundle.  Next you’ll need the VersaMark ink pad, the Silver Embossing Powder and the heat gun.

Stamp dragonfly with VersaMark, sprinkle with embossing powder (shake off excess) and begin to heat.  Watch the dull powder turn into a shiny silver raised image!! It’s amazing! Our next step was to take the dragonfly framelit from our bundle, and on a separate piece of turquoise cardstock layer one of the circle dies from the “Stitched Framelits Dies” and cut them out on the BigShot.

000_4040

We’re now going to color our dragonfly by pulling some Tempting Turquoise ink from the pad with your Aqua Painter and then gently brush color onto the wings. It’s so easy to do and adds a nice touch of color to our dragonfly. Now we’re going to adhere our layers beginning with the Silver Metallic Doily.

Our greeting comes directly from the stamp set from our “Dragonfly Dreams” bundle. A few rhinestones were added to the card to draw the eye to the dragonfly and to anchor our greeting. Our new stampers were amazed they could make a card with that many techniques … I just reminded them they are just doing 3 simple techniques/steps, and then putting it all together!

000_4042

I hope you enjoyed our card as much as the rest of us did, and that our hint of the Southwest will bring us some much needed sun and a bit warmer temperature!

Thanks for coming by …

Enjoy your day, and I hope it’s special!

blog-closing-small            starry-purple-background-vector

TODAY’S STAMPIN’ SUPPLY LIST …


Birthday Across the Miles …

Hello Stampin’ Friends ~

Today I’d like to share with you a card that I used as a Make & Take at Kathie’s workshop. I’d like to thank Kathie for inviting me into her home to share my passion of stamping. It was so great to see old friends and meet new stampers! What a great group.

Kathie’s guests ranged from “never” stamping before to stamping longer than me … and I’ve been doing this for almost 17 years. Time flies when you’re having fun!! My challenge was to come up with Make & Takes that were easy for newbie’s to do, yet fun enough for seasoned stampers.

Here is what I came up with ….

000_4010

I chose one of my favorite bundles … the “Lift Me Up” bundle found on page 10 of the Occasions Catalog.  We talked about how easy it is to create a card using Designer Series paper – here you see the “Carried Away” Designer Series paper (Free with a qualifying purchase).

Of course stamping is easy … Stampin’ Up! creates these great stamps and we just use ink and paper to create something fun and cute! We simply stamped our greeting in Night of Navy and then stamped the small Hot Air balloon from the stamp set in Mint Macaron on Mint Macaron cardstock.

Ok … they’re thinking this is fun, and easy! While we were at it, we stamped the inside of the card as well. Again the salutation in Night of Navy and the balloons in Mint Macaron. Then I pulled out the BigShot!

000_4012

Ohhh… don’t be scared, let me show you have easy this is!  They took the Dazzling Diamonds Glimmer paper and set it on the Precision Base Plate on top of our BigShot platforms and rolled it through. Check to see if it’s all the way cut through, yes …

OK, now let me show you how easy it is to get all the little pieces out of this balloon die (enter … Die Brush) Man – that little brush really knocks out all those pieces. And it’s fun!!

Wow … all we have left to do is secure our Hot Air balloon. You can either use the Fine Tip Glue pen or the Multipurpose Liquid Glue.

Can you believe it!! You just made that card … it wasn’t hard at all. Three simple steps combined can create a fun, layered card.  Did you notice that by stamping the small balloon in the same color as the cardstock gives that appearance that it is farther away than your focal point – the balloon done with the glimmer paper.

000_4010

Now is a great time to have a Stampin’ Party because not only do you get your hostess (rewards) benefits … Your guests have the opportunity to earn FREE goodies too!! I’d love to stamp with you and your friends … contact me, and we’ll set something up.

Thank you so much for dropping in today ~

Hope you have some fun today!

blog-closing-small    jan2017-hostess-code

TODAY’S STAMPIN’ SUPPLY LIST …


More on Birthdays

Hello Stampin’ Friends ~

Today I’m going to share another video that highlights a birthday card kit!

Stampin’ Up! trainer Brandi and her daughter Lily Jane, share some tips and tricks for the Birthday Bright Project Kit–a brand-new kit in the 2017 occasions (spring/summer) catalog.

I thought it was so cute to see Brandi’s daughter Lily Jane showing us how to make this card.  You’re never too young or old to stamp!  My granddaughter started stamping when she was 4 years old … and I have many stampers that are well (shhhh) we never tell a women’s age!!

This kit is awesome and the cards are so cute!  Twelve cards with envelopes and 12 gift tags and the cute storage box… wow! Don’t forget the envelope template … how neat to have that for all your future mailings.  I now have this on my next order!! Let me know if I can order one for you, or just click on the pictures below and you can shop directly from my on-line store.

Thanks so much for checking out my blog today.

I hope your day is a good one.

blog-closing-small        jan2017-hostess-code


Today’s Stampin’ Supply List …


Birthday’s & Balloon Adventures …

Hello Stampin’ Friends ~

Happy Tuesday to you!  Today I’m going to share with you a video of a great new product that was introduced in the Occasions catalog, the Balloon pop up die …

Watch Stampin’ Up! trainer, Brandi, give some tips and tricks on using the Balloon Adventure Stamp Set, Balloon Bouquet Punch, and Balloon Pop-Up Thinlits.

I love learning all the tips and extra things you can do with a product before you purchase, that’s why I love to share these videos with you.  If you want “hands-on” …. invite me and some friends over and let’s have a Stampin’ Party. 

Now is a great time to host a stamp party, it’s Sale-a-bration – You and your guests can earn FREE products! Maybe we can even get you this bundle for FREE too!

Let me know if you have any questions with the products shown here today, or would like to host a stampin’ party!  Stop back tomorrow and see what I’ve come up with using this fun product suite.

Thanks for checking it out, see you tomorrow.

Have a terrific Tuesday!

blog-closing-small      jan2017-hostess-code


TODAY’S STAMPIN’ SUPPLY LIST …


Special Day … Watercolor Technique

Hello Stampin’ Friends ~

Today we’re trading in the designer paper for our Watercolor Paper! We are going to use the new Watercolor Pencils to create a really cool background with step by step instructions!  As promised, I will be using the “Dragonfly Dreams” bundle again today.

000_3978

So … we are going to begin with our watercolor paper, the new pencils and your Aqua painter.

000_3967_0001

When you color your paper, you do not need to press hard … the lead is soft and spreads easily. You can use any color combination for your cards but today I went with more of a rainbow effect.

Did you know these new Watercolor Pencils come in Stampin’ Up! colors … that is awesome!!

000_3969

Once you’ve colored your paper with the desired colors, take your Aqua Painter and begin your watercoloring process just by moving the painter … the water is inside. Just a little squeeze can give you a bit more moisture.  Too much moisture or water puddling?  Simply soak it up with a tissue. Let Dry.

Now were back to our dragonflies … again, I cut from the Dazzling Diamonds Glimmer paper, but this time I cut out an additional set of dragonflies in black and adhered that to my glimmer paper with just a touch of it showing … creates a nice shadow effect!

000_3981

I did some watercoloring directly onto my glimmer paper as well. Also colored their heads in (not sure I’d do that again)!! They are popped up with dimensions so they appear to by flying.

Just love this bundle and the new Watercolor pencils.  If you like watercoloring be sure to stop back tomorrow, I have another Water color card for you.

Thanks for dropping in. I hope you enjoyed the card today and yesterday that highlighted the Dragonfly Dreams bundle.

Have a great day!

blog-closing-small    jan2017-hostess-code

STAMPIN’ SUPPLY LIST …


Timeless Tags Card & Class Annoucement

Hello Stampin’ Friends ~

How are you on this fine Monday?  Me? I’m great … starting a much needed vacation! So while I got my computer running better, I’m power blogging so I don’t miss a beat while I’m gone.  I’ve got some great cards to show you this week!

Today we’re going to step it up a notch.  Yesterday I share two cards with you that used the “Falling in Love” Designer paper and the “That’s the Tag” Bundle, so today I took the pink card and I’m going to show you how you can “step it up” ….

000_3954

We are taking the pretty flower cut from the Timeless Tags Framelits Die and we’re going to mount it to a piece of coordinating cardstock – Sahara Sand and then cutting out the same image in two different colors so we can “piece” those pieces into our original frame. Here are the results ….

000_3965

Isn’t that pretty! The colors coordinate so nicely especially against that Bokeh background on our designer paper.

I have some great stampin’ tips for you when using this technique.  Mount the frame of your image onto your mat before you begin … I use the Fine Tip Glue Pen.  Set it aside for now.

When die cutting your colors: Only use a small piece of Pear Pizzazz to cut out your leaves, you do not need the entire flower, pop out the pieces you need and mount them directly into your frame. Again, I use the Fine Tip Glue Pen and put the glue into the recessed area of your frame.

000_3960

Next, I used Blush Blossom for my petals – I die cut the entire image.  DO NOT POP OUT YOUR PIECES (Petals) Take them out as you assemble them, that way you will know exactly where that piece belongs.  When you are all done with your petals, you can pop out the other pieces and save your frame for the next card!

000_3961

Lastly, I cut the center of the flower with a scrap piece of Pear Pizzazz. I also did a bit of paper piercing around the edge of my flowers center.

You could use a yellow if you wish, however I thought using just these two colors worked best and really brought out the sparkly color from out Dazzling Diamonds Glimmer Paper Frame.

000_3965

Hope you enjoyed my “Stepped Up” Timeless Tag card.  If you would like to learn how to do this “Hands On”- I’m hosting a TIMELESS TAG class on Wednesday, February 15th. / Cost $60

This class will include: That’s the Tag Stamp Set, Timeless Tags Thinlits Dies, Fine Tip Glue Pen, Paper Piercer, Stampin’ Mat and a minimum of 3 projects! Wow, that’s a basket full!!  BUT WAIT, I’m not done – YOU also qualify for a FREE Sale-a-Bration item of your choice!! A $75+ Total Value!!

MUST RSVP by FEB. 1st, 2017 to ensure we get all your supplies & goodies ordered by class time.  Limited seating: 8 attendee’s per class.  I will schedule a second if the first class fills.

You will learn: Hands On the Paper Piecing / Puzzle technique used on today’s card, plus additional tips and techniques that highlight the fabulous dies and stamps in the “That’s the Tag” Bundle!!

CLICK HERE FOR DETAILS & RSVP

Hope to see you in my Timeless Tags class. You can also RSVP by calling me at 262-334-1009

Thank you for joining me today, I hope you have a fabulous Monday!

blog-closing-small   jan2017-hostess-code

STAMPIN’ SUPPLY LIST …


Simply Sunday: That’s the Tag

Hello Stampin’ Friends ~

Today I have a simple and easy cards for you that delights the eyes with our beautiful “Falling in Love” Designer Series paper. The possibilities are endless when you teams this designer paper with the “That’s the Tag” Bundle!

On the first card I chose the “Falling in Love” Designer Series paper that had the delicate flower pattern. The color is Sahara Sand so I used Very Vanilla as my base and my tag.  I stamped the tag with the oval dot pattern and the thanks from the “That’s the Tag” stamp set from the bundle of the same name.

000_3951

I then added the pretty little “Falling in Love” embellishments from the Falling in Love suite. I placed them to align with the pattern on the paper and to anchor the greeting. Simple!

000_3949

My next card, I again used the “Falling in Love” Designer Series paper but chose the “Bokeh” style paper. Bokeh, which is pronounced bow-kay or bow-keh, refers to the wonderful out-of-focus light and shapes. The color pallet on my card is Blushing Bride and Sahara Sand.

000_3954

On our first card we used the simple oval tag for our greeting, on this card we stepped it up with the pretty flower die cut from the Dazzling Diamonds Glimmer paper.  Oh so pretty!

Again, the greeting comes from the bundle and I created a simple banner and then backed it with a touch of the glimmer paper to make the greeting pop.

000_3958

Simple cards to make but dramatic in texture and design. I hope you enjoyed today’s cards … I will be back with more of the items we used today.  You can see a list below.

Thank you so much for taking time out of your Sunday to visit me.

Have a wonderful day ~

blog-closing-small    jan2017-hostess-code


TODAY’S STAMPIN’ SUPPLY LIST …


Balloons, Balloons, Balloons … See what the fuss is all about!

Hello Stampin’ Friends ~

Today I’d like to share with you how Stampin’ Up! introduces our new Occasions Catalog! It gives you a fun way of seeing what these fabulous stamp sets and accessories can do … in motion! Take a look …

 Wasn’t that fun!!  How do you like the new “tool” set? Great for the much desired “man” cards!!  Now, I have another video for you to watch  …

Watch Stampin’ Up! trainer, Brandi, give some tips and tricks on using the Balloon Adventure Stamp Set, Balloon Bouquet Punch, and Balloon Pop-Up Thinlits. Contact me to order yours or visit www.lindaluvs.stampinup.net to order yours today!

Thanks so much for spending part of your day with me! I hope you enjoyed the videos.

Stay warm Wisconsin … and everyone, have an awesome day!

blog-closing-small


RMHC Day of Change …

Hello Stampin’ Friends ~

Today I have another card parade for you … featuring the “MY HERO” stamp set to honor the Ronald McDonald House Day of Change ….

14720546_10155363940753840_4557430107992624772_n

October 15th is an extraordinary day. It is the day when the entire RMHC global system commemorates the opening of the very first Ronald McDonald House. To celebrate, we rally around our Donation Boxes-our largest fundraiser- to ensure that we continue to keep families close to the care and resources they need to thrive.

Your small change can change lives for Ronald McDonald House Charities … Donate to a RMHC donation box at your local participating McDonald’s.

Today I just wanted to post a recap of all the cards that I created so far, using the NEW My Hero Stamp Set… Stampin’ Up!s exclusive stamp set created for the Ronald McDonald House Charities.  

I will share all 7 with you today …

000_3508

Ronald McDonald House Charities®

Stampin’ Up! partnered with Ronald McDonald House Charities (RMHC). Each year, we design an exclusive stamp set to promote the partnership with RMHC, and donate a portion of the proceeds from the each sale of that set. To date, more than $1,000,000 has been donated from RMHC stamp set sales.

000_3527

Stampin’ Up!’s demonstrators are also encouraged to volunteer their time teaching local Ronald McDonald House guests the creative art of rubber stamping through the Making a Difference program. Demonstrators also create cards at training events which are donated to Ronald McDonald Houses. Those staying at the Houses then use the cards to keep in touch with loved ones while they are away from home.

000_3517

How you can help!

You can help us make a difference. Purchase this year’s set, My Hero, and we’ll donate $3 to Ronald McDonald House Charities for each set purchased.

000_3529

000_3515000_3519000_3521

THE RONALD McDONALD HOUSE

Our homes are filled with more than help, they’re filled with hope

Many families travel far from home and spend several weeks or months to get treatment for their seriously ill or injured children – a long time to be away or to divide a family. And, for children facing a serious medical crisis, nothing seems scarier than not having mom and dad close by for love and support. A Ronald McDonald House is that “home-away-from-home” for families so they can stay close by their hospitalized child at little or no cost.

Our Houses are built on the simple idea that nothing else should matter when a family is focused on the health of

their child – not where they can afford to stay, where they will get their next meal or where they will lay their head at night to rest. We believe that when a child is hospitalized the love and support of family is as powerful as the strongest medicine prescribed.

You can help us make a difference. Purchase this year’s set, My Hero, and we’ll donate $3 to Ronald McDonald House Charities for each set purchased.

I appreciate you staying with me to learn more about the Ronald McDonald House Charities. It’s a foundation that touches my heart, as our children are our future. I’m proud that Stampin’ Up! is a RMHC partner.

Have a safe and wonderful day ~

blog-closing-small         october-2016-hostess-code

You can choose from either a wood mount or clear mount stamp set …


Wonderful Birthday Wishes

Hello Stampin’ Friends ~

Today I’m going to share with you a sweet card to celebrate a friends birthday, and what better way than to send a “Basket of Wishes”. This is the stamp set that creates the focal point of your card.

Let’s begin with the “Pretty Paisley” textured embossing folder … this is your first step in creating this card. I love the way the oval encompasses the greeting and our dragonfly, then brings your eye right to your focal point … the basket of flowers.

000_3693

The basket and flowers were simply colored with multiple markers … you could watercolor with the Aqua Painters is you wanted a more subtle look.

Our cute little dragonfly comes from the “Touches of Texture” stamp set found on page 141 of the Annual catalog. There are no rules that say you can’t mix and match stamp sets, in fact, Stampin’ Up! designs many of their sets to coordinate and flow with each other … Love it!

Just a quick post today to get you back to your weekend, but I appreciate that you stopped in to check out my blog. Thank you.

Have yourself a wonderful day ~

blog-closing-small         starry-purple-background-vector

TODAY’S STAMPIN’ SUPPLIES …


Banners & Butterflies

Hello Stampin’ Friends ~

Today I have a cute little project that I wanted to share that comes directly out of our annual catalog. This is the best place to gather ideas and get inspired, you’ll always find the hottest trends.

Trending now are banners & butterflies, both of which you will find on today’s project …

Annual16_p105_a-165

The bag for our project is a “Kraft Tag a Bag” Gift Bag found on page 176. Just insert your gift (these are also “food safe”… how cool is that!) and begin layering & embellishing.

Let’s begin with our banner cut from our “Fabulous Foil Designer Acetate” … it’s new this year and really fun to work with.  Next you’ll see a ribbon layer cut from our new “Mini Striped” Ribbon – adds a nice pop of color. Layered on top of that you will find the “Delicate White Doilies” also new this year!

Annual16_p105_a-165-closeUp

Now comes our butterfly die cut from our “Butterflies” Thinlits … I use these with the new “Big Shot Platform” and the “Precision Base Plate”. They work great together when using these detailed dies. “Precision Base Plate” – Not to be used with the open face die like the small butterfly, circles, ovals, etc.

Of course I used the “Die Brush” to help me get all those little pieces out of my delicate butterfly. Such a time saver … you no longer have to pick or push the pieces out of your die! I simply love it!!

A cute embellishment to top off your package and to draw out the gold dots on your “Fabulous Foil Designer Acetate” are the new “Gold Binder Clips”. They are so cute and really draw your eye to your project.

Annual16_p105_a-165

Last but definitely not least is our greeting! It comes from the stamp set “Suite Sayings” … you’ve seen me use this stamp set a lot! And … it’s done in that banner style! You can trim this yourself, use a square punch or use our new “Bunch of Banners” Framelits… Perfection every time!

So … next time you need some inspiration, just pick up your Stampin’ Up! catalog or check out my archives, either way … you’ll get some great ideas.

Thank you so much for stopping by today … Hope yours is a good one!

blog-closing-small

TODAY’S STAMPIN’ SUPPLY LIST … You can click on any item for more information about it, or to begin your shopping experience. Thank you! Linda

ThrowBack Thursday: Blooming Birthday

Hello Stampin’ Friends,

Today I would like to share a post from August of 2014 … It’s still as relevant as it was two years ago. This is a sweet and simple birthday card that will bring a smile to anyone who receives it.  I used the new “Flower Patch” stamp set!  This is one of our Photopolymer sets, and makes the two-step stamping super simple because of the clear images.

I have a video for you to view that highlights the “Flower Patch” stamp set …

My card base color is the new In-Color Mossy Meadow along with the Whisper White which truly highlights to ink colors we will be using on our card.

The flower was created by stamping our largest image first, in the lightest color: Crisp Cantaloupe.  I then layers the Calypso Coral next, and completed the flower with the Cajun Craze… and topped it off with a pearl.

000_1352

STAMPIN’ TIP:  The leaves were added behind the flower by creating a mask.  Stamp the largest flower image on a piece of scrap paper and cut it out.  I always cut inside the line.  Then place it over the flower and stamp your leaves … it gives the appearance they are behind the flower!

It’s been a while since I’ve used a two-step stamping set and forgot how fast you can create a beautifully layered, colorful card.  I added the Daffodil Delight flowers in the background to create another pop of color.

There is no longer a bundle available as this was an earlier post.

I hope you enjoyed today’s card and video!

Happy Birthday ~

blog-closing-small