Parade of Pansies …

Hello Stampin’ Friends ~

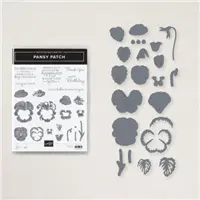
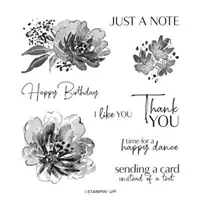
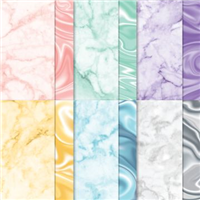
Today I have several cards to share with you today … I have some quick & simple pansy cards that highlight Pansy Petal Bundle and the Pansy Petals Designer paper …

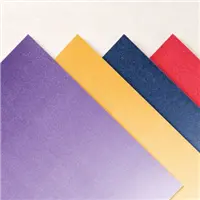
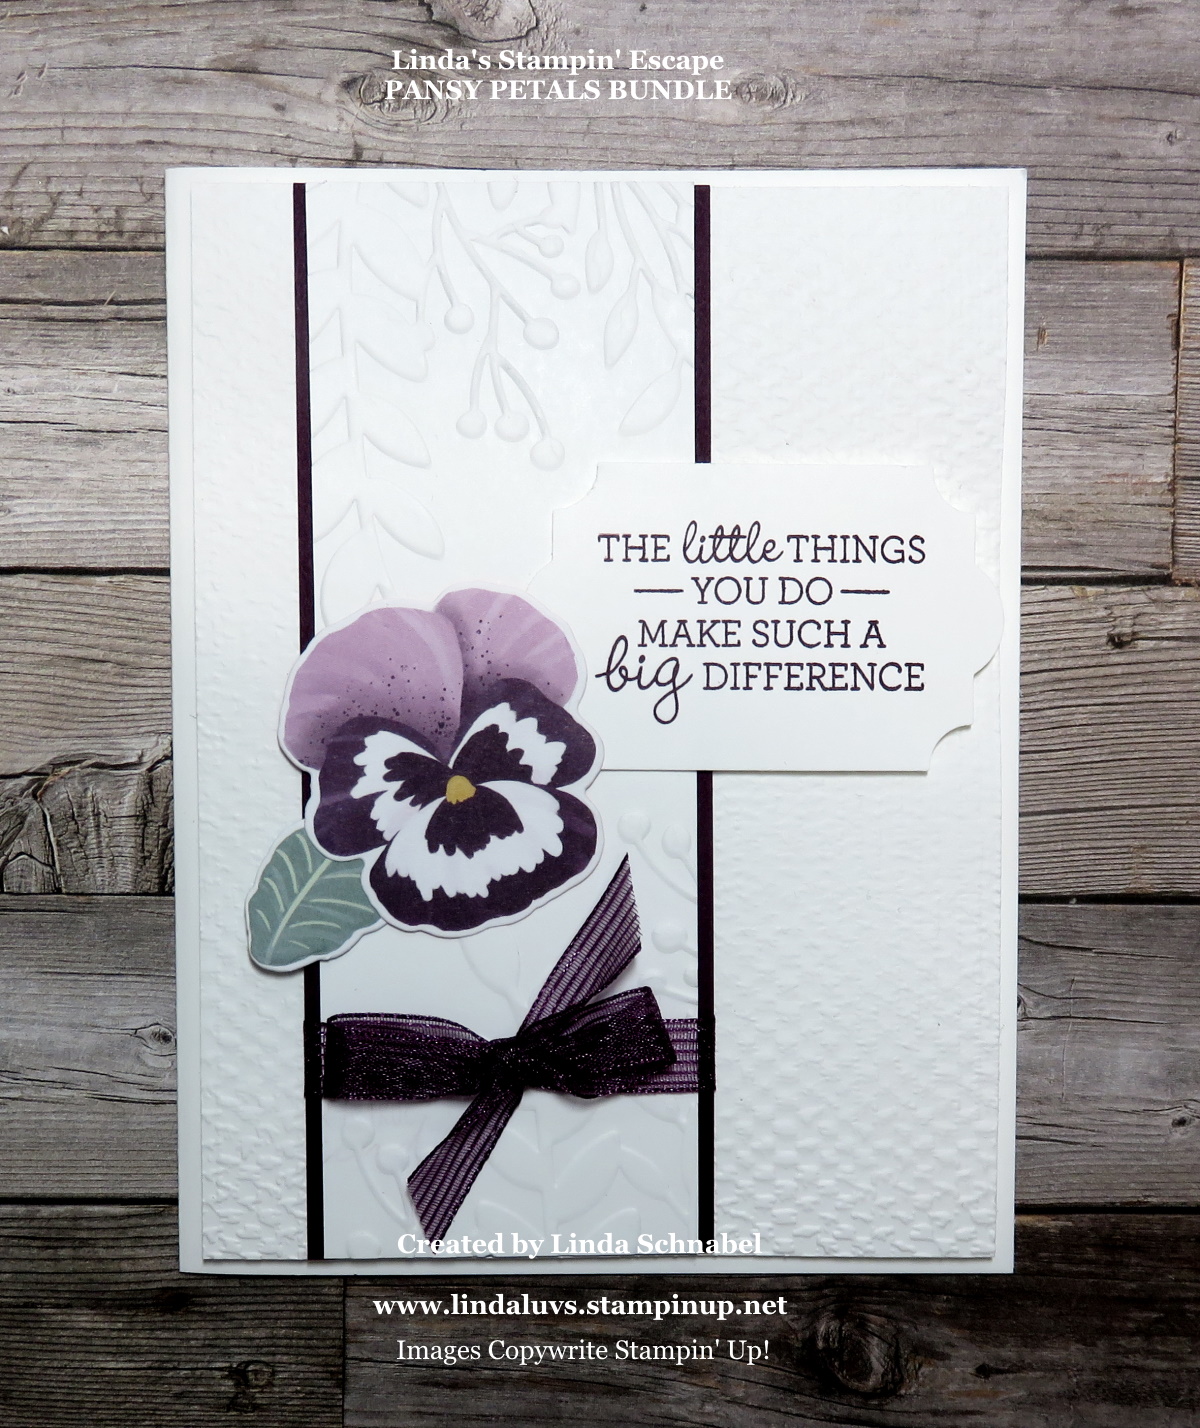
I’m using the Gorgeous Grape from the Ombre Specialty Paper … To view the original post to see how I created the “punched” tag, CLICK HERE.

Then I showed how easy it was to use the layering of the pansy images to create pretty hand stamped pansies ….

Many of you have used Two-Step stamp sets, and the Pansy stamps are no different. They are designed to layer color to create a beautiful flower. CLICK HERE to view the entire post.

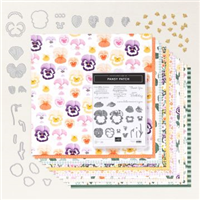
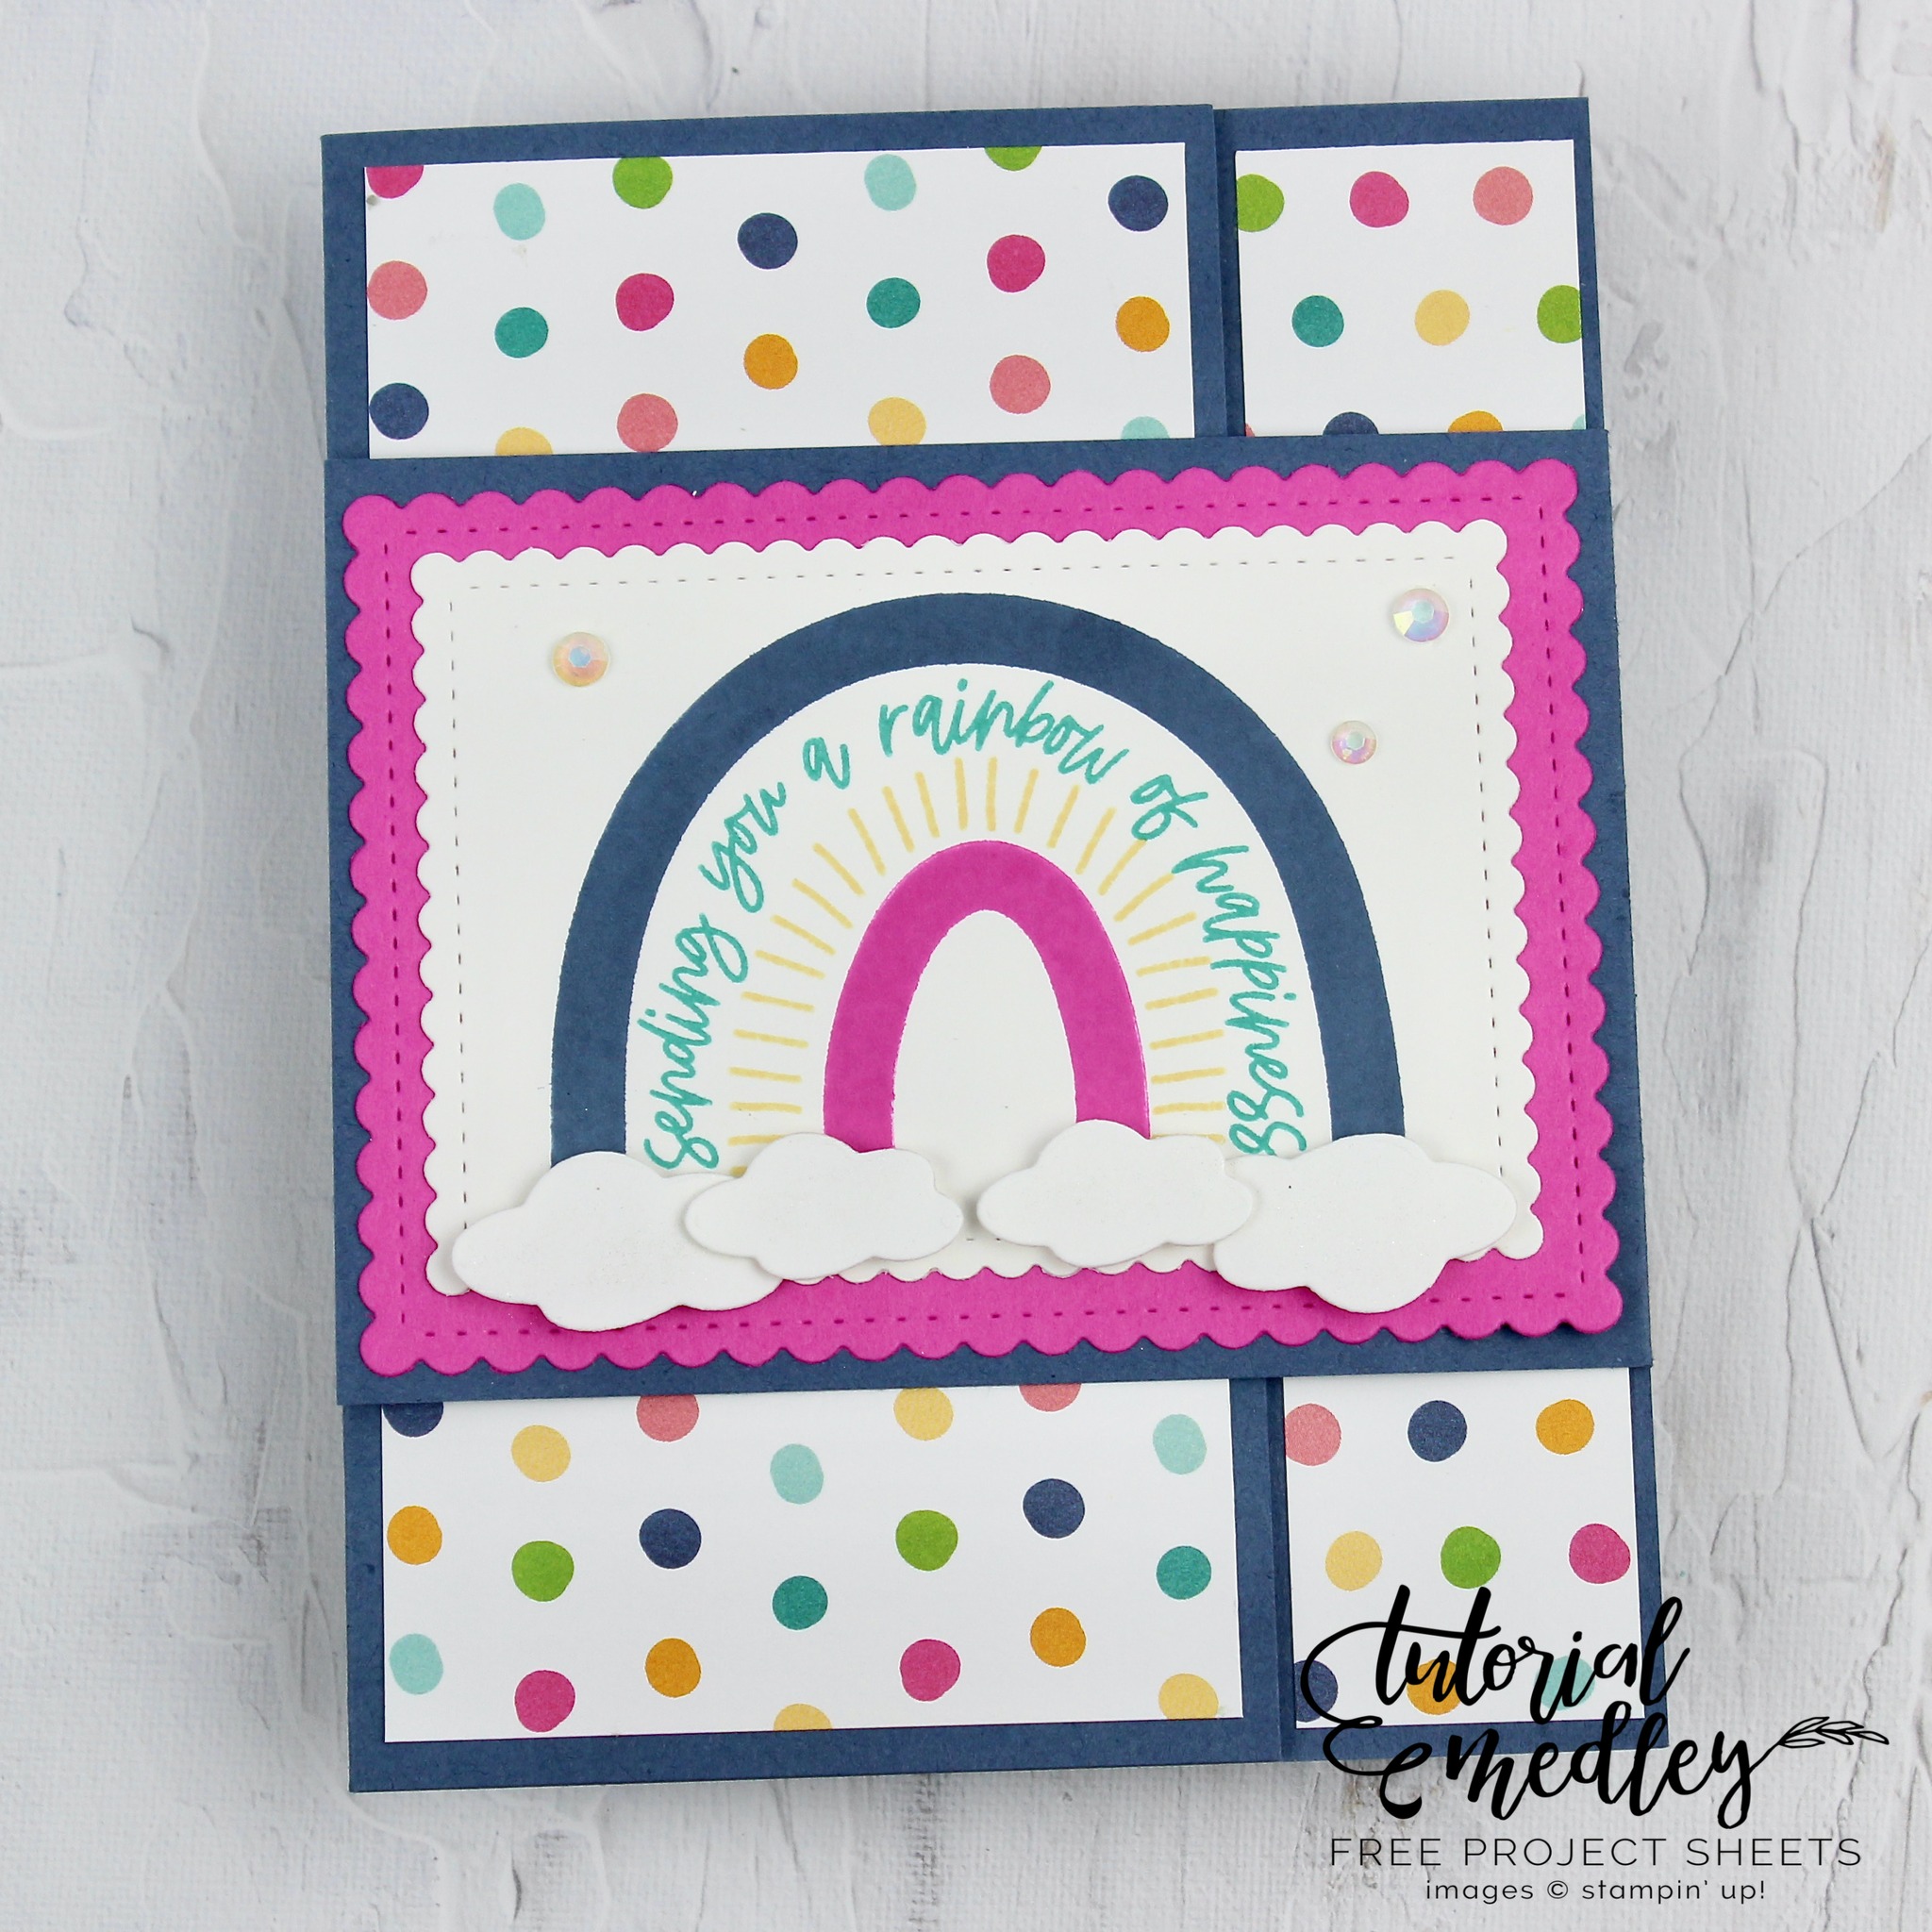
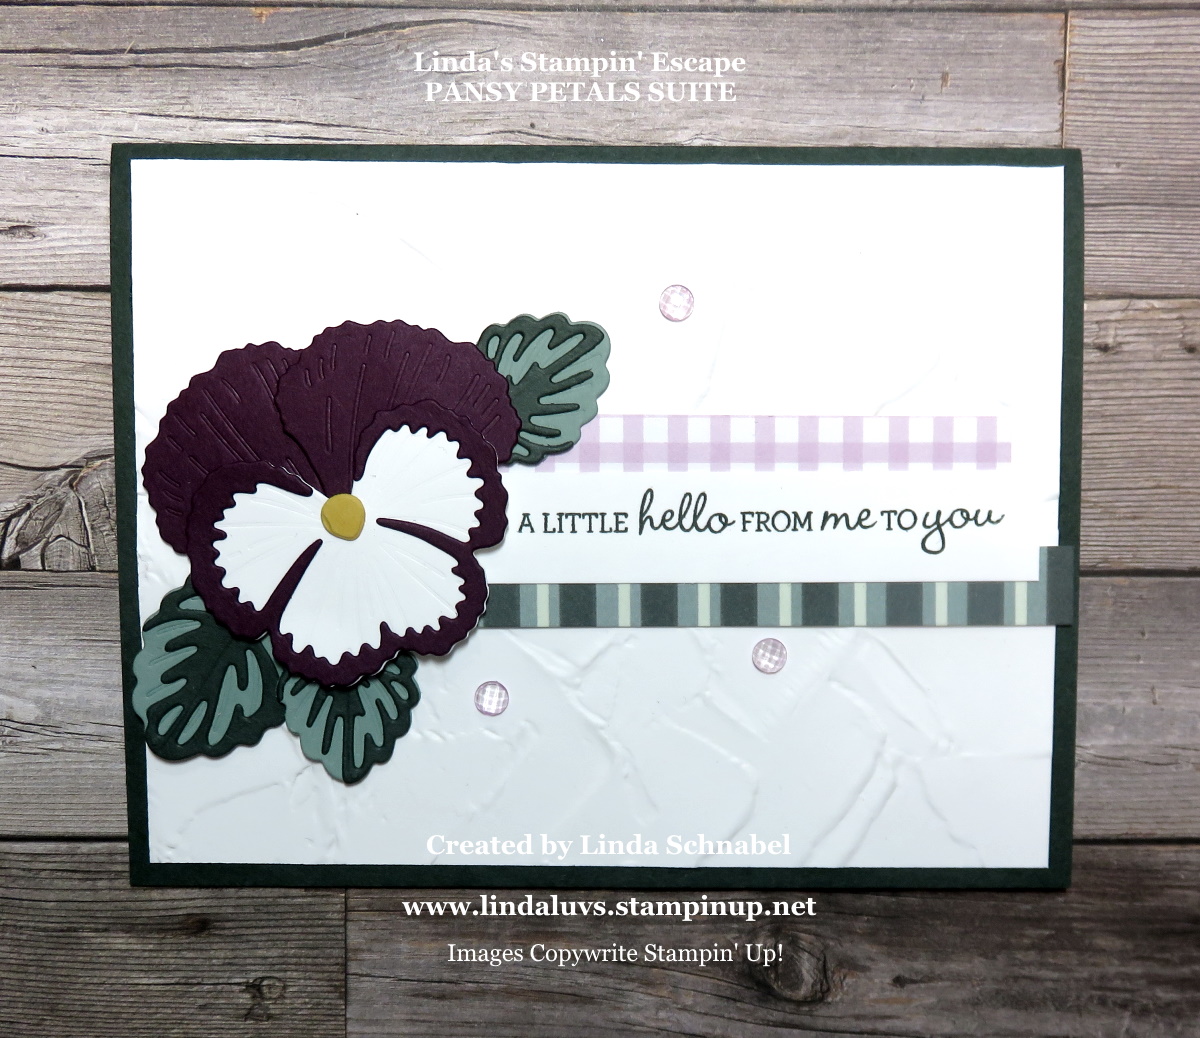
Now I’d like to share another card that also highlights the designer paper, but also the dies… because these dies actually are designed to not only cut your stamped images but the images on the designer paper …

The cute pansy and leaves above were cut from the Pansy Petals Designer paper. They are layered on a piece of Basic White embossed with the “Greenery” Embossing Folder and backed with a piece of Blackberry Bliss … these are layered onto more Basic White that was embossed with the “Tasteful Texture” embossing folder. The embossing added some nice texture to the card.

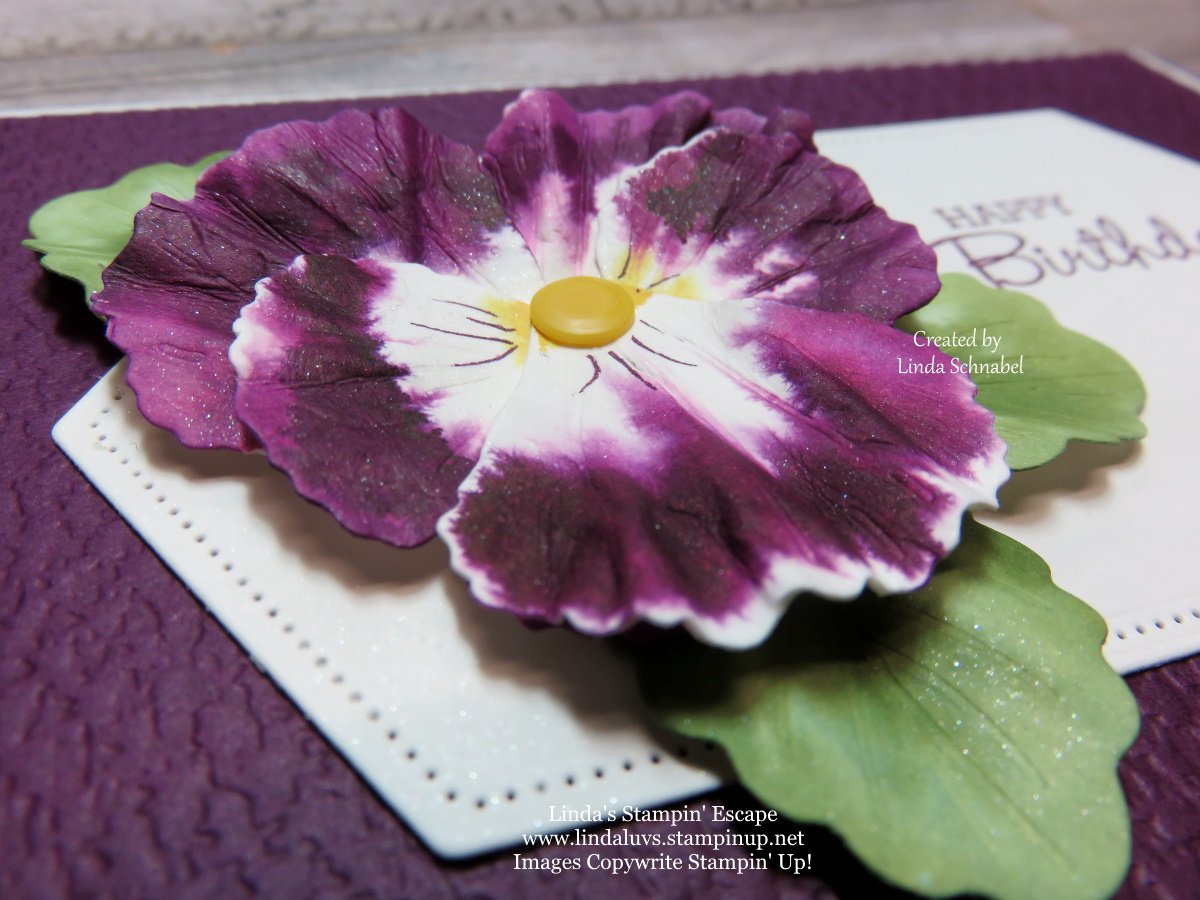
If you like texture on your flower, then you’ll love the layered die cuts to create you pansy …

The dies not only cut but they emboss as well … amazing!! The layering of the die cuts gives you some fun texture on your cards, but that didn’t stop me from embossing the background with the “Painted Texture” embossing folder! I also added the cute little Elegant Faceted Gems to draw your eye around the card.

I have fallen in love with this suite, join me tomorrow and I’ll share a video of the watercoloring technique demonstrating how to create this amazing pansy ….

The Pansies are part of our March Savings promotion … if you have them or not, I hope I inspired you and brightened your day with this pretty flowers.

Thanks so much for hanging out with me for a spell today.

I hope your day is a beautiful one!!

TODAY’S STAMPIN’ SUPPLY LIST … If you liked the products used in today’s projects, I have links for you below. Just click on the item you would like more information on, or to begin your shopping. It will take you directly to my website. Thank you

Hugs, Prayers, & Love for Ukraine

Hello Stampin’ Friends ~

Yesterday I shared the replay (video) of my Facebook LIVE and I told my viewers that I would show them what I created with all the left over vanilla sunflowers that I die cut … and I’m sharing that with everyone here today.

I attached the die cut flowers directly to a piece of Vanilla cardstock using the gluing technique I shared in the video and then trimmed the excess off … it creates a beautiful textured background …

Measurements:  

  • Very Vanilla Cardbase: 8-1/2″ x 5-1/2″ … Score & Fold at 4-1/4″
  • Very Vanilla Card front: 5-1/4″ x 4″ … Glue die cut sunflowers
  • Ombre Specialty paper and Very Vanilla Cardstock: Stamp Greeting and for die cutting the sunflowers

I stamped the sunflower in Bumblebee ink and the greeting “Hugs, Prayers, Love” in Night of Navy … this greeting comes from the Positive Thoughts Stamp set. These are pretty close to the colors of Ukraine and I wanted to send my prayers out in my own way. I matted the greeting with the Ombre Specialty paper in Night of Navy.

The entire cardfront was “popped up” using our Stampin’ Dimensionals and gives the card a nice finished look. I tried Night of Navy as a card base but I thought it took away from the greeting and I really wanted that to be a major focal point.

Thank you for joining me today.

TODAY’S STAMPIN’ SUPPLY LIST … If you liked the products used in today’s projects, I have links for you below. Just click on the item you would like more information on, or to begin your shopping. It will take you directly to my website. Thank you ❤

Celebrating Sunflowers & Savings

Hello Stampin’ Friends ~

I’m excited to share today’s cards with you… Yes, I have 2 for you today!! It is a fun and creative way to use your Sunflower Dies without all the waste … and it looks so cool!! With prices rising all around use, it’s nice to be cost effective … you know, save some money by not wasting our cardstock! OH … and by the way, you can save 20% on this bundle right now.

I also will share the video created from last nights Facebook LIVE ….

As promised … I’m going to give you the measurements for the cards

Measurements:  

  • Cardbase: 8-1/2″ x 5-1/2″ … Score & Fold at 4-1/4″
  • Ombre Glimmer paper: 5-1/4″ x 4″
  • Cardstock for Sunflower Die Cut: 5-1/8″ x 3-7/8″
  • Very Vanilla Inside Cardstock: 5-1/4″ x 4″ plus scrap to punch greeting

This card is so cute and easy to make … After you die cut the sunflower out, you can place your flower back into the cut out area to create a unique look … I like mine embossed!!

Don’t be afraid to mix and match colors … it can really highlight the ombre paper underneath. Have some fun with it and add a patterned designer paper!!

I hope you caught my little tip for finding the perfect size greeting for the punch design you want to use … I do this all the time. Don’t forget to head over to my YouTube channel … there is a video that highlights the card you saw yesterday! CLICK HERE … and please subscribe!

Have a wonderful day and thank you for stopping by.

TODAY’S STAMPIN’ SUPPLY LIST … If you liked the products used in today’s projects, I have links for you below. Just click on the item you would like more information on, or to begin your shopping. It will take you directly to my website. Thank you ❤

Celebrating Sunflowers …

Hello Stampin’ Friends ~

Happy 1st Day of March!! That means spring is just around the corner and that makes me happy! Today I’d like to share three beautiful cards that I created with the Celebrate Sunflowers bundle. They highlight the stamp set … I’d like to invite you to join me tonight for my Facebook LIVE where I will highlight the dies … I can’t wait until you see the amazing different looks for the dies.

Yesterday I shared the Savings Are in Bloom promotion and what excites me is they are bringing back the previously popular Art Gallery, Celebrate Sunflowers, and Garden Wishes bundles. They will only be available in their bundle form during this promotion, so make sure to snag ‘em while you still can!

Let’s begin with some simple beauty ….

I begin with Bumble Bee ink on Bumble cardstock and the small sunflower … creating your own background is a quick & easy was to add dimension to a card without layering. However, that didn’t stop me from adding layers … I wanted to highlight the flower (which is stamped off) and the greeting in Early Espresso stamped directly over it.

My next card also uses the small flower for my background on Very Vanilla, but this time only on the sides to frame the focal point … my large sunflower!

I used the Stampin’ Blends in Daffodil Delight, So Saffon and Soft Suede to create the realistic look on the sunflower. I colored my large sunflower the same way on my next card but then added a WOW ….

When I finished coloring the sunflower I coated it with VersaMark ink and then Heat Embossed it with clear embossing powder … WOW, that really brings out the color!! It looks so beautiful against the designer paper.

Tonight I will dazzle you with some wonderful tips/techniques using the sunflower dies. You can join me at 6:30 pm Central Time on my Linda’s Stampin’ Escape Facebook page! Here is the link: CLICK HERE Can’t wait to show you!

Enjoy your day and thanks for droppin’ in!

TODAY’S STAMPIN’ SUPPLY LIST … If you liked the products used in today’s projects, I have links for you below. Just click on the item you would like more information on, or to begin your shopping. It will take you directly to my website. Thank you ❤

Simply Sunday: Simply Marbleous Flowers

Hello Stampin’ Friends ~

Today I have an amazing combination featuring the Simply Marbleous Designer Paper in our Sale-a-bration catalog and the Flowing Flowers stamp set from our Jan-June Mini Catalog. I highlighting all 6 colors from the paper and each of the flowers and greetings from the stamp set … yes, 6 cards today!!

Let’s get started! I’m going to share two cards using the same floral design, and because the designer paper has a “marble” and a “silky” appearance … I will show one of each. This will give you a good look at this amazing designer paper!

Going to start simple with basic stamping …. the flowers are “stamped off” using Highland Heather. The image is stamped three times across the cardstock and then our greeting is stamped directly on top in Gorgeous Grape. I also used the Gorgeous Grape as a mat to highlight my stamped images and the Simply Marbleous Designer Paper. I finished off this card with the pearlescent Elegant Faceted Gems.

My next card highlights the “Basic Gray” designer paper and again the small floral image … which I stamped onto Basic Gray cardstock to create my own background. This is a technique that has been around for some time … and with a strip of our designer paper, the combination is a hit and really draws your eye to the focal point … our greeting.

I used the “stamping off” technique again to stamp my floral image onto the Basic White and then stamped my greeting directly over the top using Basic Gray. I punched it with the Label Me Lovely punch and jazzed it up with the Metallic Mesh Ribbon and our Basic Rhinestones!

My 3rd card showcases the Bumble Bee designer paper with the “silk” look and the single flower image. Just simple stamping on this card as well but it really highlights the pretty paper, but I couldn’t stop there … I had to add some Wink of Stella to my flower… WOW!

I stamped my greeting in Bumble Bee ink and then punched it out using the Tailored Tag Punch and embellished it with the Iridescent Rhinestones ….

The fourth card is Basic Black and Pool Party … talk about a pop! I love the marble design in the Pool Party and it makes a perfect background for this flower. The greeting is simply stamped directly onto the designer paper. The flower is highlighted with a piece of Basic Black and the Square Vellum Doilies and then embellished with the Classic Mat Dots found in the Jan-June Mini Catalog ….

Classic Mat DotsOnly 2 more to go … This card showcases the Blushing Bride designer paper and I am using the “marble” effect on this one as well. This fourth card also introduces you to the full floral design inked up in Blushing Bride, stamped off and then stamped onto Basic White. I brought in the Basic Gray to compliment the Blushing Bride.

The greeting is stamped in Basic Gray directly over the floral image … the entire assembly is popped up using dimensionals. I used the “gray” dots from the Classic Mat Dots … they come in four basic colors; Black, Gray, White and Vanilla.

My last card uses the same floral image and highlights the Misty Moonlight and Balmy Blue in the “silky” effect designer paper. The image is stamped in Balmy Blue and the greeting in Misty Moonlight. The base and mats are all in Misty Moonlight Cardstock and popped up with dimensionals. I added the 2020-22 In Color Square Gems to pull the two colors together.

I bought the beautiful Flowing Flowers stamp set because I could not resist the sentiments!! It includes the perfect all occasion … I just want to cheer you up, say “hello” and more greetings! AND … the flowers are pretty. Plus, I thought the “flowing” flowers went perfectly with the flowing silky look of the Simply Marbleous Designer Paper.

I hope I inspired you with theses simple and pretty layouts, and if you don’t have the Flowing Flowers you can click on the link below and get yours today … the Simply Marbleous Designer Paper is a Sale-a-bration item and is FREE with a purchase of $50.

Thank you so much for hanging out with me this Sunday.

Enjoy the rest of your day.

TODAY’S STAMPIN’ SUPPLY LIST … If you liked the products used in today’s projects, I have links for you below. Just click on the item you would like more information on, or to begin your shopping. It will take you directly to my website. Thank you ❤

Paradise Palms Card …

Hello Stampin’ Friends ~

I don’t know about you but I’m ready for warmer weather! The freezing rain … snow … YUK! So today I’m going to paradise! I’ve pulled out my Paradise Palms bundle and sat down to create something to transport us into visions of a tropical paradise.

I love the palm tree in the die set so that was going to be a definite part of my card …. then I decided to use the Granny Apple Green designer paper patterns from the Friendly Hello bundle, and this is what I came up with …

I used the leafy pattern as my background against a Basic Black cardbase …and wow, that really makes it pop! I die cut the floral pattern using the Stitched Rectangle die and then matted that in Basic Black as well. I attached it directly to the card front, leaving room for the palm tree.

The greeting comes from the Paradise Palm stamp set and was stamped on Basic White with the Momento Ink and then die cut with another of the Stitched Rectangle dies. I used dimensionals to pop it up.

I also used the dimensionals to pop up the top of the palm tree and then secured the bottom directly to the card front. I then added the white Elegant Faceted Gems that have the look of “Mother of Pearl” so I thought it fit perfectly with my tropical card.

This layout is so simple and fun to create with and can be used with any of your bundles and designer papers, but I just had to share a pop of color and take you to a warmer place!

Well let’s see if the warmth of this card gets me through shoveling another 3 inches of snow … lol. I am so ready to see green again, and palm trees would be even better!!

Thank you for joining me in paradise, I hope you have a wonderful day!

TODAY’S STAMPIN’ SUPPLY LIST … If you liked the products used in today’s projects, I have links for you below. Just click on the item you would like more information on, or to begin your shopping. It will take you directly to my website. Thank you ❤

Fun Fold Window Card …

Hello Stampin’ Friends ~

Today I’m going to share the second card from my LIVE on Tuesday …. I’m highlighting the Friendly Hello Stamp Set and Designer Paper that is in the Sale-a-bration Catalog.

Yesterday I shared the “Side Fold” version of this Fun Fold ….

Today I’m going to show you the “Top Fold” version … the inside is exactly the same! It’s just the outside card base that is either folds down from the top, or over from the side. Isn’t that cool 🙂

Measurements:  

  • Petal Pink Cardbase: 11″ x 4-1/4″ … Score & Fold at 5-1/2″
  • Friendly Hello Designer Paper for Front: 5-1/4″ x 4″
  • Use Circle Dies to Die Cut the “Window” in Front of your card (Save Designer Paper Circle)
  • Basic White Inside Cardstock: 5-1/4″ x8″ … Score at 4″ and 6″ / A scrap piece to die cut smaller circle for your stamped image.

We begin with the Petal Pink Cardbase cut to 11″ x 4-1/4″ and then score & fold at 5-1/2″. If you want to stamp directly onto your designer paper, now is the time. Using your favorite adhesive (around the edges only and NOT in the center) secure your designer paper to the front. The next step is to die cut the circle …. save both the cardstock and designer paper circles. The next step is to secure the “fun fold” into your cardbase …. the scored side will go to the right side of your card.

Put adhesive onto the back of the 5-1/4″ x 4″ section of the white folded piece and secure it inside the card. The first score (at the edge) is folded to the right and the second score if folded back upon itself…. burnish with your bone folder and close the card.

The Basic White cardstock fold is now exposed so it’s time to secure the Petal Pink circle to the fun fold …. this will be done while the top flap is down. Apply adhesive on the one section of the flap … that is why I close my card, it makes it so easy to remember exactly where to put the adhesive to attach your circle. Once you have stamped your image onto the white circle and color it, you can attach it to the pink.

If you want to add the die cut designer paper into the inside of your card like I did …. flip up the top, open the fold and then drop the top back down and one you have adhesive on your designer paper circle, fit it directly into the opening and then everything will line up perfect!

I think you are going to have so much fun making these cards… fun and easy is the way.

Thank you for hanging out with me today, have a great one!

TODAY’S STAMPIN’ SUPPLY LIST … If you liked the products used in today’s projects, I have links for you below. Just click on the item you would like more information on, or to begin your shopping. It will take you directly to my website. Thank you ❤

Sunshine & Rainbows Window Fun Fold Card

Hello Stampin’ Friends ~

I’m excited to share today’s card with you!! It is a fun fold card that I first shared at my Holiday Stampin’ Retreat … so I updated it with the Rainbows of Happiness bundle and the Sunshine & Rainbows Designer paper that you will find in the Sale-a-bration Catalog.

I also will share the video created from last nights Facebook LIVE ….

Measurements:  

  • Bermuda Bay Cardbase: 8-1/2″ x 5-1/2″ … Score & Fold at 4-1/4″
  • Sunshine & Rainbows Designer Paper for Front: 5-1/4″ x 4″
  • Use Circle Dies to Die Cut the “Window” in Front of your card
  • Basic White Inside Cardstock: 5-1/4″ x8″ … Score at 4″ and 6″

This card is so cute and easy to make … Just think of all the different stamp sets/bundles you could use … you saw 2 additional fun folds in the video!!

This is the “side fold” card and when they open it … it’s a “fun” surprise on the inside. Remember to attach the inside layer with the score lines to your right so you can fold them into the card.

And ONLY apply adhesive on the one section of the flap … that is why I close my card, it makes it so easy to remember exactly where to put the adhesive to attach your circle. Have a blast making this Fun Fold card!!

I’ll share the “Friendly Hello” Top Fold Card with you tomorrow.

Have a wonderful day and thank you for stopping by.

TODAY’S STAMPIN’ SUPPLY LIST … If you liked the products used in today’s projects, I have links for you below. Just click on the item you would like more information on, or to begin your shopping. It will take you directly to my website. Thank you ❤

Hello Ladybug Card Tutorial

Hello Stampin’ Friends ~

I hope this Monday morning finds you well. Today I am going to share a card tutorial from the amazing group of ladies that I belong to who make up “Tutorial Medley” …. and today I’m highlighting Hello Ladybug which is found on page 20 in the Jan-June Mini catalog.

The Hello Ladybug stamp set is bundled with the Ladybug Builder Punch… but don’t just stop at ladybugs, I’ve seen cute Bumble Bees made with the bundle too!! Let’s take a look at todays card ….

Instructions:

  1. Stamp the big leaves around all sides using Granny Apple Green ink on the card base. 
  2. On the 2 ½ x 3 Basic White thick cardstock stamp one leaf in Granny Apple Green and the greeting in Night Of Navy ink. 
  3. Hand cut the leave, and the greeting by section see photo. 
  4. Emboss the Ombre Specialty Paper Mango Melody 3 x 4 ¼ using the Stripes 3-D embossing folder. 
  5. Adhere to the Night Of Navy, then onto the card front. 
  6. Punch the Ladybug out of the Poppy Parade and Night Of Navy Ombre Specialty Paper. 
  7. Stamp the dots on the wings using StazOn ink.
  8. Adhere the leave, ladybug (dimensionals), and greeting to the embossed Mango Melody specialty paper. 
  9. Using the Night Of Navy marker, draw the flight pattern randomly onto the card front. 
  10. Adhere six Iridescent Rhinestones to the card front. 
  11. Inside stamp the leaves at the bottom and draw the flight pattern randomly. 

Measurements:  

  • Card Base: Basic White Thick 11 x 4 ¼ score at 5 ½   
  • Cardstock #2: Night Of Navy 3 ¼ x 4 ½   
  • Cardstock #3: Ombre Specialty Paper Mango Melody 3 x 4 ¼
  • Cardstock #4: Scrap of the Poppy Parade and Night Of Navy Ombre Specialty Paper for the ladybug punch out.
  • Cardstock #5: Basic White thick 2 ½ x 3  

This card was created by fellow demonstrator France Martin for our Tutorial Group … I hope you have enjoyed today’s card! I think her card is soooo cute!!

Have a wonderful day and thank you for stopping by.

TODAY’S STAMPIN’ SUPPLY LIST … If you liked the products used in today’s projects, I have links for you below. Just click on the item you would like more information on, or to begin your shopping. It will take you directly to my website. Thank you ❤

Friends of the Forest Card Tutorial ….

Hello Stampin’ Friends ~

Create a super cute forest scene on your handmade cards with the Friends of the Forest Stamp Set. Use the card-sized tree as the focal point and have fun deciding where to scatter the adorable animals around the tree.

Try the masking technique to layer the animals in close groupings or layer the grass and tree stump into the setting. The set also includes friendship-themed greetings. The open line-art images can be colored using your favorite coloring techniques.

Let’s take a look at today’s card share ….

Measurements: 

  • Card Base: Mint Macaron 4-1/4” x 11, scored at 5-1/2”
  • DSP #1: Hand Penned 4-1/8” x 5-3/8”
  • Cardstock #1: Blushing Bride 4-1/8” x 5-3/8” (for die cut scalloped frame)
  • Cardstock #2: Mint Macaron 3-3/8” x 4-5/8”
  • Cardstock #3: Basic White 3-1/4” x 4-1/2”
  • Cardstock #4: Mint Macaron 2-1/2” x 1/2”
  • Scrap of Basic White Cardstock for stamped deer

Instructions:

  • Fold the Mint Macaron card base in half and burnish the fold.
  • Adhere the Hand Penned DSP to the card base with Stampin’ Seal (or glue).
  • Stamp the tree image on the piece of Basic White Cardstock in Momento ink, then stamp the flower/mushroom image to the left of the tree and then one daisy image on the right side of the cardstock as shown.
  • Color the tree trunk and branches using Crumb Cake Light & Dark Stampin’ Blends.
  • Color the leaves on the tree using Mint Macaron Light Stampin’ Blends, then accent a few of the tree leaves in Mint Macaron Dark Stampin’ Blends to add some shading.
  • Color the following using Stampin’ Blends:
    • Grass – Mint Macaron Light
    • Flowers – Flirty Flamingo Light (petals) and Daffodil Delight Light (centers)
    • Mushrooms – Pool Party Dark (mushrooms) and Daffodil Delight Light (dots)
  • Wrap two pieces of Linen Thread, each measuring about 4” around the Basic White Cardstock layer and adhere to the back using Stampin’ Seal.
  • Adhere the Basic White Cardstock to the Mint Macaron Cardstock, then adhere to the Blushing Bride die cut scalloped rectangle with Stampin’ Seal (or glue).
  • Adhere the scalloped rectangle to the card with Stampin’ Dimensionals.
  • Stamp the deer image in Momento ink on a scrap of Basic White Cardstock. Color the image using Crumb Cake Light & Dark Stampin’ Blends for the body and Flirty Flamingo Light for the insides of the ears.
  • Punch put the deer using the Deer Builder Punch and adhere to the card with Mini Stampin’ Dimensionals.
  • Stamp the sentiment on the strip of Mint Macaron Cardstock in Momento ink. Banner punch both ends of the sentiment strip using the Banners Pink a Punch and adhere to the card with Stampin’ Dimensionals.
  • Tie a bow using Linen Thread and adhere to the card using a Mini Glue Dot.
  • Add two Genial Gems (one small, one medium) to the card front as shown.

I hope you are enjoying the Card Tutorials … I enjoy sharing additional samples from stamp sets I do not have. Love being part of this amazing stamping community.

Have a wonderful day ~

TODAY’S STAMPIN’ SUPPLY LIST … If you liked the products used in today’s projects, I have links for you below. Just click on the item you would like more information on, or to begin your shopping. It will take you directly to my website. Thank you

Rainbow of Happiness Card Tutorial ….

Hello Stampin’ Friends ~

Somewhere over the rainbow … well, you know the rest. We find “cute” cards!! And that is what I have for you today, along with the dimensions and instructions. Today’s card is also a FUN FOLD … gotta love it!

Let’s take a close look at that fold ….

Measurements: 

  • Card Base: Misty Moonlight 7-1/4” x 5-1/2”, scored at 4-1/4”
  • Cardstock #2: Misty Moonlight 4-1/2” x 3-1/8”, score at 1/4” on the right side
  • DSP #1: Sunshine & Rainbows 2-3/4” x 5-1/4” (front of card)
  • Cardstock #3: Basic White 2-3/4” x 5-1/4” (inside of card)
  • DSP #2: Sunshine & Rainbows 1-1/8” x 5-1/4” (inside of card)
  • Cardstock #4: Magenta Madness 4-1/4” x 3-1/8” (for stitched die cut rectangle)
  • Cardstock #5: Basic White 3-3/4” x 2-3/4” (for stitched die cut rectangle)
  • Scrap of Basic White Cardstock for die cut clouds

Instructions:

  • Fold the Misty Moonlight card base so that the smaller flap is on the front of the card.
  • Adhere the larger piece of DSP to the front flap of the card base.
  • Adhere the Misty Moonlight Cardstock to the right side of the card base by only adding adhesive to the 1/4” flap, then adhere the smaller piece of DSP over the top. (use     photos for reference)
  • Adhere the Basic White Cardstock to the inside of the card on the left side as shown leaving about a 1/8” space between the Basic White Cardstock and the DSP layer.
  • Die cut the largest scalloped rectangle from the Magenta Madness Cardstock using the Stitched So Sweetly Dies. Adhere to the Misty Moonlight Cardstock on the front of the card.
  • Die cut the second largest scalloped rectangle from the piece of Basic White Cardstock. Stamp the largest arch of the rainbow in Misty Moonlight ink, the sentiment in Bermuda Bay ink, the striped arch in Daffodil Delight and the smallest arch of the rainbow in   Magenta Madness ink.
  • Adhere the stamped Basic White scalloped rectangle to the Magenta Madness        scalloped rectangle.
  • Die cut four clouds (two small, two medium) from a scrap of Basic White Cardstock.  Adhere to the card with Mini Stampin’ Dimensionals and accent with Wink of Stella    Glitter Brush.
  • Add three Iridescent Rhinestones (two small, one medium) to the card front as shown.

Thanks for joining me today … I hope you join me tonight for my Facebook LIVE!

Have a wonderful day ~

TODAY’S STAMPIN’ SUPPLY LIST … If you liked the products used in today’s projects, I have links for you below. Just click on the item you would like more information on, or to begin your shopping. It will take you directly to my website. Thank you

Another Textured New Horizons Card

Hello Stampin’ Friends ~

Today I have the last of the cards I shared on my Tuesday LIVE (Replay Below) I’ll let you watch the replay if you missed it the other day.

Let’s take a look at the video. You can grab a cup of coffee (or your favorite beverage) and join me …

Did you catch the part where I said the card looked like it needed something. Well … I looked and looked and thought about a bunch of things to “add” something but just wasn’t getting the look I wanted … and then, I put 3 Brass Butterflies on and it pulled the card all together!

I think those 3 little butterflies tie the green bottom of the card with the water washed sunset … they draw your eye around the entire card …

I embossed the greeting with black embossing powder and it really makes it pop and bring out the black from our card base. I love that such a simple technique like using an embossing folder would create such a difference!

Thank you for checking back in with me!! Have an amazing day ~

TODAY’S STAMPIN’ SUPPLY LIST … If you liked the products used in today’s projects, I have links for you below. Just click on the item you would like more information on, or to begin your shopping. It will take you directly to my website. Thank you ❤

Throwback Thursday: You’re So Cool

Hello Stampin’ Friends ~

Today I thought it would be fun to take a look back at the Sweet Ice Cream stamp set. I was so happy this stamp set made the cut and was not discontinued … perfect stamp set for kids and those hot summer days. Yes, that is me and my wishful thinking! lol

The Popsicle stamps are a two-step stamps which makes it fun and easy to create the most delicious flavors you can image …

My favorites are Lemon/Lime: Daffodil Delight and Granny Apple Green, then Gorgeous Grape which is stamped off on the top and full ink on the bottom, and then my Strawberry Lemonade; Flirty Flamingo and Daffodil Delight …. YUMMY! I know a few in my house who love Blue Raspberry so I’ll have to keep making Popsicles!

I used the sentiments from the Sweet Ice Cream stamp set and stamped them in Gorgeous Grape, which was also used to mat my card front ….

Wanted to jazz up my flavorful popsicles a little more with the glint of sparkle by adding the Opal Rounds to my card. I used my Stampin’ Blends to color the Opal Rounds … it’s so cool to know that you can have these cute embellishments in “any” color you want.

The popsicles were so fun and easy to create and will make quite an impression on anyone who receives this card.

Thank you for sharing part of your Sunday with me. Stay warm and have a great day ~

TODAY’S STAMPIN’ SUPPLY LIST … If you liked the products used in today’s projects, I have links for you below. Just click on the item you would like more information on, or to begin your shopping. It will take you directly to my website. Thank you ♥ 

Adding Texture to New Horizons

Hello Stampin’ Friends ~

Today I’ll be sharing my video replay of last nights Facebook LIVE along with the two cards. I showcasing the New Horizons Designer Paper and “embossing folders” … the folders will texture the paper so it looks like a canvas picture!

If you look closely you will see I actually die cut the mountains and embossed it right with the paper!! So much you can do with this …

Ok … just a little teaser there! Let’s take a look at the video. You can grab a cup of coffee (or your favorite beverage) and join me …

It is such a simple technique but creates such an amazing impact to your card. It’s as if the paper was designed for embossing it.

Measurements:

  • Basic Black: 8-1/2″ x 5-1/2″ Scored at 4-1/4″ fold in half
  • Designer Paper: 5-1/4″ x 4″ (to be embossed)
  • Basic White: 5-1/4″ x 4″ (inside of card)

The watercoloring look of this designer paper was made for this technique … I know I said that earlier but I think it looks so cool together!!

So I don’t take away from the designer paper, I like to use vellum … it allows an even flow of the imagery. I embossed with Gold Embossing powder and used the Label Me Lovely punch because I like the simple shape but it’s not a boring square! lol

I added the beautiful brass butterflies to draw your eye around the card and to bring it in to the focal point, which is our greeting.

So simple yet so pretty! Who knew that such a simple technique like using an embossing folder would create such a difference! I think we know (because we buy lots of embossing folders, but we forget we can emboss designer paper!!

Thank you for hanging out with me!! Have an amazing day ~

TODAY’S STAMPIN’ SUPPLY LIST … If you liked the products used in today’s projects, I have links for you below. Just click on the item you would like more information on, or to begin your shopping. It will take you directly to my website. Thank you ❤

LADYBUG FRIENDS CARD TUTORIAL

Hello Stampin’ Friends ~

I have another cute little ladybug for you today along with a tutorial. It’s a Win Win … these cards are simple to create and will bring a smile to the receiver!

1. Get ready to make this dazzling card by prepping the following paper pieces:
• 5-1/2” x 8-1/2” (14 x 21.6 cm) from Blushing Bride Cardstock
• 3/8” x 2” (1 x 5.1 cm) from Blushing Bride Cardstock
• 3” x 4” (7.6 x 10.2 cm) from Basic White Cardstock
• 5-1/2” x 4-1/4” (14 x 10.8 cm) from Basic White Cardstock
2. On the 3” x 4” (7.6 x 10.2 cm) Basic White piece, stamp the large daisy image from the Hello Ladybug Stamp Set in a random pattern with Polished Pink ink. Then stamp the flower centers using Pale Papaya ink.
3. On the 5-1/2” x 4-1/4” (14 x 10.8 cm) Basic White piece, stamp one ladybug body in Pale Papaya ink and another ladybug body in Soft Succulent ink. Then, stamp two sets of wings in Old Olive ink. Punch out stamped images using the Ladybug Builder Punch. Use adhesive to assemble each ladybug.
4. Stamp the sentiment in Polished Pink ink onto the 3/8” x 2” (1 x 5.1 cm) Blushing Bride piece. Trim the top right edge at an angle using scissors.
5. Create the card base by folding the 5-1/2” x 8-1/2” (14 x 21.6 cm) Blushing Bride piece in half, then adhere the 3” x 4” (7.6 x 10.2 cm) Basic White piece to the lower right side of the card base.
6. Adhere ladybugs and the sentiment to the card front using Stampin’ Dimensionals, then glue Loose Flower Flourishes for a fabulous final touch!

Thank you for taking time out of your day to visit my blog!

Have a great day ~

TODAY’S STAMPIN’ SUPPLY LIST … If you liked the products used in today’s projects, I have links for you below. Just click on the item you would like more information on, or to begin your shopping. It will take you directly to my website. Thank you