Sending Wishes Your Way …

Hello Stampin’ Friends,

How are you today? Ready to kick off a new week?

I’m here to kick off your week with a new card, a birthday card, sending wishes your way. The greeting comes from the stamp set “Butterfly Basics” in the Occasions Catalog.

000_1921

I paired it up with a fun pattern from the “Confetti Celebration” designer series paper. Here’s another series of papers that can be easily used for gender neutral cards.

I tied it together with the beautiful “3/8″ stitched satin ribbon” in Tangelo Twist.

000_1924

I carried the ribbon to the inside as well to add a pop of color and texture. The “Happy Birthday” also comes from the “Butterfly Basics” stamp set. Did you know that the Butterfly Basics stamp set is available in Wood, Clear and Photopolymer!

Hope you enjoyed today’s card share, another quick and easy card to add to your collection.

Thank you for stopping by today.

Have a great week!

blog-closing-small

TODAY’S STAMPIN’ SUPPLY LIST …


Simply Sunday Birthday Card …

Hello Stampin’ Friends,

Today it’s time to Celebrate your Big Day with Cake! And while we’re celebrating … let’s Sale-a-brate with FREE specialty paper! Today I’m sharing another technique that can be used on our “Irresistibly Yours” designer paper… Brayering over the stars!

I combined it with the “Ombre” technique: a color scheme that transitions from a lighter to darker shade. I only used the Coastal Cabana so the shading is very subtle. I brayered one layer over the entire card and then working from the left side, I added more color until I got the desired effect.

000_1918

Once you are done with the brayering, wipe off the excess ink from the card (the star’s will not absorb the color) and watch them pop!

I teamed my specialty paper with the “Big Day” stamp set … both are from our Sale-a-bration catalog and you can get them free. During Sale-a-bration you can chose exclusive items with each $50 you purchase. Gather your friends and have a party, or pass the book and do it on-line, or take those tax refunds and place your own order (I have many who do this during Sale-a-bration!)

I have a great tip for you today too … You can extend your banners by simply cutting a piece of cardstock that will slide through the punch (as shown below) and then pull to desired length. How sweet is that!

000_1914

Did you notice that the little white banner has been punched with the “Irresistibly Yours” designer paper. The banner punch is in our big catalog and can be found on page 223.

000_1915

A great birthday card for anyone at any age! Those are the best cards to have on hand.

Thanks for stopping by today!

Enjoy your day ~ 

blog-closing-small


Spotlighting Sympathy cards …

Hello Stampin’ Friends,

Yesterday I shared a “Wedding Card” with you, today I share a “Sympathy Card” … two stages of life that we go through and make cards to show our friends and loved ones that we care.

I wanted to create something simple because I find it very difficult to sit down and stamp a sympathy card when I need one, so I tend to turn to my designer paper. With all the beautiful designer papers we have, it’s not hard to find one that fits the occasion we need.

I chose the new “Adventure Bound” Designer Series Paper Stack found in the Occasions Catalog. Last time I used this paper I simply stamped my image directly onto the paper and mounted it onto the cardstock, however today I wanted to take it up a notch so I decided to do a “Spotlight”.

To create a “Spotlight” on my card I used the “Square Framelit Die” and I lined it up to the corner of the sun on my paper …

000_1908

Once I cut out my square, I mounted it onto a piece of Basic Black cardstock. Now I was ready to mount my spotlight onto the base of my card. The card base is Almost Artichoke and I used some black cardstock behind the paper to make it stand out more.

000_1909

The spotlight was mounted using the Stampin’ Dimensionals to add dimension too …

000_1910

I then stamped my salutation of “With Sympathy” from the “Bloom with Hope” stamp set. Please note that this is a Hostess stamp set and is not for sale but available as an exclusive stamp set when you place or host a qualifying stamping order or party. Contact me with any questions you may have.

I used Whisper White craft ink and the White embossing powder for my greeting … the combination of the two really makes it stand out so much more.

I took the piece of paper that I cut off of my designer paper and placed it on the inside to create a feeling of harmony on the card. The inside words also come from “Bloom with Hope” and were stamped with Black StazOn™ … my favorite black ink! I love that it’s a true black.

000_1912

Hope you enjoyed today’s card and take some time to create a few “Spotlight” cards of your own. I have always liked this technique when stamping, now I love that it works so well using these fabulous designer papers too. I didn’t have the heart to cover this one up with anything.

000_1910

Thanks for coming by today …

Have a great Saturday!

blog-closing-small

Today’s Stampin’ Supply List … Click on image for more details

Wedding Wishes in White …

Hello Stampin’ Friends,

Yesterday I said I would share with you a wedding card, a bit nontraditional but I think you will like it. I’ve been using the butterfly a lot lately and today you will see how I incorporated it into my card.

When we think of weddings, we think of white … with a touch of color. Well that is exactly what my thoughts were on my card to. My base is Whisper White with a hint of Wisteria Wonder, and then I added a touch of sparkle with the Dazzling Diamonds Glimmer Paper.

000_1899

You can see my layers and then I topped that off with a final piece of Whisper White that was embossed with our new “Spring Flowers” embossing folder.

Now it was time for my butterfly in Whisper White … no, Dazzling Diamonds Glimmer Paper! For a more cost effective approach … I cut my butterfly out of the glimmer paper that I used for my mat …

000_1901

then simply placed the embossed piece of white over it and popped it up with Stampin’ Dimensionals to give it more character. (I should have cut my Wisteria butterfly from the mat too!)

Here is the card fully assembled … The Wisteria butterfly behind the Dazzling Diamonds butterfly gives it a bit of a shadow effect, quite stunning!

000_1904

A simple “Congratulations” is all it needed and I got that from the Itty Bitty Banners stamp set, and used the Bitty Banners framelit to cut it out. Simple yet elegant, and it is prettier in person.

I think this would also make the perfect birthday card. My Mom loves butterflies so I’ll just switch out the greeting and have the perfect card to give her.

I hope you enjoyed today’s card share, and I thank you for stopping by.

Have a wonderful weekend ~

blog-closing-small

TODAY’S STAMPIN’ SUPPLY LIST …

000_1905

Stamp Happy with a New Technique!

Hello Stampin’ Friends,

Yesterday I told you that I would have a card to share with you that utilized one or more of the products from our Weekly Deals, so today I’m going to highlight the Starburst Framelits!

Starburst Framelits Die

Starburst Framelits Die 132967
Price: $26.95 $20.21
Cut your stamped images, create layers and frames! 5 layering dies. Largest image: 4-11/16″ diam. Coordinates with Baby and Starburst Sayings Stamp Set

I chose the coordinating stamp set; Starburst Sayings to create my card. My color pallet is Island Indigo and Pool Party … a favorite of many!

BUT … before I put these all together I thought I would share with you a technique that you can use on the NEW “Irresistibly Yours” specialty paper. This paper cannot be bought … but you can get it for FREE in our Sale-a-bration catalog with a $50 order! (before shipping & handling)

The technique I want to show you is watercoloring with your Aqua Painter …. super simple. I will tell you that the paper absorbs the water quickly and that I watered down my ink before I applied it to the paper. (Remember to clean out your ink from the stamp case (as shown) because you have added water and you do not want that on your ink pad)

000_1890

My favorite thing about this technique is that you control the variation of color! I always tell my stampers “less is more … because you can always add more, but it it difficult to take away”. So start light and then add more color where you want it.

000_1891

Don’t you love how the dots pop through the watercoloring! The paper is pre-embossed for you and acts like the “resist” technique. My technique clubs are learning additional techniques in coloring this awesome paper.

You can see why I chose the polka dot pattern (1 of 6 designs) because that too coordinates with our stamp set! The Happy Day is stamped in Island Indigo and the Celebrate in Pool Party.

All three pieces were cut with the Starburst Framelit Die. Here’s a little tip … You can align the framelit to your image easier if you keep the numbers that are printed on the framelit to the top! Take a look at your framelits, most have numbers printed on them and many times I use this when aligning with my stamped image.

000_1894

I popped up the Happy Day with our Stampin’ Dimensionals and then “doubled” the dimensionals on the celebrate to create a lot of dimension.

I hope you enjoyed the use of the framelits from the “Weekly Deals” and learning what you can do with our new Designer Paper; Irresistibly Yours. It’s a must see 🙂 and it’s FREE!

Thanks for stopping by, I’d love to hear what you think of today’s project.

Have a wonderful day ~

blog-closing-small

TODAY’S STAMPIN’ SUPPLY LIST …

Just click on a product image to learn more about it, or to begin shopping. Thank you.

Sweetly said with love …

Hello Friends,

Today I’d like to share with you a few card samples that come from Jen our concept artist. She is using one of my favorite new stamp sets “Hello Life” that can be found in the Occasions Catalog.

The first is simple but so adorable, and is created by repeatedly stamping the twin hearts across the note card. I will admit … I really love the script greetings!

Sweet-Notecard


The next is a shaker card … who doesn’t love those little hearts floating inside the big heart.  To create the striped background, she masked horizontal stripes using washi tape, then spritzed using Blushing Bride Classic Stampin’ Ink Refill and the Stampin’ Spritzer.

Shaker-Card


On the final card she paired Real Red and Blushing Bride on the Crumb Cake note card, which highlights those cute hearts in the stamp set so sweetly.

Heart-card


Happy Valentines can be said simply yet sweetly and these cards are definitely proof of that. You know what they say … sometimes, less is more!

Thanks for stopping by.

Have a wonderful Sunday … and I must say “GO PACK GO”!

blog-closing-small

TODAY’S STAMPIN’ SUPPLY LIST …


Saturday’s Simply Masculine …

Hello Stampin’ Friends,

Today I have created a card for you that can be made in just minutes! It’s super easy and very masculine.

I began with our “Adventure Bound” Designer Series Paper pack and chose the brick pattern. I trimmed it down slightly smaller than the basic 4″ x 5-1/4″ because I wanted to mat the designer paper.

000_1887

That 1/8″ pop of black from our mat really makes the brick stand out. I mounted these onto the “Naturals White” cardstock. It compliments nicely with the brick and creates a look of texture that the Whisper White does not … perfect for our masculine card.

000_1888

Next, I grabbed my “Balloon Bash” stamp set … I think this is such a fun and versatile set. It’s also bold enough to stamp and embossed directly onto designer paper and still pop! It does not get lost in the background of the designer paper.

I stamped the image with the White Craft Ink and then embossed with white embossing powder. That is it … simple, fun, and very masculine!

000_1887

Thank you for dropping by to visit my blog today.

I wish you a simply wonderful Saturday ~

blog-closing-small

STAMPIN’ SUPPLY LIST …


I Made This Just for You!

Hello Stampin’ Friends,

I’m excited to share today’s card with you! First, because we all need birthday cards, second, because I made it with some really cool new products and it was fun to do!

I started with the “Balloon Bash” stamp set from the Occasions catalog – pg. 13. It’s such a fun stamp set and can be used for any gender at any age … from 9 month to 90 years (and beyond!)

000_1874

Well … then I knew I wanted to do the “Chalkboard” technique because Stampin’ Up! introduced “Chalkboard paper” … It works so nice, and is a bit heavier than regular cardstock. You can find it on page 25 with the new Chalk ink (but that’s another day – lol).

I started by wiping down the Chalkboard paper with the embossing buddy, then I inked up my stamp with the White Craft Ink and embossed with the white embossing powder… this gives you a very bold image, AND it allowed me to color the banner with the Coastal Cabana Blendabilities pen! I love the way it pops!!

The embossing buddy adds to the “chalkboard” look, however if you want a bolder look of “chalk” you can use the White Craft Ink and sponge it on lightly.

Once I finished that, I needed to mount my project, but I wanted more than just a plain background so … I went to the new paper stack “Staked with Love” and picked out the XOXOXOXO pattern! Who doesn’t want “Hugs & Kisses” on their birthday!

000_1874

I don’t know about you … but I think this card is so stinkin’ cute! It was FUN and easy to make too!

I appreciate you stopping by to see me today. Let me know if you have any questions with the technique or products I used to create the card.

Have a terrific Tuesday … and don’t forget to check out the new Weekly Deals. Just click on the button below.

blog-closing-small                                  6a00e554f4a3a4883401a511ebad82970c-800wi

STAMPIN’ SUPPLY LIST …


To a Great Friend …

Hello Stampin’ Friends,

Happy Monday to you and I hope many of you are warmer than those of us in Wisconsin … burrrrr! It’s a bit nippy here with wind chills down around 35 below.

On that note, I’d like to warm things up by letting you know today is the day we kick off the Occasions and Sale-a-bration Catalogs!

Something else that will warm you up is our beautiful “Painted Blooms” designer series paper. You can’t think anything but spring when you look at this pattern …

000_1869

The flowers are so beautiful, and this was a left over piece from the card I shared January 3rd!

No fuss with this card, I simply stamped my greeting directly onto the designer paper! I used the “Simply Wonderful” stamp set which you can get FREE during Sale-a-bration which starts today!

If you are not familiar with Sale-a-bration … it is our most anticipated promotion of the year, with many ways to earn Free stamp sets and accessories. You can chose a FREE Sale-a-bration item with each $50 purchase (before shipping & handling)

000_1871

I couldn’t resist not decorating the inside and you’ll be amazed at how much this beautiful stamp set mimics the designer paper. The stamp set is the new “Painted Petals” from the Occasions catalog – pg. 19. It’s a two-step stamp set so it was easy to stamp the pink petals and green stems. The greeting is also part of this set.

With the purchase of the Painted Petals stamp set, Painted Blooms Designer paper and the Blackberry Bliss ribbon, you will be pretty darn close to getting the FREE “Simply Wonderful” stamp set! Just add some needed cardstock or inks and you’ll be there.

000_1872

Thank you for visiting my blog today! Please let me know if you have any questions of the products I showed you or Sale-a-bration. I

f you do not have a demonstrator and would like me to be yours, let me know if you need either the Occasions or Sale-a-bration catalog.

Stay warm and have a wonderful Monday ~

blog-closing-small

STAMPIN’ SUPPLY LIST …


Baby, it’s cold outside …

Hello Stampin’ Friends,

A truer statement I could not make … it’s cold outside, and getting colder! But enough about the weather, I have a cute and easy card for you today.

Since today is the last day you can purchase from the Holiday Catalog, I thought I would share a few items that I love from the catalog. First is the beautiful “All is Calm” Designer Series paper … you’ve seen quite a few of my cards using it. It has so many wonderful patterns – today’s is one of my favorites.

000_1866

I used the coordinating “Lost Lagoon” cardstock and ink. The stamp set is from the “Project Life Holiday Cheer” stamp set … I hope this carries over into the next main catalog. It captures the fall and winter seasons so nicely.

I highlighted today’s stamped images with the “Postage Stamp” punch… always fun to use on a card.

My granddaughter Shayla liked the way I did the heart on yesterday’s card and said I should do the snowflakes with the same technique … so I did. Makes them sparkle so nicely.

I added a bow to bring your eye full circle and embellished it with a silver sequins and white snowflake from the “Frosted Sequins” … they really go a long way. Then, I topped off the sequins with a rhinestone! Isn’t that pretty?!

000_1867

So it may be cold outside but this sweet and simple card will warm anyone’s heart.


000_1864

Thanks so much for stopping by my blog today.

Have a relaxing and “simple” Sunday ~

blog-closing-small

STAMPIN’ SUPPLY LIST …


My New Years Wish for You …

Hello Stampin’ Friends,

I have returned! I took a little R & R after the busy Christmas / New Years holiday. After 25 years in the Quality Control field and not having to work holidays and such, it’s been quite a transition to managing a retail store, especially during the holidays! I do however love the fact that I have maintained my Stampin’ business for almost 15 years, and I thank you for supporting me along the way!

I hope you had a wonderful Christmas and enjoyed time spent with friends and family. Today my card share has the sentiment that I wish for you this New Year! “Do more of what makes you happy”.

 000_1855

The sentiment comes from the “Hello Life” stamp set that will be available January 6th from the new Occasions catalog (pg.6) When you look at the catalog it will show 4 of the images at full size and the remaining 6 at 50% or half the size. So you can see by my card that the sentiment is much larger than shown.

The beautiful background paper is the “Painted Blooms” Designer Series Paper that I gave you a sneak peek on my December 28th post. I love the many different patterns and color combinations of this paper.

The base card and stamped sentiment is done in the tantalizing “Blackberry Bliss”.

The cute little heart also comes from the “Hello Life” stamp set … I cut it out, added it to my sentiment, filled it with “Crystal Effects” and sprinkled it with Dazzling Diamonds Glitter. The Crystal Effects absorbs the glitter and holds it in place … it looks so pretty! Love that technique!

000_1858

The inside stamped images is yet another stamp from the “Hello Life” stamp set.  Hope you enjoyed today’s card, it’s quick and easy to make!

Thank you for stopping by today, and for your patience while I took a mini-break.

Have a wonderful day …. and do more of what makes you happy this year.

blog-closing-small

Please note that the “Hello Life” and Painted Blooms Designer Series Paper is not available until January 6th. However the ingredients needed for this card will qualify you for a FREE Sale-a-bration Item!!


A Year in Review ….

Hello Stampin’ Friends,

Today is New Year’s Eve day and I thought that I would share with you some of my favorite creations from this past year, what I discovered going through my cards is that you like them for different reasons!

Some you like because they are cute and easy to replicate, others because they have a really neat technique, so hard as it was to pick, here they are …

000_0663

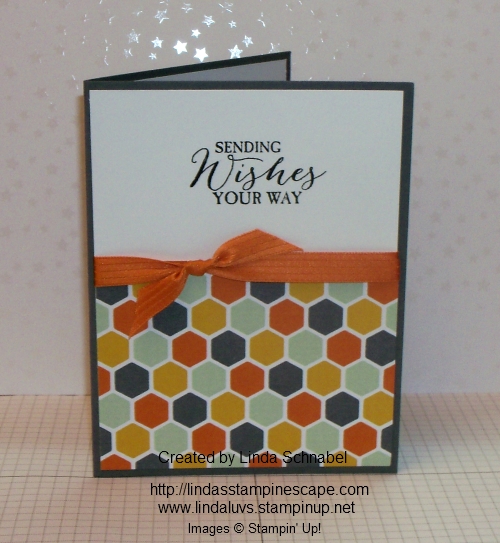
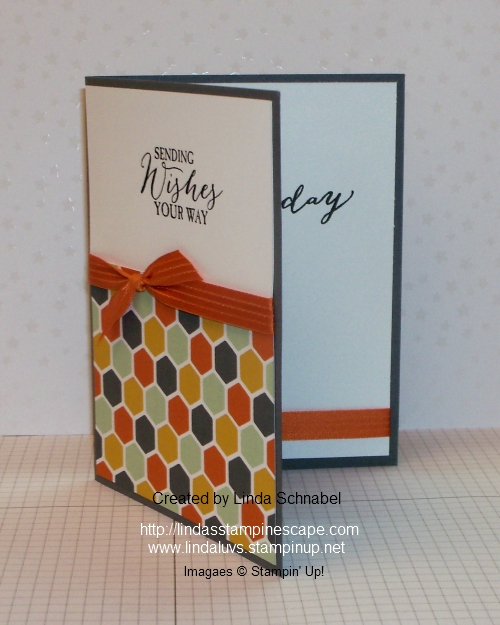
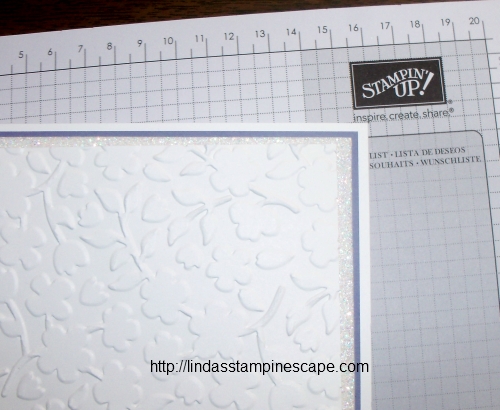
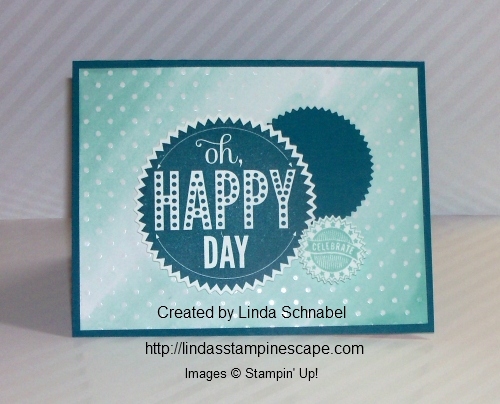
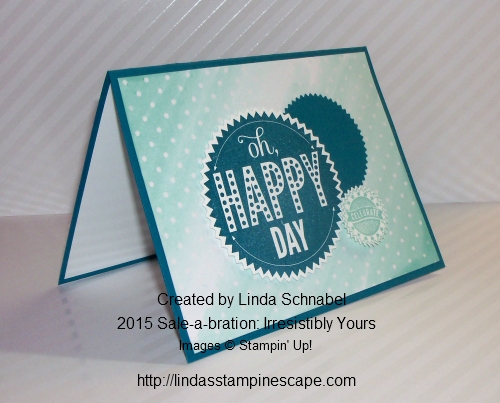
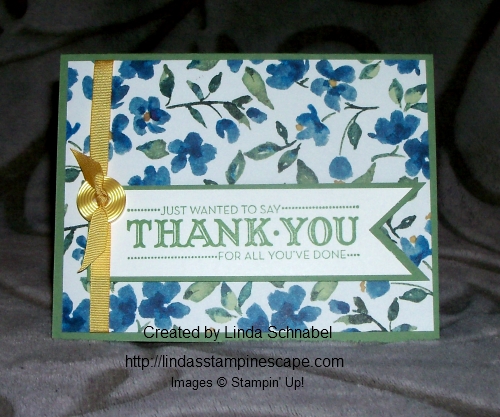
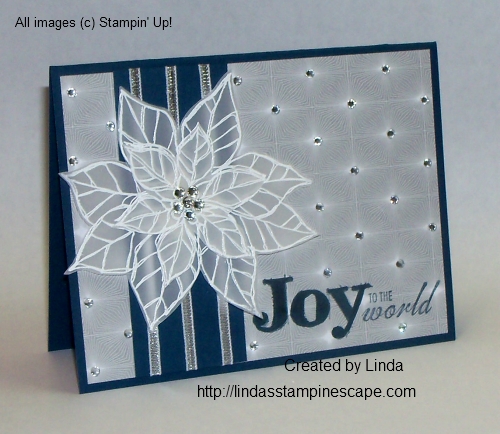
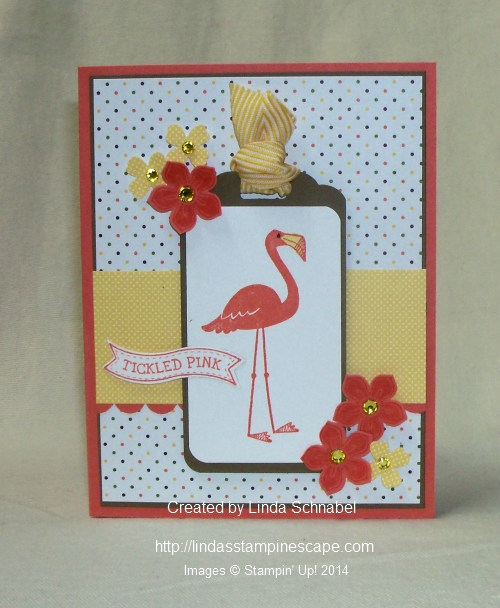
This was from a January post … I love the fun the Silver Vellum brings with the polka dots and the the flower spread that highlights the greeting! And who doesn’t love turquoise?!

* * * * * * * * * *

000_0857

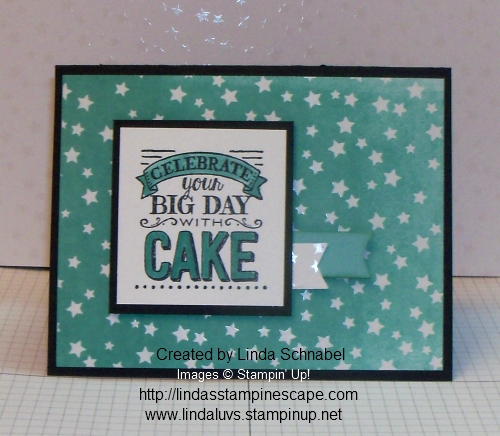
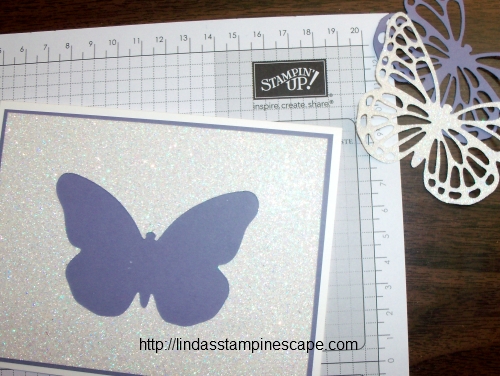
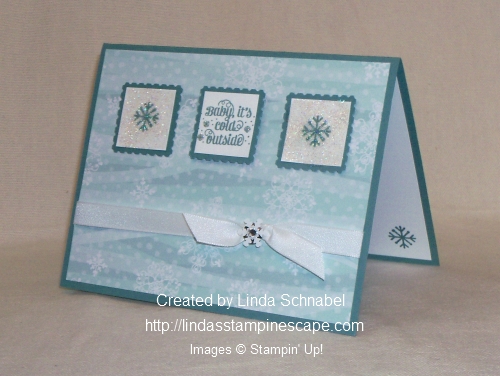
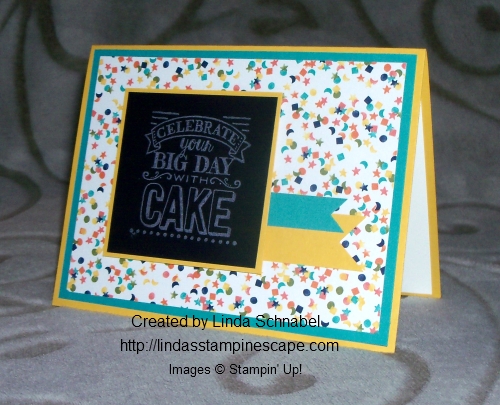
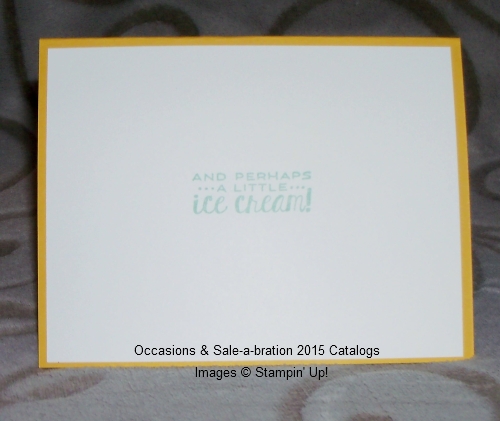
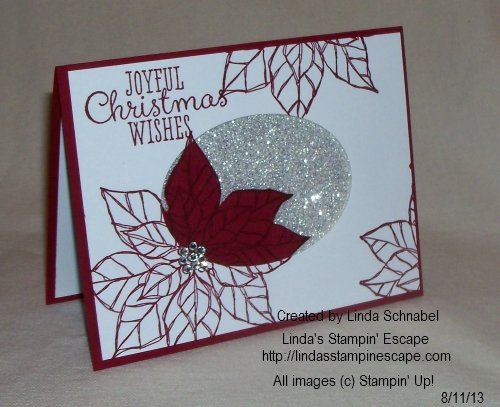
Here’s a cheery card with a lot of sparkle! This is a fun and easy technique you can do with any designer paper. Simply dab your VersaMark pad evenly over your designer paper, add “Iridescent Ice” embossing powder and heat! Soooo pretty!

* * * * * * * * * *

000_1003

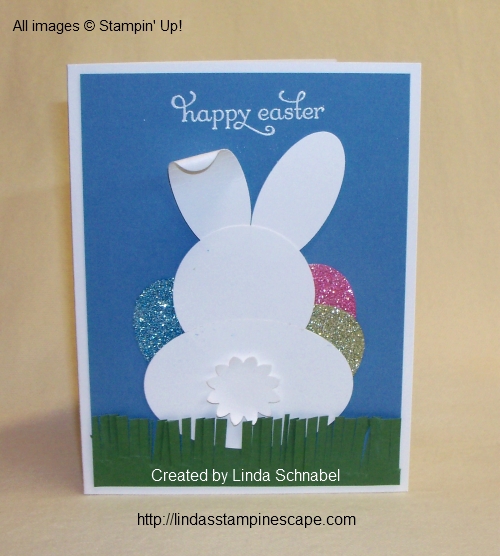
Everyone I know loves punch art … and here is my little Easter Bunny I did last year. With a few ovals, a circle and the Boho Blossom punch – I gave him life! And I especially love his little Easter Eggs … those are the silver glimmer paper died with our ink refills and a sponge dauber! Now we have the fabulous fringe scissors so you no longer have to cut grass the hard way!

* * * * * * * * * *

pic2

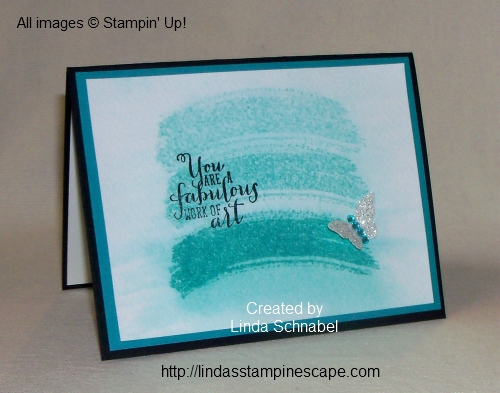
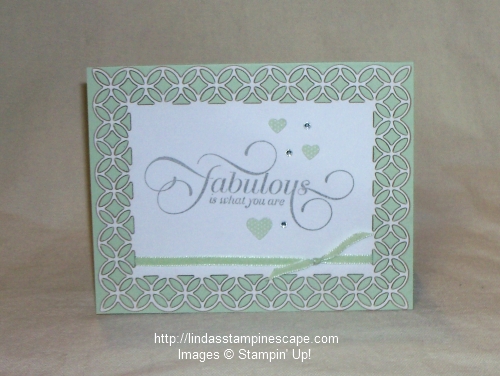
I love this one because I stepped out of my comfort zone! You don’t see me creating card with the abstract stamp sets but I really like the “Work of Art” set! Here I used the “Ombre” technique: different shades of the same color (or color family). Plus I used the new “Blendabilites” markers and colored my rhinestones!

* * * * * * * * * *

000_1154

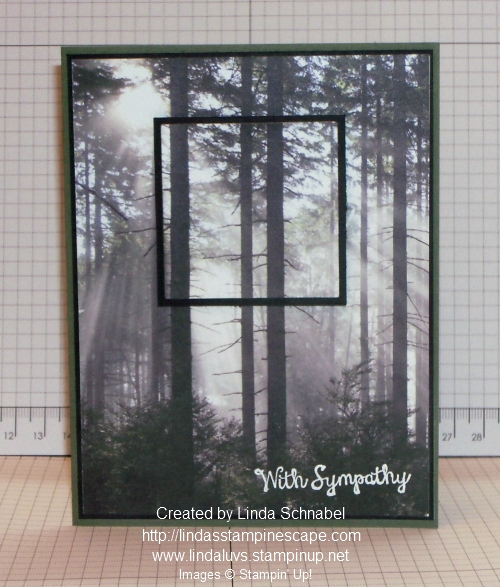
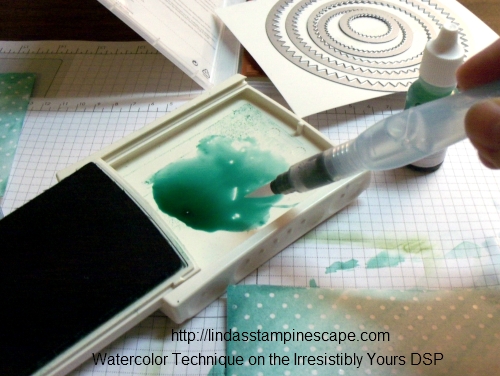
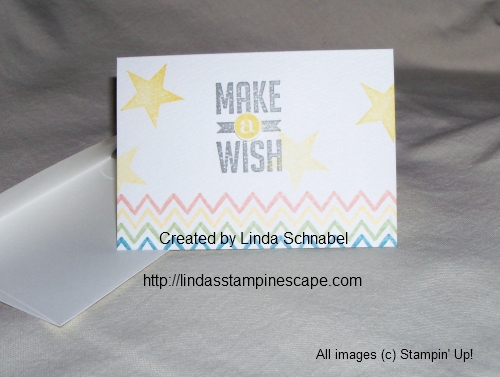
First of all … I love “The Open Sea” stamp set teamed up with the “Maritime” Designer Series paper, you just can’t go wrong. Here is the first time I did the “Reflection” Technique … I know, why did I wait so long? It’s really easy to do!

First stamp your image onto the cardstock, then I used a piece of “Window Sheet” stamped the onto that, flip it over so the ink is to the paper, align image and press down! It will come out lighter, but that’s OK … it’s a reflection!

* * * * * * * * * *

000_1292

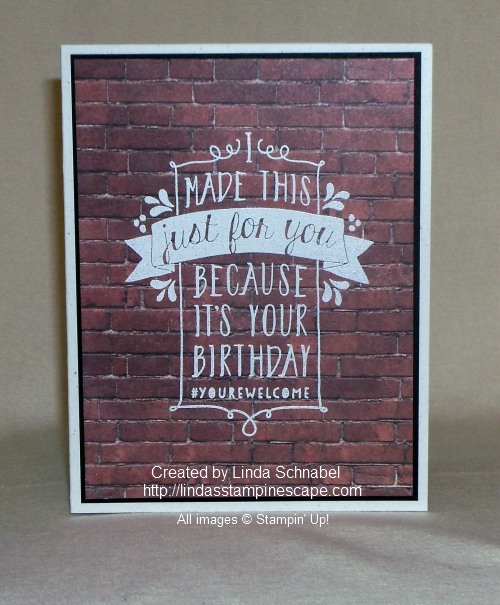
Here is another one of my fav’s … because it’s our Ronald McDonald House Charity Stamp set. Stampin’ Up! is a partner to the RMHC and for each stamp set we sell … $3.00 is donated to the Ronald McDonald Houses.

134306G          38462c7375ca777e506fb182285a0f54

Just think, if I sell 300 stamp set … $300 is donated! Add that by 10,000 more demonstrators … It’s really powerful, and wonderful! But don’t leave it up to someone else … get your stamp set and help in the fabulous cause… housing families so they can be close to their terminally ill sons, daughters, brothers, & sisters. It truly is heart-warming. PURCHASE NOW ♥

* * * * * * * * * *

000_1386

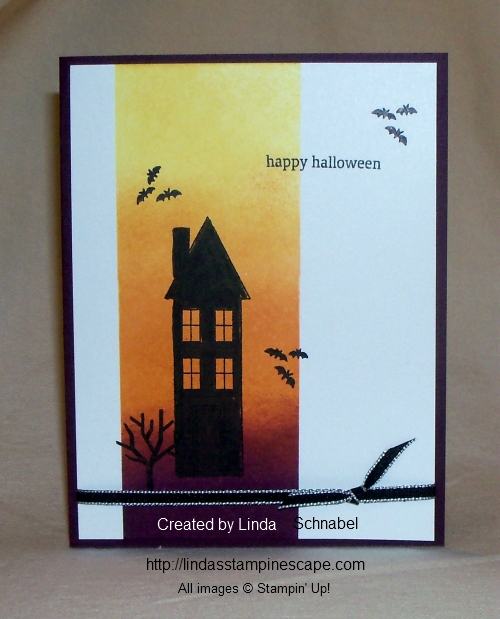
My last (I’m not going to do Christmas because you just saw most of them, and can easily go back to review) I’m sharing my Halloween card… it is much simpler to do than it appears! Mask an area off – I used post-it notes and then sponge on your desired color.

I started with the Daffodil Delight at the top, then moved into the Pumpkin Pie, and last I sponged the Blackberry Bliss (LOVE that Color!). The stamp set is from the Holiday catalog called “Holiday Home” … I just colored in the entire image so it created a silhouette.

* * * * * * * * * *

It was hard to choose a few favorites, and I hope I represented the year well. I love sharing my ideas and new techniques with you.

If you enjoy my blog … please, pass it on to a friend and have them follow me too. I have so much more to show you in the New Year. I invite you to “LIKE” my Facebook Page too!

Thank you so much for stopping by today …

Take good care, have a wonderful New Year’s Eve!

blog-closing-small

LINDA SCHNABEL

Your Stampin’ & Scrappin’ Creative Coach

Clubs * Classes * Private Parties * Retreats

My Blog: http://lindasstampinescape.com  (You are here)

My website: www.lindaluvs.stampinup.net

Follow me on Pinterest: http://pinterest.com/stampinescape/

Simply Sunday Flowers ….

Hello Stampin’ Friends,

Today I’d like to share with you a quick and simple card with a touch of elegance. The elegance is brought into the card with the use of the “Painted Blooms” Designer Series Paper that will be available with the kick-off of the Occasions catalog on January 6th.

000_1849

I can’t wait for the Occasions catalog to go live … it’s full of amazing stamp sets and accessories. This paper is just one of them. It works beautifully if you are in need of a quick yet pretty card!

I chose the blue flower pattern for today’s card and highlighted the yellow centers by adding the button and ribbon from the Sale-a-bration bundle!! The base of the card and mat on the greeting is Wild Wasabi.

My sentiment (or greeting) comes from the Main catalog and can be found in our hostess section on page 238. I could not resist getting the “Let Your Hair Down” stamp set for my hostess dollars … it just reminded me of my friends!

000_1854

So that is my card share today … I get requests all of the time to post quick and easy cards.  Why not, don’t we all need a card in a pinch!

Thank you so much for stopping by today …

Have a great one!

blog-closing-small

Just a reminder … There are only 4 days left of my “Sweet End of Year Deal”

CLICK HERE FOR DETAILS


Occasions & Sale-a-Bration 2015 Sneak Peek: Celebrate with Cake

Hello Stampin’ Friends,

It’s getting closer to Christmas, a busy time for all of us I’m sure. So I hope you can escape the craziness and join me for a minute… kick back and relax because I would like to show you a sneak peek from the Sale-a-Bration and Occasions 2015 Catalogs!

I love that Stampin’ Up! is always right on track with the “hot” techniques and latest products for stamping, and I’m excited to share with you the NEW Chalkboard Paper in the Occasions catalog. Cool right? Well hang onto your socks because they also brought us “Chalk Ink” pads!

Here is my card share today … This is one of the cards that I did as a Make & Take for my Star’s members for our Christmas party this year.

000_1830

This paper is a bit heavier and has a smooth grain that pairs perfectly with the Chalk ink and our White Stampin’ Chalk Marker. The chalk ink is permanent and creates a realistic chalk effect. You can find these on page 25 of the new Occasions catalog.

Also from the Occasions catalog is our “Birthday Bash” Specialty Designer Series Paper …. I picked out the Bermuda Bay and Crushed Curry colors from the DSP as my base colors because I thought it was gender neutral. It’s always nice to have cards around that can be used for anyone.

000_1832

The Chalkboard paper really is the focal point and it highlights our greeting which comes from the “Big Day” stamp set. Yes, you already got a sneak peek from this set on Saturday (click here to view).

vidheaders_SAB_demo_campaign_US_CA

customer_SAB_demo2_US

I love stamp sets that have a greeting and words to match that I can put inside …

000_1833

Ice cream and cake … it’s making me hungry! I think I should have added some designer paper to the inside to add a bit more color! Hmmm … that is why I like stamping with my friends, we share ideas and end up with even better cards! Right ladies!!

Hope you enjoyed the break and I’ll see you tomorrow.

Till then, have a wonderful day ~

blog-closing-small


Stampin’ on a Budget …

Hello Stampin’ Friends,

Today I want to share with you some of the items that were just posted on the Year End Clearance and some fabulous samples from those items. It’s a great time to be looking for some savings (and card samples)!


Simply Fabulous Simply Sent

Simply Fabulous Simply Sent 126925
Price: $12.95 $5.19
Paper and accessories for 8 cards. Coordinates with Million & One Stamp. Kit includes* 8 4-1/4″ x 5-1/2″ cards, with elegant lasered edges
* 8 envelopes, 4 Pistachio Pudding and 4 Smoky Slate
* 30 adhesive-backed, 3 mm rhinestones
* 72 cardstock sticker hearts, 36 in Pistachio Pudding and 36 in Smoky Slate
* 8 pieces of 1/8″ Taffeta Ribbon, each 15″ long; 4 pieces of Pistachio Pudding and 4 of Smoky Slate

000_1025

I want you to know that I added the base of the card, so when you recreate these designs … you can make them any color you want!

000_1022

Joyful Christmas Clear-mount Stamp Set
Joyful Christmas Clear-Mount Stamp Set 131805
Price: $16.95 $10.19
Share Christmas joy and your best wishes for the new year with cards you make yourself. Some cardstock, a little bit of ink, and this stamp set are all you need.Set Quantity: 4

OK … this is one of my favorites, and I miss this set so much. I have four beautiful Christmas card samples to share with you today.

I used the Triple Time Technique for this card, using the Silver Foil paper … quite striking, don’t you think?

000_0282

On my second poinsettia card sample, I embossed Vellum cardstock and cut them out to create a beautiful focal point on my card.

000_0420

On the third sample I used Washi Tape between the lines from the embossing folder. I stamped the flower in Cherry Cobbler and then lightly sponged the edges after cutting it out.

000_0085

On my last sample from the Joyful Christmas stamp set, I used the “Reverse Spotlighting” technique. The Cherry Cobbler really pops against the Silver Shimmer Paper.

000_0074

Here was another one of my favorite stamping item to have in my stamp room …

Watercolor Wonder Designer Note Cards & Envelopes
Watercolor Wonder Designer Note Cards & Envelopes 133362
Price: $12.95 $5.19
Easiest DIY cards ever! Take a printed Watercolor Wonder Designer Note Card. Stamp or write on it. Done! Coordinate with the Watercolor Wonder suite.■ 20 printed cards on watercolor paper: 4 ea. of 5 designs
■ 20 Ivory envelopes
■ Card size: 3-1/2″ x 5″

This note card set is a fantastic way to make quick and easy cards… Add a greeting and then either stamp an added image or punch a butterfly ….

000_0493

000_0582

It’s nice to see the items that are on sale … but it’s even nicer to see what you can create with these items! I have more and would love to share them with you, so stop back tomorrow and check them out.

To begin your shopping experience, just click on one of the items descriptions and it will take you to my on-line store or you can click my shop now button…

blog insert - shop now

Have a great day … and thank you for stopping by today.

blog closing-small