Technique Share from an Artisan Team member …

Hello Stampin’ Friends,

Today I want to share with you a blog post from Allison Okamitsu, one of our Stampin’ Up! Artisan team members. I share the entire blog and video with you because I could not say it any better than Allison. Her work is simply beautiful and very creative … I will be trying this technique myself!

FAUX RUSTED METAL EMBELLISHMENTS

faux-rusted-metal-1

I love all things shabby and vintage, and although this passion doesn’t surface much in my papercrafting projects, it’s always fun to play. A little while ago I visited an absolutely fabulous salvage yard where I found loads of rusted metal filing cabinets, signage, and almost anything else you could think of. My mind was spinning! How could I translate these beautiful, rusty, and worn pieces into my papercrafting? Well, after a little bit of thinking and a lot of playing in my stamp studio, I’m ready to show you how you can transform a simple piece of paper into ultra-fab, faux rusted metal embellishments. And, of course, what better way to show you than with a video tutorial?

faux-rusted-metal-2

For the faux rusted embellishment on this card I used the Sweetheart Punch and punched out six hearts from Basic Gray Cardstock. I then glued them one on top of another to create a thick embellishment that would look more like a real chunk of metal.

faux-rusted-metal-3

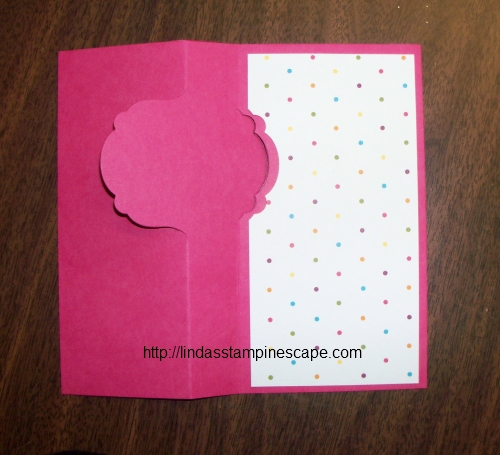
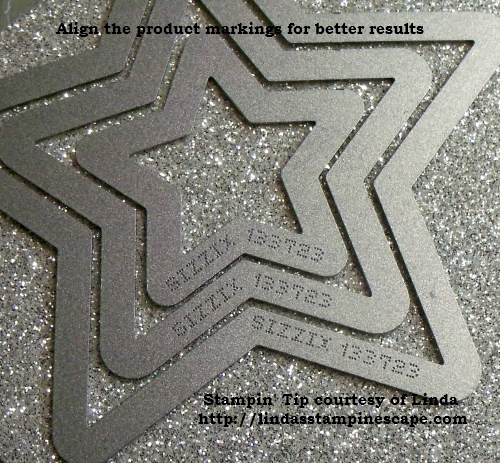
When creating a faux rusted embellishment that has some dimension (like this fabulous 3D star!) make sure you do all of your scoring and folding before you begin applying the layers of ink and embossing powder.

faux-rusted-metal-4

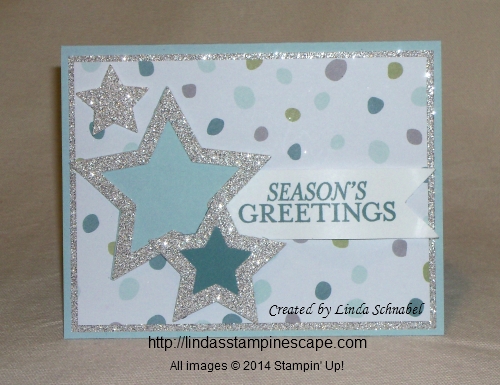
Want to create a faux rusted metal stamped image? Easy! Stamp on top of faux rusted metal using the Jet Black StāzOn Ink Pad. Now you can create faux rusted metal images with all of your favorite Stampin’ Up! stamps! Oooh . . . I need to try flowers next!

I hope you’ll give this technique a try!

Allison Okamitsu
2014–2015 Artisan Design Team

Again, I want to give the credit for today’s post to Allison and her beautiful projects, and a big “Thank You” for sharing her creativity on the Stampin’ Up! blog “Get Inspired”.

Stop back tomorrow … I will be sharing a beautiful wedding card with you.

Have a wonderful day !

blog-closing-small

Stamp Happy with a New Technique!

Hello Stampin’ Friends,

Yesterday I told you that I would have a card to share with you that utilized one or more of the products from our Weekly Deals, so today I’m going to highlight the Starburst Framelits!

Starburst Framelits Die

Starburst Framelits Die 132967
Price: $26.95 $20.21
Cut your stamped images, create layers and frames! 5 layering dies. Largest image: 4-11/16″ diam. Coordinates with Baby and Starburst Sayings Stamp Set

I chose the coordinating stamp set; Starburst Sayings to create my card. My color pallet is Island Indigo and Pool Party … a favorite of many!

BUT … before I put these all together I thought I would share with you a technique that you can use on the NEW “Irresistibly Yours” specialty paper. This paper cannot be bought … but you can get it for FREE in our Sale-a-bration catalog with a $50 order! (before shipping & handling)

The technique I want to show you is watercoloring with your Aqua Painter …. super simple. I will tell you that the paper absorbs the water quickly and that I watered down my ink before I applied it to the paper. (Remember to clean out your ink from the stamp case (as shown) because you have added water and you do not want that on your ink pad)

000_1890

My favorite thing about this technique is that you control the variation of color! I always tell my stampers “less is more … because you can always add more, but it it difficult to take away”. So start light and then add more color where you want it.

000_1891

Don’t you love how the dots pop through the watercoloring! The paper is pre-embossed for you and acts like the “resist” technique. My technique clubs are learning additional techniques in coloring this awesome paper.

You can see why I chose the polka dot pattern (1 of 6 designs) because that too coordinates with our stamp set! The Happy Day is stamped in Island Indigo and the Celebrate in Pool Party.

All three pieces were cut with the Starburst Framelit Die. Here’s a little tip … You can align the framelit to your image easier if you keep the numbers that are printed on the framelit to the top! Take a look at your framelits, most have numbers printed on them and many times I use this when aligning with my stamped image.

000_1894

I popped up the Happy Day with our Stampin’ Dimensionals and then “doubled” the dimensionals on the celebrate to create a lot of dimension.

I hope you enjoyed the use of the framelits from the “Weekly Deals” and learning what you can do with our new Designer Paper; Irresistibly Yours. It’s a must see 🙂 and it’s FREE!

Thanks for stopping by, I’d love to hear what you think of today’s project.

Have a wonderful day ~

blog-closing-small

TODAY’S STAMPIN’ SUPPLY LIST …

Just click on a product image to learn more about it, or to begin shopping. Thank you.

I Made This Just for You!

Hello Stampin’ Friends,

I’m excited to share today’s card with you! First, because we all need birthday cards, second, because I made it with some really cool new products and it was fun to do!

I started with the “Balloon Bash” stamp set from the Occasions catalog – pg. 13. It’s such a fun stamp set and can be used for any gender at any age … from 9 month to 90 years (and beyond!)

000_1874

Well … then I knew I wanted to do the “Chalkboard” technique because Stampin’ Up! introduced “Chalkboard paper” … It works so nice, and is a bit heavier than regular cardstock. You can find it on page 25 with the new Chalk ink (but that’s another day – lol).

I started by wiping down the Chalkboard paper with the embossing buddy, then I inked up my stamp with the White Craft Ink and embossed with the white embossing powder… this gives you a very bold image, AND it allowed me to color the banner with the Coastal Cabana Blendabilities pen! I love the way it pops!!

The embossing buddy adds to the “chalkboard” look, however if you want a bolder look of “chalk” you can use the White Craft Ink and sponge it on lightly.

Once I finished that, I needed to mount my project, but I wanted more than just a plain background so … I went to the new paper stack “Staked with Love” and picked out the XOXOXOXO pattern! Who doesn’t want “Hugs & Kisses” on their birthday!

000_1874

I don’t know about you … but I think this card is so stinkin’ cute! It was FUN and easy to make too!

I appreciate you stopping by to see me today. Let me know if you have any questions with the technique or products I used to create the card.

Have a terrific Tuesday … and don’t forget to check out the new Weekly Deals. Just click on the button below.

blog-closing-small                                  6a00e554f4a3a4883401a511ebad82970c-800wi

STAMPIN’ SUPPLY LIST …


Baby, it’s cold outside …

Hello Stampin’ Friends,

A truer statement I could not make … it’s cold outside, and getting colder! But enough about the weather, I have a cute and easy card for you today.

Since today is the last day you can purchase from the Holiday Catalog, I thought I would share a few items that I love from the catalog. First is the beautiful “All is Calm” Designer Series paper … you’ve seen quite a few of my cards using it. It has so many wonderful patterns – today’s is one of my favorites.

000_1866

I used the coordinating “Lost Lagoon” cardstock and ink. The stamp set is from the “Project Life Holiday Cheer” stamp set … I hope this carries over into the next main catalog. It captures the fall and winter seasons so nicely.

I highlighted today’s stamped images with the “Postage Stamp” punch… always fun to use on a card.

My granddaughter Shayla liked the way I did the heart on yesterday’s card and said I should do the snowflakes with the same technique … so I did. Makes them sparkle so nicely.

I added a bow to bring your eye full circle and embellished it with a silver sequins and white snowflake from the “Frosted Sequins” … they really go a long way. Then, I topped off the sequins with a rhinestone! Isn’t that pretty?!

000_1867

So it may be cold outside but this sweet and simple card will warm anyone’s heart.


000_1864

Thanks so much for stopping by my blog today.

Have a relaxing and “simple” Sunday ~

blog-closing-small

STAMPIN’ SUPPLY LIST …


A Year in Review ….

Hello Stampin’ Friends,

Today is New Year’s Eve day and I thought that I would share with you some of my favorite creations from this past year, what I discovered going through my cards is that you like them for different reasons!

Some you like because they are cute and easy to replicate, others because they have a really neat technique, so hard as it was to pick, here they are …

000_0663

This was from a January post … I love the fun the Silver Vellum brings with the polka dots and the the flower spread that highlights the greeting! And who doesn’t love turquoise?!

* * * * * * * * * *

000_0857

Here’s a cheery card with a lot of sparkle! This is a fun and easy technique you can do with any designer paper. Simply dab your VersaMark pad evenly over your designer paper, add “Iridescent Ice” embossing powder and heat! Soooo pretty!

* * * * * * * * * *

000_1003

Everyone I know loves punch art … and here is my little Easter Bunny I did last year. With a few ovals, a circle and the Boho Blossom punch – I gave him life! And I especially love his little Easter Eggs … those are the silver glimmer paper died with our ink refills and a sponge dauber! Now we have the fabulous fringe scissors so you no longer have to cut grass the hard way!

* * * * * * * * * *

pic2

I love this one because I stepped out of my comfort zone! You don’t see me creating card with the abstract stamp sets but I really like the “Work of Art” set! Here I used the “Ombre” technique: different shades of the same color (or color family). Plus I used the new “Blendabilites” markers and colored my rhinestones!

* * * * * * * * * *

000_1154

First of all … I love “The Open Sea” stamp set teamed up with the “Maritime” Designer Series paper, you just can’t go wrong. Here is the first time I did the “Reflection” Technique … I know, why did I wait so long? It’s really easy to do!

First stamp your image onto the cardstock, then I used a piece of “Window Sheet” stamped the onto that, flip it over so the ink is to the paper, align image and press down! It will come out lighter, but that’s OK … it’s a reflection!

* * * * * * * * * *

000_1292

Here is another one of my fav’s … because it’s our Ronald McDonald House Charity Stamp set. Stampin’ Up! is a partner to the RMHC and for each stamp set we sell … $3.00 is donated to the Ronald McDonald Houses.

134306G          38462c7375ca777e506fb182285a0f54

Just think, if I sell 300 stamp set … $300 is donated! Add that by 10,000 more demonstrators … It’s really powerful, and wonderful! But don’t leave it up to someone else … get your stamp set and help in the fabulous cause… housing families so they can be close to their terminally ill sons, daughters, brothers, & sisters. It truly is heart-warming. PURCHASE NOW ♥

* * * * * * * * * *

000_1386

My last (I’m not going to do Christmas because you just saw most of them, and can easily go back to review) I’m sharing my Halloween card… it is much simpler to do than it appears! Mask an area off – I used post-it notes and then sponge on your desired color.

I started with the Daffodil Delight at the top, then moved into the Pumpkin Pie, and last I sponged the Blackberry Bliss (LOVE that Color!). The stamp set is from the Holiday catalog called “Holiday Home” … I just colored in the entire image so it created a silhouette.

* * * * * * * * * *

It was hard to choose a few favorites, and I hope I represented the year well. I love sharing my ideas and new techniques with you.

If you enjoy my blog … please, pass it on to a friend and have them follow me too. I have so much more to show you in the New Year. I invite you to “LIKE” my Facebook Page too!

Thank you so much for stopping by today …

Take good care, have a wonderful New Year’s Eve!

blog-closing-small

LINDA SCHNABEL

Your Stampin’ & Scrappin’ Creative Coach

Clubs * Classes * Private Parties * Retreats

My Blog: http://lindasstampinescape.com  (You are here)

My website: www.lindaluvs.stampinup.net

Follow me on Pinterest: http://pinterest.com/stampinescape/

Ornamental Pine Birthday Card …

Hello Stampin’ Friends,

It’s a bit “chilly” out today but I am grateful that the snow blast that hit our western states did not make it to Wisconsin – or should I say… my neck of the woods! Northern Wisconsin got snow.

Today I am going to share with you the Ornamental Pine Birthday card as promised, and my favorite of this weeks “Weekly Deals”.

Let’s begin with the card ….

000_1681

My colors are based off the designer paper pack “Trim the Tree” which includes the Garden Green that I used as my base and my frame. The designer paper is cut 4 x 5-1/4″ … then cut a Whisper White and Garden Green slightly smaller. The white you will stamp on, and the green will be a frame!

 000_1682   000_1684

Align the Garden Green cardstock behind the designer paper and using the “Oval Collections” Framelits … you will cut through both pieces.

000_1686

Take away the Garden Green and place the Trim the Tree Designer paper back onto the BigShot … using the “next size up” oval, align and cut.  Now when you place your Garden Green back behind the designer paper … you will have a frame!

Just to recap ….

000_1687

Next, you will ink up your Pine with Garden Green ink and color in the stem with the Chocolate Chip marker and stamp onto the Whisper White piece you cut earlier. Stamp the pine cone in Chocolate Chip and cut out… yes, you have to fussy cut – sorry!

My “Happy Birthday” greeting comes from the “Making Spirits Bright” … a great set you can use all year long, and the greeting size is perfect!

000_1679

OK … now for some more fun, let’s talk “Weekly Deals”! My favorite from this weeks bunch of deals is the …. Daffodil Delight Seam Binding! We had some great guesses, but no one guessed it right 😦

Daffodil Delight 1/2" Ribbon Seam Binding

Daffodil Delight 1/2″ Ribbon Seam Binding

125583

Price: $6.95  New Price $5.21

Returning favorite now in even more colors! Soft and flowingÑdrapes like silk. 10 yds.

Don’t fret though ladies because I told you that I was going to be full of surprises this year, so each of you who responded will get a bolt of the Daffodil Seam Binding!!

I want you to know why I fell in love with it.  It is so easy to work with, and ribbon is always a great way to embellish a card without breaking the bank. Congratulations Olivia, Cheryl, Barb & Nancy!  🙂

Thanks so much for stopping by and stay warm!

blog-closing-small


STAMPIN’ SUPPLY LIST …

Ornamental Pine Clear-mount Stamp Set
Ornamental Pine Clear-Mount Stamp Set

Price: $18.95


Making Spirits Bright Clear-mount Stamp Set
Making Spirits Bright Clear-Mount Stamp Set

Price: $19.95

Simply Thankful Sunday …

Hello Stampin’ Friends,

A happy Sunday to you! Today I am going to share another transformation of Motley Monsters to a pretty card of “thanks”.

000_1665

I began with a Tangerine Tango base and the Tango stripped Motley Monsters Designer Paper. I used the “thanks” from Seasonally Scattered … the multiple colors come from the Baby Wipe Technique. The “thanks” was highlighted by adding a touch of glitter.

I used the “Apothecary Accents” framelits to highlight our stamped design and was matted with Old Olive. I actually “fussy cut” the mat.

I added a sweet button from the “Very Vintage” buttons… it was colored with the Old Olive blendabilities and topped off with a pumpkin bow. The results are a cute, simple card of thanks.

000_1666

Have a fabulous Sunday ~

blog-closing-small


The “JOY” of Christmas Cards and Stampin’ Tips!

Hello Stampin’ Friends,

OK … Halloween is over and many of you know that I just loved that “Motley Monsters” Designer Series paper, but what are we going to do with it now that Halloween is over?

Don’t fret … I have an obvious solution for you in today’s card share plus an awesome stamping tip! 000_1646

 The obvious answer … Yep, flip it over! The great wood-grain paper below comes from “Motley Monsters”! I teamed it up with the “Wondrous Wreath” stamp set and coordinating framelits. Save 15% when you bundle the stamp set with the framelits!

000_1654

The stamp set and framelits are amazing to work with … the beautiful color you create when using this two-step stamp set. I stamped Old Olive onto the Whisper White and then the Mossy Meadow in-color on top of the Olive.

* Just a quick reminder that the tabs on the photopolymer stamps are there for you to align the images and make your stamping easier.

000_1535

You know me, I wanted that holiday sparkle so I used the Red Glimmer Paper and Cherry Cobbler Dazzling Details. I had a blast putting this card together. The Multi-purpose glue works wonders on glimmer paper and holds superbly.

Yes, the “JOY” comes in the Wonderful Wreath framelits collection!!

000_1652-B

One of the things I liked about this stamp set was that it also had a beautiful verse for the inside of the card, but if you are like me …. you can never stamp it straight! Today I want to share an easy solution to that problem …

1. Begin with the Grid Paper and align the inside of your card so it’s straight …

000_1647

2. Use Washi tape and place it where you want your verse to “end” ….

(I unsticky my washi tape a bit by placing it on my skin or clothing … you don’t want it to peel your cardstock)

3. Align the bottom of your verse slightly above your washi tape and stamp …

000_1649

Ahhh … doesn’t that look nice! Perfectly straight! I love it, I love it, I love it! Why didn’t I think of this before, like 13 years ago – lol.

000_1651

I hope you enjoyed my card and stamping tips …

000_1654

I’d love to hear what you think… you can leave me a message below. I will have another “Motley Monsters” transformation for you tomorrow!

Till then, have a great day ~

blog-closing-small

PS… I still haven’t found those swaps!

STAMPIN’ SUPPLY LIST …


The Natural Beauty of Ornamental Pine

Hello Stampin’ Friends,

Wooo Hooo … the weekend is here and we’re kickin’ off November! Hope you had a good week.

Today I want to share with you a card that we had several discussions over at our retreat last weekend..

One of the ladies found a card on Pinterest and I commented that we had made that card at Alice’s stampin’ party as a Make & Take, but I changed the colors. For the life of me, I could not remember what colors I used! So here it is ladies …

000_1619

The base color used was “Crumb Cake” …I teamed it up with Early Espresso. My pine was stamped in the new “Mossy Meadow” ink and the stem filled in with the Espresso marker.

The smaller piece of Crumb cake was cut at 4″ x 2-3/4″ and the Espresso mat at 4-1/4″ x 3″. Simply place the smaller Crumb Cake onto the center of your folded base (I tack mine down with a bit of adhesive so it doesn’t move) and then stamp … use firm, even pressure and you’ll get a great image.

Pick up your smaller piece and mount it to your mat, then mount the mat directly onto the base. It’s so pretty… and so easy!

This was not my original design, I just “cased” it (Copy And Share Everything) and switched up the color scheme for a more natural look. You can follow me on Pinterest as well … CLICK HERE!

Don’t forget your coordinating envelope … and stamp that too! It’s always a treat when you open your mailbox and find a hand stamped card!

000_1623

Stampin’ Tip: Make sure your ink pads are properly inked to get the best stamped image. It’s always best to purchase an ink refill when you purchase your ink pad. If you have not done this, ink refills make a great filler when your adding to your orders.

I’d love to hear what you think, feel free to leave a comment below.

Thank you for taking time to visit me today ~

Have an awesome Saturday … see you tomorrow!

blog-closing-small

STAMPIN’ SUPPLY LIST …


Halloween Birds …

Hello my Stampin’ Friends,

Today as promised … I have a Halloween card for you.  You won’t need to hide behind the tree’s as these little Halloween birds are rather cute! Of course I am using the “Motley Monsters” Designer Series Paper and the coordinating Bermuda Bay Cardstock.

000_1562

For those of you who have been following my blog for a while, you know that I love to dye my “Silver Glimmer Paper”. Today’s card I dyed it Basic Black!  It really highlights my “Halloween” … which comes from the stamp set “Halloween Street”.

000_1567

I used my marker to color the “Halloween” and omitted the house and the happy.  This is a great way to change up your stamps a bit.

I highlighted two of the cute little birds with my circle punches.  Simple … Simple … Simple!

000_1564

Thanks for stopping by! Have a wonderful week.

blog-closing-small

STAMPIN’ SUPPLY LIST …

Please let me know if you have any questions or would like to order.  To view full details of the product or begin shopping, just click on the product pic below.


Guest Stamper … Jenny’s Christmas Card

Hello Stampin’ Friends,

Hope you had a nice weekend … it looks as if we are in for a fabulous week here in Wisconsin.  Warm days and cool nights and today being the first day of Autumn – I love it!

Today I am going to share a card from my sideline / stampin’ sister Jenny F… we did her card as a Make & Take at our meeting. Jenny used a masking technique and sponging, as I did yesterday but it’s a totally different look, another beautiful Christmas card.

We began by stamping our greeting … you can choose any greeting that you have at home or one of the new ones in our Holiday catalog.

000_1499

The second step was a torn piece of paper, a sponge and the gray ink to create the layers of snow.  Just lightly pull the ink into the paper to add a bit on ink and a softness to the line.

Next, was the Serene Silhouette stamp set and we used markers to color it so our birds could be red.

The moon was created next with a mask made from the 1-1/4″ circle punch and two-way glue pen.  The two-way glue pen when applied and then let dry, will work like a post it … sticky but removable.  Once the circle is placed on the card, you simply sponge around it to create clouds, then lift it off and you’ll have the Moon!

Lastly we added glitter … always a holiday favorite on your cards.

Thank you for stopping by today, hope it’s a good one.

blog-closing-small


Christmas in Pink -n- Gray

Hello Stampin’ Friends,

Hope you are having a wonderful weekend so far.  I hosted the last of my clubs for the month yesterday and this afternoon I’m off to work.  I have to train a new employee today.

Yesterday I promised that I would share the Christmas card that I pulled together at my Star’s meeting on Friday.  I tried to use as much of the paper I had already cut, so I stuck with the Whisper White but swapped the Rose Red for Going Gray.

I already had the Pink Pirouette seam binding cut so I thought … what goes good with pink? Hmmmm… GRAY! I have been known to make a few cards with some very non-traditional Christmas colors so here’s my first for the season …

000_1491

I used the tried and true “Lovely as a Tree” and stamped it in Smokey Slate, then used the greeting from the beautiful “Wondrous Wreath” stamp set. This set comes with the coordinating framelits, so you can bundle the two and save yourself 15%!!

Combining the embossing technique with our decorative masks creates a beautiful effect, especially when you sponge the embossing with an ink to really make them POP! A touch of dazzling diamonds glitter on the tree really gave our card that holiday effect.

The sweet and soft Pink Pirouette seam binding is added for additional dimension, and it just looks prettier!

What better way to finish off your card then to add some star’s to the inside too, and the easiest way was to use our new “Confetti Star’s Punch”. I even slid a piece of Pink Pirouette cardstock behind it to tie our color pallet together and finish off the card.

000_1493

Not bad for creating a card on the spot! The layout was inspired by the card my club members made this month, so I hope they enjoy another sample.

You may begin shopping by clicking on any of the items used for today’s card.

Thank you for taking time out of your weekend to stop and see me.

Have a beautiful day ~

blog-closing-small


For a True Friend…

Hello Stampin’ Friends,

Wow … what I night!! I hosted my monthly stampin’ meeting with my downline and fellow demonstrators last night and let me just say … the swap cards were awesome (I will be sharing over time) and we had a lot of fun.

I didn’t know which card to start with today … so I’m starting with mine, the one we didn’t make!  It seems my Make & Take wasn’t a Christmas card, and that was our “theme” for September!  Oooops! So, I created one on the fly … which I will share with you tomorrow.

Since I gave each one of my Hostesses and downline members the “Hearts & Star’s” Decorative Masks, I thought it was only appropriate to make cards using the masks.  You can find them on page 205 of our annual catalog (or below). So today’s card and tomorrow card share will highlight the decorative masks… today, the hearts!

000_1490

My card uses the Ombre technique which is a graduation of color.  Once I placed my decorative mask over my cardstock, I began at the bottom and applied the Pink Pirouette with a sponge dauber, continued with Strawberry Slush and topped it off with Rose Red.

My card base and greeting are also Rose Red.  The greeting comes from the Hostess stamp set “Let Your Hair Down”.  I used the new Sweetheart punch (which is currently on sale through Monday) to add a little sparkle with the Silver Glimmer Paper.

This sweet card is topped off with the Pink Pirouette seam binding … it really does tie in all the colors to create a completed card. It’s just a great card for a true friend.

000_1488

Thanks so much for visiting today, stop back tomorrow to check out my “Christmas Card” that was designed “on the spot”!

Have a good day ~

blog-closing-small


Flippin’ for You!

Hello Stampin’ Friends,

I hope those of you who live near me in Wisconsin got a chance to get outside yesterday … what a beautiful day!  I also hope you all had a chance to look over the Weekly Deals I posted because today I’m going to share with you a few of those!

I’ve have the cutest card, stampin’ tips & techniques that you’ll flip over!  Let’s begin with the front of the card.  I used Melon Mambo for my flip card and the “Label Card” Thinlit die – one of our weekly deals … Sweet!

000_1483

Speaking of sweet, I paired the Melon Mambo with the “Sweet Taffy” Designer Series paper.  I cut the designer paper to fit the inside of my card, then I aligned it within the framelit die to cut out the area that flips.

000_1478

Now my designer paper is perfectly notched out and has the perfect mambo frame of color around it.  The Whisper White pieces for the greetings, were cut with one of the thinlits that are included with the card thinlit … it actually contains 9 dies!

000_1479

Because I love polka dots and texture … I used the “Perfect Polka Dot” folder to the left side of my lip card.  I took a picture of how I just tucked that piece into the folder, then folded the card behind the folder.  I did not use any tabs when embossing this folder.

000_1481

My greeting is from “Yippee Skippee” … also on sale this week!  I love this quirky and fun stamp set.  I used the black StazOn™ because I like the richness of the black color, and it smells good! LOL

I snuck the little heart from the “Another Thank You” stamp set to add a bit more color to my sentiments.

The third item from the Weekly deals list that I am using on my card, is the brand NEW “Sweetheart” punch!!  I punched it out of the Silver Glimmer paper and dyed it Melon Mambo!

TO DYE: All you need is a sponge dauber … then you can either use the ink pad or the ink refill.  I prefer the refill because it’s quicker and I get a darker color quicker.  Stampin’ Tip …  I dampen the sponge dauber first (not wet) but it really helps spread the ink evenly over the glimmer paper.

Now, for the inside of the card …

000_1484

I hope you enjoyed today’s card, the stampin’ tips of trimming the designer paper, embossing just a section of a card, and the technique of dying glimmer paper.

I’d love to hear what you think!  Thanks so much for following along.

Have yourself a flippin’ awesome day!

blog-closing-small

Please note that the sales price is not reflected on the ingredient list below … to check the Weekly Deals, just scroll up until you see it listed on the right hand side of the blog – then click on it.  That will take you directly to my “Weekly Deals” on my website.

Season of Stars ….

Hello Stampin’ Friends,

It is beginning to get a bit chilly out…  Are you starting your Christmas cards yet?  Are you thinking about them?

Well, today I would like to share with you a beautiful Christmas card made with one of my favorite new accessories … the Star Framelits!  I teamed it up with the “All is Calm” Specialty Designer Series Paper which will surely soften the winds of winter.

000_1470

I knew I wanted to use the Silver Glimmer paper, so I layered my stars … smallest and the next two sizes up for my card. I placed all 3 onto the glimmer paper and aligned the product markings on the stars to ensure a perfect alignment.

000_1461

Each BigShot cuts or embosses differently … my stars needed a bit of help coming apart, so next time I will add a bit of a shim by placing a piece of paper into the sandwich as well. This only happened when cutting my glimmer paper and is well worth it.

My base color is the Soft Sky which coordinates with the All is Calm paper and really sets the tone for the card.  I used that and Lost Lagoon behind my stars for an added pop of color.

Adding a layer of the Shimmer paper between the base and the designer paper just adds that “holiday” touch to the card.

000_1468

This angle shows the two smaller stars and the banner are popped up with the Stampin’ Dimensionals. It creates wonderful dimension to the card … and brings it to life!

The greeting comes from the “Bright & Beautiful” stamp set found in the Holiday catalog and is stamped in with Lost Lagoon. The banner was trimmed at the end using the square punch.

The items used for creating this card are listed below, click on anyone of them for more details or to begin your shopping at my on-line store.

Thank you so much for stopping by.

Hope you weekend is a wonderful one ~

blog-closing-small