Simply Sunday: Easter Gifting Ideas

Hello Stampin’ Friends ~

How are you on this fine day? I’m hoping happy and healthy!

Today I’ve got some fun projects for you and a card! Yesterday I shared the March 2017 Paper Pumpkin with you … today I’m sharing alternative projects. If you haven’t received this kit, or are not a Paper Pumpkin subscriber yet, you can sign up at any time, and when you do, you can purchase “past” kits!

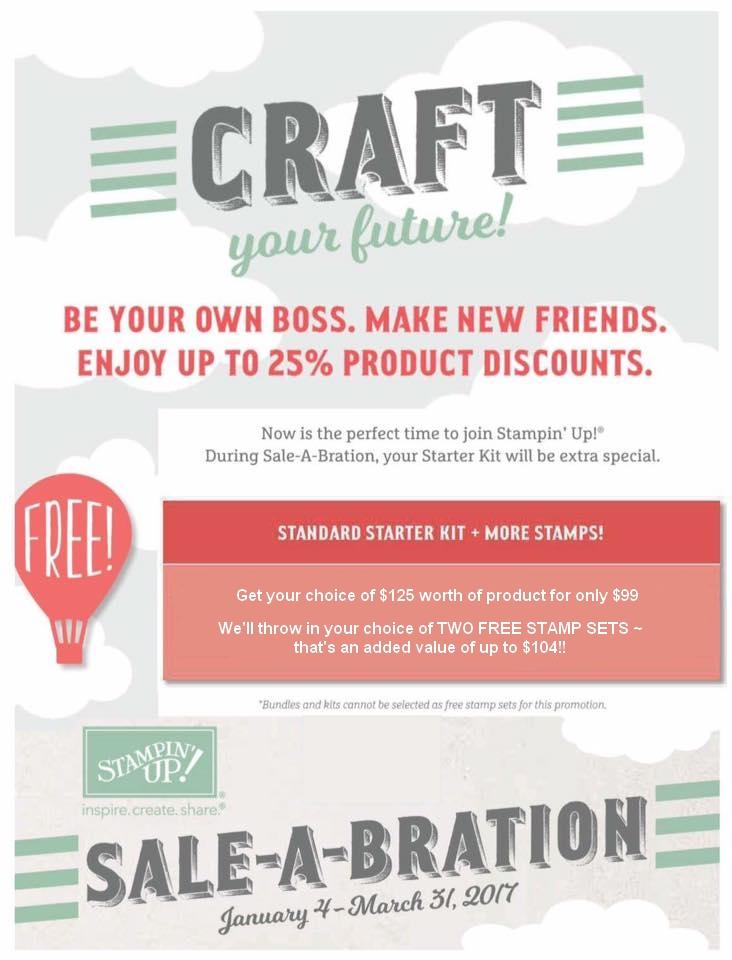
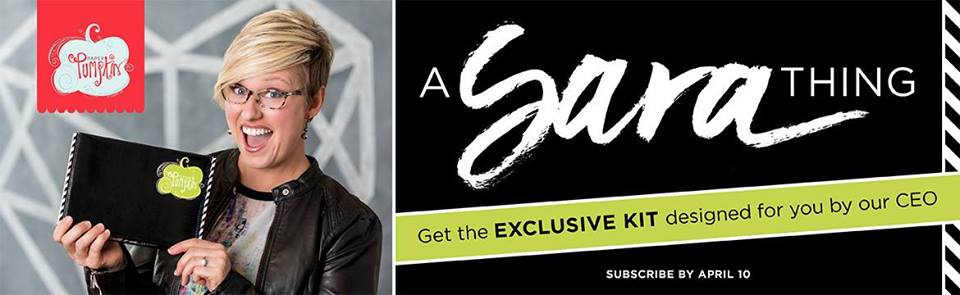
I will tell you this, if you purchase the 3 month subscription by March 31st, you will save $4 and receive a FREE Sale-a-bration item!!  Make sure you activate your subscription before April 10th because we’re all excited that Sara Douglass – Stampin’ Up!s CEO has created the April 2017 kit!!

Ok … let’s get on with the goodies! Here I wanted to show you “my” little bunny as followed by kit instructions. These are so easy … so fun and too cute! As soon as they add the refill kit – I’m ordering more so my grandkids and I can make these up!

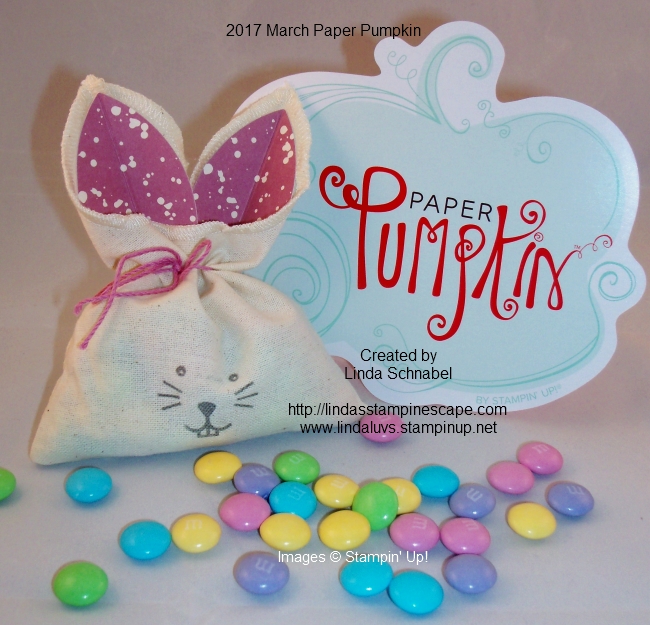
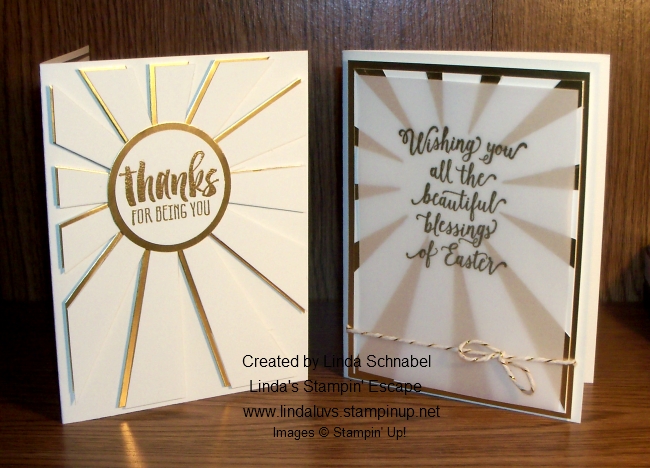
Here is a photo of all my projects put together! Did you know that the little 3 x 3 note cards fit nicely into the little bag … How cute is that!! A little gift bag with the little bunny cards.  You could make these into “Thank You” cards and give to the host of your Easter dinner. What a cute little gift.

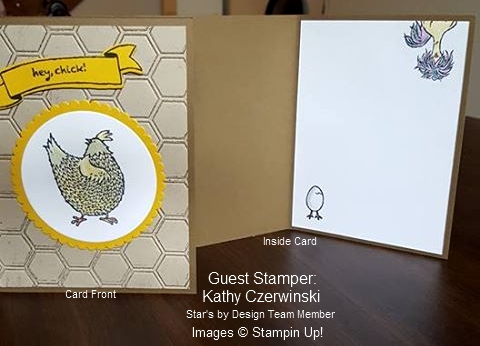
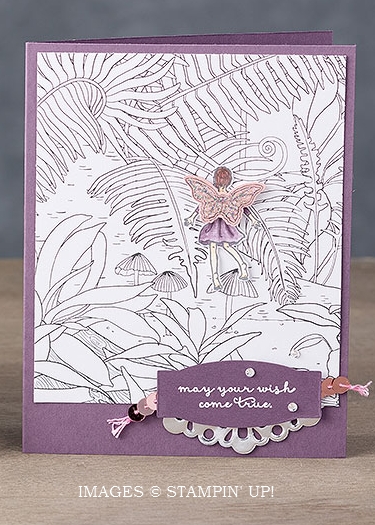
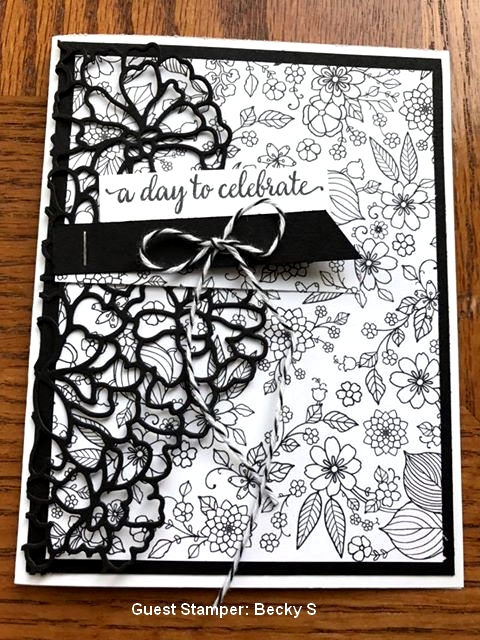
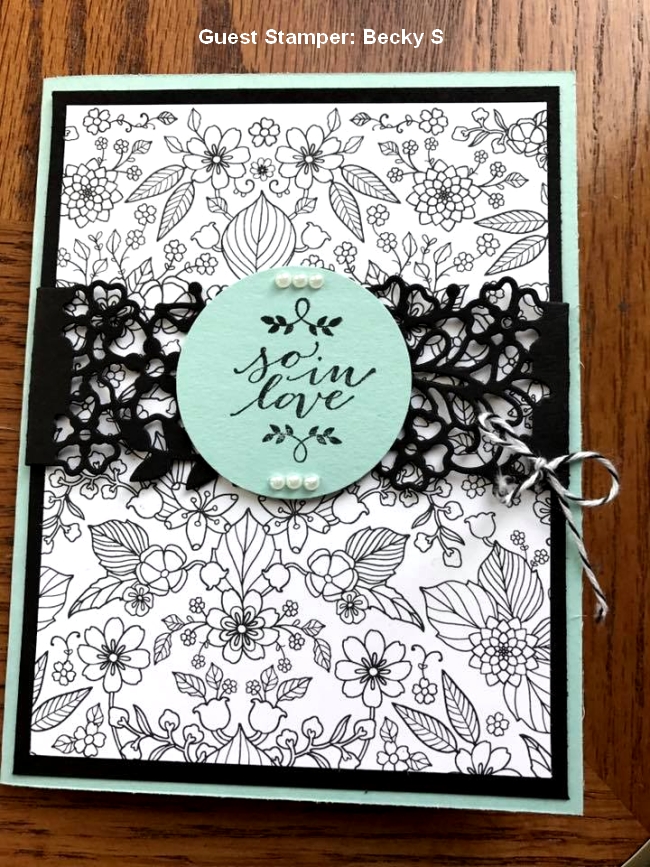
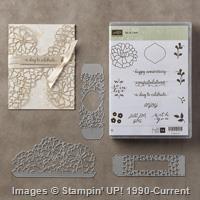
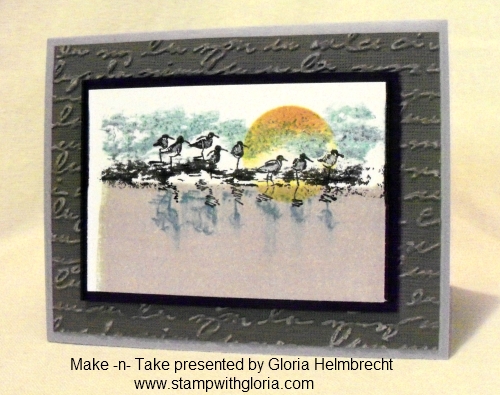
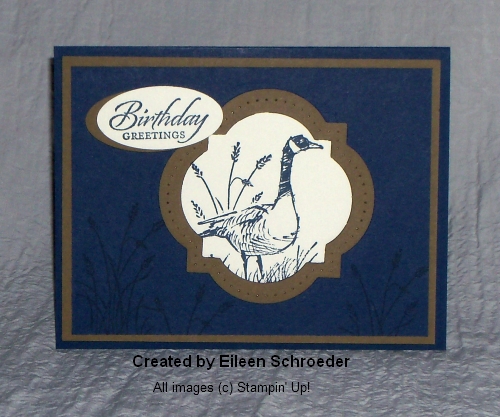
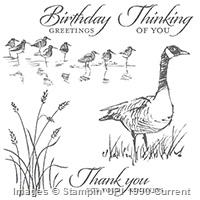
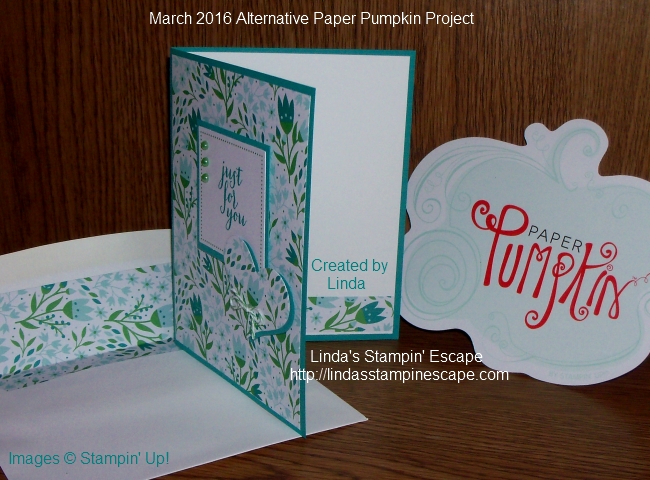
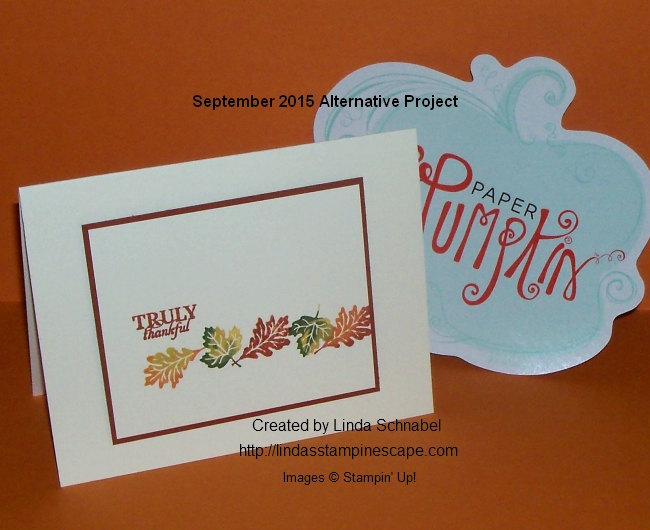
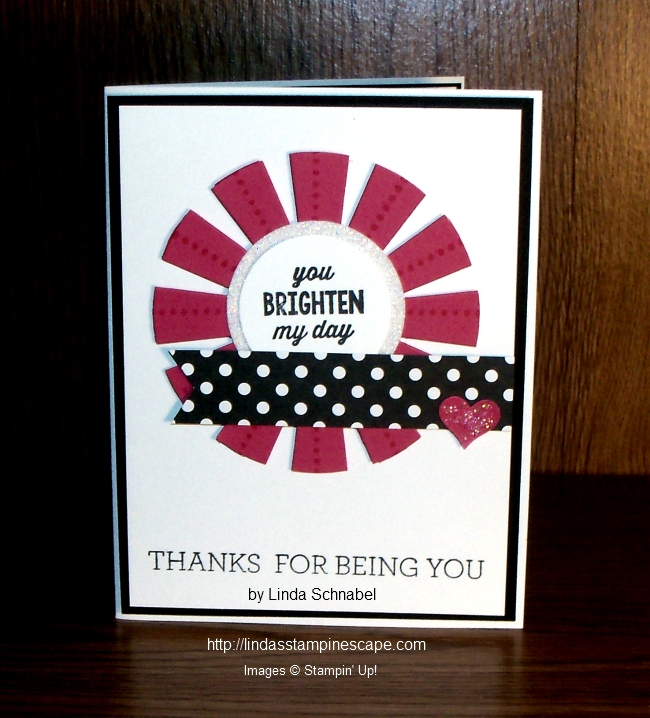
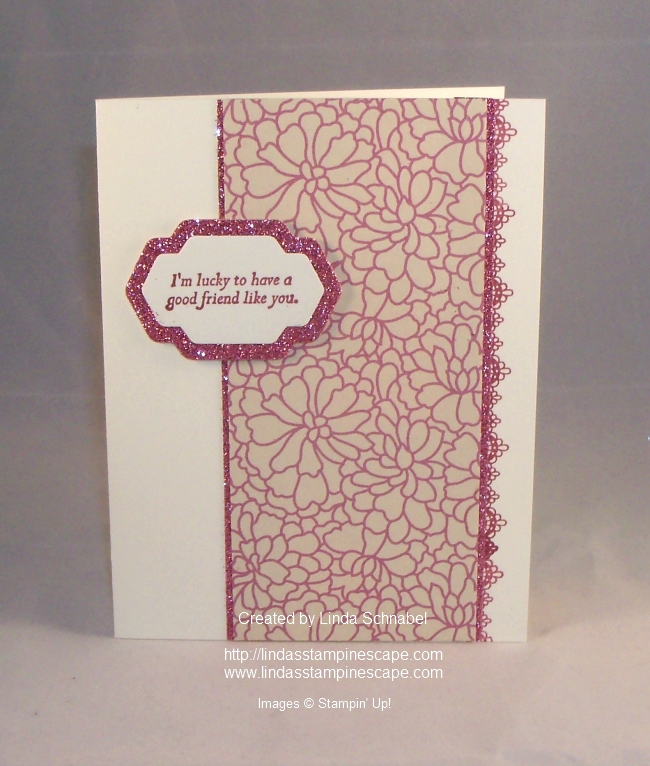
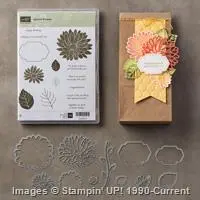
Next, I know many of my customer love their “full size” cards … so here is my alternative to the kit, a full sized card.  The cute stamps used to create that bag … come in this kit! I love the little eggs and the “I’m glad your my friend can be used all year long!

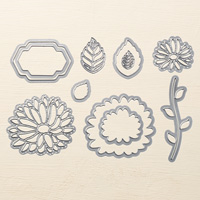
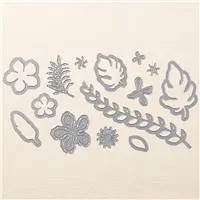
I used the inside bunny ears to create a flower! These pieces are die-cut and already have the adhesive on them so they are super simple to create with.

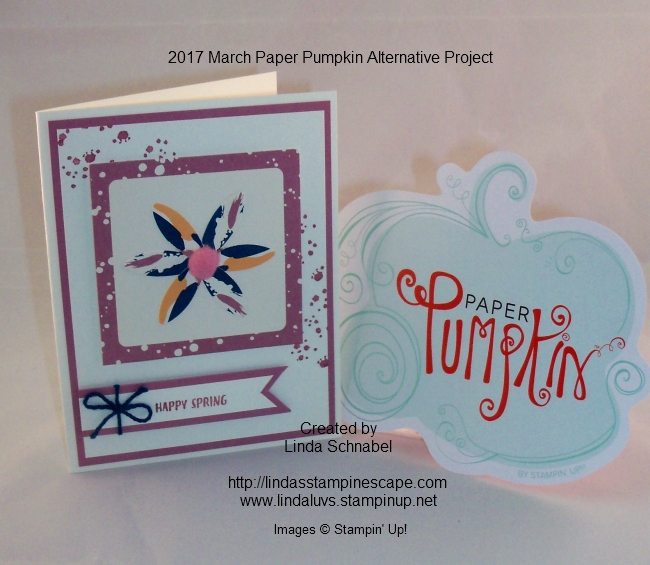
The flower is adhered to the front of the gift card … the back half is tucked away so I can use that on another card. This section is popped up from the card front.  I used a “splatter” stamp to add a little color to the vanilla and then added a banner greeting. I cut the little bunny tail in half and glued it to the center of my flower.

I must say, this was a very fun kit to play with! If you want to try out Paper Pumpkin, now is a good time.  Just click on the links below for more information or to begin your purchase, or you can contact me and I will help you out.

Thank you so much for spending a part of your Sunday with me. 

STOP BACK TOMORROW TO SEE MY MARCH MADNESS SPECIAL!!

Have a wonderful day ~


Click on any of the items below to view / more information or to begin your purchase. Don’t forget to select your FREE Sale-a-bration items.

Price: $59.00

NOW $55.00

Plus 1 FREE

Sale-a-bration item

Price: $114.00

Two (2) FREE

Sale-a-bration items

Price: $215.00

Four (4) FREE

Sale-a-bration Items

and

Hostess Benefits!

BUNNY BUDDIES!

Hello Stampin’ Friends ~

Oh my gosh … I got home from work yesterday and found the best thing in my mail box! No bills … just my Paper Pumpkin.  It is so stinkin’ cute!

Check it out, watch the video ~

Our Paper Pumpkin Bunny Buddies are bursting onto the scene just in time for spring! Every March kit comes with nine bunny cards and bags. Watch their personalities emerge as you customize each one with a face, ears, accessories, and a pompom cottontail. They are simply “ear”-resistible!

Stop back tomorrow and check out my alternative to the kits projects … not sure how I’m going to top these cute bunny bags!

Till then … Have a great day!


Fab Friday featuring “Hey Chick” Stamp set

Hello Stampin’ Friends ~

It’s finally Friday and that’s just fabulous!!  Plus I get to leave work early today … Yaaa Hooo!  Now this day is just getting better because I have 2 cards to share with you that were created by 2 of the members in of my team: Star’s by Design.

I like the “Hey, Chick” stamp set but I haven’t even had time to use it, so when the ladies shared their fabulous designs on our “Star’s by Design” Facebook page I was thrilled.

The first card I’m going to share is from Kathy …

Along with the “Hey Chick” stamp set, Kathy used the “Hexagons Dynamic Textured Embossing Folder to create the background.  The chick was cut out with the Layering Circle Framelits.  This card is just totally cute!!

Now our next card comes from Connie … It’s a show stopper!

How fun is this card!? I love how it showcases all the birds but let’s you know that it is a birthday card.  Connie also used the Hexagons Embossing folder on the Elegant Eggplant paper.  You can also see the “Hardwood” background stamp on the first section of the card on the red background … the red is carried through onto the 3rd section of the card.

Hey, Chick … what do you think?  Cute cards right! And this stamp set is just one of the FREE items you can get during Sale-a-bration. Let me know if you have any questions.

Thanks for hangin’ out with me today and checking out the talents of my team members.  We have a lot of fun … join us!

Here’s to a fabulous Friday, and a Happy St. Patrick’s day too!

Throwback Thursday: Happy Easter

Hello Stampin’ Friends ~

Today I’m bringing back a really cute Easter card and a scrapbook page! With the products we currently have in our catalog today, you could easily recreate either of these two projects.

My “technique” that I was teaching when these were created was “Dying your Glimmer Paper”.  I taught my classes how to use your ink refills and either a sponge dauber or the Stampin’ Spritzers to color the Glimmer paper … NOW you don’t have too! With the beautiful colors of Glimmer Paper Stampin’ Up! has brought out for Sale-a-bration all you have to do is punch! No fuss required!

The first is my bunny card …

Both the bunny and the eggs were created with a combination of circle and oval punches … now, I think I would use the Layering Circle and Oval Framelits. You will have a greater choice of sizes this way. The little bunny tail was made with a flower punch.

I used the same format on my scrapbook page as I did on my card.  That is one thing that I have always taught in my classes.  Use what inspires you to create what ever you need.  How do you like the little chick I tucked inside the cracked egg? Again, made with the oval 🙂

OK, I have one more card that I want to share with you that I created using the “Dying your Glimmer Paper” technique …

You could easily recreate this card using the Sale-a-bration Glimmer paper. And you know what … the “Petite Petals” punch that I used to make this card is still in the catalog!!  You know what else would be cute … the Elegant Butterfly punch.

Just because something is old (Created 2014) … doesn’t mean it can’t be new again!

Thank you for stepping back in time with me today, I hope this inspires you to get creative and have some fun!

Have yourself a wonderful day ~


Below is a list of products I used and suggested products to create that projects shown.  You can purchase any of these items by clicking on the item.  Remember that you will receive a FREE Sale-a-bration item with a qualifying purchase of $50 or more.

Sale-a-bration Product of the Week: Inside the Lines Designer Paper

Hello Stampin’ Friends ~

We’ve got less than 3 weeks of Sale-a-bration left, and I still have so many things to show you. Today I have more with the “Inside the Lines” Designer Series Paper.  Coloring books for adults are everywhere. They bring out the kid—and the Zen—in all of us!

Now you can jump on the trend with Sale-A-Bration’s Inside the Lines Designer Series Paper. I love showing this fun paper … Here are some of the many ways to use it!

#1. COLOR THERAPY: Use markers for detailed coloring like we did on this gorgeous box. Just cut the paper out with a die, color, relax, and then assemble.

#2. OUTSIDE THE LINES: Use sponge daubers on the paper for a quick and easy but awesome effect. Just look at how easy it was to color in our card with the sponge daubers.

#3. LEAVE IT ALONE: Don’t forget that the paper has a cool black-and-white look from the start. Use it as a background and add a vibrant element front and center like we did with our fairy.

Remember how Becky used the “Inside the Lines” Designer Series Paper?  Becky used the “Leave it Alone” way to use this awesome paper.  Here it is again …

Whether your like the color therapy or the quick and easy, you’ll love playing with this paper! You can get if FREE with a $50 purchase during our Sale-a-bration promotion. Stay and watch the video …

Stampin’ Up! trainer, Carrie, showcases the versatile Inside the Lines Specialty Designer Series Paper.


This exclusive 12″ x 12″ paper is only available when you make a qualifying purchase during Stampin’ Up!’s annual Sale-A-Bration event. Again, let me know if you need any help.

Thank you for checking in on me today!


Totally Techniques … “Beautiful You”

Hello Stampin’ Friends ~

Today I want to share a card with you from my March Technique Club… it’s totally full of fun techniques. 

Here is the third and last card from my Creating Backgrounds Class using the  “Beautiful You” stamp set.  I begin with the “Delicate Details” stamp set that is in our Sale-a-bration catalog.  I aligned the stamps by laying the large block onto the Grid Paper – that way I was sure they were all straight.

Then it’s inked up with the VersaMark ink … you’ll have to stamp twice because the stamps are spaced closer together.  Once your cardfront is stamped you emboss with CLEAR embossing powder. We are doing the “Emboss Resist” technique.

For the color … I’m also incorporating the “Ombre” technique. The colors are Pool Party, Bermuda Bay and Island Indigo.  I used a Sponge Dauber to apply my ink. (this works best when you start “off” your cardstock and work your way into the card. Blending of these colors is easy and very pretty.

For our lady … she was stamped with the Momento Ink and then colored with the Wink of Stella pen and Bermuda Bay ink refill.  This marvelous pen works just similar to the Aquapainter but with sparkle is included!!  If you have the “clear” pen, like I used here” … you can create as many colors as you have ink refills.  Love this!!  No need to go out and buy different colored Wink of Stella pens, by using the Stampin’ Up! ink refill, you have the perfect way to add that coordinating sparkle ❤ 

Here’s a tip … you could also use the Watercolor Pencils to color your image and then go over it with the Wink of Stella.

Thank you for sharing a part of your day with me, hope your day is a good one.

If you purchase the “Beautiful You” stamp set along with the Wink of Stella and the Watercolor Pencils – you can get the “Delicate Details” stamp set for FREE! Purchase any combination of products below and receive the trio of cards when your qualify for our Sale-a-bration item!  Click on the images below! 


It Could be YOU …

Hello Stampin’ Friends ~

How did you like Becky’s cards yesterday? Awesome right? Again, these cards were from our Star’s by Design (private) Facebook page I set up for the ladies in my downline where we share ideas, card samples and more. A downline are the people who have joined Stampin’ Up! and our Star’s family with me.

It wouldn’t seem fair if I didn’t share this wonderful opportunity with everyone. Why? … It’s a great time to join my Star’s and the Stampin’ Up! family.  It’s time to Craft your own future!
  It’s Sale-a-bration so when you sign up before March 31 … You’ll get:

  • $125 worth of product for only $99 plus tax
  • FREE Shipping ($12.50 Value)
  • Two (2) additional stamp sets of your choice! (Value up to $100+)

  Wow … That’s over $230 worth of product for ONLY $99 and doesn’t even include your business supplies: Case of each catalog: Annual and Occasions, Sale-a-bration catalogs, Order forms, postcards, etc.

It’s also a great time because we have a few weeks left in Sale-a-bration … what does that mean?  It means you can host a Kick-Off party and let your friends and family get in on the Sale-a-bration, who doesn’t want FREE stuff!!  Hey … I’d even come to help you if I can.  Don’t wait too long, you’ll want to get your kit soon.
You could have a Mystery Hostess party and draw a name out of those that ordered and they get the Hostess Rewards, or keep them for yourself to build your business!  I have many ideas to share with you!  

Think about it … contact me, let’s talk.  You can reach me at lindaluvs2stamp@aol.com

There is no obligation just to ask questions or Click HERE for more information.

Thanks for dropping by today ~

Simply Sunday: Guest Stamper … Becky!

Hello Stampin’ Friends ~

I am excited today to share with you three beautiful cards that we created by one of my Star’s by Design team members; Becky Salminen. We have a fun contest going on, on our Star’s Facebook page and Becky was gracious enough to share her cards …

All three cards are created with the “Inside the Lines” Designer paper that you can get FREE during Sale-a-bration with a $50 purchase. The designer paper is teamed up with the “So In Love” bundle.

Becky’s first card was inspired by a card that she found on Pinterest … it used the largest of the three dies.  They are not difficult to make but are stunning to look at… she did a beautiful job.

The second card uses the circle dies and the elegant die from the “So Detailed” Thinlits dies that creates a “belly band”. The greeting comes from the So In Love stamp set which is included in the bundle.  You get both the stamp set and the dies in this bundle, you SAVE 10% and you’re only $2.50 away from the FREE Sale-a-bration item of your choice.

On the last of the three cards, Becky introduces color to her card … the splash of color really makes the card pop, even though they are lovely in Black and White as well.

You can easily create these beautiful samples with the “Falling in Love” bundle and the “Inside the Lines” Designer Series paper… and Becky’s awesome samples.  All three of the greetings Becky used come in the stamp set!

Thanks for stopping by today, I’m sure you have enjoyed Becky’s cards as much as the rest of our Star’s group did.  There’s always room, if you’d like to join us and join in on the fun!  JOIN THE FUN

There is Becky … in the pink and black on the far left side of the our Star’s Group! This was taken at the Stampin’ Up! OnStage event held in Madison, Wisconsin.  🙂  We had a lot of fun that day!

Thanks again, and I hope you have a beautiful day ~

blog-closing-small     march-hostess-code

Here is a list of products used to make the cards shown today. You can purchase these and other Stampin’ Up! products at my online store by clicking on the links below each products. During Jan. 4-Mar. 31, 2017.  All $50 orders receive a free Sale-a-bration reward!


Live * Laugh * Love …

Hello Stampin’ Friends ~

Here today to share another card from the “Beautiful You” stamp set with a focus on creating backgrounds.  This is card 2 of my trio. The background on this card was created by “Masking” and sponging. Again, going back to basics. Simple yet dramatic.

First we stamped the lady in the lower left hand corner of our card, then we placed the “circle mask” in the upper right hand corner. Using the Soft Sky ink pad, we inked up our sponge and dragged it across the cardstock and mask to create the background. Leaving some white space gives you the illusion of clouds. Remove mask. Stamp greeting.

Then we used Sahara Sand for the lower part of the card. This was mounted onto Basic Black and then “popped up” with dimensionals onto the Sahara Sand card base.

I tried coloring the image but did not like it, so I just used my Wink of Stella brush to color her dress and umbrella! Subtle but very effective.  I think if I would have tried using the new “Watercolor Pencils” … it would have turned out, I used the markers and they were too bold for the rest of the card.

Thank You for stopping by today, hope to see you back again tomorrow for my Simply Sunday series.

Have a beautiful day ~


Here are the products I used to make my projects shown today. You can purchase these and other Stampin’ Up! products at my online store by clicking on the links below each products. During Jan. 4-Mar. 31, 2017.  All $50 orders receive a free Sale-a-bration reward!


Flashback Friday: Wetlands

Hello Stampin’ Friends ~

Today I’m going to share a card with you that I made at a demonstrator meeting years ago … just goes to show how some stamp sets are timeless.  We used the “Wetlands” stamp set that is still available and can be found on page 133 of our annual catalog.

We made this card in 2013 using the acrylic block to create the background effect. The wet sand was created with the brayer.  This has always been one of my favorite stamp sets … the stamps in the set coordinate beautifully together or work wonders on their own – just like you see here.

I have a second card to share, also from 2013 and comes from a card swap at one of my demonstrator meetings. Again, this shows how versatile this stamp set is, and is truly timeless.

I like how Eileen created a background on the blue just by stamping it … you can use the same ink color as the cardstock to stamp (as you saw on my card yesterday) or  you can stamp with VersaMark™ to create a more subtle tone.

Hope you enjoyed this blast from the past, and found as I have, that some card designs and stamp sets never go out of style.

Thanks for taking this trip down memory lane with me.

Enjoy the day ~


Today’s suggested products:  You can purchase these and other Stampin’ Up! products at my online store by clicking on the links below each products. During Jan. 4-Mar. 31, 2017.  All $50 orders receive a free Sale-a-bration reward!

Celebrating National Women’s Day …

Hello Stampin’ Friends ~

Today I have a card to share with you that was “in my head” when I prepared for my Technique Clubs this month.  We are “creating” backgrounds. Back when I started we didn’t have all the beautiful designer papers that we do today so it was fun to learn different ways to create a background – in class they are doing the “Emboss Resist” and Sponging. Today’s card is basic stamping …

For all the cards, we used the “Beautiful You” stamp set, pretty good timing since it was International Women’s Day yesterday!! I will share those with you when my classes are done, I like to surprise my stampers.

Our background is simply stamped with the “Happy Birthday Gorgeous” stamp, and I did color on color and my choice of color is “Peekaboo Peach”, one of the 2016-18 In Colors. I love this technique because it is subtle you easily seen, and the font on this stamp is very forgiving … you don’t notice if every time you stamp it’s not exactly perfect.

My focal point is the “women” image … she was stamped on Whisper White and cut out with the Oval from the Stitched Shape Framelits. I then stamped the image onto the coordinating sheet of “Envelope Paper”.  I’ve used this several times as a designer paper or to line my envelopes and now to “dress” or image!

You could just leave the card as it is, in it’s simplest form … or you can embellish it by adding some flowers around a part of the oval or some pearls, either way is a cute card and who wouldn’t want to be told they look gorgeous on their birthday!!

Thanks for checking in on me today.

Have a wonderful day … and celebrate being a women!


Here are the products I used to make my projects shown today. You can purchase these and other Stampin’ Up! products at my online store by clicking on the links below each products. During Jan. 4-Mar. 31, 2017.  All $50 orders receive a free Sale-a-bration reward!


Parade of Pumpkins …

Hello Stampin’ Friends ~

Yesterday I shared a special announcement from Stampin’ Up! about the April Paper Pumpkin kit that was designed by our CEO Sarah Douglas! For those of you who are not familiar with Paper Pumpkin … it is a monthly Stampin’ Kit that comes directly to your door!

This kit includes everything you need to make the projects enclosed … you may need a little adhesive and a scissors but that’s it.  Your first kit comes with a block for the stamps, of course the stamps, ink spots (small ink pad) and all the card bases, accessories and more! 

So today, I’d like to share some of my Paper Pumpkin pics and alternative projects so you can see how cute and fun these kits are … It’s like having a birthday every month!!


So much fun in a box and delivered right to your door … a stampin’ kit ready to go.  It’s a great way to get together with your friends.

Let me know if you have any questions or if your ready … Click on the link below and purchase a 3 month subscription, just to try it out.  Plus … you’ll get a FREE Sale-a-bration item as well.

CLICK HERE TO VIEW SALE-A-BRATION CATALOG

Thanks for joining me today, hope your day is a good one!


Price: $59.00

$55.00 plus

One (1) FREE

Sale-a-bration item

Price: $114.00

Two (2) FREE

Sale-a-bration items

Price: $215.00

Four (4) FREE

Sale-a-bration items

BREAKING NEWS!

Hello Stampin’ Friends ~

BREAKING NEWS! The upcoming April Paper Pumpkin Kit was designed by our very own CEO Sara Douglas! The kit will be including a FREE gift inside every April box! It’s going to be a surprise! We all love surprises right?

Reminder to all of you that if you purchase a 3-Month subscription, you qualify for a FREE Sale-A-Bration item (Order before end of March to Qualify for Sale-a-bration)!

Subscribe by April 10th to receive the April kit!

Click on my Paper Pumpkin Category to see samples or go to Pinterest and you’ll find tons of samples!

To sign up CLICK on Image Below  or Contact Me with with any questions you may have. 

Price: $59.00

$55.00 plus a

FREE Sale-a-bration Item!

Price: $114.00

2 FREE

Sale-a-bration Items

Price: $215.00

4 FREE

Sale-a-bration Items

Supply List

It really is that easy … click on the image and then enter your information, and when you do this by April 10th – YOU too can see the exciting kit that our CEO Sara Douglas has designed. I can’t wait to see it!
It’s like a gift in your mailbox each month!
ALL APRIL SUBSCRIBERS WILL BE INVITED TO MY PAPER PUMPKIN PARTY … to put this kit together with me and fellow Paper Pumpkin subscribers! They’ll be treats and an alternative project to make with your April kit.  If you don’t live in my “drive-able” area … I will send you the goodies we did in class!!
Thanks for stopping by today and let me know if you have questions on the Paper Pumpkin kits.


Sunburst Framelit Card Parade …

Hello Stampin’ Friends ~

As you know… I was down with the flu, but as women, the minute we start feeling a little better, we are up and at it, and for me that was cleaning and trying to make sure that flu bug is “out of here”!!

While I was cleaning, I found a card! This card was either from one of my technique clubs or a stamp camp … not sure but I thought I would share it with you.

The thought behind the card was the use of the “Sunburst” Thinlits die. I cut out one in Basic Black and Basic Gray.  They are layered and then with a small twist, you’ll get a “peak” of the gray behind the black.  My background behind that is the Neutrals Designer Series Paper Stack.

000_4135

This was adhered to a Basic Black mat and then onto the Melon Mambo base. My pretty little flowers that are also in Melon Mambo were cut from the “Botanical Builder” Framelits. After cutting them out on the BigShot I sponged some of the edges to create more depth on the flower.

The greeting is stamped in Basic Black and then punched out with our circle punches. This was popped up with the dimensionals to create the focal point.

If you like this card, here are a few more cards that I have shared with you in the past using the Sunburst Thinlits die …

                    000_3233        000_3246

000_3227

Let me know if you have any questions on the cards shown today. The Sunburst Framelit die is so easy to use and as you can see by the samples, can be used in many different ways.

000_4135

Thanks so much for stopping by today.

Have a “sunny” day ~

blog-closing-small      march-hostess-code

Here are the products I used to make my projects shown today. You can purchase these and other Stampin’ Up! products at my online store by clicking on the links below each products. During Jan. 4-Mar. 31, 2017.  All $50 orders receive a free Sale-a-bration reward!


Simply Sunday: Friends …

Hello Stampin’ Friends ~

Back today with this simple and beautiful card that you can easily recreate for you friends and family. If you have some larger strips of designer paper, don’t throw it away … use it!  Here is a simple way you can whip up a card…

000_4133

I began with my designer paper; the Falling in Love designer paper and because I wanted to highlight the designer paper, I teamed it up with the Very Vanilla cardstock.  I also added a touch of the new Glimmer Paper Assortment Pack you can get for FREE from your Sale-a-bration purchase.

If your not into glimmer paper, I thought I would add a touch of lace which comes from the Delicate Details stamp set that is also a Sale-a-bration item and stamped in with Sweet Sugarplum which coordinates with the designer paper and the glimmer paper.

Our greeting comes from the Special Reason stamp set … and cut out from the Stylish Stems Framelits Dies from the bundle.

000_4133

Sweet -n- Simple … that’s how we like our cards!  Thank you for visiting me this Sunday. Hope to see you back tomorrow with another card share.

Have a wonderful day !

blog-closing-small       march-hostess-code

Here are the products used to make my card… You can purchase these and other Stampin’ Up! products at my online store by clicking on the links below each products. During Jan. 4-Mar. 31, 2017, all $50 orders receive a free Sale-a-bration reward!