What did we do “before” the … BIGSHOT!?

Hello Stampin’ Friends ~

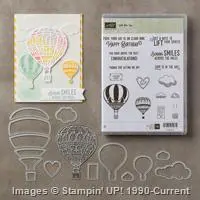
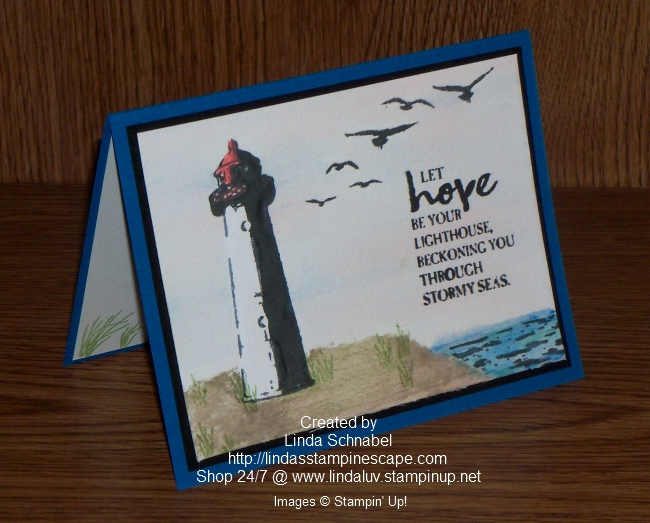
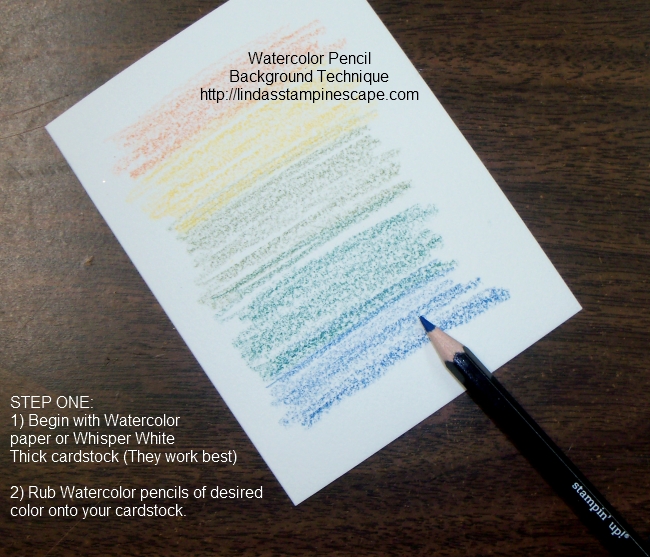
What DID we ever do before we got out BigShots? Some of us did the fussy cutting and the dry embossing but it was a lot of work! Today I’m here with two great video’s that will explain how easy the BigShot is to use and some great tips! It will explain “when” to use each of the plates “magnetic” and “precision” and which cutting dies to use with them. Then I’ll share 3 cards that I had made.

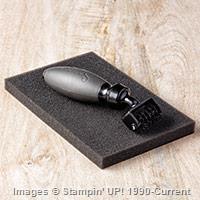
Say hello to your crafty friend—the Big Shot. It’s a manual, multipurpose die-cutting system that you can use to quickly and easily create die-cut or embossed shapes, tags, and 3D items. It’s portable; no electricity required. And we offer a huge array of dies and accessories to make your crafting fun and easy. 


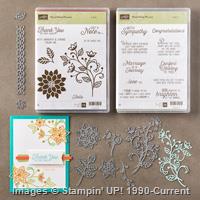
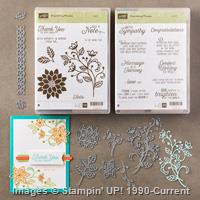
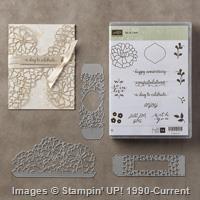
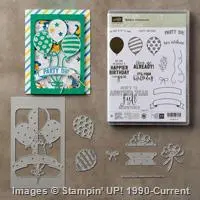
Flourish Thinlits Dies by Stampin’ Up!

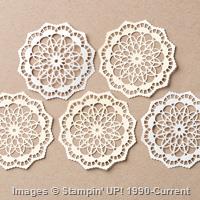
My second video is a fabulously fun bundle to work with using your BigShot! Put down those scissors—there’s an easier way to cut detailed flowers and images! Using the Flourish Thinlits Dies and the Big Shot, you can make multiple die-cut flowers in minutes. Watch as we show you how.

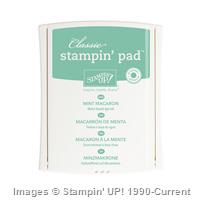
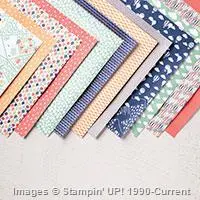
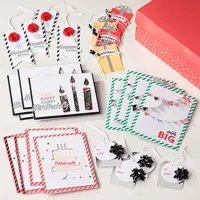
Some of you already have this beautiful stamp set and thinlits but if you don’t, just click on the item’s picture below for full details and to begin your shopping.

Don’t forget, Sale-a-bration is in full swing and for each $50 you purchase before shipping & handling, you choose a FREE Sale-a-bration item.  If you don’t have a SAB Catalog CLICK HERE to view.  (SAB = Sale-a-bration)

You will also receive your “Virtual Rewards” points from me for each $50 you spend.  Speaking of Virtual Rewards …

CONGRATULATIONS to SANDY H.

Sandy chose the stamp set: Celebrate Today for her FREE stamp set! Enjoy Sandy and Thank You!

If you want to learn more about my Virtual Rewards program, just click on the “LOYALTY REWARDS PROGRAM” logo on the right side of your screen. If your on the phone, it may be above the post or below… or just message me and I will fill you in.  🙂

Thank you for taking time out of your Friday to visit my blog.

Have a wonderful day and a great weekend!

blog-closing-small     starry-purple-background-vector

TODAY’S FEATURED PRODUCT LIST …


Enjoy Your Special Day …

Hello Stampin’ Friends ~

Today I’d like to share with you another one of the cards that we did as a Make -n- Take at Kathie’s party. We learned two different types of embossing, watercoloring, and how fun the BigShot is!!

We begin with our color pallet: Whisper White, Tempting Turquoise, and Silver! Sounds like a touch of the Southwest! Our base card is Whisper White and the card front Tempting Turquoise … soon to be embossed with the New “Petal Burst Embossing Folder”.  All you need to do is roll it through the BigShot and it comes out beautifully textured.

000_4042

Our next step and second type of embossing is “heat embossing”. You will need the beautiful dragonfly from the “Dragonfly Dreams” bundle.  Next you’ll need the VersaMark ink pad, the Silver Embossing Powder and the heat gun.

Stamp dragonfly with VersaMark, sprinkle with embossing powder (shake off excess) and begin to heat.  Watch the dull powder turn into a shiny silver raised image!! It’s amazing! Our next step was to take the dragonfly framelit from our bundle, and on a separate piece of turquoise cardstock layer one of the circle dies from the “Stitched Framelits Dies” and cut them out on the BigShot.

000_4040

We’re now going to color our dragonfly by pulling some Tempting Turquoise ink from the pad with your Aqua Painter and then gently brush color onto the wings. It’s so easy to do and adds a nice touch of color to our dragonfly. Now we’re going to adhere our layers beginning with the Silver Metallic Doily.

Our greeting comes directly from the stamp set from our “Dragonfly Dreams” bundle. A few rhinestones were added to the card to draw the eye to the dragonfly and to anchor our greeting. Our new stampers were amazed they could make a card with that many techniques … I just reminded them they are just doing 3 simple techniques/steps, and then putting it all together!

000_4042

I hope you enjoyed our card as much as the rest of us did, and that our hint of the Southwest will bring us some much needed sun and a bit warmer temperature!

Thanks for coming by …

Enjoy your day, and I hope it’s special!

blog-closing-small            starry-purple-background-vector

TODAY’S STAMPIN’ SUPPLY LIST …


Any Occasion Stamp Set

Hello Stampin’ Friends ~

Just a quick post today sharing a video featuring the Any Occasion Stamp Set that is FREE during Sale-a-bration with a purchase of $50 before shipping & handling.

Be prepared for any occasion when you get the Any Occasion Stamp Set for FREE with a qualifying purchase during our Sale-A-Bration event–January 4-March 31, 2017.

Thank you for checking in with me today.

Hope your day is full of sunshine and happiness.

blog-closing-small

So In Love … Happy Anniversary

Hello Stampin’ Friends ~

Yesterday I shared with you the “So In Love” bundle, what did you think? Pretty right!

Well today I’m going to share a simply beautiful card that I created using the “So In Love” bundle. I began with with the largest of the dies and knew I just wanted it to highlight my designer paper.

000_4031

I knew I was going to use the Falling in Love Designer Series Paper so I chose the Very Vanilla cardstock as my base and cardstock to be die cut. I used the Precision Base Plate and die brush to cut and discard of the inner pieces with ease.

Next, I layered my designer paper onto my base, and then my die cut piece onto the designer paper.  I then added my “Happy Anniversary” greeting which I stamped in Crumb Cake on my banner.  I added the pretty little “Falling in Love” embellishment to anchor my banner and create and eye catching effect.

000_4029

How simple, and how pretty is this.  You could use this card layout with so many of our pretty designer papers, and there are plenty more greetings to use in this stamp set.

Hope you enjoyed … Thanks so much for stopping by today.

Have an awesome day!

blog-closing-small    jan2017-hostess-code

TODAY’S STAMPIN’ SUPPLY LIST …


So In Love …

Hello Stampin’ Friends ~

Today I have a quick post but it’s packed full of stampin’ tips and samples from the So In Love bundle. We’re going to start with a video …

Carrie, from the training team at Stampin’ Up!, shares some beautiful project ideas and tips for using the So in Love Stamp Set and So Detailed Thinlits Dies from the 2017 occasions catalog.

I also want to share some additional projects that were created with this fabulous bundle …

so-in-love-2

Here you can see the foliage stamp was used to create the background, then the flower was added to compliment the foliage and add some dimension.  A pretty bow and an banner with the “just for you” greeting completes this card. 

Look at the jar in the background … it was wrapped with one of the delicate bands created from the dies. Below the die cut band was used again to turn this simple bag into a beautiful gift bag.

so-in-love-1

If you love pretty, delicate items … this is the bundle for you.  I can image all sorts of beautiful cards and gift packages that you could make for Wedding’s, Anniversaries, Mother’s Day … or a special friend.

Let me know what you think!

Thanks so much for checking my blog out today ~

I hope your day is a good one.

blog-closing-small    jan2017-hostess-code

TODAY’S STAMPIN’ SUPPLY LIST …


Simply Sunday: Pull out the Paper Pumpkin

Hello Stampin’ Friends,

Let me say “there is nothing easier than your Paper Pumpkin kits”.  Today I’m here to share some cute alternative projects that I made using the 2017 January Paper Pumpkin kit.

The first project I have to share is similar to the little Hostess Gift that I gave to Kathie for hosting an at home Stampin’ Party. I like to spoil my hostesses because they introduce me to some awesome people and we get to stamp!

000_4020

This cute gift box was easy to create … Simply use a punch, I used the heart punch, secure a piece of window sheet on the inside to create a window and so the treats don’t fall out. The little white heart is included in the kit as is the heart stamp that I used to put a little color around the edge of my heart, before stamping the greeting (also included in the kit).

The only thing that I added to my gift box that are not included in the kit was the “heart” from the Metallic embellishments.  It really ties all the gold together and looks cute!

My second project is a card.  Super simple … the base is Whisper White and the front is Blushing Bride – it matched the stripped vellum banner that came in the kit.  I used the round Metallic embellishments this time to anchor my banner. I created a background by stamping hearts all over the front… You could “step it up” and emboss the front with the “Happy Heart” embossing folder, that will add more texture.

000_4021

Next, I used a white heart from the kit but this time I used VersaMark to stamp on the heart and embossed it with Gold – coordinating the gold embossing on the banner (it comes that way in the kit)

The hardest part of creating this card was “where” to place the heart … by the banner, or near the bottom!  Which do you like better?

000_4016

Both of these cute projects were created in just a few minutes. Don’t forget, you can always just make your Paper Pumpkin kit per the instructions … I just want you to know there are many other options out there for you.  If you order your Paper Pumpkin before the 10th of the month … You will receive that month’s kit.

Hope you enjoyed today’s projects, and please let me know which way you like the card best.

000_4025

Here’s the video in case you missed it …


* Paper Pumpkin is on sale during Sale-a-bration!! Now is a great time to try out Paper Pumpkin and to get FREE Sale-a-bration items!

3-Month Prepaid Subscription (137859) $59 $55  Save on a  3-month prepaid subscription and instantly qualify for a FREE Sale-A-Bration item!
12-Month Prepaid Subscription (137861) $215  Take it to the next level with a 12-month prepaid subscription. Save over $2/month with the everyday awesome price, earn Stampin’ Rewards, and get 4 FREE Sale-A-Bration items!
This offer will end on March 31, 2017 at 11:50 PM (MT).

Let me know if you have any questions on the Paper Pumpkin kits @ lindaluvs2stamp@aol.com  or just click one of the links below and start your Paper Pumpkin adventure!

Thanks for taking time out of your Sunday to share it with me.

Have a wonderful day!

blog-closing-small        jan2017-hostess-code

PAPER PUMPKIN KITS ON SALE …

Price: $59.00

NOW: $55.00

plus a Sale-a-bration item

Price: $215.00

Saves you $2 mo.

plus you’ll get 4 Sale-a-bration items


Birthday Across the Miles …

Hello Stampin’ Friends ~

Today I’d like to share with you a card that I used as a Make & Take at Kathie’s workshop. I’d like to thank Kathie for inviting me into her home to share my passion of stamping. It was so great to see old friends and meet new stampers! What a great group.

Kathie’s guests ranged from “never” stamping before to stamping longer than me … and I’ve been doing this for almost 17 years. Time flies when you’re having fun!! My challenge was to come up with Make & Takes that were easy for newbie’s to do, yet fun enough for seasoned stampers.

Here is what I came up with ….

000_4010

I chose one of my favorite bundles … the “Lift Me Up” bundle found on page 10 of the Occasions Catalog.  We talked about how easy it is to create a card using Designer Series paper – here you see the “Carried Away” Designer Series paper (Free with a qualifying purchase).

Of course stamping is easy … Stampin’ Up! creates these great stamps and we just use ink and paper to create something fun and cute! We simply stamped our greeting in Night of Navy and then stamped the small Hot Air balloon from the stamp set in Mint Macaron on Mint Macaron cardstock.

Ok … they’re thinking this is fun, and easy! While we were at it, we stamped the inside of the card as well. Again the salutation in Night of Navy and the balloons in Mint Macaron. Then I pulled out the BigShot!

000_4012

Ohhh… don’t be scared, let me show you have easy this is!  They took the Dazzling Diamonds Glimmer paper and set it on the Precision Base Plate on top of our BigShot platforms and rolled it through. Check to see if it’s all the way cut through, yes …

OK, now let me show you how easy it is to get all the little pieces out of this balloon die (enter … Die Brush) Man – that little brush really knocks out all those pieces. And it’s fun!!

Wow … all we have left to do is secure our Hot Air balloon. You can either use the Fine Tip Glue pen or the Multipurpose Liquid Glue.

Can you believe it!! You just made that card … it wasn’t hard at all. Three simple steps combined can create a fun, layered card.  Did you notice that by stamping the small balloon in the same color as the cardstock gives that appearance that it is farther away than your focal point – the balloon done with the glimmer paper.

000_4010

Now is a great time to have a Stampin’ Party because not only do you get your hostess (rewards) benefits … Your guests have the opportunity to earn FREE goodies too!! I’d love to stamp with you and your friends … contact me, and we’ll set something up.

Thank you so much for dropping in today ~

Hope you have some fun today!

blog-closing-small    jan2017-hostess-code

TODAY’S STAMPIN’ SUPPLY LIST …


January Paper Pumpkin Adoring Arrows

Hello Stampin’ Friends,

The other day I shared the January 2017 Paper Pumpkin video with you (posted below for you to watch again) so today I want to share some really cute alternative projects that can be created from this kit.

This information comes from the Get Inspired blog by Stampin’ Up …

Your January kit comes with

  • 24 tiny treat bags
  • 8 photopolymer stamps
  • 1 Calypso Coral Classic Stampin’ Spot
  • 5 sheets of die-cut banners and hearts
  • 3 sheets striped vellum banners
  • 4 sheets of gold foil heart stickers
  • 24 mini arrows
  • 12 yds of gold thread
  • 75 dimensionals
  • 200 adhesive dots


And, all of it adds up to ONE amazing Adoring Arrows kit that will capture all the hearts!

Jan_PP

This kit has sure captured our hearts, no arrows from Cupid required. And, in case you weren’t already in love, here are some more projects to adore.

Jan_PP_Alt_1

First up, here’s another way to assemble the bag, in case you need more room for extra love (and chocolate)! You have everything you need to make this inside your kit, except the cute crinkle paper.

Jan_PP_Alt_2

Next, add a little tag to your Valentine’s Day gifts. It’s simple when you use the Scalloped Tag Topper Punch and contents from your kit. Stamp a sentiment in Bermuda Bay ink to create a standout statement.

Jan_PP_Alt_4

Finally, if you need a little more room to write that note to someone you love and adore, try this card. It’s simple and stunning with a pop of gold from one of our Metallic Foil Doilies.

Jan_PP_Alt_3
GREAT NEWS! Paper Pumpkin is on sale during Sale-a-bration!! Now is a great time to try out Paper Pumpkin and to get FREE Sale-a-bration items!

3-Month Prepaid Subscription (137859) $59 $55  Save on a  3-month prepaid subscription and instantly qualify for a FREE Sale-A-Bration item!
12-Month Prepaid Subscription (137861) $215  Take it to the next level with a 12-month prepaid subscription. Save over $2/month with the everyday awesome price, earn Stampin’ Rewards, and get 4 FREE Sale-A-Bration items!
This offer will end on March 31, 2017 at 11:50 PM (MT).

Let me know if you have any questions on the Paper Pumpkin kits @ lindaluvs2stamp@aol.com  or just click one of the links below and start your Paper Pumpkin adventure!

I’d like to WELCOME my newest members to my Paper Pumpkin’ Pals: Barb K. & Joyce R.  They are both quite new to stamping and decided Paper Pumpkin was a great way to get started … great choice, because everything they need comes in the kit!!

Thanks for stopping by today, I hope yours is a great one.

blog-closing-small        jan2017-hostess-code

PAPER PUMPKIN KITS ON SALE …

Price: $59.00

NOW: $55.00

plus a Sale-a-bration item

Price: $215.00

Saves you $2 mo.

plus you’ll get 4 Sale-a-bration items


More on Birthdays

Hello Stampin’ Friends ~

Today I’m going to share another video that highlights a birthday card kit!

Stampin’ Up! trainer Brandi and her daughter Lily Jane, share some tips and tricks for the Birthday Bright Project Kit–a brand-new kit in the 2017 occasions (spring/summer) catalog.

I thought it was so cute to see Brandi’s daughter Lily Jane showing us how to make this card.  You’re never too young or old to stamp!  My granddaughter started stamping when she was 4 years old … and I have many stampers that are well (shhhh) we never tell a women’s age!!

This kit is awesome and the cards are so cute!  Twelve cards with envelopes and 12 gift tags and the cute storage box… wow! Don’t forget the envelope template … how neat to have that for all your future mailings.  I now have this on my next order!! Let me know if I can order one for you, or just click on the pictures below and you can shop directly from my on-line store.

Thanks so much for checking out my blog today.

I hope your day is a good one.

blog-closing-small        jan2017-hostess-code


Today’s Stampin’ Supply List …


Birthday’s & Balloon Adventures …

Hello Stampin’ Friends ~

Happy Tuesday to you!  Today I’m going to share with you a video of a great new product that was introduced in the Occasions catalog, the Balloon pop up die …

Watch Stampin’ Up! trainer, Brandi, give some tips and tricks on using the Balloon Adventure Stamp Set, Balloon Bouquet Punch, and Balloon Pop-Up Thinlits.

I love learning all the tips and extra things you can do with a product before you purchase, that’s why I love to share these videos with you.  If you want “hands-on” …. invite me and some friends over and let’s have a Stampin’ Party. 

Now is a great time to host a stamp party, it’s Sale-a-bration – You and your guests can earn FREE products! Maybe we can even get you this bundle for FREE too!

Let me know if you have any questions with the products shown here today, or would like to host a stampin’ party!  Stop back tomorrow and see what I’ve come up with using this fun product suite.

Thanks for checking it out, see you tomorrow.

Have a terrific Tuesday!

blog-closing-small      jan2017-hostess-code


TODAY’S STAMPIN’ SUPPLY LIST …


Sending Love Valentine

Hello Stampin’ Friends ~

Having computer problems again today but that is not going to stop me from sharing my Valentine card with you today.  We’re using the Sending Love Suite today which includes the Sending Love Designer Series Paper Pack and the Sealed with Love stamp set.

Featured on the card are two of the many patterns from the Sending Love Designer Series paper. The paper on the bottom says “love” in many different languages! The cute little envelope was made with the coordinating dies and designer paper.  Our little note tucks nicely into the envelope.

000_4000

First we stamped the hearts onto Whisper White cardstock, then we cut it out with the die and stamped our “Sending Love” greeting on. The same little hearts on our greeting are also stamped along the bottom of the inside of our card, along with “Happy Valentine’s Day”.

The cute ribbon which has silver thread woven through is from our Sale-a-bration catalog and is FREE. When you purchase the bundle and designer paper … you can get the ribbon for free. Plus you will also receive a Virtual Rewards point from me! Double bonus.

Thanks for stopping by, sorry for the short post.

Have a great day!

blog-closing-small       jan2017-hostess-code


TODAY’S STAMPIN’ SUPPLY LIST …


Simply Sunday: Hello Love

Hello Stampin’ Friends ~

I’m back today with a simple Valentine card … or just an I love you card. I kept with the traditional red and white for my color pallet, which is what our “Sending Love” Designer Series paper pack contains.

I picked the pattern with the little dots that connect the hearts. With that thought I wanted to use the Stitched Shapes Framelits (they are now available again for purchase)  I used the oval shapes to create a focal point… my greeting.

000_3990

My greeting comes from the stamp set “Sealed with Love”. If you love this stamp set, consider the bundle and save 10% and enjoy the cute die cuts that are included.

I needed something a little different that had the Valentine look so I chose the “Sending Love Embellishments” … the wood embellishments add such a cute touch and a totally different color – natural. I used a Sharpie™ to color my Rhinestones and then placed them in the center of the flowers.

000_3993

Cute -n- simple that’s all it takes to let someone know you love them.  The little heart that is stamped on the inside has the same pattern as our wooden heart.

Thanks for taking time on your Sunday to stop by.

Just want to say on more thing … GO PACKERS!!!

Have a wonderful day !

blog-closing-small        jan2017-hostess-code

TODAY’S STAMPIN’ SUPPLIES …


Great Sale-a-bration News!

Hello Stampin’ Friends,

Today I just have to share this great deal with you. It’s Sale-a-bration which Pumpkinmeans that for every $50 (before ship&hdlg) you get to pick an exclusive Limited time Sale-a-bration item, that is awesome but I also have to say …

GREAT NEWS! Paper Pumpkin is on sale during Sale-a-bration!! Now is a great time to try out Paper Pumpkin and to get FREE Sale-a-bration items!

3-Month Prepaid Subscription (137859) $59 $55  Save on a  3-month prepaid subscription and instantly qualify for a FREE Sale-A-Bration item!
12-Month Prepaid Subscription (137861) $215  Take it to the next level with a 12-month prepaid subscription. Save over $2/month with the everyday awesome price, earn Stampin’ Rewards, and get 4 FREE Sale-A-Bration items!
This offer will end on March 31, 2017 at 11:50 PM (MT).

SPOILER ALERT …

Here is the January kit!  Did you know once you are a subscriber you may purchase past kits… that is awesome, plus refill kits are also available.

Aren’t they cute!  Can’t wait to put mine together and fill them up! I have 12 grandchildren and this kit gives me enough for everyone and then some!!!

Let me know if you have any questions on the Paper Pumpkin kits @ lindaluvs2stamp@aol.com  or just click one of the links below and start your Paper Pumpkin adventure!

Thanks for stopping by today, I hope yours is a great one.

blog-closing-small

PAPER PUMPKIN KITS ON SALE …


Let Hope be Your Lighthouse …

Hello Stampin’ Friends ~

How did you like the Watercolor Pencil Background Technique yesterday? So easy … and so cool! Today we are staying with the Watercolor Pencils but will introduce the stamp set “High Tide”.

In the past 6 months I have been on a few “lighthouse” hunts where I travel the coastline and stop for any lighthouses I can find … then explore them if possible and take many pictures, so this card was inspired by those trips …

000_3983

I began by stamping my lighthouse on the Watercolor paper and then stamped the land around the lighthouse in Sahara Sand, then the water… at that point I started coloring with the Watercolor Pencils.

I was on a bad part of the table and when I stamped the land around the lighthouse, I had a big void.  With the use of the Watercolor Pencils and the Aqua painter I filled everything in and now you can’t even tell!

I then colored the water using the two blues; Bermuda Bay and Pacific Point.  The Pacific Point is the cardstock I used for my base.  Then with a light hand I applied the Melon Mambo and Pacific point (birds were already stamped) and blended the colors to create a subtle evening sky.

I finished off the card with the Real Red Watercolor Pencil to the lighthouse and stamped the grassy images around it with Old Olive ink.

000_3985

Do you hear the beach calling your name? It sounds a lot like what you hear when these stamps are calling to you. Answer all the calls!  This is a Two-Step Stampin’ set… You can combine individual stamps to create the final image you want in the colors you want.

There are a total of 16 photopolymer stamps and the suggested clear blocks (sold separately): a, b, c, h

I’m glad you checked out my blog today, and I appreciate you taking time out of your day to do that. I hope it inspires you to get out and stamp or check out some lighthouses! They are a part of our history.

Can you be a beckon of light in someones life? Even if it’s just a moment, what a wonderful world we would have.

Have a wonderful day ~

blog-closing-small   jan2017-hostess-code

STAMPIN’ SUPPLY LIST …


Special Day … Watercolor Technique

Hello Stampin’ Friends ~

Today we’re trading in the designer paper for our Watercolor Paper! We are going to use the new Watercolor Pencils to create a really cool background with step by step instructions!  As promised, I will be using the “Dragonfly Dreams” bundle again today.

000_3978

So … we are going to begin with our watercolor paper, the new pencils and your Aqua painter.

000_3967_0001

When you color your paper, you do not need to press hard … the lead is soft and spreads easily. You can use any color combination for your cards but today I went with more of a rainbow effect.

Did you know these new Watercolor Pencils come in Stampin’ Up! colors … that is awesome!!

000_3969

Once you’ve colored your paper with the desired colors, take your Aqua Painter and begin your watercoloring process just by moving the painter … the water is inside. Just a little squeeze can give you a bit more moisture.  Too much moisture or water puddling?  Simply soak it up with a tissue. Let Dry.

Now were back to our dragonflies … again, I cut from the Dazzling Diamonds Glimmer paper, but this time I cut out an additional set of dragonflies in black and adhered that to my glimmer paper with just a touch of it showing … creates a nice shadow effect!

000_3981

I did some watercoloring directly onto my glimmer paper as well. Also colored their heads in (not sure I’d do that again)!! They are popped up with dimensions so they appear to by flying.

Just love this bundle and the new Watercolor pencils.  If you like watercoloring be sure to stop back tomorrow, I have another Water color card for you.

Thanks for dropping in. I hope you enjoyed the card today and yesterday that highlighted the Dragonfly Dreams bundle.

Have a great day!

blog-closing-small    jan2017-hostess-code

STAMPIN’ SUPPLY LIST …