Birthdays & Weekly Deals …

Hello Stampin’ Friends,

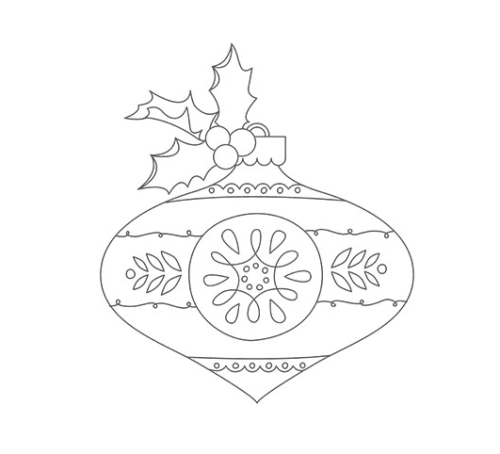
Today I going to share a sneak peek of a  birthday card I made using the Ornamental Pine stamp set. Plus I’ll be sharing this weeks “Weekly Deals”.

000_1679 Sneak Peek

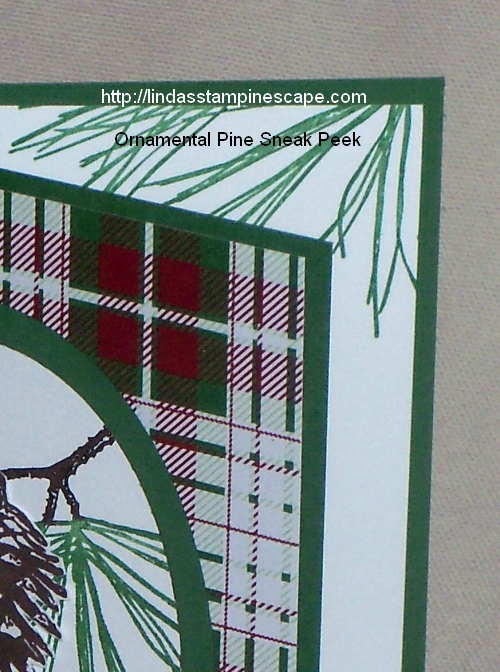
Tomorrow I will show you this great “masculine birthday” card along with the key steps for you to make it.

Main_weeklydeals_olo_10.7-31.2014_SP_UK

We hope you enjoy this week’s Weekly Deals!

Happiness is Project Life
Happiness Is Project Life Accessory Pack Item # 135309
Regular Price: $9.95

Discounted Price: $7.46

Window Frames Collection Framelits Die Item # 129021
Regular Price: $26.95
Discounted Price: $20.21
Daffodil Delight 1/2″ Ribbon Seam Binding Item # 125583
Regular Price: $6.95
Discounted Price: $5.21
Blushing Bride 3/4″ Chevron Ribbon Item # 130013
Regular Price: $8.95
Discounted Price: $6.71
7/8″ Circle Scallop Punch Item # 129404
Regular Price: $12.95
Discounted Price: $9.71
1/2″ Circle Punch Item # 119869
Regular Price: $5.95
Discounted Price: $4.46
Brights Designer Buttons Item # 130028
Regular Price: $7.95
Discounted Price: $5.96
Wonderfall Kit – Digital Download Item # 131218
Regular Price: $7.95
Discounted Price: $4.77

Can you guess which is my favorite? If you can … I’ll send one to you! Just click on the “Leave a Comment” link and leave me your answer 🙂

Thanks for stopping by, I’ll see you tomorrow as I share the Ornamental Pine Birthday card along with my tips for you to make it.

Have a great day ~

blog-closing-small

Our Stampin’ Retreat Swaps to Share ….

Hello Stampin’ Friends,

I hope you had a good weekend.  Mine turned out great … I FOUND MY SWAP CARDS and will be sharing 3 of them with you today!!!

IMG_20141026_073015

I have been looking in every bag and container that I brought back from retreat and could not find them anywhere. But today as I was going through my kitchen, I saw the little bag tucked nicely on the shelf and there they were!

It appears that I did not want anything to happen to my swaps so I put them on the shelf to keep them safe while I unpacked everything from the car. Oh my gosh … I couldn’t believe it, but I am so happy.

So today, I would like to share 3 of those cards with you …

Our first swap was done by Kathie D. She used the very versatile “Work of Art” stamp set in the delicious Blackberry Bliss!

000_1674

The second card is from Cheryl G. She used our ever popular “Lovely as a Tree” and created a beautiful winter scene by adding snow with the help of the “Gorgeous Grunge” stamp set.

000_1673

Last but definitely not least (This one won the card contest) is our swap from Meg … she used the new “Ornamental Pine” and a touch of glitter glue to add that holiday sparkle.

000_1669

Each of these stamp sets can be used for so many different occasions, they should be a staple in your stamp collection. I know most of you already have “Lovely as a Tree”.

I think my stampin’ friends do a spectacular job … there was a lot of talent at my Holiday retreat! We all had a great time. I will be sharing more swaps with you next Monday.

Stop back tomorrow to see how I used the “Ornamental Pine” for an upcoming birthday, and yes … It’s a masculine card!

Have a great Monday, and I’ll see you tomorrow!

blog-closing-small

STAMPIN’ SUPPLY LIST:

To purchase any of the stamp sets you have seen here today, just click on the link. I’ll have a sweet treat sent to your home as a Thank you from me.


Simply Thankful Sunday …

Hello Stampin’ Friends,

A happy Sunday to you! Today I am going to share another transformation of Motley Monsters to a pretty card of “thanks”.

000_1665

I began with a Tangerine Tango base and the Tango stripped Motley Monsters Designer Paper. I used the “thanks” from Seasonally Scattered … the multiple colors come from the Baby Wipe Technique. The “thanks” was highlighted by adding a touch of glitter.

I used the “Apothecary Accents” framelits to highlight our stamped design and was matted with Old Olive. I actually “fussy cut” the mat.

I added a sweet button from the “Very Vintage” buttons… it was colored with the Old Olive blendabilities and topped off with a pumpkin bow. The results are a cute, simple card of thanks.

000_1666

Have a fabulous Sunday ~

blog-closing-small


The “JOY” of Christmas Cards and Stampin’ Tips!

Hello Stampin’ Friends,

OK … Halloween is over and many of you know that I just loved that “Motley Monsters” Designer Series paper, but what are we going to do with it now that Halloween is over?

Don’t fret … I have an obvious solution for you in today’s card share plus an awesome stamping tip! 000_1646

 The obvious answer … Yep, flip it over! The great wood-grain paper below comes from “Motley Monsters”! I teamed it up with the “Wondrous Wreath” stamp set and coordinating framelits. Save 15% when you bundle the stamp set with the framelits!

000_1654

The stamp set and framelits are amazing to work with … the beautiful color you create when using this two-step stamp set. I stamped Old Olive onto the Whisper White and then the Mossy Meadow in-color on top of the Olive.

* Just a quick reminder that the tabs on the photopolymer stamps are there for you to align the images and make your stamping easier.

000_1535

You know me, I wanted that holiday sparkle so I used the Red Glimmer Paper and Cherry Cobbler Dazzling Details. I had a blast putting this card together. The Multi-purpose glue works wonders on glimmer paper and holds superbly.

Yes, the “JOY” comes in the Wonderful Wreath framelits collection!!

000_1652-B

One of the things I liked about this stamp set was that it also had a beautiful verse for the inside of the card, but if you are like me …. you can never stamp it straight! Today I want to share an easy solution to that problem …

1. Begin with the Grid Paper and align the inside of your card so it’s straight …

000_1647

2. Use Washi tape and place it where you want your verse to “end” ….

(I unsticky my washi tape a bit by placing it on my skin or clothing … you don’t want it to peel your cardstock)

3. Align the bottom of your verse slightly above your washi tape and stamp …

000_1649

Ahhh … doesn’t that look nice! Perfectly straight! I love it, I love it, I love it! Why didn’t I think of this before, like 13 years ago – lol.

000_1651

I hope you enjoyed my card and stamping tips …

000_1654

I’d love to hear what you think… you can leave me a message below. I will have another “Motley Monsters” transformation for you tomorrow!

Till then, have a great day ~

blog-closing-small

PS… I still haven’t found those swaps!

STAMPIN’ SUPPLY LIST …


Seasons Greetings in Silver & Blue …

Hello Stampin’ Friends,

It’s been two weeks since we were at our Holiday Retreat and one of the pillow gifts my guests received was the beautiful Christmas Bauble stamp ….

133824G

We made a gorgeous card by coloring in the bauble with our inks and blender pens, and a touch of that fun glitter glue! It definitely is a perfect stamp for those who love to color, but what about those of you who don’t like to color?!

That was a challenge posed to me at retreat. After thinking about it, I described a card that could be make in silver and blue, with minimal coloring. It’s now out of my head and onto the paper … or should I say cardstock…

000_1642

I began by embossing the Christmas Bauble in silver on the stunning Brushed Silver cardstock and then colored it with the Night of Navy Blendabilities Assortment. I only used the darkest shade for coloring the bauble.

I framed it up like a pretty little package using the Silver 1/8″ Metallic Ribbon.

I mounted the bauble image onto Night of Navy cardstock and embossed Seasons Greetings from the “Watercolor Winter Too” photopolymer stamp set, then completed the card by mounting it onto a Smoky Slate base.

136819G

You don’t have to love coloring to love this precious stamp … I’m sure there are many different cards we could create with little or no coloring, this is just one idea.

Feel free to share your idea with me … I’d love to share it with our stampin’ community! Send picture to lindaluvs2stamp@aol.com

000_1644

Thank you for stopping by ~

Hope you enjoyed today’s solution to coloring in an entire image. Sometimes less is more … especially when you need to make 80 Christmas cards!

Have a wonderful day,

blog-closing-small

STAMPIN’ SUPPLY LIST…


Simply … Merry!

Hello Stampin’ Friends,

Today I would like to share a card that I did as a Make & Take at Alice’s stampin’ party.

We began with Lost Lagoon, a new in-color this year and it coordinates perfectly with the “All is Calm” Specialty Designer Paper.  Specialty… Why?

Because not only does this packet contain the pretty double-sided designer papers, but it also has 2 beautiful silver foil embossed designs. A must have for your holiday cardmaking this year.

000_1636

I chose the paper with the pretty little snowflakes because it goes so well with the snowflake design of the “Merry” in the Seasonally Scattered stamp set.

We stamped our image with the coordinating Blue Lagoon ink and tied it all up with the Blue Lagoon ribbon! I love how everything coordinates … makes life so much easier!

I wanted a bit of holiday sparkle… so we added a few rhinestones to our card. So simple and fun to make, especially when your sitting around the table with a bunch of your friends and family.

I would love to host a stampin’ party for you and your friends. With the holidays coming it’s a great time to get together, see all the wonderful holiday stamps and accessories, and go home with a couple of cute Christmas cards!

000_1637

Contact me (lindaluvs2stamp@aol.com) … we’ll pick a date and begin planning a FUN get together for your friends and check out the free hostess goodies for you!

I have listed all the supplies you need to make the card below.

Thanks so much for dropping by …

and have a great day!

blog-closing-small

STAMPIN’ SUPPLY LIST

Click on the item for more details or to begin your shopping experience. Please let me know if I can be of any help.


Two New Video’s and Product Giveaway!

Hello Stampin’ Friends,

You can get the products in the video! Click on the Stampin’ Up! product below for more information or to begin your easy on-line shopping …

 Here’s your chance to WIN … CLICK HERE TO ENTER!

One lucky winner will win a complete Project Life by Stampin’ Up! prize pack including every product available in the product line! You could also win one of 100 Project Life by Stampin’ Up! Card & Accessory Packs.

Project Life Header

Stampin’ Up! has created a new landing page … you will find all the Project Life information and products CLICK HERE to view! It’s a must see.

PROJECT LIFE GIVEAWAY CLICK HERE TO ENTER!

There is NO obligation … just enter for a chance to win some amazing product!

Be sure to enter to WIN the Project Life by Stampin’ Up! giveaway! I did!

Have yourself a wonderful Wednesday.

See you tomorrow ~

blog-closing-small

Wonderful Weekly Deals…

Hello Stampin’ Friends,

I know that I said I would be sharing one more card with my leftover pieces from retreat, however I wanted to share this weeks “Weekly Deals” with you …

Main_weeklydeals_olo_10.7-31.2014_SP_UK

We hope you enjoy this week’s Weekly Deals!

133375G Large Triangle Punch Item # 133375
Regular Price: $15.95
Discounted Price: $11.96
Silver Stampin’ Glitter Item # 133756
Regular Price: $3.95
Discounted Price: $2.96
Twine Baker’S Early Espresso Item # 123124
Regular Price: $2.95
Discounted Price: $2.21
Boys Will Be Boys Wood-Mount Stamp Set Item # 134135
Regular Price: $24.95
Discounted Price: $18.71
Shaker Frames Item # 124155
Regular Price: $4.95
Discounted Price: $3.71
Basic Black 3/4″ Chevron Ribbon Item # 130010
Regular Price: $8.95
Discounted Price: $6.71
Island Indigo 3/4″ Chevron Ribbon Item # 131151
Regular Price: $8.95
Discounted Price: $6.71
Grateful Heart Thanksgiving Ensemble – Digital Download Item # 127620
Regular Price: $14.95
Discounted Price: $8.97

For more details or to purchase any of the products shown, just click on the highlighted products description and it will take you to my on-line store.

You can combine the Weekly Deals with items from the annual catalog, holiday catalog or the Holiday supplement… you can even add items from the Clearance Rack!

Just click on any of the pictures below and you’ll be magically transferred into the pages of these fabulous catalogs …

CM1995B

CM2008B

CM493B

Please let me know if I can help you in any way!

Thanks so much for stopping by.

blog-closing-small

The Star’s are Shining Brightly …

Hello Stampin’ Friends,

Yesterday I told you that I was going to share with you another idea from my scraps, today it’s a 3-D project using the flip side of the paper.

First I will tell you that I cut the “Under the Tree” Designer Specialty Paper into 4 x 4 inch squares … it made cutting the star’s for my retreat projects easier.

Today I turned my scrap into luminaries …

000_1630

Such a quick and easy project! Cut some vellum into 4 x 4 squares and tape them to the inside of the cardstock. Then I taped my sides together with …. washi tape! That way if I made a bit of a mistake (crooked) I could lift it up, reposition and attach the side.

000_1632

Tomorrow I will have one more product share for you using my scrap pieces. How’s that for saving money! Then we can spend it on more fun stampin’ stuff! LOL

Have a fabulous week ~

blog-closing-small

Stampin’ Supply List …

Holiday Joy …

Hello Stampin’ Friends,

Happy Sunday to you! Today I’d like to share a simple card that I created out of my scraps from a retreat project!

Each retreat we create name tags for our guests, that are hung on the doors to their rooms. It’s just a cute little way to welcome them, and they get to take them home. Sorry I don’t have a photo of them this time.

This year we used “Star’s” … so not letting anything go to waste, I turned it into a card!

000_1625

I used the Baked Brown Sugar which coordinates well with the “Under the Tree” Specialty Designer Series Paper, and Whisper White. And of course, the BigShot and Star Framelit Dies.

The negative from the star is what I’m using for my card, and popping it up with Stampin’ Dimensionals to create that fabulous dimension we all love.

000_1628

My greeting “JOY” comes from the Project Life December Wonder Photopolymer Stamp Set …

136562G

You can find this stamp set in the 2014 holiday supplement. If you need the new supplement, please let me know. If you are a regular customer of mine, you will find it tucked in your last order 🙂

I coordinated my Cherry Cobbler seam binging with my greeting to complete the card. Don’t you just love sweet and simple Christmas cards!

000_1625

Thanks for stopping by and be sure to check back tomorrow as I will show you another version.

Have a simply serene Sunday ~

blog-closing-small

STAMPIN’ SUPPLY LIST …

Just click on any of the items listed for more details or to begin your shopping.


The Natural Beauty of Ornamental Pine

Hello Stampin’ Friends,

Wooo Hooo … the weekend is here and we’re kickin’ off November! Hope you had a good week.

Today I want to share with you a card that we had several discussions over at our retreat last weekend..

One of the ladies found a card on Pinterest and I commented that we had made that card at Alice’s stampin’ party as a Make & Take, but I changed the colors. For the life of me, I could not remember what colors I used! So here it is ladies …

000_1619

The base color used was “Crumb Cake” …I teamed it up with Early Espresso. My pine was stamped in the new “Mossy Meadow” ink and the stem filled in with the Espresso marker.

The smaller piece of Crumb cake was cut at 4″ x 2-3/4″ and the Espresso mat at 4-1/4″ x 3″. Simply place the smaller Crumb Cake onto the center of your folded base (I tack mine down with a bit of adhesive so it doesn’t move) and then stamp … use firm, even pressure and you’ll get a great image.

Pick up your smaller piece and mount it to your mat, then mount the mat directly onto the base. It’s so pretty… and so easy!

This was not my original design, I just “cased” it (Copy And Share Everything) and switched up the color scheme for a more natural look. You can follow me on Pinterest as well … CLICK HERE!

Don’t forget your coordinating envelope … and stamp that too! It’s always a treat when you open your mailbox and find a hand stamped card!

000_1623

Stampin’ Tip: Make sure your ink pads are properly inked to get the best stamped image. It’s always best to purchase an ink refill when you purchase your ink pad. If you have not done this, ink refills make a great filler when your adding to your orders.

I’d love to hear what you think, feel free to leave a comment below.

Thank you for taking time to visit me today ~

Have an awesome Saturday … see you tomorrow!

blog-closing-small

STAMPIN’ SUPPLY LIST …


Holiday Sweet Treats …

Happy Friday Stampin’ Friends,

And Happy Halloween! Today I have a quick -n- quick sweet treat to share with you. I’m using the “Tiny Treat Boxes” from the Holiday Catalog – page 10 to be exact.

These cute little boxes are quick and easy to pop up and have 25 in the package for only $6.95… perfect for passing along a sweet treat.

000_1617

To decorate I used designer paper to create a belly band … just think, you can do this for birthdays, Halloween, wedding favors – the possibilities are endless!

My flower was created with the (yes, it’s retired) 5 petal punch stamp set, but I know many of you have this punch, and I wanted a poinsettia as my flower. The center petals comes from the Boho Blossom punch.

We colored the pearls with the Blendabilities marker … and they turned out so cute.

These cute little boxes were made for my retreat attendees as a pillow gift on Friday night. Each box contained two Christmas truffles …. yum!

It’s that time of year again … and here in Wisconsin, we woke up to snow on the car!

Have a wonderful day ~

blog-closing-small

Gratitude for Days Project …

Hello Stampin’ Friends,

Today I would like to share with you one of our new Simply Created Kits … Gratitude for Days. The kit includes 33 note cards, 30 pockets, stickers, binder clips and bakers twine. It’s a wonderful way to journal what you’re grateful for…. instructions are included.

Here is a video that gives you an alternate way to use the Gratitude for Days Simply Created Kit …

STAMPIN’ SUPPLY LIST from Video …

blog-closing-small

Project Life by Stampin’ Up! Product Giveaway!

Hello Stampin’ Friends,

Slight change of plans today … you know how you tuck something away so it won’t get damaged or lost, and then you can’t find it … well that’s what I did with my swap cards!

However,  I have some updates and announcements to share with you, and I’m sure my swaps will turn up as I finish unpacking my supplies.

675642_c69bdad61755a4545431e5fc79c28d02

  • Are you a scrapbooker or memory keepers who have never heard of Project Life by Stampin’ Up!

  • Are looking for affordable solutions for documenting their life?

  • Are looking for creative yet easy ways to get their photos into albums?

 Here’s your chance to WIN … CLICK HERE TO ENTER!

One lucky winner will win a complete Project Life by Stampin’ Up! prize pack including every product available in the product line! You could also win one of 100 Project Life by Stampin’ Up! Card & Accessory Packs.

PROJECT LIFE GIVEAWAY CLICK HERE TO ENTER!

There is NO obligation … just enter for a chance to win some amazing product!

 Header_Recruiting_demo_10.1-31.2014_US

There are just a few days left, so don’t miss your chance to earn free Designer Series Paper for six whole months!

For more information CLICK HERE or contact me lindaluvs2stamp@aol.com

contact me hostess special

Only 2 days left to get your free “Good Greetings” stamp set … pass your catalog, collect the orders and give me a call 262-334-1009 or place the order on my on-line store! CLICK HERE

 Please let me know if you need any help with the great promotions listed, and be sure to enter to WIN the Project Life by Stampin’ Up! giveaway! I did!

Have yourself a wonderful Wednesday.

See you tomorrow ~

blog-closing-small

Our retreat stamping was in the bag …

Hello Stampin’ Friends,

Today is Day 2 of my “Holiday Retreat” series and I would like to take you along to our first stamping session on Friday evening.  After a dinner of hot turkey sandwiches, fruit salad, taco dip & chips and more, we retreated to our stamping area …

Stamp room - blog post

I set up the area before my guests arrive so they can just come in and begin the fun. The projects are pre-cut for them but they still get to do some of the BigShotting, embossing and punching.  On Friday we began with a project, an awesome bag they could take their cards home in and pass on for a gift.

I’m sure some of you recognize the “Paper Pumpkin” bag … One of the benefits of being a Paper Pumpkin supscriber is that you can order “past kits” when available … and this is one of my favorites!  I’ve personally used them many times.   Click Link for more information …

DemoHeader_PastKits_Demo_Feb18_NA

I jazzed it up with our beautiful “Under the Tree” Specialty Designer Series paper found on page 5 of the Holiday catalog. A touch of Old Olive behind it really highlights the snowflake pattern.

000_1613

The precious snowflake comes from the “Snowflake Card Thinlit Dies” and is done in the stunning Champagne Glimmer Paper. I will admit that the large Rhinestones used for the center are now discontinued, but my guests learned how easy it is to color any of their Rhinestones and Pearls with our Blendabilities … we used the “Skin Tone Assortment”.

I swapped out the ribbon from the kit and used the “Natural & Old Olive” Two-Tone Trim for the handles … they look so cool! All the colors came together so nicely to create a beautiful holiday bag that could be given to a man or women.

Tomorrow I’ll be sharing a few of the swap cards that my ladies created … we did an all occasion swap! There was a lot of talent in out stamping group!

The Stampin’ Supply List for today’s project is listed below.

Thanks for stopping by ~

blog-closing-small

Just click on the “Weekly Deals” to view.

Main_weeklydeals_olo_10.7-31.2014_SP_UK


STAMPIN’ SUPPLY LIST ….