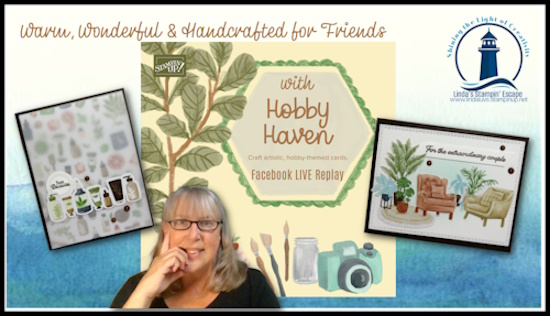
If you love cozy, creative projects, you’re going to adore the Hobby Haven 12″ x 12″ Specialty Designer Series Paper! This collection is filled with charming illustrations inspired by life’s simple pleasures — from baking and sewing to reading and relaxing. It’s the perfect paper to bring warmth and personality to your handmade cards, scrapbook pages, and gift packaging.
What makes this paper even more fun to work with are the two sheets of precut pieces — ready to use for quick accents — and the fussy-cutting potential that lets you add depth and detail to your designs. Whether you’re crafting for yourself or sending a little handmade love to a friend, Hobby Haven helps you capture those heartwarming moments that make life special.
In my latest Facebook LIVE Replay, I’m sharing two beautiful card ideas using this delightful paper pack:
✨ The first card uses vellum to gently calm the background and make the die cut sentiment stand out — a simple trick with an elegant effect!
✨ The second card turns two cozy chairs into a sweet anniversary card, perfect for celebrating love and togetherness.
You can catch the full video tutorial below and see how both cards come together step-by-step. 🎥 Watch here / Just Click Here
I hope these ideas inspire you to take a fresh look at your designer papers and find new ways to make them warm, wonderful, and from the heart. 💗
I’m here to announce that beginning today … Monday, October 6th, every single kit in the Stampin’ Up! Kits Collection is on sale for up to 30% off – but only for 3 days!
✨ These all-inclusive kits have everything you need to create cards, gifts, or even home décor. Whether you want to spread holiday cheer, send birthday wishes, or just enjoy some crafty “me time,” there’s a kit for you.
👉 Thinking ahead? With Christmas sneaking up, these kits also make the perfect gift—they’ll have everything needed to jump right into the joy of creating. 🎁
⏳ But hurry—this sale ends October 8th, and favorites will fly off the shelves fast!
🥳 Every kit in the Kits Collection is up to 30% off, and the best part? You can even add your favorite sale kits to the ultimate kit — our Starter Kit!
It’s a kit lover’s dream come true! All Kits Collection projects are up to 30% off, and here’s the best part — you can even include your favorite sale kits in the ultimate kit (our Starter Kit!). That means you’ll get the best deal on top of a deal — double the fun, double the savings, and endless creative possibilities!
It doesn’t get better than this — kits you love on sale, and the chance to add them to the ultimate kit for even more savings! 🎁 With the holidays sneaking up, it’s the perfect time to stock up on creative gifts (or treat yourself!). Pair the Kits Collection Sale with the Starter Kit special for the best value and endless inspiration. Don’t wait — both offers are happening now, and they’re too good to miss!
💕 Thank you for checking out today’s post, and I hope your inspired to grab a deal or two!
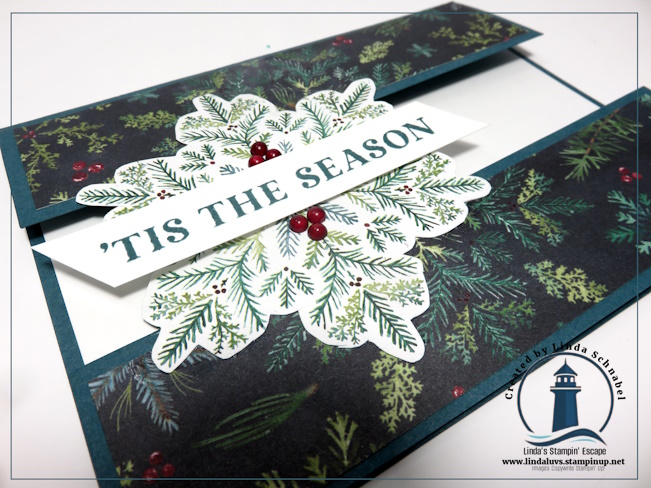
Happy Sunday! Today’s project brings together two of my favorite things from the Holiday Mini Catalog—the Traditions of Christmas Specialty Designer Series Paper and the Traditional Labels Bundle. These two pair beautifully to create timeless cards that capture the spirit of the season while staying easy and fun to make.
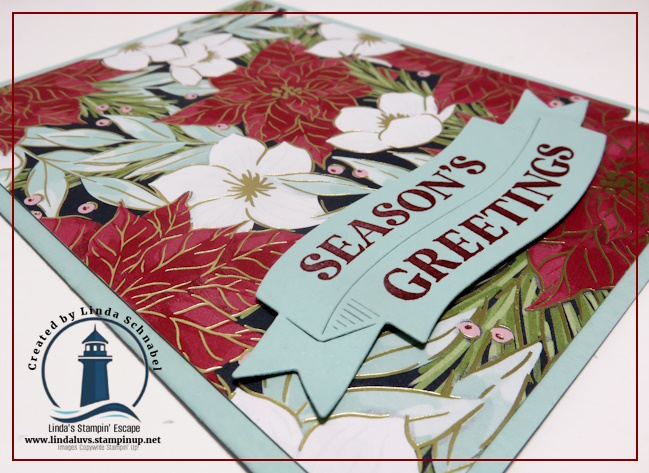
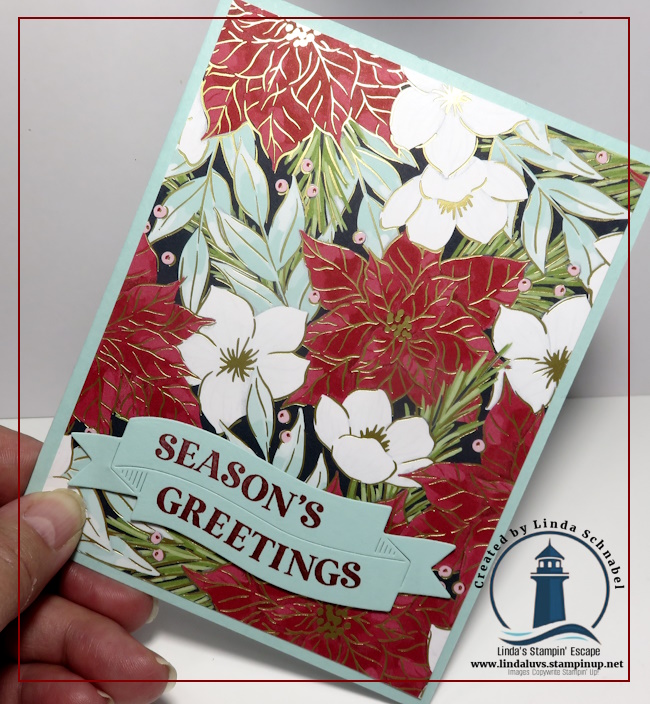
The Traditions of Christmas Designer Paper is a classic choice for holiday crafting. With bold poinsettias, delicate white flowers, and lush greenery accented with gold foil, it offers a warm and traditional palette that feels just right for Christmas. Pair that with the Traditional Labels Bundle, which includes versatile greetings and perfectly sized dies, and you have everything you need for cards that are both elegant and effortless.
For today’s card, I chose patterned paper featuring red poinsettias, white flowers, and hints of Pool Party and Old Olive greenery upon a Secret Sea backdrop. The base of the card is Pool Party cardstock (8 1/2″ x 5 1/2″, scored and folded at 4 1/4″), which makes those seasonal colors pop. I die cut the double label banner from the Traditional Labels in Pool Party cardstock and stamped my greeting in Cherry Cobbler ink to tie in with the poinsettias.
Popping the sentiment up with dimensionals adds just the right amount of depth and texture. Although I didn’t, I suggest a few embellishments finish it off. Even this simple layout, our card still shines.
What I love about this design is that it’s perfect for beginners while still looking polished enough to impress. The die-cut label gives it that “next level” look without adding any complicated steps, so it’s a win for both new and experienced stampers alike.
Thanks so much for joining me for this Simply Sunday inspiration! I hope today’s project encourages you to reach for the Traditions of Christmas Designer Paper and the Traditional Labels Bundle as you craft your holiday cards. These products are truly timeless and will help you create keepsakes that capture the magic of the season.
World Card Making Day is here—October 4th—and I couldn’t be more excited! Today is all about celebrating the joy of creating and sharing handmade cards. Whether you’ve been stamping for years or you’re brand new to the craft, there’s something special about taking time to create a little piece of art that brings joy to someone else.
And what better way to celebrate than with some amazing deals that will spark your creativity? 💌
Right now, Stampin’ Up! has put together a couple of offers that are just too good to pass up. Think of it as your chance to stock your shelves with the supplies that inspire you—inks, papers, stamps, tools—you name it! Here’s the scoop:
✨ Deal #1: Extra Product in Your Starter Kit! Pay just $99 and fill your kit with $189.00 worth of your favorite products.
✨ Deal #2: A Lower Price Point! Want to dip your toe in for less? Pay just $35.00 for a kit filled with $125 worth of products.
Unbelievable, right? But that’s just the start … your kit also includes:
🚚 FREE shipping
🎁 A FREE Paper Pumpkin kit
📦 Business supplies (We can talk about these)
💲 20–25% off all your future orders while you remain active
The best part?Both options are completely customizable—you get to choose what goes inside. Pick the tools, stamps, and materials that inspire you most, so your creative journey starts out your way.
And when you say yes to one of these deals, you’re not just getting a great value—you’re joining a community of stampers who share, inspire, and celebrate creativity together. My Stars by Design team is ready to welcome you with open arms, and you’ll also gain access to exclusive perks, early releases, and ongoing support.
So while today we’re celebrating World Card Making Day, why not also celebrate you? Treat yourself to the tools and savings that will fuel your creativity for the months ahead.
👉 Click [HERE] to grab your deal and start customizing your kit today!
Happy creating, friends—and Happy World Card Making Day! 🎉
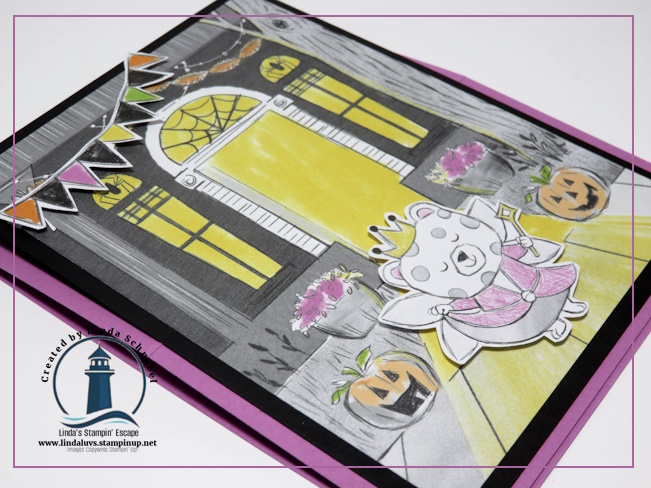
Today, we’re creating a No Tricks, All Treats Fun Fold “Easel” Card that’s playful, interactive, and—best of all—super easy to make because the Spooky Sweet Designer Paper is practically doing all the work for you! This card is perfect for Halloween, but it’s so whimsical and fun that it’s hard not to smile while making it.
We’ll start with our Petunia Pop card base, cut to 11″ x 4 1/4″ and scored at 5 1/2″ and 8 1/4″. Burnish those score lines! Since this card is a portrait/vertical layout, the 5 1/2″ score forms the top fold, and the 8 1/4″ score lands about halfway down the front of the card base. This simple fold gives us our “fun fold” mechanism that will let the card pop up and stand for display.
Next, cut two pieces of Basic Black cardstock to 4″ x 5 1/4″ (front & inside mats) and a piece of Basic White at 3 3/4″ x 5″. Grab the Spooky Sweet designer paper and cut your favorite scene—like the cute house and sidewalk—to 3 3/4″ x 5″. Then, let’s bring in our stars: fussy cut the beary sweet little fairy and the banner from the paper. I added a little sparkle using Wink of Stella on her crown, wings, and scepter—because every fairy deserves a touch of shimmer! Both the fairy and banner are popped up with Stampin’ Dimensionals for extra dimension and then attached to the designer paper… then attach to your black mat.
Here’s an important trick: when attaching the front of the card to the base, apply adhesive only from the second score line to the bottom edge of the card base. Leave the area above that top score line free of adhesive, or your fun fold won’t open properly.
Now for the inside—where the magic really happens! I stamped sparkles in Petunia Pop ink onto the white panel, then stamped my greeting on a scrap of white and die-cut it using the Textured Notes Dies. I dressed it up with some Petunia Pop shimmery ribbon and a piece of black cardstock behind it, then popped it up with Stampin’ Dimensionals in the middle of the inside panel. This creates the Easel mechanism, so your card stands perfectly. Finally, I added some fussy cut candy corn for a sweet little embellishment.
The best part? This card lays flat for mailing but pops up to display your cute creation at home—so it’s both practical and whimsical. The combination of fun folds, interactive easel design, and playful designer paper makes it a joy to create.
I encourage you to get creative with embellishments, die cuts, and colors—make this card your own! You’ll find links to all the supplies used today below for your convenience.
Thanks for flying by and spending part of your day with me …
I hope you enjoyed my Simply Sunday cards! Today, we’re stepping things up a notch and highlighting one of the real gems in the Autumn Toile Suite—the ornate background die found in the Amber Autumn Bundle. Honestly, this die was the first thing that caught my eye when I opened the suite, and once you see it in action, you’ll understand why. It’s a showstopper!
This intricate background die creates a stunning, leaf-patterned backdrop that instantly elevates your card designs. The beauty of it is you don’t need to fuss with multiple layers or complicated layouts—just one pass through your die-cutting machine and you’ve got a card front that looks elegant, rich, and detailed.
For today’s card, I started with a Very Vanilla card base to keep things simple. The magic happens when you pair it with the Earthen Toned Metallic Specialty Paper, included right in the suite. I ran the background die through with this paper, and the result is an absolutely gorgeous metallic leaf layer that shimmers and shines. To finish it off, I heat-embossed my greeting in Bronze Metallic Embossing Powder—and die cut with the Textured Notes Dies—so everything ties together beautifully.
Imagine this same design layered over a patterned background from the Autumn Toile Designer Series Paper—wow! The possibilities are endless, and the die does all the heavy lifting for you. That’s the brilliance of this suite: simple stamping and die-cutting turn into cards that look intricate and professional.
If you’re looking to add elegance and ease to your fall crafting, the Autumn Toile Suite is a must-have. With the Amber Autumn Bundle, metallic specialty papers, and coordinating accessories, you’ll have everything you need to create cards that impress without stress. Today’s card is just the beginning—I have more to share with you soon, so stay tuned!
Let me know what you think … comment below, and thanks for stopping by today!
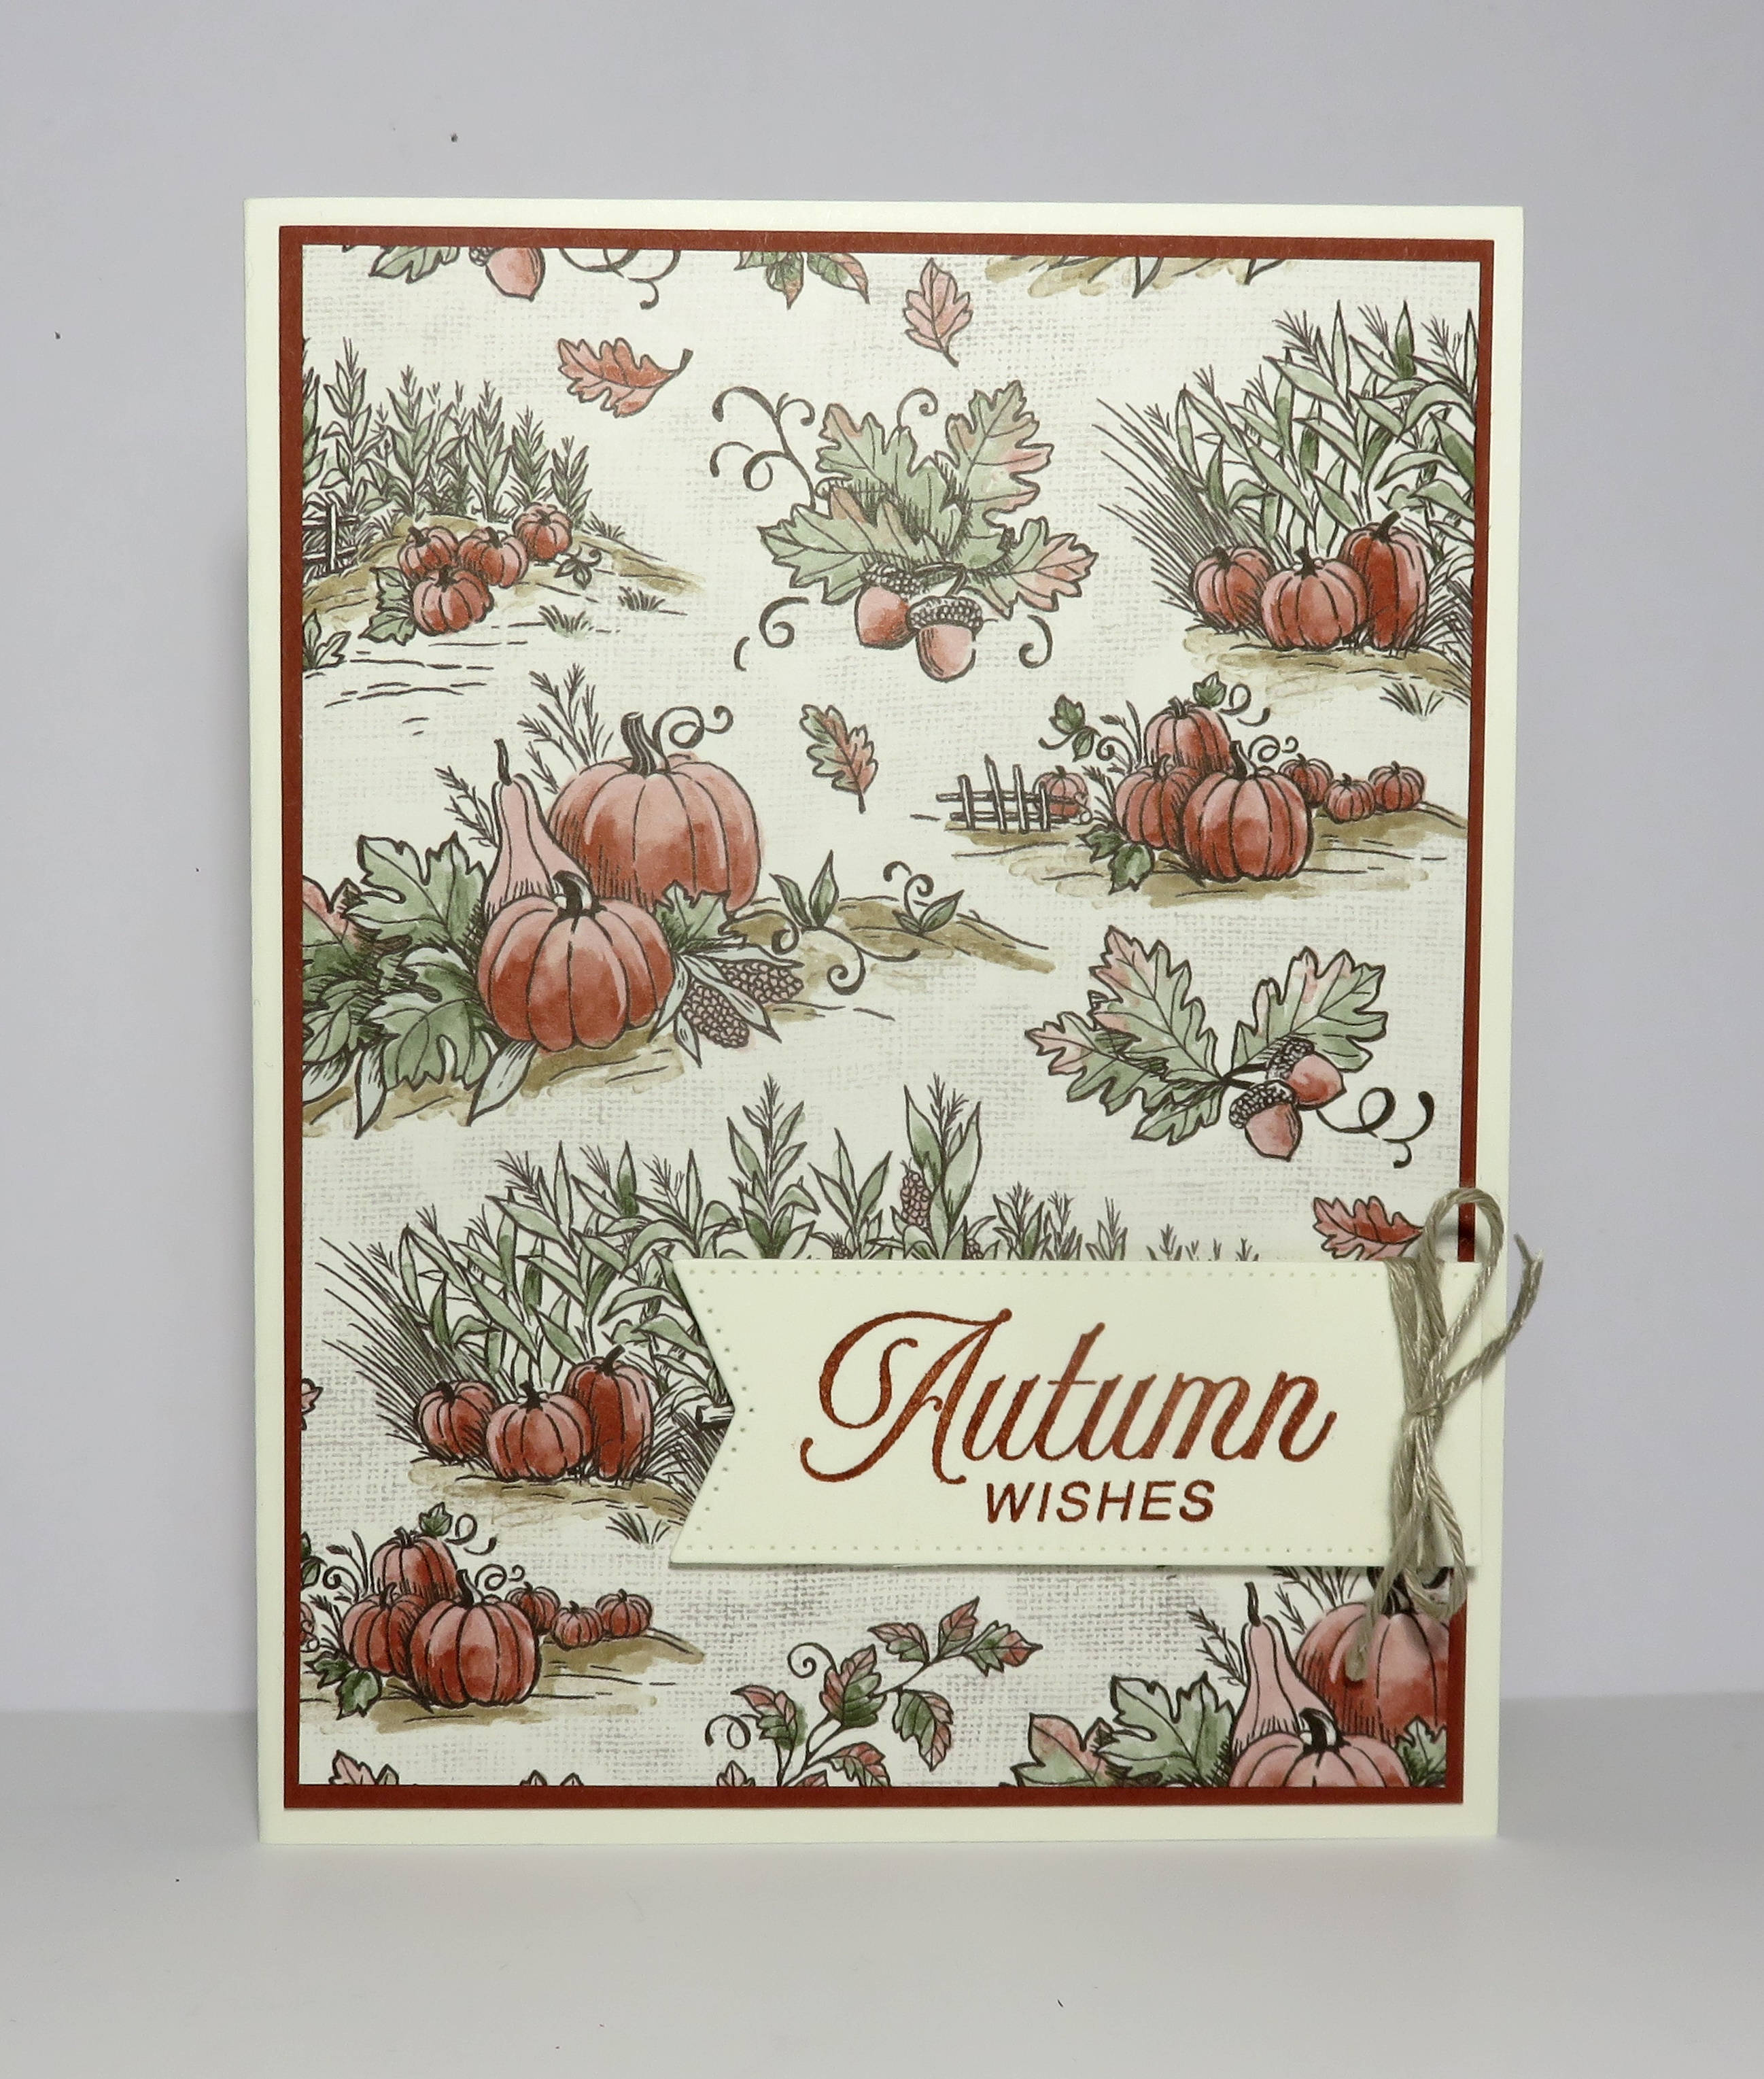
Bring an air of sophistication to your fall crafting with the Autumn Toile 12″ x 12″ Designer Series Paper. My Simply Sunday post is the perfect time to showcase how easy it can be to create beautiful cards when you have paper this stunning. With its intricate imagery of trees, pumpkins, animals, and more, this collection instantly elevates any project. Inspired by traditional toile wallpaper, each sheet carries a timeless elegance that’s both classic and seasonal—making it ideal for harvest gatherings, Thanksgiving greetings, or simply sending a touch of autumn warmth to someone special.
For today’s cards, I let the Autumn Toile Designer Series Paper take center stage. The detailed patterns are so striking that little else is needed—just a coordinating sentiment or die-cut accent, and you have a card that looks like it took hours to make. This is what I love about Simply Sunday projects: minimal effort, maximum beauty. The paper practically does the work for you, allowing you to spend more time enjoying the creative process and less time fussing over details. Whether you’re a beginner or a seasoned crafter, these designs open the door to quick, elegant cards that feel sophisticated and heartfelt.
If you’ve been searching for a way to refresh your fall crafting, the Autumn Toile Designer Series Paper is a must-have. Its timeless patterns pair beautifully with the season and add a touch of elegance that’s hard to resist. Imagine how lovely your handmade cards, scrapbook layouts, or even 3D projects will look when dressed in these graceful designs. Don’t wait—add this stunning paper to your collection today and bring the warmth and elegance of Autumn Toile to all of your harvest-season creations.
Thank you for checking out these quick -n- easy cards today.
I’m so glad you’re here today. I have a fun card-making idea to share with you—the Split Card Technique—featuring the stunning Elegant Pine Snowflakes Designer Paper. This is one of those quick-and-easy techniques that creates an impressive WOW factor, perfect for any occasion. Before we dive in, I want to pause and say a heartfelt “Thank You” to everyone who placed an order during yesterday’s Stamp-tastic Sale. Your support means so much and allows me to keep bringing you fresh ideas and inspiration! 💙
Card Dimensions
Pretty Peacock Cardstock: Base 5 3/4″ x 5 1/2″ (score at 1 1/2″), plus 1 strip 5 1/2″ x 1 1/2″
Designer Paper: 2 pieces at 5 1/4″ x 1 1/4″ + 1 snowflake
Basic White Cardstock: 5 1/4″ x 4″ (inside), plus 1 scrap large enough for snowflake and 1 strip 1/4″ wide for greeting
Step-by-Step Instructions
Glue the snowflake onto white cardstock and fussy cut. (This strengthens the piece so it will hold your card together.)
Adhere the designer paper strips to the top and bottom strips of your card front.
Align the cardstock strip along the bottom of the card front. (Tip: Use a Post-It Note to hold it in place while you work!)
Attach the snowflake to the top and bottom strips, connecting the card. Be careful to place adhesive only where the snowflake touches the cardstock strips.
Add the white cardstock insert to the inside of your card.
Stamp Greeting with Pretty Peacock on the white 1/4″ width strip and trim ends as desired… attach with Stampin’ Dimensionals to pop it up!
Embellish as desired—I used the Cherry Cobbler & Pearl Adhesive-Backed Berries to give my snowflake extra pop!
This card comes together so quickly, yet looks like you spent hours creating it. Try experimenting with different designer papers for a variety of looks—you’ll love how versatile this technique is!
I hope today’s project inspires you to give the Split Card Technique a try. With the beautiful Elegant Pine Snowflakes Designer Paper, the results are nothing short of magical. Remember, simple steps can deliver big “WOW” moments, and this card proves just that! Be sure to grab your favorite designer papers and see how many unique variations you can create.
Thanks for joining me today … hope yours is filled with creativity!
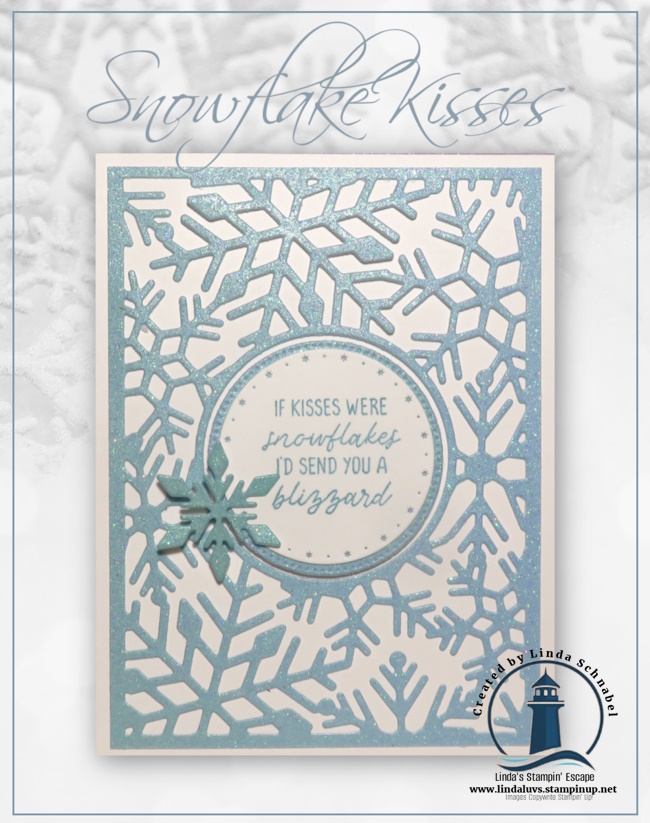
There’s something magical about snowflakes, and the new Snowflake Kisses Bundle captures that wintery charm perfectly. This bundle includes a sentiment-only stamp set filled with heartfelt greetings that will warm up any winter card, along with a coordinating set of dies that bring beautiful, intricate snowflakes to life. Together, they’re the perfect pair for creating cards that sparkle with seasonal cheer.
In my latest video, I’m sharing step-by-step instructions to help you see just how versatile this bundle really is. From delicate die-cut layers that create dimension and elegance, to stamped sentiments that send the sweetest wishes, you’ll be amazed at how easy it is to put together cards that look like they took hours to make. Trust me—once you see the snowflakes cut from shimmering paper or layered for extra depth, you’ll fall in love with this bundle just like I did.
I invite you to watch my video below where I walk you through the creative process and share a few card designs that highlight the magic of this bundle. After seeing these ideas, I know you’ll be inspired to add Snowflake Kisses to your collection—it’s a must-have for winter crafting!
Now that you’ve seen the Snowflake Kisses Bundle in action, I hope you’re feeling inspired to create your own winter masterpieces. The versatility of this bundle makes it one you’ll reach for again and again—whether you’re making simple, elegant cards or layering up for a dazzling snowflake scene.
This scene with the Soft Waves embossing folder reminds me of a blustery winter day …. and you have to watch the video to see the inside of the card (it features one of these amazing dies)!
If you’re ready to bring a little extra sparkle to your crafting, I’ve included the shopping links below for your convenience. Go ahead and treat yourself to this bundle—you’ll love how sweet winter crafting can be! Thank you for joining me today!
There’s something truly magical about the holiday season—cozy moments, heartfelt giving, and the joy of creating something special with your own hands. The Peaceful Garden Suite captures all of that and more with its elegant designs and timeless charm. Whether you’re crafting Christmas cards, heartfelt tags, or scrapbook pages filled with memories, this suite offers everything you need: graceful sentiments, versatile tools, and beautiful coordinating paper that you’ll reach for long after the holidays have passed.
During a recent LIVE, I showcased two cards created with the same layout but each with a completely different look. One featured the Peaceful Greenery 3D Embossing Folder, which creates a stunning embossed frame with delicate filigree and greenery surrounding a large open space—perfect for your stamped images or sentiments. The other card highlighted the Peaceful Garden 12″ x 12″ Designer Series Paper, which has beautiful dove and greenery images on one side and soft tone-on-tone washes on the other. The paper is perfect for holiday crafting, but its gentle designs make it just as lovely for all-occasion projects.
ThePeaceful Greenery 3D Embossing Folder
The embossing folder creates a stunning embossed frame with delicate filigree and greenery surrounding a large open space, which I used the dies and stamp set to add the greeting, and are backed with the beautiful glimmer paper. The die cut doves are recognized as symbols of peace and goodwill, and brought all together makes a beautiful Christmas card with dimension and texture.
Peaceful Garden 12″ x 12″ Designer Series
As you can see, the layout of the two cards is the same, right down to the greeting (I only changes the color of the glimmer paper). The patterned paper I used gives a soft background and is perfect for Christmas, or switch out the greeting to either Sympathy or the Heartfelt Prayer stamps and change the entire feeling of this card, showing the versatility of this suite.
Both cards came together quickly, yet each offered its own personality: the embossed version was rich with texture and a little more luxurious, while the designer paper version had a softer, layered elegance that’s wonderful for creating multiples with ease. That’s what I love about this suite—it’s so easy to mix and match, whether you prefer the tactile beauty of embossing or the graceful flow of patterned paper.
If you’re looking to create projects that are both elegant and versatile, the Peaceful Garden Suite Collection is a wonderful addition to your crafting lineup. The coordinating products take the guesswork out of designing, allowing you to focus on what matters most—sharing a little handmade joy.
If you haven’t added the Peaceful Garden Suite to your collection yet, this is the perfect time to do so. It’s one of those suites that will serve you beautifully for the holidays and long after the season is over.
Thank you for stopping by my blog today. I hope these two cards inspired you.
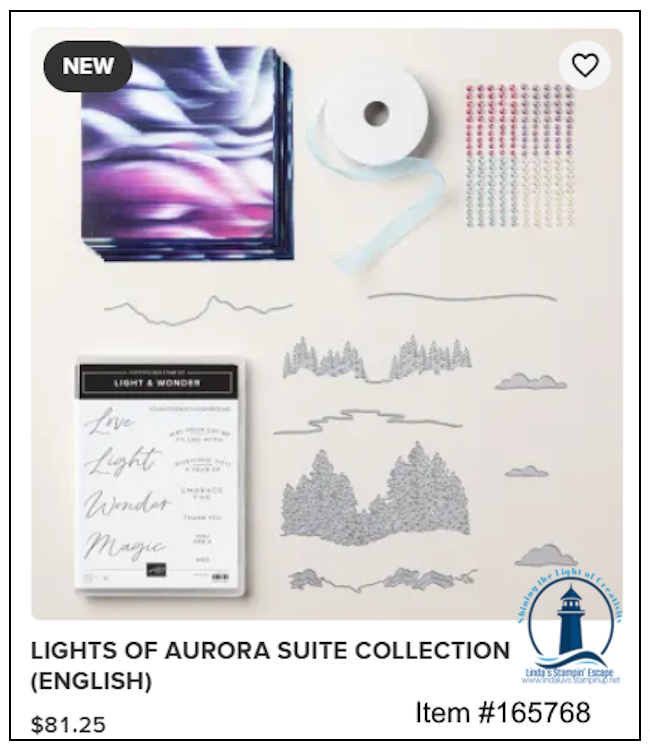
Have you ever sat beneath a starry sky, watching the Northern Lights dance across the horizon? That same sense of wonder comes alive with the Lights of Aurora Suite. This stunning collection was designed to capture the magic of the aurora borealis and bring it right to your craft table. Today, I want to share not only the beauty of this suite, but also a few different ways you can create with it, so you can see just how versatile and inspiring it can be.
Inside this suite, you’ll find designer paper that swirls with cosmic color, dies that create breathtaking natural landscapes, and all-occasion sentiment stamps that make your handmade cards shine for any moment worth celebrating. Add in the frosted iridescent gems and a touch of sheer blue ribbon, and suddenly your creations feel as if they’re glowing beneath a winter sky.
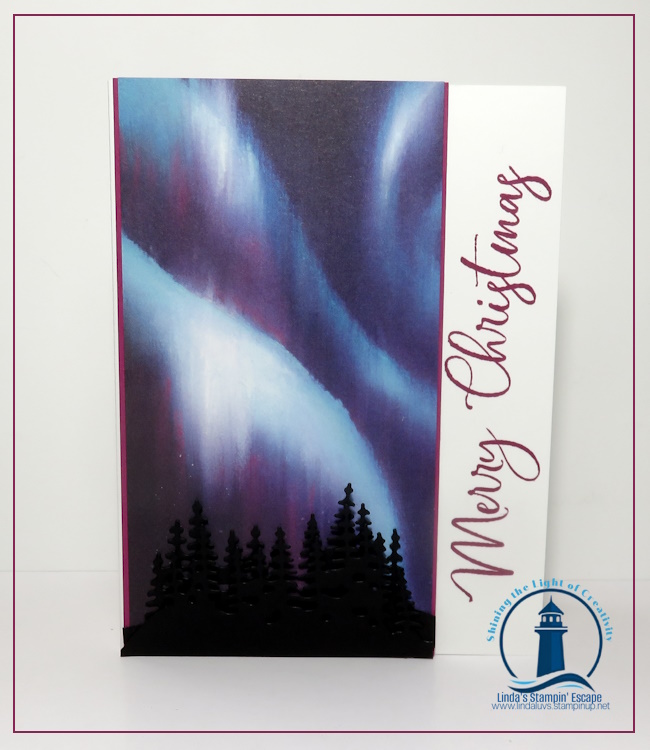
The first of my cards is a simple combination of the stunning paper, a die and a hand stamped greeting in Berry Burst …. Don’t you love the look of stamping your greeting sideways? Different & fun!!
The palette is rich and dreamy—Azure Afternoon, Balmy Blue, Basic Black, Berry Burst, Blackberry Bliss, Gorgeous Grape, Highland Heather, Lost Lagoon, Petunia Pop, Pool Party, and Very Vanilla—perfect for creating depth, drama, and soft blends that mirror the night sky. With just a little ink, some cardstock, and your favorite adhesive, you can make truly magical projects.
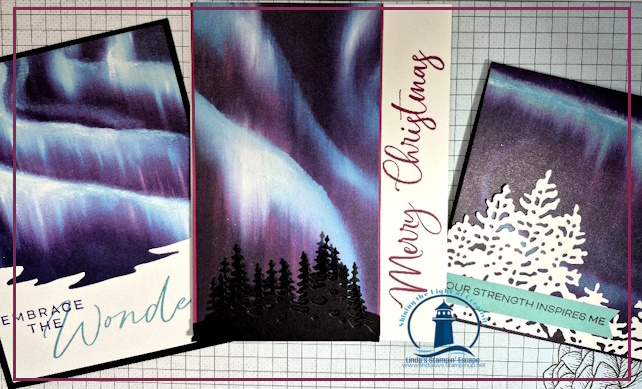
The second card again used the pretty patterned paper and a unique die (I can’t wait to play with this more) and a combination of stamps to create our greeting.
Join me in today’s video, where I’ll share how I used this suite to craft cards that feel like they’re kissed by the lights themselves. Let’s explore the possibilities together and bring that celestial beauty into your hands and onto your paper!
The Lights of Aurora Suite isn’t just about making cards—it’s about capturing a moment of wonder and sharing it with someone else. Each swirl of color, each delicate gem, and every shimmering ribbon can turn an ordinary card into a keepsake that feels like a little piece of the night sky.
If you’ve ever dreamed of creating something truly magical, this is your invitation to start. With its rich palette and versatile designs, this suite will take your crafting to new heights—whether you’re making a card for a special occasion or simply letting your creativity dance across the paper like the aurora itself.
The last card I’m sharing is a twist to the usual “black” die cut that represents a silhouette, I chose “white” to give you another option … to me it’s like a snowy scene. So fresh and pretty!
I hope this inspired you to see all the different ways you can bring that magical glow into your own crafting. Whether you create a simple card or a stunning layered masterpiece, this suite is ready to help your projects shine.
If it’s calling your name, now is the perfect time to add it to your collection—because every card you make with it will feel like a little piece of the night sky, ready to share.
Thank you so much for stopping by and sharing a moment under the “northern lights” with me today.
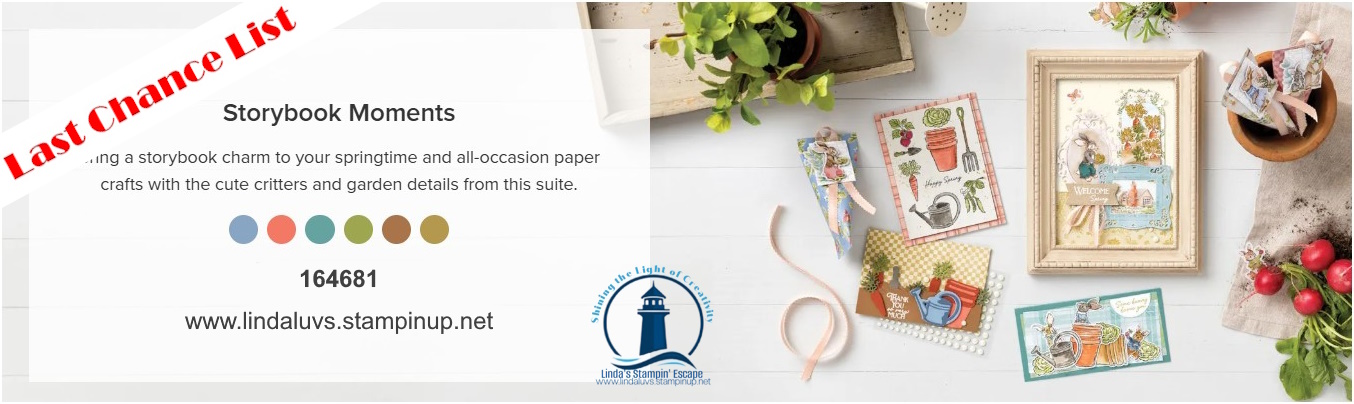
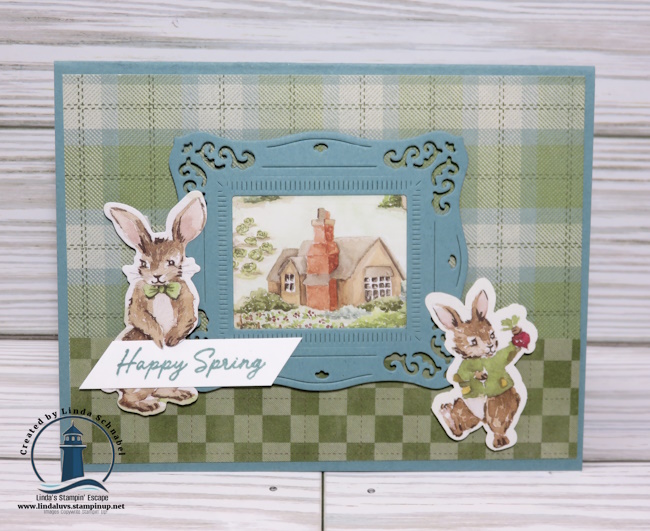
Today I’m excited to highlight the charming Storybook Moments Suite! This delightful collection is filled with woodland whimsy, cozy patterns, and heartwarming details perfect for spring, Easter, friendship, or just-because cards. If you love creating scenes that tell a story, you’re going to fall in love with this suite!
There’s something truly magical about crafting a card that feels like it stepped right out of a fairytale—and the Storybook Moments Suite delivers just that kind of wonder! Whether you’re a seasoned crafter or just starting your creative journey, this suite will have your heart from the very first stamp.
I’ve included a few card samples below to spark your inspiration—and I can’t wait to hear which one is your favorite! 💕
Inside this collection, you’ll find fuzzy bunnies, friendly squirrels, garden tools, and sweet little veggies—all ready to help you create charming, heartfelt scenes. The coordinating dies make it a breeze to bring your stamped images to life, and the plaid designer paper adds the perfect cozy background to tie it all together.
Add in scalloped ribbon, pearl-shaped embellishments, and whimsical details, and you’ve got everything you need to tell your own paper-crafted story. These elements shine in springtime projects, Easter cards, friendship notes, and even scrapbook pages—especially those that capture garden memories or sunny spring days.
If you’re looking for something that feels sweet, timeless, and oh-so-inviting, the Storybook Moments Suite is a must-have for your collection. Let’s make something beautiful together.
Just a reminder …. Now through June 30th, when you buy one suite from the Annual Catalog or Online Exclusives, you can get another at 50% off! It’s the perfect time to treat yourself to the Storybook Moments Suite—and maybe grab a second suite you’ve had your eye on.
Ready to craft your own storybook scene? The Storybook Moments Suite is waiting for you!
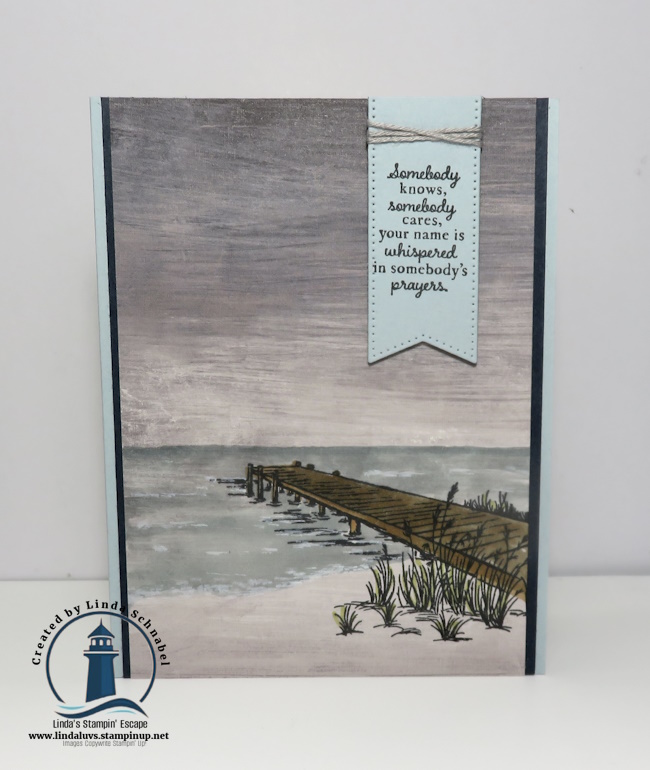
Do you know someone whose perfect day is sitting on a quiet pier with a fishing pole in hand? Maybe it’s your dad, a friend, or even you! The Peaceful Pier Stamp Set is perfect for capturing that calm, reflective moment—and today, I’m excited to share two card projects that bring that peaceful scene to life.
This stamp set features a beautiful collection of images: a rustic wooden pier, a young fisherman, fish, trees, and thoughtful sentiments to let someone know they’re on your mind. It’s a versatile set that works well for masculine cards, nature lovers, or anyone who enjoys a quiet escape by the water. Let’s look at my first card …..
The two cards I’m sharing today are extra special. One showcases a creative new stamping technique that adds texture and depth to your images, and the other features a unique fun fold that’s sure to impress. Whether you’re an experienced stamper or just starting out, these cards are simple to make but full of charm. I walk you through both projects in a step-by-step video tutorial so you can follow along and recreate them with ease.
Now more than ever, sending a handmade card is a simple way to stay connected and show someone you care. Imagine how touched someone would be to receive a card that feels like their happy place, stamped just for them.
If you already own the Peaceful Pier set, it’s time to ink it up and create something meaningful. And if it’s on your wish list—why wait? This is one you’ll reach for again and again, especially for those hard-to-make masculine cards. Be sure to watch the video for instructions and inspiration, and don’t forget to leave a comment letting me know who your “peaceful pier” card would be for.
Let’s get creative—because stamping, like fishing, is all about patience, joy, and taking a little time to enjoy the moment.
If you loved my last post featuring the Storybook Friends Bundle, then you’re in for a treat today! I have two more enchanting cards to share, along with some quick tips and techniques that will make your card-making even easier.
This enchanting suite is perfect for bringing charming characters and whimsical scenes to life. The best part? You can create stunning cards in less time by using the coordinating Designer Series Paper and die cuts—no fussy cutting required on today’s cards!
💡 Technique Highlight: It’s an oldie but a goodie! To create a background that appears to have texture, just “scrunch” up some wax paper, dab it onto your ink pad and pounce it onto your cardstock! This little touch makes a big difference!
Time to let the designer paper do all the work … layering different patterns makes it easy to craft a complete scene. You’ll see I used the Everyday Arches when adding the blue patterned paper … I showcased this in my last post. (Seen Here) With just a simple die cut and layering, this card comes together in minutes!
The greeting wishing you a Happy Easter, comes from the Greetings for All Ephemera pack. This set features a wide range of precut sentiments in a variety of styles, perfect for saying thanks, hello, congratulations, and more. The simple black and white colors ensure you’ll have a perfect fit for any design style.
My second card encompasses more of our suite as I highlight the coordinating die cut frame and stamp set.
The second card features one of my favorite “simple” techniques—layering die-cut elements. By combining the stamped images with pre-printed die cuts, you create depth and interest without a lot of extra work. I began with this adorable designer paper pattern – it gives us the framework for our creation – the strawberries!
So many stampers are already falling in love with the Storybook Friends Bundle, and it’s easy to see why! Whether you’re crafting for Easter, birthdays, or just because, this suite makes it simple to create charming, heartfelt cards in no time.
With Easter just around the corner, now is the perfect time to add this bundle to your collection and start crafting something truly special. Don’t miss out on the chance to create with these sweet characters!
Are you as enchanted by this suite as I am? I’d love to hear which card is your favorite! 💕
I’m back … finally. I’m on week number four of this cold/flu thing that was going around, but finally feeling more like myself, only coughing a few times a day (I’ll take it!) If you love quick and easy card-making techniques, you’re going to love today’s featured cards!
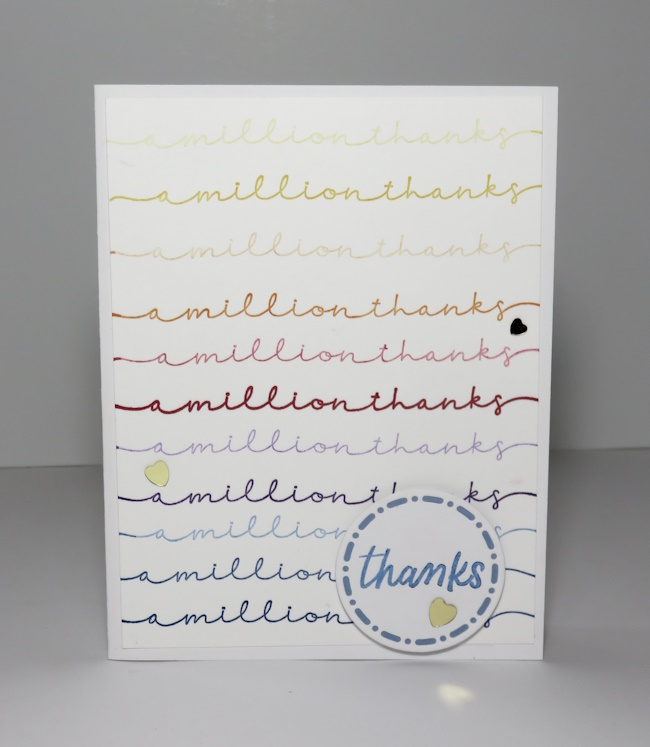
Today, I’m showcasing two adorable designs that highlight the Sweetly Scripted stamp set and some fun, beginner-friendly techniques. Plus, I’ve included a step-by-step video to guide you through the process of creating both cards. These techniques are simple, yet they add a creative touch to your handmade projects!
The first card is super simple yet so effective. This Split Card technique is a great way to showcase your favorite Designer Series Paper while making space for a beautiful sentiment. To create this look, start with a 4″ x 4″ piece of DSP and cut it diagonally from corner to corner. Adhere each piece to opposite sides of your card base, leaving a space in the middle. Stamp your sentiment from the Sweetly Scripted set right in that open space. Add embellishments if desired, and your card is complete! This technique is perfect for using up those extra designer paper scraps while creating a polished, professional-looking card.
The second card is all about color and repetition! This simple repeat stamping technique creates a fun, custom background. Choose a sentiment from the Sweetly Scripted stamp set and stamp it multiple times in different ink colors across your cardstock. Using bright, coordinating colors makes the design pop! Add a focal point or embellishments to complete the card. This technique is a great way to get more use out of your sentiment stamps while making a unique, eye-catching design.
I was completely shocked to learn that the Sweetly Scripted stamp set has SOLD OUT! I just demonstrated it, and within a few days, it was gone. This is a perfect reminder that if there’s anything on the Last Chance list that you’ve been eyeing, grab it before it disappears! Even though this stamp set is no longer available, you can still use these simple techniques with any stamps you have in your collection.
Be sure to check out the video tutorial below for step-by-step instructions, and don’t forget to let me know which technique is your favorite!
I hope you enjoy these card ideas and find inspiration to try them yourself.
Keep stamping, keep creating, and most of all, have fun!