Cosmic Colors & Creative Magic: Lights of Aurora Inspiration Inside

Hello Stampin’ Friends ~

Have you ever sat beneath a starry sky, watching the Northern Lights dance across the horizon? That same sense of wonder comes alive with the Lights of Aurora Suite. This stunning collection was designed to capture the magic of the aurora borealis and bring it right to your craft table. Today, I want to share not only the beauty of this suite, but also a few different ways you can create with it, so you can see just how versatile and inspiring it can be.

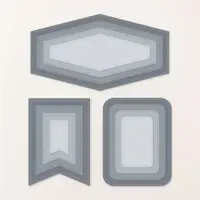
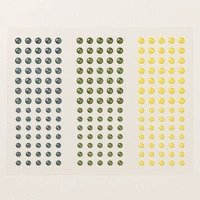
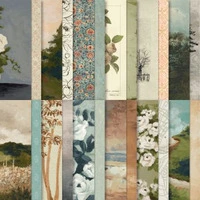
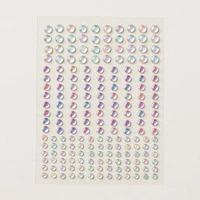
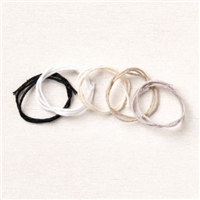
Inside this suite, you’ll find designer paper that swirls with cosmic color, dies that create breathtaking natural landscapes, and all-occasion sentiment stamps that make your handmade cards shine for any moment worth celebrating. Add in the frosted iridescent gems and a touch of sheer blue ribbon, and suddenly your creations feel as if they’re glowing beneath a winter sky.

The first of my cards is a simple combination of the stunning paper, a die and a hand stamped greeting in Berry Burst …. Don’t you love the look of stamping your greeting sideways? Different & fun!!

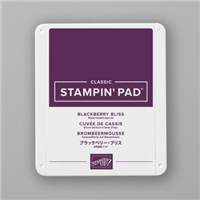
The palette is rich and dreamy—Azure Afternoon, Balmy Blue, Basic Black, Berry Burst, Blackberry Bliss, Gorgeous Grape, Highland Heather, Lost Lagoon, Petunia Pop, Pool Party, and Very Vanilla—perfect for creating depth, drama, and soft blends that mirror the night sky. With just a little ink, some cardstock, and your favorite adhesive, you can make truly magical projects.

The second card again used the pretty patterned paper and a unique die (I can’t wait to play with this more) and a combination of stamps to create our greeting.

Join me in today’s video, where I’ll share how I used this suite to craft cards that feel like they’re kissed by the lights themselves. Let’s explore the possibilities together and bring that celestial beauty into your hands and onto your paper!

CLICK HERE TO VIEW ON YOUTUBE

The Lights of Aurora Suite isn’t just about making cards—it’s about capturing a moment of wonder and sharing it with someone else. Each swirl of color, each delicate gem, and every shimmering ribbon can turn an ordinary card into a keepsake that feels like a little piece of the night sky.

If you’ve ever dreamed of creating something truly magical, this is your invitation to start. With its rich palette and versatile designs, this suite will take your crafting to new heights—whether you’re making a card for a special occasion or simply letting your creativity dance across the paper like the aurora itself.

The last card I’m sharing is a twist to the usual “black” die cut that represents a silhouette, I chose “white” to give you another option … to me it’s like a snowy scene. So fresh and pretty!

I hope this inspired you to see all the different ways you can bring that magical glow into your own crafting. Whether you create a simple card or a stunning layered masterpiece, this suite is ready to help your projects shine.

If it’s calling your name, now is the perfect time to add it to your collection—because every card you make with it will feel like a little piece of the night sky, ready to share.

Thank you so much for stopping by and sharing a moment under the “northern lights” with me today.

Come Enjoy the Splendor of the Storybook Moments Suite Collection! 🌼📖🐇

Hello Stampin’ Friends ~

Today I’m excited to highlight the charming Storybook Moments Suite!
This delightful collection is filled with woodland whimsy, cozy patterns, and heartwarming details perfect for spring, Easter, friendship, or just-because cards. If you love creating scenes that tell a story, you’re going to fall in love with this suite!

There’s something truly magical about crafting a card that feels like it stepped right out of a fairytale—and the Storybook Moments Suite delivers just that kind of wonder! Whether you’re a seasoned crafter or just starting your creative journey, this suite will have your heart from the very first stamp.

I’ve included a few card samples below to spark your inspiration—and I can’t wait to hear which one is your favorite! 💕

Inside this collection, you’ll find fuzzy bunnies, friendly squirrels, garden tools, and sweet little veggies—all ready to help you create charming, heartfelt scenes. The coordinating dies make it a breeze to bring your stamped images to life, and the plaid designer paper adds the perfect cozy background to tie it all together.

Add in scalloped ribbon, pearl-shaped embellishments, and whimsical details, and you’ve got everything you need to tell your own paper-crafted story. These elements shine in springtime projects, Easter cards, friendship notes, and even scrapbook pages—especially those that capture garden memories or sunny spring days.

If you’re looking for something that feels sweet, timeless, and oh-so-inviting, the Storybook Moments Suite is a must-have for your collection. Let’s make something beautiful together.

Just a reminder …. Now through June 30th, when you buy one suite from the Annual Catalog or Online Exclusives, you can get another at 50% off! It’s the perfect time to treat yourself to the Storybook Moments Suite—and maybe grab a second suite you’ve had your eye on.

Ready to craft your own storybook scene? The Storybook Moments Suite is waiting for you!

How to Make Peaceful, Nature-Inspired Cards with Peaceful Pier

Hello Stampin’ Friends ~

Do you know someone whose perfect day is sitting on a quiet pier with a fishing pole in hand? Maybe it’s your dad, a friend, or even you! The Peaceful Pier Stamp Set is perfect for capturing that calm, reflective moment—and today, I’m excited to share two card projects that bring that peaceful scene to life.

This stamp set features a beautiful collection of images: a rustic wooden pier, a young fisherman, fish, trees, and thoughtful sentiments to let someone know they’re on your mind. It’s a versatile set that works well for masculine cards, nature lovers, or anyone who enjoys a quiet escape by the water. Let’s look at my first card …..

The two cards I’m sharing today are extra special. One showcases a creative new stamping technique that adds texture and depth to your images, and the other features a unique fun fold that’s sure to impress. Whether you’re an experienced stamper or just starting out, these cards are simple to make but full of charm. I walk you through both projects in a step-by-step video tutorial so you can follow along and recreate them with ease.

CLICK HERE TO VIEW VIDEO

Now more than ever, sending a handmade card is a simple way to stay connected and show someone you care. Imagine how touched someone would be to receive a card that feels like their happy place, stamped just for them.

If you already own the Peaceful Pier set, it’s time to ink it up and create something meaningful. And if it’s on your wish list—why wait? This is one you’ll reach for again and again, especially for those hard-to-make masculine cards. Be sure to watch the video for instructions and inspiration, and don’t forget to leave a comment letting me know who your “peaceful pier” card would be for.

Let’s get creative—because stamping, like fishing, is all about patience, joy, and taking a little time to enjoy the moment.

Thank you for stopping by, have a great day!

Spring Cards with the Storybook Moments!

Hello Stampin’ Friends ~

If you loved my last post featuring the Storybook Friends Bundle, then you’re in for a treat today! I have two more enchanting cards to share, along with some quick tips and techniques that will make your card-making even easier.

This enchanting suite is perfect for bringing charming characters and whimsical scenes to life. The best part? You can create stunning cards in less time by using the coordinating Designer Series Paper and die cuts—no fussy cutting required on today’s cards!

💡 Technique Highlight: It’s an oldie but a goodie! To create a background that appears to have texture, just “scrunch” up some wax paper, dab it onto your ink pad and pounce it onto your cardstock! This little touch makes a big difference!

Time to let the designer paper do all the work … layering different patterns makes it easy to craft a complete scene. You’ll see I used the Everyday Arches when adding the blue patterned paper … I showcased this in my last post. (Seen Here) With just a simple die cut and layering, this card comes together in minutes!

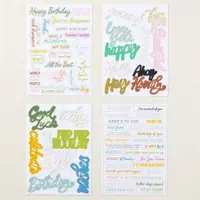
The greeting wishing you a Happy Easter, comes from the Greetings for All Ephemera pack.  This set features a wide range of precut sentiments in a variety of styles, perfect for saying thanks, hello, congratulations, and more. The simple black and white colors ensure you’ll have a perfect fit for any design style.

My second card encompasses more of our suite as I highlight the coordinating die cut frame and stamp set.

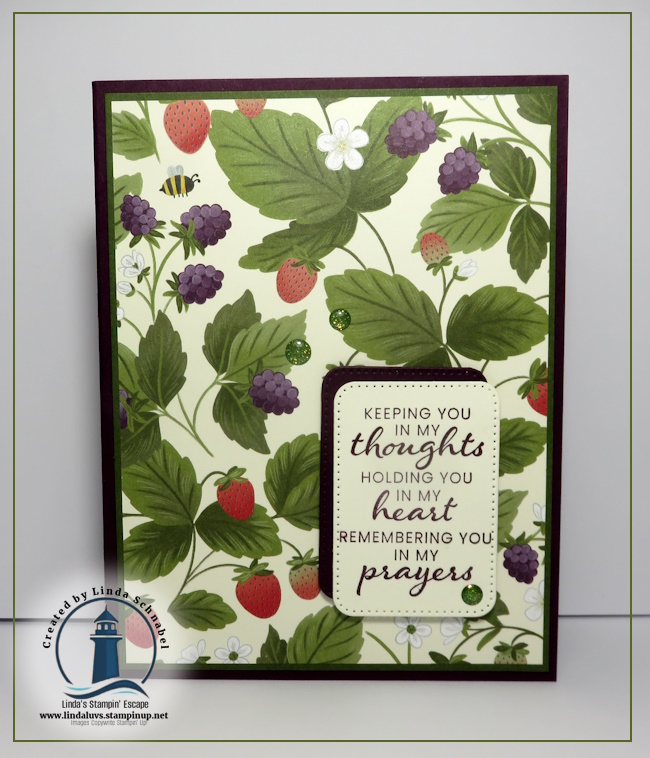
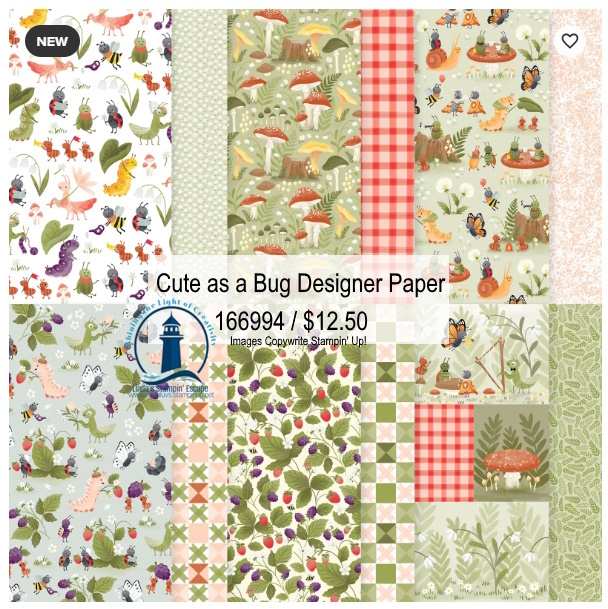
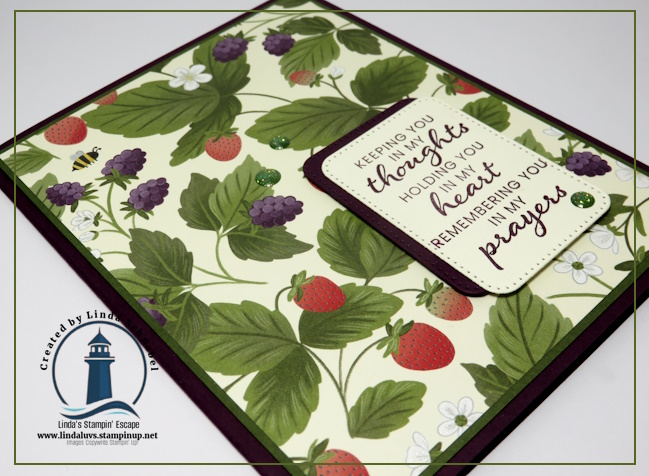
The second card features one of my favorite “simple” techniques—layering die-cut elements. By combining the stamped images with pre-printed die cuts, you create depth and interest without a lot of extra work. I began with this adorable designer paper pattern – it gives us the framework for our creation – the strawberries!

So many stampers are already falling in love with the Storybook Friends Bundle, and it’s easy to see why! Whether you’re crafting for Easter, birthdays, or just because, this suite makes it simple to create charming, heartfelt cards in no time.

With Easter just around the corner, now is the perfect time to add this bundle to your collection and start crafting something truly special. Don’t miss out on the chance to create with these sweet characters!

Are you as enchanted by this suite as I am? I’d love to hear which card is your favorite! 💕

Two Cute & Easy Cards Featuring the Sweetly Scripted Stamp Set

Hello Stampin’ Friends!

I’m back … finally. I’m on week number four of this cold/flu thing that was going around, but finally feeling more like myself, only coughing a few times a day (I’ll take it!) If you love quick and easy card-making techniques, you’re going to love today’s featured cards!

Today, I’m showcasing two adorable designs that highlight the Sweetly Scripted stamp set and some fun, beginner-friendly techniques. Plus, I’ve included a step-by-step video to guide you through the process of creating both cards. These techniques are simple, yet they add a creative touch to your handmade projects!

The first card is super simple yet so effective. This Split Card technique is a great way to showcase your favorite Designer Series Paper while making space for a beautiful sentiment. To create this look, start with a 4″ x 4″ piece of DSP and cut it diagonally from corner to corner. Adhere each piece to opposite sides of your card base, leaving a space in the middle. Stamp your sentiment from the Sweetly Scripted set right in that open space. Add embellishments if desired, and your card is complete! This technique is perfect for using up those extra designer paper scraps while creating a polished, professional-looking card.

The second card is all about color and repetition! This simple repeat stamping technique creates a fun, custom background. Choose a sentiment from the Sweetly Scripted stamp set and stamp it multiple times in different ink colors across your cardstock. Using bright, coordinating colors makes the design pop! Add a focal point or embellishments to complete the card. This technique is a great way to get more use out of your sentiment stamps while making a unique, eye-catching design.

I was completely shocked to learn that the Sweetly Scripted stamp set has SOLD OUT! I just demonstrated it, and within a few days, it was gone. This is a perfect reminder that if there’s anything on the Last Chance list that you’ve been eyeing, grab it before it disappears! Even though this stamp set is no longer available, you can still use these simple techniques with any stamps you have in your collection.

Be sure to check out the video tutorial below for step-by-step instructions, and don’t forget to let me know which technique is your favorite!

I hope you enjoy these card ideas and find inspiration to try them yourself.

Keep stamping, keep creating, and most of all, have fun!

Happy Stamping! Linda

#cardtechniques #cardmaking #papercrafting

Perennial Postage Dies and Sending Love Stamps & Dies

Hello Stampin’ Friends ~

Today, I’m excited to share a perfect pairing that takes your handmade cards to new heights – the Perennial Postage Dies and Sending Love Stamp Set and Dies. These products seamlessly come together, allowing you to craft beautiful greetings that will surely warm the hearts of your loved ones. 

Birthdays are special occasions, and what better way to celebrate than with a personalized touch? The Wanted to Say Dies offer a versatile and elegant way to express your birthday wishes. These dies beautifully complement the Perennial Postage set, creating a harmonious blend of sophistication and sentiment.

This watercolor look of the designer paper brings a whimsical and dreamy element to your cards, creating a perfect backdrop for the Perennial Postage Dies and the Wanted to Say sentiment.

Now, let’s talk about the Sending Love stamp set and dies, which is the ideal companion for the Perennial Postage Dies. The coordinating stamps and dies, allow you to create intricate and charming mailboxes & envelopes to accompany your cards. (Today’s mailbox was stamped). The attention to detail in both sets ensures that your creations are not just cards but expressions of love and thoughtfulness. 

With the Perennial Postage Dies, Sending Love stamps and dies, you have the perfect recipe for creating heartfelt and visually stunning cards. Whether it’s a birthday celebration or any other special occasion, let your creativity soar with this perfect pairing. Create Card, send, and spread love with every handmade creation!

Thank you for spending part of your Saturday with me!

It’s time to party with the Wildflower Birthday Suite Collection! 🌸

Hello Stampin’ Friends ~

Today I’m sharing the wonderful Wildflower Birthday Suite collection. I have cards and a video to share with you today! This suite is a celebration of beauty, joy, and creativity, offering everything you need to craft unforgettable birthday cards, party invitations, and so much more. Whether you’re hosting a milestone celebration or sending birthday wishes to a loved one, this collection blends playful party vibes with the delicate charm of wildflower designs, making it perfect for any occasion.

One of the highlights of this suite is the Birthday Celebration Dies, a true paper crafting essential! These dies include numerals 0 through 9, giving you the freedom to create die-cut numbers for any age or milestone. Imagine adding personalized touches to birthday cards, scrapbook pages, or even DIY decorations that celebrate life’s most special moments. From a child’s first birthday to a loved one’s big 50th celebration, these dies make it effortless to bring your vision to life.

To showcase the versatility and beauty of the Wildflower Birthday Suite Collection, I’ve created a video tutorial packed with inspiration and crafting tips. In the video, you’ll see how to combine the suite’s coordinating elements—stamps, dies, and designer paper—to craft a stunning birthday card that’s sure to delight. I’ll also share ideas for layering and embellishing to add extra dimension and flair to your projects.

The second card in my Wildflower Birthday Suite Collection features the delightful balloon die cuts, from the suite’s stunning specialty paper. 🎈✨ These die cuts bring a burst of color and texture to the design. Paired with the hand-stamped “Happy Birthday” sentiment, this card radiates festive cheer while showcasing the versatility of the suite’s elements. Perfect for birthdays of all ages, this design is a joyful celebration on paper! 🌸

The final card in my Wildflower Birthday Suite Collection puts the spotlight on the designer paper featuring adorable birthday cakes with shimmering touches of gold—perfect for adding a hint of elegance to the celebration. 🌟 I used the pocket die to create a charming tuck-in spot for a little surprise (as seen in the video), making the card interactive and fun. The greeting, cut with the Wanted to Say Dies, ties the design together beautifully. Mixing and matching elements from different products is not only easy but also adds a unique flair to your creations! 🎂✨

Thank you for joining me as I showcased the Wildflower Birthday Suite Collection! 🌸 I hope these cards and ideas have inspired you to get creative and add a personal touch to your next celebration. Don’t forget to watch the video for step-by-step instructions and additional tips. I’d love to hear which project was your favorite, so be sure to leave a comment below!

Until next time, happy crafting! 🎉✨
Linda

Day 2 of 12 Days of Christmas: Peaceful Painted Trees with a Touch of Pearl

Hello Stampin’ Friends ~

Welcome to Day 2 of my 12 Days of Christmas celebration! Today, I’m thrilled to share a card that combines elegance with ease. This design features the stunning Painted Trees 3-D Embossing Folder, the Peaceful Season Bundle, and introduces the dazzling Pearlized Enamel Effects – Basics. This card was a hit with my Stamp Club, where members enjoyed learning the step-by-step process to create it. Now it’s your turn to dive in and see just how simple it is to bring this beautiful design to life!

Christmas cards hold a special kind of magic, and the Painted Trees 3-D Embossing Folder delivers that magic effortlessly. The intricate trees scene provides a textured backdrop, setting the stage for a serene, peaceful holiday message. Pairing it with the Peaceful Season Bundle—complete with coordinating stamps and dies—adds layers of charm. To top it off, the Pearlized Enamel Effects add just the right amount of shimmer, and truly highlighting our trees.

Step-by-Step Instructions:

  1. Card Base:
    Night of Navy: 8 1/2″ x 5 1/2″ scored and folded at 4 1/4″. Attach 4″ x 5 1/4″ piece of Basic White to the inside / stamp sentiment if desired.
  2. Basic White / Embossed Trees:
    Cut to 3 3/4″ x 5 1/2″. Using the Painted Trees embossing Folder, place your white cardstock in the center of the folder and “center” the largest tree to be the focal point of your card.
  3. Add Pearlized Details:
    Now for the fun part! Using a Sponge Dauber, lightly tap the Pearlized Enamel Effects onto your trees to add delicate covering on them, truly highlighting the beautiful detail of the embossing folder. Set aside and let dry while you continue.
  4. Gold Foil Mat::
    The Gold mat is 4″ x 5 1/2″. Using the “detailed” CHRISTMAS die from the Peaceful Season Bundle, you will place this in the center of the Gold Mat and die cut your greeting. At this time, using a scrap piece of Night of Navy… cut the coordinating Mat / Bold CHRISTMAS die. Adhere the two die cut pieces together with glue, and don’t forget the dot for your “i”.
  5. Assemble the Card:
    Begin by layering your greeting over the embossed trees. Add “MERRY” at this time. Now place your embossed tree piece over the Gold Mat. Now is the perfect time to add the beautiful Night of Navy and Gold Glitter Ribbon to your piece. Once you’ve added your bow, attach this assembly to your card base. You can adhere directly or add Stampin’ Dimensionals to pop it up.
  6. .Embellish:
    This will complete your card! I added the Gold Textured Adhesive Backed Dots. Feel free to use any of your favorite embellishments… I just wanted to stick with the GOLD and NAVY theme, as it’s so elegant.

This card was a joy to make and a delight to give. The combination of texture, elegant embossing, and that touch of pearly shine creates a timeless holiday greeting that anyone would cherish.

I hope you’ve enjoyed the Step by Step Instructions and feel inspired to give this card and the Enamel paint technique a try. The Painted Trees 3-D Embossing Folder and Peaceful Season Bundle are must-haves for your holiday crafting, and the Pearlized Enamel Effects truly elevate your designs. Let me know if you recreate this card—I’d love to see your version!

Stay tuned for Day 3 of my 12 Days of Christmas, where more holiday inspiration awaits.

Happy crafting ~

🎄 Welcome to my 12 Days of Christmas – Day 1! 🎄

Greetings Stampin’ Friends ~

The holiday season is upon us, and there’s no better way to get into the spirit than with handmade crafts that come straight from the heart! Over the next 12 days, I’ll be sharing creative inspiration for your Christmas crafting, so be sure to check back daily. Let’s kick things off with a project that’s equal parts festive, elegant, and oh-so-easy to recreate!

Today, we’re spotlighting two fabulous products that will elevate your holiday projects: the Sentimental Christmas Designer Series Paper and the Christmas Labels Bundle. These items are your new best friends for creating beautiful handmade cards, gift tags, scrapbook pages, and more.

The Sentimental Christmas Designer Series Paper exudes a cozy, vintage charm that captures the essence of the season. Think warm, rich colors, timeless patterns, and designs that instantly set a nostalgic mood.

The Christmas Labels Bundle, which includes stamps and coordinating dies, is a must-have for your holiday toolbox. Save 10% when you buy the bundle instead of purchasing the stamps and dies separately! Not only does it save you money, but it also saves you time by effortlessly cutting out your stamped images.

For today’s project, I’ve created a simple yet stunning card featuring the lantern design from the Sentimental Christmas paper. The lantern is so beautifully detailed that it becomes the star of the card. To complete the look, I added a bold “Peace on Earth” greeting using the rectangular die from the Christmas Labels Bundle.

Here’s how easy it is to make:
1️⃣ Cut a piece of the lantern-patterned paper; 4″ x 5 1/4″ to fit your card front. Pretty Peacock Card Base measures 8 1/2″ x 5 1/2″… then scored and folded at 4 1/4″.
2️⃣ Stamp “Peace on Earth” (or your favorite sentiment!) with Pretty Peacock Classic Ink and use the coordinating die to cut it out. The bundle makes it an easy choice!
3️⃣ Attach the greeting to the card with a few dimensionals for a polished look. Embellish!

That’s it! This card is a breeze to assemble and perfect for making multiples—ideal for spreading holiday cheer far and wide.

Join the Fun!

This is just the beginning of my 12 Days of Christmas series! Every day, I’ll showcase a new project to inspire your holiday creativity, featuring tips, techniques, and must-have products. Whether you’re a seasoned crafter or just starting out, there’s something here for everyone.

Be sure to stop by tomorrow for Day 2, where I’ll share another festive idea to spark your imagination. Let’s make this Christmas extra special with handmade touches!

🎅 Happy Crafting,
Linda

Simple Elegance with the Changing Leaves Bundle

Hello Stampin’ Friends ~

First, let me welcome my NEW Subscribers; welcome to our creative community! I’m excited to have you …. and excited to share today’s card with all of you!! It’s simply stunning and so simple to recreate … let’s begin!

This project proves that sometimes, less is more, and simplicity can absolutely shine! Using a rich palette of Very Vanilla and Gold, this card exudes elegance and warmth—perfect for my “thank you” … the upcoming season or any occasion that calls for a touch of class.

The card starts with a classic A2 card base in Very Vanilla. The magic begins with a 4” x 5-1/4” piece of Very Vanilla cardstock embossed using the Changing Leaves Hybrid Embossing Folder. This will be attached directly to the base. If you haven’t used a hybrid folder before, you’re in for a treat! It’s called “hybrid” because it embosses and cuts images with the coordinating dies—such a clever and time-saving design.

To add dimension and interest, I die-cut some delicate leaves using the coordinating dies from the bundle. These layered onto the embossed background create a look that’s both understated and elegant. For the sentiment, I turned to the Changing Leaves Stamp Set. Everything in this bundle works seamlessly together—the stamps, the dies, and the embossing folder! Using VersaMark Ink, I stamped the sentiment onto Very Vanilla cardstock and heat-embossed it with our new Gold Embossing Powder. The metallic finish adds such a stunning and cohesive touch to the design.

The sentiment was die cut —you guessed it— using the coordinating die from the bundle! A few of the Woven Golden leaves and gold Opal Rounds were added around it to draw the eye and provide just the right amount of embellishment. I kept the card simple to let the embossed details and gold accents shine, proving that with the right tools, you can create something truly exquisite without spending hours at your craft table.

You can order the Changing Leaves Bundle directly from me—just click here to shop. And don’t forget to grab the Gold Embossing Powder while you’re at it! Remember, the “embossing folder” is included in the bundle. If you have any questions or need help placing your order, I’m always here to assist you. I’d love to see what you create with this bundle, so feel free to share your projects or tag me on social media.

Happy stamping, and remember: with the right tools, anything is possible!

Masculine Cards with the Trusty Toolbox Designer Paper

Hello Stampin’ Friends, 

Today, I’m thrilled to share a fabulous budget-friendly find and a creative project with a masculine twist! The Trusty Toolbox Designer Paper is now on sale in the Clearance Rack for just $5—talk about a steal! Masculine cards don’t always take center stage, but this collection of patterns makes it a breeze to create cards perfect for the men in your life.

Even at Christmas time—guys still have special occasions that deserve a personal touch; from birthdays to anniversaries, we can still create special cards to show our love.

Let’s dive into four amazing cards, created by me and the talented design team I’m part of, to inspire your next project. ….

Measurements:

  • Cardstock: Basic Black 8 ½” x 5 ½” Scored and folded at 4 ¼”
  • Cardstock 2:  Basic White: 5 ¼” x 4” (Inside) and scrap for greeting
  • Cardstock 3: Poppy Parade 5 ¼” x 4”
  • Designer Paper: Grid Design: 5” x 3 ¾” plus fussy cut 2 pencils / tape measure and cut strip of tape measure DSP
  • Vellum Cardstock: Scrap piece large enough to die cut postage die

Instructions:

  • Score and fold Black cardstock at 4 ¼” / Attach White cardstock to inside
  • Attach Grid design designer paper onto Poppy Parade and then attach to front of cardstock
  • Stamp greeting with Poppy Parade Ink  onto scrap white cardstock and fussy cut.  Attach it to strip of tape measure design and piece together using dimensionals.
  • After fussy cutting designer paper elements, attach them to tape measure designer paper with dimensionals (as shown on sample).
  • Die cut postage rectangle from Vellum Cardstock and secure with Stampin’ Seal  to left hand side of cardfront, leaving a nice border around the other 3 sides.
  • Remove backs from dimensionals and attach your assembly to cardfront over vellum.
  • Using hearts die from the Sending Love dies, die cut from Poppy Parade and attach with Glue Dots. 
  • Send the love 

This card, designed by one of my team members, uses the tools from the Designer Paper as a focal point. It’s a clever way to celebrate special occasions with a nod to precision and craftsmanship.

These trusty tools were fussy cut and arranged in an explosion of excitement to celebrate a birthday … how fun is this card!!

This last card is similar to mine but uses the coordinating stamps verses the designer paper like I used …. using the stamps and dies, you’ll always have it handy!!

At only $5, the Trusty Toolbox Designer Paper is a deal you don’t want to miss. Combine it with the stamp set and dies to create cards that are meaningful, masculine, and oh-so-memorable. Whether you’re crafting for birthdays, anniversaries, or even Christmas, this collection makes it easy to stay on budget while crafting beautiful cards.

Head to my online store now to snag these great deals and get started on your next masculine masterpiece. Don’t forget to share your creations—I’d love to see what you come up with!

Thanks for stopping by,

Just a Few More Retreat Highlights: Pillow Gifts & Special Moments

Hello Stampin’ Friends ~

Our Fall/Holiday Stamping Retreat was packed with fun, creativity, and festive surprises! One of my favorite parts of hosting these retreats is spoiling my guests with thoughtful pillow gifts. Each one is designed to bring a little extra joy and sparkle to their retreat experience—and this time was no different.

Friday night set the tone for a cozy, magical weekend. Guests were welcomed with a special holiday-themed mug, perfect for a warm drink at our Hot Cocoa Bar! Alongside the steaming cocoa, they indulged in delicious holiday treats and pralines—a sweet touch to enjoy after stamping, and just relaxing.

Saturday night’s gift was practical, elegant, and oh-so-fun! Each guest received one of my favorite tools—the versatile Paper Snips, tucked into a stunning royal blue velvet bag. To add a festive touch, we included a cute holiday necklace that doubles as a scissor holder. Now, they’ll never lose track of their snips while crafting! The velvet bag is a keeper, too—it’s perfect for jewelry, small keepsakes, or even as a thoughtful regift for someone special.
Our retreats are more than just crafting weekends—they’re opportunities to connect, laugh, and make lasting memories. It’s heartwarming to see returning guests catching up like old friends and new guests quickly becoming part of our retreat family.

If this sounds like your kind of getaway, make sure you’re on my mailing list! Invitations for my Spring Stamping Retreat—scheduled for the first weekend in May—will be sent out soon. You won’t want to miss it!
Here’s to creating, connecting, and escaping into the joy of stamping. 🖤

#stampingretreats #papercrafting #girlsweekend #craftinggetaway

Sharing One of my Favorites: Country Birdhouse

Hello Stampin’ Friends ~

I am so excited to share some great news with you today—our Stampin’ Up! Seasonal Sale has officially begun! This is an ideal time to stock up on essentials and splurge on a few new treats for yourself. Right before the holiday rush, you can shop for all the goodies you need for your projects (and maybe add a little something just for you)!

If you’re like me and can’t resist a good bundle, you’re in for a treat. Not only do bundles in the 2024-2025 Annual Catalog offer an incredible 10% discount every day, but during this sale, you’ll get an extra 10% off! That’s a full 20% off—a fantastic opportunity to snag that bundle you’ve been eyeing or gift yourself a creative boost.

One of my absolute favorite bundles this year is the Country Birdhouse. This bundle has been a joy to create with—it’s versatile, beautiful, and has endless possibilities for card-making. The stamp set features the birdhouse, flowers and beautiful sentiments, and the coordinating dies add that extra bit of polish and flair to any project. Here’s a look at a few cards I’ve made using this bundle that might just inspire you too:

Card 1: With soft, elegant tones and intricate layering, this card makes a beautiful choice for any occasion. The bird and flowers add such a lovely touch, making it perfect for sending warm wishes to someone special.

Card 2: I adore this one because it’s a bit more playful and colorful! Paired with the Country Woods Designer Series paper, it’s fun and versatile for birthdays or just a cheerful “hello” to brighten someone’s day.

Card 3: For those who love a touch of elegance, this card shows off the bundle’s potential for more formal designs. Paired with Moody Mauve and Pretty in Pink, it’s a stunning combination to say hello to a good friend.

What’s on Sale: Bundles, Designer Paper, Cardstock, and Select Ink Pads!

It’s not just bundles on sale; you’ll also find Designer Paper, Cardstock, and select Ink Pads at discounted prices. Whether you’re looking to add a touch of shimmer with new papers or keep your favorite colors in stock, this sale covers all the crafting essentials you need.

Why Wait? Shop Early and Beat the Black Friday Rush

Shopping early has its perks! You can avoid the Black Friday madness, get your supplies at a fantastic discount, and spend those holiday weekends actually crafting, not shopping. So go ahead and check a few things off your list for yourself or the crafters in your life.

The Sale Starts Today—Don’t Miss Out!

This Seasonal Sale only lasts until Friday at midnight, so hop over to the catalog and treat yourself to something special. With these discounts, there’s no better time to complete your collection or try something new. Whether you’re stocking up on basics or diving into a new bundle, I hope you find something to spark your creativity and make this season even more joyful.

Happy crafting, and happy savings!

Here’s a quick look with links to my Online Store ….

Sale: $37.13

Price: $41.25

Sale: $42.75

Price: $47.50

Sale: $49.28

Price: $54.75

Sale: $8.10

Price: $9.00

Sale: $9.00

Price: $10.00

Let’s Take a Peek into my Stamping Retreat

Hello Stampin’ Friends,

Welcome to a little peek into the joy-filled weekend we shared at our Fall Holiday Stamping Retreat! Last weekend was truly an escape into creativity, connection, and fun—a beautiful retreat filled with laughter, crafting, and the warmth of friendships both new and old. Picture yourself arriving at our charming English Tudor retreat home, welcomed at the door with open arms and a heartfelt greeting. We guide you to your room, where a specially crafted name tag awaits you, made just for you using the delicate Frozen Edges dies. If you take a look at page 50 in the catalog, you’ll spot where this inspiration came from. This was one of the bundles that played a starring role in one of our weekend stamping sessions, and it brought a touch of winter’s elegance to our retreat.

As you settle into your cozy room, you’ll notice a Welcome Gift waiting just for you, a little something special to start the weekend off right. And to aid in your crafting endeavors. It’s an adorable memento of our time together, a token of appreciation to carry home as a reminder of this getaway. This personal touch, just for you, is a cornerstone of what makes these retreats so memorable and meaningful.

As you move into the dining room, the warm glow of the space invites you further in. There, you’ll spot adorable gift boxes set at each place, a touch of holiday charm and creativity wrapped up just for you. The Book Treat Boxes, found on page 27 of the catalog, were assembled and lovingly decorated with the festive Sentimental Christmas Designer Paper. Each box was filled with small surprises, perfect for adding to the retreat’s joy and spirit… and a little inspiration to craft when they get home!

After settling in and enjoying a hearty dinner together, the excitement of our first stamping session begins. As everyone gathers, they’re met with a delightful surprise—a fun and festive Popcorn Bar filled with an assortment of sweet and salty treats! It’s the perfect way to add a little extra joy to the evening, letting everyone nibble as we dive into our creative projects and settle into the cozy atmosphere of the craft room. And speaking of adding … our guests always add to this table (it magically fills us with all sorts of special treats).

This retreat was even more special as I introduced Paper Pumpkin to our stamping session for the very first time. Attendees were thrilled to get hands-on experience with these kits, starting with a chance to capture photos of the original designs. I also shared some of my own alternative techniques and layouts, giving them a fresh perspective on how to get more out of their kits. Watching their excitement as they discovered new ways to craft unique cards was such a joy, and it was just one of the highlights of the retreat.

The energy in the room was contagious, and each participant left that evening feeling inspired and ready for more. These sessions are all about learning, sharing, and having fun, and I’m beyond grateful to create these experiences with such a wonderful group. If this sounds like the kind of weekend you’d love, I invite you to join us for our upcoming Spring Stamping Retreat from May 2nd through the 4th. It’s an experience you won’t want to miss—one full of warmth, laughter, and creativity, with friends old and new.

Make sure you get on my mailing list for the invitation!

Here is a comment I received from one of our guests today! Peggy K: Working on Christmas cards for our homebound church members. I got out my Home for the Holidays Paper Pumpkin kit and can get 19 beautiful alternate cards out of it plus the ones we made at retreat. Thanks for the inspiration!

Thanks for joining me, and I will be back to share more.

#stampingretreats #christmascards #papercrafting

HAPPY HALLOWEEN🎃👻

Hello Stampin’ Friends ~

Today I thought we’d take a look through some of our Halloween inspiration …

I’ve summoned not one, but four hauntingly amazing products to create this wickedly wonderful design: the Halloween Spells Designer Paper, the Playful Ghosts stamp set, the Halloween Memories stamp set, and the versatile Take a Bow Dies.

For this hauntingly cute card, we’re showcasing the eerie charm of the Halloween Memories Scrapbooking Kit and its oh-so-versatile two-tone cardstock. One side is the full-strength color, while the flip side is a lighter, spookier version—perfect for creating dimensional depth. I chose to use the “tearing” technique to give this card an extra ghostly touch by revealing the white core of the cardstock.

My pencil holders are a bewitching way to share the fun of Halloween without adding more sugar to the night. Created with the hauntingly beautiful Halloween Spells Designer Paper, these cute little pouches are a cinch to make. Whether you tuck in three Halloween-themed pencils or a ghoulishly delightful pen, these treats are sure to cast a spell on whoever receives them!

These cards have it all: spooky fun, creative techniques, and of course, lots of Halloween spirit. Whether you’re crafting for a party or just want to send a frightfully fun greeting, these projects are sure to cast a spell on your recipients!

Thanks for joining me today! Happy Halloween ~