Discover how easy it is to create my Sending Smiles Fun Fold card. Today I will be sharing a video of my replay from last nights Facebook LIVE. I’m also featuring the Delightfully Eclectic Designer paper that is currently on sale … Wooo Hooo!
OH… and we have FREE SHIPPING today only! Enjoy Free shipping and 15% off your Designer papers. I love it when we can combine these promotions.
Let’s take a look at our video …
DIMENSIONS:
Cardbase: 11″ x 4-1/4″ then Scored at 2-1/8″ and 5-1/2″
Basic White for Inside Card: 5-1/4″ x 4″
Basic White for (Diamond) Front Flap: 2-3/4″ x 2-3/4″
Colored Cardstock or Designer Paper for Front Flap: 2-1/2″ x 2-1/2″
Designer Paper for front (3-1/8″) & inside(2-1/4″): You can use 4″ x 5-1/2″ … just make sure your 3-1/8″ piece is on the front, then you can attach the remainder to the inside.
I hope this cutie inspires you to try this fun fold, it is pretty quick and easy to make and doesn’t require a lot of layers or designer paper so have fun!
Thanks so much for dropping in today for a visit … please feel free to leave a comment and let me know how you liked today’s fun fold.
Don’t forget the FREE SHIPPING today …. with qualifying order of $75 or more.
Today I will be sharing the second card that I showed in my video it also features the Delightfully Eclectic Designer paper but you can use any designer paper for this fun fold pattern.
DIMENSIONS:
Cardbase: 11″ x 4-1/4″ then Scored at 2-1/8″ and 5-1/2″
Basic White for Inside Card: 5-1/4″ x 4″
Basic White for (Diamond) Front Flap: 2-3/4″ x 2-3/4″
Colored Cardstock or Designer Paper for Front Flap: 2-1/2″ x 2-1/2″
Designer Paper for front (3-1/8″) & inside(2-1/4″): You can use 4″ x 5-1/2″ … just make sure your 3-1/8″ piece is on the front, then you can attach the remainder to the inside.
So are you ready to try this fun fold?? What designer paper are you going to use?
Thanks for stopping by today … I appreciate your visit.
Don’t forget the FREE SHIPPING today …. with qualifying order of $75 or more.
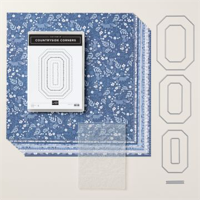
Today I’ll be sharing the replay of last nights Facebook LIVE, creating the Tent Fold Card with the Delightfully Eclectic designer paper. You’ll also see my original design using the Countryside Inn Designer paper. Both papers are on SALE until the end of June … I also have a “special” which includes 3 Free PDF’s (step by step instructions).
Let’s take a look at the Countryside Inn ….
Let’s take a look at the replay / video which explains the steps on how I created these cards. They look so pretty with the stamped Countryside Inn stamp and the designer papers ….
I also have the picture of the finished Tent Fold card with the Delightfully Eclectic designer paper. If you really love this paper, I’ll send you three PDF files with instructions for the two cards you were shown in the video, and then another surprise card!! Remember, orders must be made through me CLICK HERE and before the end of June so you can also get the awesome discount!!
Thank you for taking time out of your day to join me and watching the video. I hope you enjoyed it and that you were inspired to try making this fun Tent Fold card.
Today I’m sharing another Delightfully Eclectic Designer Series paper card, a Fun Fold, and yes … the Faux Step card again. I am hooked on this quick & easy fun fold. Ohhhh, wait to you see the pattern I picked for this card …
Those pretty pink posies and the stripes look great together and create a fun background. There are so many great patterns in this big bundle of designer paper, picking it up this month while it’s on sale is a smart move and a savings of almost $5.00
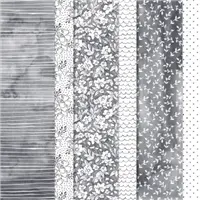
You can never have too much patterned paper. And with the Delightfully Eclectic 12″ x 12″ Designer Series Paper, you’ll always have plenty on hand. This extra-generous stack of paper has designs you can use for holidays, birthdays, seasons, and everyday use. Stripes, flowers, dots, grids, geometric designs—there’s a design for every project you want to make!
Side view ….
Card Base: 9″ x 4-1/4″ which is scored at 1-1/4″ … 2-1/2″ … and 5-3/4″.
Center step: 8-1/2″ x 2-1/4″ then score at 3″.
You need 3 pieces of designer paper; 4″ x 3″ … 4″ x 1″ (those will go on the base of the card). The 4″ x 1″ goes on the smallest panel to the front, then skip a panel, and then the 4″ x 3″ piece will go on the 3rd panel. The third measures 2″ x 5-1/4″ which goes on the step portion of your card.
If you have enjoyed this designer paper for the past two days, join me tonight when I share a couple of cuties using the Delightfully Eclectic designer paper on my Facebook LIVE tonight at 6:30 central time …. CLICK HERE to get onto my page. Then “Follow Me” so that you don’t miss out on any of the stampin’ action.
Thank you for hanging out with me today, and I hope to see you tonight.
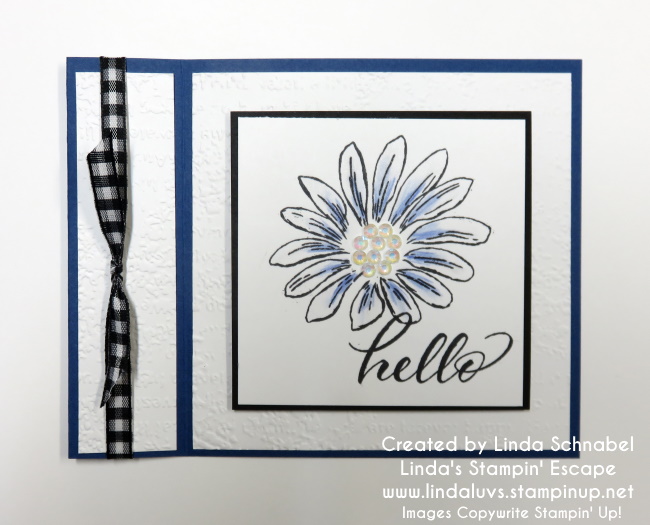
Happy Sunday! Today I have a fun fold for you with our “Cheerful Daisy” … perfect day for it today, it’s beautiful here in Wisconsin!!
I am repurposing some “cut” cardstock from my retreat (I always take a few extra … just in case) so I was on a mission to start using these up. This was one of our Fun Folds that we made, the “Book Binder” technique/fun fold. They are so simple to make and add a little fun to your card.
We begin with the card base; Starry Sky measuring 11″ x 4 1/4″ and then on the 11″ length; score at 4 – 1/4″ and 5 – 1/2″. Now you’ll fold your card in half on the 5 – 1/2″ score line, then fold the front flap “back over” … like you are opening the card but on the 4 – 1/4″ score line.
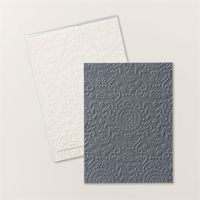
Now we are ready to add some cardstock and create the Binder effect …. You’ll need Basic White measuring 1″ x 4″ and 4″ x 4″ embossed with the Timeworn Type 3-D embossing folder. Once you’ve attached your textured pieces, you can add your bow. I’m using the Black & White Gingham ribbon using 2 pieces. Cut one piece at 6″ … add your adhesive to the “inside / back of that piece and secure your ribbon edges down.
Now, put adhesive on that area “between” the two score lines and secure it … this creates your “Book Binder” fold. Now you can slide the second piece of ribbon under your secure piece on front and tie. This creates a bow that will not fall off or slide around.
OK … We are ready for the focal point of our card ….
Our Basic White square measures 3″ x 3″ and we begin by stamping our “hello” first. I am using the beautiful Layering Leaves stamp set. I then stamped my large daisy … both are stamped with our Tuxedo Black Memento Ink.
Using the Night of Navy in the Assortment 2 Watercolor Pencils, I added a touch of color and then softened it by blending it with the Blender Pen. I finished it off by filling the center with the Iridescent Rhinestones (they are so versatile)!
That’s it! It really is so simple to make and the Book Binder fun fold adds a great touch to your card. Hope this inspired YOU to try out this Fun Fold. Until next time … Have a great day.
Thanks for stopping by today ~
Here is the list of supplies that I used to create today’s card. Just click on the image for more details and to add it to your stampin’ collection.
Today I’ll be sharing the Accordion Fun Fold from the replay VIDEO of last nights Facebook LIVE … You are going to love seeing all the cute swap cards from retreat and the one that inspired me to create the two cards I made for you.
I’m using the NEW Countryside Inn Designer Paper and dies from the suite. The greetings come from the Wonderful Thoughts stamp set. Grab a cup of coffee or your favorite beverage and join me for this short video … you’ll be amazed at how easy the Accordion Fold card is to make.
Dimensions:
Night of Navy Base: 5-1/2″ x 4-1/4″
Designer Paper: 12″ x 5-1/4″ Scored at 2″ – 5″ – and 8″
Basic White (Inside) 5″ x 3-3/4″
Plus you will need a piece of Night of Navy and Basic White to Die Cut your Greeting
Balmy Blue (Inside – 1st Flap) 5″ x 1-3/4″
I hope that I with the help of my video inspires you to grab some of that beautiful designer paper you have and try out this FUN FOLD card today. I’m adding the list of ingredients below, if you like what you saw (like that amazing sentiment set) you can click on that item and shop at my store … it will be sent directly to you.
Thank you so much for stopping by and checking out my video today.
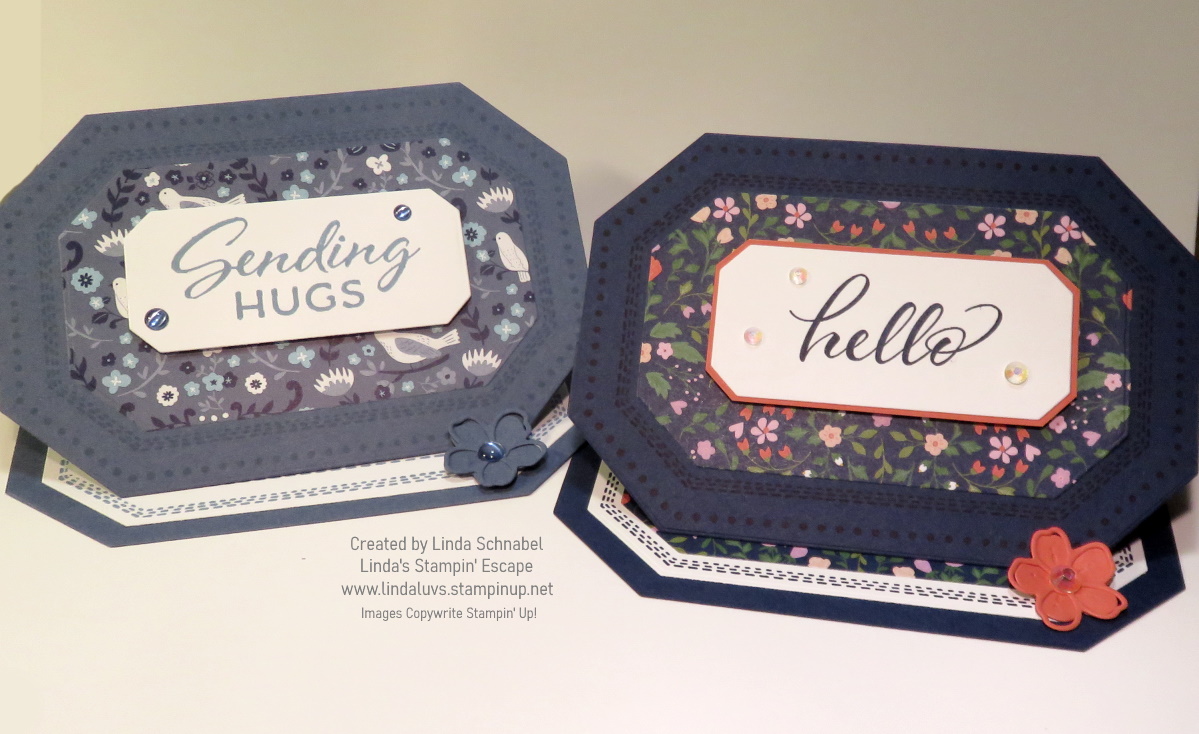
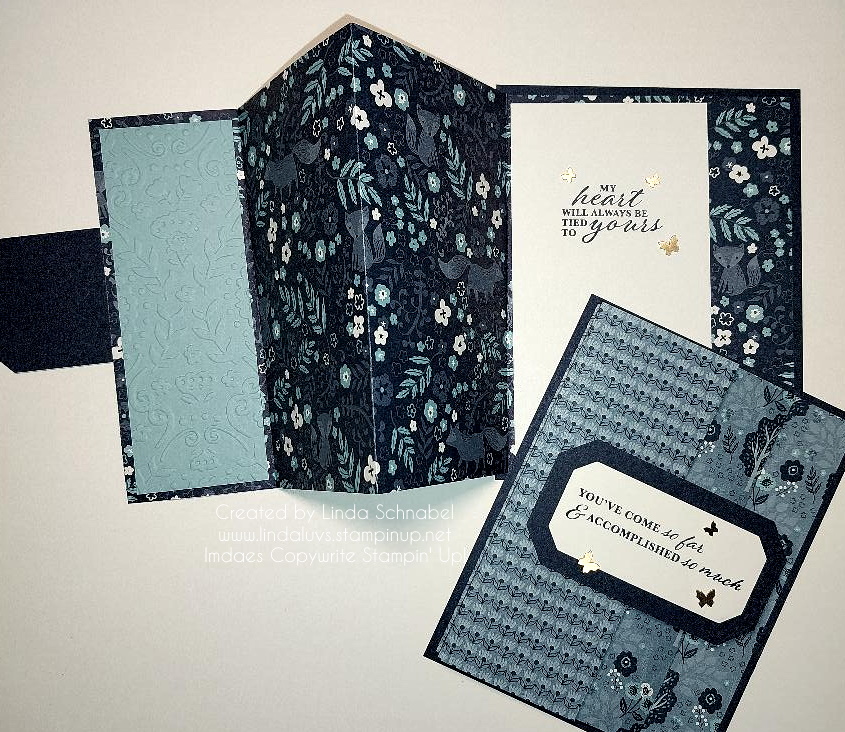
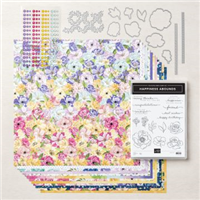
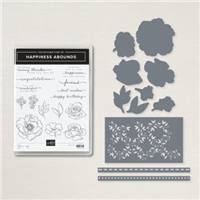
Here’s another beauty that will be retiring, the Happiness Abounds Bundle and the Hues of Happiness Designer paper… going to be hard to let this one go. Today I’d love to share this beautiful card with you that is enhance with the Accordion Z-Fold.
For my birthday card I used the Hues of Happiness Designer paper …
I began with my Night of Navy card base and the Hues of Happiness Designer Series Paper … You can see that I have used the coordinating dies to cut the floral pieces for the front. I will share measurement below so your can try out this car too.
Measurements: Card Base: (Night of Navy) 5-1/2″ x 11″ scored at 1-3/4″, 3-1/2″, 5-1/4″ and 7 on the 11″ side. Hues of Happiness and white embosses panels on accordion: 1-1/2″ x 5-1/4″, DSP on inside: 3-3/4″ x 5-1/4″, Folded mechanism: Night of Navy – 3″ x 6″ scored at 3″ on 6″ side and (3) White squares 2-3/4″ x 2-3/4″, Night of Navy mat for the white inside is cut 3″ square and will be placed onto the designer paper as shown. Use the alignment tip that I shared in yesterday’s video.
I used the Painted Texture embossing folder on the two white panels on the inside of the card. Greetings were stamped from the Happiness Abounds bundle in Night of Navy… and to complete my card, I added a few Iridescent Rhinestones. Who doesn’t love a little sparkle?
I hope you have time this weekend to play with these fun folds that I have shared in the past two days. Have fun and enjoy!!
Thanks for stopping by,
Here is a list of supplies used for today’s Fun Fold Accordion Z-Fold Card …
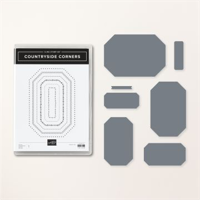
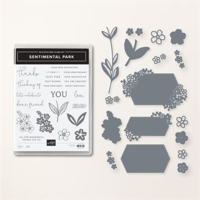
I’m thrilled to share the cards and the cutting pattern from my Facebook LIVE last night. I will share the replay with you which walks you through the cutting pattern, how to assemble and then finished cards created with the Sentimental Park Bundle. Plus you’ll learn a really cool way to use your Sentimental Park label dies.
Let’s watch the video first ….
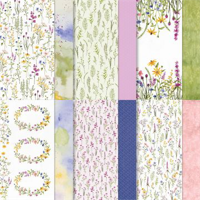
Pretty cool right? A special Thanks to LeAnne Greff for sharing her Designer Paper pattern with all of us. The Dandy Designs makes picking patterns pretty easy too, and the Sentimental Park bundle … is it on your Wish List now? I love sentiment stamp sets and the fact that we can create so many with this set is amazing, and I love dies that are not like all the rest.
Here is a “cheat sheet” so you can remember the cutting dimensions. Feel free to click on the image and download it so you can keep it in your files.
Between the video and the pattern, I hope you feel inspired enough to make some of these up yourself. I will share the rest of my color pallets with you the next few days but let’s get a better look at the ones I did last night …
On this card I only used 2 of the 4 patterns that I cut. I used the smaller of the two label dies with the flowers (it’s so cute) then I added the Fresh Freesia Opaque Adhesive Backed Gems and a swatch of the Fresh Freesia ribbon.
Next up is the cute flowers, you can use them separately, or layer them as I did …
I used the second smallest circle from the Stylish Shapes dies for my greeting on this card. Can you see the embossing on the flowers in the center… too cute.
Another card for you …..
This is the largest of the dies with the floral pieces on it. I also used the Opaque Adhesive-backed Gems on this card … they were right, but I used my Stampin’ Blends to color them so they popped on the die cut. I also added Wink of Stella to the flowers.
Now we’re going to use this die to cut a piece of Fresh Freesia ….
This one is special because we can tuck the solid die cut label and tuck it into the floral one … I flipped when I figured this out. Image this in whites, it would make a perfect wedding card. Add Gold and turn it into an anniversary card. The possibilities are endless … see why I fell in love with this amazing bundle!?
Love this cute cutting pattern, and trust me, you can use this pattern with any of your favorite designer papers. So I hope you go into your stamp room today and try it out. And if you fell in love with the Sentimental Park bundle, I have the link for you below … just click on it and you can have it in your stampin’ stash soon.
Thank you so much for hanging out with me today.
Have a beautiful day ~
The supplies I used to create today’s card is listed here ….
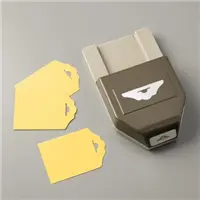
Today I’m going to show you what I did with the last piece of the Dainty Flowers designer paper to create the Perfect Gift Card Holder. Great for Birthdays, Graduations, Thank You’s and more. Isn’t this just the cutest?
You start with a half sheet of cardstock measuring 11″ x 8-1/2″ … score at 2″ and 5-1/2″. The 5-1/2″ score it to fold your card in half, the 2″ section gets a piece punched out of it and then it’s tucked under to create the pocket for your Gift Card. I used Tear & Tape Adhesive along the edges to secure it.
I used a piece of 5-1/4″ x 4″ piece of Dainty Flowers for the inside … the right side will be exposed when the card is closed. The Label Me Lovely Punched was used to punch the piece out of the pocket and for my sentiment.
I created an area for you to write in … the Basic White measures 3″ x 4″ and the Mango Melody mat is 3-1/8″ x 4-1/8″…. and you won’t be able to see it while the front is closed so your message is safe! lol
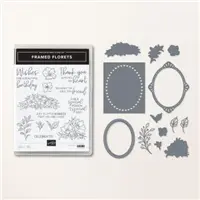
The front Mango Melody piece used to mat the designer paper measures3-3/8″ x 4-1/8″, making the Dainty Flowers designer paper 3-1/2″ x 4″. I used Framed Florets for my sentiment on the front and punched it with the Label Me Lovely punch. The Mango was punched and then cut in half and then adhered to the top half and bottom half (see the split on this back view).
Those pretty flowers sure can make an adorable card to wish someone a happy birthday and tuck a little something in there for them to treat themselves.
Thanks for stopping by today, I hope these sharing these cards with the beautiful Dainty Flowers Designer papers has inspired you pick a pack up for yourself.
Have a wonderful Monday ~
Here is a list of supplies used for today’s card …
So, how many of you tried the easy, breezy Basic Z-Fold Card I shared yesterday? Which of the three options did you try? Ready to step it up?? Today I’d love to share this beautiful card with you that is enhance with the Accordion Z-Fold.
For my birthday card I used the Hues of Happiness Designer paper …
I began with my Night of Navy card base and the Hues of Happiness Designer Series Paper … You can see that I have used the coordinating dies to cut the floral pieces for the front. I will share measurement below so your can try out this car too.
Measurements: Card Base: (Night of Navy) 5-1/2″ x 11″ scored at 1-3/4″, 3-1/2″, 5-1/4″ and 7 on the 11″ side. Hues of Happiness and white embosses panels on accordion: 1-1/2″ x 5-1/4″, DSP on inside: 3-3/4″ x 5-1/4″, Folded mechanism: Night of Navy – 3″ x 6″ scored at 3″ on 6″ side and (3) White squares 2-3/4″ x 2-3/4″, Night of Navy mat for the white inside is cut 3″ square and will be placed onto the designer paper as shown. Use the alignment tip that I shared in yesterday’s video.
I used the Painted Texture embossing folder on the two white panels on the inside of the card. Greetings were stamped from the Happiness Abounds bundle in Night of Navy… and to complete my card, I added a few Iridescent Rhinestones. Who doesn’t love a little sparkle?
I hope you have time this weekend to play with these fun folds that I have shared in the past two days. Have fun and enjoy!!
Thanks for stopping by,
Here is a list of supplies used for today’s Fun Fold Accordion Z-Fold Card …
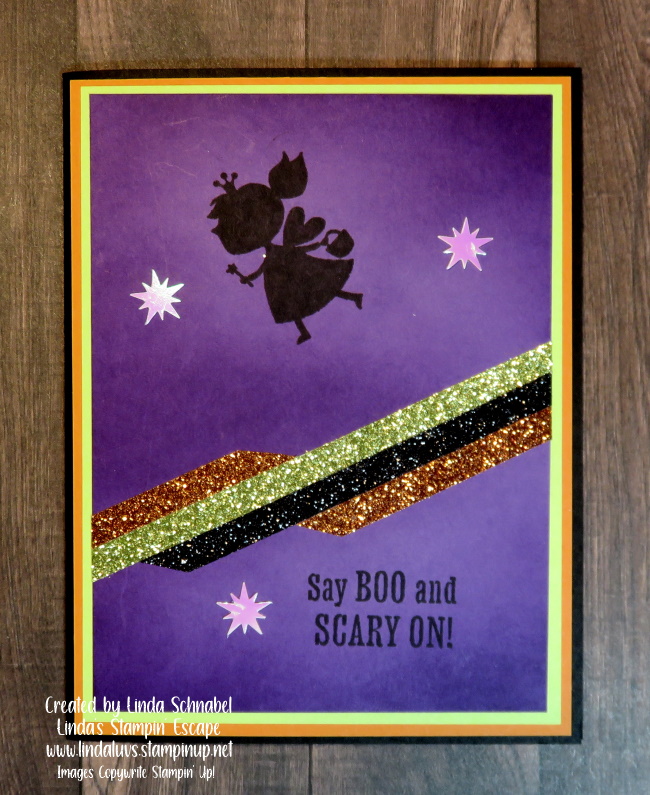
Today I have the replay of last nights Facebook LIVE presentation. I featured the Scary Cute bundle using the Corner Fold Fun Fold but with a twist. I’ll be showing you a different layout to this common fun fold then give you some ideas on how to use the dies.
Grab a coffee and sit back and relax while I show you this scary cute card ….
This fun fold is easy to do and as you’ve seen, you can either use the horizontal / landscape layout or the vertical / portrait style and any occasion works with this layout… so have fun! I absolutely love the different looks you can create with this bundle … a touch scary and a whole lot of cute.
I’ll start with today’s card and then share some of the cards I have presented before …
Halloween is only 8 weeks away so if I’ve inspired you with this bundle, I have added the links below for your shopping convenience. Thank you for taking the time to visit me today.
Stop back tomorrow to see the new promotions Stampin’ Up! has announced. BUT … Don’t forget that today is the last day to enjoy the Sale-a-bration FREE Products.
Have a good day ~
Here is my list of ingredients for today’s card ….
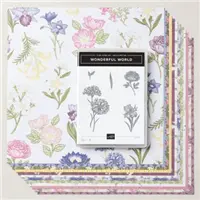
A Wonderful World … Celebrate the natural beauty found around the world with this stamp and paper bundle featuring prominent flowers from across the globe. The stamps and paper are designed to coordinate perfectly for handmade cards as beautiful as Mother Nature herself.
The Wonderful World Bundle includes the Wonderful World Stamp Set and the Wonderful World 12″ x 12″ (30.5 x 30.5 cm) Designer Series Paper. Let me show what a beautiful combination these two are together…
I’m teaming it up with the Corner Flip Fold … an easy Fun Fold that gives your card extra dimension and an additional pop of color by exposing the designer paper we are using on the inside…. Instead of trying to write down all of the instructions, I have created a video from my LIVE presentation during my Summer Sale-a-bration & Mini Catalog Celebration.
I hope that the video explains how to create the fun folds and shows how beautiful this bundle really is. I love the “Distinktive” stamps and how realistic they are…. those sponge daubers add color so nicely to the stamps as well.
Thank you for stopping over today and checking out my blog,
Here is a list of the products I used for my two cards shown in the video ….
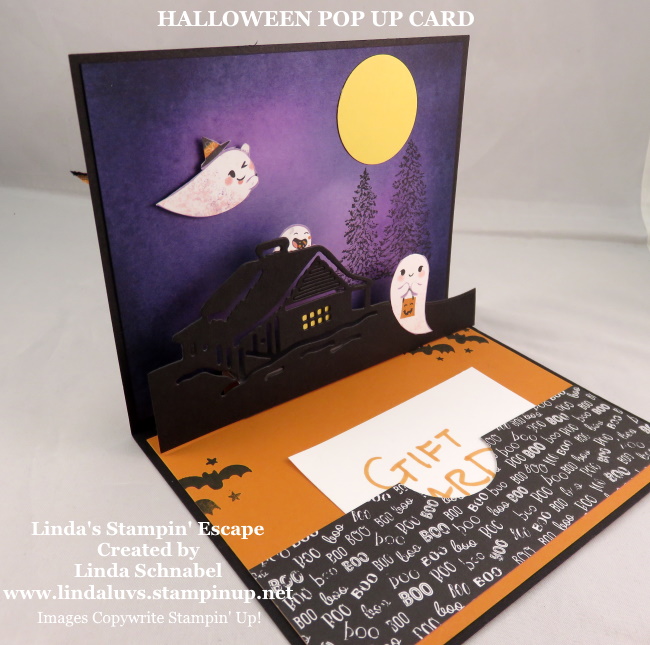
Enter if you Dare!! Today, I’m sharing the a Fun & Functional Halloween Card … The fun is the POP UP – inside the card a haunted cabin pops up to give you a 3-D effect complete with ghosts!! The functional is the my card serves as a “GIFT CARD” too!
Let’s start with the front of the card … I used the “Cute Halloween” Designer Series paper and Black & White Gingham Ribbon dyed with my Pumpkin Pie Stampin’ Blends Marker.
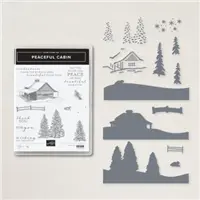
The inside of the card is created with the “Peaceful Cabin” bundle and the magic of our Blending Brushes … this is illustrated in the video below.
You’ll also see that I used another pattern of the Cute Halloween Designer Paper which creates the pocket you can put your Gift Card into.
In this photo, you will notice I “did not” line the back of my cabin as I showed in the video … I wanted you to see the difference. Here you can see the purples through the cabin … kind of spooky!
Enjoy the video and please let me know if you have any questions …
This fun card is very easy to make … three simple components, the front, the pop up & background and the base in which you can tuck in a Gift Card. Your ghouls and goblins are going to flip for this card!!
The dimensions for the “pop up” section of the card is 3″ by 2-1/4″ … score in 1/2″ incriminates: Score at 1/2″ – 1″ – 1-1/2″ and 2″ … then CUT at 2-1/4″. The 1/4″ edge will be your glue flap that secures the pop up together.
Here is the Fall Special I talked about in my video. Please message me if you have any question. Thank you!!
Thank you for stopping by and spending a part of your day with me. I hope the rest of your day is wonderful ~
TODAY’S STAMPIN’ SUPPLY LIST … If you liked the products used in todays projects, I have links for you below. Just click on the item you would like more information on, or to begin your shopping. It will take you directly to my website. Thank you ♥
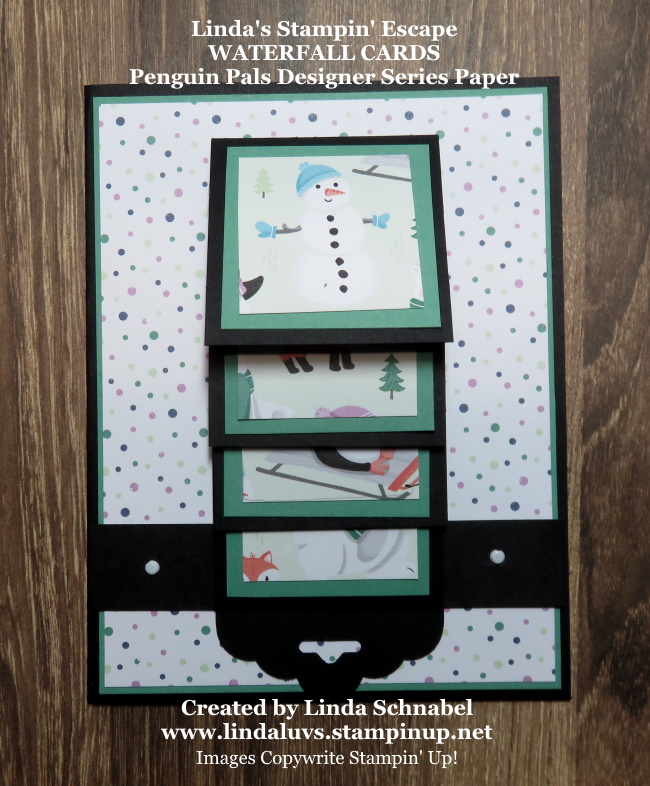
Today, I’m sharing the fabulous flippin’ Waterfall card with you … this fun is just that, FUN!! I have three cards and a short video for you today.
Let’s start with the first card I created using the Beautifully Penned Designer paper from our Sale-a-bration catalog (FREE with a $50 purchase / before Ship&Handling)
I gave the flowers a hint of color using my Flirty Flamingo ink pad and Sponge Daubers. I then went over the flowers with the Wink of Stella.
The second card was created with the Cute Halloween Designer paper … you can find this adorable paper in the Mini Catalog.
The background paper comes from the Pattern Party Designer paper which is one of our Hostess Gifts!! You’ll see in the video how I embellished the paper with a pop of color….
You will want to watch the video as it shows you how simple the cards are to create, and how budget friendly this layout truly is. I even talk about how you break down the costs.
Enjoy the video and please let me know if you have any questions …
The crucial dimensions you need for your Waterfall card is the Waterfall itself: 9-1/4″ x 2″ … Punch one end and flip to score other side: Score at 2″ … 2-3/4″ … 3-1/2″ and 4-1/4″. Then you will need your “band” which hold down the sliding part of your card: 4-1/4″ x 3/4″.
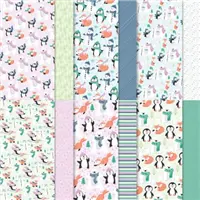
The last card that I shared in the video was the Christmas Card that I created using the Penguin Pals designer paper … another Sale-a-bration item!! I want to remind you that our Sale-a-bration promotion ends in about 2 weeks … wow, that time sure flew by!
Thank you for stopping by and spending a part of your day with me. I hope the rest of your day is wonderful ~
TODAY’S STAMPIN’ SUPPLY LIST … If you liked the products used in todays projects, I have links for you below. Just click on the item you would like more information on, or to begin your shopping. It will take you directly to my website. Thank you ♥
I’m back with more Pinwheel tower cards. I’ll be sharing the video replay of the Pinwheel Tower card again for our new viewers … it has the dimensions you need to create your own.
Let’s begin with the cute Pattern Party Designer paper with all it’s adorable patterns. In the video you heard me say that this has color on one side and black and white on the other, so….
For a pop of color, I did the Ombre technique using Bermuda Bay ink and my Blending Brush. I love how it turned out. I did “each side” as it lays flat the same … not intermingling the designer paper like I did on the other cards. So one side is Ombre and the other is ….
With some of the leftover Basic Black cardstock, I created a “pocket” to tuck in some money or a gift card into it!
Here are the dimensions for the Pinwheel Tower Card …
Tower: 4-1/4″ x 4-1/4″ … Score at 1″ – 2″ – 3″ and 4″ which leaves 1/4″ flap to secure the tower.
Cut 4 pieces of cardstock 4-1/4″ x 2-3/4″. These pieces will be attached to the tower.
Designer paper cut 4 @ 4″ x 2-1/2″ plus four slim pieces cut at 4″ x 1-1/2″.
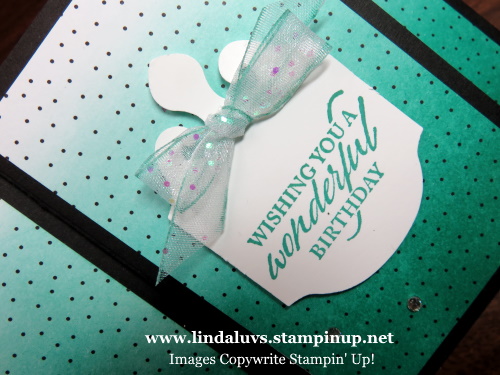
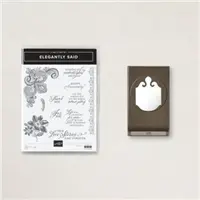
I used the Elegantly Said bundle for my greeting as I did on one of the other cards, and I dyed the edges of the Glitter Organdy Ribbon to coordinate and add a hint of color to the tag.
My next card highlights the stunning Expressions in Ink Designer Paper… The pattern was cut to flow around the entire card. I simply can not resist beautiful designer paper … it turns a “fun fold” card into something elegant …
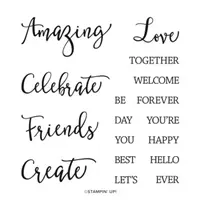
I used the Create with Friends stamp set and stamped my greeting in Evening Evergreen … I adorned the card with the 2021-23 In-Color Gems, also the Evening Evergreen.
STAMPIN’ TIP: You save designer paper when cutting a 12″ x 12″ at the 4″ dimension instead of the 4-1/4″ because the 4″ cuts equally and the other leaves leftover.
Here is the video
I hope you enjoyed these additional cards. Thank you for joining me today ….
Have a wonderful weekend!
Here is a list of supplies used to create today’s cards. You can click on any one of them to view the product and get more details. It will take you directly to my store so you may begin shopping for the items you need. Thank You ❤