Create a Splash with the Shutter Card Technique!

Hello Stampin’ Friends ~

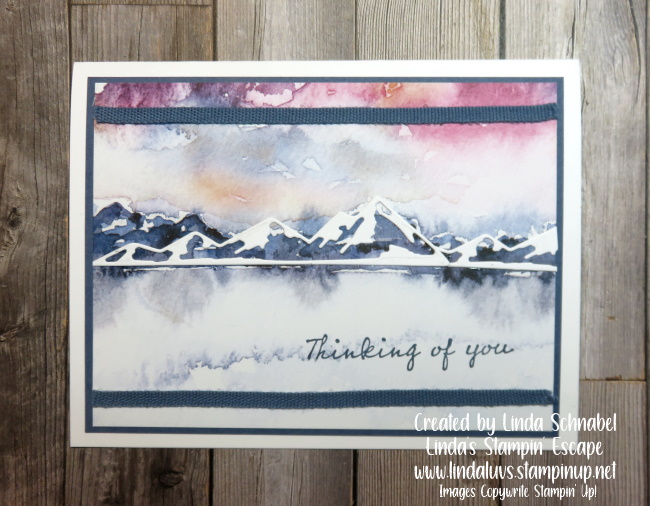
Today I’m sharing a great technique and “how” you can make it with ease. I’m sharing a video I created last year for my 12 weeks of Christmas, today’s card is a masculine version of this technique … to inspire you to try it with “any” occasion.

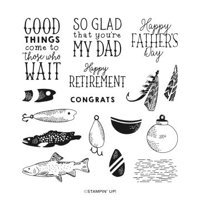
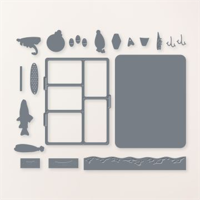
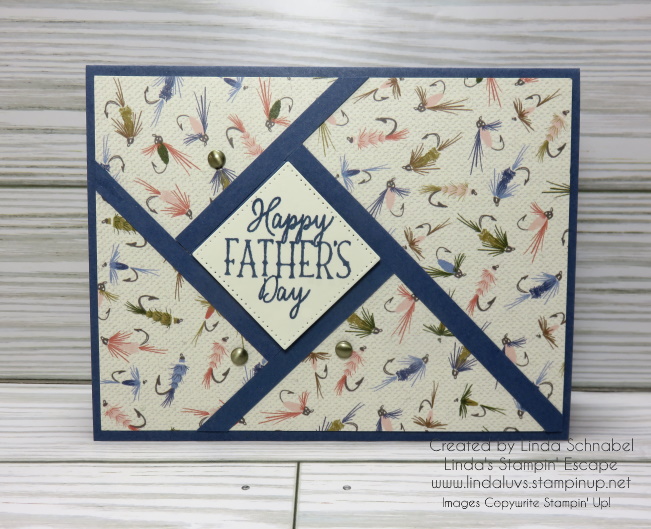
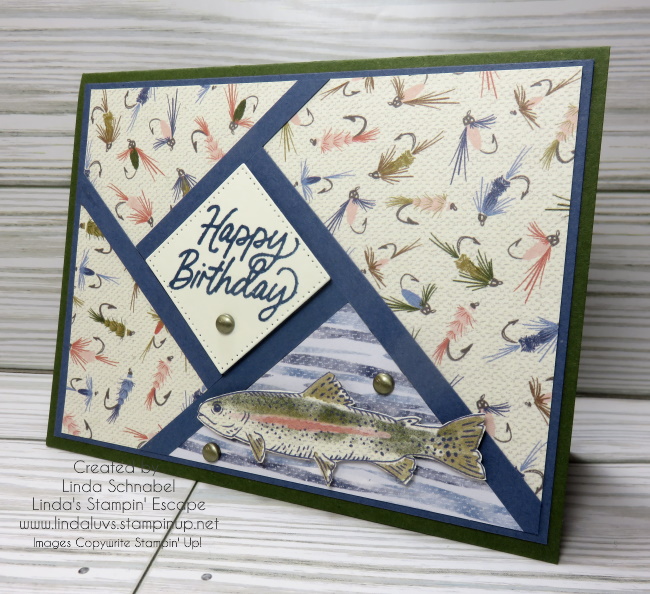
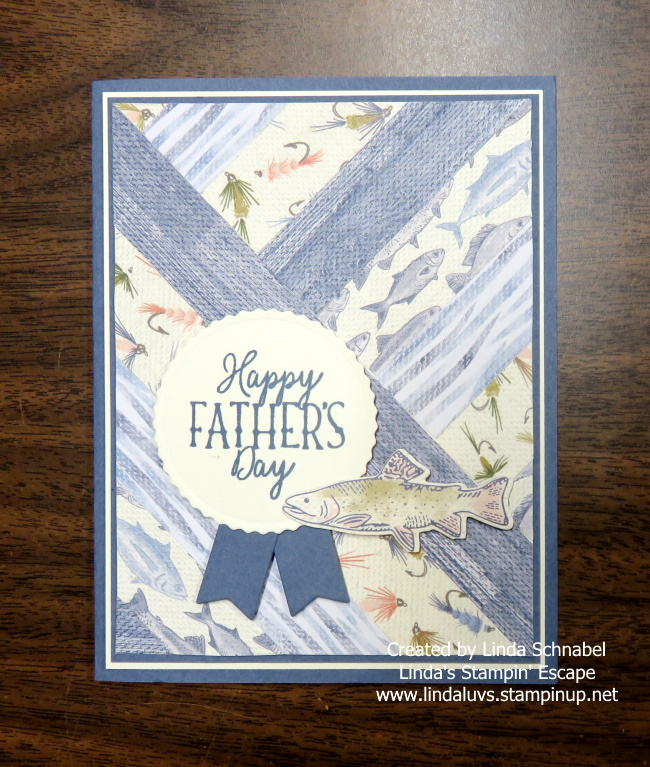
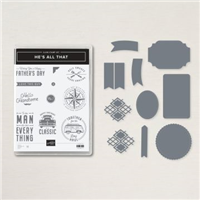
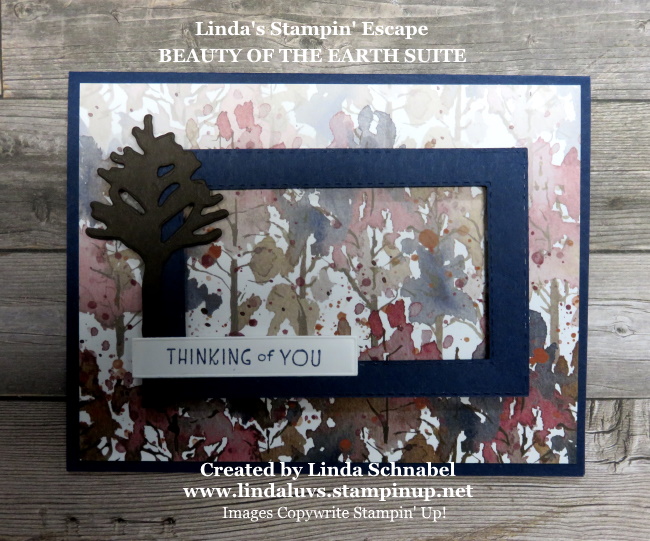
If you’re looking for a card design that will wow your friends and family, the Shutter Card is the perfect choice! Today, I’m sharing a recently created Shutter Card featuring the Gone Fishing stamp set and dies—perfect for the anglers in your life. Plus, I’ve included a video tutorial from last year’s 12 Weeks of Christmas series to guide you through the steps of creating this card. Trust me, you’ll be whipping these up in no time, and they’re even fun to adapt for Christmas themes!

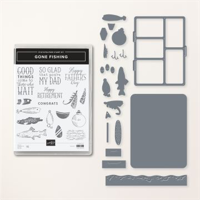
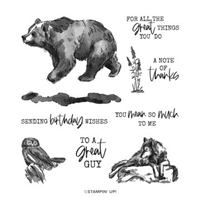
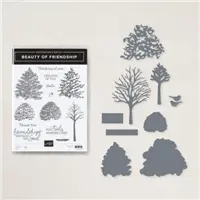
The Gone Fishing stamp set and coordinating dies bring the outdoors to life with their detailed images and versatile elements. For today’s card, I wanted to spotlight the playful bobber and intricate fishing flies. These pieces add dimension and charm, making the Shutter Card impressive to the “fisher person” in your family. The bobber, colored with Real Red and die cut from Basic White cardstock, is the perfect centerpiece to evoke memories of lazy days by the water. Meanwhile, the fishing flies are just the right touch to reel in some extra detail and make this card a real catch!

Whether you’re using the Gone Fishing suite or switching gears to create festive Christmas cards, this design is as versatile as it is fun. Check out the video for step-by-step guidance, and feel free to adapt the design with your favorite stamps and dies.

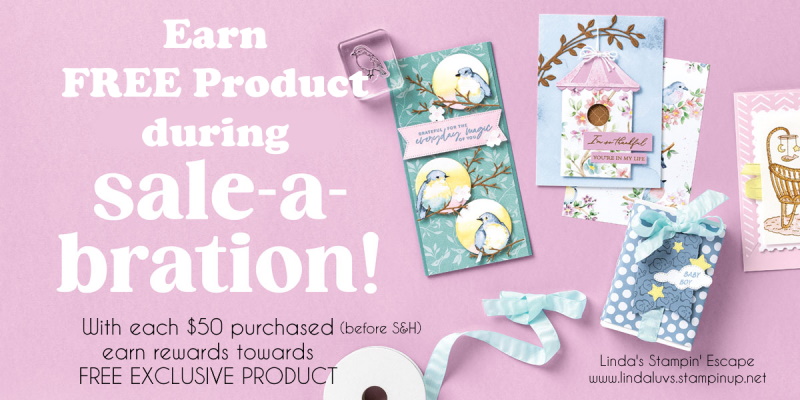
Great News —some of your favorite holiday crafting essentials shown in the video, including the Sparkling Snowflakes stamp set, Winter Meadow Designer Paper, and the Faceted Gems Trio Pack, are still available for purchase! Stock up while supplies last to keep your creativity sparkling all season long! ❄️

Whether you’re crafting for Christmas or creating the perfect card for the fishing enthusiast in your life, (or combined!) the Shutter Card is bound to leave a lasting impression! 🎣✨

Thank you for joining me today. Let me know how you like this technique in the comments below.

Masculine Cards with the Trusty Toolbox Designer Paper

Hello Stampin’ Friends, 

Today, I’m thrilled to share a fabulous budget-friendly find and a creative project with a masculine twist! The Trusty Toolbox Designer Paper is now on sale in the Clearance Rack for just $5—talk about a steal! Masculine cards don’t always take center stage, but this collection of patterns makes it a breeze to create cards perfect for the men in your life.

Even at Christmas time—guys still have special occasions that deserve a personal touch; from birthdays to anniversaries, we can still create special cards to show our love.

Let’s dive into four amazing cards, created by me and the talented design team I’m part of, to inspire your next project. ….

Measurements:

  • Cardstock: Basic Black 8 ½” x 5 ½” Scored and folded at 4 ¼”
  • Cardstock 2:  Basic White: 5 ¼” x 4” (Inside) and scrap for greeting
  • Cardstock 3: Poppy Parade 5 ¼” x 4”
  • Designer Paper: Grid Design: 5” x 3 ¾” plus fussy cut 2 pencils / tape measure and cut strip of tape measure DSP
  • Vellum Cardstock: Scrap piece large enough to die cut postage die

Instructions:

  • Score and fold Black cardstock at 4 ¼” / Attach White cardstock to inside
  • Attach Grid design designer paper onto Poppy Parade and then attach to front of cardstock
  • Stamp greeting with Poppy Parade Ink  onto scrap white cardstock and fussy cut.  Attach it to strip of tape measure design and piece together using dimensionals.
  • After fussy cutting designer paper elements, attach them to tape measure designer paper with dimensionals (as shown on sample).
  • Die cut postage rectangle from Vellum Cardstock and secure with Stampin’ Seal  to left hand side of cardfront, leaving a nice border around the other 3 sides.
  • Remove backs from dimensionals and attach your assembly to cardfront over vellum.
  • Using hearts die from the Sending Love dies, die cut from Poppy Parade and attach with Glue Dots. 
  • Send the love 

This card, designed by one of my team members, uses the tools from the Designer Paper as a focal point. It’s a clever way to celebrate special occasions with a nod to precision and craftsmanship.

These trusty tools were fussy cut and arranged in an explosion of excitement to celebrate a birthday … how fun is this card!!

This last card is similar to mine but uses the coordinating stamps verses the designer paper like I used …. using the stamps and dies, you’ll always have it handy!!

At only $5, the Trusty Toolbox Designer Paper is a deal you don’t want to miss. Combine it with the stamp set and dies to create cards that are meaningful, masculine, and oh-so-memorable. Whether you’re crafting for birthdays, anniversaries, or even Christmas, this collection makes it easy to stay on budget while crafting beautiful cards.

Head to my online store now to snag these great deals and get started on your next masculine masterpiece. Don’t forget to share your creations—I’d love to see what you come up with!

Thanks for stopping by,

Let’s Go Fishing Designer Paper: Two for Tuesday Inspiration

Hello Stampin’ Friends ~

Welcome back, crafters! Today, we’re diving into some creative card-making using the Let’s Go Fishing Designer Paper. While this specific paper may be sold out, fret not! We’ll explore two card designs that you can recreate using any pretty paper you have on hand.

Our first card features a simple layout paired with the mesmerizing Fractured Glass technique. This technique adds a unique dimension to your cards and is surprisingly easy to create.

You can view “HOW TO” make this card by “CLICKING HERE” and viewing my YouTube video sharing this technique.

For my second card, we’re going to elevate the design by incorporating a cut piece of designer paper into one of the fractured glass sections. This adds visual interest and complexity to the card while still maintaining the playful theme of Let’s Go Fishing.

This card also includes a bit more layering with a Misty Moonlight mat and Mossy Meadow card base. By incorporating a cut piece of designer paper into the fractured glass design, you’ve taken your card to the next level, creating a visually captivating masterpiece that is sure to make a splash!

While the Let’s Go Fishing Designer Paper may be currently sold out, the creative possibilities with any pretty paper are endless. Whether you’re experimenting with the Fractured Glass technique or adding designer paper accents to your cards, let your imagination run wild! I hope these Two for Tuesday card designs have inspired you to dust off your paper stash and create something beautiful.

Thanks for joining me & Happy crafting!

ATTENTION: If you haven’t already heard, the Retirement List is out, and it’s time to act fast! This list features retiring items from the Annual and Spring Mini Catalogs, including many beloved designer papers, that are being reduced in price before they’re gone for good. Just like the Let’s Go Fishing Designer Paper, these items won’t stick around forever, so don’t miss out on the opportunity to stock up on your favorites.

A Handcrafted Masculine Card in Green & Gold

Hello Stampin’ Friends ~

In this blog post, we’ll explore the creation of a stunning card using the Most Adored Specialty paper and incorporating the captivating “Ink Dragging Technique.” The result is a visually striking combination of Shaded Spruce and Gold, enhanced further by the use of Gold Foil sheets and a touch of sentiment from the “He’s All That” stamp set.

To begin, select the Most Adored Specialty Paper as the canvas for your card. To add depth and dimension, employ the Ink Dragging Technique using Shaded Spruce ink. The gentle strokes of color will create a captivating visual effect, giving the paper an alluring quality.

Next, I introduced the Gold Foil Sheet to complement the rich Shaded Spruce tones. Cut and layer the foil strategically / cutting diagonally allowing it to bring out the luxurious gold accents on the card. For a heartfelt touch, use the “He’s All That” stamp set to heat emboss your sentiment in gold. Once embossed, utilize the Heartfelt Hexagon Punch to give the sentiment a distinctive shape, adding a touch of sophistication to the card.

On The Flip Side:

When you turn over the Most Adored gold pattern it reveals a delightful surprise on the flip side. Against a backdrop of flirty flamingo, white floral hearts bloom, creating a charming contrast. This pretty design adds an element of playfulness to our overall card design. 

For the greeting, I used the “Sending Smiles” stamp set and coordinating Sending dies. Cut out the delicate elements and arrange them onto your card front. To accentuate the design, embellish with silver pearls from the Festive Pearls package. These pearls add a touch of elegance to our card.

Crafting a handmade greeting card is an art form that allows for the expression of creativity and thoughtfulness. By showcasing the allure of the Most Adored Specialty Paper, either card is sure to leave a lasting impression on its recipient.

Thanks for taking time out of your Sunday to check out my cards today.

Trusty Tools Bundle / Guest Stamper: Sheryl P.

Hello Stampin’ Friends,

In the world of card crafting, having the right tools at your disposal can make all the difference. Stampin’ Up! understands the needs of crafters and has introduced the Trusty Tools Bundle to cater to those looking for a versatile and reliable set of tools. What’s even better? With the purchase of this bundle, you can choose the Trusty Tools Designer Series paper for FREE during Sale-a-bration.

In this blog post, we’ll explore the benefits of the Trusty Tools Bundle, focusing on its versatility for crafting masculine cards, ease of use, and suitability for all occasions, including Father’s Day and expressing gratitude. All these cards are compliments of Sheryl P. She is in my card club and shared her samples with us, and now with you ….

One of the standout features of the Trusty Tools Bundle is its ability to help crafters create stunning masculine cards. Often, it can be challenging to find the right elements for cards that suit a more masculine aesthetic. The Trusty Tools Bundle solves this problem with its collection of stamps, dies, and accessories that are perfect for projects tailored to the men in your life. From rugged tools to timeless patterns, the Trusty Tools Designer Series paper complements the bundle, adding a touch of sophistication to your creations.

Crafting should be an enjoyable experience, and the Trusty Tools Bundle ensures just that with its user-friendly design. The stamps and dies included in the bundle are carefully crafted to provide clean and precise cuts, making it easy for both beginners and experienced crafters to achieve professional-looking results. The coordinating elements in the Trusty Tools Designer Series paper simplify the creative process, allowing you to focus on the joy of crafting rather than struggling with intricate details.

The Trusty Tools Bundle goes beyond being a one-trick pony – it’s a versatile set that covers a range of occasions. Whether you’re creating a Father’s Day card to express appreciation for that special dad in your life or crafting a thank-you card to convey gratitude, the Trusty Tools Bundle has you covered. The stamps feature sentiments that are perfect for a variety of occasions, ensuring that you can turn to this bundle for all your card-making needs.

Stampin’ Up!’s Trusty Tools Bundle is a game-changer for card makers and scrapbookers alike, offering a blend of versatility, ease of use, and suitability for various occasions. With the added bonus of the Trusty Tools Designer Series paper during Sale-a-bration, there has never been a better time to invest in this fantastic bundle. Elevate your card-making experience and let your creativity flourish with the Trusty Tools Bundle – a must-have for every crafter. 

Thank you for joining me this Sunday. Have a great day ~

Trusty Tools Masculine “Valentine” Card

Hello Stampin’ Friends, 

I’m so excited to share this adorable card with you today. I’m introducing the Trusty Tools Designer Series Paper – a crafting essential that adds a touch of creativity and charm to your projects! As part of the exclusive designer series, this paper is a must-have for any stamping enthusiast looking to elevate their creations. With its vibrant colors, intricate patterns, and high-quality design, the Trusty Tools DSP is sure to inspire your imagination.

I created this for my Tutorial Group I’m in ….

Measurements:

  • Cardstock: Basic Black 8 ½” x 5 ½” Scored and folded at 4 ¼”
  • Cardstock 2:  Basic White: 5 ¼” x 4” (Inside) and scrap for greeting
  • Cardstock 3: Poppy Parade 5 ¼” x 4”
  • Designer Paper: Grid Design: 5” x 3 ¾” plus fussy cut 2 pencils / tape measure and cut strip of tape measure DSP
  • Vellum Cardstock: Scrap piece large enough to die cut postage die

Instructions:

  • Score and fold Black cardstock at 4 ¼” / Attach White cardstock to inside
  • Attach Grid design designer paper onto Poppy Parade and then attach to front of cardstock
  • Stamp greeting with Poppy Parade Ink  onto scrap white cardstock and fussy cut.  Attach it to strip of tape measure design and piece together using dimensionals.
  • After fussy cutting designer paper elements, attach them to tape measure designer paper with dimensionals (as shown on sample).
  • Die cut postage rectangle from Vellum Cardstock and secure with Stampin’ Seal  to left hand side of cardfront, leaving a nice border around the other 3 sides.
  • Remove backs from dimensionals and attach your assembly to cardfront over vellum.
  • Using hearts die from the Sending Love dies, die cut from Poppy Parade and attach with Glue Dots. 
  • Send the love 

What makes it even more exciting is the opportunity to earn this fantastic paper for FREE with a qualifying purchase during Sale-a-bration! Imagine unlocking a world of artistic possibilities while enjoying the perks of complimentary crafting supplies. Don’t miss out on this limited-time offer – indulge your passion for crafting and let the Trusty Tools Designer Series Paper be the secret ingredient that takes your projects to the next level! 

Thanks for stopping by, have a superb Saturday!

Fun Background with Gone Fishing Bundle

Hello Stampin’ Friends ~

Today I have and cards for you showcasing a FUN Background using the Gone Fishing Bundle and the Lets Go Fishing Designer Series paper. You’ll see though watching the video how easy it is to create this fun background, along with some tips and I share my “discovery” of what other bundle works GREAT with the NEW Gone Fishing Bundle.

Let’s watch, then I’ll share the cards again with you …

So easy to make this fun background with scrap paper … and just think of all the different occasions you can create for!! The dimensions are in the video and I leave them up for a while so you can easily write them down as well.

This is the one that I create during the video … don’t forget, there is a coordinating die for that fish!! lol I have just fallen in love with this suite. Watch for more!!

Background is the same on this next card … a little different as far as paper strips but I used the dies from the “All That” dies to create an award ribbon to show Dad that he’s the best.

So … who is going to try this out? Or have you already. I do have another card with this pattern but with different designer paper .. WOW! It’s a whole different look. I will share that with you tomorrow.

Thank you for stopping in and sittin’ a spell. Enjoy your Wednesday!!

Creating Motion using Layers & the Greatest Journey Bundle

Hello Stampin’ Friends ~

I can’t wait for you to see this card, I absolutely love the way it turned out!! Today I have a video … the replay of my Facebook LIVE where I shared two cards the featured the Greatest Journey bundle. I will show you how to create “motion” by using several of the same dies and a slight change of color, then you will see a simple card with a fun pop of color made mostly of scraps!

Join me for a bit and watch the video, after which I will share any dimensions needed for our cards…

So … I didn’t actually start my kitchen on fire, but a little fire inside one of my pans, easily taken care of, but not the way one would like to start their day! lol OK … back to our cards. I wanted to create the appearance of motion with my card, and since there is no coordinating stamp, I could not do the dragging technique (which smears the ink and makes it look like it’s moving).

I thought the layering technique worked well ….

The great part of this is you are using up your scraps! Anything big enough to fit your images on. The colors for my layers are: Basic Black, Basic Grey, Smoky Slate, and Basic White … which is amazingly visible on the card. My Basic Black card base is the standard A2 size: 8-1/2″ x 5-1/2″ scored and folded at 4-1/4. The Basic White Front is 5-1/4″ x 4″. Keepin’ it easy.

The next card was just an easy pop of color and was also done mostly with scraps!

While I was preparing my photos for the blog, I realized that instead of die cutting my runners out of black … I could have die cut the image “out of” the color blocks and let the black show through! Another way to create dimension …. WOW! The possibilities never end.

The color blocks are die cut from the Stylish Shapes dies (as is the banner) the black mat behind it measures 3″ x 4-3/4″ and the Starry Sky piece is 3-1/4″ x 5″ … the Basic Black card base is the standard A2 size: 8-1/2″ x 5-1/2″ scored and folded at 4-1/4.

I hope you enjoyed today’s adventure into creating “motion” on your cards and give it a try. If you are interesting in purchasing this bundle, I have the links below.

Thank you. Have an adventurous day ~

Here is the list of supplies used for today’s cards ….

Simply Sunday: Wildlife Wonder Masculine Birthday Card

Hello Stampin’ Friends ~

Today I have another masculine card featuring the Wildlife Wonder stamp set, along with the dimensions and step by step instructions! Can’t get easier than that ❤

Measurements: 

  • Card Base: Thick Very Vanilla 5 ½” X 8 ½” score at 4 ¼”
  • Cardstock #2: Very Vanilla 3 ¾” X 5”
  • Cardstock #3: Early Espresso 3 7/8” X 5 1/8”
  • Cardstock #4: Very Vanilla 5/8” X 4”
  • Cardstock #5: Early Espresso ¾” X 4”

Instructions:

  • Score your card base and fold in half.
  • On the Very Vanilla cardstock #2 stamp your Bear with Ground images using Early Espresso ink.
  • Using the Simply Scored Scoring Tool score the outside edges at ¼” and ½”.
  • Using the Blending Brush and the Crumb Cake ink; apply ink around the outside edges.
  • Attach to the Early Espresso cardstock #3 and attach to your card front as shown.
  • On the strip of Very Vanilla cardstock #4 stamp your sentiment using Early Espresso ink.  Using your scissors trim the ends on an angle.
  • Attach to the Early Espresso cardstock #5 and trim the edge matching the angle.
  • Attach to your card front as shown.
  • Attach Rustic Metallic dots as shown.
  • On the inside stamp your bear image again in the bottom corner using Early Espresso ink.

Thank you for joining me today. Hope your day is a good one ~

Twelve Days of Christmas: Masculine Twisted Ribbon

Hello Stampin’ Friends ~

I little change of plans today. Instead of the final holiday project, I’ve decided to share a “Masculine” Twisted Ribbon technique. Readership has been going down with the 12 days so I thought you might find this more appealing.

This is one of the cards that we made at our December Stamp Club …

I used the He’s All That bundle and the He’s the Man Specialty Designer Series paper. This patterned paper is packed with bold patterns in neutral colors. Choose from antique cars, camping gear, suits and ties, and more. You’ll also find versatile patterns such as diamonds, stripes, and plaids. Mix and match the patterns with the coordinating die-cut images.

This papercrafting staple is great scrapbook paper, card making paper, and more! Ask your demonstrator about coordinating products.

I hope you enjoyed a different version of this fun technique. If you missed the video, you can see it HERE.

Here are the links to the products that I used in today’s card ….

New Horizons Trio of Cards!

Hello Stampin’ Friends ~

Today I will be sharing the two cards that I made during my Facebook Live last night, plus another card I created with the left over designer paper from the second card! I used the New Horizons suite … and highlighted how amazing the coordinating dies look with the designer paper.

Let’s start the fun off with the video …

Now that you watched the video, let’s get a close up of those cards. The first card begins with a 8-1/2″ x 5-1/2″ Basic White card base. The New Horizons Designer paper was cut to 5″ x 4-3/4″ with a Basic Black mat that was cut to 5-1/8″ x 4-7/8″.

It’s amazing what a little ribbon and a die cut can do for a card … and it’s so easy to make because the “work” is already done for you with this stunning designer paper. Stampin’ Up! gets two thumbs up from me … I LOVE this Suite!

My second card highlights the fence and grasses die … It really does look like an invitation to walk into the sunset, doesn’t it!?

The stamping of the background is an old technique but one I pull out quite a bit. It really does create a sense of depth and texture without adding any bulk to your card, we’ll save that for our dies

The third card is actually the other half of the designer paper from our second card, and I simple cut the 5″ x 3″ piece into equal 1″ strips. I would suggest to cut down the 5″ to 4-3/4″ as it would make a nicer border around your card instead of going almost to the bottom.

This card has a few more layers but it is not hard to do, let’s start with our base;

  • The Evening Evergreen Base: 8-1/2″ x 5-1/2″ then score at 4-1/4″ and fold
  • The Evening Evergreen Mat: 5-1/4″ x 4″ … Textured with the Hammered Metal Embossing Folder
  • Designer Paper: Three strips of 1″ x 4-3/4″ with a mat of Basic Black (3) 1-1/8″ x 4-7/8″

These are all layered directly on top of each other but if you wanted to add additional dimension to your card, you could secure the layers with Stampin’ Dimensionals and pop them up.

The greeting was stamped in black and punched with the Tailored Tag punch. A second punch was done with Basic Black so we could mat the greeting … this has been popped up with dimensionals and embellished with the Silver & Clear Epoxy elements. I then colored them with the Stampin’ Blends.

Don’t forget … Sale-a-bration is in full swing and you will receive a FREE Sale-a-bration item with the purchase of this suite … Add the Take Your Pick Tool, the Silicone mat… whatever you’d like and you’ll have enough for 2 FREE items or a Level 2 Sale-a-bration item. CLICK HERE TO VIEW CATALOG

Thank you for hanging out with me today, and I hope you are just as excited as I am for this new suite, and that I’ve inspired you to get back in your stamp room! Have fun 🙂

Have a wonderful day ~

TODAY’S STAMPIN’ SUPPLY LIST … If you liked the products used in today’s projects, I have links for you below. Just click on the item you would like more information on, or to begin your shopping. It will take you directly to my website. Thank you ❤

Thinking of You Card

Hello Stampin’ Friends ~

Today, we’re going back to nature with the Beauty of Friendship bundle. This is one of my favorites because it is so versatile for any occasion, male or female … the possibilities are endless!

The beautiful color pallet and thick borders just seem to be a bit more masculine than what I’ve been sharing lately. I simply followed the colors in the beautiful Beauty of the Earth Designer Series paper. Let me share some information with you …

Card Dimensions ….

  • Night of Navy Card base is cut 4 1/4″ x 11″ and scored at 5 1/2″.
  • Beauty of the Earth Designer Paper is cut 5 1/4″ x 4″. 
  • Night of Navy for the die cut frame
  • Early Espresso for the die cut tree

I used the 3rd and 5th dies from the Stitched Rectangle dies (I count from the center of the dies to the outside. Align them carefully by centering the smaller one inside the larger die, this will ensure your frame has equal sides.

While you are die cutting, use the small tree from the Beauty of Friendship bundle. The tree will be attached to the frame with our Glue Dots …

I used a greeting from the Inspired Thoughts stamp set. Because the “Thinking of You” stamp has more to the greeting, I used my Stampin’ Write Marker to color only the part of the verse I wanted and then die cut it with the rectangle die included in the Beauty of Friendship bundle.

I used glue dots to attach the greeting over the tree and slightly touching the frame. Then I used the Foam Adhesive Strips to the entire frame and attached it to the front of my card.

I really like the way the frame highlights this beautiful paper, yet allows the tree and greeting to stand out as well. I guess I would end up saying this could be a gender neutral card!!

Thank you for checking out my blog post today. Hope your day is a good one.

TODAY’S STAMPIN’ SUPPLY LIST … If you liked the products used in todays projects, I have links for you below. Just click on the item you would like more information on, or to begin your shopping. It will take you directly to my website. Thank you 

Thinking of You: Masculine Card

Hello Stampin’ Friends ~

Hope you all had a Happy Fourth of July weekend! For some … you have off of work as well (Me … I’m back at work in the candy store). The past two days I’ve shared some “pretty” cards, perfect for your bestie, sister, Mom or daughter …

Today, we’re going back to nature with the Beauty of Friendship bundle, now don’t get me wrong when I call this a masculine card, I know a few ladies who would LOVE this card …

The beautiful color pallet and thick borders just seem to be a bit more masculine than what I’ve been sharing lately. I simply followed the colors in the beautiful Beauty of the Earth Designer Series paper, and yes, this one is on sale too!! Let me share some information with you …

Card Dimensions ….

  • Night of Navy Card base is cut 4 1/4″ x 11″ and scored at 5 1/2″.
  • Beauty of the Earth Designer Paper is cut 5 1/4″ x 4″. 
  • Night of Navy for the die cut frame
  • Early Espresso for the die cut tree

I used the 3rd and 5th dies from the Stitched Rectangle dies (I count from the center of the dies to the outside. Align them carefully by centering the smaller one inside the larger die, this will ensure your frame has equal sides.

While you are die cutting, use the small tree from the Beauty of Friendship bundle. The tree will be attached to the frame with our Glue Dots …

I used a greeting from the Inspired Thoughts stamp set. Because the “Thinking of You” stamp has more to the greeting, I used my Stampin’ Write Marker to color only the part of the verse I wanted and then die cut it with the rectangle die included in the Beauty of Friendship bundle.

I used glue dots to attach the greeting over the tree and slightly touching the frame. Then I used the Foam Adhesive Strips to the entire frame and attached it to the front of my card.

I really like the way the frame highlights this beautiful paper, yet allows the tree and greeting to stand out as well. I guess I would end up saying this could be a gender neutral card!!

Thank you for checking out my blog post today. Hope your day is a good one.

TODAY’S STAMPIN’ SUPPLY LIST … If you liked the products used in todays projects, I have links for you below. Just click on the item you would like more information on, or to begin your shopping. It will take you directly to my website. Thank you 

Masculine Cards: Fathers Day & Birthday

Hello Stampin’ Friends ~

With Father’s Day creeping up on us quickly, I though it would me nice to share some cards created from the Well Suited Suite which can be found on page 66 and 67 of the Mini Catalog.

The suite includes the Handsomely Suited Stamp set, Suite & Ties Dies … both carried over to the Annual Catalog, and the Well Suited Designer Paper and the Well Suited Twine … both retiring!

Today we are going to begin just using simply; stamps * ink * paper! Isn’t this how the whole “stamping” thing got started? My color pallet will be Night of Navy, Merry Merlot and Basic White … masculine. I started with my base in Night of Navy and my mat in Merry Merlot and my Basic White to stamp on, and I choose the ties!

The greeting was stamped on a piece of scrap that I had lying around and fit it well, and then I added some Night of Navy to mat the greeting.

Next up, I thought I would use the ties again, however I’m introducing the Well Suited Designer Paper and the Suite & Ties Dies …

First, I used a simple yet masculine design from the Well Suited Designer Series paper as my background, and then using 3 other patterns of designer paper … I cut out my ties with the coordinating tie dies! It’s so much fun pick patterns and make your own ties! I felt like I could sew again … LOL!!!

Next up … I’m going all out, it’s time to introduce “A Sharp Dressed Man”!! I picked out two patterns from the Well Suited Designer Series Paper; one that reminded me of tweed and the other is paisley! That is how I started …

Your card base begins as any other; 8-1/2″ x 11″ and scored at 5-1/2″ … fold in half and your ready to dress your card. I took the “tweed” pattern paper and with the coordinating dies, cut out the suit. You get the suit and lapels.

The shirt consists of the White card base and the die cut collar … it is so easy to create. HOWEVER, before you adhere down the suit, you need tuck the tie under the collar and and suit. I just love that paisley tie!! You could add a pocket, buttons and more to dress up your card, the dies have them all.

This will be your last chance to purchase the suite as it retires at the end of the month, so the “bundle” with 10% saving … the Designer paper … and Bakers Twine will be gone. Let me know if you have any questions, and thank you for hanging out with me today.

TODAY’S STAMPIN’ SUPPLY LIST … If you liked the products used in today’s projects, I have links for you below. Just click on the item you would like more information on, or to begin your shopping. It will take you directly to my website. Thank you

Gear Up for Retiring Stamps …

Hello Stampin’ Friends ~

I hope you are enjoying your week so far. I’ve been busy having fun planning and creating more cards for my upcoming stamping events; the Retirement Party and then in May, the New Catalog Launch Party. First, lets talk retiring products, and today I have a masculine card to share …

Our masculine card today is designed from the Geared Up Garage stamp set and Garage Gear dies. Not only is it a great masculine card but it’s an “Easel” Fold card. The color pallet is simple: Real Red, Basic Black and Silver… oh yes, and a little Whisper White.

The amazing Garage Gear dies not only cut out the gears but emboss them so they have detail and texture which really jazzes up the card. Everything you need to start working on your cars are included in this duo.

Let’s take a look at another card. This is a fun “guy” card … the background was created with the stamps included in the set and really look like a stained garage floor!!

The greeting comes from the Geared Up Garage stamp set and was punched with the Tailored Tag Punch. I punched a second piece out and cut it in half so I could create a mat.

The silver strips were scrap pieces I used to highlight my greeting and my car … nice masculine card, or a girl who is into nice cars! Love me a classic.

I hope you enjoyed today’s masculine card using the Easel Fold. Now for the some fun upcoming events ….

Thanks so much for hanging out with me today. I appreciate the company!

Have a wonderful day ~

TODAY’S STAMPIN’ SUPPLY LIST … If you liked the products used in today’s projects, I have links for you below. Just click on the item you would like more information on, or to begin your shopping. It will take you directly to my website. Thank you