Sweet, Sweet Candy …

Hello Stampin’ Friends ~

Happy Weekend to you! Many of you know besides being a Stampin’ Up! demonstrator, a blogger, Mom of 3, grandma of 11 and great-grandma of one … I also manage the candy store in my hometown.

So, what do you think I thought of when I say that little candy stamp in this months Paper Pumpkin kit?

Yep … a sweet but simple card featuring the candy! I used it to create the background …

000_2600

I wanted plenty of color so I chose the Daffodil Delight, Crisp Cucumber, Watermelon Wonder and Wisteria Wonder and stamped that little candy stamp all over!

Then I chose the “You’re So Sweet” as my greeting and stamped it in Watermelon… that is when I decided to create a banner to highlight the greeting. For a bit more pop of color I added the Daffodil Delight and Crisp Cucumber behind it. (Subliminal message: Green and Gold)

The entire card front was matted with the Watermelon Wonder to make the greeting stand out and then that was layered onto the Whisper White background.

000_2602

Cute & fun card for any occasion … birthday, sweet sixteen or just because!

Thank you for joining me today ~

I hope your day is filled with fun and lots of color!

blog-closing-small

TODAY’S STAMPIN’ SUPPLY LIST …


Simply Sunday: Silent Night

Hello Stampin’ Friends ~

Today I’d like to share with you a simply beautiful card that I did at with my technique clubs this month. We focused on the “Woodland” embossing folder and some fun techniques that you can use with them to create a “WOW” card.

I paired up the Woodland folder with the beautiful “Wonderland” and “Happy Scenes” stamp sets…

000_2568

To create this beautiful card, you simply stamp directly onto the Woodland embossing folder with the pines from the Wonderland stamp set. Be sure you stamp on the “raised” side of the folder (the trees will be recessed on the side you stamp on).

Silent Night is stamped on vellum in Mossy Meadow and tucked behind your embossed front … I also used Mossy Meadow to mat the front and highlight the beautiful color.

000_2571

For the inside of the card, we stamped the trees from “Happy Scenes” into the corner and the verse from “Wonderland” into the center. I love how many of the stamp sets from Stampin’ Up! coordinate together.

Hope you enjoyed my card …

000_2568

 and I hope you have a beautiful day!

Thanks for stopping by ~

blog-closing-small

TODAY’S STAMPIN’ SUPPLY LIST …


Death by Chocolate!

Hello Stampin’ Friends,

Death by Chocolate!?  If we have to go … what a way to go! I simply could not resist sharing another treat bad with you. I am again using the “Happy Haunting” Designer Series paper in yet another pattern… Plaid!! Plus it has a cute polka dot pattern on the other side so it worked perfect for my treat bag.

000_2565

This treat bag went together … 1 – 2 – 3! Once the bag was secured with my Fast Fuse, I simply popped on one of our “Spider Web Doilies” … they are soooo cute!

I then grabbed my greeting from the “Sweet Hauntings” stamp set and with the use of my markers I decided I only wanted the words and not the frame around it… this way I could punch them out (which I did) with the 1-3/4″ circle punch and place it nicely into the center of my doily!

Last but definitely not least … I grabbed a Sharpie™ and colored my Rhinestones to match my designer paper and greeting.  I love it when everything matches … lol. Then used my dimensionals to adhere my greeting and give the bag even more dimension.

000_2562

I can’t wait to stuff it with candy! And if you take a walk on Main Street in West Bend, Wisconsin you will see this cute little treat bag, along with some other stamped projects in the Candyman on Main’s Halloween window display. I should have that done by the end of the month!

I thank you for stopping by, it was so sweet of you!

Have a delightful day!

blog-closing-small

TODAY’S STAMPIN’ SUPPLY LIST …


More Treat Bag Fun for You!

Hello Stampin’ Friends ~

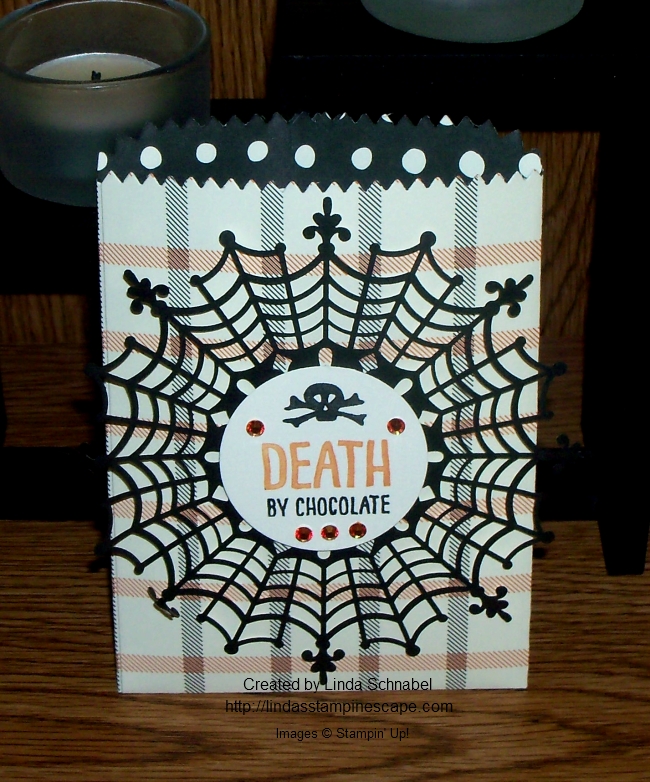
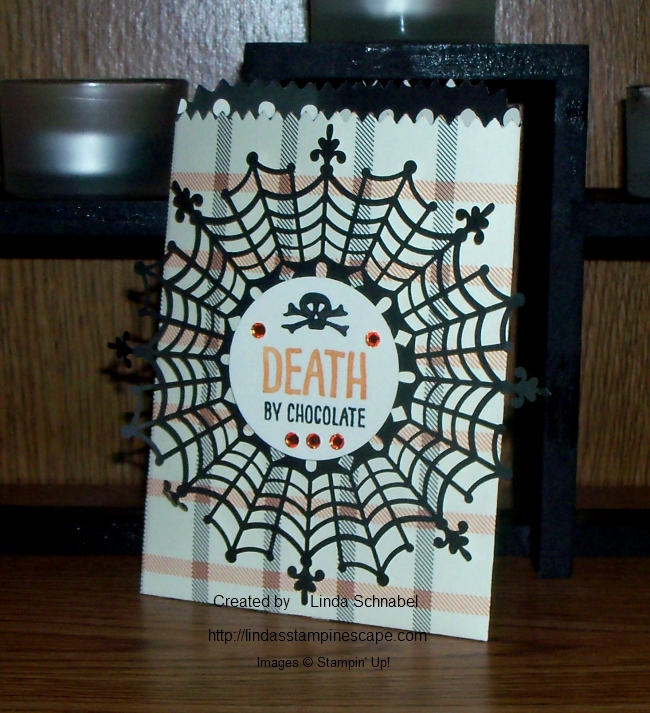
As promised, today I have a treat bag with a window! Let’s have a little fun here today … I’m using the  Treat Bag Thinlit and Happy Haunting Designer paper. I’ve chosen a different pattern of paper today so I can show you that this is not just for Halloween.

For those of you who know me well, you know I love Star’s!! Here they are in full force, and to top it off … our thinlit die has a star in it too! I used it to cut out my window and make another star to bring in the orange color from the inside of the bag (reverse side of paper).

000_2556

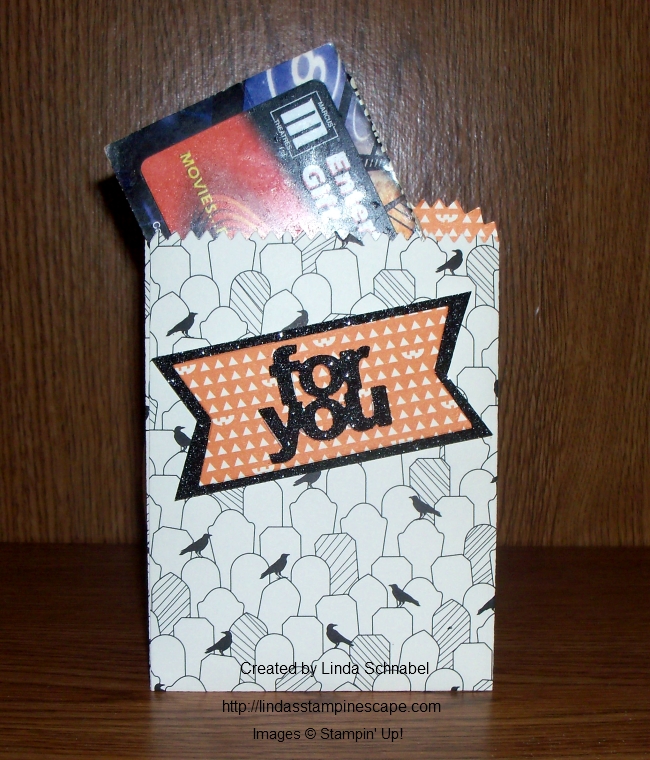
You simply place the star or other shape that you would like to use to create a window in the center of the largest die. If you want to fill your treat bag with smaller goodies, simply adhere a window sheet inside before assembling your treat bag. (Too hard to do once it’s all put together).

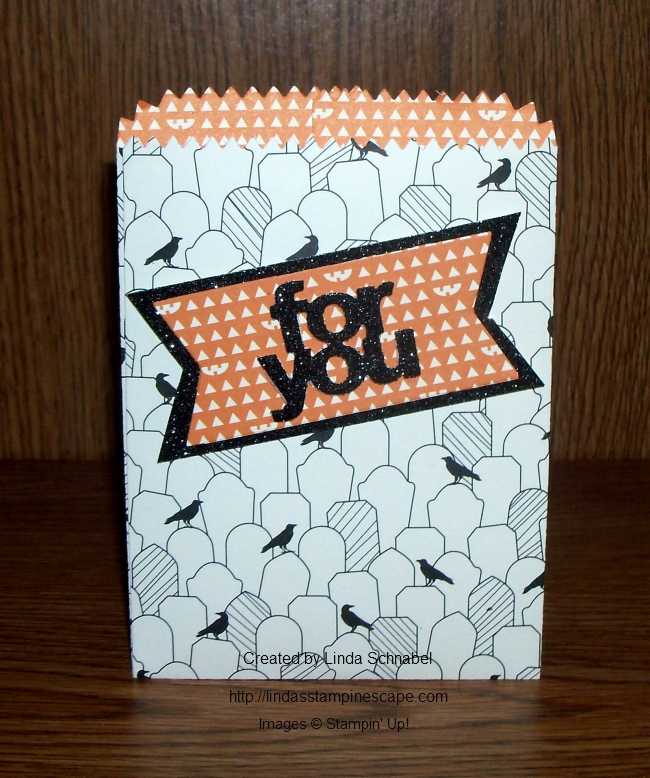
So … if you want to treat someone that “rocks” with a fun little gift, what would you give them? Why “POP ROCKS” of course.  So clever (or fun) … Pop Rocks + Star paper = Rock Star!

000_2560

What a quick and simple way to brighten someones day! Hope you enjoyed!


I also have something special to share with you …

BCRF_Demo_Header_0915

To show our support for Breast Cancer Awareness Month, Stampin’ UP! is going PINK . . . or at least our October Paper Pumpkin boxes are! And because we know our subscribers want to share the love too, Stampin’ Up! will be making a donation on our subscribers behalf to the Breast Cancer Research Foundation (BCRF).

Stampin’ Up! will donate

  • $1 for every active Paper Pumpkin subscriber.
  • Plus, an additional $1 for every new subscriber.

Together, we will make a difference!

Here’s how you can help:

  1. Subscribe! If you’re new to Paper Pumpkin, click here to get started. Your first kit will arrive in a limited-edition pink box that you’ll want to hold onto forever-and we’ll donate $2 because you’re new!
  2. Stay active if you’re a subscriber so we can donate $1 for you. Only those who receive the October shipment will be counted for the donation.
  3. Spread the word! Help us get as many new subscribers as possible. Every current subscriber adds $1 and for new subscribers it’s doubled, so let’s get the word out and raise as much as possible.

The Breast Cancer Research Foundation (BCRF) advances the world’s most promising research to eradicate breast cancer. Founded by Evelyn H. Lauder in 1993, BCRF has raised more than $550 million to fuel discoveries in tumor biology, genetics, prevention, treatment, survivorship and metastasis, making it one of the largest non-governmental funders of breast cancer research in the world.  For more information, please visit: www.bcrfcure.org.

Thank you for visiting with me today.

blog-closing-small

TODAY’S STAMPIN’ SUPPLY LIST …


Halloween Treats For You!

Hello Stampin’ Friends,

Today I made you a cute little treat bag from the Mini Treat Bag Thinlits that are currently on Sale during our Weekly Deals (ends Monday).

With Halloween just around the corner, I thought it would be fun to team up the Treat Bag Thinlits Dies with the Happy Haunting Designer Series Paper and the beautiful Black Glimmer paper! When cutting out your bag … you want to make sure the pattern is going in the same direction. Easiest way is to keep the “zigzag or pinking” edge up when placing your dies onto the paper.

000_2552

Don’t you think this designer paper is cute? If you look closely … you will see that those crows are actually sitting on gravestones! And the other side of this paper? Well take another close look … you will see little jack-o-lantern faces! Too cute.

137547G

I cut the banner (which is included with the dies) out of the left over piece of designer paper. The “For You” (also included) I cut from a 1-1/2″ wide strip of Black Glimmer paper. I kept it in the center so I could put the banner over the top ( No Waste! ) then I simply trimmed the ends to match the banner.

How simple was that!? I used Fast Fuse to adhere my edges because it’s a bit stronger than the Snail and much easier that the old sticky strip. Then a few dimensionals to pop up my words and I was done!

000_2550

I like it because it fits a Gift Card in … but a candy bar would be good too! Oh yes, and you could give them a sneak peek by cutting a window into your treat bag. Would you like to see a sample of that tomorrow?

Hope you enjoyed my little project today! And don’t just think of Halloween … You could use these as a table dressing for Thanksgiving or to tuck the gift cards in for a Tree of Giving at Christmas. The possibilities and gift giving opportunities are endless!

Thank you for sharing a part of your day with me!

Hope your today is wonderful ~

blog-closing-small

TODAY’S STAMPIN’ SUPPLY LIST …


Simply Sunday: Grateful for cool tools!

Hello Stampin’ Friends,

I’m back with a pretty card that showcases some of my favorite tools for cardmaking. Have you ever thought … what did I do before the BigShot? Me too!! I love using my BigShot and all the tools for cutting and embossing.

Maybe someday I’ll show you some of my first cards … I think we all giggle when we look back. But we had to start somewhere right! That was 15 years ago.

On to today’s card …

000_2532

I began with the thought of using the “Into the Woods” Designer Series paper. I wanted to highlight the pretty flowers so I punched some out with the 2″ circle punch. Did you know the designs on this set of designer paper was hand painted by our designers? Watch this quick video to learn more (Into the Woods is the 3rd highlighted) …

Once I punched out the flowers I chose my color pallet … Whisper White, Rich Razzleberry and Mossy Meadow. I used the Razzleberry for my base and mat behind the flowers to make the razzleberry flowers pop in the bouquet of flowers. The mat was cut with the Circle Framelit Dies.

It’s so easy to create beautiful backgrounds with our embossing folders, and I wanted to use the new “Woodland” folder, it coordinates so well with the “Woodland” theme of this card.

000_2536

Finally my greeting … a simple choice! I used the “Seasonal Framelit Dies” and chose the grateful die cut and adhered it with the new Fine Tip Glue Pen. If you don’t have this yet, you will really need to get it on your wish list. I works so nice!

000_2532

Thanks so much for joining me today. I hope you enjoyed the fun tools (punches, folders & framelits) that were used to create today’s Simply Sunday card.

Hope  you are having a wonderful weekend.

blog-closing-small

TODAY’S STAMPIN’ SUPPLY LIST …


10 Reasons I Love the Watercolor Wishes Card Kit

Hello Stampin’ Friends ~

Today I’m going to re-post the “10 Reasons I Love the Watercolor Wishes Card Kit” from our Stampin’ Up! Inspired by blog. I can’t help but share these cute cards and the wonderful reasons why this kit is so cool …

The giftable Watercolor Wishes Card Kit includes preprinted cards for the perfect artistic look without the mess. Includes supplies for 20 unique cards in 3 sizes and an exclusive stamp set. Make one when you need it, or make them all and use them later. Makes 20 unique cards.

You provide the adhesive; we’ll provide the rest, including the stamp set, clear stamp block, and ink.

Watercolor-Wishes

10 Reasons I Love the Watercolor Wishes Card Kit

  1. It’s so quick and easy to assemble.
  2. There’s something for anyone—male or female.
  3. I love the hand-painted look and the watercolor washes.
  4. The stamp set is super-versatile. Once the kit is made, I can still use the stamps for so many other projects.
  5. The kit comes with detailed instructions; it’s also easy to change it up and make it my own. The photos I’m sharing are alternate designs.
  6. The colors are fantastic—Watermelon Wonder, Pool Party, Night of Navy, Crushed Curry, and Tip Top Taupe.
  7. It has some of my favorite embellishments—washi tape, sequins, and wood elements.
  8. It’s all-inclusive! That’s ink, paper, die cuts, Stampin’ Dimensionals, envelopes, embellishments, and stamps.
  9. The box is cute, which makes it so “giftable.” Add a bow and it’s all ready to share with someone.
  10. I need cards! And sometimes I need them in a hurry. With this kit, it will look like I spent hours handcrafting a beautiful card, when in reality, it was quick to assemble.

Hello-Watercolor-Card

Just-a-Note-Watercolor-Card

Thanks-Watercolor-Card

You're-Amazing-Watercolor-Card

Another thought that came to mind while I was playing with this kit was all of the other Stampin’ Up! products that might compliment it. I thought it was fun to bring in some other ink colors. I would suggest Pool Party, Calypso Coral, or even Old Olive.  And what project doesn’t need some Baker’s Twine?!

What do you love most about the Watercolor Wishes Card Kit (item # 140406)?

Jen C.
Concept Art

Thank you for checking this out.

Have a great Saturday … See you tomorrow for my Simply Sunday post!

blog-closing-small

Simply Sunday: Ghostly Greetings

Hello Stampin’ Friends,

Hope you are enjoying your holiday weekend! Did you get a chance to see yesterday’s post and the cute Witches Hat!? Well today, I have a bit more Halloween for you for my Simply Sunday card share.

The quickest and easiest way to create a cute card is to begin with cute paper (or a beautiful card with beautiful paper). Stampin’ Up has many flavors of designer paper to fit your needs.

Today I have chosen the “Happy Haunting” designer paper, and another simple choice is the “Happy Haunting” cardstock pack. These colors were picked to coordinate with your designer paper!

000_2506

There are soooo many cute patterns in the “Happy Haunting” designer paper but I just had to use the ghosts first! And what does a ghost say when he wants to scare you? Boo! I cut the “Boo” out of the new “Black Glimmer” paper. Don’t forget that you can bundle the “Boo to You” framelit dies with the “Howl-o-ween” stamp set and save 15%.

I wanted to highlight my greeting so I used a banner created with the “Triple Banner” punch. Then I grounded my banner with the Rhinestones – coloring them with a black Sharpie™ marker. The finished banner was mounted with the dimensionals to give the card “dimension!”

000_2504

Now … did you catch my ghostly guy inside the card? I created the little eyes with the “White Perfect Accents” that are found in our main catalog (pg. 161) in the embellishments. I colored them with a Sharpie™ marker as well.

Keepin’ my Sunday’s simple with Designer Paper and a few helpful accessories. I hope you enjoyed it.

Thanks so much for taking time out of your holiday weekend and spending it with me.

Have a wonderful day & continue to have a safe and happy holiday weekend.

blog-closing-small


50% off First Two Months of Paper Pumpkin

Hello Stampin’ Friends,

50% off First Two Months of Paper Pumpkin

If you’ve never tried Paper Pumpkin, now is a great time-get 50% off your first two months. With a deal like this, you’ll want to invite everyone you know to give it a try too!

Now through September 10, 2015

Offer Details: Use the code HALFOFF to join Paper Pumpkin before September 10, 2015, and get 50% off the first two months! After that, keep the creativity coming for only $19.95 + tax per month (shipping included).

The Fine Print:

  • For new subscribers only.
  • Available for month-to-month subscriptions, not prepaid subscriptions.
  • Discount applied to one kit per month for the first two months of a new subscription. After the first two months, the price for each month’s kit will go to the regular price: $19.95.
  • Click HERE to join.
  • Enter the Promo Code, HALFOFF when you sign up.
  • New subscribers must join by Thursday, September 10, 2015; 11:50 PM (MT).

CLICK HERE TO VIEW a Collection of Paper Pumpkin projects I’ve saved on my Pinterest board. Here you will find alternative ideas for your Paper Pumpkin kits!

IMG_0156

Please let me know if you have any questions about Paper Pumpkin.

Thanks for checking in with me today ~

blog-closing-small

CELEBRATE …

Hello Stampin’ Friends ~

Today I have a sweet -n- simple card for you. When you are in need of a quick card but you still want a special look … just create one like this!

Use your designer papers, here you see the brilliant Bohemian designer paper – Today I kept it a bit subdued but you could go really bold with one or more of the other patterns.

000_2434

You will also see the pretty Venetian Lace ribbon that is currently listed in the Weekly Deals. I used it as a separation between the two designer paper patterns. You could easily make this more masculine by adding a strip of coordinating cardstock.

And what a way to make your card special … just add one the the beautiful wood veneer greetings from our Expressions Natural Elements.

NEW TODAY … More items have just been added to the Clearance Rack!

Clearance Rack
2013-2015 In Color Sequin Assortment by Stampin' Up!
2013-2015 In Color Sequin Assortment
Price: $4.95 $1.99
A Little Sumthin’ Sumthin’ Gift Box by Stampin' Up!
A Little Sumthin’ Sumthin’ Gift Box Kit
Price: $13.95 $5.59
All Is Calm Designer Washi Tape
Price: $7.95 $3.19
Alphabet Press Textured Impressions Embossing Folder
Price:$7.95   $4.79
Argyle Textured Impressions Embossing Folder
Price: $7.95  $4.79
Artisan Label Punch
Artisan Label Punch
Price: $15.95 $9.59
Baked Brown Sugar 8-1/2 x 11 Card Stock
Baked Brown Sugar 8-1/2″ X 11″ Card Stock
Price: $6.95 $2.79
Beach House Designer Washi Tape
Price: $4.95 $1.99
Birthday Bash Specialty Designer Series Paper   by Stampin' Up!
Birthday Bash Specialty Designer Series Paper
Price: $12.95 $5.19
Blackberry Bliss 3/8 Satin Stitched Ribbon by Stampin' Up!
Blackberry Bliss 3/8″ Satin Stitched Ribbon
Price: $8.95 $3.59
Chalkboard Paper  by Stampin' Up!
Chalkboard Paper
Price: $7.95 $3.19
Cherry Cobbler 1 Sheer Linen Ribbon
Cherry Cobbler 1″ Sheer Linen Ribbon
Price: $7.95 $3.19
Chocolate Chip 3/4 Chevron Ribbon
Chocolate Chip 3/4″ Chevron Ribbon
Price: $8.95 $3.59
Color Me Autumn Designer Washi Tape
Price: $4.95 $2.49
Crisp Cantaloupe Thick Baker's Twine by Stampin' Up!
Crisp Cantaloupe Thick Baker’s Twine
Price: $3.50 $1.39
Crushed Curry Stampin' Emboss Powder
Crushed Curry Stampin’ Emboss Powder
Price: $4.95 $1.99
Darling Doily Thinlits Die by Stampin' Up!
Darling Doily Thinlits Die
Price: $24.95 $14.99
Documented This And That Designer Stickers by Stampin' Up!
Documented This And That Designer Stickers
Price: $4.95 $1.99
Epic Day Designer Washi Tape
Price: $4.95 $1.99
Extra Large Gift Boxes
Price: $3.95 $1.59
Festive Paper-Piercing Pack
Price: $7.95 $3.19
Frightul Wreath Simply Created Kit
Price: $26.95 $10.79
Gold Soiree Specialty Designer Series Paper
Price: $12.95 $5.19
Holiday Ornaments Framelits Dies
Price: $24.95 $14.99
Homemade Holiday Framelits Dies
Price: $21.95 $13.19
Lost Lagoon 3/8 Satin Stitched Ribbon
Lost Lagoon 3/8″ Satin Stitched Ribbon
Price: $8.95 $3.59
Lost Lagoon 3/8 Silky Taffeta Ribbon
Lost Lagoon 3/8″ Silky Taffeta Ribbon
Price: $5.95 $2.39
Lullaby Designer Series Paper by Stampin' Up!
Lullaby Designer Series Paper
Price: $10.95 $4.39
Maritime Designer Series Paper by Stampin' Up!
Maritime Designer Series Paper
Price: $10.95 $4.39
Moonlight Designer Series Paper by Stampin' Up!
Moonlight Designer Series Paper Stack
Price: $6.95 $2.79
Mosaic Punch
Mosaic Punch
Price: $15.95 $9.95
Mossy Meadow 3/8 Satin Stitched Ribbon by Stampin' Up!
Mossy Meadow 3/8″ Satin Stitched Ribbon
Price: $8.95 $3.59
Natural & Old Olive Two-Tone Trim by Stampin' Up!
Natural & Old Olive Two-Tone Trim
Price: $4.95 $1.99
Natural 7/8 Cotton Ribbon
Natural 7/8″ Cotton Ribbon
Price: $7.95 $3.19
Natural Filter Paper by Stampin' Up!
Natural Filter Paper
Price: $2.95 $1.19
Nordic Designer Buttons
Price: $5.95 $2.39
Nordic Noel Designer Series Paper
Price: $10.95 $4.39
On Point Textured Impressions Embossing Folders
Price: $7.95 $4.79
Pistachio Pudding Thick Baker's Twine by Stampin' Up!
Pistachio Pudding Thick Baker’s Twine
Price: $3.50 $1.39
Pumpkin Pie 3/4 Chevron Ribbon
Pumpkin Pie 3/4″ Chevron Ribbon
Price: $8.95 $3.59
Real Red 3/8 Satin Woven Ribbon
Real Red 3/8″ Satin Woven Ribbon
Price: $6.95 $2.79
Retro Fresh This and That Washi Tape
Retro Fresh This And That Washi Tape
Price: $4.95 $1.99
Santa & Co. Designer Washi Tape
Price:$4. 95 $1.99
Santa & Co. Embellishments
Price: $5.95 $2.39
Snowflake Card Thinlits Dies
Price: $32.95 $19.79
Spring Flowers Textured Impressions Embossing Folder by Stampin' Up!
Spring Flowers Textured Impressions Embossing Folder
Price: $7.95 $4.79
Stacked with Love Designer Series Paper Stack  by Stampin' Up!
Stacked With Love Designer Series Paper Stack
Price: $6.95 $2.79
Sweet Dreams Designer Buttons by Stampin' Up!
Sweet Dreams Designer Buttons
Price: $5.95 $2.39
Sweet Dreams Designer Series Paper  by Stampin' Up!
Sweet Dreams Designer Series Paper
Price: $10.95 $4.39
Sweet Sadie Designer Washi Tape
Price: $4.95 $1.99
Tag A Bag Accessory Kit
Price: $7.95 $3.19
Texture Boutique Machine
Price: $29.95 $14.99
Watercolor Winter Simply Created Kit
Price: $24.95 $9.99
What's Up Punch
What’s Up Punch
Price: $16.95 $10.19
White & Tangerine Tango Two-Tone Trim by Stampin' Up!
White & Tangerine Tango Two-Tone Trim
Price: $4.95 $1.99
Wildflower Meadow Textured Impressions Embossing Folder
Price: $7.95 $4.79

To go to my On-line CLICK HERE to begin shopping!

Thank you for checking out my blog today. Please let me know if I can be of any assistance to you.

Have a wonderful Wednesday ~

blog-closing-small

TODAY’S SHOPPING SUPPLY LIST …


Just for you ….

Hello Stampin’ Friends,

Yesterday I shared a sneak peak at one of our Halloween stamp sets and one of the things I spoke of was the “layout” of the card.

Here is the card I shared with you yesterday …

000_2418

Here is today’s card with the same layout, just a new designer paper and stamp set! 

000_2427

I chose Pretty Petals designer series paper stack and teamed it up with the “Watercolor Words” stamp set. I stamped the greeting in Old Olive on Very Vanilla and punched it out using the 2-1/2″ Circle Punch. I followed up by punching out an Old Olive circle with the 1-3/4″ punch.

Then I highlighted the flowers by punching them out and adding a Calypso Coral mat behind it.  The layout is so fun and easy to use … think kids cards, Christmas, Birthday … anything really!

000_2428

I have added the stampin’ supply list below so you can begin making your cards today! If you need any of the items used today, just click on the link and begin shopping.

Thank you for stopping by today!

Have a great day ~

blog-closing-small

TODAY’S STAMPIN’ SUPPLY LIST …


Simply Sunday: Howl-o-ween Sneak Peak!

Hello Stampin’ Friends,

Yesterday I told you that I would share a cute card created with the Howl-o-ween stamp set that I won at Convention. It is a quick and easy card and they layout works for anything!

I started with my Howl-o-ween stamp set and teamed it up with the “Cherry on Top” designer series paper stack. I chose the little candies … how appropriate

000_2418

for Trick-or-Treat! I simply stamped the greeting on Crushed Curry and punched it out using the 2-1/2″ Circle Punch. I followed up by punching out a black circle with the 1-3/4″ punch.

For the highlight … I punched out a piece of the designer paper and covered it with Crystal Effects and Dazzling Diamonds!! It just adds a sweet touch of sparkle to the card.

Just think of all the different type of cards you can create using this layout… three simple punches, some pretty paper and a greeting!

000_2421

Look for the Howl-o-ween stamp set in the upcoming Holiday catalog. If you are a current customer of mine, yours will be arriving mid-August!! 

If you would like to have a catalog (and you don’t have a Stampin’ Up! demonstrator) and would like me to be your demonstrator – please e-mail me at lindaluvs2stamp@aol.com

Thank you for taking the top to stop in today … stop back and see what I have for you tomorrow!

Have a beautiful Sunday ~

blog-closing-small

HIP HIP HOORAY!

Hello Stampin’ Friends ~

Today I have a cute card I’d like to share with you! I’ve seen many cards done with this layout so I thought I’d do one for you. Of course … I had to use stars!

000_2398

I’ve seen this style of card done with butterflies and other shapes too.  It’s easy and so much fun. It’s also a good way to use up some of those scrap pieces!

This card can be used for so many different occasions … especially with the “Hip Hip Hooray” greeting! I embossed it using White craft and White Embossing powder – I like how the white on white really stands out.

When I trimmed off the top of my card front, it was too cool to throw away … so I put it in the inside of my card and added a star!

000_2401

Here’s a tip … when you want to put adhesive on something thinner than your adhesive, use the Silicone Craft Sheet! You can run your adhesive over the top without making a sticky mess every where else. It’s a MUST HAVE!!

Thanks for taking the time out of your day to visit my blog!

Have an awesome day ~

blog-closing-small

TODAY’S STAMPIN’ SUPPLY LIST …


THE BEST THING … In Black & White

Hello Stampin’ Friends,

Today is our first full day in beautiful Salt Lake City, Utah! We’re here for the Stampin’ Up! Convention and some genealogy! I will be posting all week long but if you would like a glimpse into SLC and Convention, come visit my Linda’s Stampin’ Escape facebook page ... CLICK HERE!

I have a card share with you today done in Black and White. I began with the layout and my Squares Collection Framelits…

000_2393

Then I teamed it up with the Neutrals Designer Series Paper pack and World of Dreams stamp set.

The Whisper White frame was cut 4″ x 5-1/4″ and then the Square framelit was used to cut out and expose the designer paper underneath. The white frame is popped up with the use of Stampin’ Dimensionals!

I then stamped the birds using the Memento Ink and used a smaller square framelit to cut it out.  This was also popped up with dimensionals … giving the card added dimension and a classic clean look.

000_2396

If you want … you could mat your favorite color behind the center square (bird image) and create a focal point with a “pop” of color! Experiment and have some fun.  Even simple layouts can become extraordinary cards!

Thank you for stopping by today ~

Hope your day is a good one!

blog-closing-small

TODAY’S STAMPIN’ SUPPLY LIST …

A Cup of Cheer …

Happy Monday Stampin’ Friends ~

I hope you all had a wonderful weekend!  I am back today with my Alternative project from the 2015 July Paper Pumpkin kit … and I just love this card!

So …  How many of you guessed which was my favorite?? Yep … the “A Cup of Cheer”.  It’s just so cute, and I know I’ll will be using it a lot!

000_2386

I used all the pre-cut supplies from the kit, then added just one piece of cardstock to mat the designer paper in the kit and pull out the color of my coffee cup! Stampin’ Up! has 4 extra coffee cups in our kit, that were not shown on the original card designs… so I used it!

I sponged the cup in Night of Navy … and if you think you see a bit of a pattern (you’ve got good eyes) because I originally sponged the ink over some lace ribbon to create a pattern, but it looked a little busy with the designer paper. The more solid color looks better.

I used the square punch to create little banners out of the designer pieces of “sticky” cardstock and placed them behind the cup.

So another quick and easy card done … and all from my Paper Pumpkin kit. TRY IT … It’s so much fun to get a box of creativity in your mail box each month. You can stop and start … anytime!

Tomorrow I’m off to the North America Stampin’ Up! Convention …

jet-airliner

If you would like updates and to follow me at Convention … Go to and LIKE my Linda’s Stampin’ Escape Facebook page! This way you can join me at Convention (and Salt Lake City) without having to get on that plane!

I’ll be back tomorrow with the Weekly Deals!

Thanks so much for joining me today …

I hope you have a fabulous Monday!

blog-closing-small