Window Card using Playing in the Rain by Stampin’ Up!

Hello Stampin’ Friends ~

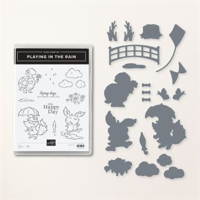
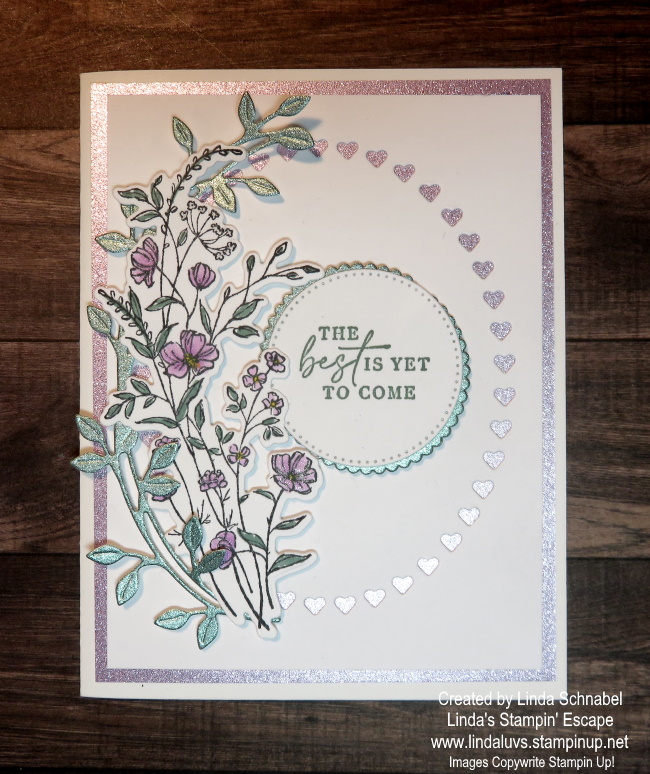
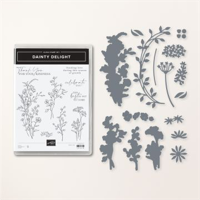
Today I’m going to share the replay and the card from my Facebook LIVE last night. It was so much fun playing with the Playing in the Rain bundle, it actually just made me happy! The song Singing in the Rain just keeps playing over and over again in my head.

Let’s get right to the video …

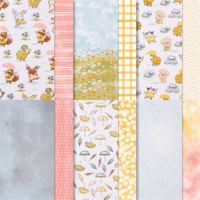
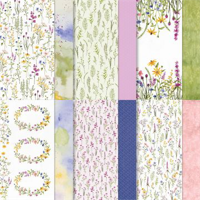
So, what did you think? Cutest paper right! I have my two little granddaughters this weekend (for a princess party) while mama’s at work so we are going to be “Playing in the Rain”!

Let’s talk measurements again:

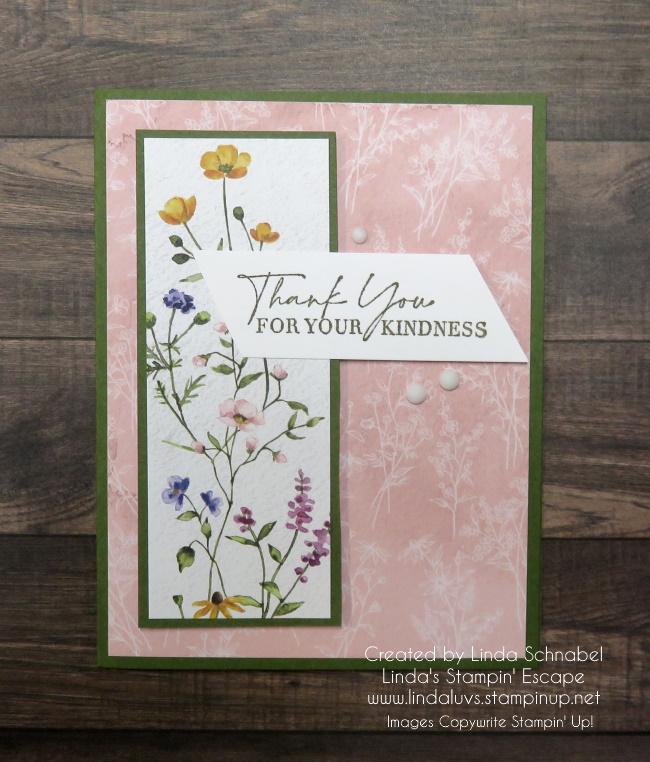
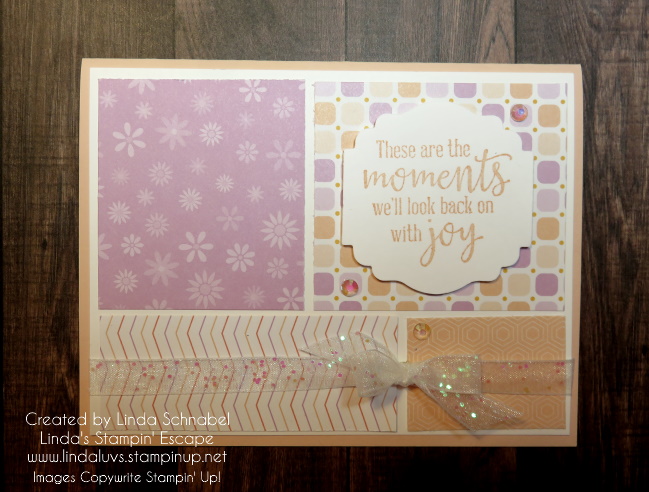
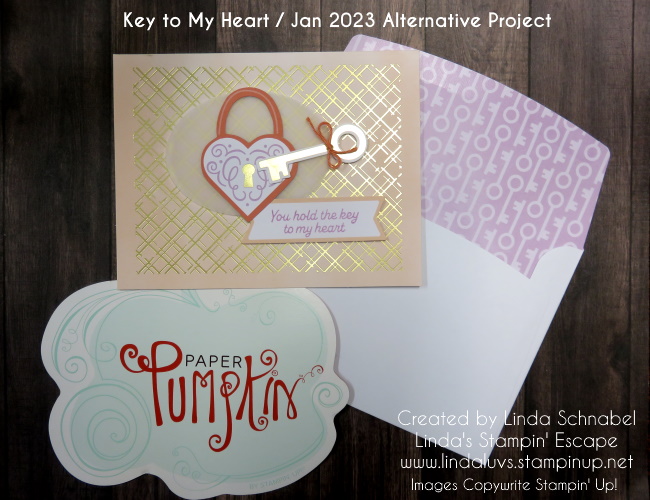
  • Card base = 8-1/2″ x 5-1/2″ Score at 4-1/4″ then Cut at 5-3/4″ … cut 1-1/2″ from the piece you cut off.
  • Window Sheet & Basic White Inside: 5-1/4″ x 4″
  • Mat: 5-1/4″ x 1-1/4″
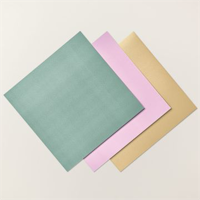
  • Designer Paper: 5-1/8″ x 1-1/8″

And my greeting … Well, I pulled out my Stamparatus and the greeting was aligned perfectly. Ahhhh … the tools we have to make our cardmaking easier. Not sure why I didn’t think of that sooner.

I did a little addition to the inside as well …

I used some of the scraps left over from trimming my designer paper and added to the inside. Someone once told me it was not nice to have naked envelopes or insides!! lol

Thanks so much for stopping by my blog today. Hope you have all the information and instruction you need to create this quick & easy window card using the Playing in the Rain bundle and Rain or Shine Specialty Designer paper.

Have a sun shiny day … or have fun playing in the rain!

Here is the list of supplies that I used for today’s card ….

Time Sure Flies … Care to Join me?

It’s Sale-A-Bration, and it’s one of our biggest promotions of the year, and it’s only happening once this year! It’s overflowing with opportunities for YOU, and filled with fun for everyone! Grab your Sale-A-Bration brochure and check out the great products for FREE when you shop, host, or join from 5 January to 28 February 2023.

They say a picture is worth a thousand words to let me paint one for you …

You can shop from either the Annual Catalog or the NEW Jan-April Mini Catalog … yes, I said through April! Sale-a-bration ends in 29 days … wow, time sure flies by and you won’t want to miss out on your favorites.

Here are some of the FREE items you can choose from ….

Here are the product that are FREE with a $100 purchase ….

You could also HOST a virtual or in home stampin’ party with me and we will have fun checking out some of the NEW products, stamping some cute cards and earning you some great products!

If you’ve ever attended one of my Launch Parties or Kick-Off parties you know how much fun they are, and I can create a Private Virtual Party for you and your friends.

However my friend, if you are like me and want it all … consider joining my team, and I will show you how to Save money … or Make money, the choice is yours. I hear to guide you, and not only do you have me but you’ll get to know the rest of my team, and 40,000 other of our closest Stampin’ Up! sisters and brothers worldwide. We love to share! And that’s not it ….

In addition to the already excellent value of the Starter Kit, if a customer decides to sign up as a Stampin’ Up! demonstrator during Sale-A-Bration, they can choose from three incredible options:

  • Option 1: The exclusive Boho Blue Mini Machine ($63 value) + your choice of $175* of Stampin’ Up! products for only $129.
  • Option 2: The original white Mini Machine ($63 value) + your choice of $175* of Stampin’ Up! products for only $129.
  • Option 3: Your choice of $175 of Stampin’ Up! products for only $99.

Ummm … yea, that is a REALLY good deal. WOW … That is over 56% Savings!! JOIN HERE or contact me with any questions / concerns. We’d love to have you join us for our next stamping get together.

I hope you consider joining me and my team, or having a party for your friends … just know that I am here to help you, even if you would like help placing your order.

Thank you so much for taking the time to check out my blog post today. Have a beautiful Tuesday.

Hey, and don’t forget to join me LIVE on Facebook tonight. See ya!

Beautifully Happy & Watercolor Pencils

Hello Stampin’ Friends ~

Today I’m going to introduce you to the magic of Beautifully Happy & Water color pencils, these two make the perfect coloring combination and it’s great for beginner stampers, or anyone of us who just loves to color. The Beautifully Happy Stamp Set can be found in our Sale-a-bration Catalog.

We begin with a plain white (Basic White) piece of paper and stamp your image with the Momento or the StazOn ink. Then I lightly color in my petals with the “Balmy Blue” watercolor pencil … I’m using Assortment 2 (found on page 126) in the Annual Catalog.

Next, I darken the area closest to the center where the flower dips down and again by following the lines in the stamped image. Now you can blend your pencil color with the Blender Pens. These are filled with specialized solution for easier blending. I did the same technique with my leaves in Garden Green, and a little dab of Crushed Curry for the center of my flower.

Once I completed my coloring, which I find so relaxing, in fact … I like to stamp several images and color them all at once, then set them aside for when I need a quick card. The base and front piece for my card are both Basic White. The front piece was embossed with the Timeworn Type 3D Embossing Folder. The flower image was then attached to the front of my card using the Stampin’ Dimensionals.

The greeting comes from the Beautifully Happy stamp set. If those pretty Hollyhocks don’t get you, the beautiful sentiments in this set will. They are a perfect combination to make “beautiful” cards with the perfect sentiment. I used the Double Oval punch to highlight my greeting and pop it up.

To complete the look, I added the Mango embellishments from the Adhesive Backed Milky Dots … my new favorites! You will find them on page 31 of the Jan-April Mini Catalog. The come in four colors; Mango Melody, Night of Navy, Petal Pink and Clear. They just seem to go with anything!

I hope you were inspired to pick up your Watercolor Pencils again, learned a new stampin’ tip, or hack for quick cards. Let me know in the comments below.

Thank you for stopping by today! Have a fabulous Monday.

Here is a list of supplies used for todays card ….

Simply Sunday: Stampin’ Up!s Beautifully Happy

Hello Stampin’ Friends ~

Today I’d like to introduce you to the Beautifully Happy Stamp set, you will find it in the Sale-a-bration catalog. Create beautiful floral projects using the Beautifully Happy Stamp Set. This all-occasion stamp set features floral designs as well as greetings that can be used on their own or paired together for more versatility all year long!

Combine the stamp pieces of the hollyhocks for a Two-step effect or create a soft and subtle individual colored floral background using your favorite coloring tools. Send happy thoughts, share friendly notes, or wish happy birthday through your own floral style! 

This is a Two-Step Stampin’ set; it allows you to layer two or more images to create one final image with extra texture and dimension in the colors you want. As a Distinktive stamp set; it has a special texture that gives added depth and dimension in a single step, creating photo-realistic images.

I used the Fresh Freesia and Soft Succulent for my inks for this two step stamping technique and I brought back the Fresh Freesia Fine Glimmer paper as I did yesterday. I also added Wink of Stella onto my Hollyhocks to tie in with the Glimmer paper.

The greeting comes from the Beautifully Happy stamp set and then punched out with the Double Oval Punch. This was attached to the floral piece and then both were popped up using the Stampin’ Dimensionals to create texture and dimension to the card.

To finish off this beautiful card, I used the Fresh Freesia color of the Milky Dots (I just love them) and they really do complete this card. Have I sold you on this stunning Fine Shimmer paper yet? I can’t seem to keep my hands off it.

I want to Thank You for taking time out of your Sunday to visit me today. It’s snowing again outside so I’ll be crafting all day, hope you can take time out to create something today to.

Today’s List of Ingredients …

Dainty Delight Bundle meets Fine Shimmer; Stunning!

Hello Stampin’ Friends ~

Today I’m sharing a stunning card created with the Dainty Delight and the Fine Shimmer paper from the Fancy Flora Suite. I also borrowed a die from the Framed Florets Bundle. Let me walk you through how I created this card.

I began by stamping my floral image with Momento Ink and coloring it in with the Fresh Fresia and Soft Succulent Stampin’ Blends. (same as yesterday) and added a touch of Wink of Stella to tie into the shimmer from the Shimmer paper. Then I used the coordinating die to cut it out. I then die cut the sweeping leaves from the Soft Succulent Fine Shimmer and intertwined the two pieces.

Before attaching them to my card front I created a beautiful layering … I started with a Basic White card base 8-1/2″ x 5-1/2″ scored and folded at 4-1/4″. The I took another piece of Basic White measuring 5″ x 3-3/4″ and then die cut with the Oval Hearts dies from the Framed Florets bundle. Then from the same packet of Fine shimmer paper, I used the Fresh Freesia Shimmer paper measuring 5-1/4″ x 4″ and layered it behind the die cut hearts allowing the pretty freesia shimmer shine through ….

Then I prepared by greeting stamped in Soft Succulent and die cut with the Stylish Shapes circle die and then used a scallop die to mat it in Soft Succulent Fine Shimmer paper. Now I layered my floral piece onto the front by using our Stampin’ Dimensionals.

You don’t really need to embellish this card as the hearts allow the shimmer to shine through …

The combination of the Dainty Delights bundle, the hearts oval from our Framed Florets truly creates a stunning card with the Fine Shimmer paper in Fresh Freesia and Soft Succulent. The Fine Shimmer paper also has a sheet of Gold – it contains two 12″ x 12″ sheets of each color for a total of 6 sheets.

I fell in love with this bundle because of it’s beautiful florals and was excited to see that our Sale-a-bration catalog has a FREE offering of coordinating designer paper. You’ll see that in many cards I’ve already shared …. Just put “Dainty Flowers” into the search box!

There is years and years of information and samples for you to discover … check it out!

Thank you for joining me on this Saturday, I appreciate the visit. I’d love to know what YOU think of this card I feel is a stunner with that Shimmer paper!

Have a great day ~

Here is a shopping list of products used in todays card …

Gettin’ Punchy with the Fun Cut Pattern Cards

Hello Stampin’ Friends ~

Are you ready for some more fun cards? I’m getting punchy with the Fun Cut pattern and Dandy Designs paper I shared with you yesterday. I thought I’d share some cute cards you can recreate right away by using punches you have in your stamp room. I also added the Organdy Glitter ribbon and Iridescent Rhinestones.

Let’s take a look! Today I’m using the paper with with the Fresh Freesia and the Petal Pink. We’ll start out with the Heart Punch Pack. I punched the solid heart from the designer paper and the Scalloped Heart in Basic White cardstock.

So you’ll see the same layouts as yesterday, just my new colors and I’m highlighting the Peaceful Moments stamp set … I’m using this for my greetings on all 4 of the cards. Here you will also see the Stitched with Whimsy dies which adds texture and this cute pattern of stitching which really frames your greeting. Both the greeting and the hearts are popped up with Stampin’ Dimensionals.

My second card features the Label Me Lovely punch …

This sweet and simple card also showcase a bit of bling with the Iridescent Rhinestones and White Organdy Glitter Ribbon … WOW these go together really nicely! I tied my bow “first” and then attached it to the ribbon with a Mini Glue Dot.

The third card … there she is, our Medium Daisy Punch!

Once you get your Dandy Designs paper cut and laid out onto your card mat, you can really whip out a whole stack of cards. I just added a simple banner with my Daisy and then added a few Iridescent Rhinestones.

For my last card I kept it really simple, and sorry, but on punch …

Again I brought in the Stitched Whimsy Dies, Organdy Glitter Ribbon and Iridescent Rhinestones. This pattern, a great sentiment set and a few items you have in your stamp room will create wonderful cards to share and bring joy to a friend or family member.

I want to thank you for joining me today. Have an awesome Thursday …

the weekend is almost here!

Here is our supply list for today’s card ….

Fun Cutting Pattern + Fun Fold + Sentimental Park Bundle = Fabulous Cards

Hello Stampin’ Friends ~

I’m thrilled to share the cards and the cutting pattern from my Facebook LIVE last night. I will share the replay with you which walks you through the cutting pattern, how to assemble and then finished cards created with the Sentimental Park Bundle. Plus you’ll learn a really cool way to use your Sentimental Park label dies.

Let’s watch the video first ….

Pretty cool right? A special Thanks to LeAnne Greff for sharing her Designer Paper pattern with all of us. The Dandy Designs makes picking patterns pretty easy too, and the Sentimental Park bundle … is it on your Wish List now? I love sentiment stamp sets and the fact that we can create so many with this set is amazing, and I love dies that are not like all the rest.

Here is a “cheat sheet” so you can remember the cutting dimensions. Feel free to click on the image and download it so you can keep it in your files.

Between the video and the pattern, I hope you feel inspired enough to make some of these up yourself. I will share the rest of my color pallets with you the next few days but let’s get a better look at the ones I did last night …

On this card I only used 2 of the 4 patterns that I cut. I used the smaller of the two label dies with the flowers (it’s so cute) then I added the Fresh Freesia Opaque Adhesive Backed Gems and a swatch of the Fresh Freesia ribbon.

Next up is the cute flowers, you can use them separately, or layer them as I did …

I used the second smallest circle from the Stylish Shapes dies for my greeting on this card. Can you see the embossing on the flowers in the center… too cute.

Another card for you …..

This is the largest of the dies with the floral pieces on it. I also used the Opaque Adhesive-backed Gems on this card … they were right, but I used my Stampin’ Blends to color them so they popped on the die cut. I also added Wink of Stella to the flowers.

Now we’re going to use this die to cut a piece of Fresh Freesia ….

This one is special because we can tuck the solid die cut label and tuck it into the floral one … I flipped when I figured this out. Image this in whites, it would make a perfect wedding card. Add Gold and turn it into an anniversary card. The possibilities are endless … see why I fell in love with this amazing bundle!?

Love this cute cutting pattern, and trust me, you can use this pattern with any of your favorite designer papers. So I hope you go into your stamp room today and try it out. And if you fell in love with the Sentimental Park bundle, I have the link for you below … just click on it and you can have it in your stampin’ stash soon.

Thank you so much for hanging out with me today.

Have a beautiful day ~

The supplies I used to create today’s card is listed here ….

Creating beauty with Scrap paper … and a cute card!

Hello Stampin’ Friends ~

Today I’m thrilled to share this beauty I created with scraps left over from tonight’s Facebook LIVE. It’s so cute! I’m using the Dandy Designs Designer paper from the Sale-a-bration catalog. I’ve got a really cute project planned for tonight’s LIVE so I hope you join me at 6:30 HERE.

So my scraps are 1″ wide and then I cut them down to 3-1/2″ in length so they would fit when I laid them out on my card. The colors are so bright and cheery and well … that Daisy returns (I think I am waiting impatiently for Spring!) or I just want to cheer up a friend and everything just goes together so nicely.

My greeting comes from the NEW Sentimental Park stamp set from the Jan-April Mini Catalog and is stamped in Coastal Cabana. I die cut my greeting with the largest of the banners from the Stylish Shapes dies, this is a great set of dies to have because there are the banners, circles and squares.

Thanks so much for joining me today, I hope you consider joining me tonight for my Facebook LIVE to see what I’m doing with the rest of that designer paper!!

Have a great day ~

Supply List for today’s card ….

Quick & Easy Dandy Designs Thank You Card …

Hello Stampin’ Friends ~

Today I have one more card from my quick & easy cut patterns I shared yesterday. It comes from the 4″ x 6″ pattern cut down to 5-1/4″ …. using the Dandy Designs as well and mounting it onto a Coastal Cabana cardbase.

The greeting comes from the Charming Sentiments stamp set and stamped with Coastal Cabana ink … I just cut the points off the square to create a look similar to the squares on the designer paper.

I punched 6 daisies out and layered them to create 3 flowers and added Coastal Cabana to the centers. These add so much dimension and texture to your card and they are cute!

Once those daisies are popped up with dimensionals, I added a little Wink of Stella to the centers to add a little sparkle. Not much else to say … this card is that simple, but will bring a smile to who ever receives it.

I think we all like making quick & cute cards ….

Thank you for stopping by today. Have a wonderful week.

Supply list for items used to create this card ….

You are the Key to My Heart

Hello Stampin’ Friends ~

Yesterday I kicked off my Catalog Launch party … It was a great start. My Stampin’ Friends are the Key to my Heart because they are the Heart of my business and they make my stamping classes, clubs and retreats so worth while and so much fun.

This is the Alternative project I shared yesterday ….

Here are the cards I shared during my LIVE demonstration on Facebook last night …..

I even gave away a FREE “Key to my Heart” Paper Pumpkin kit last night. All the names of the attendee’s watching LIVE were in the drawing … yep, all they had to do was join in and watch.

Here is the awesome February kit: Remember that there are Sale-a-bration Rewards when you subscribe to one of our three Pre-Paid options.

Thank you so much for stopping by today … Why don’t you join us on my Linda’s Stampin’ Escape Facebook page.

Have yourself an amazing weekend.

Here are the Paper Pumpkin Subscriptions …. It’s a great time to check out Paper Pumpkin because you will earn FREE product during Sale-a-bration!

Key to My Heart: Alternative Paper Pumpkin Card

Happy Friday Stampin’ Friends ~

As promised, I’m back to share my Alternative Card from the Key to My Heart Paper Pumpkin kit. I used most of the items from the January kit except for the Vellum oval that I cut from the Framed Florets Dies.

The original design has 3 padlocks on the front … I borrowed one! Then I knew I wanted to use the Key to “unlock” their heart. I used the vellum oval to really highlight my heart lock and key, and with dimensionals on back, it gives it dimension as well.

I added a little bow to my key which is included in the January Paper Pumpkin kit, and it ties in the color of our heart lock. Then I stamped my greeting in Fresh Freesia and trimmed the ends off the banner.

One of the main reasons I love the Paper Pumpkin kits is the Exclusive Stamp Sets!! Not to mention you can collect many colors of “spots” ink pads and the ease of having a kit so you can whip out a card when needed … no lengthy though process to design your own card.

Stampin’ Up! thinks of everything because you also get a coordinating envelope, and that’s what Stampin’ Up! and Paper Pumpkin is all about …. COORDINATION. Making our lives easier.

Thank you so much for checking back to see my alternative card.

Have yourself an amazing weekend.

Here are the Paper Pumpkin Subscriptions …. It’s a great time to check out Paper Pumpkin because you will earn FREE product during Sale-a-bration!

Key To My Heart: Paper Pumpkin

Hello Stampin’ Friends ~

Today I want to share with you the Key to My Heart Paper Pumpkin. Each kit includes nine unique cards—three each of three designs—and nine coordinating envelopes that you can fill with love! This month’s kit represents a love lock tradition.

Many couples have signified their unbreakable love and devotion to one another by writing their names on a padlock, locking it on a bridge, and throwing the key into the river below. So, become locked in love this season and send a card to those you really care about! Check out these Love Lock Bridges!

Now let’s check out the Paper Pumpkin kit …

Don’t forget the special add-on to make your love go even further! Get the heart-shaped treat boxes and fill them with something sweet! The add-ons are sold separately and only be available while supplies last: https://bit.ly/3bW3F0v

Stop back tomorrow to see the very special card I designed (my alternative project) with these cards.

Thanks so much for stopping by today!

Here are the Subscriptions that Qualify for Sale-a-bration Rewards …. Click on any one to get started with Paper Pumpkin and then collect YOUR Sale-a-bration Rewards!

Dainty Delight Makes the Perfect Gift Card Holder …

Hello Stampin’ Friends ~

Today I’m going to show you what I did with the last piece of the Dainty Flowers designer paper to create the Perfect Gift Card Holder. Great for Birthdays, Graduations, Thank You’s and more. Isn’t this just the cutest?

You start with a half sheet of cardstock measuring 11″ x 8-1/2″ … score at 2″ and 5-1/2″. The 5-1/2″ score it to fold your card in half, the 2″ section gets a piece punched out of it and then it’s tucked under to create the pocket for your Gift Card. I used Tear & Tape Adhesive along the edges to secure it.

I used a piece of 5-1/4″ x 4″ piece of Dainty Flowers for the inside … the right side will be exposed when the card is closed. The Label Me Lovely Punched was used to punch the piece out of the pocket and for my sentiment.

I created an area for you to write in … the Basic White measures 3″ x 4″ and the Mango Melody mat is 3-1/8″ x 4-1/8″…. and you won’t be able to see it while the front is closed so your message is safe! lol

The front Mango Melody piece used to mat the designer paper measures3-3/8″ x 4-1/8″, making the Dainty Flowers designer paper 3-1/2″ x 4″. I used Framed Florets for my sentiment on the front and punched it with the Label Me Lovely punch. The Mango was punched and then cut in half and then adhered to the top half and bottom half (see the split on this back view).

Those pretty flowers sure can make an adorable card to wish someone a happy birthday and tuck a little something in there for them to treat themselves.

Thanks for stopping by today, I hope these sharing these cards with the beautiful Dainty Flowers Designer papers has inspired you pick a pack up for yourself.

Have a wonderful Monday ~

Here is a list of supplies used for today’s card …

Simply Sunday: Simply Gorgeous Dainty Flowers Card

Hello Stampin’ Friends ~

Happy Sunday! Today I’m sharing a super simple card that is Simply Gorgeous using the Dainty Flowers Designer paper you can get FREE during Sale-a-bration.

For those who don’t know what Sale-a-bration is, it’s Stampin’ Up!s most anticipated time of year because YOU can earn FREE “exclusive” products now through February 28th. Yes, sometimes the freebies sell out, so I don’t hesitate to get the ones I love first! Click HERE to learn more about Sale-a-bration.

Early in the week I shared a cutting technique using the Dainty Flowers (CLICK HERE to see post) and now I want to share what I did with some of the left overs! This piece is 12″ x 6″ – it’s simply cut in half, so you have another sheet just like this one (and a full one too!).

These will show the left over pieces from my first card (they are marked on the paper). Now I’d like to share my finished card and give you the simple instructions to create your own card ….

If you take a look at the layout of the Dainty Flowers paper I have “marked” … the pattern piece I chose for today’s card is on the right. My colors were chosen to highlight the daisies of Mango Melody with Early Espresso centers. The third color I used was Old Olive to bring in my greens from the designer paper.

The Early Espresso card base is 8-1/2″ x 5-1/2″ and is scored and folded at 4-1/4″ (basic A-2 size). I had to trim the top off my designer paper from 6″ to 5-1/2″ to match my card base. The Mango Melody mat behind the Dainty Flowers designer paper is 5-1/2″ x 3-3/4″. Simple measurements for this simply beautiful card (the designer paper does all the work)

Speaking of this designer paper, I had to share a close up so you could see the “look” of texture that it has. We don’t have to do anything … it’s already there for us. It adds such a warm and natural look with these beautiful flowers. And the flowers, well … I have fallen in love with the “watercolor” look. It truly is a work of art, and to share this masterpiece …. just add cardstock.

And a sentiment, which comes from the Dainty Delights stamp set. I suggest the bundle so you don’t have to “fussy cut” any flowers, the dies will do that for you! I’ll share more of that with you as well. Today the sentiment was punched using the Double Oval Punch.

Just so you know, when you purchase the Dainty Delights bundle, you can chose the Dainty Flowers Designer paper for FREE! It’s a perfect pairing. I will also be hosting a Dainty Delights Class in February.

I thank you for taking time out of your Sunday and sharing it with me.

Have a beautiful day ~

Here is a list of supplies used for today’s card. You can click on any image to learn more about it, or to begin shopping with me. Thank you!!

Time to Celebrate FREE Product …

Hello Stampin’ Friends ~

I hope you have heard the News … Our Sale-a-bration and Mini Catalogs are now LIVE!! We will only be having ONE Saleabration this year! It’s the BEST time of year with Stampin’ Up! For every 50.00 you spend you get to pick exclusive free product! Can we say…ADORABLE OWLS, or beautiful papers!

Another way you can get FREE Sale-a-bration products is to be a Paper Pumpking subscriber.

Our Pre-paid Paper Pumpkin craft kits by mail are an even better deal during Sale-A-Bration! Pick a free reward item for every $50 spent in January when you get your pre-paid code for the year. https://www.paperpumpkin.com/en-us/sign-up/?demoid=26646

So, for every $50 spent during Sale-a-bration (January & February) YOU get to pick a FREE Exclusive Sale-a-Bration Reward … purchase the 12-month subscription and you not only get to pick up to 4 FREE products, YOU will have earned HOSTESS Rewards as well!! That’s right, you will quality as a hostess too.

If your wishlist is over 100.00…you will really want to consider buying the starter kit and joining my Stars team so you get 20-25% off all your future orders! Plus choose to get the Boho Blue Mini Machine added to your starter kit! Choose 175.00 in product of your choice in your starter kit and pay only 99.00 or 129.00!

You can CLICK HERE for more information or to join my team. If you have any questions, please message me and we can chat. There is never an obligation … it’s all about YOU!

Thank you for joining me on this fine Friday… I hope you have yourself a wonderful day.

Here are the QUICK LINKS for the Paper Pumpkin subscriptions …