Today I’m going to share a Father’s Day Faux Step card using the Let’s Go Fishing Designer Series Paper. I also have a second card to share with you that uses the Countryside Inn Designer paper… each of these cards use the same dimensions I shared with you yesterday. Due to some difficulties filming yesterday, I’m hoping to get my video to you by tomorrow.
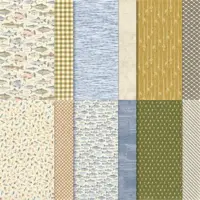
On this card I will be using a Boho Blue card base and the Let’s Go Fishing Designer paper …
You are seeing 3 different patterns of cardstock … one with the flies, the second that looks like water and the third in which I fussy cut 3 fish from. I love the contrast on this card and of course it works so well together, plus it highlights the fish.
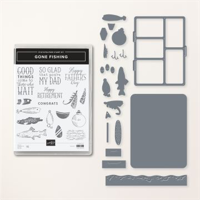
Two of the fish are popped up to add some dimension to our card and the other was secured directly to the front. The greeting comes from the Gone Fishing Bundle and was die cut with the Stylish Shapes Dies.
Card Base: 9″ x 4-1/4″ which is scored at 1-1/4″ … 2-1/2″ … and 5-3/4″.
Center step: 8-1/2″ x 2-1/4″ then score at 3″.
You need 3 pieces of designer paper; 4″ x 3″ … 4″ x 1″ (those will go on the base of the card). The 4″ x 1″ goes on the smallest panel to the front, then skip a panel, and then the 4″ x 3″ piece will go on the 3rd panel. The third measures 2″ x 5-1/4″ which goes on the step portion of your card.
My second card used the Countryside Inn Designer paper and is simply elegant ….
The greeting comes from the Layering Leaves stamp set and I used the Stylish Shapes dies to cut it out. I then embellished the card with the Iridescent Rhinestones … They are very subtle as they pick up the color that they are attached to!!
Thank you for taking time out of your day to join me … Which one of these Faux Step Cards is your favorite; the Fathers Day with Let’s Go Fishing or the Hello card using the Countryside Inn?
Today I have a FUN FOLD for you, the Faux Step Card … it’s a peek into my Facebook LIVE last night. I shared more cards, and will share them here tomorrow, along with an updated video showing you Step by Step HOW to make the Faux Step card.
On this card I will be using a Basic White card base and the Bright & Beautiful Designer Series Paper ….
The card used two sheets of cardstock to create the faux step …. begin with a piece of Basic White 9″ x 4-1/4″ which is scored at 1-1/4″ … 2-1/2″ … and 5-3/4″. To make the center step your Basic White piece measured 8-1/2″ x 2-1/4″ then score at 3″.
You need 3 pieces of designer paper; 4″ x 3″ … 4″ x 1″ (those will go on the base of the card). The 4″ x 1″ goes on the smallest panel to the front, then skip a panel, and then the 4″ x 3″ piece will go on the 3rd panel. The third measures 2″ x 5-1/4″ which goes on the step portion of your card.
The greeting comes from the Layering Leaves stamp set and I used the Lovely Label punch (retired) and embellished the card with the Iridescent Rhinestones … I love how they pick up the color that they are attached to!! Make sure to stop back tomorrow when I share a video and more cards using the FUN FOLD: Faux Step Card and our amazing Designer papers, now on sale!!
Thank you for joining me today, and I look forward to sharing more with you tomorrow.
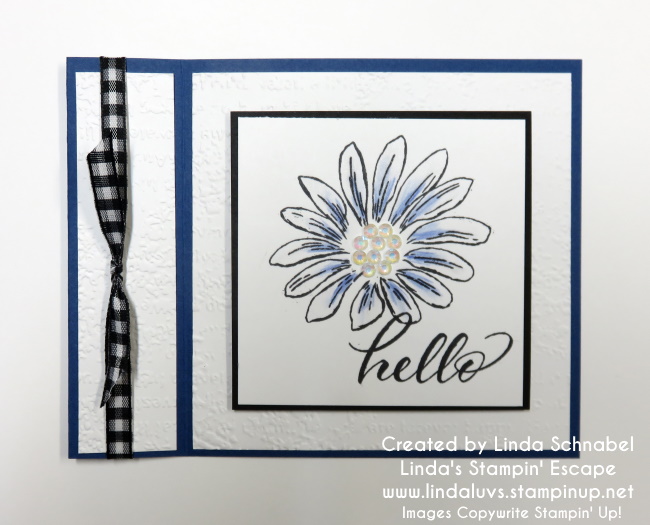
Happy Sunday! Today I have a fun fold for you with our “Cheerful Daisy” … perfect day for it today, it’s beautiful here in Wisconsin!!
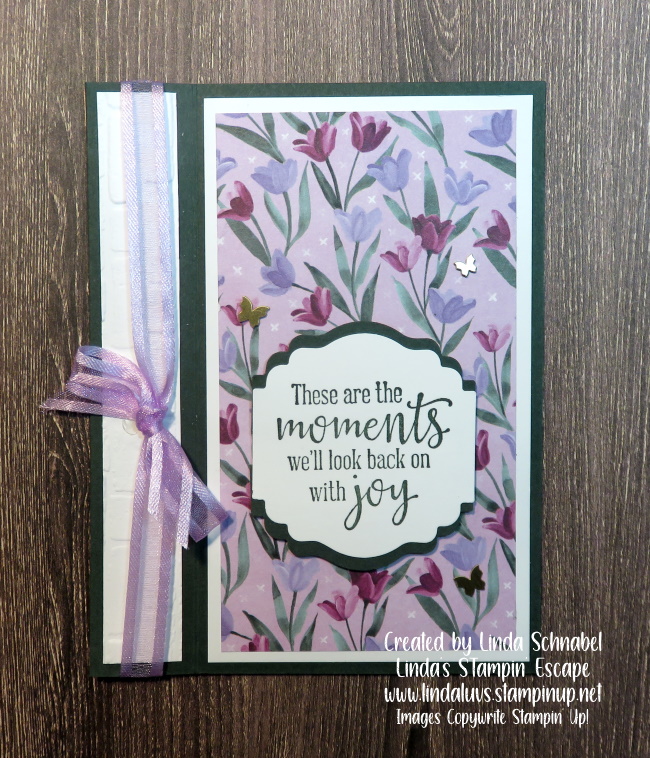
I am repurposing some “cut” cardstock from my retreat (I always take a few extra … just in case) so I was on a mission to start using these up. This was one of our Fun Folds that we made, the “Book Binder” technique/fun fold. They are so simple to make and add a little fun to your card.
We begin with the card base; Starry Sky measuring 11″ x 4 1/4″ and then on the 11″ length; score at 4 – 1/4″ and 5 – 1/2″. Now you’ll fold your card in half on the 5 – 1/2″ score line, then fold the front flap “back over” … like you are opening the card but on the 4 – 1/4″ score line.
Now we are ready to add some cardstock and create the Binder effect …. You’ll need Basic White measuring 1″ x 4″ and 4″ x 4″ embossed with the Timeworn Type 3-D embossing folder. Once you’ve attached your textured pieces, you can add your bow. I’m using the Black & White Gingham ribbon using 2 pieces. Cut one piece at 6″ … add your adhesive to the “inside / back of that piece and secure your ribbon edges down.
Now, put adhesive on that area “between” the two score lines and secure it … this creates your “Book Binder” fold. Now you can slide the second piece of ribbon under your secure piece on front and tie. This creates a bow that will not fall off or slide around.
OK … We are ready for the focal point of our card ….
Our Basic White square measures 3″ x 3″ and we begin by stamping our “hello” first. I am using the beautiful Layering Leaves stamp set. I then stamped my large daisy … both are stamped with our Tuxedo Black Memento Ink.
Using the Night of Navy in the Assortment 2 Watercolor Pencils, I added a touch of color and then softened it by blending it with the Blender Pen. I finished it off by filling the center with the Iridescent Rhinestones (they are so versatile)!
That’s it! It really is so simple to make and the Book Binder fun fold adds a great touch to your card. Hope this inspired YOU to try out this Fun Fold. Until next time … Have a great day.
Thanks for stopping by today ~
Here is the list of supplies that I used to create today’s card. Just click on the image for more details and to add it to your stampin’ collection.
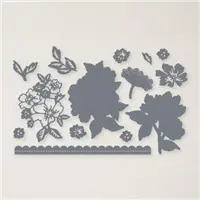
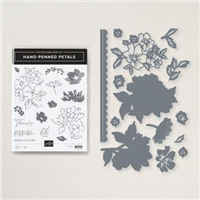
I am bringing back a favorite today…. the “FAUX” Step Card that I changed up a bit … and I’m going through step by step with dimensions on how to recreate this card. Today I’m using the Hand Penned Petals and Penned Flowers dies, both are on the retiring list … and I love the way this card turned out. I have this all on video for you to view.
Let’s take a look at the video now …
Dimensions:
Card Base: Basic Black: 9” x 4-1/4” then Score at 1-1/4”, 2-1/2” and 5-3/4”
Cardstock #2: Basic Black Center Step: 8-1/2” x 2-1/4” then Score and fold at 5-1/2”
Cardstock #3: Basic White 3″ x 4″ for inside of card / Scrap of white for greeting and Highland Heather as a mat (Cut with the Layering Circle Dies)
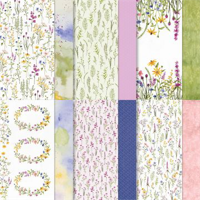
Designer Paper #1: Hand Penned Petals (Mint Macaron) for Center Step 2″ x 5-1/4″ and Floral Design paper is 3″ x 4″ and 1″ x 4″.
I find it easiest to lay the card base out flat when attaching the designer paper, as shown in the video.
What a fun twist to the card … placing your “center step” either on the right or the left side of the card. It gives you a totally different look. For my card, I choose to put my center step to the right to balance out the greeting which I let “hang over” the left side … that gives it another dimension to the card.
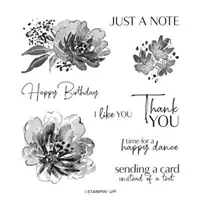
As for that greeting … It comes from the Flowering Tulips stamp set and one of the main reasons I bought that set! I love the way this card turned out! Don’t you just love that feeling when you’re done creating something that turned out sooo cool!
I hope you enjoyed the quick coloring technique as well …. it was fun and easy to recreate the watercolor look. As for the designer paper … you can use any that coordinates with the colors you choose to color with.
Enjoy making this fun fold … it’s really easy, and I love the twist of placing the “step” off to the side.
TODAY’S STAMPIN’ SUPPLY LIST … If you liked the products used in today’s projects, I have links for you below. Just click on the item you would like more information on, or to begin your shopping. It will take you directly to my website. Thank you ❤
Today I’m going to show you what I did with the last piece of the Dainty Flowers designer paper to create the Perfect Gift Card Holder. Great for Birthdays, Graduations, Thank You’s and more. Isn’t this just the cutest?
You start with a half sheet of cardstock measuring 11″ x 8-1/2″ … score at 2″ and 5-1/2″. The 5-1/2″ score it to fold your card in half, the 2″ section gets a piece punched out of it and then it’s tucked under to create the pocket for your Gift Card. I used Tear & Tape Adhesive along the edges to secure it.
I used a piece of 5-1/4″ x 4″ piece of Dainty Flowers for the inside … the right side will be exposed when the card is closed. The Label Me Lovely Punched was used to punch the piece out of the pocket and for my sentiment.
I created an area for you to write in … the Basic White measures 3″ x 4″ and the Mango Melody mat is 3-1/8″ x 4-1/8″…. and you won’t be able to see it while the front is closed so your message is safe! lol
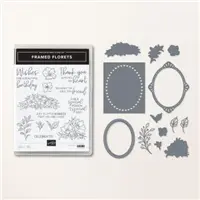
The front Mango Melody piece used to mat the designer paper measures3-3/8″ x 4-1/8″, making the Dainty Flowers designer paper 3-1/2″ x 4″. I used Framed Florets for my sentiment on the front and punched it with the Label Me Lovely punch. The Mango was punched and then cut in half and then adhered to the top half and bottom half (see the split on this back view).
Those pretty flowers sure can make an adorable card to wish someone a happy birthday and tuck a little something in there for them to treat themselves.
Thanks for stopping by today, I hope these sharing these cards with the beautiful Dainty Flowers Designer papers has inspired you pick a pack up for yourself.
Have a wonderful Monday ~
Here is a list of supplies used for today’s card …
Today I’m going to share my replay of this Quick & Easy Fun Fold and all the dimensions and instructions with you because it highlights one of our beautiful designer papers that resurfaced in our Clearance Rack!! If you already have this pretty paper then here is a video and the two cards I made.
Let’s take a look at the video now …
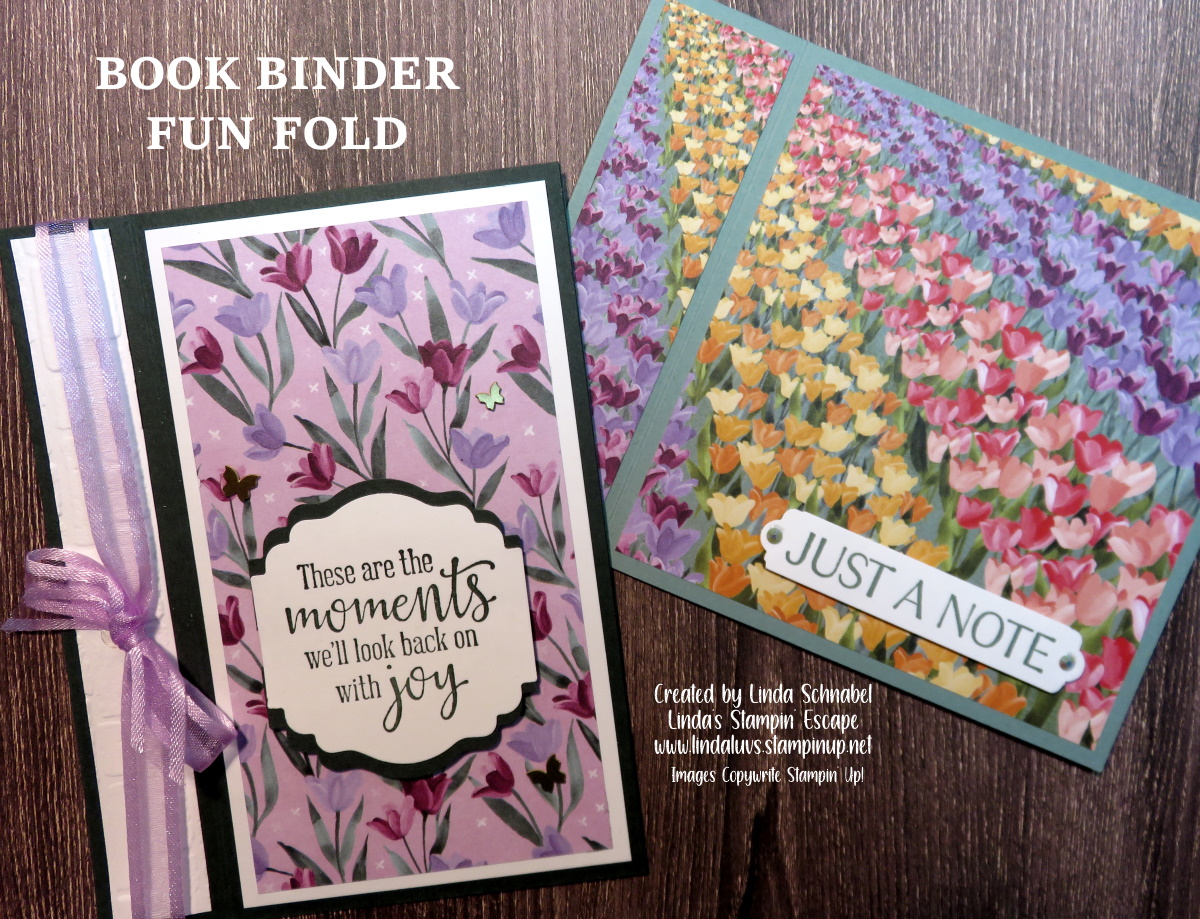
Book Binder Fun Fold … Super Simple!
HORIZONTAL PROFILE (Above) How It’s Made
Cut a 4-1/4 x 11″ piece of Soft Succulent cardstock for the card base. Score at 5-1/2 and 4-1/4. Crease folds and add adhesive to the inside of the two scored lines. The 4-1/4″ score line should be facing out on the front of the card.
Cut a 4 x 4″ piece of Designer Paper (or cardstock) and adhere to card front.
Cut a 1″ x 4″ strip from the tulip design designer series paper and adhere to the left side margin on the card front.
PORTRAIT PROFILE (Above) How It’s Made
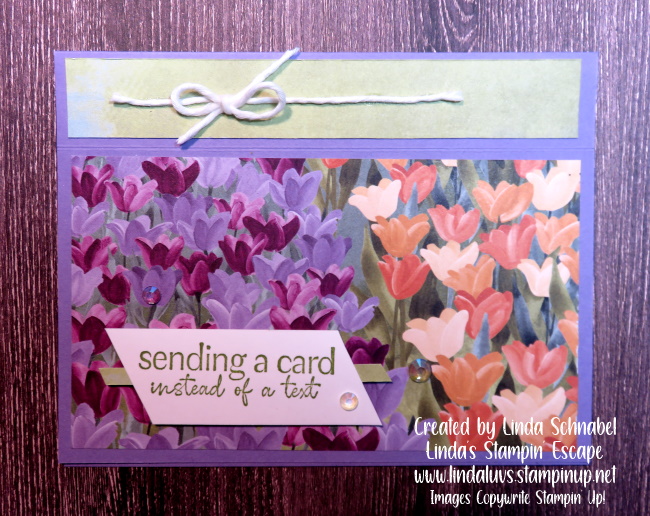
Cut a 5-1/2 x 8-1/2″ piece of Evening Evergreen cardstock for the card base. Score at 4-1/4” and 5-1/4”. Crease folds and add adhesive to the inside of the two scored lines… You can add your ribbon at this time.
To layer card front; cut Basic White 5-1/4” x 3” (Cut 2: one for inside and one for mat on front) Cut Designer paper to 5” x 2-3/4” to layer on top of white.
Binder area is cut in Basic White at 5-1/4” x 3/4” and I embossed with “Brick” embossing folder for some texture.
Cool … right! Now, let me share another layout you can use when creating the Book Binder Fun Fold. It’s another portrait however the card stock is cut at the usual 8-1/2″ x 5-1/2″ and it is scored at the 4-1/4″ and 5-1/4″ … now you will just position your “binder” to the “TOP” of your card.
The designer paper is cut at the same dimensions as well … however, you need to make sure you are “cutting” to the designer of the paper. On this card, my “binder” actually has the same designer paper, I just flipped it over. The greeting also comes from the Flowing Flowers stamp set, same as we used on our first card.
Enjoy making this fun fold … it’s really easy, and you’re going to have a blast creating with all your beautiful designer papers. Don’t forget, you can add in your embossing folders, die cuts or hand stamped items!
TODAY’S STAMPIN’ SUPPLY LIST … If you liked the products used in today’s projects, I have links for you below. Just click on the item you would like more information on, or to begin your shopping. It will take you directly to my website. Thank you ❤
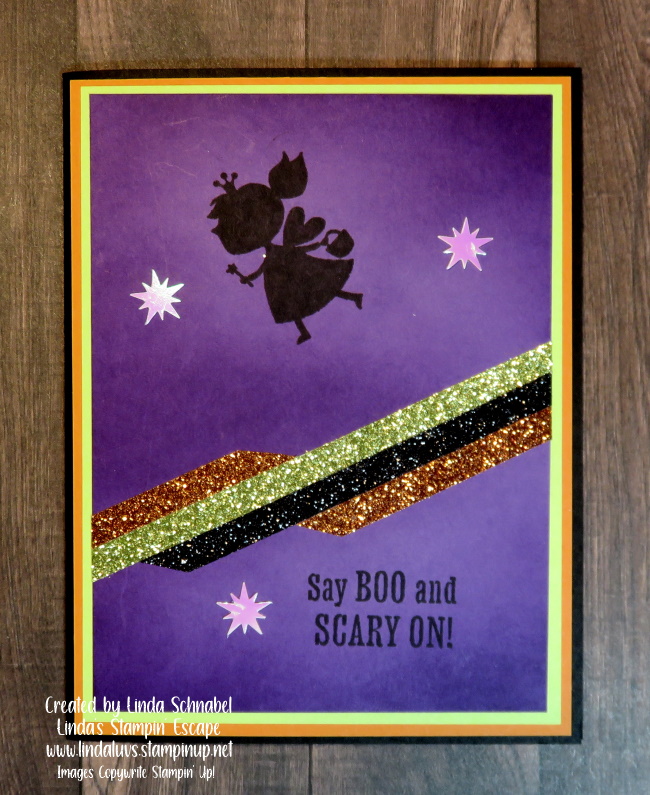
Today I have the replay of last nights Facebook LIVE presentation. I featured the Scary Cute bundle using the Corner Fold Fun Fold but with a twist. I’ll be showing you a different layout to this common fun fold then give you some ideas on how to use the dies.
Grab a coffee and sit back and relax while I show you this scary cute card ….
This fun fold is easy to do and as you’ve seen, you can either use the horizontal / landscape layout or the vertical / portrait style and any occasion works with this layout… so have fun! I absolutely love the different looks you can create with this bundle … a touch scary and a whole lot of cute.
I’ll start with today’s card and then share some of the cards I have presented before …
Halloween is only 8 weeks away so if I’ve inspired you with this bundle, I have added the links below for your shopping convenience. Thank you for taking the time to visit me today.
Stop back tomorrow to see the new promotions Stampin’ Up! has announced. BUT … Don’t forget that today is the last day to enjoy the Sale-a-bration FREE Products.
Have a good day ~
Here is my list of ingredients for today’s card ….
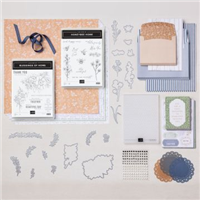
I am so full of gratitude for the amazing weekend we had for our Annual Spring Stamping Retreat! The weather was windy and rainy but it always seemed to clear when we had to go outside … a true sign if you ask me!
I have a peek into our stamping retreat for you … I will share a bit more in the coming days as well. I will begin with the door tags … Each guest has a name tag on their door so they know which room the will be staying in and they are free to take it home with them. They can easily pop the name off and turn it into a card!
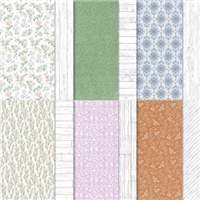
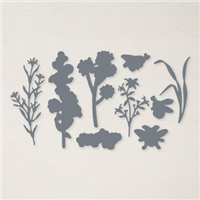
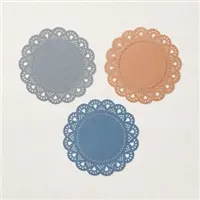
This was created using the Heart and Home Suite of products … The “theme” for our retreat. The Heart and Home designer paper, Flowers Of Home Dies, Heart & Home Doilies in Basic Grey, the White 3/4″ Frayed Ribbon which comes from the Artfully Composed suite (pg.32 in Mini), the 1/8″ Cotton Ribbon in Petal Pink which is layered over and the Petal Pink cardstock embossed with the Thanks & Hello Embossing Folders all layered onto a Basic Grey base. I printed each guest’s name onto Basic White Cardtock (from my computer) and punched it out using the Tailored Tag Punch (retiring today).
The cup is a food safe cup that has retired from the Stampin’ Up! catalog … I decorated it with the Heart and Home Designer Series paper … to do this, I took apart one of the cups, and traced the outside onto designer paper and cut it out to make my wrap!! They were so cute!
The cover was created using Evening Evergreen cardstock, die cut with the Layering Circle Dies and embossed with the NEW 3-D Fern Embossing Folder. My “greeting” to my guests comes from the NEW Nature’s Prints Stamp set from our Sun Prints Suite … pg. 90 & 91. WOW!!
As my guests come into the dining room, over the fireplace …. they find what I call my Mantle Gifts! Each retreat I decorate the mantle with a hand crafted gift that they get to take home at the end of the retreat. These are actual “pocket cards” and a seed packet was tucked inside to they have a “living” remembrance of our retreat. Each seed packet is adorned with a flower … which is actual chocolate! We all know how good chocolate and stamping go together!
Here is a closer look ….
The card was created from one sheet of Very Vanilla … I created my own pattern for this. From the left over piece of vanilla, I stamped and punched (Label Me Lovely Punch) my greeting which come from one of my favorite sentiment stamp sets: Peaceful Moments. The pretty die cut flowers come from the Hand-Penned Petals bundle.
The “sentiments” on my gifts are carefully picked to show my thoughts and gratitude to my guests for choosing to spend their time with me at my Annual Retreats … I want to create an atmosphere of fun, relaxation and camaraderie. (noun: camaraderie: mutual trust and friendship among people who spend a lot of time together.)
I hope you enjoyed my PEEK into my Annual Spring Stamping Retreat … can’t wait to share even more with you!
I am thrilled to share this Quick & Easy Fun Fold with you today. Super simple to make yet it adds a fun twist to your cards. I demonstrated two different layouts in my video (a replay of last nights Facebook LIVE) and then I’ll have another layout that you can create as well.
Let’s take a look at the video now …
Book Binder Fun Fold … Super Simple!
HORIZONTAL PROFILE (Above) How It’s Made
Cut a 4-1/4 x 11″ piece of Soft Succulent cardstock for the card base. Score at 5-1/2 and 4-1/4. Crease folds and add adhesive to the inside of the two scored lines. The 4-1/4″ score line should be facing out on the front of the card.
Cut a 4 x 4″ piece of Designer Paper (or cardstock) and adhere to card front.
Cut a 1″ x 4″ strip from the tulip design designer series paper and adhere to the left side margin on the card front.
PORTRAIT PROFILE (Above) How It’s Made
Cut a 5-1/2 x 8-1/2″ piece of Evening Evergreen cardstock for the card base. Score at 4-1/4” and 5-1/4”. Crease folds and add adhesive to the inside of the two scored lines… You can add your ribbon at this time.
To layer card front; cut Basic White 5-1/4” x 3” (Cut 2: one for inside and one for mat on front) Cut Designer paper to 5” x 2-3/4” to layer on top of white.
Binder area is cut in Basic White at 5-1/4” x 3/4” and I embossed with “Brick” embossing folder for some texture.
Cool … right! Now, let me share another layout you can use when creating the Book Binder Fun Fold. It’s another portrait however the card stock is cut at the usual 8-1/2″ x 5-1/2″ and it is scored at the 4-1/4″ and 5-1/4″ … now you will just position your “binder” to the “TOP” of your card.
The designer paper is cut at the same dimensions as well … however, you need to make sure you are “cutting” to the designer of the paper. On this card, my “binder” actually has the same designer paper, I just flipped it over. The greeting also comes from the Flowing Flowers stamp set, same as we used on our first card.
Enjoy making this fun fold … it’s really easy, and you’re going to have a blast creating with all your beautiful designer papers. Don’t forget, you can add in your embossing folders, die cuts or hand stamped items!
TODAY’S STAMPIN’ SUPPLY LIST … If you liked the products used in today’s projects, I have links for you below. Just click on the item you would like more information on, or to begin your shopping. It will take you directly to my website. Thank you ❤
I am back today with the “FAUX” Step Card that I changed up a bit … and I’m going through step by step with dimensions on how to recreate this card. Today I’m using the Hand Penned Petals bundle… and I love the way this card turned out. I have this all on video for you to view.
Let’s take a look at the video now …
Dimensions:
Card Base: Basic Black: 9” x 4-1/4” then Score at 1-1/4”, 2-1/2” and 5-3/4”
Cardstock #2: Basic Black Center Step: 8-1/2” x 2-1/4” then Score and fold at 5-1/2”
Cardstock #3: Basic White 3″ x 4″ for inside of card / Scrap of white for greeting and Highland Heather as a mat (Cut with the Layering Circle Dies)
Designer Paper #1: Hand Penned Petals (Mint Macaron) for Center Step 2″ x 5-1/4″ and Floral Design paper is 3″ x 4″ and 1″ x 4″.
I find it easiest to lay the card base out flat when attaching the designer paper, as shown in the video.
What a fun twist to the card … placing your “center step” either on the right or the left side of the card. It gives you a totally different look. For my card, I choose to put my center step to the right to balance out the greeting which I let “hang over” the left side … that gives it another dimension to the card.
I love the way this card turned out! Don’t you just love that feeling when you’re done creating something that turned out sooo cool!
I hope you enjoyed the quick coloring technique as well …. it was fun and easy to recreate the watercolor look that you find on the Hand Penned Petals designer paper.
Enjoy making this fun fold … it’s really easy, and I love the twist of placing the “step” off to the side.
TODAY’S STAMPIN’ SUPPLY LIST … If you liked the products used in today’s projects, I have links for you below. Just click on the item you would like more information on, or to begin your shopping. It will take you directly to my website. Thank you ❤
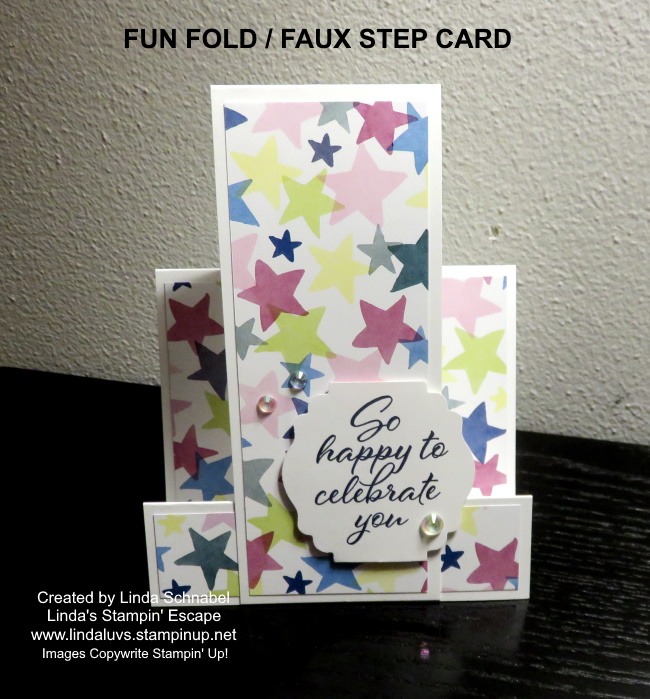
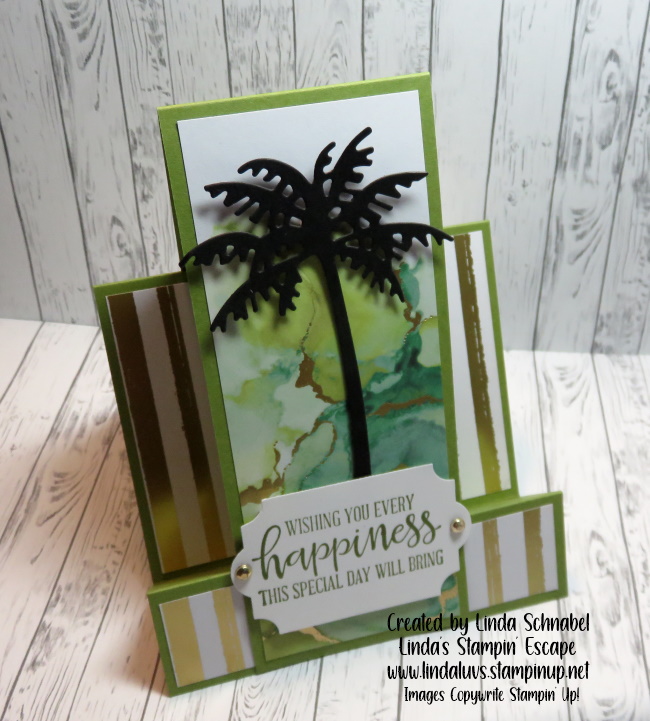
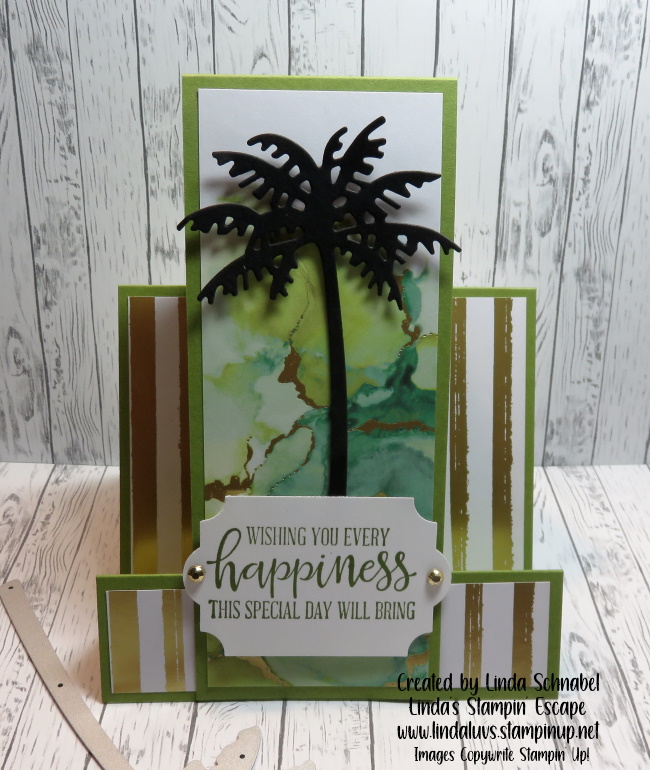
I am excited to share the “FAUX” Step Card that I shared with my Stamp Club in February. I have my Facebook LIVE video to share with you so you can see how easy it is to create this FUN FOLD card. I’m also sharing the dimensions with you.
Let’s take a look at the video now …
Dimensions:
Card Base: Old Olive: 9” x 4-1/4” then Score at 1-1/4”, 2-1/2” and 5-3/4”
Cardstock #2: Old Olive Center Step: 8-1/2” x 2-1/4” then Score and fold at 5-1/2”
Cardstock #3: Basic White 3″ x 4″ for inside of card / Scrap of white for greeting
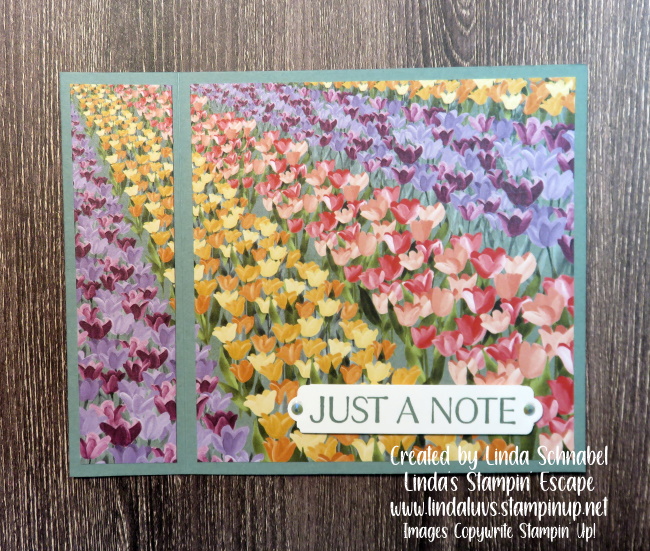
Designer Paper #1: Expressions in Ink for Center Step 2″ x 5-1/4″ and Striped paper 4″ x 4″ cut off 1″ from bottom so it aligns during assembly
I find it easiest to lay the card base out flat when attaching the designer paper, as shown in the video. Then use your favorite adhesive to attach the center flap … you’ll want to make sure to center and align the front flap to the bottom, then attach to the back.
.
Ahhh … Don’t you just love making quick & easy cards that look like you spent all day cutting and creating!! lol No one has to know that … right! Just image all the different designer papers or dies that you can use with this Fun Fold Faux Step Card.
Have fun creating and thank you for hanging out with me today.
TODAY’S STAMPIN’ SUPPLY LIST … If you liked the products used in today’s projects, I have links for you below. Just click on the item you would like more information on, or to begin your shopping. It will take you directly to my website. Thank you ❤
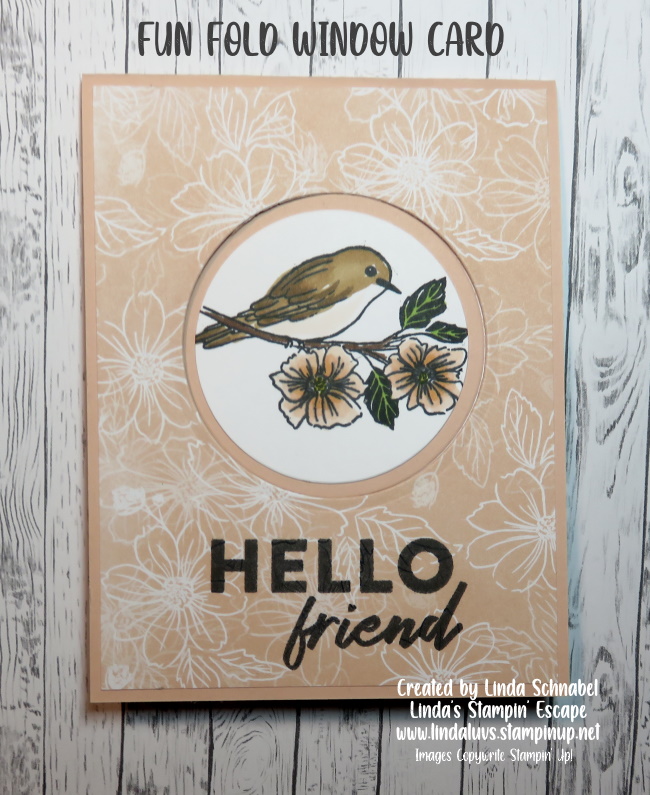
Today I’m going to share the second card from my LIVE on Tuesday …. I’m highlighting the Friendly Hello Stamp Set and Designer Paper that is in the Sale-a-bration Catalog.
Yesterday I shared the “Side Fold” version of this Fun Fold ….
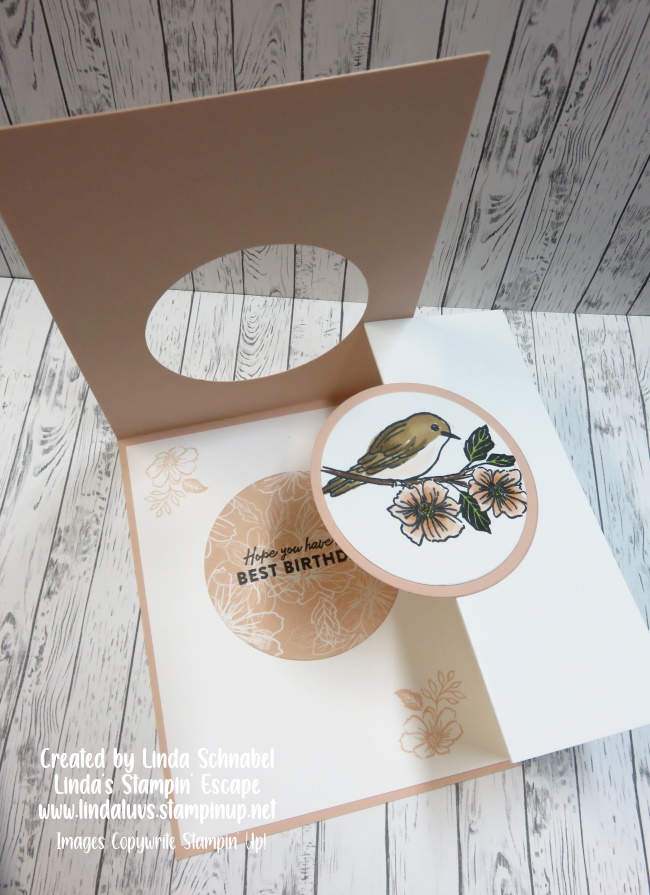
Today I’m going to show you the “Top Fold” version … the inside is exactly the same! It’s just the outside card base that is either folds down from the top, or over from the side. Isn’t that cool 🙂
Measurements:
Petal Pink Cardbase: 11″ x 4-1/4″ … Score & Fold at 5-1/2″
Friendly Hello Designer Paper for Front: 5-1/4″ x 4″
Use Circle Dies to Die Cut the “Window” in Front of your card (Save Designer Paper Circle)
Basic White Inside Cardstock: 5-1/4″ x8″ … Score at 4″ and 6″ / A scrap piece to die cut smaller circle for your stamped image.
We begin with the Petal Pink Cardbase cut to 11″ x 4-1/4″ and then score & fold at 5-1/2″. If you want to stamp directly onto your designer paper, now is the time. Using your favorite adhesive (around the edges only and NOT in the center) secure your designer paper to the front. The next step is to die cut the circle …. save both the cardstock and designer paper circles. The next step is to secure the “fun fold” into your cardbase …. the scored side will go to the right side of your card.
Put adhesive onto the back of the 5-1/4″ x 4″ section of the white folded piece and secure it inside the card. The first score (at the edge) is folded to the right and the second score if folded back upon itself…. burnish with your bone folder and close the card.
The Basic White cardstock fold is now exposed so it’s time to secure the Petal Pink circle to the fun fold …. this will be done while the top flap is down. Apply adhesive on the one section of the flap … that is why I close my card, it makes it so easy to remember exactly where to put the adhesive to attach your circle. Once you have stamped your image onto the white circle and color it, you can attach it to the pink.
If you want to add the die cut designer paper into the inside of your card like I did …. flip up the top, open the fold and then drop the top back down and one you have adhesive on your designer paper circle, fit it directly into the opening and then everything will line up perfect!
I think you are going to have so much fun making these cards… fun and easy is the way.
Thank you for hanging out with me today, have a great one!
TODAY’S STAMPIN’ SUPPLY LIST … If you liked the products used in today’s projects, I have links for you below. Just click on the item you would like more information on, or to begin your shopping. It will take you directly to my website.Thank you ❤
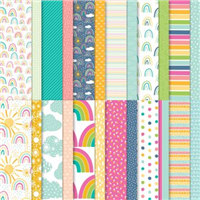
I’m excited to share today’s card with you!! It is a fun fold card that I first shared at my Holiday Stampin’ Retreat … so I updated it with the Rainbows of Happiness bundle and the Sunshine & Rainbows Designer paper that you will find in the Sale-a-bration Catalog.
I also will share the video created from last nights Facebook LIVE ….
Measurements:
Bermuda Bay Cardbase: 8-1/2″ x 5-1/2″ … Score & Fold at 4-1/4″
Sunshine & Rainbows Designer Paper for Front: 5-1/4″ x 4″
Use Circle Dies to Die Cut the “Window” in Front of your card
Basic White Inside Cardstock: 5-1/4″ x8″ … Score at 4″ and 6″
This card is so cute and easy to make … Just think of all the different stamp sets/bundles you could use … you saw 2 additional fun folds in the video!!
This is the “side fold” card and when they open it … it’s a “fun” surprise on the inside. Remember to attach the inside layer with the score lines to your right so you can fold them into the card.
And ONLY apply adhesive on the one section of the flap … that is why I close my card, it makes it so easy to remember exactly where to put the adhesive to attach your circle. Have a blast making this Fun Fold card!!
I’ll share the “Friendly Hello” Top Fold Card with you tomorrow.
Have a wonderful day and thank you for stopping by.
TODAY’S STAMPIN’ SUPPLY LIST … If you liked the products used in today’s projects, I have links for you below. Just click on the item you would like more information on, or to begin your shopping. It will take you directly to my website.Thank you ❤
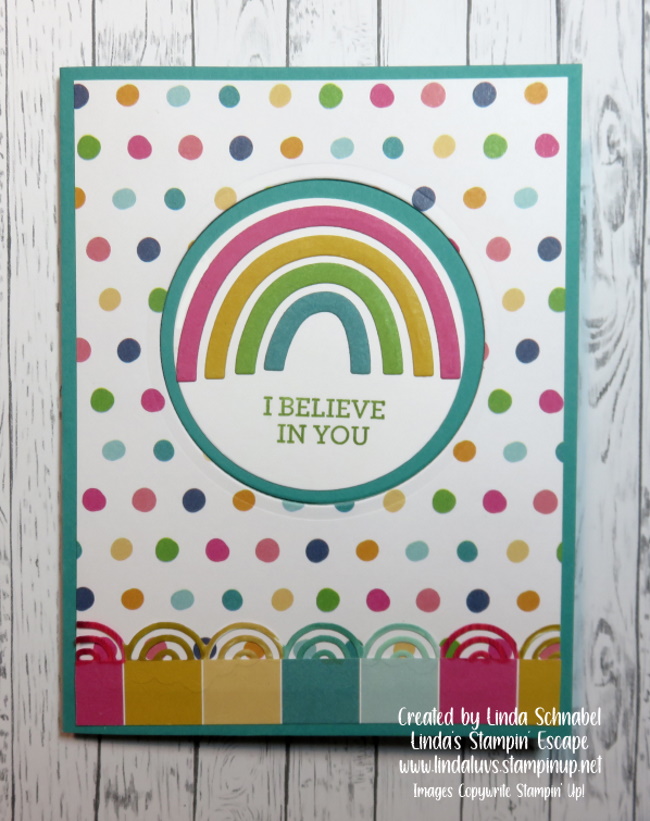
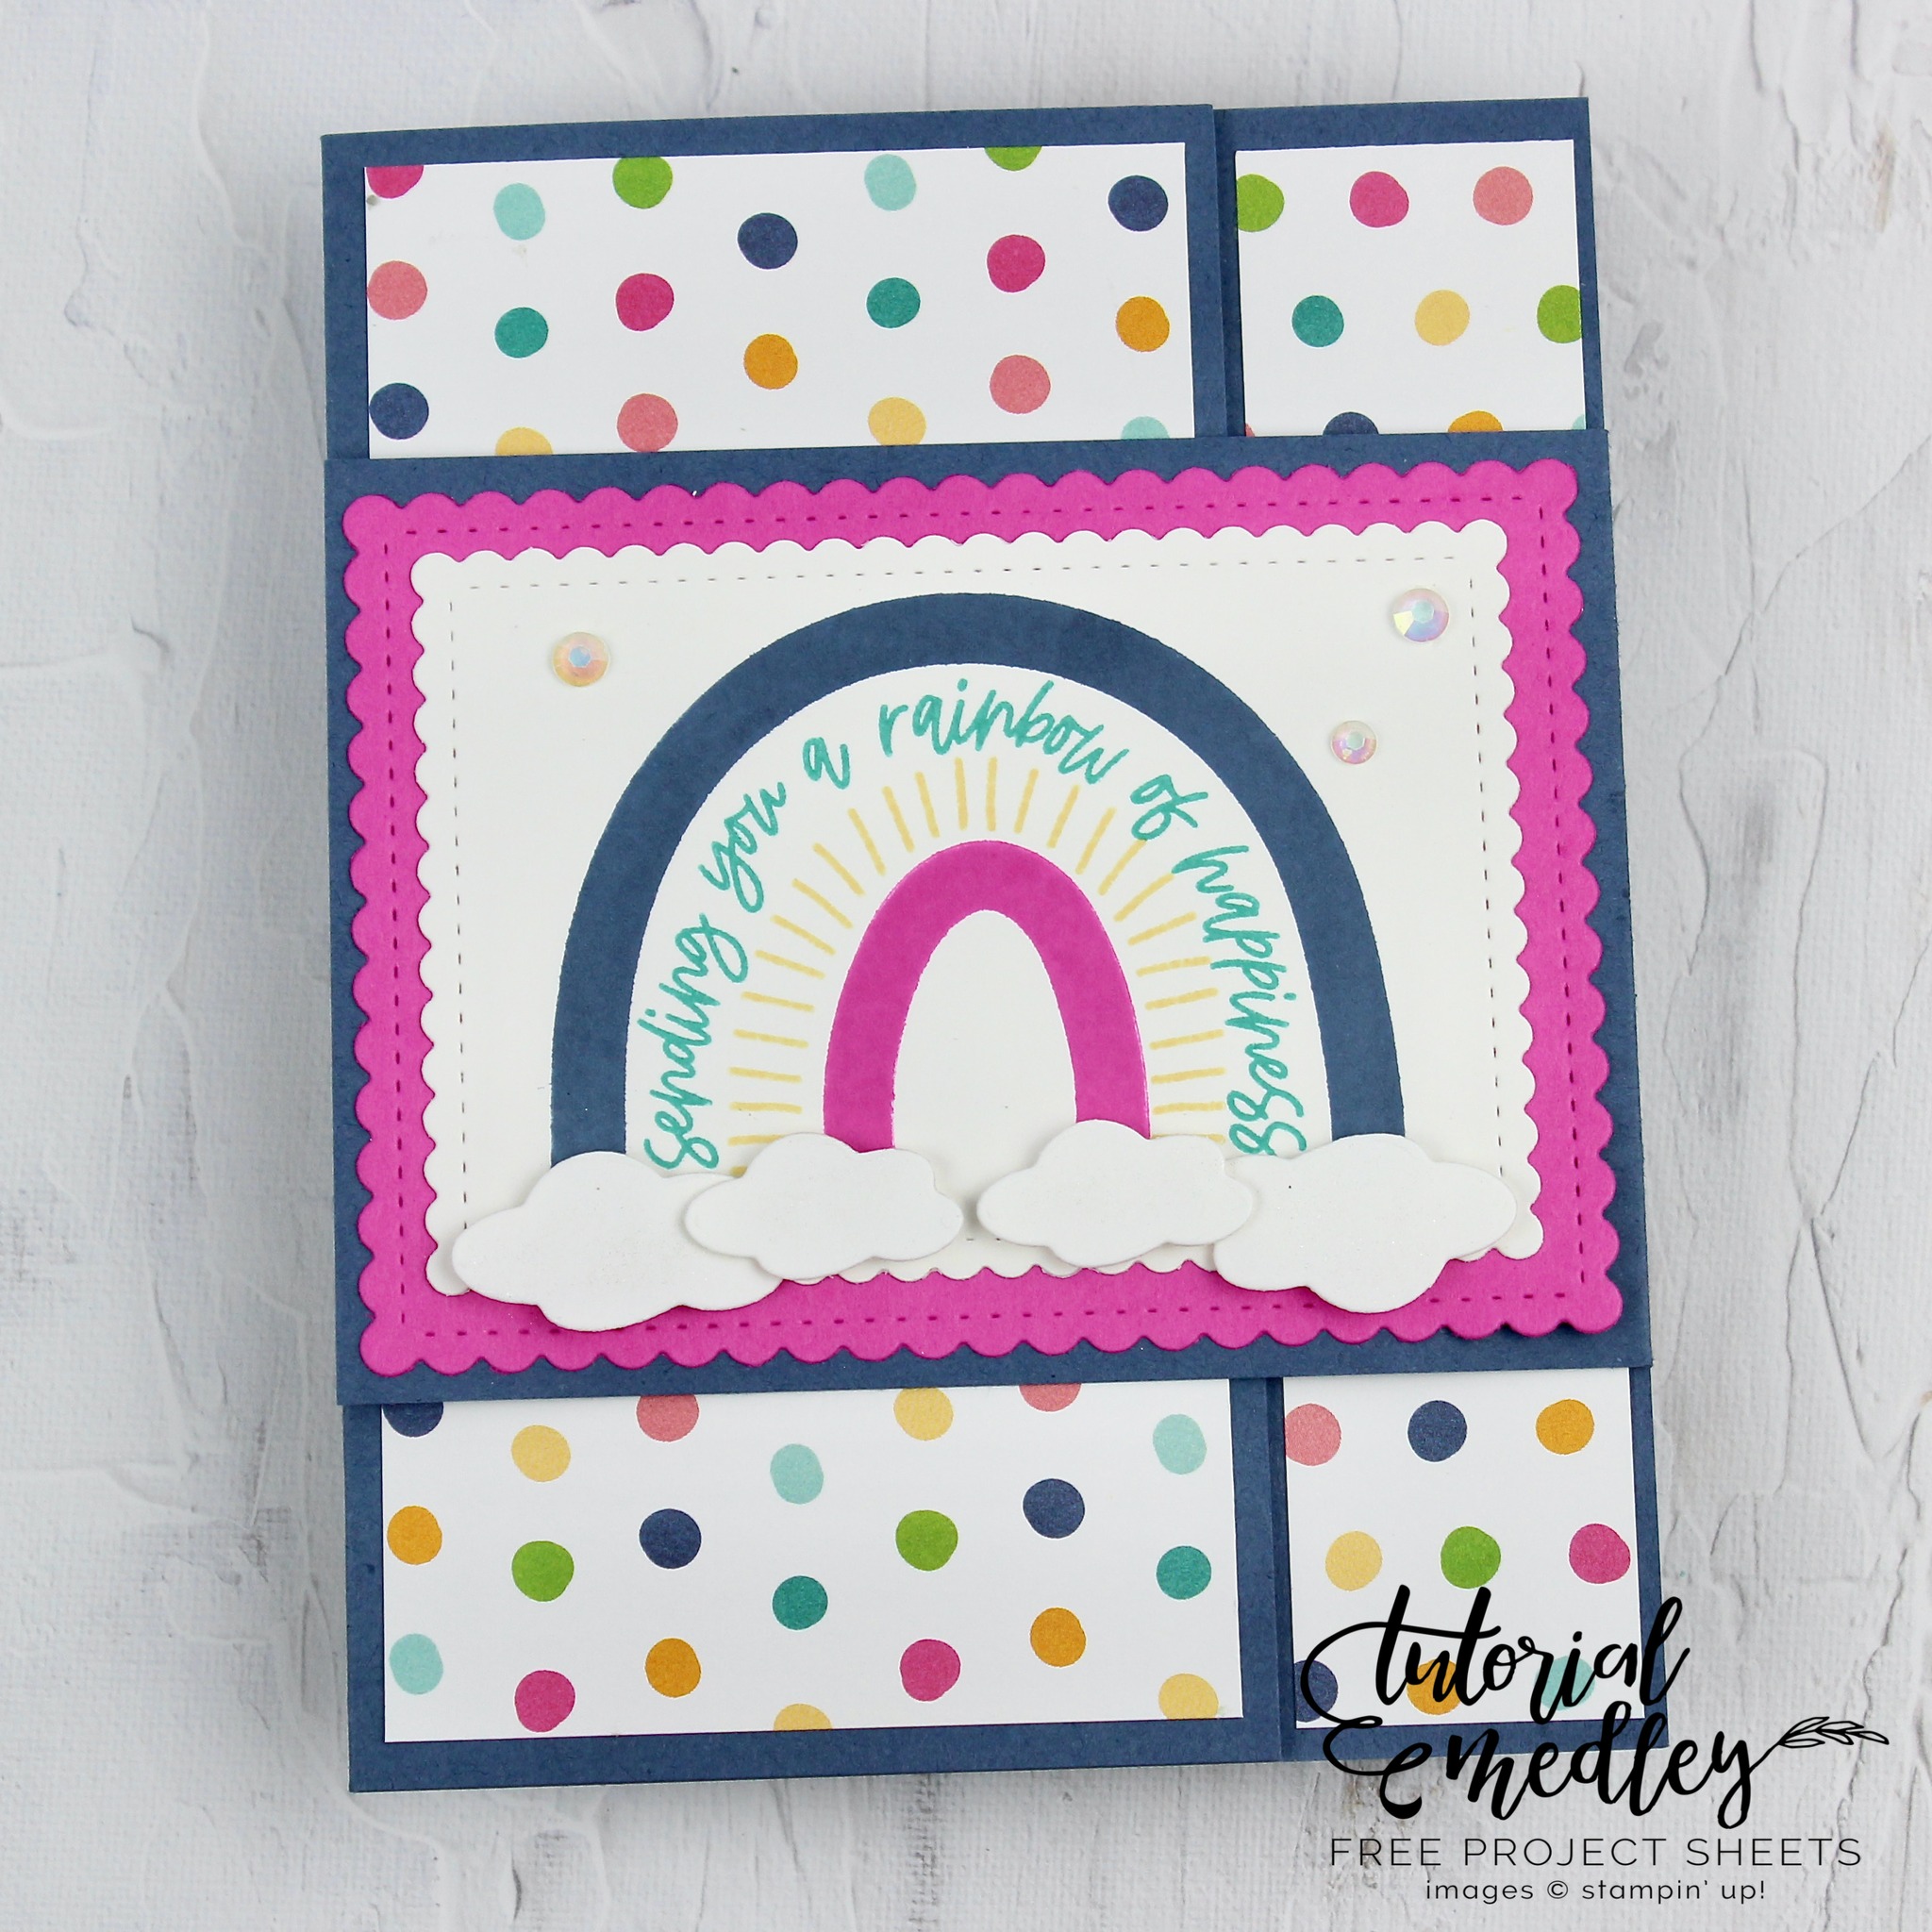
Somewhere over the rainbow … well, you know the rest. We find “cute” cards!! And that is what I have for you today, along with the dimensions and instructions. Today’s card is also a FUN FOLD … gotta love it!
Let’s take a close look at that fold ….
Measurements:
Card Base: Misty Moonlight 7-1/4” x 5-1/2”, scored at 4-1/4”
Cardstock #2: Misty Moonlight 4-1/2” x 3-1/8”, score at 1/4” on the right side
DSP #1: Sunshine & Rainbows 2-3/4” x 5-1/4” (front of card)
Cardstock #3: Basic White 2-3/4” x 5-1/4” (inside of card)
DSP #2: Sunshine & Rainbows 1-1/8” x 5-1/4” (inside of card)
Cardstock #4: Magenta Madness 4-1/4” x 3-1/8” (for stitched die cut rectangle)
Cardstock #5: Basic White 3-3/4” x 2-3/4” (for stitched die cut rectangle)
Scrap of Basic White Cardstock for die cut clouds
Instructions:
Fold the Misty Moonlight card base so that the smaller flap is on the front of the card.
Adhere the larger piece of DSP to the front flap of the card base.
Adhere the Misty Moonlight Cardstock to the right side of the card base by only adding adhesive to the 1/4” flap, then adhere the smaller piece of DSP over the top. (use photos for reference)
Adhere the Basic White Cardstock to the inside of the card on the left side as shown leaving about a 1/8” space between the Basic White Cardstock and the DSP layer.
Die cut the largest scalloped rectangle from the Magenta Madness Cardstock using the Stitched So Sweetly Dies. Adhere to the Misty Moonlight Cardstock on the front of the card.
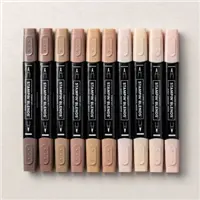
Die cut the second largest scalloped rectangle from the piece of Basic White Cardstock. Stamp the largest arch of the rainbow in Misty Moonlight ink, the sentiment in Bermuda Bay ink, the striped arch in Daffodil Delight and the smallest arch of the rainbow in Magenta Madness ink.
Adhere the stamped Basic White scalloped rectangle to the Magenta Madness scalloped rectangle.
Die cut four clouds (two small, two medium) from a scrap of Basic White Cardstock. Adhere to the card with Mini Stampin’ Dimensionals and accent with Wink of Stella Glitter Brush.
Add three Iridescent Rhinestones (two small, one medium) to the card front as shown.
Thanks for joining me today … I hope you join me tonight for my Facebook LIVE!
Have a wonderful day ~
TODAY’S STAMPIN’ SUPPLY LIST … If you liked the products used in today’s projects, I have links for you below. Just click on the item you would like more information on, or to begin your shopping. It will take you directly to my website. Thank you ♥
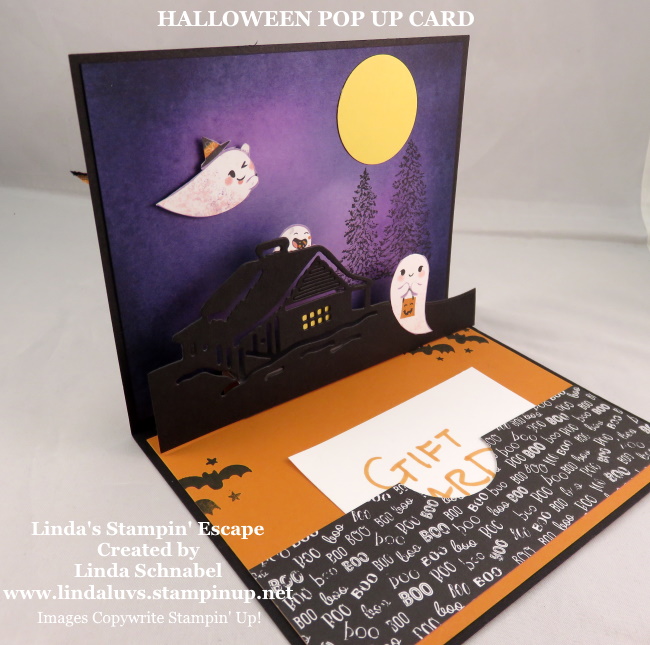
Enter if you Dare!! Today, I’m sharing the a Fun & Functional Halloween Card … The fun is the POP UP – inside the card a haunted cabin pops up to give you a 3-D effect complete with ghosts!! The functional is the my card serves as a “GIFT CARD” too!
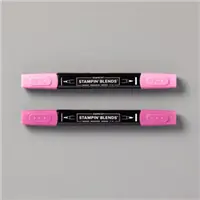
Let’s start with the front of the card … I used the “Cute Halloween” Designer Series paper and Black & White Gingham Ribbon dyed with my Pumpkin Pie Stampin’ Blends Marker.
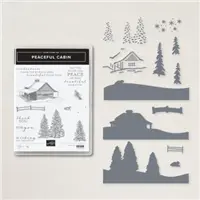
The inside of the card is created with the “Peaceful Cabin” bundle and the magic of our Blending Brushes … this is illustrated in the video below.
You’ll also see that I used another pattern of the Cute Halloween Designer Paper which creates the pocket you can put your Gift Card into.
In this photo, you will notice I “did not” line the back of my cabin as I showed in the video … I wanted you to see the difference. Here you can see the purples through the cabin … kind of spooky!
Enjoy the video and please let me know if you have any questions …
This fun card is very easy to make … three simple components, the front, the pop up & background and the base in which you can tuck in a Gift Card. Your ghouls and goblins are going to flip for this card!!
The dimensions for the “pop up” section of the card is 3″ by 2-1/4″ … score in 1/2″ incriminates: Score at 1/2″ – 1″ – 1-1/2″ and 2″ … then CUT at 2-1/4″. The 1/4″ edge will be your glue flap that secures the pop up together.
Here is the Fall Special I talked about in my video. Please message me if you have any question. Thank you!!
Thank you for stopping by and spending a part of your day with me. I hope the rest of your day is wonderful ~
TODAY’S STAMPIN’ SUPPLY LIST … If you liked the products used in todays projects, I have links for you below. Just click on the item you would like more information on, or to begin your shopping. It will take you directly to my website. Thank you ♥