Expressions in Ink: Card Parade

Hello Stampin’ Friends ~

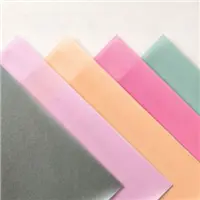
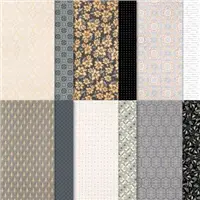
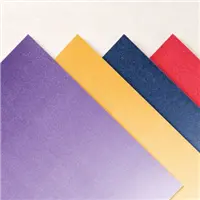
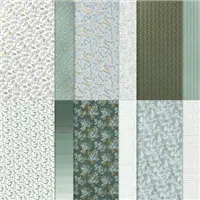
Many of the designer papers in the Mini catalog may be “SOLD OUT” but today I want to focus on the amazing designer papers in the Annual Catalog (One of my Favorites!!) Today I have a card that I created using the amazing “Expressions In Ink” Designer Series Paper. Many of the papers have ribbons of gold foiling running through the beautiful jewel tone colors like Evening Evergreen, Jade, Magenta Madness, and Pale Papaya….

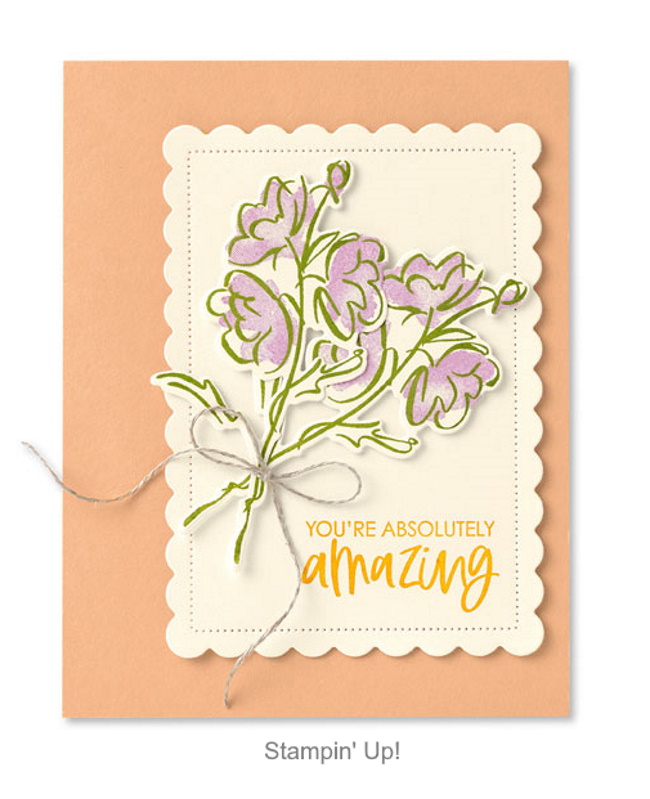
During one of my LIVE demonstrations, I showed my attendee’s how simple it was to cut these designer papers to maximize it’s beauty and have NO waste! Here is one of the cards I created ….

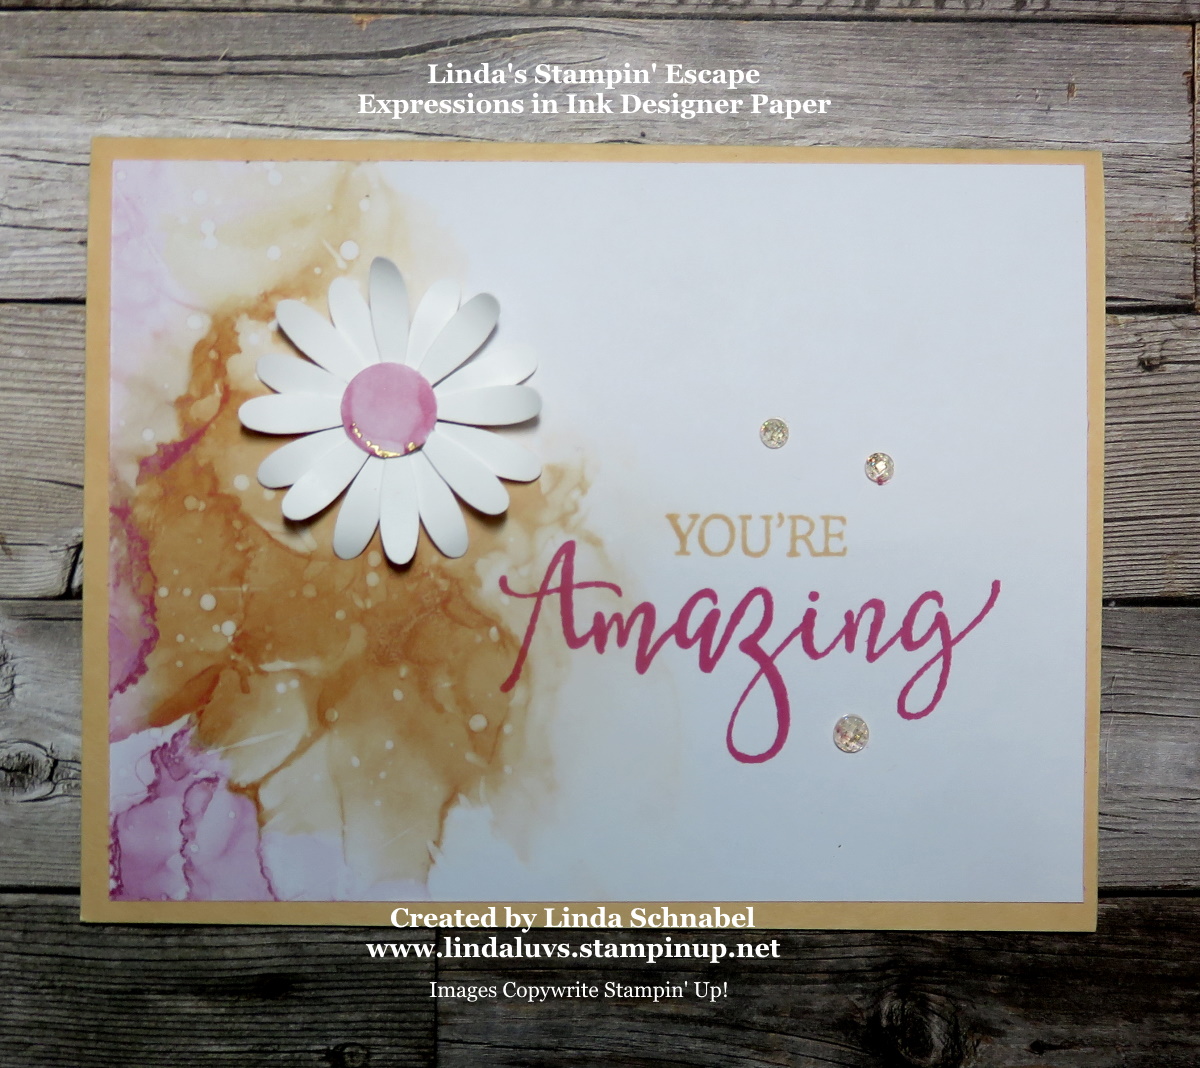
The beautiful water color design add such a natural look … as if I created it myself! Luckily it was done for me and I had no mess to deal with!!

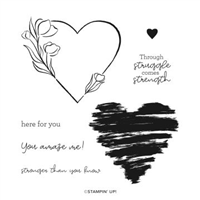
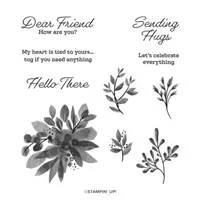
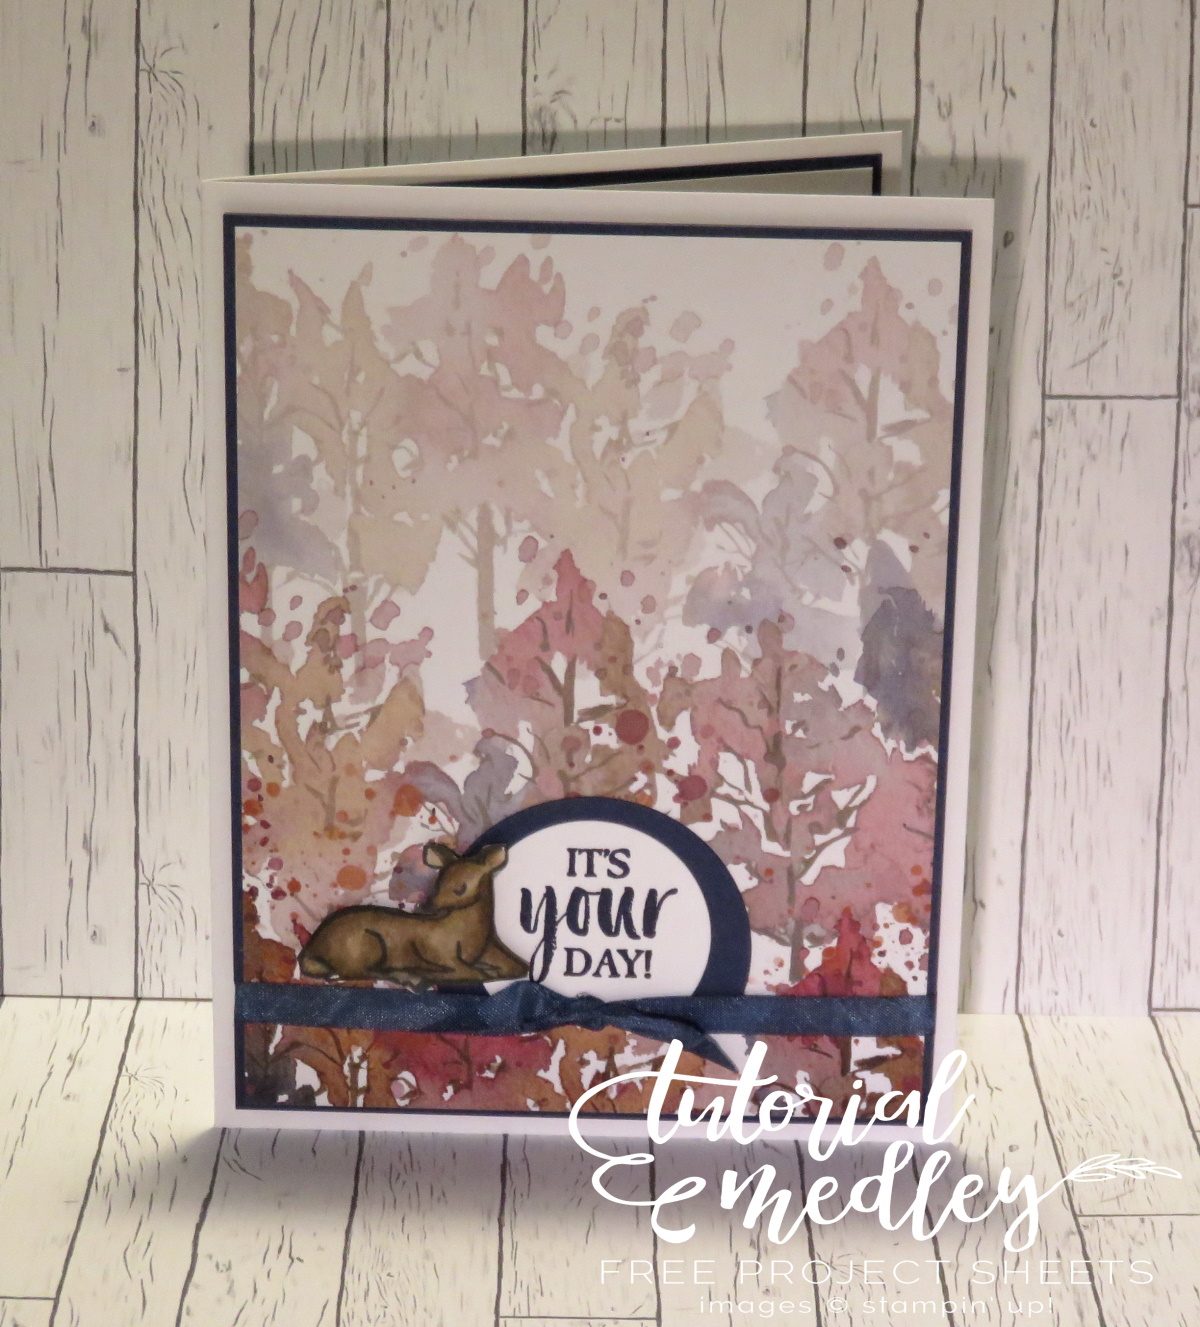
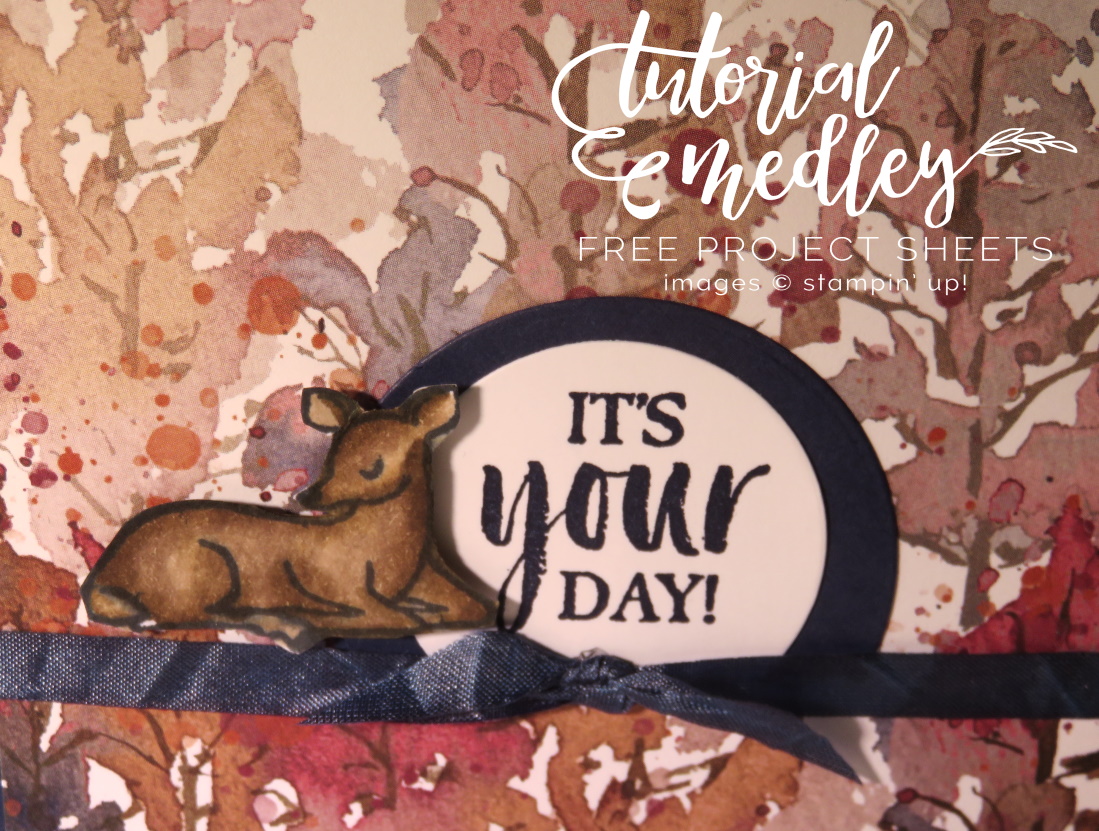
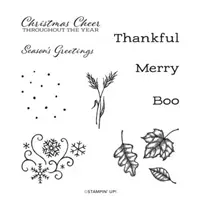
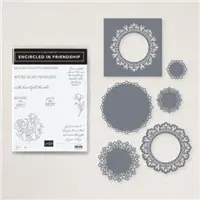
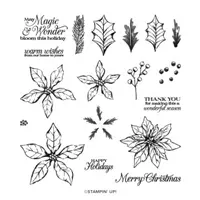
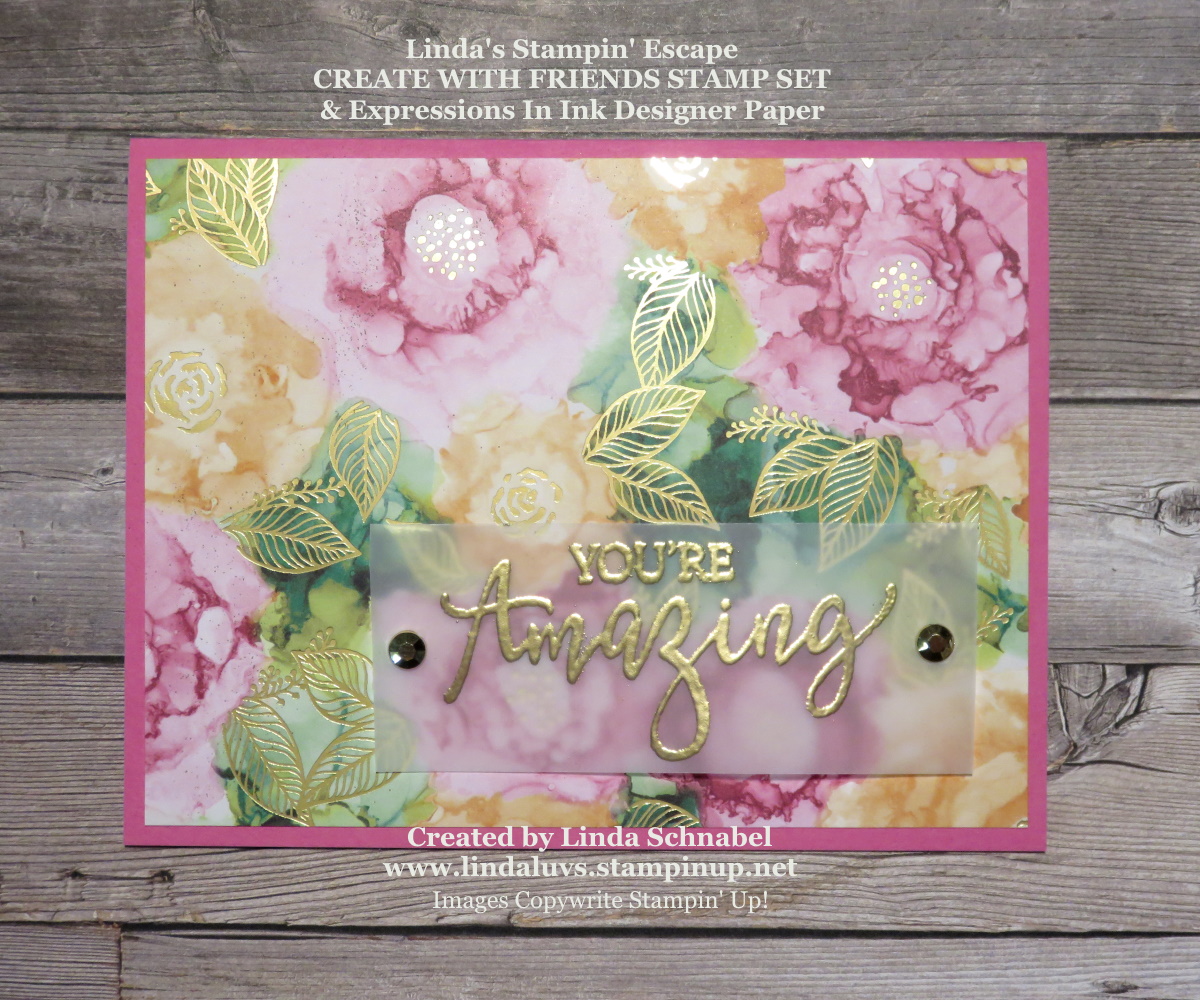
I teamed up my Expressions in Ink Designer Paper with the “Creating with Friends” stamp set. This stamp set is fun and easy to work with, and you can create an multitude of options …

Don’t you just love all of the different options for greeting you can create with this stamp set? I kept it simple by just saying … “You’re Amazing” and I stamped it in the Polished Pink and Pale Papaya ink.

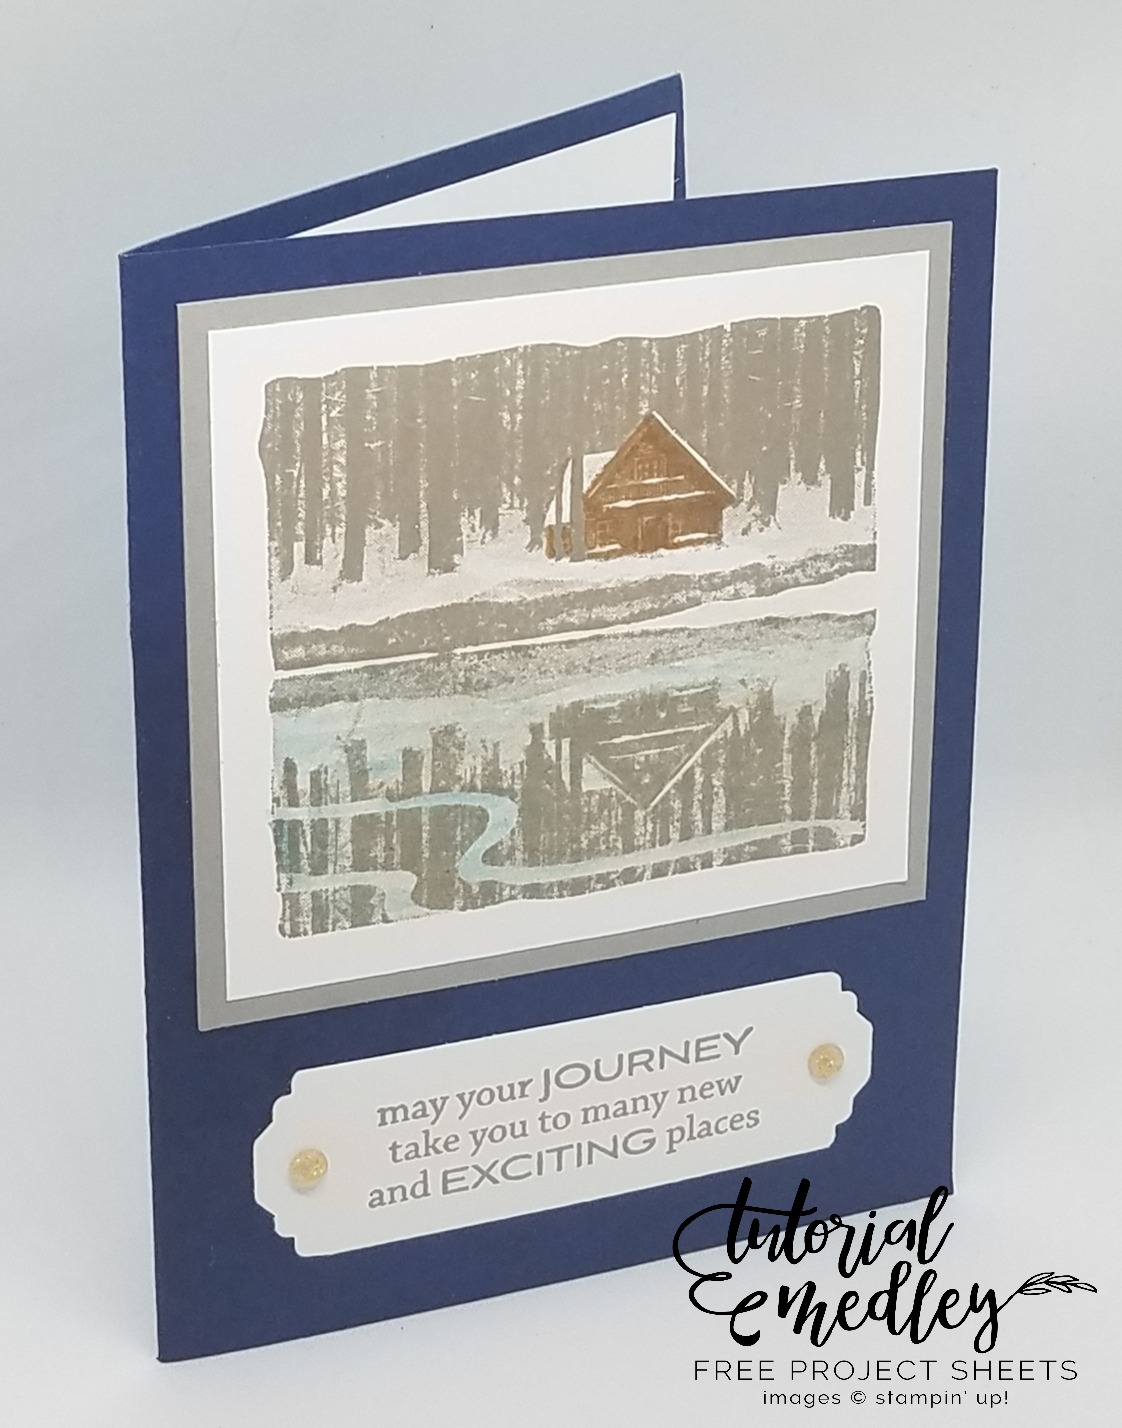
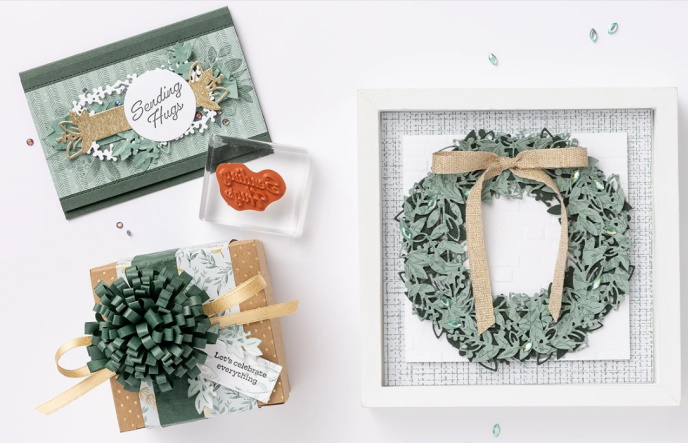
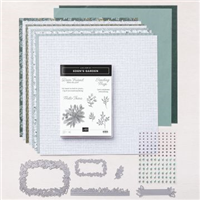
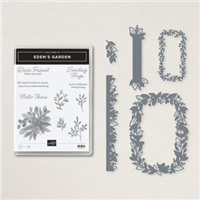
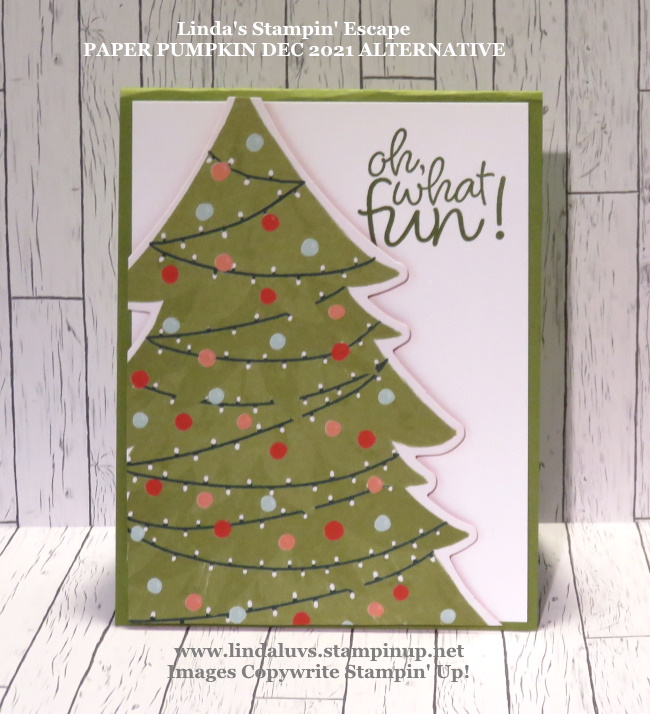
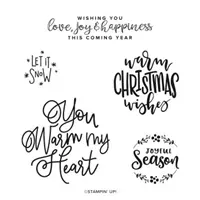
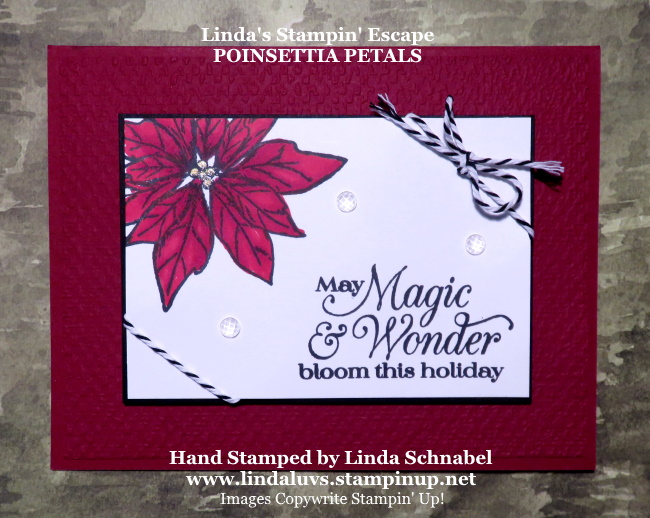
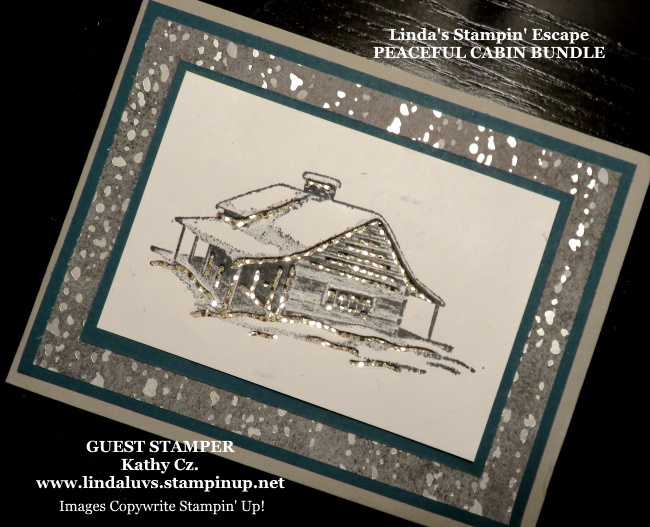
Since we are in the holiday spirit … here is a none traditional Christmas card I created with the help of the Tidings & Trimmings bundle which is also found in the Annual Catalog.

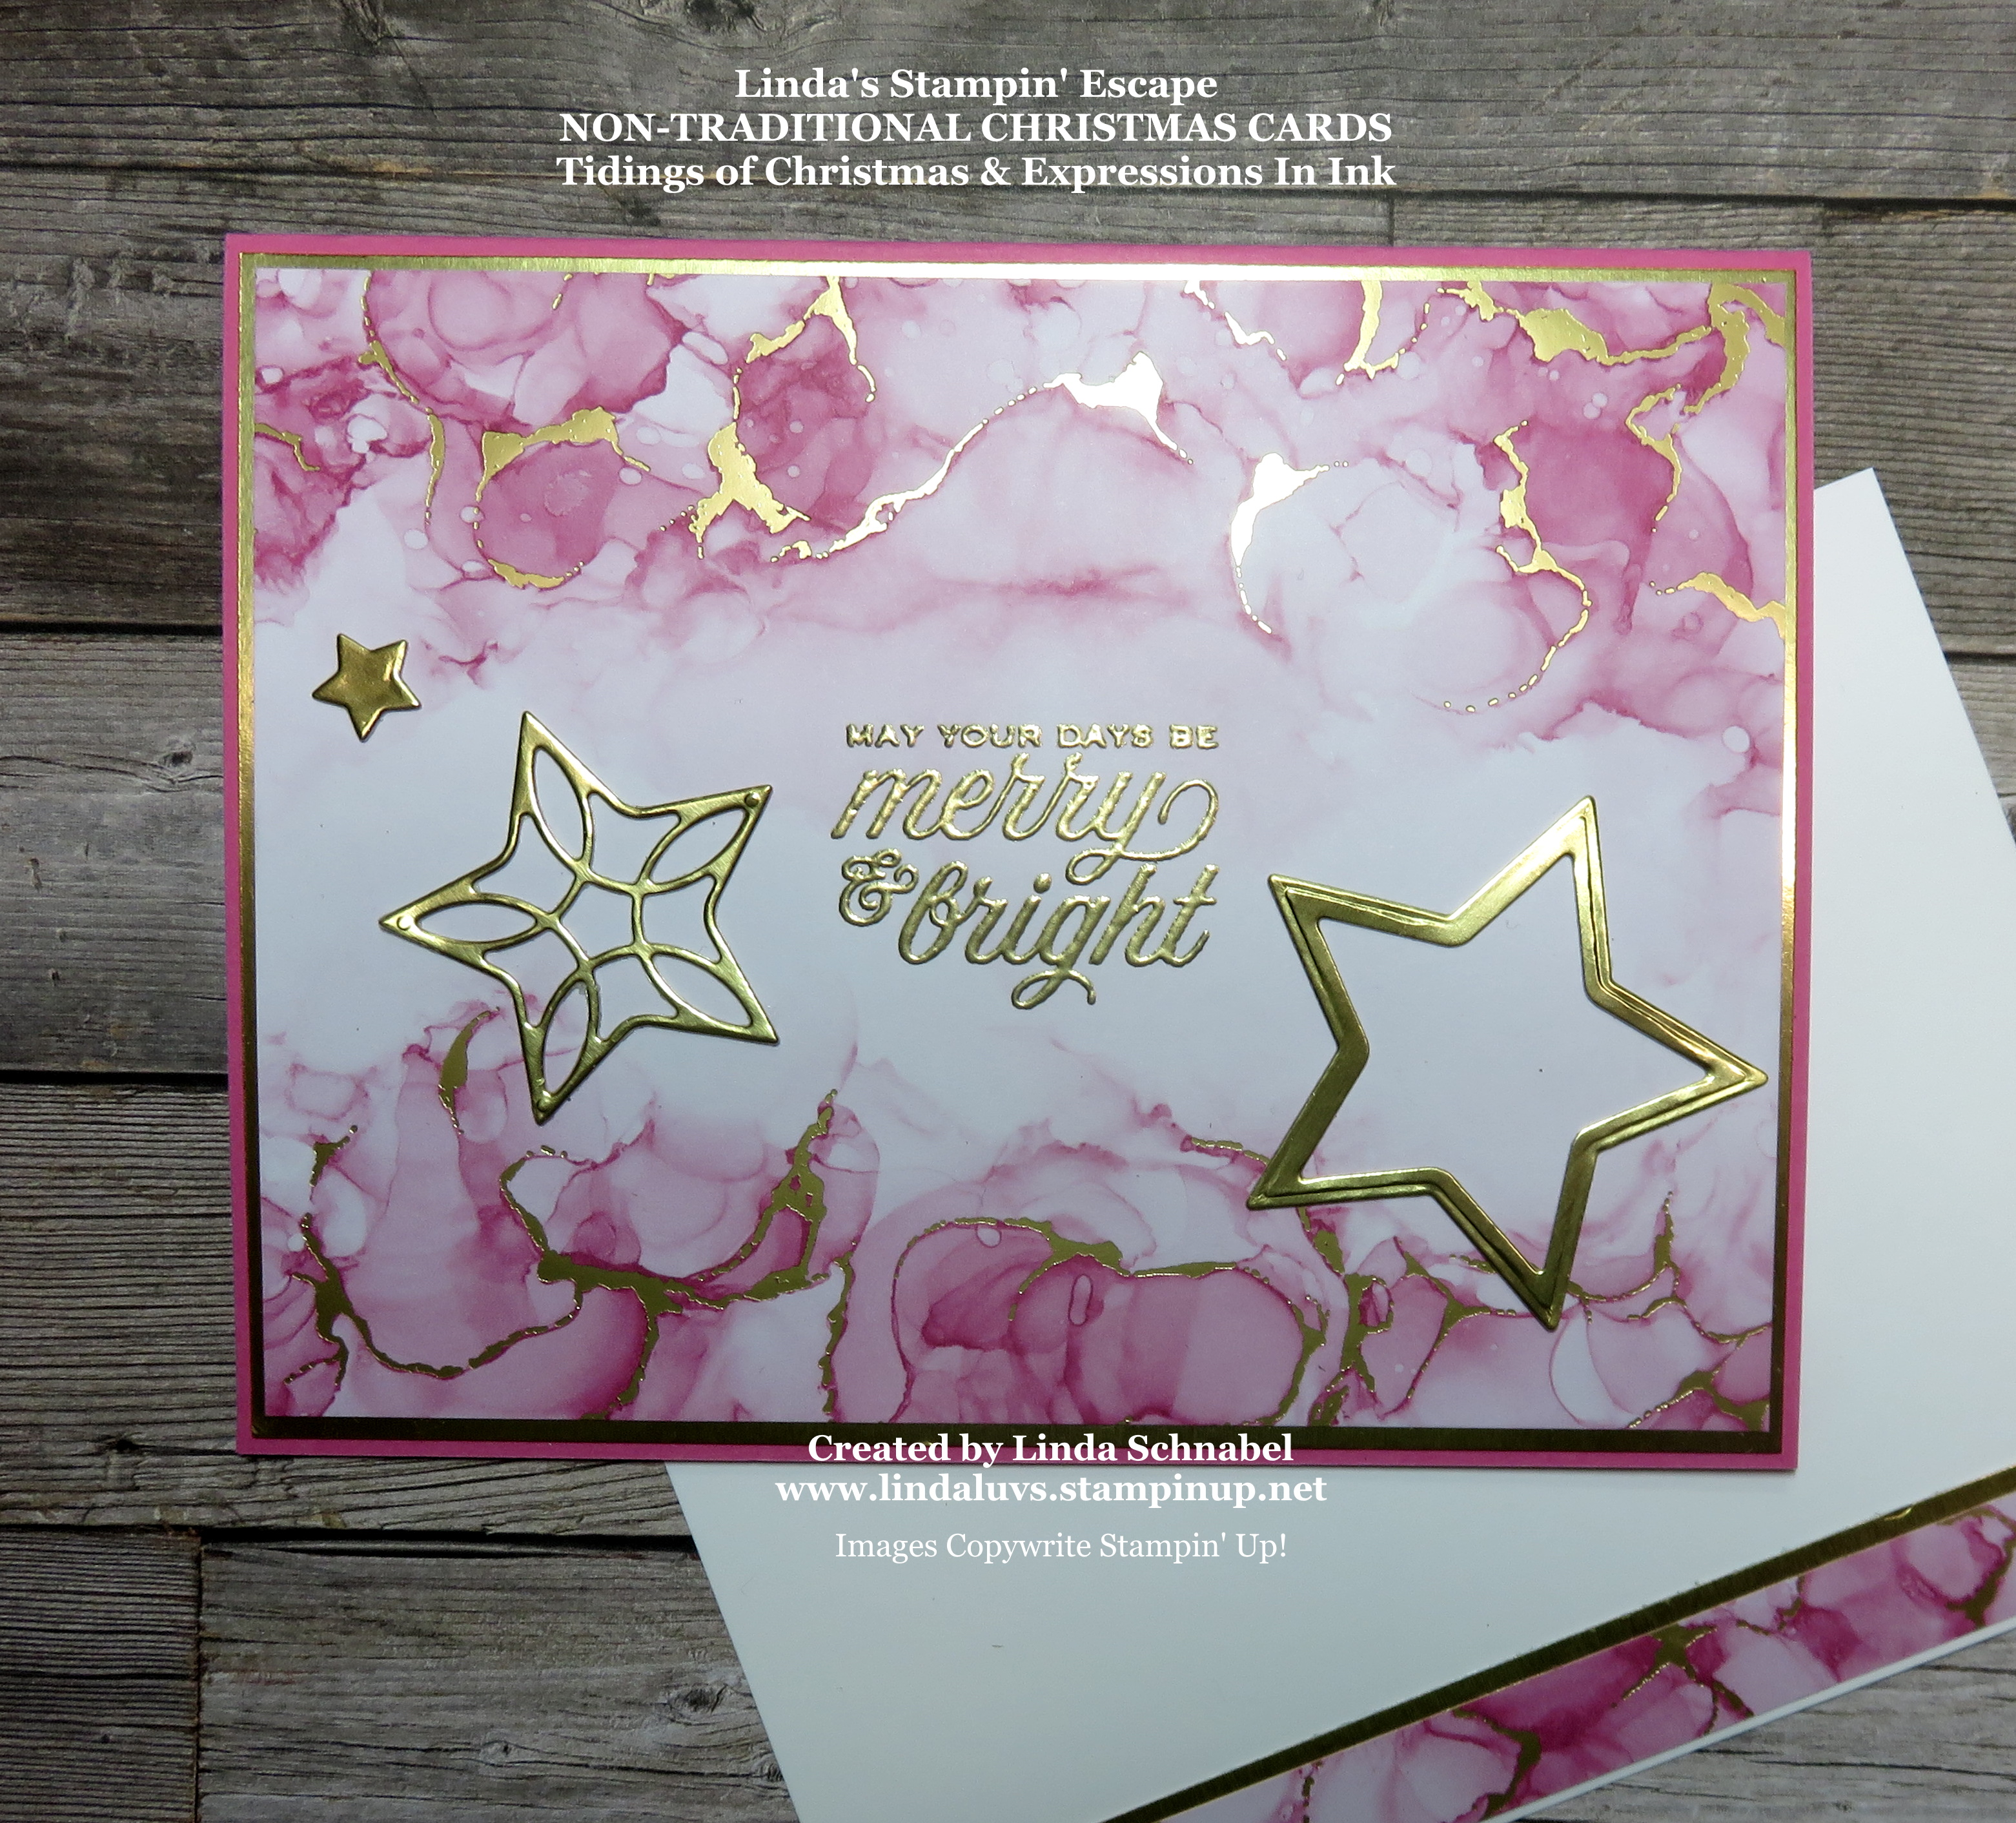
Lets show off some of our jewel tones with the Just Jade and Evening Evergreen. WOW … this card is stunning in it’s simplicity of greens and gold embossed greeting. Add a few Gilded Gems to finish off your card and you can head to the party early!

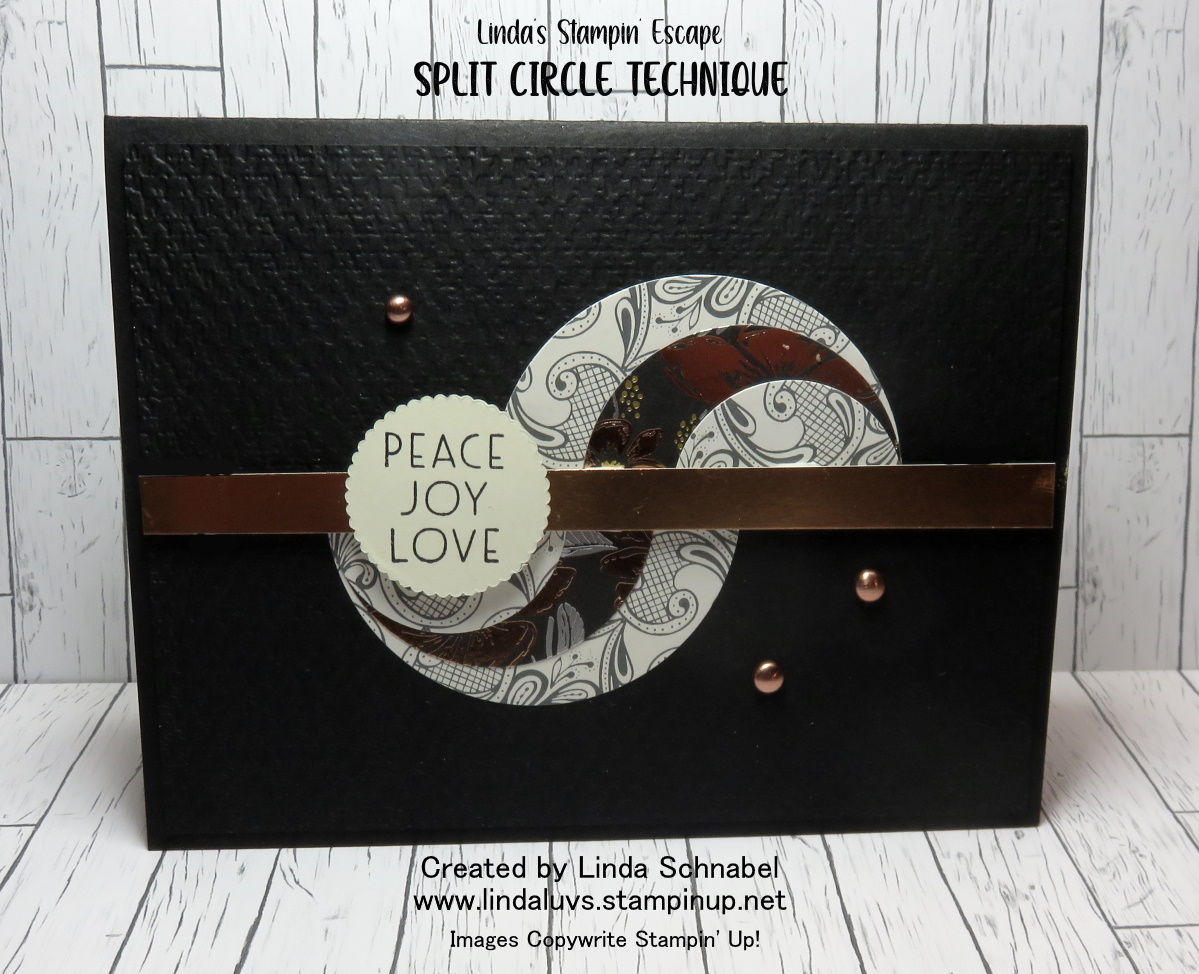
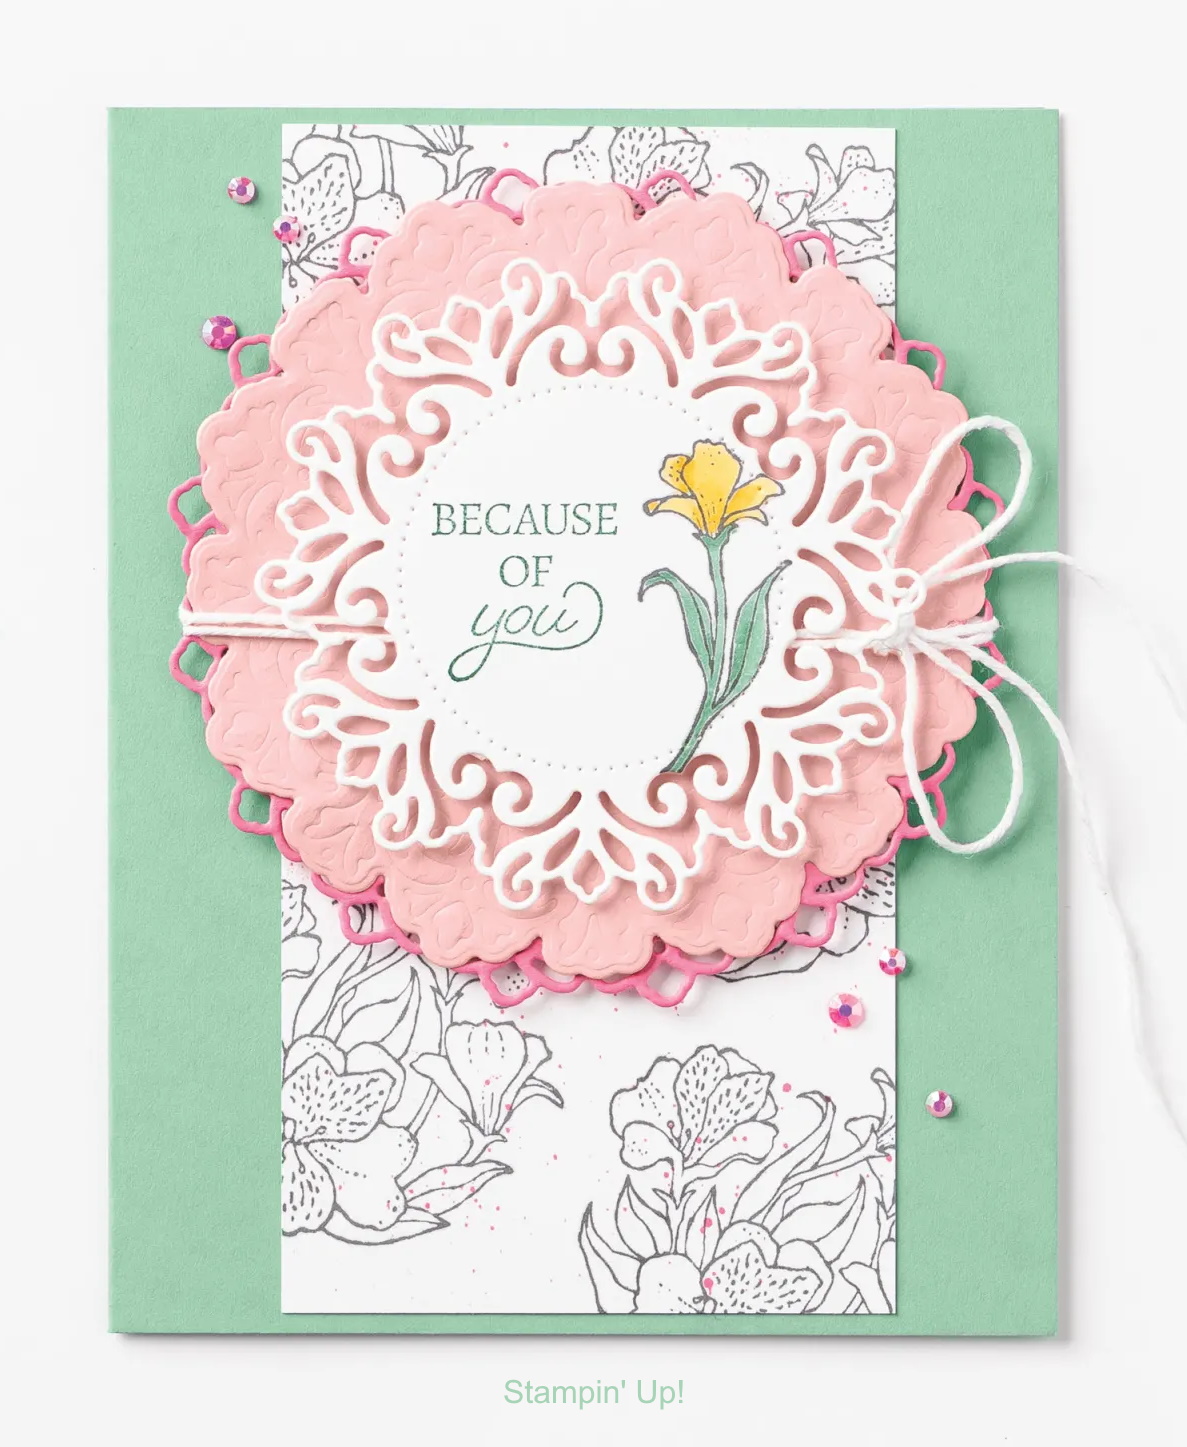
Speaking of stunners … this beauty had it’s greeting done on vellum so you could still see the beautiful patterned paper. Are you falling in love with this yet? At first glance I knew I had to have this paper, and of course the stamp set because the go together perfectly.

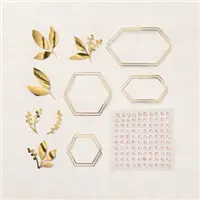
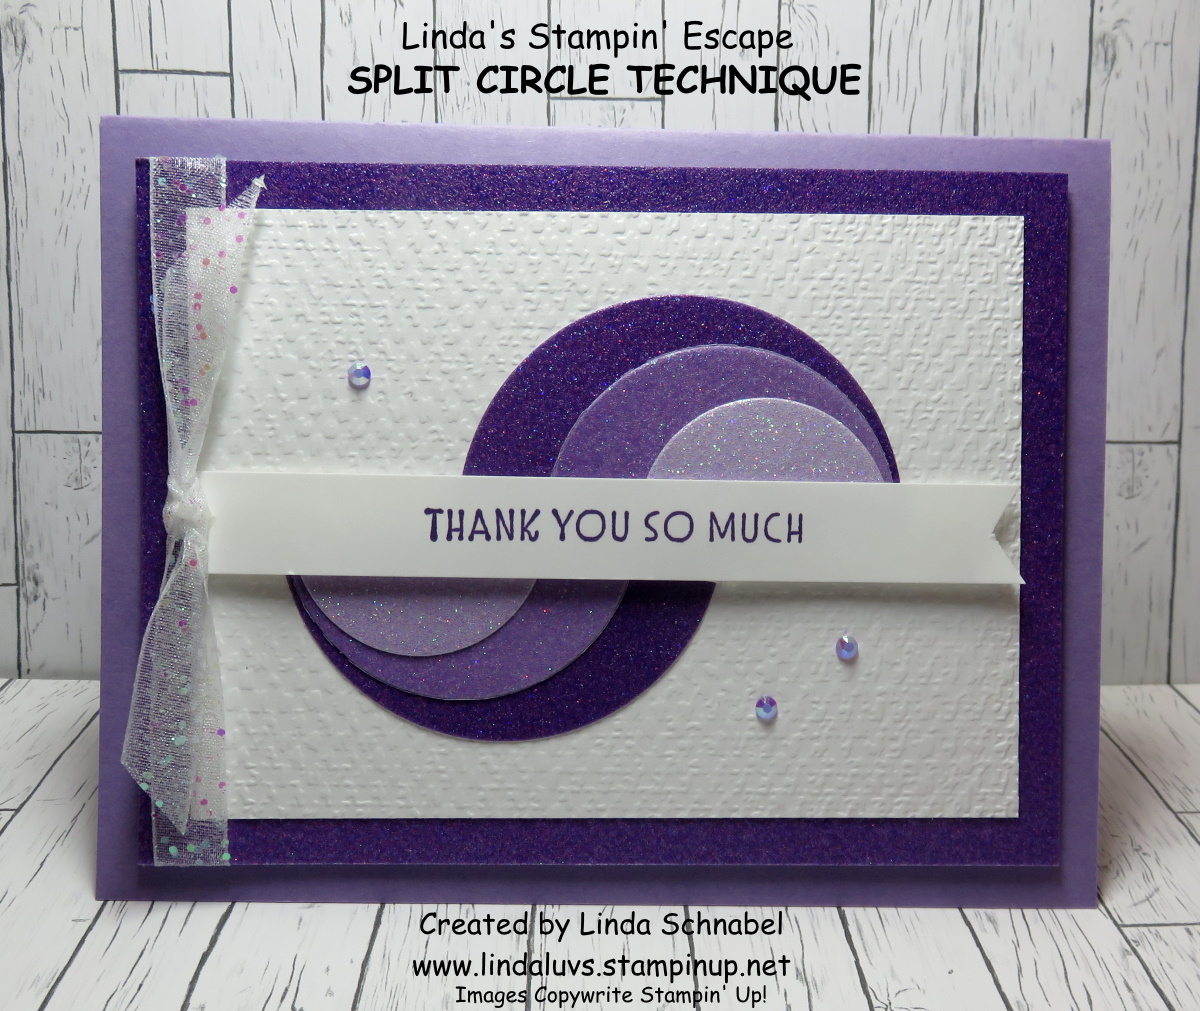
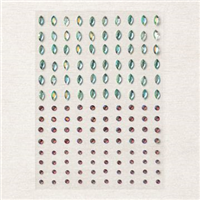
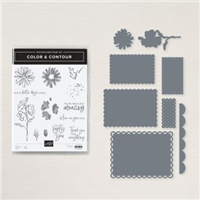
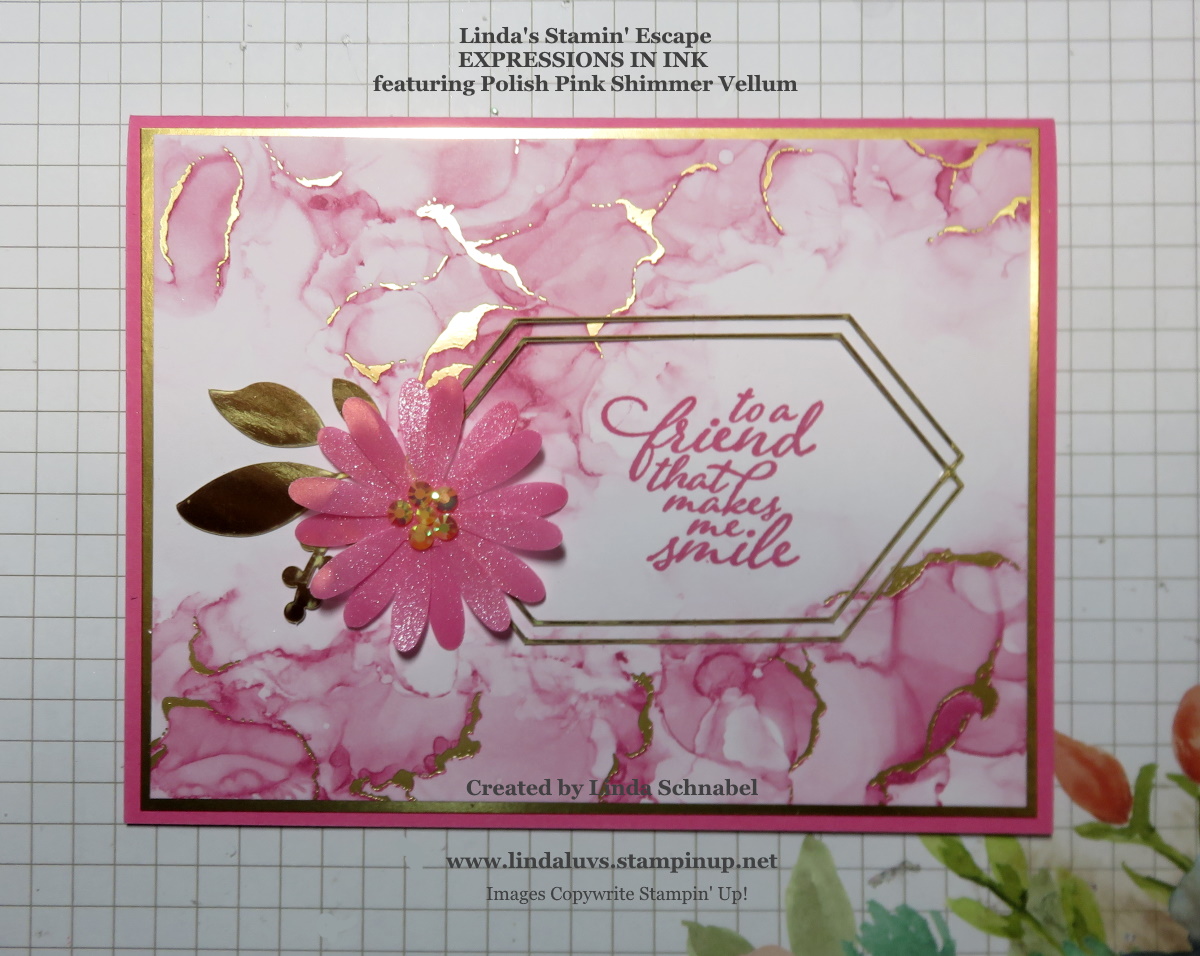
Oh … I’m not done yet, I have another that I’d like to share with you! Just like on my first card, I used the Daisy punch and highlighted the In Color Shimmer Vellum, the Expressions in Ink Ephemera Pack and the 2021-2023 In Color Jewels. Another simple yet stunning card.

Thanks so much for joining me for my card parade. I’d love to hear what you think about this amazing paper!!

Enjoy your day ~

TODAY’S STAMPIN’ SUPPLY LIST … If you liked the products used in today’s projects, I have links for you below. Just click on the item you would like more information on, or to begin your shopping. It will take you directly to my website. Thank you

Split Circle Technique Video

Hello Stampin’ Friends ~

Today we’re going to explore the “Split Circle” technique … you’ll discover how easy it is to create this fun and unique paper design. I will be sharing the replay of my Facebook Live which shows you step by step how to create this card, then I’ll be sharing another card I’m sure you’ll enjoy just as much.

Here is the short video …

Are you ready to try this fun and easy technique? The next card is a bit more fun … I decided to use the Ombre Specialty paper, each circle was cut from a different section of the Ombre paper so you got the full effect.

I’ve decided to use the same embossing folder as I did on my first card, this piece of Basic White was cut 4-1/2″ x 3-1/4″ and was mounted onto a 5″ x 3-3/4″ piece of the Ombre Glimmer paper. I also used the same stamp set for my greeting which I stamped with Gorgeous Grape onto my Basic White banner.

Before mounting the card front onto our Highland Heather card base, I tied a White Glitter bow onto the left side. I couldn’t resist adding the beautiful 2021-2023 In-Color Jewels.

Even though we used the same technique on both cards, just the little touch of changing out how we add the greeting can make a big difference in the way the card looks. Fun, fun, fun!

Thank you for hanging out with me today!! Inspiration has spoken, are you following the calling?

Have an amazing day ~

TODAY’S STAMPIN’ SUPPLY LIST … If you liked the products used in today’s projects, I have links for you below. Just click on the item you would like more information on, or to begin your shopping. It will take you directly to my website. Thank you

Strong at Heart Stamp Set

Hello Stampin Friends ~

Today I’d like to share the Strong at Heart stamp set. You will find this on page 5 of your Mini Catalog. This catalog and many of it’s items will retire on January 3rd … the last day to order.

This special stamp set is what we call our “Make a Difference” set … for each stamp set sold, Stampin’ Up! will donate $3 to support heart health. I love these sets because they are always designed to make a difference in someone’s life, whether it being the recipient of the card, or a recipient of the monies donated.

Measurements: 

  • Highland Heather Card Base: 5 ½ by 8 ½
  • Basic White Inside Liner : 5 ¼ by 4
  • Basic Black 3 ¼ by 3 ¼
  • Basic White 3 x 3  

Instructions:

  • Score Highland Heather Card Base at 2 1/8 and 4 ¼
  • Stamp the heart and sentiment with Tuxedo Black, Color with Blends and Glue to Basic Black Layer
  • Attach Flower with a glue dot to white layer, put the In Color Jewel Inside the Flower
  • Emboss just the front panel with the Meadow Moment Folder
  • Glue the Basic White Layer to the inside of the card base
  • Attach the basic black layer to the embossed panel with dimensionals
  • Send this pretty to a friend for family member.   

I just love this card … so pretty, and made by my fellow Demonstrator Deb Naylor. You see, pretty cards do not have to be hard to make or spend hours … they can be a simply layout, with an easy fold and quick to make.

Thank you for hanging out with me today. Don’t forget to come watch me tonight for my Facebook LIVE at 6:30pm Central time.

Happy Tuesday ~

TODAY’S STAMPIN’ SUPPLY LIST … If you liked the products used in today’s projects, I have links for you below. Just click on the item you would like more information on, or to begin your shopping. It will take you directly to my website. Thank you

Another Reflected in Nature Card Tutorial

Hello Stampin Friends ~

Today I’d like to share another card featuring the Reflected in Nature Stamp set… It is on the Retiring list and that makes me sad. Two of my favorites: Welcoming Woods and Angels of Peace are already Sold Out so I’m going to try to share as many of those available yet as I can ….

Measurements: 

  • Card Base: Night of Navy 8-1/2” x 5-1/2”
  • Cardstock #2: Gray Granite 3-3/4” x 3-1/2”
  • Cardstock #3: Basic White 3-1/2” x 3-1/4”
  • Cardstock #4: Basic White 3-1/2” x 1”
  • Cardstock Inside: Basic White 5-1/4” x 4”

Instructions:

  • Score and fold the card base in half as you would if you were making a normal card.
  • Stamp the image onto the Cardstock #3 (Basic White) using Gray Granite ink.
  • Color the cabin using the Light Cinnamon Cider Stampin’ Blends marker.
  • Color all the snow on the cabin and in the woods with the Wink of Stella.
  • Using the Wink of Stella brush, pick up a little bit of the Balmy Blue ink, and color the frozen lake.
  • Adhere Cardstock #3 to Cardstock #2, then adhere to the top of the card base.
  • Stamp the sentiment with Grant Granite ink in the center of the 3-1/2” and 1” piece of Basic White.  Punch both ends using the Lovely Labels Pick a Punch.  Adhere under the stamped imaged.  Add Genial Gems to each side.
  • For the inside of the card, stamp the sentiment with Gray Granite ink onto the Basic White card stock and adhere to the inside of the card.

Thank you for stopping by today. It’s my wish that you find these tutorials helpful and that they inspire you. Please let me know if there is anything I can do for you.

Have a beautiful day ~

TODAY’S STAMPIN’ SUPPLY LIST … If you liked the products used in today’s projects, I have links for you below. Just click on the item you would like more information on, or to begin your shopping. It will take you directly to my website. Thank you

Simply Sunday: Reflected in Nature Card Tutorial

Hello Stampin Friends ~

Today I have a beautiful card to share with you created by my friend Lisa Solis Brown featuring the Reflected in Nature Stamp set. I’ll be share all the dimensions and step by step instructions for you too.

Measurements: 

  • Card Base: Night of Navy Cardstock- 4-1/4” x 11”.  Score at 2-1/4” and 5-1/2”.
  • Night of Navy Cardstock Layers: 3-3/4” x 3-3/4”, 3-3/4” x 3/4”.
  • Balmy Blue Cardstock Layers: 4” x 4”, 4” x 1”.
  • Basic White Cardstock Layers: 3-1/2” x 3-1/2”, 1/2” x 3-1/2”; 4” x 4” for inside.

Instructions:

  • Stamp the image in Night of Navy on the 3-3/4” square. Glue this piece to the Night of Navy square, then these adhered pieces to Balmy Blue square.
  • Fold and burnish with Bone Folder at the 2-1/4” score line on the card base to make a tent fold.  Glue the bottom of the image piece the bottom portion of the tent piece as shown.
  • Stamp sentiment on Basic White strip.  Layer this piece with the Night of Navy and Balmy Blue strip.
  • Glue the 4 x 4 square near the top of the inside of the card.
  • Using Dimensionals, adhere the sentiment piece just below the 4 x 4 square on the inside of the card.  This will be the “bumper” piece to hold the easel fold open.
  • Apply 5 gems to card front.

I hope you enjoyed today’s card share and tutorial. Thank you for joining me today.

Have a wonderful Sunday ~

TODAY’S STAMPIN’ SUPPLY LIST … If you liked the products used in today’s projects, I have links for you below. Just click on the item you would like more information on, or to begin your shopping. It will take you directly to my website. Thank you

Eden’s Garden Collection!

Hello Stampin’ Friends ~

Enter and explore Eden with the Eden’s Garden Collection! This delightful and desirable collection includes early-release products from the January–June 2022 Mini Catalog—a bundle of stamps and dies that’s blooming with beauty and bounty. Plus, exclusive products you can’t uncover anywhere else—a pack of paper patterned with green and gold, a set of specialty sheets for gift-giving and textured touches, and a sparkling set of gleaming gems!

Just as the timeless tale can be told in a variety of versions, these paradisical products can be used to create projects for any occasion—and they make the perfect papercrafting companion. Take a taste of this coveted collection …

Thank you for checking out my blog today. Have a great day and enjoy your weekend.

TODAY’S STAMPIN’ SUPPLY LIST … If you liked the products used in todays projects, I have links for you below. Just click on the item you would like more information on, or to begin your shopping. It will take you directly to my website. Thank you

Peaceful Deer Card Tutorial

Hello Stampin’ Friends ~

Today I’d like to share a special birthday card, a card I created using the Beauty of the Earth Designer paper and the deer from the Peaceful Deer Bundle. I recently joined a group of demonstrators that create and share cards … this is the one that I shared with our group.

We also share instructions and a supply list. Nice thing about this group … I will be able to share cards with you that were created by my stampin’ demonstrator friends, so you’ll see different styles and ideas, and isn’t that what we all seek … ideas!

Measurements: 

  • Card Base: Basic White  5-1/2″ x 8-1/2″ scored & folded at 4-1/4″ & 2” x 2” (greeting)
  • Cardstock #2: Night of Navy: 5-1/4” x 4” (Mat for Designer Paper) & 2” x 2” Circle
  • Cardstock #3 Scrap for deer
  • Designer Paper: 5-1/8″ x 3-7/8″
  • Cardstock #4: Night of Navy: 5-1/4” x 4” (Inside Mat)
  • Cardstock #5: Basic White: 5-1/8” x 3-7/8” (Inside for writing)
  • Designer Paper Strip: 5″ x 1/2″ décor for inside

Instructions:

  • Stamp (It’s Your Day) greeting with Night of Navy Ink onto Basic White and Die Cut with Layering Circle Die
  • Die cut 2” x 2” Night of Navy piece with slightly larger Layer Circle Die … attach together.
  • Stamp resting deer with Momento Ink on a scrap piece of Basic White.
  • Color Deer with Stampin’ Blends and fussy cut.
  • Use the Night of Navy Stampin’ Blends (Dark) and dye your White Seam Binding … Let Dry.
  • Layer the 5-1/8″ x 3-7/8″ Beauty of the Earth Designer paper over Night of Navy mat and secure.
  • Attach the ribbon that you have dyed to the bottom portion of the cardfront
  • Snip off the bottom of the greeting layers and tuck behind the ribbon.  I did not pop this up.
  • Using Mini Stampin’ Dimensionals pop up the deer and position it on the left side of the greeting.
  • Using Stampin’ dimensionals, attach the assembled card front to your base.
  • For the inside of the card, adhere strip of designer paper on the left side of the Basic White.
  • Attach Basic White piece to your Night of Navy and secure to the inside flap of your card.

I hope this card tutorial inspires you to begin making all occasion cards. Can you image using all of your amazing designer papers for different looks … Have fun with this layout, it’s simple yet highlights the birthday greeting for the receiver of the card.

Thank you for stopping by today to check out my post. Give it a LIKE at the bottom or leave a comment … it is welcomed and greatly appreciated. It also helps others find this blog.

Have a wonderful day ~

TODAY’S STAMPIN’ SUPPLY LIST … If you liked the products used in today’s projects, I have links for you below. Just click on the item you would like more information on, or to begin your shopping. It will take you directly to my website. Thank you

Quick & Easy POP UP Cards!

Hello Stampin’ Friends ~

Today I’d like to share a fun, easy and quick way to make POP UP cards. I love the look on my grandkids faces when the open up the card and up pops the greeting, a stamped image or a Gift Card!!

Grab a cup of coffee and sit back while we watch the replay of my LIVE video last night … then I will share my finished card inside and out!

Don’t you just love to find fun and easy ways to make people smile. You can put your “POP UP” insert inside any card like I showed in the video. I’ll be sharing the Paper Pumpkin card shown in the video…

As I suggested in the video, I tucked another present inside the card …

Too cute and some “eye poppin'” fun as well. I hope I’ve inspired you to grab some cardstock and a scissors and create some POP UP cards for your friends and family.

Have fun and have a great day!

Thanks for joining me today ~

Christmas Snowflakes … Two for Tuesday

Hello Stampin’ Friends ~

Many of us would love to send out hand-made Christmas cards but do not have a lot of time, so I’m here to help with an … oh so cute, and quick & easy card you can recreate in no time at all …

Two simple colors of cardstock; Basic White and Balmy Blue. I used the Time of Giving Stamp Set for the snowflake swirls inside the card and to decorate my envelope.

I used the Wintry 3-D Embossing Folder on the Balmy Blue for both my cards. Then the Wonderful Snowflakes … they are iridescent so the color just dances across them.

If you’re looking for just a little more color … you can use any one of our Stampin’ Blends and color your Snowflakes … and best of all, that iridescence shines right through.

You can create these pretty snowflake cards with ease and in no time at all. It’s a card base with a contrasting piece that measures 3″ x 4-1/4″. I hope you try out this simple layout.

Thank you for visiting my blog today. A simple layout so you can create your Christmas Cards with ease … fun for the whole family!

Enjoy your day ~

TODAY’S STAMPIN’ SUPPLY LIST … If you liked the products used in today’s projects, I have links for you below. Just click on the item you would like more information on, or to begin your shopping. It will take you directly to my website. Thank you

Encircled in Warmth Card …

Hello Stampin’ Friends ~

We’re kicking off another week so I thought I would start it out by sharing a very versatile group of stamps -n- dies. I’ll begin with the Encircled in Warmth stamp set that is in our current MINI Catalog which ends soon….

These fabulous greetings were designed to coordinate with the Encircled in Beauty Dies that you’ll find in our Annual Catalog …

They may not look like much but wait until you start cutting out the delicate designs and layer them … there are so many different creative options, I’ll show you two today! My “Let it Snow” card showcases the Encircled in Warmth Stamp Set and Encircled in Beauty dies ….

I used the die on the bottom left (large outer die) to cut the Basic White mat, and then again with the die on the bottom left to die cut the delicate Mint Macaron pattern and layered them together. I stamped my greeting and die cut that as well.

I’m using a Mint Macaron design from the Hand-Penned Designer Series Paper pack, and added texture with the use of the Wintry 3-D Embossing Folder. Although this sample has a Pool Party Ribbon … I like the White Glitter Ribbon on this card better.

Let me share the “bundle” with you …

The bundle is found in the Annual Catalog and will save you 10% when purchased together. And the Encircled in Warmth Stamp set which I used on my card is found in the Mini Catalog. All together these stamp sets and dies make up a force to be reckoned with … and can be used year round for any occasion.

Here is a card from the catalog that highlights the bundle …

So whether your making Christmas cards or a card for any occasion, this trio should be in your stamp room for easy access.

Thank you for joining me today. Have a wonderful week!

TODAY’S STAMPIN’ SUPPLY LIST … If you liked the products used in todays projects, I have links for you below. Just click on the item you would like more information on, or to begin your shopping. It will take you directly to my website. Thank you ❤

Simply Sunday: Happy National Poinsettia Day!

Hello Stampin’ Friends ~

Today I have a beautiful card to share highlighting the Poinsettia Petals Stamp set. Today I began with just Stamp * Ink * and Paper …. then introduced our Stampin’ Blends to create the stunning color on our poinsettia and a little texture on the background.

The card base is Cherry Cobbler as is the piece that I textured using the Tasteful Textile Embossing folder … The texture really makes the focal point of the card pop! My Basic White stamped piece measures 4″ x 2-3/4″ and the Basic Black mat measures 4-1/8″ x 2-7/8″ … you can use 1/4″ measurements on the mat to make it easier cutting (4-1/4″ x 3″).

Next, I stamped the Poinsettia in the upper-left hand corner, and the greeting in the lower-left hand corner.

Now it’s time to color … I’m using the Dark Poppy Parade and Dark Cherry Cobbler. I color the entire petal with the Dark Poppy Parade and then use the lines in the image to color in the Dark Cherry Cobbler. They blend so easily together and give you a deep rich color (the photo does not do it justice!) Once finished, I go back with the Dark Cherry Cobbler and color just the area closest to the yellow center … this was colored with Dark Daffodil Delight and highlighted with Wink of Stella.

I finished off the card with three of my favorites, the Elegant Faceted Gems and tied it up with the Bakers Twine from the Playful Pets Trim Combo pack. Don’t ever be afraid to grab items from another bundle / suite to enhance your cards & hand stamped projects!

Thank you for checking in on me today …

Enjoy your Sunday!

TODAY’S STAMPIN’ SUPPLY LIST … If you liked the products used in todays projects, I have links for you below. Just click on the item you would like more information on, or to begin your shopping. It will take you directly to my website. Thank you ❤

Thank You Card Tutorial & Video

Hello Stampin’ Friends ~

Today I have another card from our Stampin’ Up! offices that features the Color & Contour bundle … the same bundle I shared with you yesterday. I will also be sharing a video that demonstrates how easy it is to create “both” today’s and yesterday’s cards. Awesome right! Here is today’s card ….

Grab a cup of coffee, hot cocoa, tea … whatever you prefer and join me for this quick video …

THANK YOU FOR EVERYTHING CARD TUTORIAL

  1. Cut a piece of Fresh Freesia Cardstock to 5-1/2″ x 8-1/2″ (14.9 x 21 cm) and score at 4-1/4″ (10.8 cm). This is your card base.
  2. With the Stampin’ Cut & Emboss Machine, use the Scalloped Contours Dies to die cut a scalloped rectangle shape (3-3/4″ x 2-1/2″; 9.5 x 6.4 cm) out of Very Vanilla Cardstock (4″ x 3″; 10.2 x 7.6 cm).
  3. On the right side of the Very Vanilla die-cut piece, use the Granny Apple Green Classic Stampin’ Pad to stamp the leaf and stem image from the Color & Contour Stamp Set. Stamp the “Thank you for everything” sentiment in Fresh Freesia to the left.
  4. On a 2″ (5.1 cm) square of Very Vanilla Cardstock, stamp the open-line floral image using the Mango Melody Classic Stampin’ Pad. Then, stamp the coordinating Two-Step filler image in Mango Melody over the open-line floral image to create a complete flower.
  5. To cut the complete flower, run the coordinating floral die from the Scalloped Contours Dies through the Stampin’ Cut & Emboss Machine. Then, adhere the die-cut piece above the leaf and stamped stem using Mini Stampin’ Dimensionals.
  6. Cut a 17″ (43.2 cm) piece of Linen Thread. Wrap the thread horizontally around the scalloped rectangle piece and tie a bow in the lower left-hand corner.
  7. Stamp the splatter image from the Color & Contour Stamp Set in Fresh Freesia diagonally onto the center of the card base, moving from the lower left-hand corner to the upper right-hand corner.
  8. Adhere the scalloped rectangle piece to the card base using Mini Stampin’ Dimensionals.

I hope you enjoyed the cards, the tutorials and the video … This is a cute bundle, and I just love those dies because they can be used anytime! I still may be sneaking in some Christmas cards yet though! lol

Thank you for joining me for a while today …

Have a wonderful weekend!

TODAY’S STAMPIN’ SUPPLY LIST … If you liked the products used in todays projects, I have links for you below. Just click on the item you would like more information on, or to begin your shopping. It will take you directly to my website. Thank you ❤

Color & Contour Card Tutorial

Hello Stampin’ Friends ~

Today I have a card to share that comes direct from our Stampin’ Up! offices. The featured bundle is Color & Contour and the card highlights some of my favorite New In-Colors; Pale Papaya and Fresh Freesia.

ABSOLUTELY AMAZING CARD

1. Cut a piece of Pale Papaya Cardstock to 5-1/2″ x 8-1/2″ and score at 4-1/4″ (10.8 cm). This is your card base.

2. With the Stampin’ Cut & Emboss Machine, use the Scalloped Contours Dies to die cut a scalloped rectangle shape (4-1/2″ x 3-1/4″; 11.4 x 8.3 cm) out of Very Vanilla Cardstock (5″ x 4″; 12.7 x 10.2 cm).

3. On the lower right-hand corner of the Very Vanilla die-cut piece, stamp the “You’re absolutely amazing” sentiment from the Color & Contour Stamp Set using the Mango Melody Classic Stampin’ Pad®.

4. On a 4″ (10.2 cm) square of Very Vanilla Cardstock, stamp the open-line floral and stem image in two places using the Granny Apple Green Classic Stampin’ Pad. Then, stamp the coordinating Two-Step filler image in Fresh Freesia over both open-line images.

5. Run the coordinating floral and stem die from the Scalloped Contours Dies through the Stampin’ Cut & Emboss Machine to cut both floral and stem images.

6. Cut a 9″ (22.9 cm) piece of Linen Thread. Combine the die-cut floral pieces to create a bouquet, wrap the thread around the stems, then tie a bow.

7. Adhere the bouquet to the scalloped rectangle piece using Mini Stampin’ Dimensionals®. Then, adhere the scalloped rectangle piece to the card base using Mini Stampin’ Dimensionals.

I hope you enjoyed today’s card and inspires you to try this layout or bundle … the soft colors have me thinking Spring!! I had my one snowfall and one cold day, so I’m ready – LOL

Thank you for stopping by … Have a wonderful day!

TODAY’S STAMPIN’ SUPPLY LIST … If you liked the products used in todays projects, I have links for you below. Just click on the item you would like more information on, or to begin your shopping. It will take you directly to my website. Thank you ❤

Peaceful Cabin / Guest Stamper: Kathy Cz.

Hello Stampin’ Friends ~

How many of you have the Peaceful Cabin bundle? Many of my friends do … it’s so versatile. Today I’d like to share with you a beautiful card that I received from one of my friends Kathy C. Kathy is also one of my Stars Team members and loves to share her passion for stamping!

Kathy used the Peaceful Place Designer paper (sold out) along with the Peaceful Cabin bundle and then accented it with the Evening Evergreen cardstock. (Looks bluish from the light). It’s a simple layout but with the glimmer paper tucked underneath the die cut cabin … it really pops.

I think anyone would enjoy receiving this card, I know I sure did. I would love to spend a few days here in this Peaceful Cabin.

I want to thank you for checking out my blog today…. enjoy today.

TODAY’S STAMPIN’ SUPPLY LIST … If you liked the products used in todays projects, I have links for you below. Just click on the item you would like more information on, or to begin your shopping. It will take you directly to my website. Thank you

Gift Boxes & Card Alternatives

Hello Stampin’ Friends ~

Today I’m sharing my Tuesday Night LIVE video replay of the fun November 2021 Paper Pumpkin. You’ll see how easy it is to put these little cuties together (they are not really little) and two Alternative Projects!! Grab a cup of coffee or hot chocolate and join me for this presentation …

This November kit is sooo much fun and easy to put together … remember, everything is included in the kits (you may need adhesive for some kits) but includes all the projects that are die cut for you, the exclusive stamp set and an ink spot … plus fun embellishments.

Here is a picture of the finished tree …

All you need for this kit is the goodies you tuck inside the bag! As a subscriber you can also purchase past kits and refills when available! How cool is that. Here is the link if you wish to be a monthly subscriber: CLICK HERE TO SUBSCRIBE When you subscribe through me, you will be invited to my Paper Pumpkin Pals Facebook Page where I’ll share more alternative projects with you.

If you subscribe on or before December 10th … you will receive the Lots of Pun Kit … You can activate your subscription after the 10th and receive the January Kit which will be announced on December 11th.

Now let’s get a close up of that cute snowman … he is adorable! This is the first of two alternative projects I have for you today!

The perfectionist in me had to change out the Real Red cardstock to Poppy Parade … I wanted to colors to coordinate as they should. He is adorable!!

Now I would like to share with you the second alternative project that I made using the third gift box pieces … the presents!

I cut apart the stack of presents so they would fit on the front of my card. The cute background you see is not designer paper but Wink of Stella just “dotted” onto Basic White cardstock!! I also added Stella to all the bows … oh, it sparkles so pretty! I try not to add other products to my first alternatives so you can really see what you can do with just this kit.

But, if you think the front is cute … wait till you see the inside!!

Oh yes I did … I took one of those presents and made a pop-up card. The pretty greeting comes from the exclusive stamp set that comes with your Paper Pumpkin Kit. The exclusive stamp sets are worth the price of the Paper Pumpkin alone!! I think that our Paper Pumpkin and Stamping Kits are the perfect “GIFT” for the crafters on your holiday shopping list.

Did you know you can give “Gift Subscriptions” … how fun to have one of these fun kits sent to your craftin’ friends each month. I will put links at the bottom for limited subscriptions.

Thank you for joining me today. Feel free to contact me if you have any questions about Paper Pumpkin or other “gifting” ideas. I’m here to help.

Don’t forget we have FREE SHIPPING today ONLY (Paper Pumpkin Subscriptions do not apply) and may be combined with the Clearance Rack and Retiring products! Great way to save.

Again, thanks for stopping by and I wish you a fabulous day!!

TODAY’S STAMPIN’ SUPPLY LIST … If you liked the products used in todays projects, I have links for you below. Just click on the item you would like more information on, or to begin your shopping. It will take you directly to my website. Thank you