A Treat Box for Every Reason …

Hello Stampin’ Friends ~

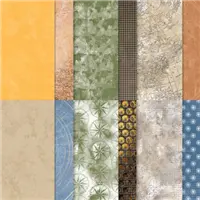
Today I’m sharing some cute treat / gift boxes that are super easy to make! These boxes will be celebrating Halloween, Christmas and a time for friends. One 12 x 12 sheet of designer paper will make 2 boxes. Once you start making these boxes … you’re going to want more paper!

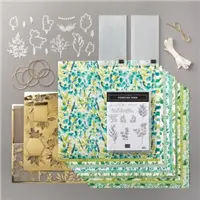
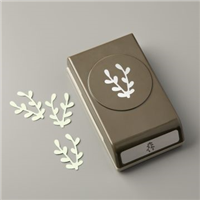
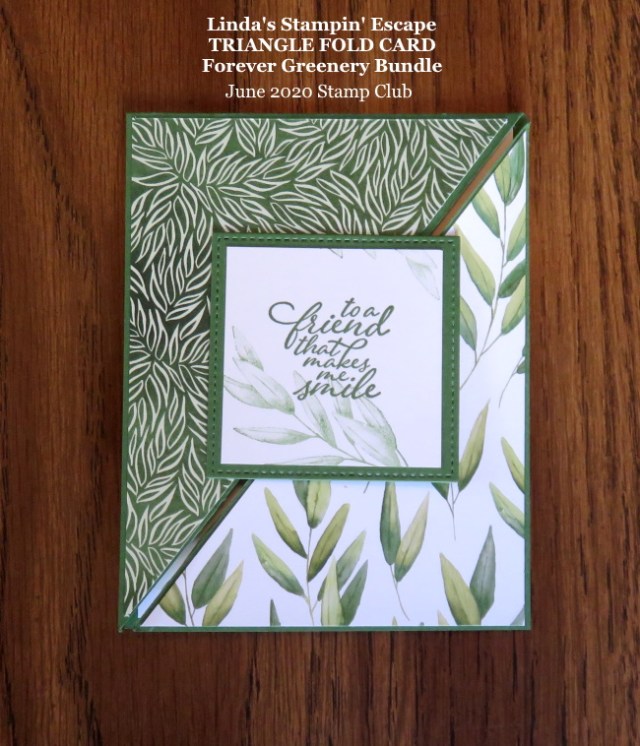
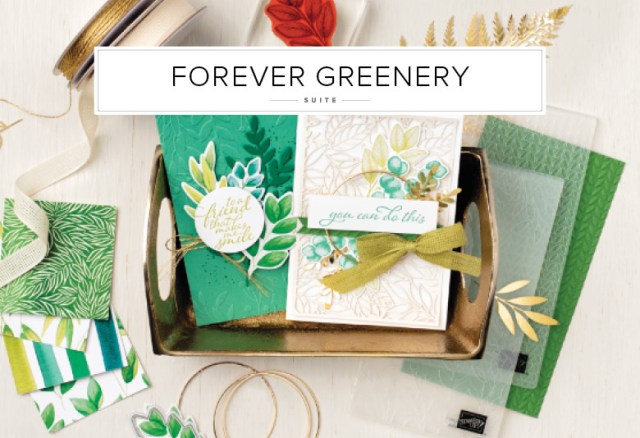
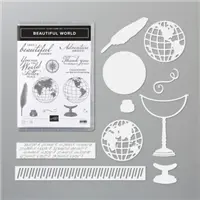
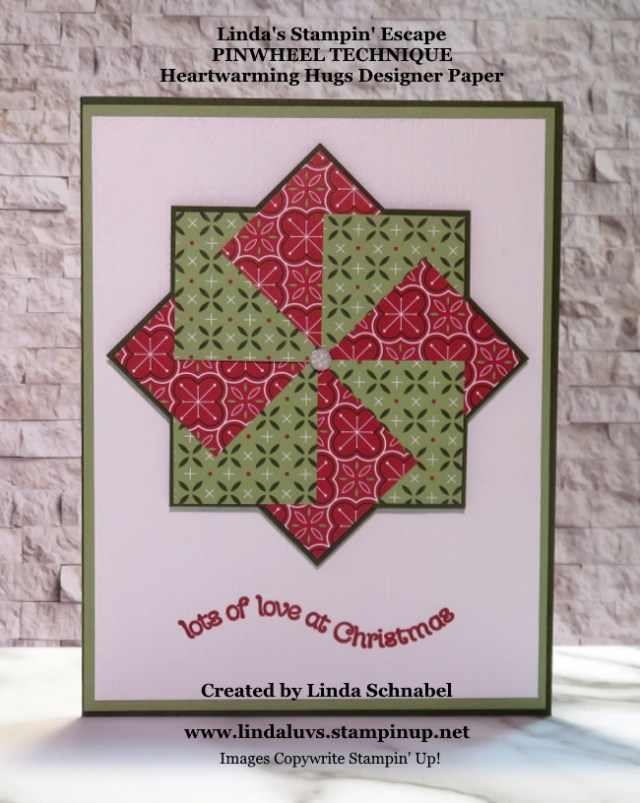
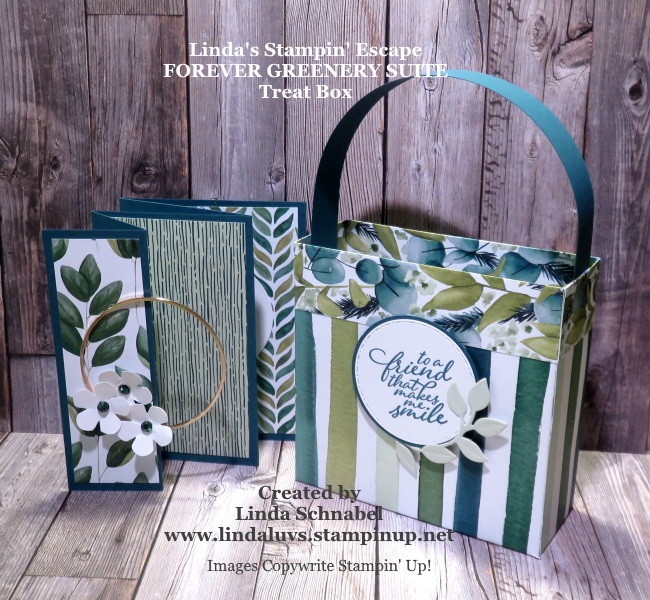
This very first box was created with the Forever Greenery Product Suite. The cute little stitched circle die cut comes from the Heartwarming Hugs bundle and the leaves were cut directly from a wreath cut using the Arrange a Wreath Bundle.

Grab a cup of your favorite beverage and join me while I take you step by step creating this simple box …

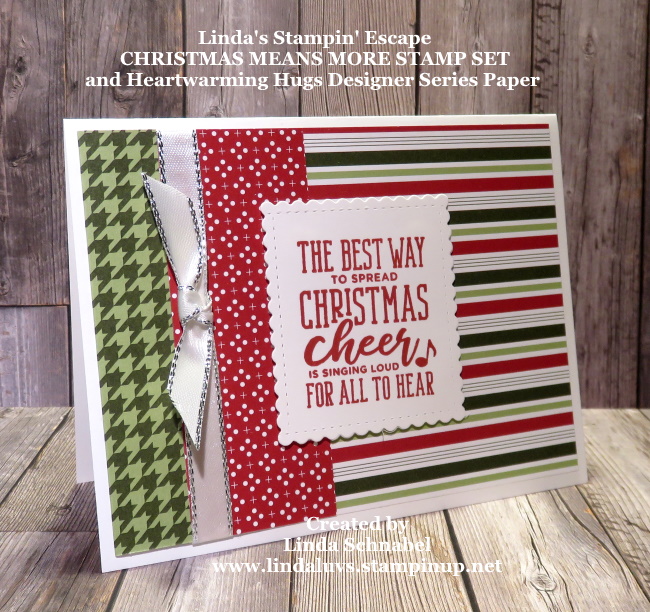
So easy right? I will also be sharing the dimensions with you, as promised in the video. I thought it would be fun to share the box made in this video along with the card I made in last weeks video. You can find all my videos on my Linda’s Stampin’ Escape YouTube Channel … please subscribe while you are there πŸ™‚

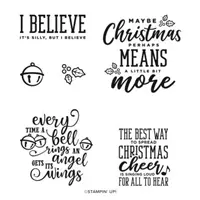
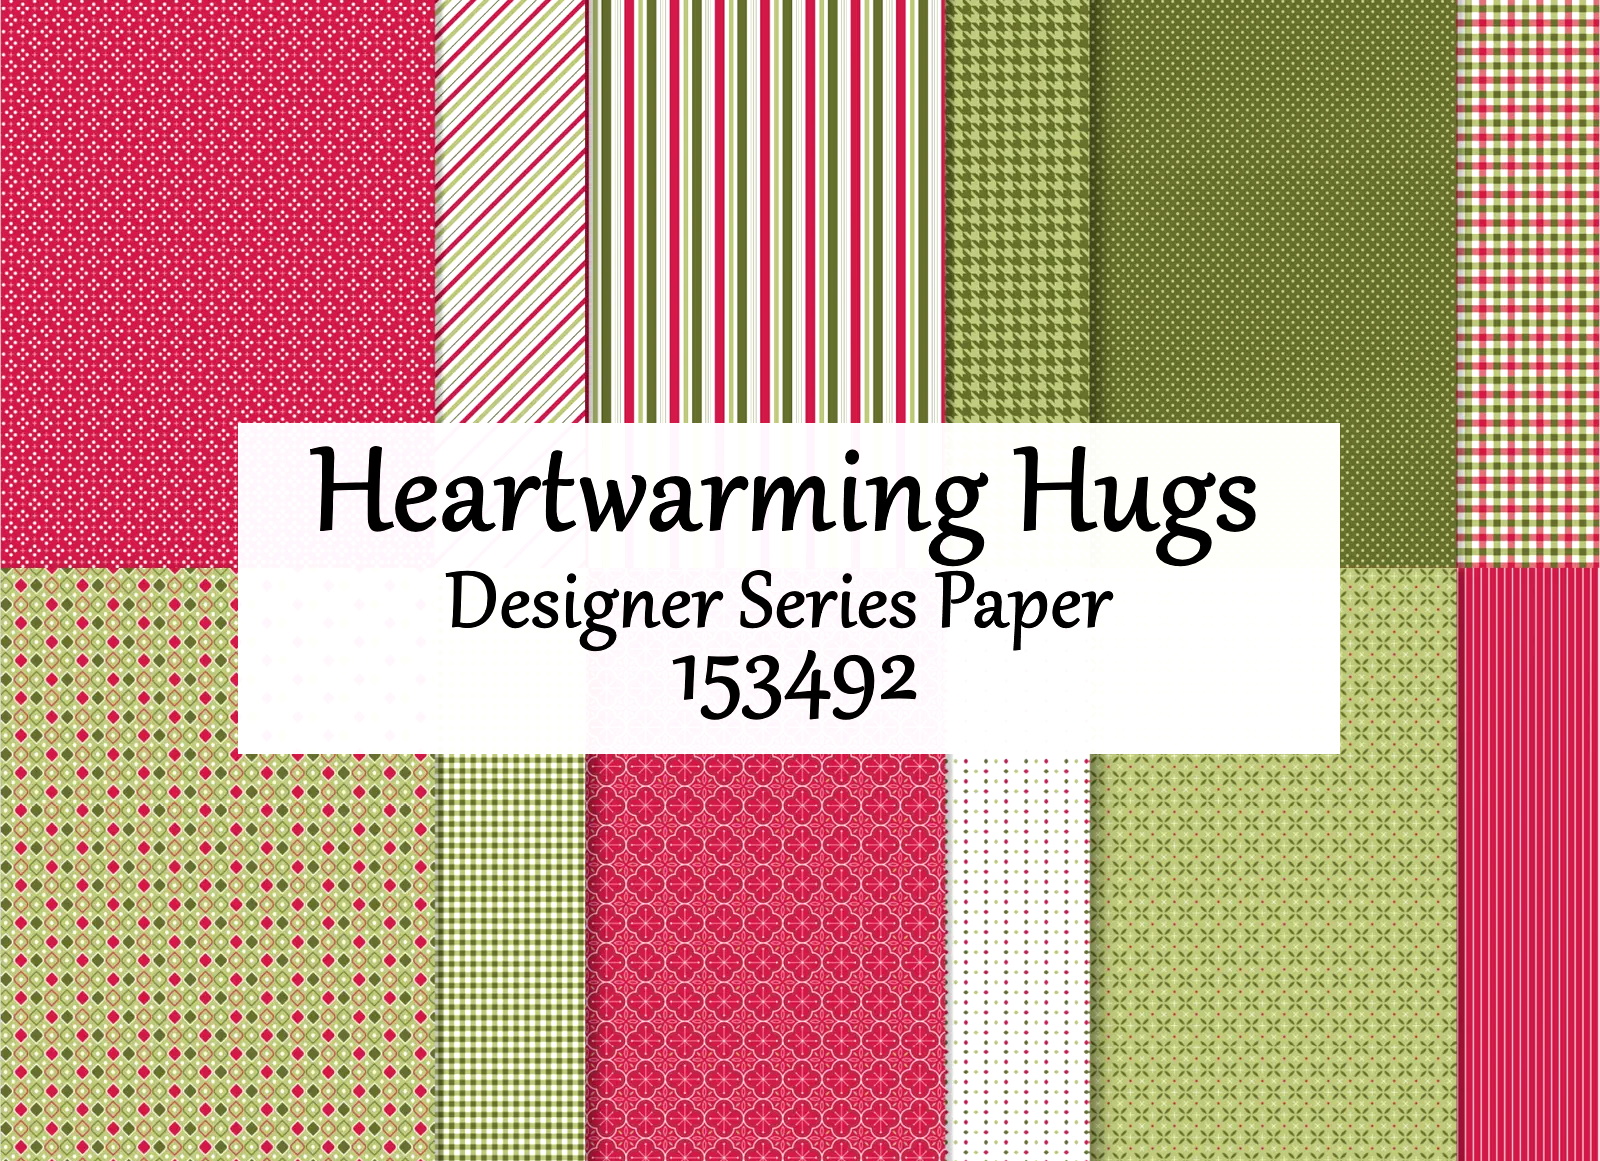
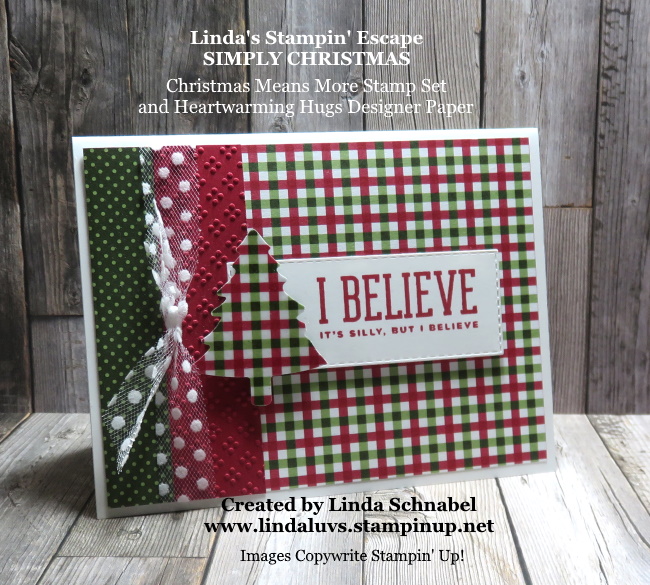
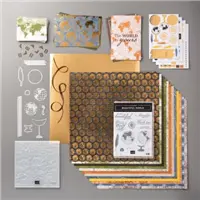
The next little treat box celebrates Christmas … I used the Heartwarming Hugs Product Suite. With so many amazing papers in this package, it was hard to choose one … hope you like it!

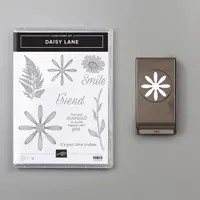
The “For You” badge was fun to make … first I stamped it in Real Red on Whisper White and die cut it with this die that cuts out the center as well. The cool die that mats the circle is a fun shape to work with. The tree was stamped in Mossy Meadow on Pear Pizzazz.

I wrapped a ribbon around the top and tied a bow on … you don’t always need a handle! The next treat box I want to share is my Halloween one …

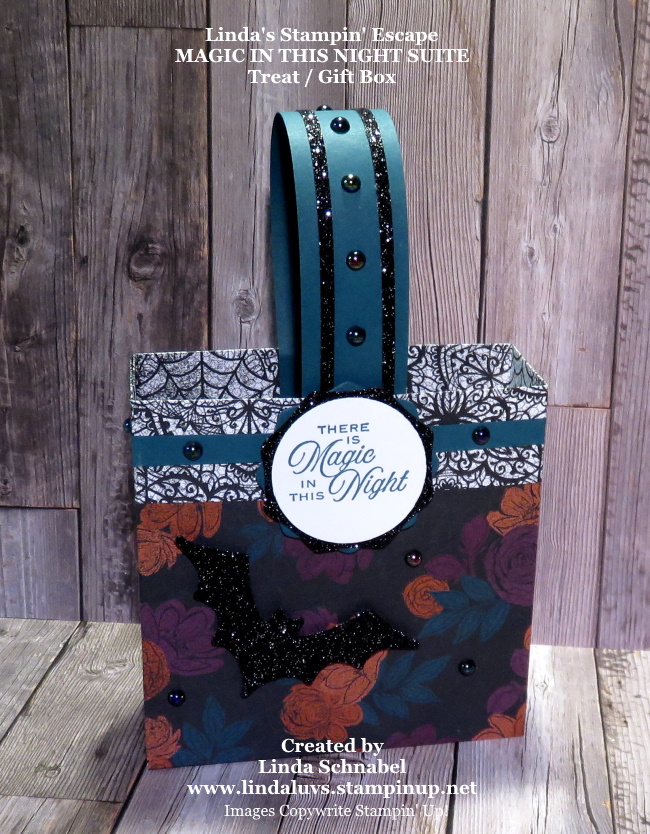
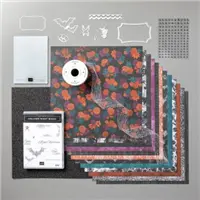
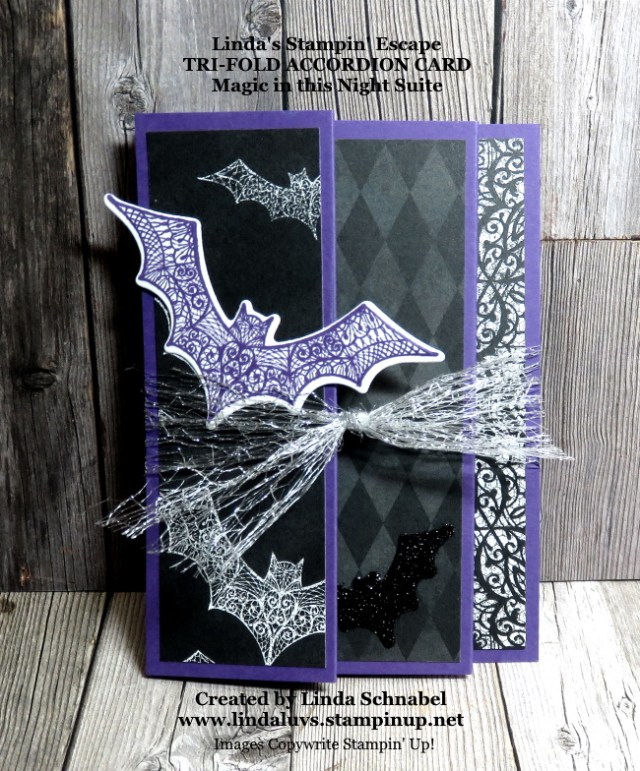
My Oh My … I had fun with this one!! I wrapped the top and created the handle with Pretty Peacock cardstock … along with a piece die cut with the fun shape from the Heartwarming Hugs! Using that die I also cut a piece from the Black Glitter paper… together they make a fun design behind the greeting.

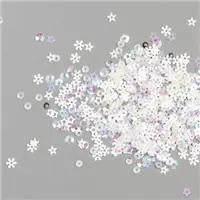
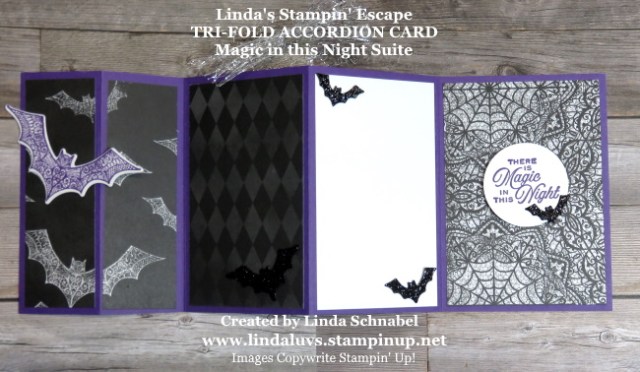
I blinged out the handle with more of the Black Glitter paper and those lovely Iridescent Pearls. The next treat box was created with the same Magic in this Night suite … No handle!

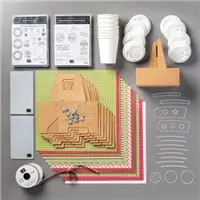
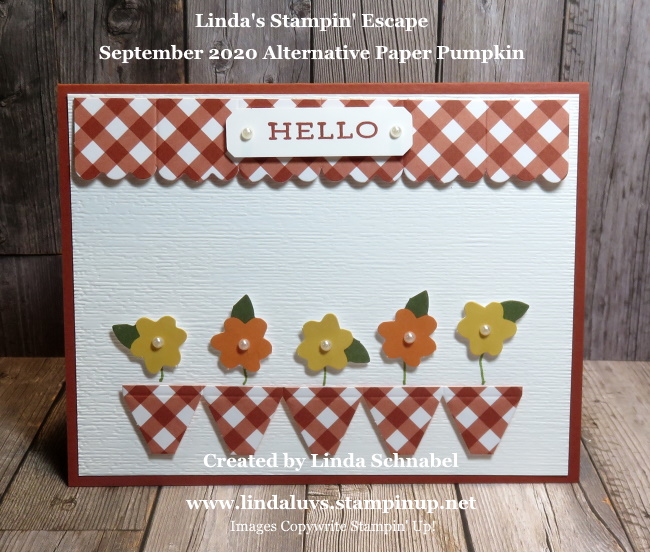
This one was created with the help of the September 2020 Paper Pumpkin. The greeting, the hat, the flower and the mini doily are all from the Paper Pumpkin kit! I’ll be sharing more about the upcoming Paper Pumpkin soon.

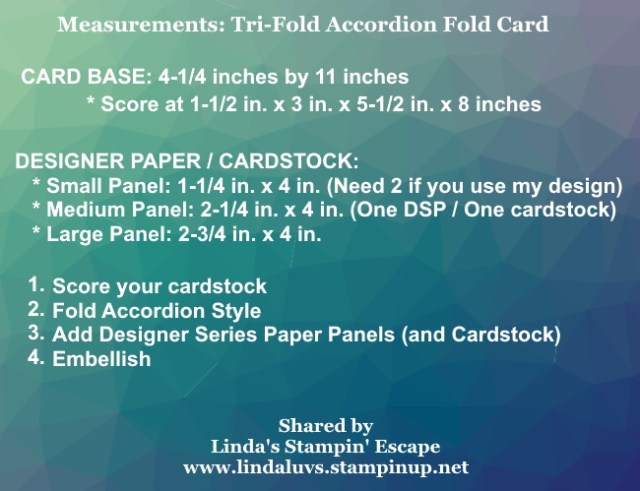
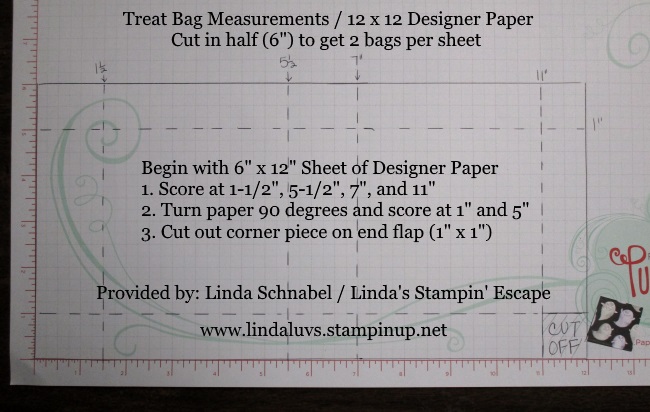
Here are the dimensions for our treat / gift box ….

I hope you have enjoyed today’s project share … they were really fun to make. I wasn’t kidding when I said that once you start making them that you’ll want more paper ….

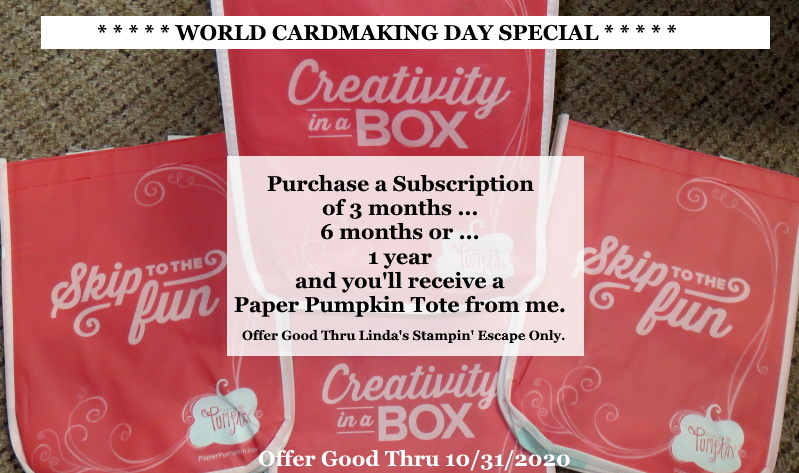
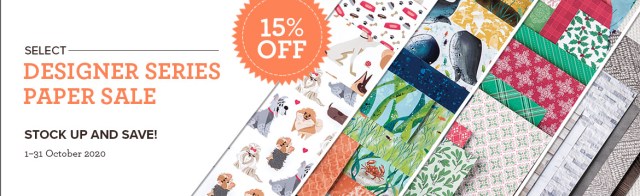
Don’t forget that 15 of our designer papers are 15% Off until the 31st of this month. The deadline is coming up soon. Let me know if you need any help placing your order.

Thank you for joining me today …

Have a wonderful day!

TODAY’S STAMPIN’ SUPPLY LIST … If you liked the products used in today’s projects, I have links for you below. Just click on the item you would like more information on, or to begin your shopping. It will take you directly to my website. Thank you β™₯ 

Best Moments Card + FREE PDF file …

Hello Stampin’ Friends,

If you are looking for the perfect way to tell someone how much you card, then I have the perfect card for you. Today I have a beautiful card that can express your feelings and warm their heart with a fall bouquet of wild flowers.

This pretty card is just one of the cards created for my Stamp Club. My Clubs meet once each month, but since the Covid outbreak we began communicating virtually… let me know if you are interesting in a club.

The focal point of the card is it’s beautiful greeting … “The best moments in my life happen with you”. It is then highlighted by the spray of greens and flowers.

The flowers and greenery frame the stamped greeting cut with a circle die and layered with the Stitched So Sweetly die … these are then layered onto a “wood” strip of designer series paper.

The card base is Very Vanilla as is the card front which is embossed with the Subtle Embossing Folder. You can actually attach the designer paper to the card front and emboss with the Subtle folder … the wood designer paper looks amazing embossed!!

Don’t forget to add a little bling! If you can’t find the right color in one of our color packets of rhinestones, color your own … Our Stampin’ Blends will color the Rhinestones to match your projects.

If you would like a FREE PDF file with Step by Step instructions to this card, please message me in the comment section below. And if there are any supplies you need to recreate this card, please consider me as your demonstrator … I will have links below.

Thank you for stopping by to check out my blog today. It made me smile! Have a good day ~

TODAY’S STAMPIN’ SUPPLY LIST … If you liked the products used in today’s projects, I have links for you below. Just click on the item you would like more information on, or to begin your shopping. It will take you directly to my website. Thank you β™₯Β 

Christmas Means More

Hello Stampin’ Friends,

Yesterday I shared the “I Believe” card (shown below) and today I’d like to share another card that I made during World Cardmaking Day using the same simple design.

I began with a Whisper White card base and 4″ x 6″ sheet of the Heartwarming Hugs Designer paper. I scored the designer paper at 5-1/4″ and folded the pretty polka dot side over onto the top of my plaid paper… No cutting!

Instead of using a piece of cardstock, I used another piece of the Heartwarming Hugs designer paper …

These fun designer papers look so great together and add such a fun core to the card. I’ve added the Silver Edge Ribbon to add a touch of bling to the card.

The focal point of my card is the Christmas Means More stamp set …

This is such a fun stamp set and really works well with any of our Holiday Designer Papers.

I did not get my video made yesterday but I will share it with you as soon as it’s done… and I’ll demonstrate how easy the cutting and embellishing the card is.

Thanks for coming back today … I’ll be back tomorrow this another pretty card.

TODAY’S STAMPIN’ SUPPLY LIST … If you liked the products used in today’s projects, I have links for you below. Just click on the item you would like more information on, or to begin your shopping. It will take you directly to my website. Thank you β™₯Β 

Simply Sunday: Designer Paper Fun

Hello Stampin’ Friends,

Today I’d like to share a sweet -n- simple card that I made during World Cardmaking Day last weekend. It’s simple design makes it easy to create multiple cards … and with Christmas coming, that’s a good thing!

I began with a Whisper White card base and 4″ x 6″ sheet of the Heartwarming Hugs Designer paper. I scored the designer paper at 5-1/4″ and folded the pretty polka dot side over onto the top of my plaid paper… No cutting!

I found a piece of scrap in Real Red so I used the Wrapped in Texture embossing folder with the dots… I then added the Tulle Polka Dot Ribbon … it adds some fun and dimension to the card.

I used the Pine Tree Punch to punch out my Christmas tree … this piece was “Heat Embossed” with clear embossing powder from a demonstration I did LIVE for my Technique Tuesday on Facebook. Don’t want to waste anything and with the embossed tree, it really highlighted the designer paper on my card.

The greeting comes from the Christmas Means More stamp set. This stamp set was a must have on my Wish List. I BELIEVE … do you?

I hope you enjoyed today’s Simply Sunday card, I will be demonstrating this SIMPLE cardmaking technique tomorrow with yet another version of this card.

Thank you for joining me this Sunday, and I look forward to hanging out with you tomorrow.

TODAY’S STAMPIN’ SUPPLY LIST … If you liked the products used in today’s projects, I have links for you below. Just click on the item you would like more information on, or to begin your shopping. It will take you directly to my website. Thank you β™₯ 

Don’t Miss the “Joy to the World” Kit!

Hello Stampin’ Friends ~

Bells are ringing, angels are singing, and the new Joy to the world Paper Pumpkin Kit is coming soon! I’m here today with a friendly reminder that today is the last day to get in on the October Paper Pumpkin kit.

The Joy to the World Paper Pumpkin Kit was designed to bring people togetherβ€”connecting them with one another and spreading joy with each other around the world! I think it’s going to be amazing! With die-cut sentiments in English, French, and German, you can send holiday cheer to their friends across the globeβ€”in their language.

I have a couple of the tote bags left if you’d like one … Purchase a 3, 6, or 12 month subscription (Just click the links below) and I will send one out to you!

You’ve seen my “alternative” cards with the September kit … Here’s a reminder …

I cut apart one of the “cracker” wraps and used it to create my little flower pots … the flowers where there so I made little pots for them! Then I used the scalloped edge as a valance … it is secured directly to the top, and the bottom half is popped up.

Glad you stopped in today, this special offer is for any who purchases one of the subscriptions below … While supplies last

Thank you for hanging out with me today. Enjoy your weekend!

TODAY’S STAMPIN’ SUPPLY LIST … If you liked the products used in today’s projects, I have links for you below. Just click on the item you would like more information on, or to begin your shopping. It will take you directly to my website. Thank you β™₯ 

More Pines Card …

Hello Stampin’ Friends,

I hope you enjoyed my introduction to the In the Pines Bundle yesterday. This is such a pretty set and can be used for any occasion, who doesn’t love a walk through the pines! Here is a pic of yesterdays cards in case you missed them …

I also shared the directions for these cards yesterday. I love the sentiments on these cards and thought you would love them too! Here is the stamp set and coordinating dies ….

Time to share the beautiful card I have for you today … I’m not really looking forward to snow right now, but I wanted to share how versatile this stamp set is …

You will stamp the trees with the solid tree stamp and cut them out with the open tree die. On Whisper White, stamp the outline tree, emboss it with white emboss powder and watercolor the images with Mint Macaron …. when dry, cut the “detailed” peek through tree die.

They used the wrapped in texture embossing folder for the snow, and heat embossed the falling snow. The Snowflake Sequins add a lovely touch to the falling snow (background is Pool Party).

The greeting is stamped on Crumb Cake and punched out with the Lovely Labels Pick a Punch. There is a piece of Shaded Spruce behind it to make it pop! Such a pretty and serene card.

Thank you so very much for taking a stroll over to my blog today. I appreciate it and wish you a wonderful day today ~

TODAY’S STAMPIN’ SUPPLY LIST … If you liked the products used in today’s projects, I have links for you below. Just click on the item you would like more information on, or to begin your shopping. It will take you directly to my website. Thank you β™₯Β 

In The Pines Cards …

Hello Stampin’ Friends ~

Today I’ve got some cards from our Stampin’ Up! home office … cute and quick to make, you’ll fall in love …

BEAUTIFUL JOURNEY CARD
5-1/2″ x 4-1/4″

  1. Stamp the sentiment in Bermuda Bay ink on a 2-3/4″ x 1-1/16″ (4.4 x 2.7 cm) piece of
    Whisper White Cardstock, then cut into a banner shape.
  2. Stamp the three solid trees in Garden Green ink (stamp off one time for each tree)
    on a separate piece of Whisper White Cardstock. Stamp the tree details on top of the
    solid tree images.
  3. Die cut all three stamped trees.
  4. Stamp speckles on Whisper White Cardstock in Garden Green ink. For depth,
    stamp off some speckles to create a two-tone effect. Die cut the hillside.
  5. Adhere the stamped hillside to Designer Series Paper, then cut out a circle using
    the 3″ (7.6 cm) circle from the Layering Circles Dies.
  6. Adhere trees and sentiment to the circle. Adhere the circle to the Pacific Point card
    base using Stampin’ Dimensionals.
  7. Cut a 10″ piece of Gold 1/16″ (1.6 mm) Trim and tie a bow. Adhere the bow to the card.

ADVENTURE AWAITS CARD
4-1/4″ x 5-1/2″

  1. Stamp solid tree image in Garden Green ink on Whisper White Cardstock after
    stamping off one time. Stamp the detailed tree on top of the solid image. Die cut
    the stamped solid tree using the open tree die.
  2. Stamp the sentiment in Garden Green ink on a 2-1/2″ x 3/4″ (6.4 x 1.9 cm)
    piece of Whisper White Cardstock. Stamp speckles on the sentiment in
    Garden Green ink, stamping off one time. Cut both ends of the sentiment on a
    diagonal.
  3. Die cut the tree silhouette in the middle of a 3″ x 4-1/2″ (7.6 x 11.4 cm) piece
    of Designer Series Paper. Adhere the die-cut Designer Series Paper to the
    Whisper White card base.
  4. Adhere the die-cut tree to the Designer Series Paper using Stampin’
    Dimensionals.
  5. Adhere a looped piece of 15″ (38.1 cm) Gold 1/16″ (1.6 mm) Trim to the card
    front.
  6. Layer the sentiment over a piece of 3″ x 1/2″ (7.6 x 1.3 cm) Pacific Point
    Cardstock. Adhere the sentiment to the card front using Stampin’ Dimensionals.

Cute right? And simple … Love these cards. Thanks for dropping in and checking out my blog today.

Enjoy this beautiful day ~

Forever Fern Tri-Fold Card …

Hello Stampin’ Friends ~

If you are looking for a new Fun Fold that is quick and easy to make … look no further because I have a great card to share with you today. With a few score lines you can create this fun card!

I am using the Forever Greenery product suite that you can find on pages 108 – 110 in our Annual Catalog, so you’ll see the stamp set, dies, designer paper and the awesome Gold Hoop Embellishments.

I love this picture because it shows the designer paper was embossed with the “Subtle” embossing folder … it compliments the other designer paper next to it. They all look nice together.

Grab a cup of coffee or your favorite beverage, sit back and relax while I show you step by step how to create this quick -n- easy fun fold card….

Such a super simple fun fold card to make. The designer papers make it easy to get complimentary patterns that look so good together. The Gold Hoop really adds a special touch to this card. Here is the full layout …

Here are the measurements for the card and designer series paper panels …

On my Facebook Live last night (in the video) I promised I would share a second card … a Halloween card! I chose my favorite for Halloween, the Magic in this Night product suite. Here is the front of the card …

Using 3 different patterns from the Magic in this Night Designer Series paper and Gorgeous Grape cardstock, we have the base of our card. We stamped some Gorgeous Grape bats and die cut them along with smaller bats out of the Black Glitter Paper. I created a belly band with the ribbon.

Such a cute little card for the Halloween lovers in your family. One of my stampin’ friends stated on my facebook comments that it’s and easy card to make but looks like you worked really hard! lol I must agree … it is fun and easy to make and can be used for any occasion.

I hope you give this card a try, you’ll be amazed at how easy it is to make. Have some fun with this one!

Thank you for hanging out with me today. Hope you enjoy your day!

TODAY’S STAMPIN’ SUPPLY LIST … If you liked the products used in today’s projects, I have links for you below. Just click on the item you would like more information on, or to begin your shopping. It will take you directly to my website. Thank you β™₯Β 

Technique Tuesday: Fun Fold Card …

Hello Stampin’ Friends ~

Today I’m sharing a fun fold card created with the Forever Greenery Suite … the designer paper in this suite is currently ON SALE! These products are so versatile and can be used for any occasion.

The Forever Greenery Suite Collection by Stampin’ Up! features watercolor patterns and images in a glorious array of green hues. Today’s card is a fun fold and super easy to recreate… and cute!

This Triangle Fun Fold works great for showing off your designer series paper. With a few simple cuts your card is over half way done. You can add layers if you prefer and some additional embellishments to “jack it up” even more. And when you open it ….

The simplicity of this card makes it easy to whip out many at a time … hmmm, a consideration for my Christmas cards! And they are fun to open.

FREE INSTRUCTIONS: When you purchase this suite or bundle through me (anything over $50 before ship/tax) I will send you the full color PDF with step by step instructions for this card AND the Double Triangle Fold Card!

Be sure to join me tonight for my FACEBOOK LIVE presentation of yet “another” FUN Fold card using the Forever Fern and more!

Thanks for stopping in today! Enjoy this beautiful day… See you at 6 pm.

Here is the Suite and Bundle that is the focus of the products I used to today’s cards. Find out more information about these products by clicking on the image … or you can begin your shopping from here as well. Thank you!

To Halloween… and Beyond!

Hello Stampin’ Friends ~

Who said a Halloween kit has to create Halloween cards? I’m still reeling from the excitement that I experienced on World Cardmaking Day with a group of wonderful stampers. We gathered from Wisconsin, Canada, South Dakota, Montana, Oklahoma and beyond!! It was awesome, and so were the projects we made with the Paper Pumpkin kit.

Today I’d like to share the fun alternative Paper Pumpkin projects that I shared on Saturday. It’s amazing how the energy of others really can get the creative juices flowing. I thought this one turned out so cute … It goes beyond Halloween!

I cut apart one of the “cracker” wraps and used it to create my little flower pots … the flowers where there so I made little pots for them! Then I used the scalloped edge as a valance … it is secured directly to the top, and the bottom half is popped up.

The group decided that I should put the greeting onto the valance… I agree, I think it looks cute on there!

Our second card is all Halloween and also created from the cut pieces … actually the panels, and the cute embellishments enclosed in the kit.

This little cutie was quite simple and easy to create. I love playing and making alternatives to the Paper Pumpkin kit, just shows the versatility. The only thing I used that wasn’t in the kit for this card was the “Subtle” embossing folder … wanted a little texture (on both cards).

Glad you stopped in today, I have a special offer this month for any who purchases one of the subscriptions below … While supplies last

Thank you for hanging out with me today. Enjoy your week!

TODAY’S STAMPIN’ SUPPLY LIST … If you liked the products used in today’s projects, I have links for you below. Just click on the item you would like more information on, or to begin your shopping. It will take you directly to my website. Thank you β™₯Β 

A World of Good …

Hello Stampin’ Friends ~

First and foremost I want to send a BIG THANK YOU to all of you who joined me yesterday for my All Day “Virtual” World Cardmaking Event … I had so much fun. The best part were the cards that we made together, and I’m here to share those with all today.

You can’t do World Cardmaking Day without using the World of Good Suite …

You will simply fall in love with this beautiful suite … it’s perfect for scrapbooking your travels and making beautiful cards! We stepped out of the box yesterday and created Christmas cards with this amazing suite. Let’s begin with the “Gold” card …

We began with the beautiful World of Good Specialty Designer Series paper … this is part of the entire suite or can be purchased along with the bundle (but you’re going to want it all!) It’s hard to see but the designer paper has a Gold Foil mat behind it.

Next, we sponged Balmy Blue and Pear Pizzazz onto Whisper White Cardstock and die cut with the detailed globe die. These were then glued onto Gold Foil paper to tie in the gold in the World of Good Specialty Designer Series paper.

Once we attached our “world” we wanted to make them look like Christmas Ornaments so we added bows, using the Old Olive ribbon from the”All the Trimmings” Ribbon Combo pack. This added a cute touch to the card and gave us the “ornament” look we were going for.

Next up… our greeting which comes from the Itty Bitty Christmas stamp set. I embossed it with Gold Embossing Powder onto a piece of scrap paper that was previously watercolored from my Technique Tuesday LIVE on Facebook. My stampin’ friends and I were very happy with the way this turned out, so we moved onto our next card ….

We started this card with our globes … Stamped with Tuxedo Black Momento Ink and sponged with Balmy Blue and Pear Pizzazz. Then they were die cut with the coordinating dies from the bundle. Wink of Stella was added on the sponged areas … and then they were embossed with Clear Embossing powder … WOW!!

For the backgound we choose the Old World Paper embossing folder …

The Old World Paper embossing folder is included in the product “suite” … I will have the suite and the bundle along with the other products listed below for you. During our stamping session, I let the attendees of my presentation pick out the background color … the winner was Old Olive …

I had to share this angle with you so you could see that the Wink of Stella shows through beautifully with the clear embossing … it also makes the black stand out! They are stunning! To keep with the ornament them, I used the Black Bakers Twine that was included with the September 2020 Paper Pumpkin kit!

The greeting comes from Itty Bitty Christmas and was die cut using the cirlcle dies. The little banner behind it was hand cut and used to pop the greeting.

I hope you enjoyed these two beautiful cards the I created with the help of my stampin’ friends on World Cardmaking Day. It was a blast!!

Thank you for joining me today, I hope you have a beautiful day ~

TODAY’S STAMPIN’ SUPPLY LIST … If you liked the products used in todays projects, I have links for you below. Just click on the item you would like more information on, or to begin your shopping. It will take you directly to my website. Thank you β™₯Β 

Celebrating World Cardmaking Day …

Hello Stampin’ Friends ~

How are you today? I hope you are ready to celebrate and have some fun because I’ve been waiting for this day … and it’s finally here. World Cardmaking Day, and I have a party planned for you!

Please join me on my Linda’s Stampin’ Escape Facebook page at 9 am to kick off the fabulous event…

I will be going LIVE seven (7) times throughout the day with demonstrations on new techniques, fun folds, great products and more. It’s time we just have some fun. I hope you gather with your friends and watch together.

Here are the times I will be going LIVE on Facebook …

During the LIVE demonstrations you will see new techniques, how to’s, card layouts, new products and more! It’s all about sharing what we love to do… I will even have a layout you can follow along with and then share your card.

Thank you for checking out my blog post today, and I really hope you plan on joining me this World Cardmakign day!

Heartwarming Hugs …

Hello Stampin’ Friends ~

Today I’m going to share a parade of cards designed with the beautiful Heartwarming Hugs Designer Series paper. This is one of many that are currently On Sale …

I’d like to begin with one of the pretty patterns that I used as my background on this card. I teamed up the Heartwarming Hugs with the Festive Corners stamp set. Click Here to check out the entire blog post!

This is just one of the pretty patterns included in this amazing collection of designer papers. You’ll find the perfect pattern for your holiday needs along with patterns you can use for everyday occasions.

My quilt pattern card showcases another 4 patterns for this package. This simple layout is perfectly suited for using up those scrap ends you have left over from your cardmaking.

And talk about using your scraps … The Pinwheel card is perfect for those smaller scraps, and besides … It’s cute!! Read more about the Pinwheel card HERE and get the template.

One more card I’d like to share is just another way to use up those scraps!! This little cutie is easy to make and is so colorful … one nice thing about a designer series package is they all coordinate.

You and I both know that there is so many more things to do with designer paper and the Heartwarming Hugs is part of a product suite that will knock your socks off…. the Heartwarming Hugs Suite! Check out this project ….

The Heartwarming Hugs designer paper elevates this gift to the next level. If you’d like to see more of this product suite, join me on October 3rd for my WORLD CARDMAKING DAY Party!! Hop on over to my Linda’s Stampin’ Escape Facebook page … Kick Off begins at 9 am.

Thank you for hanging out with me today, and I hope that you join me on Saturday … Gather with your friends and tune in!! I’m planning a fun filled day.

Enjoy your Friday ~

Β 

Sharing More Magic …

Hello Stampin’ Friends ~

Yesterday I shared the Magic of Embossing and how the transformation can be an amazing addition to your cardmaking. We saw how the embossing changed the color of the cardstock and how it enhances the designer paper.

I also showed you that you can emboss directly onto your stamped images, I demonstrated on the sunflower … Today, I’d like to share the finished card with you!

I used the “In Good Tasted” Designer Series paper as my background on my card and behind the card for the photo. I love the rustic look with the sunflower, and it is one of the designer papers that go On Sale Today!

The In Good Taste Designer paper is so very versatile because the textile patterns are so stunning and well chosen. I think Stampin’ Up! gave us a good variety of patterns.

I teamed up my Celebrate Sunflowers with the dies from the Well Said Bundle to add a pop of color with the leaves and a simple greeting ….

The results are amazing! The dark color of the “In Good Taste” Designer Series paper and the depth you get when you clear emboss your sunflower really stand out and compliment each other well.

If you are enjoying any of the items showcased today, and would like to add them to your stampin’ collection, I have a list of ingredients below. Just click on any item … it will give you a full description and takes you directly to my store. I appreciate your support.

Here are two more cards that Stampin’ Up! created …

Two new textile backgrounds … a woven pattern and tiles! This designer paper is simply amazing.

I hope you enjoyed seeing my finished sunflower card and the two Stampin’ Up! samples. Thank you so very much for spending a part of your day with me.

Have a great day ~

TODAY’S STAMPIN’ SUPPLY LIST … If you liked the products used in todays projects, I have links for you below. Just click on the item you would like more information on, or to begin your shopping. It will take you directly to my website. Thank you β™₯Β 

The Magic of Heat Embossing

Hello Stampin’ Friends ~

Today I’ll be sharing my short video on the Magic of Heat Embossing … this simple technique probably dates back many years. I’ve been stamping and a demonstrator (Yes, I was not a cardmaker before I signed up!!) for 20 years, and heat embossing is what caught my attention!

I will be showing you how amazing a VersaMark pad and Clear embossing power is in transforming your projects. Grab your favorite beverage and sit back for a short video as I show you three (3) different items to emboss …

I must admit … not my best presentation but I hope you saw the magic in the technique. Here’s the the first card that I made on the video …

but I’ll also be sharing the two cards that I promised. Lets begin with the balloons ….

The balloons were created as shown in the video. In the video I said I prefer the “strings” on my balloons versed the hand drawn strings so I found some Bakers Twine and added them to my balloons.

Since we I shared the upcoming Designer Paper Sale with you, I thought I would use one of them for a background. I’m using the “In Good Taste” Designer Series paper on this card …

In fact, I have been using the “In Good Taste” Designer Series paper as my backgrounds for all my photo shoots for posting my cards right here!! All of those beautiful wood patterns, brick and tiles all come from this package, including this rustic wood which is probably my favorite!

Let’s move on to the Heartfelt Hugs designer series paper we embossed …

I love the look of the Heartwarming Hugs Designer paper, and embossing it created a stunning new look. When I punched it out with the heart (Heartwarming Hugs paper … get it! lol) I knew exactly where I was going with this card. Create layers of this designer paper to highlight the heart.

In the video you can see how lovely the designer paper is embossed so I decided to mat the heart with the new Red Foil from the Mini Catalog. The shine on both of these creates an amazing focal point to the card …

The only thing I would add to this card is “Red Rhinestones” … might add a little balance on the right side. BUT … I still love the way this card turned out.

Hope you enjoyed the video and the final cards created with this simple and fun technique … there truly is magic in heat embossing!

Here is a list of the Designer Papers on Sale starting tomorrow …

Thank you for joining me today, I’ll be back tomorrow to share the “Sunflower” card with you!! Till then …

Have an amazing day ~

TODAY’S STAMPIN’ SUPPLY LIST … If you liked the products used in todays projects, I have links for you below. Just click on the item you would like more information on, or to begin your shopping. It will take you directly to my website. Thank you β™₯Β