Throwback Thursday … in 3-D

Hello Stampin’ Friends ~

Today I wanted to share a cute little project I made last year for Halloween … whats cool about this project is the core tools to make it are still available in the catalog!

Since I manage a Candy Store I find these little treat keepers the bomb!! They are the perfect size for our dessert truffles … Yum, Yum.

If you would like to see the original post and how to make the tag … just Click Here

It will also show you a list of supplies for my “Good to the Last Bite” treat box.

000_1576_0001

Oh so cute!! But now it’s time to check out my updated version … same Curvy Keepsake Box Thinlits die but I’m using the Happy Haunting Designer Series Paper and the Spider Web Doilies (currently on back order).

000_2673

Love the pattern of this paper … you could slip off the Halloween greeting and add a Thanksgiving greeting! Who wouldn’t love a cute little treat box filled with chocolate!

Last Christmas I made these cute little boxes for my Holiday Retreat attendee’s …

IMG_20141024_103846

The possibilities with this versatile framelit is definitely worth it’s price in gold!! Oh wait … I have one more to share with you! Ho Ho Ho …

000_1612

Hope you enjoyed my Throwback Thursday post … it’s always fun to look back at the fun projects we have made, and then take a look at what we can do with today’s tools.

Thank you for hangin’ with me today!

I hope your day is a marvelous one.

blog-closing-small

TODAY’S STAMPIN’ SUPPLY LIST … It does not include the “Throwback Thursday” projects.

Beware of Black Cats!

Hello Stampin’ Friends ~

Today I have another cute Halloween card to share and just in case you missed them yesterday … the Weekly Deals will also be featured.

My card today highlights the fabulous bundle; Happy Scenes stamp set & Hearth & Home Thinlits Dies, and it that isn’t fun enough … I’ve lured the black cat over from the Festive Fireside Framelits too!

000_2669

I wanted my black cat to be peering out the window on Halloween night, and what would one expect to see but a creepy little spider and a full moon! The full moon was created with the 1-1/4″ circle punch and the masking technique. I sponged on So Saffron, Calypso Coral and Perfect Plum to create my All Hallows Eve effect.

I wanted a nice sturdy house to protect me so I used the “Brick” embossing folder. To create the weathered look of the brick, I simply dragged my VersaMark™ pad across it. So simple but it really creates an awesome effect.

000_2670

 To complete my card I finished off the inside and wished you all a Happy Halloween! And Many More … is the stamp set my greeting comes from.

Thank you for stopping by my Halloween home and meeting my little black cat!

blog-closing-small

Here are the weekly deals and below I’ll have the ingredients for today’s card …

Supply List

Built for Free Using: My Stampin Blog

 TODAY’S STAMPIN’ SUPPLY LIST …

If you liked the card you saw today and would like to purchase the supplies, just click on any of the products to begin shopping.  Thank you!


Do You Believe in Ghosts … Spooky!

Hello Stampin’ Friends ~

Today I continue with my “Halloween Week”.  I know that it’s Tuesday and I usually post the new Weekly Deals, don’t worry I have the link that will take you directly to them! You won’t miss a thing, I promise.

000_2663

A quick and simple card created with the “Happy Haunting” designer Series paper…. this just makes card making so easy! I put my little ghosties on the bottom and stripes on the top! I finished off the bare edges of my paper with the “Basic Black Stitched Satin Ribbon”.

My greeting comes from the “Among the Branches” stamp set (it’s bundled with the Woodland Textured Folder) which I embossed in black on Pear Pizzazz. I used the “Circle Framelits” to cut it out.

000_2664

I added the two little banners to a a touch more color and give the card . Wow … those creepy little eyes staring back at you from the inside, kind of gives me the goosebumps! Well, it is Halloween!

Now for your WEEKLY DEALS … Just click on the logo below.

CM100100B

Thank you for checking out my blog today!

Hope yours is a good one.

blog-closing-small

TODAY’S STAMPIN’ SUPPLY LIST … Click on any item for details or to begin shopping.  Thank You!


000_2664

Witches Happy Haunting …

Hello Stampin’ Friends ~

I hope you all got to enjoy the beautiful weekend, we were blessed with a fabulous fall day! I love this time of year.

Yesterday I used the large stripes from the “Timeless Elegance” designer paper, and today I’m going to highlight the lace pattern. Who better to wear lace than a witch! I stamped her hat in Elegant Eggplant and heat embossed it with the Iridescent Ice emboss powder.

hat-2

Her hat … oh yes, that came from the Howl-o-ween Bundle; The Howl-o-ween Treats stamp set and Boo to You Framelits Dies. It’s so cute and so much fun to play with. To create the focal point, I placed the hat on a silver 2-1/2″ circle.

I love to use purple, green and orange for Halloween so my color choices for today’s card was Elegant Eggplant, Pear Pizzazz, Pumpkin Pie which I used for my tags and base for the card. I finished my edges with the Triple Banner Punch … it can really make a banner from any size of cardstock, not just the 3 that are slotted for!

hat-1

As for my “Happy Haunting” greeting … I took that from my September Paper Pumpkin stamp set. Paper Pumpkin has some awesome “exclusive” stamps! It is really worth trying it out at least. CLICK HERE.

I hope my card inspired you to use your designer papers for any type of project … it’s always more fun to think outside the box!

Thank you for stopping by today ~

Have a marvelous Monday!

blog-closing-small

TODAY’S STAMPIN’ SUPPLY LIST … Click on any item for details or to begin shopping.  


Simply Sunday: Spooky

Hello Stampin’ Friends ~

Before we begin I would like to “WELCOME” all our new blog readers! So glad you joined us and I appreciate that you all take time out of your busy day to visit my blog… Thank You!

As many of you know, my sister and I have been busy preparing for our upcoming Holiday Retreat, so I have decided that I’m going to celebrate the upcoming holiday …. Halloween, by sharing a week long feast of “Tastefully Spooky” cards and more!!

Today’s Simply Sunday post is a quick -n- easy card that is sure to bring a smile to those who receive it. A simple pumpkin created with 3 circles punched for our 2-1/2″ punch. I sponged the edges to create an appearance of dimension that you would see on a real pumpkin.

000_2641

The cute little face on my pumpkin comes from the “Sparkly Seasons” stamp set. I purchased the bundle and saved 15% which gave the the “Spooky” from the “Seasonal Frame” thinlits dies! I used the silver glimmer paper so it would add that Halloween sparkle to my card.

The leaves come from another bundle (yes, I like things on sale!) the Vintage Leaves and Leaflets Framelits. The stem was just cut free hand … easy!

000_2644

My background designer paper comes from the “Timeless Elegance” collection. Wait till you see what I did with it on tomorrows card! Remember, I’ll be sharing “Halloween” projects all week long.

Thanks again for joining me today!

blog-closing-small

TODAY’S STAMPIN’ SUPPLY LIST … Click on any item for details or to begin shopping.         

Thank you.

000_2646

Do you know what today is …

Hello Stampin’ Friends ~

Sorry for posting a bit late today, but I am here and I want to have a little fun today!

Did you know… 

… that today is Tuxedo Debut Day? The tuxedo dinner jacket made its debut at a ball in Tuxedo Park, New York, on this day in 1886. There are several theories about the “invention” of the tuxedo but most can agree that it is a standard in American formal attire and is a ubiquitous symbol of celebration and special occasion for men of any and all levels of society. 

000_0935

Who knew right! I didn’t know there was such a day. Guess we all learned something new today. lol

So … I brought back this cute little card I made a while back which features a “Tuxedo” … how fun is that! It was pretty much done “free-hand” … just a bit wider at the shoulders (that’s how we like them).

If you would like to see the original post for this card, just CLICK HERE!

Thanks so much for joining me today. I’ll be back tomorrow with one of my Simply Sunday series cards.

Have a wonderful day ~

blog-closing-small

Swap Cards …

Hello Stampin’ Friends ~

I’m a bit under the weather … a tooth infection I believe so I didn’t get much stampin’ done but I do have a wonderful post to share that comes from our Stampin’ Up! Get Inspired blog presented by our Concept Artist … Jen C.

You are going to really enjoy the creative cards and projects  …

Founder’s Circle is an exclusive event awarded to our top demonstrators who have shown leadership and a balanced, successful approach toward developing their businesses. This wonderful event (more like a party that lasts for days!) was held last week in St. George, Utah. We’ve loved seeing the achievers’ photos on social media!

Card swaps are a part of nearly every Stampin’ Up! event. It’s always fun to see all of the great things that Stampin’ Up! demonstrators create. The swaps from Founder’s Circle were proudly displayed at the home office, and I wanted to share a few of the wonderful projects that were created. (Trust me, seeing them all together was awe-inspiring!)

Janet Baker Founders Swap

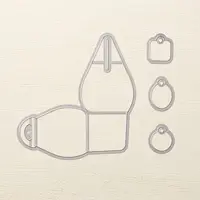
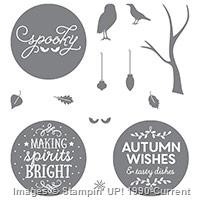
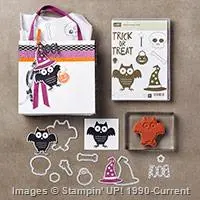
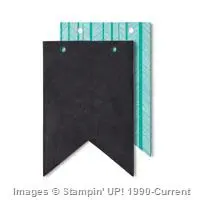
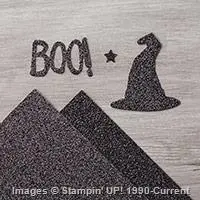
First of all, the witch’s hat attached to this little treat bag is pure genius! Janet Baker created this darling project using the Tree Punch (item 135859), Bow Builder Punch (item 137414), 2-1/2″ Circle Punch (item 120906), and the 1″ Circle Punch (item 119868). She also used the new Black Glimmer Paper (item 139605) and the Witches’ Night Photopolymer Stamp Set (item 139708). 

Allison Okamitsu Founders Swap

Next up is an adorable card designed by Allison Okamitsu. I just love how she showed off the cute reindeer from the Jolly Christmas Stamp Set (item 139876). And, our Rhinestone Basic Jewels (item 119246) can be easily colored using permanent marker (for those who are partial to red-nosed reindeer)!

Kimberly Van Diepen Founders Swap

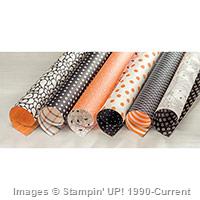
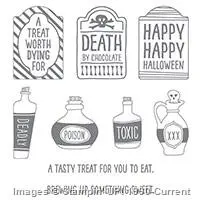
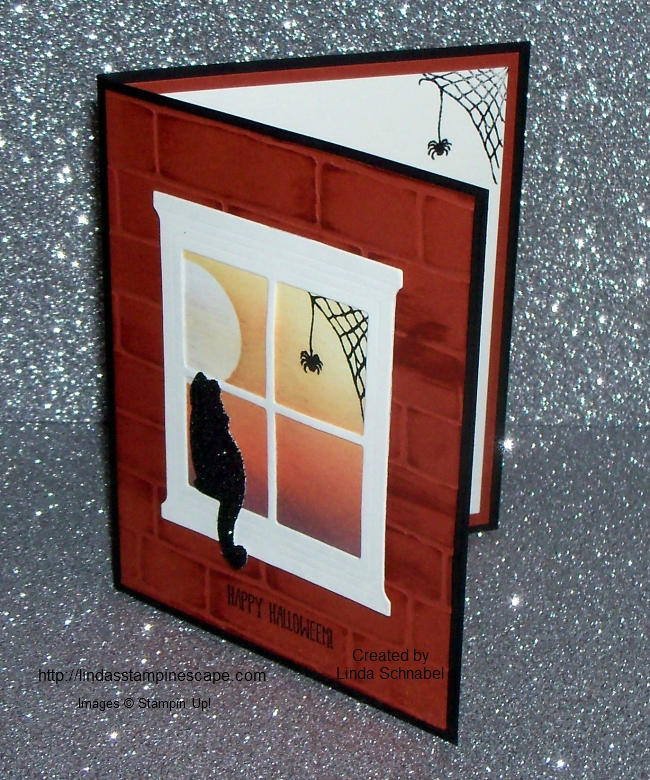
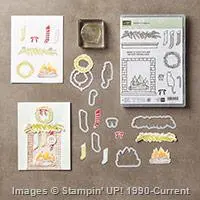
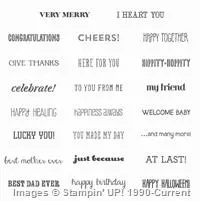
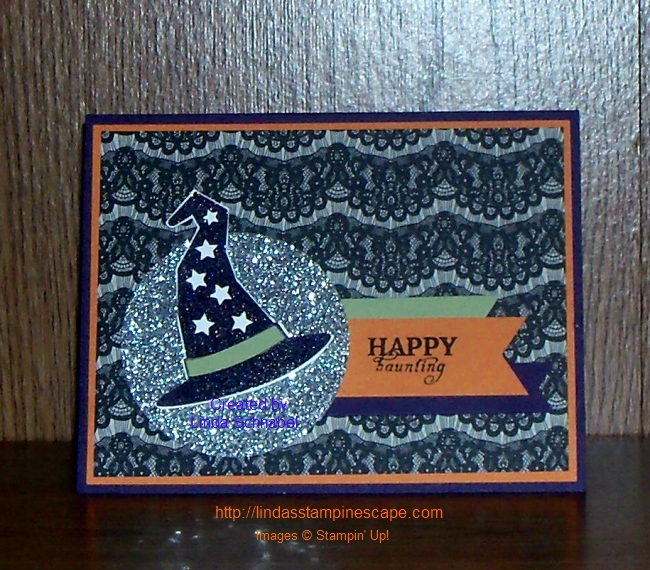
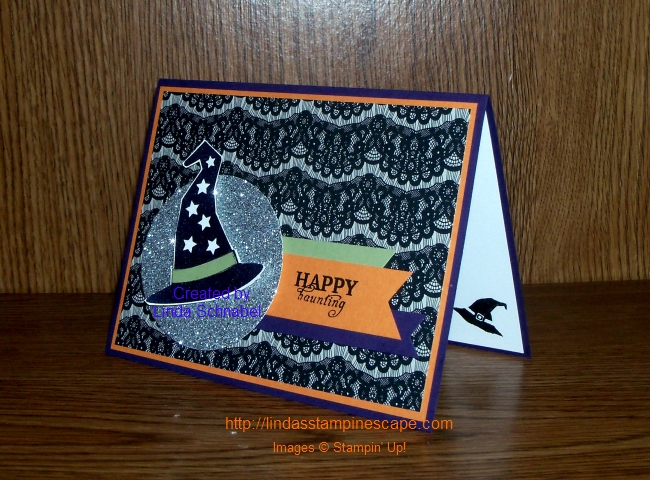
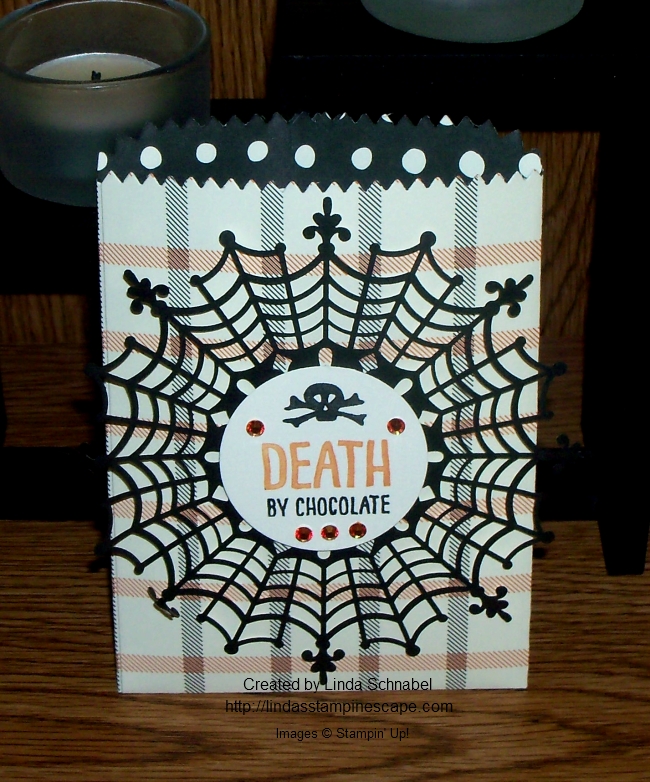
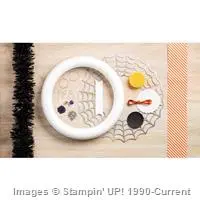
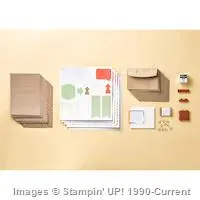
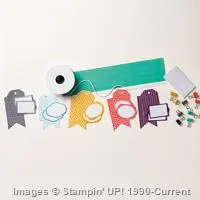
I also really loved this Halloween card made by Kimberly VanDiepen. She used the Cheer All Year Photopolymer Stamp Set (item 139839) and the Happy Haunting Designer Series Paper (item 139584). This stamp set coordinates with the Season to Season Wreath Kit (item 139645); however, it’s super-versatile outside of the kit, too.

Sherry Roth Founders Swap

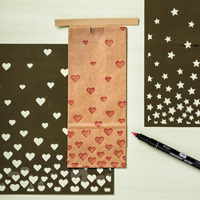
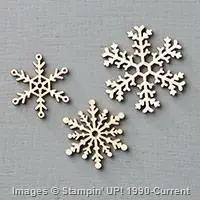
One of my favorite stamp sets from our holiday catalog is Flurry of Wishes (item 139732), showcased in this beautiful card by Sherry Roth. I thought her use of the Hearts Border Punch (item 133784) was the perfect accent.

Mary Knabe Founders Swap

Check out this elegant card created by Mary Knabe.  She added color to our Timeless Elegance Designer Series Paper (item 138444), which is perfect!  I think she definitely achieved timeless elegance.

Joyce Feraco Founders Swap

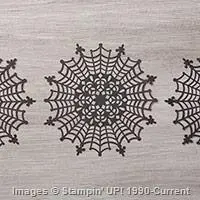
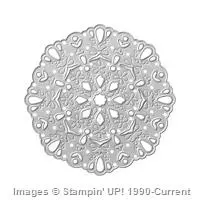
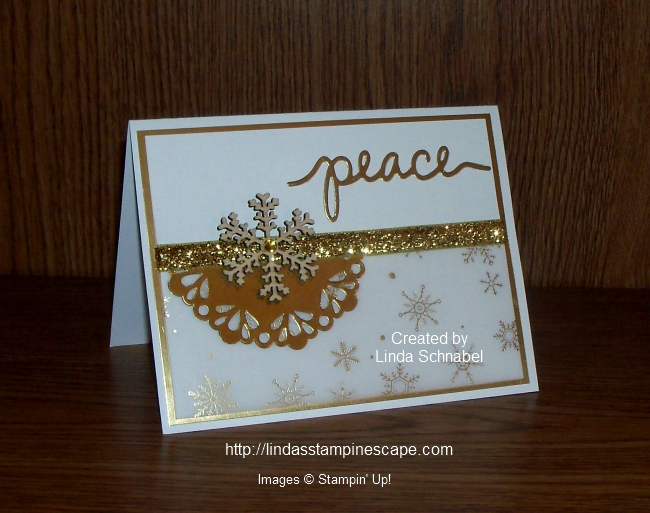
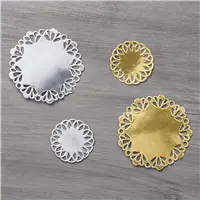
Our new Spider Web Doilies (item 139622) appear in the Halloween section of the catalog, but I love how Joyce Feraco used the white side of the doily as an elegant snowflake. It looks lovely paired with the Winter Wonderland Specialty Designer Series Paper (item 139588).

Becky Roberts Founders Swap

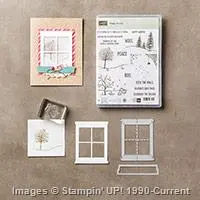
I really love the star window on this card from Becky Roberts. The Home for Christmas Designer Series Paper (item 139592) is a favorite, and she showcased it beautifully. Also, the stamp set she used—Seasonal Snapshot 2015 (item 139841)—coordinates with the Project Life Collection, but it can be used with so much more.

Esther Boyle Founders Swap

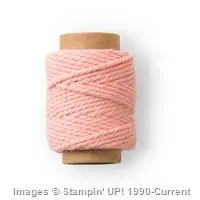
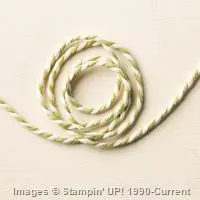
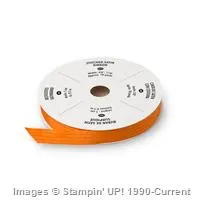
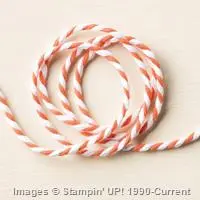
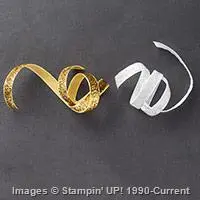
Lastly, I thought this card created by Esther Boyle was very clever. She used an Oval Framelit Die (item 129381), a Metallic Foil Doily (item 138392), and some Silver Cording Trim (item 139620) to create this sweet angel ornament. 

I wish there were time to share them all! Our demonstrators are truly remarkable and have so much creativity to share. A special thanks to them all for sharing what they love.

Enjoy!

Jen C. / Concept Artist

Thank you for stopping by ~

Have a wonderful day!

blog-closing-small

Alternative Treats that Wow!

Hello Stampin’ Friends ~

Today I have a new video for you and a new twist on a familiar product … Our Treat Bags.  I LOVE learning alternate ideas to use for our products!  It shows how versatile the product is and what a good investment we have made!

Here’s is a cute treat bag made with the Mini Treat Bag Thinlits Die & two of my designs:

     Treat Bag 2    000_2565   000_2550

Here are a couple treat bags that are 1/2 the width…cute right?

Treat Bag

Sit back and watch this short video as it shows you exactly how to create the “MINI” Mini treat bags!

This is a GREAT product to have in your stamping supplies – it’s fabulous for all occasions! You saw my Halloween bags, now image … Christmas! How about Birthdays, Baby Showers, Thank You Gifts & more!

What would you make with yours? I’d love to know! Lets see how many different ideas we can come up with 🙂

Thank you for taking time out of your day to spend with me!

Have an awesome day!

blog-closing-small

SUPPLY LIST …


All-Season Season of Cheer

Hello Stampin’ Friends ~

Just a quick post today to share with you some cute cards that Stampin’ Up! shared with us yesterday.

At first glance, our Season of Cheer Designer Series Paper, from the 2015 holiday catalog, may seem decisively Christmas. But if you take another look, there’s so much more you can do!

 139590G

Check out these three non-Christmas cards, all using the Season of Cheer Designer Series

Cards_SW_Oct0615

Thanks for stopping by ~

Have a wonderful day!

blog-closing-small

Weekly Deals …

Hello Stampin’ Friends ~

It’s Tuesday and every Tuesday Stampin’ Up! brings you amazing deals on select products. Because the products change each Tuesday, don’t wait to place your order, you won’t want to miss out on these deals.

CM100100B

Sale: $5.63

Price: $7.50

Sale: $3.38

Price: $4.50

Sale: $32.25

Price: $43.00

Sale: $3.75

Price: $5.00

Sale: $2.25

Price: $3.00

Sale: $3.75

Price: $5.00

Supply List

Built for Free Using: My Stampin Blog


You may also want to check out what’s on the Clearance Rack!

Look no further, it’s here  …

Sale: $9.59

Price: $15.95

Sale: $1.19

Price: $2.95

Sale: $14.99

Price: $24.95

Sale: $1.59

Price: $3.95

Sale: $3.19

Price: $7.95

Sale: $22.79

Price: $37.95

Sale: $7.99

Price: $19.95

Sale: $9.95

Price: $15.95

Sale: $1.19

Price: $2.95

Sale: $2.39

Price: $5.95

Sale: $2.39

Price: $5.95

Sale: $3.99

Price: $9.95

Sale: $19.79

Price: $32.95

Sale: $3.19

Price: $7.95

Sale: $14.99

Price: $29.95

Sale: $9.59

Price: $15.95

Sale: $10.19

Price: $16.95

Supply List

Built for Free Using: My Stampin Blog

Thank you for checking out what’s new this week ~

Have a great day!

blog-closing-small

Golden Christmas …

Hello Stampin’ Friends ~

I hope you had a wonderful weekend … they go so fast! I spend most of my weekend in my stampin’ studio finishing up my project for my upcoming holiday retreat, so I was in a bit of a Christmas mood!

My card for you today is not one of the retreat cards, but it will give you a glimspe of what they attendee’s can expect. I wanted to use all the wonderful “gold” products in our main catalog and holiday catalog.

000_2634

It all began with the “Winter Wonderland Designer Vellum Stack” … and I chose to use the stunning golden snowflakes!! I had the “Metallic Doilies” but have not used them much so decided to pair the two products together.

I needed something to hide my edge of the vellum and decided to use the new gold ribbon from the “Gold and White Glitter” ribbon … oh, it’s so pretty! To create the focal point of my card, I added the “Snowflake Elements” … they add a wonderful dimension to the card.

I knew I had the “Gold Foil Sheets” so I decided to mat my card front with it to tie the whole card together and use it for my greeting. I chose the “peace” from the “Christmas Greetings Thinlits Dies. I’m getting quite hooked on these!

I needed one more touch of bling (really!?) yes, so I added a rhinestone to the snowflake element but colored it gold first. You can use a Sharpie™ marker or if you still have our Blender pens … the yellow work too.

000_2637

I hope you enjoyed today’s card share, and that it inspires you to create your Christmas cards this year. I’d love to hear what you think, so feel free to leave a comment!

Thank you so much for joining me today! I’ll see you tomorrow with another set of Weekly Deals.

Have a “Peaceful” day ~

blog-closing-small

TODAY’S STAMPIN’ SUPPLY LIST … You may click on any item to learn more about it, or to begin shopping for your supplies.

000_2634


Simply Sunday: Autumn Smiles

Hello Stampin’ Friends ~

I hope you are enjoying your weekend! I am busy in my crafting room preparing for my upcoming Holiday Retreat … can’t wait!

Yesterday I shared with you a simple card layout using the Seasonal Snapshot 2015 Project Life Card Collection. Isn’t it amazing what you can do with a such a kit! Today I want to share a quick and easy card I created with the Accessory Pack!

000_2629

Look at all the fun and amazing accessories included in this packet! I really do need to get back to scrapbooking!! These kits make it so easy … but I keep sneaking it for my cards! lol

000_2630

I took the jack-o-lantern lazer cut wood piece (popped out the face to save for another card) and then sponged the Pumpkin Pie color onto it.  It’s so easy to dye these wood pieces with your ink and a sponge!

And what else would I back it with but the fabulous Black Shimmer Paper! Love it, Love it, Love it!!

WOW, how simple was that!! And … you have the coolest card on the block!! I finished off the inside with a strip of Washi Tape that is included in your Seasonal Snapshot 2015 Project Life Accessory Kit.

000_2632

I hope your Sunday brings you a smile as wide as my jack-o-lanterns face!

Thanks so much for stopping by!

blog-closing-small


Easy Breezy Card Layout …

Hello Stampin’ Friends,

Did you ever have one of those days when you needed a card but your creative self was … well, just not that into it?

Well, I’ll share a little secret of how I handle those days. I run for one of my “Project Life” kits! Seriously, they are great for quick and easy scrapbooking, but those cute sheets they have in there are awesome.

000_2623

Today I’m using the “Seasonal Snapshot 2015” Project Life by Stampin’ Up! It has all sorts of cute designs you can use. I picked the snowflakes just because my brain has been a bit overworked this week.

It was easy to embellish these cute snowflakes … I love the craft cardstock and decided to add red for a pop of color! My greeting is also in Real Red using the “Seasonal Frame” dies.

I thought it needed just a bit more so I used the Real Red Ribbon and created a simple bow…. that did the trick! It came together so easily once I picked out a design from the Project Life kit.

000_2626

Use this quick and easy layout with any of the designs in kits, why you can even use this simple layout with designer paper! The possibilities are endless.

Thanks for spending time with me today ~

I hope your day is a good one!

blog-closing-small

Seasonal Snapshot 2015 Project Life Card Collection by Stampin' Up!
Seasonal Snapshot 2015 Project Life Card Collection 139651
Price: $16.00

Tree Advent Calendar

Hello Stampin’ Friends ~

Sorry I’m a bit late today, I spent some time with my grandson AJ yesterday who turned 17! Wow, they grow up fast. On the other hand, I also spent time with my youngest granddaughter Lori … she’s just 4 months. It was a busy day!

While checking out the “Get Inspired” blog by Stampin’ Up! I ran across the cutest project for Christmas. It was created by Allison Okamitsu 2014–2015 Artisan Design Team. I just had to share this one with you ….

Tree Advent Calendar

Christmas will be here before you know it, my friends, and what better way to celebrate the days leading up to it than an advent calendar?!

1

Tiny Treat Boxes (item #135829) make an adorable advent tree. I’ve covered each of the boxes with patterns from the Home for Christmas Designer Series Paper (item #139592)—what fabulous nostalgic designs it has! And the Hello December 2015 Project Life Accessory Pack (item #139654) has some great stickers numbered 1–25 for each box lid. The boxes are the perfect size to hold a treat, love note, or coupon for each day of December until Christmas day.

2

You’ll want to assemble your tree in layers, with seven boxes on the bottom layer, followed by layers of six, five, four, three, and one. The box on the very top of the tree isn’t meant to be opened, but it sure looks lovely as a topper. Using hot glue, I also adhered a double bow with long, whimsical tails using two yards of Mossy Meadow 5/8″ Striped Cotton Ribbon (item #138419).

3

Whether you’re counting down until Christmas with little children at home, grown children at university, or your spouse, this Tree Advent Calendar will be a lovely addition to your holiday (or dorm room) décor!

Allison Okamitsu  2014–2015 Artisan Design Team

Don’t you think that is the most adorable? What a fun project to make with your kids!

Thank you for stopping by today, I’ll be back tomorrow with fun Halloween card!

Have a wonderful day ~

blog-closing-small

No Leftovers Here …

Hello Stampin’ Friends ~

Hope you enjoyed yesterday’s fall card and the fun “Reverse Masking” technique used to create it.

I had someone ask me … “What do you do with the left over items when you make a card?”  Well, she was speaking of the piece of paper that I used as a mask to create the leaf on yesterdays card.

Well … Let me show you!!

000_2621

I that the mask looked pretty after I got done sponging, so I added a bit more sponging and trimmed it down and came up with the 3-1/2″ x 3-1/2″ square. I used dimensionals to raise the leaf above the “Into the Woods” designer paper.

I trimmed off the designer paper and matted the front (leaf) piece to create more impact for my focal point. Without the Early Espresso mat behind the leaf, it just blended in to much. Now the designer on the card front works well with our focal (leaf) point.

The card front sits upon a Early Espresso base and is tied together with a bit of that left-over bakers twine from my September Paper Pumpkin.  I created a little tag with the Note Tag and Curvy Corner Trio Punches (I’ll show you step by step soon).

000_2617

The greeting on the tag comes from the stamp set “Teeny Tiny Wishes … still a staple in my stamp collection.

So … now you know what I do with some of my left-over paper, I use it!

Thank you so much for stopping by today ~

Hope your day is a good one!

blog-closing-small

TODAY’S STAMPIN’ SUPPLY LIST …