Best Deal Around …

Hello Stampin’ Friends ~

Happy Friday!!

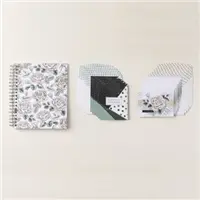
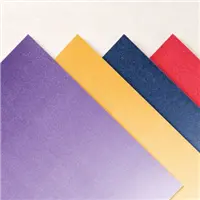
If you like a good deal … if you like to save money …. It’s an exciting time to join our community of stampers. Right now, it’s even more exciting because when you sign up between now and October 31st and become a part of my Stars teams and the Stampin’ Up! community, you  will get  $155  worth of your choice of  products for only $99  + free shipping + free business supplies + all the fun being a part of our fantastic community!

It was over 22 years ago I began my journey “to get the discount” to save money on the stampin’ supplies my sister Eileen and I wanted, but … I stayed because of all the friendships (you, my team & fellow demonstrators) that have kept me here for 22 years. The travel and flexible schedule isn’t too bad either! lol

✨ So … why would you join my team / Stampin’ Up! in the first place?  Good question … so I asked my Stars by Design Team.

They joined for a variety of reasons. They join to make money, they join to save money. The discount! We like it because we want to use the product for our personal use. Some joined for the social connections; they wanted to feel part of the community and make new friendships.  Some for the ability to create your own schedule and work around their family. And then of course, love of stamping and loving the products!!   

I loved hearing all of these reasons my team members joined, it helps me serve the needs of each one so they can enjoy the most benefits.  So what is your reason? Save money … Love the product, make some money, be part of the community & make new friends or all of them? ❤

It truly is the friends we meet along the way that help us appreciate “and enjoy” the journey. Are you ready to start … CLICK HERE

The Starter Kit is $99 (Free Shipping) Choose $155 in product and design your own kit with your favorite products. If you are new and need help, contact me at lindaluvs2stamp@aol.com

I have a welcome packet when you join my team …

Have an amazing day.

FUN FOLD: Accordion Z-Fold Birthday Card

Hello Stampin’ Friends ~

So, how many of you tried the easy, breezy Basic Z-Fold Card I shared yesterday? Which of the three options did you try? Ready to step it up?? Today I’d love to share this beautiful card with you that is enhance with the Accordion Z-Fold.

For my birthday card I used the Hues of Happiness Designer paper …

I began with my Night of Navy card base and the Hues of Happiness Designer Series Paper … You can see that I have used the coordinating dies to cut the floral pieces for the front. I will share measurement below so your can try out this car too.

Measurements: Card Base: (Night of Navy) 5-1/2″ x 11″ scored at 1-3/4″, 3-1/2″, 5-1/4″ and 7 on the 11″ side. Hues of Happiness and white embosses panels on accordion: 1-1/2″ x 5-1/4″, DSP on inside: 3-3/4″ x 5-1/4″, Folded mechanism: Night of Navy – 3″ x 6″ scored at 3″ on 6″ side and (3) White squares 2-3/4″ x 2-3/4″, Night of Navy mat for the white inside is cut 3″ square and will be placed onto the designer paper as shown. Use the alignment tip that I shared in yesterday’s video.

I used the Painted Texture embossing folder on the two white panels on the inside of the card. Greetings were stamped from the Happiness Abounds bundle in Night of Navy… and to complete my card, I added a few Iridescent Rhinestones. Who doesn’t love a little sparkle?

I hope you have time this weekend to play with these fun folds that I have shared in the past two days. Have fun and enjoy!!

Thanks for stopping by,

Here is a list of supplies used for today’s Fun Fold Accordion Z-Fold Card …

One Fun Fold: Done 3 Different Ways!

Hello Stampin’ Friends ~

Today I’m going to share the replay of last nights Facebook LIVE along with both of the cards I made, and another way to use the Basic Z-Fold Fun Fold!! Let’s begin with the finished cards!

My first card was a “Full Front” so it looks like a regular card, but when you open it, you have that fun Z-Fold card ….

This card features items from the Sweetest Christmas Suite from the Mini Catalog. There is so much fun in this bundle, from the back ground die to the Red Glitter paper used, to the cute Candy Cane designer paper that are easily cut out with the coordinating dies. And who doesn’t love that cute sentiment that come from the bundled stamp set.

My next Z-Fold Fun card features the Santa Express Suite and a partial front…. If you’re looking at easy Christmas cards this year, but still want a Fun Fold … this is it!

The Z-Fold is super easy and when you add in the ease of the Santa Express Cards. They are so cute … just attach them to the front of your card and the fun coordinating designer paper brings it all together stress free!

OK … time to grab a cup of coffee (or whatever) and join me for my replay of last nights LIVE! You will get the dimensions you need during my demonstration … Enjoy!

Don’t you just love that these cards are so easy to create! You get a Fun Fold along with different ways to enhance that fun fold!!

Now … let’s check out one more way to play with your Fun Fold. I had a lot of fun with this one … you’ll see more layers and some embossing! We’re doing a Belly Band and playing the Gnomes!!

Belly Bands are simple … I use and 11″ x 1″ strip of paper, wrap it around and, trim off excess, then adhere it together (I don’t score … I fold) I used Soft Suede and Pool Party Cardstocks along with the Storybook Gnomes Designer paper.

To create my banner I used the Stylish Shapes dies, both the banner and the square! I used both so that I could create a banner to the size I needed …

Pretty cool tip right! I like that is still adds the texture and creates a second banner!

Now, let’s slide off our Belly Band and look at the inside of our card…

I used the Charming Landscapes Embossing folder from the Santa Express Suite to create some texture and interest but still leave room for you to write your sentiment. Again, a simple but oh so cute card (because who doesn’t love gnomes) and Fun Folds!!

Thank you for hanging out with me today, and I hope I inspired you to try out this easy Fun Fold and enhance it any of the 3 ways you’ve seen today.

Have an awesome day!!

Here is a full list of items used to create all the cards shown … from the entire suite to bundles and individual items. Shop your way! 🙂

Join me …

Hello Stampin’ Friends ~

Join me LIVE tonight for a Holiday “Fun Fold” card. Meet me on my Linda’s Stampin’ Escape Facebook page for some fun and inspiration.

I’m going to share a FUN FOLD tonight … Simple cards that impress!

Thank you for taking time out of your day to drop by … I hope you do the same tonight!

Have a good day ~

Halloween Card Parade 2….

Hello Stampin’ Friends,

Happy Monday! I hope you enjoyed this beautiful weekend … well, here in Wisconsin anyway 🙂 I hear some of you out west are getting a blanket of white! I’m not ready … I’m ready for Halloween and I’ve got more cards to share with you today.

I’m going to continue with the Scary Cute Bundle …

I teamed this card up with the Aspen Tree die! I love the background … It’s designer paper so you can’t get easier than that. CLICK HERE to view the original post.

My Halloween Wizard via the Kindest Gnomes ….

This card uses the Scary Cute Bundle and Kindest Gnomes. It also features the Color Blocking technique.

If you are an old movie buff … especially Halloween Horror movies (Hammer Films) like the Mummy, then you will fall in love with this card.

This card uses the Linen Adhesive Backed paper to create a our mummies! We have to dirty up those bandages a bit so if you want to see more … CLICK HERE!

Here is a major mash up …. I have the dies from Sweet Candy Canes, the Scary Cute bundle and the Scottie Dog!

I have a lot of fun with that Scottie Dog … perfect all year long, and for any occasion.

Thank you for joining me again today, Have a great week!

Simply Sunday: Using Scraps for a Halloween Scottie!

Hello Stampin’ Friends ~

Today I’m sharing the replay of one of my Tuesday Facebook LIVE where we used scraps to create a fun and easy card. The Scary Cute bundle meets Christmas Scottie … that little dog is way too cute to be scary!

I’ll share some tips for creating this card so sit back and enjoy ….

Don’t you just love that Scottie Dog … heck with Christmas, he is an all occasion pup!! The banners or flags as some people call them, create so much fun on a card, they’re just happy.

Here are the measurements for today’s card …

  • Card Base:  Thick Basic White: 8-1/2” x 5-1/2”; score at 4-1/4”
  • Layer #1: Parakeet Party: 4” x 5-1/4”
  • Layer #2: Basic White: 3-3/4” x 5”
  • Layer #3:  Basic Black: 3/4” x 4
  • Assorted Colors / Sizes of Designer paper and Cardstock to create banners

Don’t you think this would make the perfect birthday card? How about celebrating a new job, a promotion or a graduation? Today we did Hallowen … I think it would be perfect for Christmas too. The layout works for any occasion and is fun to make … I hope you enjoy creating many of these simple cards.

I want to thank you for joining me today for this replay.

Enjoy and have a wonderful day ~

Here are the ingredients I used for this card. You can click on any one of them for more information, or to begin shopping.

Halloween Card Parade ….

Hello Stampin’ Friends,

Halloween just over a week away, I thought it would be fun to showcase many of the cards I have shared with you … a recap!

The first is not a card at all but a simple scrapbook page …

I was working on a “Window Card” and had all these circles left over so I simply attached them to my page … added a few cats and my darling granddaughter Lori. She is 8 now and loves looking back at her pages (that’s what scrapbooking does) lol

On to the cards ….

This card uses the Scary Cute Bundle and a Watercolor Wash background. You can CLICK HERE to view the original post.

Let’s look at another Scary Cute card …

This card uses the Blending Brushes to create a soft background for our little fairy! Add some of the Washi Tape and adhesive backed Stars and you have a quick and cute card any little girl would love.

Here is another using the same technique just different stamps from Scary Cute!

I thought I would do one more fitting a boy! Colors did not show up well on this one, much cuter in person with the Pumpkin Pie, Parakeet Party and Gorgeous Grape color pallet.

The next card was super simple but a favorite of many …

With a simple black and white design from the Rustic Harvest Designer Paper, all I had to do to jazz it up with some sparkle was add the Washi Tape!! Then I die cut the house and bats from the Scary Cute Bundle … you can see how versatile this bundle really is. CLICK HERE to view original post which includes a video!

One more card using the Harvest and Scary Cute …

Don’t you just love this … It’s a Fun Fold and it highlights those Scary Cute dies! You could add color to the Black & White but on this card I wanted the house to be my focal point. You can CLICK HERE to view the video for this Fun Fold Card!

Well, well, well … I didn’t realize how many Halloween cards I had so I’ll be back with even more tomorrow, and the second half of the Halloween Card parade on Monday!

It’s a beautiful day here in Wisconsin, hope you can enjoy it too.

Here is a list of the core supplies used for these cards ….

Christmas Cheer Gnome …

Hello Stampin’ Friends ~ Woo Hooo it’s finally Friday and I am looking forward to the weekend, I’m sure you are too! Today I’d like to share one of the cards we made in my Stampin’ with my Gnomies class.

It’s a fun and easy layout that highlights the Gnome … this one is die cut and put together. His hat and the background comes from the Storybook Gnomes designer series paper. The “Christmas Cheer” greeting comes from the Sweet Candy Canes stamp set and was die cut using the Stylish Shapes dies … I found them to be very versatile and use them a lot!!

The Vellum cardstock was also die cut from the Stylish Shapes … then they were popped up using the Stampin’ Dimensionals. To finish off the card, I added some Basic Rhinestones for a bit of sparkle and shine.

Thank you so much for stopping by my blog today.

Have a great weekend ~

Kindest Gnomes …

Hello Stampin’ Friends ~ Tonight I am hosting my Stampin’ with my Gnomies class so I thought it would be fun to share an extra card and let everyone else in on it too!! Gnomes are so adorable and part of my Norwegian heritage …

Just check out this guy…

If you would like a FREE PDF for this card … Just leave me a comment below on how / why you like Gnomes and I’ll send you the FREE PDF!

Thank you for stopping by today!

Have a wonderful day ~

Birthday Card Organizer Kit

Hello Stampin’ Friends ~

Today I’d like to share something new with you … Birthday Card Organizer Kit. Party all year long with our Birthday Card Organizer Kit! This kit comes with 12 cards you can customize to celebrate any birthday.

You’ll also get a monthly planner to help keep track of all your friends and family’s birthdays. It even comes with a card holder for each month so you can craft ahead without misplacing your handmade cards. Make quick multiples and store them in the planner, ready to use at any moment. Never miss a birthday again!

You can click on the image below to discover more about this amazing kit, or to purchase it now.

Thank you for joining me today. Happy Tuesday to you.

Candy Cane

Hello Stampin’ Friends ~

From poinsettia’s to candy canes … I’m love sharing Christmas cards, and you can take a walk down candy cane lane with the Sweetest Christmas Suite! Use the playful variations of the candy cane stripe patterns to create delightful Christmas cards and tags for you family and friends.

I’ve actually used three different patterns from the designer paper … you’ll enjoy having the ability to die cut your candy canes from one of the patterns!! My cardbase is Real Red. I slipped a snowflake behind my candy cane to highlight it … then tied a pretty little bow using the Real Red and Garden Green Ribbon Combo pack. How sweet it is!

Thanks for popping in to check out my card today … Enjoy your week ahead.

A Sparkling Stunner!

Hello Stampin’ Friends,

I’m so excited to share today’s card with you, it is a sparkling stunner and the amazing part of it … these were all left-over pieces from other cards!! Let me begin with the Sweetest Christmas Designer paper with the diagonal stripes …. it was just sitting in a pile of cut paper when I noticed the White Glimmer Paper I had die cut using the die from the Sweet Candy Cane Bundle. Well, little did I know that they layered together really nice!

I knew that I wanted to use the pretty poinsettias from the Boughs of Holly Designer paper and had some left over, so I fussy cut one out and framed my greeting. My greeting comes from the Sweet Candy Cane bundle which is part of the Sweetest Christmas suite … I stamped that with Real Red on (you guessed it) a piece of scrap paper. Then I found the strip of Red Glimmer paper so I tucked it under my greeting … WOW.

I decided to pop up the poinsettias to give the card more dimension (the die cut gives it a lot of texture). If you didn’t think there was enough sparkle … I added Wink of Stella to the poinsettia flower. This is definitely a card for our glitter lovers, and those who desire the tradition red and green colors!!

I have more left overs … so you never know what you’ll see next!! Thank you so much for stopping by on this Saturday, I hope you have a good day!

Here is a list of the supplies that I used to create this card. You can click on any item to start shopping for you can CLICK HERE and use the monthly host code & get in the the drawing!

Celebrating Sunflowers

Hello Stampin’ Friends ~

I’m excited to share today’s cards with you… Yes, I have 2 for you today!! It is a fun and creative way to use your Sunflower Dies without all the waste … and it looks so cool!! With prices rising all around use, it’s nice to be cost effective … you know, save some money by not wasting our cardstock!

I also will share the replay of a Facebook LIVE I had done several months ago ….

As promised … I’m going to give you the measurements for the cards

Measurements:  

  • Cardbase: 8-1/2″ x 5-1/2″ … Score & Fold at 4-1/4″
  • Ombre Glimmer paper: 5-1/4″ x 4″
  • Cardstock for Sunflower Die Cut: 5-1/8″ x 3-7/8″
  • Very Vanilla Inside Cardstock: 5-1/4″ x 4″ plus scrap to punch greeting

This card is so cute and easy to make … After you die cut the sunflower out, you can place your flower back into the cut out area to create a unique look … I like mine embossed!!

Don’t be afraid to mix and match colors … it can really highlight the ombre paper underneath. Have some fun with it and add a patterned designer paper!!

I hope you caught my little tip for finding the perfect size greeting for the punch design you want to use … I do this all the time. Don’t forget to head over to my YouTube channel … there is a video that highlights the card you saw yesterday! CLICK HERE … and please subscribe!

Have a wonderful day and thank you for stopping by.

TODAY’S STAMPIN’ SUPPLY LIST … If you liked the products used in today’s projects, I have links for you below. Just click on the item you would like more information on, or to begin your shopping. It will take you directly to my website. Thank you ❤

Guest Stamper: Kathie with Peaceful Deer …

Hello Stampin’ Friends ~

Look what I found! With my Holiday Stamping Retreat coming up quickly, I thought it would be fun to re-share this cute swap card. The swap is held for our attendee’s just for fun (and a $30 Gift Certificate) to the winner. These ladies never fail to impress … I love to see the different styles, and everyone goes home with even more cards!!

My Guest Stamper is Kathie D. who highlights the Peaceful Deer Bundle. Kathie did a beautiful job showcasing the both the stamp set and the punch.

I love that has Kathie stamped directly onto the designer paper … it gives the card visual depth.

She created more depth and texture with the stamped images that were punched out. The greeting was die cut and has the stitched look for additional texture. Let’s not forget the pop of color from not only the tree’s but the mat behind the designer paper.

Kathie’s card not only makes a beautiful Christmas card but would make a perfect Birthday card as well.

Thank you for stopping by my blog today.

Enjoy your Monday ~

TODAY’S STAMPIN’ SUPPLY LIST … If you liked the products used in today’s projects, I have links for you below. Just click on the item you would like more information on, or to begin your shopping. It will take you directly to my website. Thank you 

Designer Paper: From Drab to FAB!!

Hello Stampin’ Friends ~

Today I am sharing the video replay of my Facebook LIVE last night. I shared how you can take your Designer paper from Drab to FAB!! Watch while I show you several card featuring different techniques used to enhance your designer paper.

Let’s begin with the video …

Here is the finished card featuring the pumpkins…. All cards featured in the video were using the Rustic Harvest Designer paper.

Now I loved this paper because of it’s versatility but when I started coloring it … well, I flipped head over heels!! Isn’t the transformation amazing! I really liked the paper before but adding that color totally transforms it to another level.

NOW … it’s time to share the finished floral card ….

WOW!! How stunning are our flowers. As I compare my two floral cards … pretty before, but simply stunning afterwards. These designer papers were created for those of us who love to explore and discover new dimensions in our paper crafting. By the way … the dimensions for this card are the same as the pumpkin card and they are shown in the video.

Thank you for hanging out with me and checking out today’s blog post.

Have an amazing day!

I have a list of supplies used for the two colored cards show here today. You can click on anyone of them for more details about the product or to begin shopping.