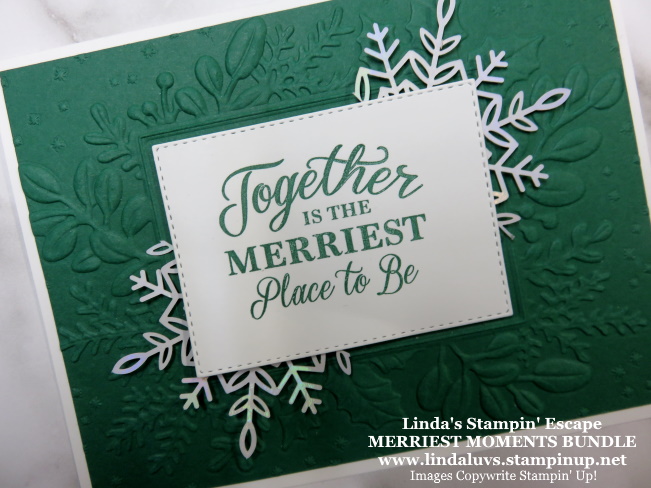
And a HAPPY Saturday to you all. Today I have a card from the amazing Merriest Moments stamp set and the Hybrid Embossing Folder. I was thrilled to see these amazing products back in the Mini Catalog this season as one of the returning favorites!! It’s surely a favorite of mine.
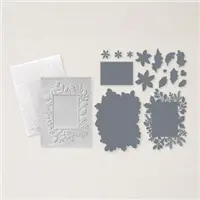
You can create unique and festive frames with the Merriest Frames Hybrid Embossing Folder. It comes with one embossing folder and one set of dies. This hybrid embossing folder will add a unique touch to your Christmas and winter cards.
The dies fit around the embossed image in the folder, allowing you to emboss and cut with one run through the machine. Or choose to use the folder and the dies separately; the choice is yours … I chose to just the the embossing folder on my card.
This is a simple and easy card to make. I used Basic White as my card base … the Evening Evergreen card front is 4″ x 5-1/4″ and is embossed with the Merriest Frames Hybrid Folder.
I complimented the embossed card front with the Wonderful Snowflakes in the Mini Catalog. You’ll find them on page 45 in the Mini Catalog … you get 24 Snowflakes for only $6 and you can stretch that even further by cutting them in half as I did here.
The greeting comes from the Merriest Moments Stamp set …
The greeting was stamped onto Basic White cardstock in the Evening Evergreen and die cut with the die included with our bundle … it fits perfectly in the framed space!
I told you this special team of products would be so fun to use! There are so many different ways you can use the stamps, dies and embossing folder. Be sure to keep an eye out, as I will be sharing more in the future.
Thank you for joining me today. I hope you have the “merriest” of weekends ~
TODAY’S STAMPIN’ SUPPLY LIST … If you liked the products used in today’s projects, I have links for you below. Just click on the item you would like more information on, or to begin your shopping. It will take you directly to my website. Thank you ♥
If you missed last night’s LIVE Facebook presentation, I will be sharing it with you today, along with close-ups and dimensions shared in the video. The Book Binder Fun Fold is so easy to make but gives you that special touch of fun … and it works great with any occasion!!
Let’s take a look at the video and then I will share the measurements for the card…
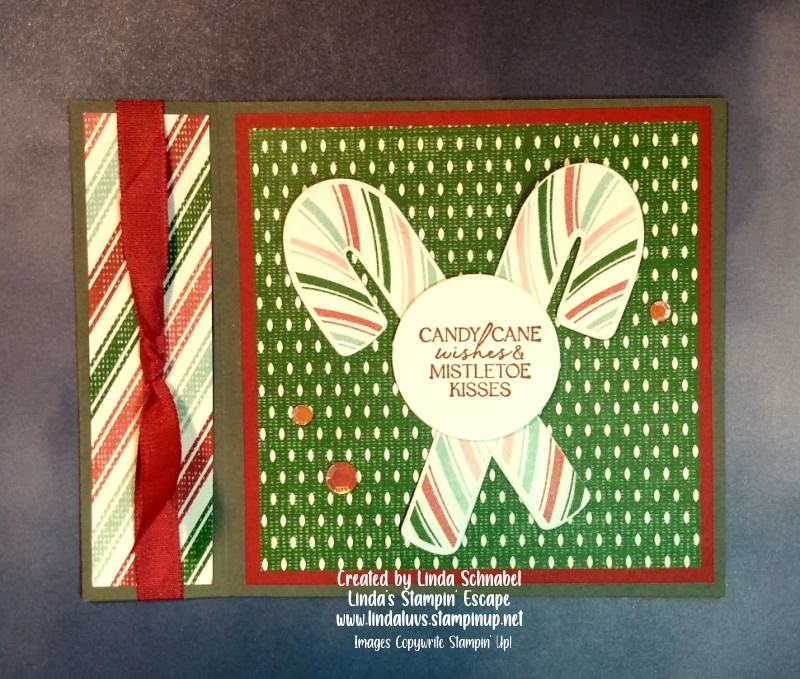
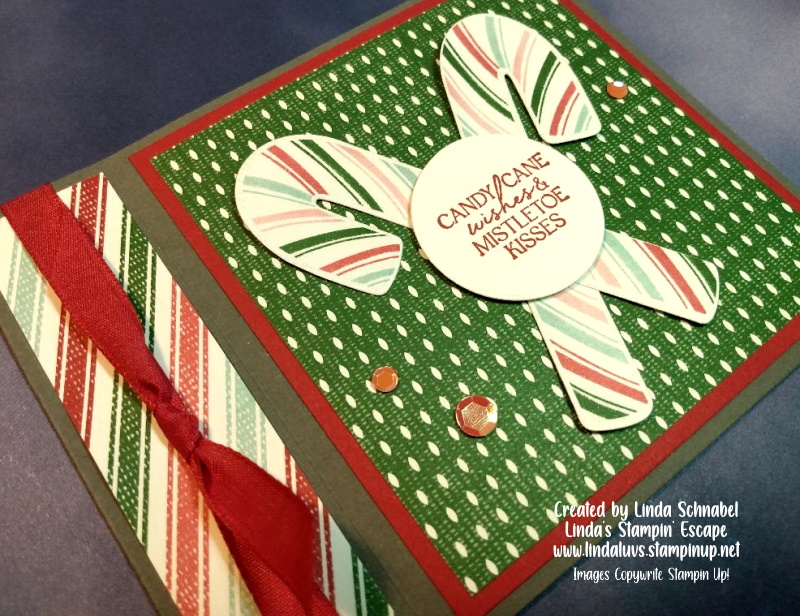
So cute and easy … right! One piece of cardstock, two score lines and some adhesive and you can create the Book Binder Fun Fold. This bundle makes it easy to stamp and die cut your way to “sweet” Christmas cards and treats!
Measurements:
Card Base: 11″ x 4-1/4″ then score at 5-1/2″ and 6-3/4″ … the adhesive goes between the 5-1/2″ and 6-3/4″ score lines to create the “binder”.
Real Red Mat: 4″ x 4″
Designer Paper or White (for inside): 3-3/4″ x 3-3/4″
Binder Designer Paper: 4″ x 1″
The layout to this card is so simple that you can use it for any occasion … I’ll share more with you later.
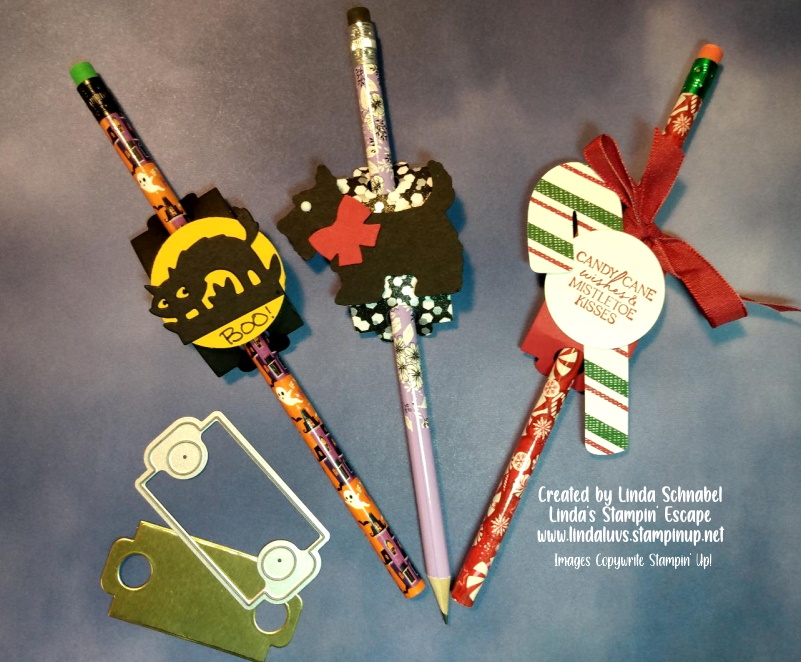
In the Sweet Candy Cane bundle I showed you that one little die that creates a little “wrap” for candy canes but I wanted to share what else you could use them for … non-candy treats / gifts!!
Talk about a quick and easy little gift to give … and inexpensive. I used scrap pieces to cut my little wraps out and the pencils were from the $$tore! I think there are about 8 pencils in each pack, and they always have them for special occasions.
I hope you enjoyed the fun fold and the little treat wraps today. I’ll be back to share more of these with you.
Thank you so much for joining me today, and to those who watched me LIVE last night.
Have an amazing Wednesday ~
Here are the supplies that I used to create today’s Book Binder Fun Fold. If you do not have a demonstrator, I’d be happy to serve your stamping needs. Thank you.
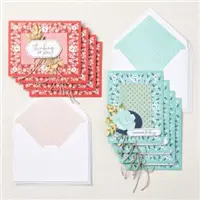
Happy Saturday!! A few days back I shared my version of a card that I cased from the catalog. It was my challenge from my Design Team I’m on … so today I thought I would share another card with you that features the same layout! (The Original card CASED was the “Hello, Baby” card in the upper right-hand corner on page 46 of the Annual Catalog)
He’s so cute … isn’t he? I liked the layout so that is the card I chose. I decided to swap out the Happier than Happy Bundle for the Kindest Gnomes bundle. I couldn’t resist the pretty Storybook Gnomes Designer paper that would be the backdrop for my cute little gnome.
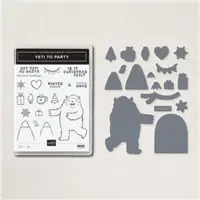
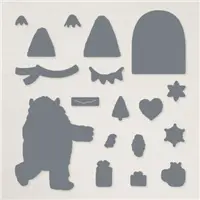
So today. we’re getting Yeti to Party ….
This card turned out so cute and you can see this layout is perfect for any occasion. Bonus … if you have designer paper scraps, this layout is the perfect one to use them up. Here she is using the Sweetest Christmas Designer Series paper and of course, the Yeti to Party stamp set on page 38 of the July / December Mini Catalog.
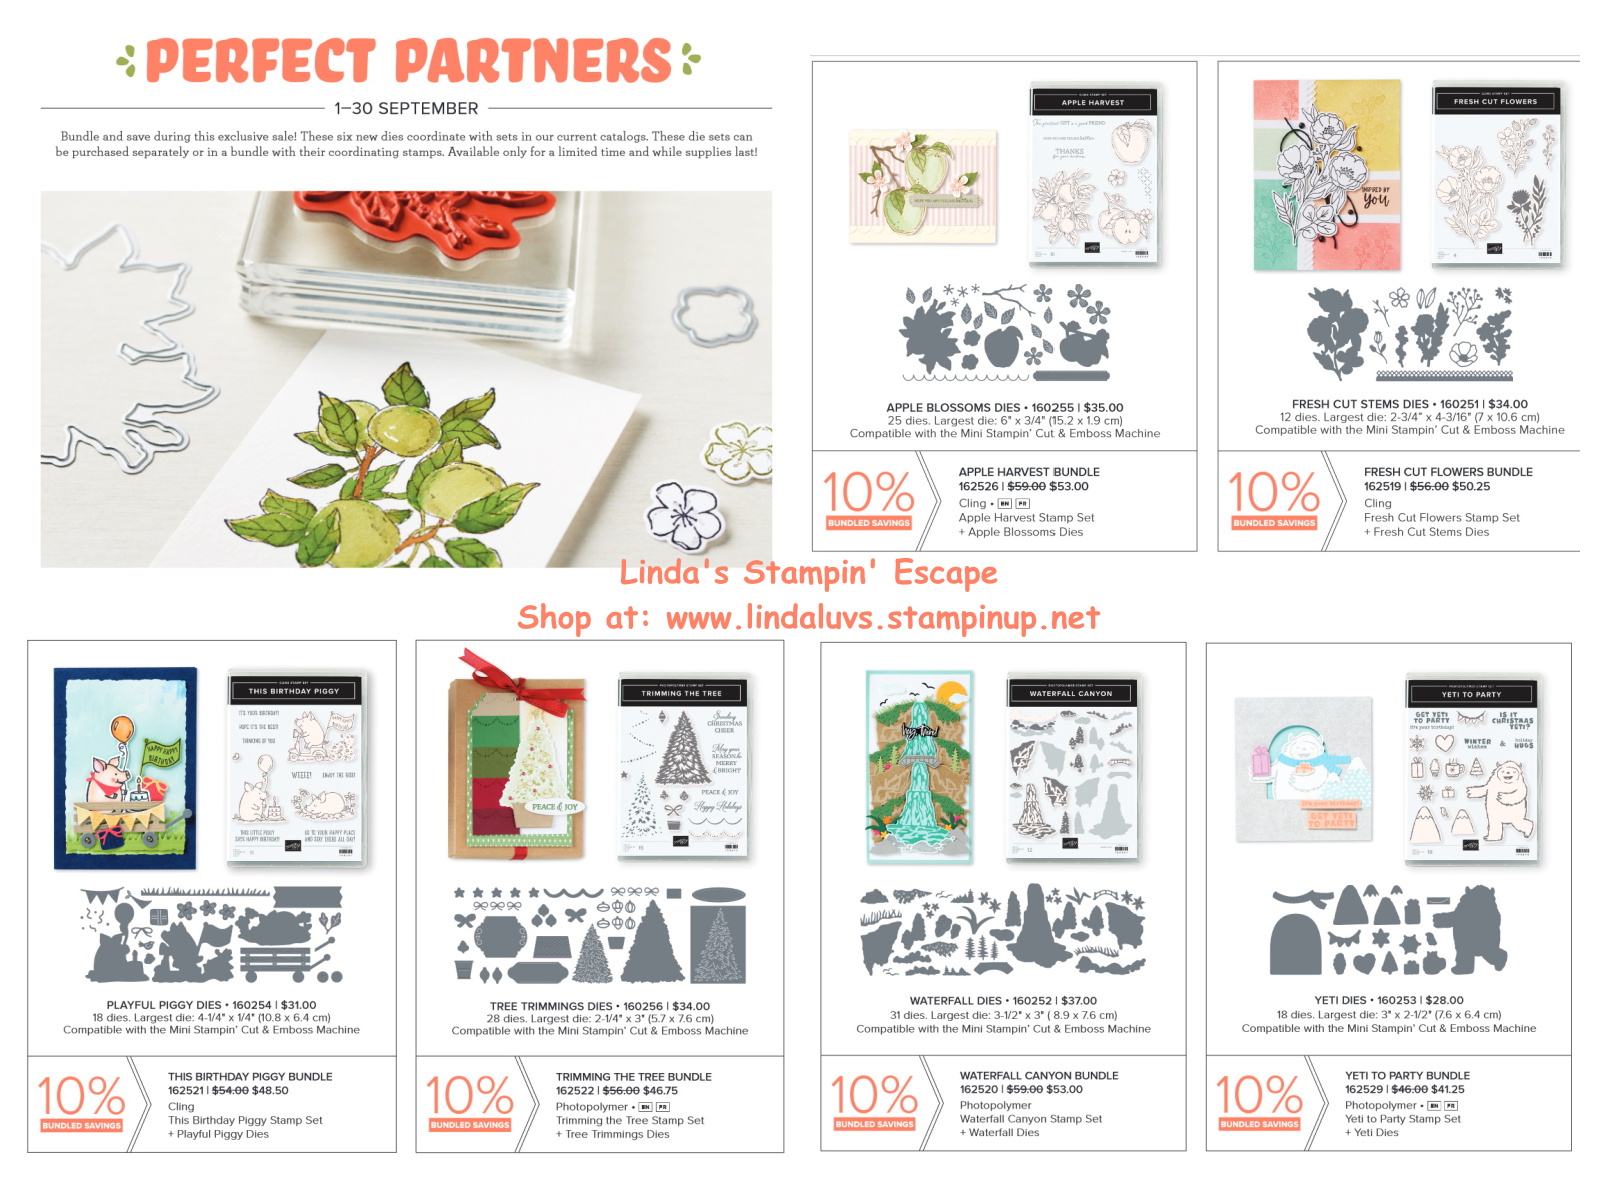
I’m thrilled to tell you that Stampin’ Up! has created a die set for the Yeti to Party and can be found with the Perfect Partners promotion during September ONLY.
If you would like the PDF for my Gnome card … just comment below and I’d be happy to send it to you!
Thank you for joining today, have a great weekend.
Yesterday I shared a beautiful card that was quick and easy to create using the beautiful Snowflake Specialty Vellum, today I’m sharing one with the flocked snowflakes and blending brushes.
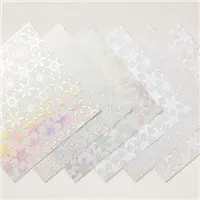
Here is a close up of the stunning Snowflake Specialty Vellum …. three sheets have iridescent patterns and three are flocked in white.
The flocked paper is so elegant and soft and is beautiful in white, but I wanted to give it a special touch, so I brought out my blending brush and used the soft pastel color; Fresh Freesia.
The blending brush leaves a soft hue of color on the vellum but the flocked snowflakes grab a little more so you get a beautiful two tone effect. This technique will be a favorite for those that enjoy a more “non-traditional” card.
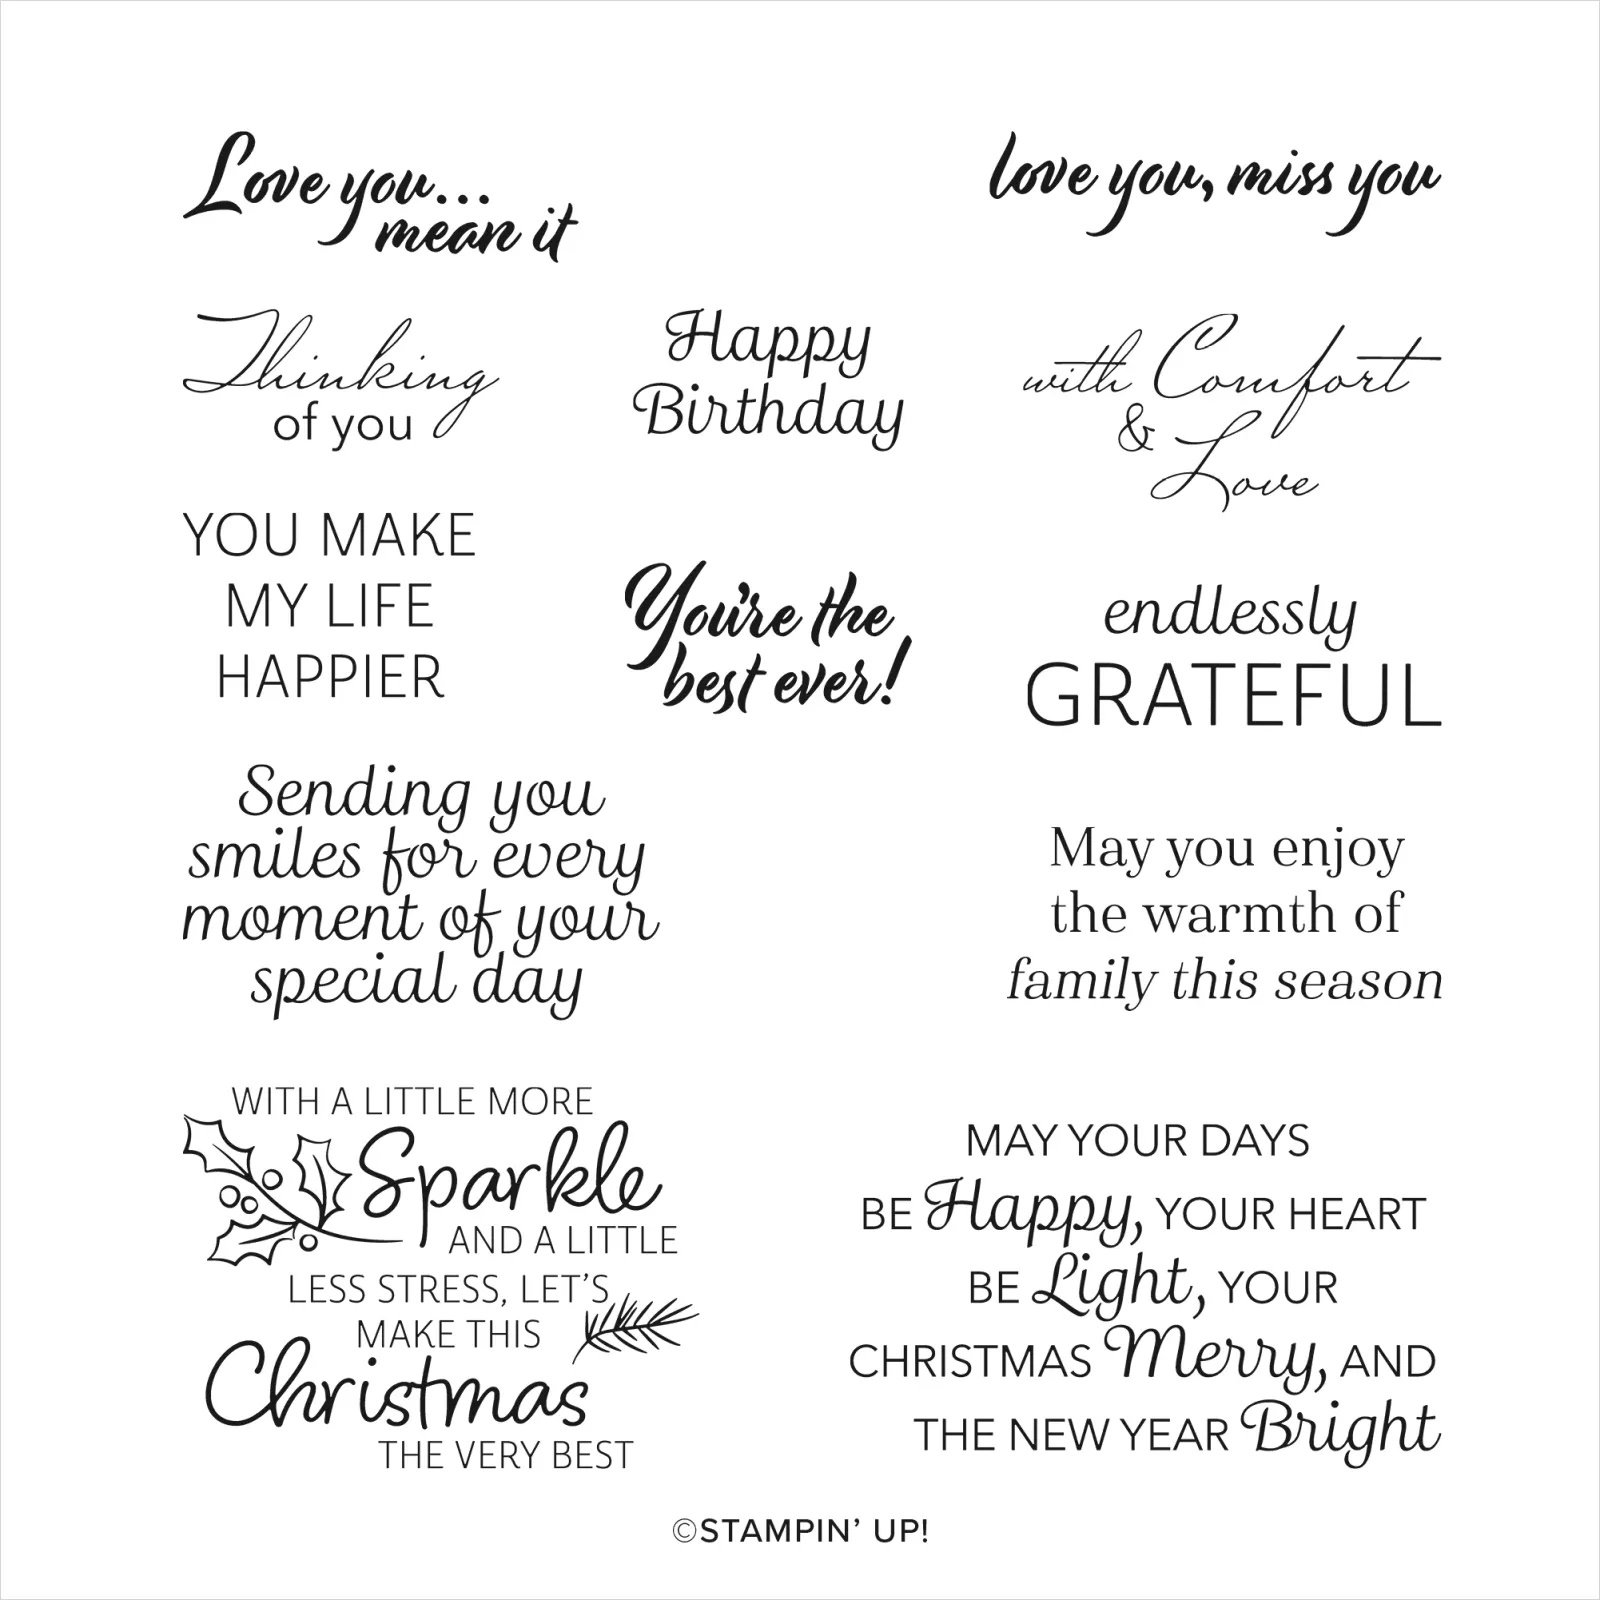
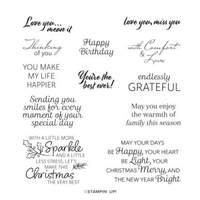
The sentiment for today’s card also uses the Very Best Occasions Stamp Set …. and like I said yesterday, if you do not have this amazing stamp set in your collection, you are going to want to add it to your collection.
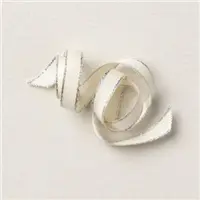
The Very Best Occasions Stamp set is part of a bundle which includes the Very Best Trio punch. That is what gave my greeting the cute edges you see … with a quick push of the punch. To complete my card I added the Silver Metallic Edge ribbon. Imagine creating these pretty cards in any of your favorite colors … oh yes!
Thank you for stopping by today…. Hope yours is a good one.
Here is the list of ingredients I used for today’s beautifully quick & simple card ….
Today I have a quick & easy and very pretty Christmas card that will add a Little More Sparkle and Shine into the lives of your friends and family when they receive this handmade card from you this holiday season.
Just some cardstock, the beautiful Snowflake Specialty Vellum, the Very Best Occasions stamp set, a punch and your ink (oh yes, I also used the new Metallic Woven Ribbon) and you can create a stack of beautiful cards.
Let’s being with the stunning Snowflake Specialty Vellum ….
You’ll add a touch of elegance to your winter crafts and creations with the Snowflake 12″ x 12″ Specialty Vellum. This unique paper includes three different snowflake designs in white vellum and iridescent foil—that’s six different papers to get creative with!
We got that professional touch with ease by layering the snowflake vellum on our Night of Navy card front and backed by the Basic White so that the iridescent snowflakes were the highlight of the card …
The sentiment is so fun and fitting for the times, and is perfect for our handmade cards!! If you do not have this amazing stamp set in your collection, you are going to want to add it before it goes away!
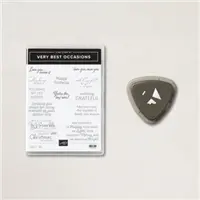
If you’re looking for a stamp set that has heartfelt sentiments for just about everything, then you need the Very Best Occasions Stamp Set. These 12 versatile sentiments celebrate the Christmas season, express gratitude for family and friendships, share positive and uplifting messages, and so much more. Whether you need a simple, “With Comfort & Love,” or an upbeat, “You’re the best ever!” this stamp set has you covered.
My sentiment is stamped in the coordinating Night of Navy to match my cardbase and punched out with one of my favorites … the Label Me Lovely punch. Add some adhesive to the back and then create a little whimsy and texture by running the Metallic Ribbon back and forth before mounting it onto your card with Stampin’ Dimensionals.
Quick … Sparkly … and easy to recreate for your friends and family. I hope you enjoyed today’s card sample … the holiday season can be stressful, I don’t want your cardmaking to be.
I ❤ Simple & Beautiful. Thank you for joining me today.
Here is the list of ingredients I used for today’s beautifully quick & simple card ….
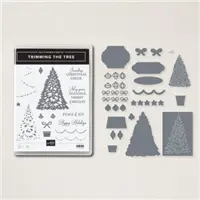
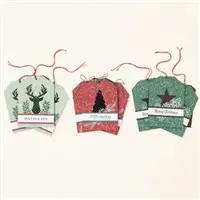
Today I have a card to share with you from the Trimming the Tree Bundle. I have the dimensions and step by step instructions! Free tutorial Friday!
The Trimming the Tree bundle is one of the bundles from the PERFECT PARTNERS promotion … there are six new dies that coordinate with stamp sets in the 2022–2023 Annual Catalog and the July–December 2022 Mini Catalog. These coordinating dies will only be available during this promotion and will not be offered in any catalog.
MEASUREMENTS:
Card Base: Thick Basic White 5 ½” X 8 ½” score at 4 ¼”
Cardstock #2: Painted Christmas Designer Series Paper 4 ¼” X 5 ½”
Cardstock #3: Real Red cardstock ¾” X 4 ¼”
Cardstock #4: Painted Christmas Designer Series Paper 2 ¼” X 5”
Cardstock #5: Gold Foil 2 ¾” X 3”
Cardstock #6: Garden Green cardstock: 2” X 3”
Cardstock #7: Basic White cardstock: 1” X 2 ½”
INSTRUCTIONS:
Score your card base and fold in half.
Attach the Painted Christmas Designer Series Paper #2 to your card front.
Take the Painted Christmas Designer Series Paper #4 and cut up from the bottom and from the sides creating the banner piece.
Attach the Real Red cardstock #3 to the backside as shown and attach to your card front.
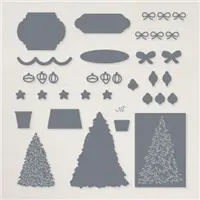
Die cut the Gold Foil #5 with the tree pot, bows, star and label dies.
Die cut the Garden Green cardstock #6 with the Christmas Tree Die shown.
Here are the PERFECT PARTNERS Bundles with the item numbers on them along with the discount for bundling …
I also want to share the latest WEEKLY DEALS … these will be available through September 13th.
New products added each week on 8th, 15th, and 22nd of September!
Thank you for hanging out with me today. Hope your day is a good one.
Here is a list of ingredients used to make this card ….
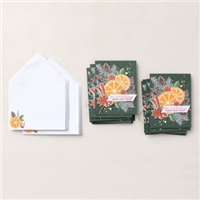
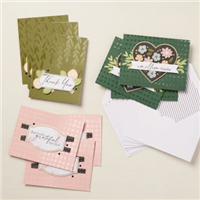
The latest addition to the Kits Collection by Stampin’ Up! is a simple solution to gift cards and tags for the holidays! The Christmas Gifting Kit has everything you need to create gorgeous gift tags to attach to presents and gift card holders that adds a handmade touch.
Kit includes 9 tags and 9 gift card holders—3 each of 3 designs ….
Includes the exclusive Christmas Gifting Stamp Set and a Shaded Spruce Classic Stampin’ Spot
Sized to fit standard gift cards …
Our Kits Collection are all-inclusive kits that are designed for beginner crafters or those of us looking for a quick creative fix… I like them as a “beautiful” time saver!! They are a fun and fast and offer a creative opportunity without having to purchase the whole craft store! Perfect for those who don’t have a lot of space!
I have added the link below for those of you who want to try it out. Thanks so much for stopping by today. Hope your day is a good one ~
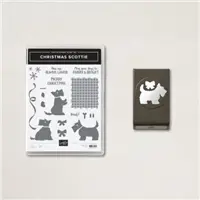
Yesterday I announced my newest Stamp Class … Christmas Scottie. The Scottie is so adorable and I just LOVE punches because they make your cardmaking a touch quicker! I teamed up the Christmas Scottie with a quick and easy technique I shared at my Halloween Class … The magic of markers to dress up a plain black and white piece of designer paper.
Join me now as I share how easy this Christmas cutie is to make ….
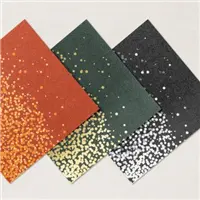
I began with a Basic Black base and a piece of 4″ x 5-1/4″ piece of Real Red which will mat our designer paper which measures 3-3/4″ x 5″. Before you adhere your designer paper to the mat, you will be coloring it with your markers; I used Real Red and Garden Green. The designer paper is the Rustic Harvest Designer paper found in the Mini Catalog.
My sweet little Scottie Dog is punched out from the Metallic & Shimmer paper found in the Mini catalog… although you could use Basic Black. I then punched the bow out of Real Red and attached it to my puppy. I mounted my Christmas Scottie onto a piece of Vellum Cardstock that I had leftover from another project (it’s around 2″ in diameter). Don’t you love how the vellum makes the dog stand out more! This piece was popped up with dimensionals.
The greeting comes from our stamp set and was stamped in Garden Green ink to coordinate with the Garden Green stripes that we added to our designer paper. Don’t forget that you save 10% when you bundle the stamp set and punch. And the “eye” on my Scottie is actually one of the metallic dots on the specialty paper … cool right!?
I want to thank you for joining me today for my debut of Christmas Scottie. This will not be one of the cards in my class, but you know you’ll leave with totally cute cards (and a treat for your puppy!) plus there is always something “sweet” as a treat for you too.
Have a good day ~
Here is a list of supplies I used to create today’s card ….
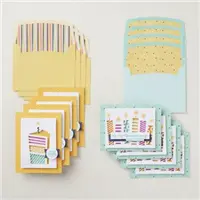
Today I would like to share with you the “newest” kit in our Kits Collection, the Cozy & Bright Kit. Celebrate the season with a card kit that has everything you need to wish those you love a merry Christmas and a joyous New Year.
This kit is a quick way to make 12 festive cards to celebrate the holiday season. Your Christmas cardmaking has never been easier.
Don’t let the holidays overwhelm you–get your all-inclusive kit and make quick and beautiful cards everyone will love! Here is everything you will need to make your cards, including the Step by Step instructions.
Kit Includes:
Cozy & Bright Photopolymer Stamp Set
Acrylic Stamp Block
Classic Stampin’ Spot: Poppy Parade
Predesigned projects
Step-by-step instructions
Precut pieces (No prep work! Get right to crafting). Including printed die-cut sheets: sticker adhesive sheets & non-adhesive sheets
Makes 12 cards of 1 design
Gold foil accents
Folded card size: 5-1/2″ x 4-1/4″ (14 x 10.8 cm)
12 preprinted envelopes
Enough adhesive to complete projects
Linen thread
A 9-7/8″ x 6-1/2″ x 2-3/4″ (25.1 x 16.5 x 7 cm) printed designer box for storage or crafting on the go
Product colors: Cajun Craze, Early Espresso, Evening Evergreen, Garden Green, Poppy Parade, Pumpkin Pie
I not only love the design of these cards (I can almost smell them – YUM) but I love that once the cards are sent, you still have a beautiful set of Christmas sentiments to keep and use over and over again. Here is the stamp set included in this kit ….
Our kits are perfect for beginners, but as a busy working girl … I love the ease and peace of mind that you get when you can create and send beautiful cards to your friends and family, without having to design your own (that’s OK too!)
Life sometimes has a way of sneaking into your plans … lol, and the kits allow you a little help when needed. I keep several on hand … birthday, thank you and all occasions. There are many kits to choose from.
Take a look, this card even has a touch of “bling” with gold splatter on the background. I just fell in love with this kit. In fact, I even thought of putting some Orange & Cinnamon oils on my card so you could smell those warm holiday scents! What do you think? I’d love to hear in the comments below.
Have a warm and wonderful day ~
Here is the link for today’s kit and a few of my favorites …
I have been showcasing several different bundles on my Facebook page during my Christmas in July event. Here is the Lights Aglow Suite which highlights two different bundles; the Christmas Light Bundle and the Brightest Glow Bundle. You’ll find them on pages 30 – 33.
Bring the magic of twinkling Christmas lights to all your seasonal papercrafts with the Lights Aglow Suite Collection. It includes all the coordinating pieces you need to make your handmade greeting cards and gift tags shimmer and shine.
Then I showcased the Boughs of Holly suite / Leaves of Holly Bundle. This beautiful bundle has coordinating designer paper which is simply stunning. Check it out on page 25 of the Mini Catalog. If you don’t have one yet, you can click on the catalog that is located on the right side of the screen … or reach out to me for one if you do not have a demonstrator already.
Make classic seasonal cards, tags, gift boxes, and scrapbook pages with the Boughs of Holly Suite Collection. This suite features holly leaves and berries in deep greens and rich reds that you can stamp, cut out, and embellish with beautifully designed paper, ribbon, and more!
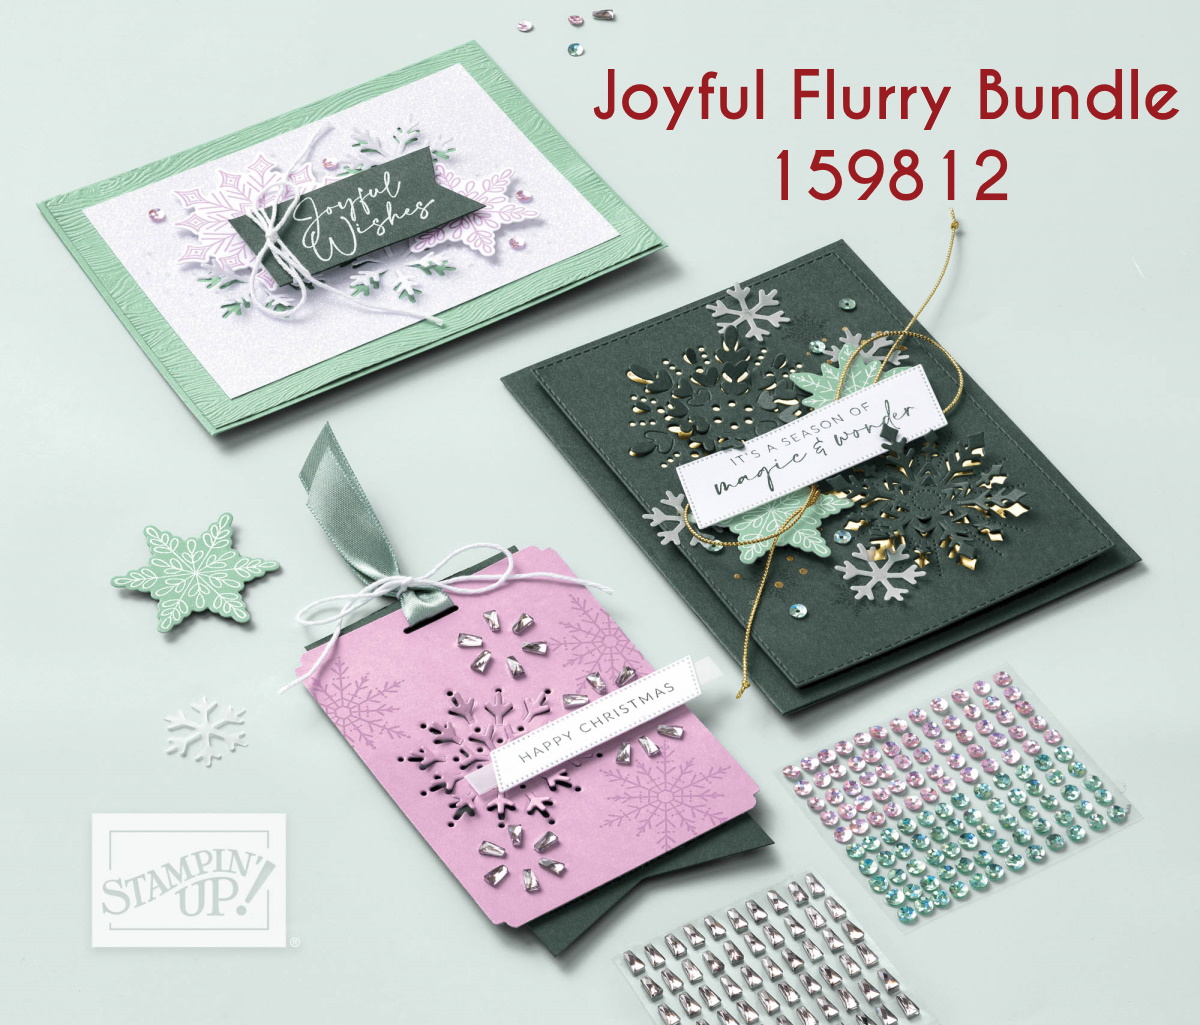
We also looked at the amazing Joyful Flurry … these are very special snowflakes! These dies don’t just cut them out, they make amazing patterns that add a beautiful texture to your card.
Create magical snowflake elements on your handmade cards and gift tags with the Joyful Flurry Bundle, Wonderful Snowflakes foil pieces, and more!
I would love to have you join me on my Facebook page for more samples, fun and tips … just CLICK HERE to get to my page. My Christmas in July event is only going on through the end of July so let me know if you need any help ….
This is a great time to get your holiday stamping needs/wants taken care of and collect some extra goodies for FREE! Thank you for joining me today … head on over to my Facebook page, we’d love to have you join us.
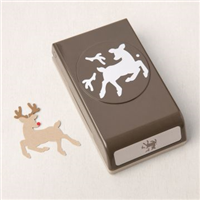
Since I’ve kicked off my Christmas in July special, I thought it would be fun to share of of my favorites from last year Peaceful Deer. I realize that there are no “bundles” so to speak of Christmas items in our Annual catalog, there are a few favorites in there.
What’s great about this card is that it can really be used all year long … perfect for a birthday!
Measurements:
Card Base: Crumb Cake 5-1/2″ x 8-1/2″, scored & folded at 4-1/4
Cardstock #2: Crumb Cake 4-1/8″ x 5-3/8″
Cardstock #3: Balmy Blue 4″ x 5-1/4″
Cardstock #4: Basic White scraps for deer and greeting
Instructions:
Cut a mask for the background hills from the copy paper. Use a Blending Brush to add Mossy Meadow ink forming the hills on the Balmy Blue cardstock.
Stamp the trees in Mossy Meadow ink, then emboss with the Tasteful Textile folder and adhere to card base.
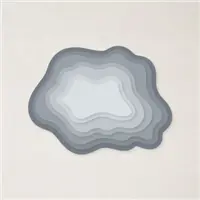
Using the third largest diorama die, cut the Crumb Cake cardstock, then emboss with the Bark folder. Cut 4 pieces of Linen Thread and tie around the right side, fraying ends. Adhere to card with dimensionals.
Stamp, color and punch out deer. Adhere to card with double layer of dimensionals.
Stamp greeting, die cut with Messages die, and adhere to card with dimensionals (double on left, single on right).
Add Brushed Metallic Dots as desired.
I hope you enjoyed today’s tutorial … these are shared so you can print them out and recreate these cute cards. Don’t forget my special Christmas in July special ….
I have an exciting announcement to share with you today … I am hosting a Christmas in July event in conjunction with Sale-a-Bration so you can earn maximum benefits! You can join in some of the extra fun by following me on Facebook where I share tips, projects and more!
This event runs from Thursday July 28th through the end of the month … July 31st at midnight. When you purchase one of our Holiday Bundles, either from the Mini or Annual Catalog and spend $50+ or more, you will be rewarded with three special gifts.
You will need to use HOST CODE: QGR9QZYP when ordering.
The first gift is from me ….
Make your Christmas cards stand out this year with the Festive Pearls. These little beauties will not only add dimension but also a touch of elegance to all your seasonal papercrafting projects… and they are the first of three gifts during my Christmas in July event.
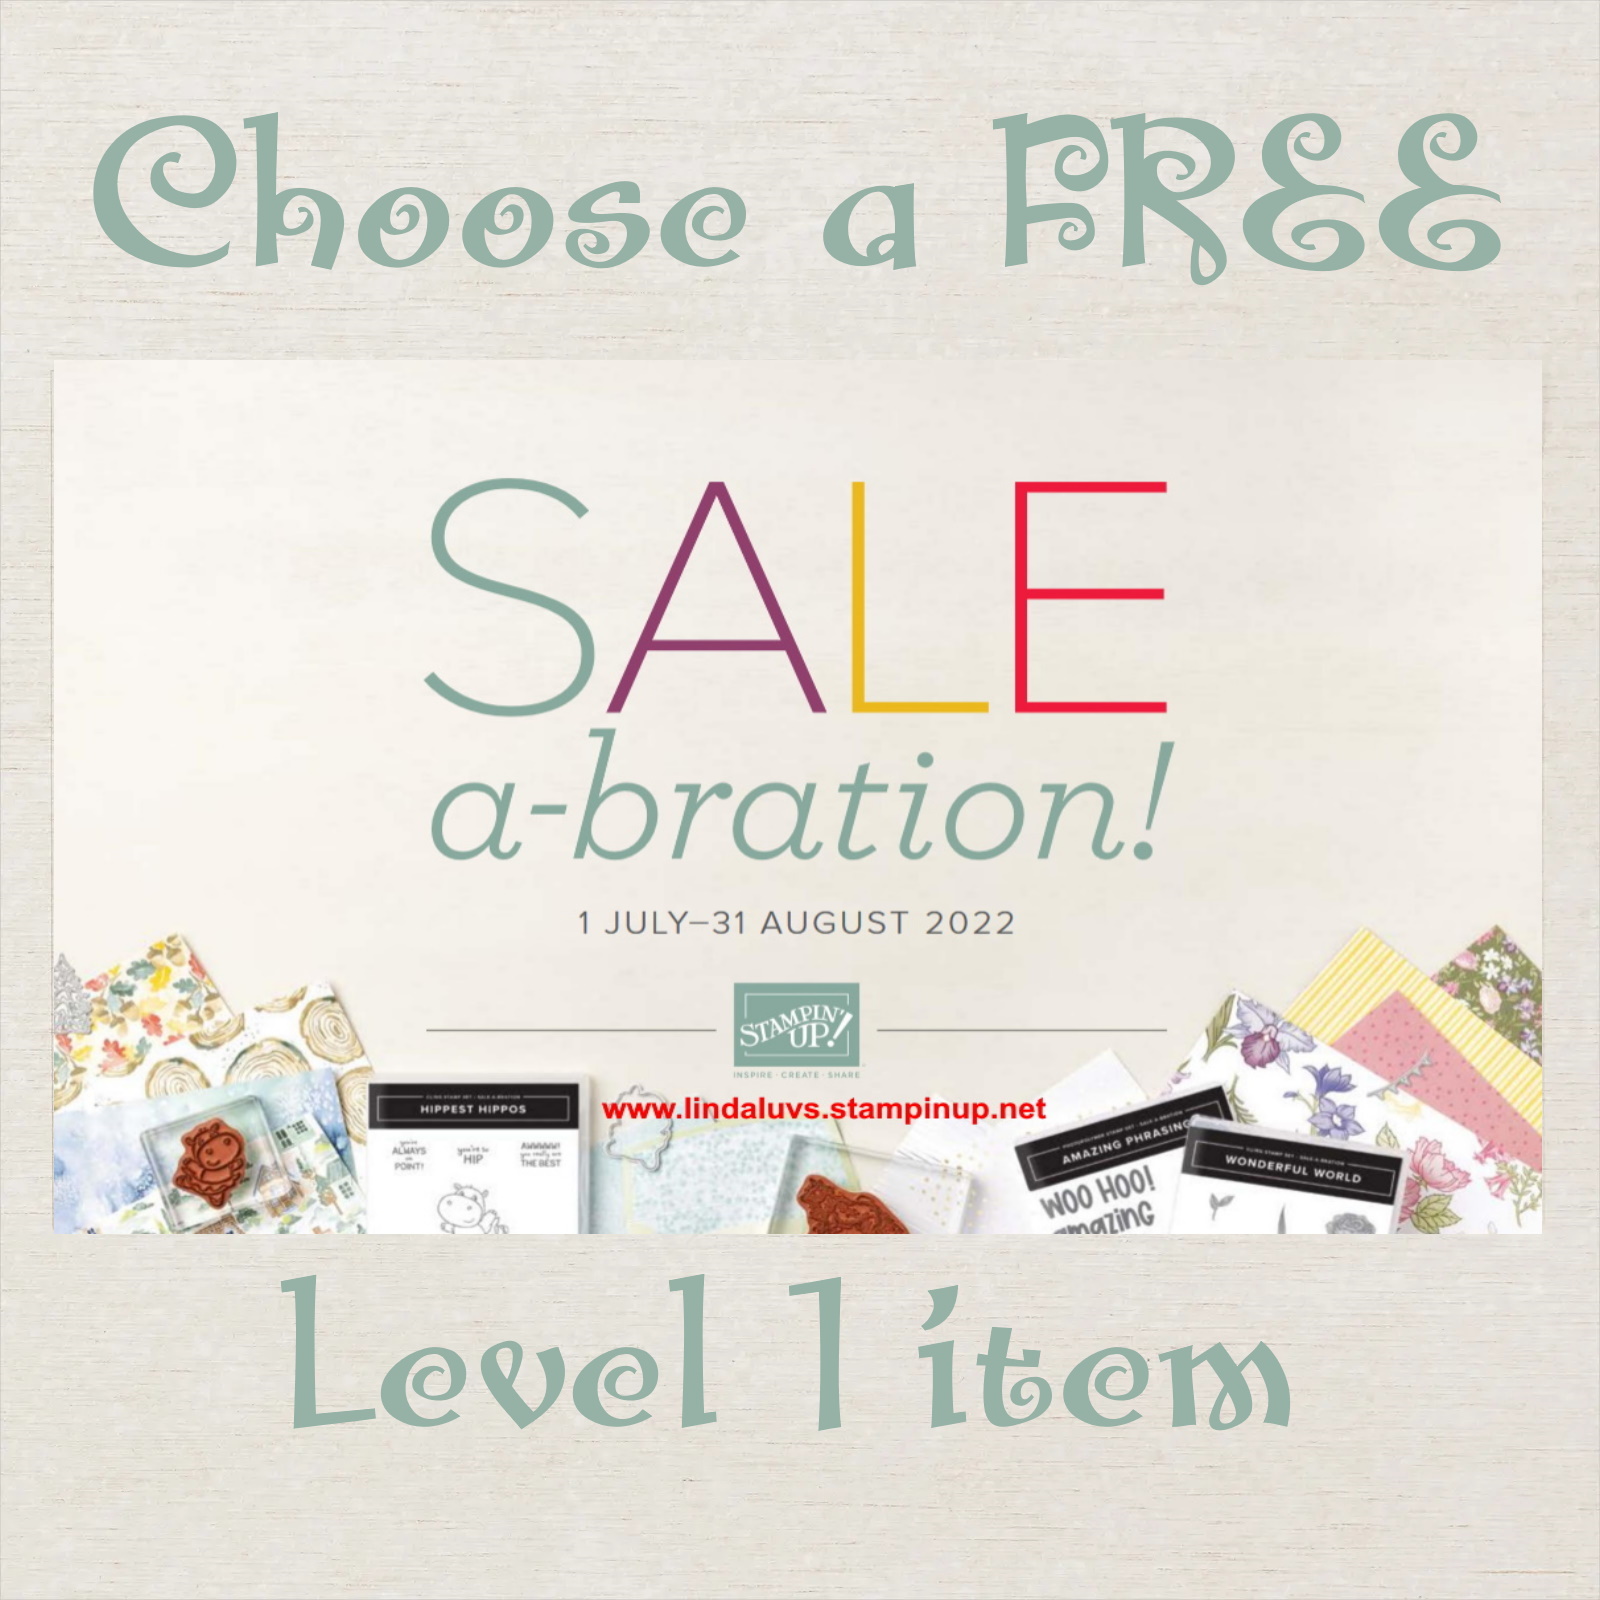
The second gift is from Stampin’ Up! ….
You will get to choose a FREE item out of the Sale-a-bration catalog. What you choose depends on the amount you spend… $50 = 1 Level 1 item / $100 = 2 Level 1 items or 1 Level 2. If you choose to purchase $150 or more … Do NOT Use the Host Code as I want you to receive hostesses benefits!!
The third gift is a virtual one …
You will receive a point for each $50 you purchase towards a FREE Stamp Set. You can get full details of my Rewards Program HERE.
I thought it would be fun to boost up your benefits when your order for your holiday cardmaking. I know many of my stampin’ friends begin their cards early … I’m here to help you out.
Thank you for hanging out with me today and learning about this amazing special event. If you have any questions message me. I’d love to help you out.
Today I’ll be sharing my Facebook LIVE replay for you. We created a cute little Gift Basket from the Pillow Box Die (Retiring) … You’ll be surprised at how easy this is to make!
I have the dimensions for the inner box in the video but I thought I would share them again. Start with a 7-1/4″ x 5-1/2″ piece of cardstock and score at 2″ on all for sides. Then you will cut on the score lines on the 7-1/4″ length sides (ref. Video) You should have also seen the cute little baskets I made for the Mantle Gifts for my Holiday Stampin’ Retreat!
The ladies watching LIVE had plenty of ideas they could use these for … Baby Showers, Wedding Showers, Birthday Parties, on the table for the Holiday’s … a teachers Gift or a cute little gift for a co-worker. The possibilities are endless, and that cute little basket is priceless!
I have listed the ingredients below for your shopping convenience. Let me know if you have any questions.
Stop back tomorrow … I have something interesting to show you using this die!! Thank you so much for joining me today!
TODAY’S STAMPIN’ SUPPLY LIST … If you liked the products used in today’s projects, I have links for you below. Just click on the item you would like more information on, or to begin your shopping. It will take you directly to my website. Thank you ♥
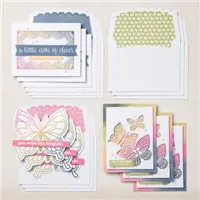
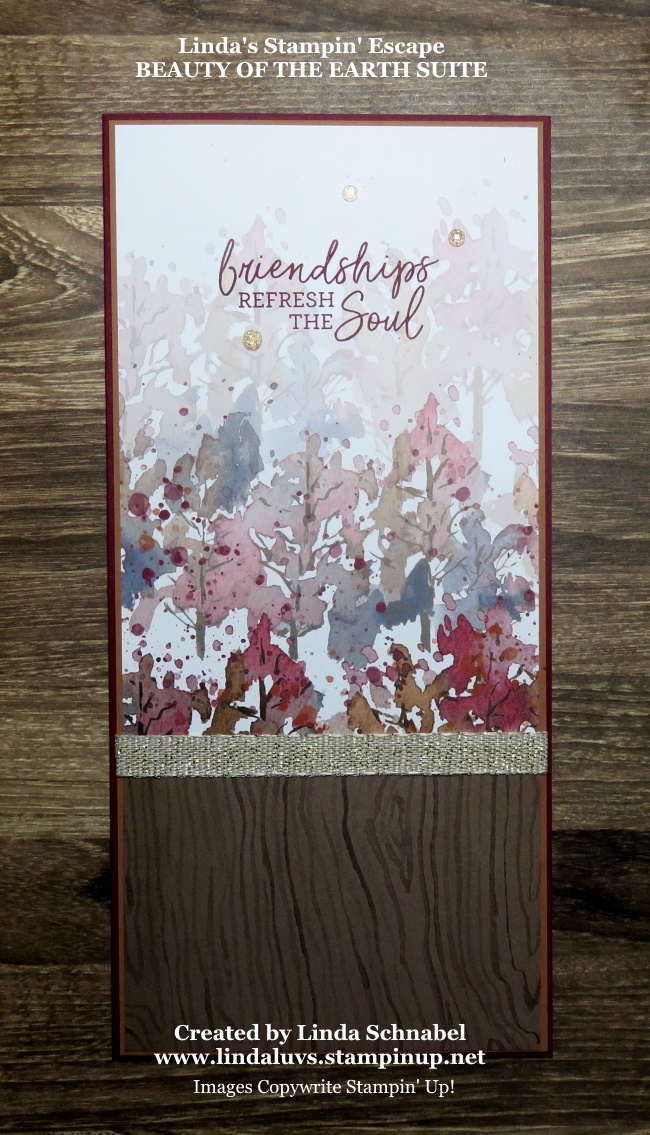
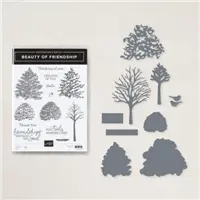
I have a treat for you today … a simple yet beautiful Slim Line card and a parade of other cards that were created from the amazing Beauty of the Earth Suite. I will also be sharing some fun techniques on these cards so, grab a cup of coffee and sit back with me while we go through these creative gems!
I share these because the Beauty of Friendship Bundle is part of the Savings in Bloom promotion. I will share “all” of the items on sale at the bottom of my post.
First up is my Slimline cards, this card fits in a business size envelope … I’m using two different patterns from the Beauty of the Earth Designer paper and joined them together with the pretty Gold Fine Art Ribbon; it has a touch of sparkle, so I had to add the Genial Gems to keep the sparkle going.
The greeting comes from the Beauty of Friendship stamp set / bundle. I chose the Cinnamon Cider as a mat and Merry Merlot as my card base … they pull those colors out of the designer paper. I find this suite / bundle very gender neutral … who wouldn’t love these cards!
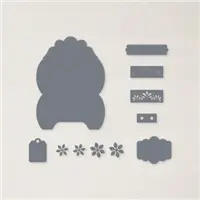
My second card I’m using the same pattern of the Beauty of the Earth Designer Series paper and the Beautiful Trees dies. Another simple card when using your Stampin’ Cut & Emboss machine. The greeting comes from the Beauty of Friendship stamp set included in the bundle.
Ready to see another card using the same paper? The amazing thing is that each one looks sooo different! I used a landscape layout verses the portrait as I did on the first two cards and created this unique card. I also used Night of Navy on this card to pull out the blue in the designer paper.
I created the frame with the Stitched Rectangle Dies … I love this look, it’s new and fresh and highlights the designer paper. I added the tree and greeting from the bundle …
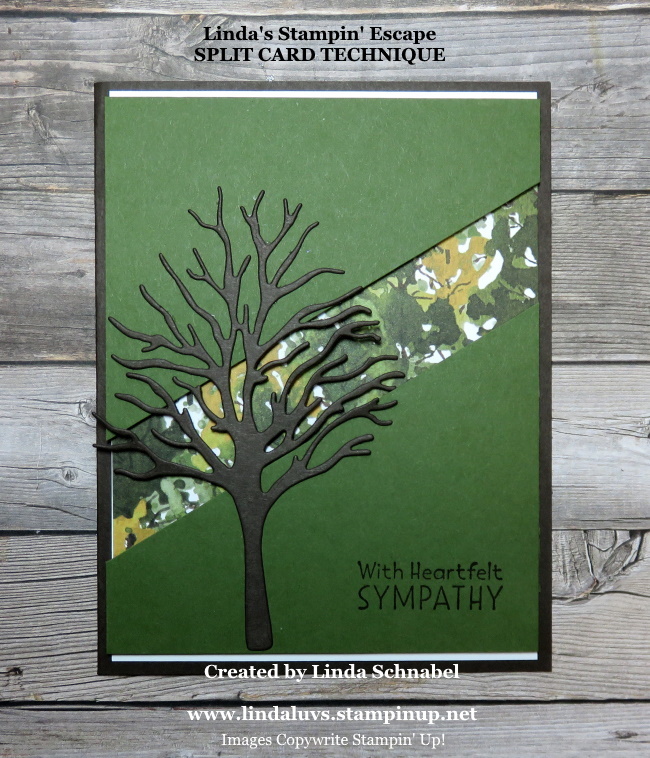
Now lets change things up a little by using a different pattern from our Beauty of the Earth Designer paper and a fun technique … the “Split Card Technique”. I’m using Old Olive and Early Espresso to coordinate with my designer paper. You can watch the video to see how to create this card yourself by CLICKING HERE!
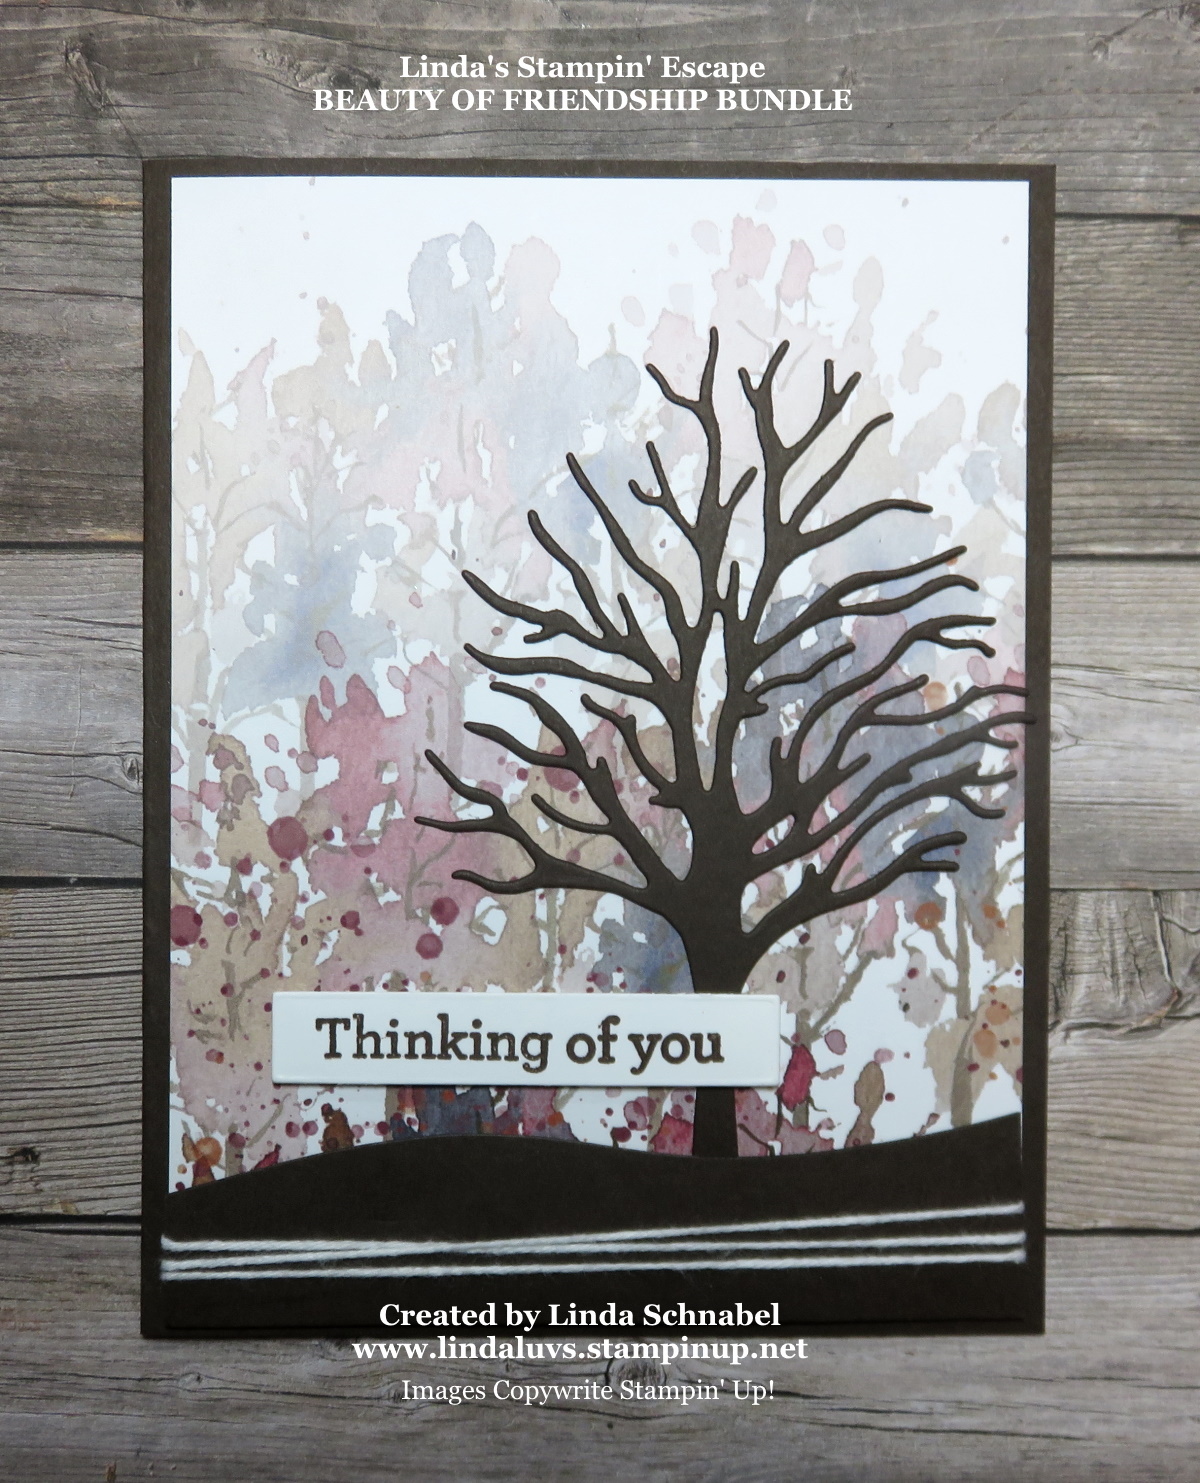
Now I would like to bring in one of the “hottest designer papers” right now, and that is the NEW HORIZONS Designer paper … so many pretty patterns would work perfectly with the dies from the Beauty of the Earth bundle. The watercolor landscapes look so cool with the tree.
The next card I share with you has a card base is Early Espresso …. so is the tree itself, it made the Misty Moonlight designer paper from the Beauty of the Earth Designer paper really pop, and when I added the leaves to the trees … WOW! The leaves on the bottom are just another die cut of the top … just cut up into smaller pieces to lay upon the ground. So pretty!
The last card I have to share with you, has the same watercolor background paper that I used on the “You Inspire Me” card but I’m changing up the seasons. Once the leaves are gone … well, winter comes next, and it makes for the perfect Christmas card …
I just love this card and I used the Chalk pen and Wink of Stella to add snow to my tree! How fun is that! I just wanted to show you that this is not just another tree set, but a bundle / or suite that can be used for any season … or any reason!!
The Beauty of the Earth Suite is still available, but if you are just looking for the bundle … it’s 20% Off right now. I always wonder if Stampin’ Up! will retire a stamp set when they put it on sale … so if this is on your “Wish List”, you may want to consider getting it now and enjoy the extra savings!! You can click on any of the images below for details on the bundles or to begin shopping … it takes you directly to my store.
Thank you for joining me this Sunday for my card parade, I hope you enjoyed the many styles of cards. Please let me know if you have any questions.
TODAY’S STAMPIN’ SUPPLY LIST … If you liked the products used in todays projects, I have links for you below. Just click on the item you would like more information on, or to begin your shopping. It will take you directly to my website. Thank you ♥
Whether you’re relaxing, working, staying at home, I’d like to wish you a Merry Christmas…
I hope you are spending Christmas in whatever way makes you happy. I enjoy spending some time with friends and family. I can’t wait to see my grandchildrens’s faces light up with glee and delight.
For me, giving is so much better than receiving, and practicing mindfulness, and really feeling ‘the feeling of gratefulness’ at this time of year makes it all the more special.
I wish the next few days are the best they can be for you and your family.
Thank you for hanging out with me and for your support this year – I really appreciate it.