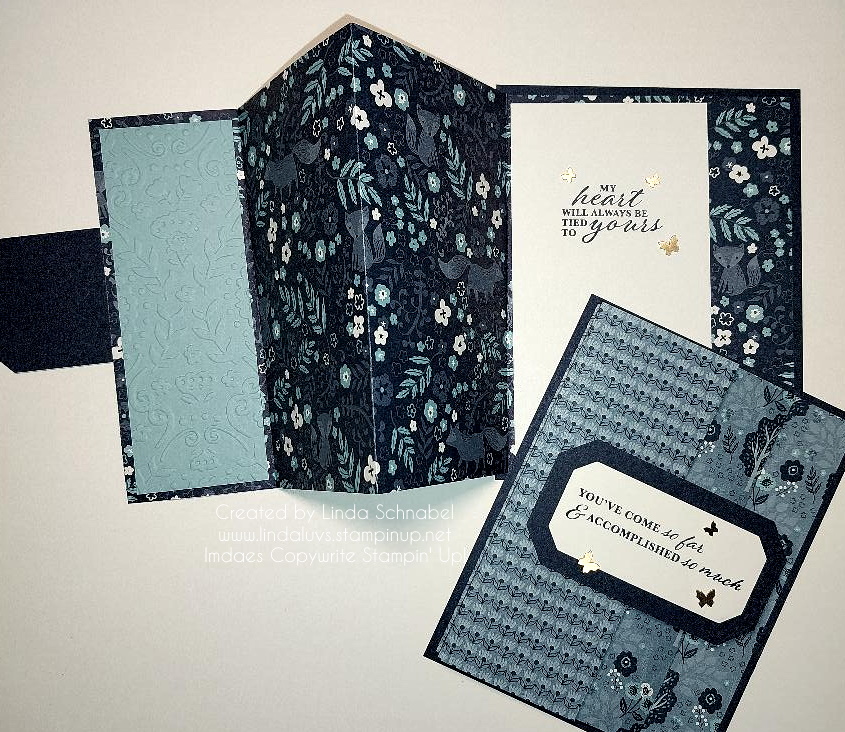
Today I’ll be sharing the Accordion Fun Fold from the replay VIDEO of last nights Facebook LIVE … You are going to love seeing all the cute swap cards from retreat and the one that inspired me to create the two cards I made for you.
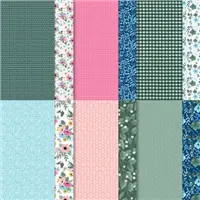
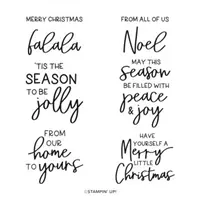
I’m using the NEW Countryside Inn Designer Paper and dies from the suite. The greetings come from the Wonderful Thoughts stamp set. Grab a cup of coffee or your favorite beverage and join me for this short video … you’ll be amazed at how easy the Accordion Fold card is to make.
Dimensions:
Night of Navy Base: 5-1/2″ x 4-1/4″
Designer Paper: 12″ x 5-1/4″ Scored at 2″ – 5″ – and 8″
Basic White (Inside) 5″ x 3-3/4″
Plus you will need a piece of Night of Navy and Basic White to Die Cut your Greeting
Balmy Blue (Inside – 1st Flap) 5″ x 1-3/4″
I hope that I with the help of my video inspires you to grab some of that beautiful designer paper you have and try out this FUN FOLD card today. I’m adding the list of ingredients below, if you like what you saw (like that amazing sentiment set) you can click on that item and shop at my store … it will be sent directly to you.
Thank you so much for stopping by and checking out my video today.
Welcome to our Stampin’ Up! 2023-2024 Annual Catalog Introduction video! In this video, we will be taking a first look at our brand new catalog and all of the exciting products that it contains. From beautiful new stamp sets to versatile dies and punches, we have something for everyone in this catalog.
Our designer series paper, embellishments, and tools will help you take your crafting to the next level. Our catalog is filled with inspiring project ideas to help you create stunning cards, scrapbook pages, home decor, and more.
We are thrilled to share these new products with you and can’t wait to see what you create with them. Don’t forget to check out our amazing hostess rewards program, which allows you to earn free products and discounts by hosting a stamping party with your friends.
Thank you for joining us for our Stampin’ Up! 2023-2024 Annual Catalog Introduction video. We hope you enjoy this sneak peek of our exciting new products and find inspiration for your next crafting project. Happy stamping!
So excited to share the NEW Cheerful Daisy card with you that we made at my Spring Stamping Retreat. I’m also sharing the video replay of last nights Facebook LIVE and then the ingredients and dimensions so you can recreate this quick -n- cute card ….
Wasn’t that easy to make!! Here is a close up of my card
DIMENSIONS:
Card Base: Pebble Path / 8-1/2″ x 5-1/2″ Scored and folded at 4-1/4″.
Lemon Lolly / 2 pieces 5-1/4″ x 4″ … mat for designer paper (front) and white (inside) & small piece of scrap to add a pop of color behind the greeting
Designer Paper: 5″ x 3-3/4″
Basic White: 5″ x 3-3/4″ (Inside) + 4″ x 3-1/2″ (cut daisy) + 3″ x 1-1/2″ (stamp greeting) + small scrap to stamp the flowers center in Lemon Lolly
I learned something new today ….
What is the Centre of a daisy called?
A single stem arises carrying the flower head – this is not just one flower, but a composite of a number of tiny flowers which make up the yellow disc in the middle (‘disc florets‘) and the surrounding white ‘ray florets’ (which look just like petals).
I am bringing back a favorite today…. the “FAUX” Step Card that I changed up a bit … and I’m going through step by step with dimensions on how to recreate this card. Today I’m using the Hand Penned Petals and Penned Flowers dies, both are on the retiring list … and I love the way this card turned out. I have this all on video for you to view.
Let’s take a look at the video now …
Dimensions:
Card Base: Basic Black: 9” x 4-1/4” then Score at 1-1/4”, 2-1/2” and 5-3/4”
Cardstock #2: Basic Black Center Step: 8-1/2” x 2-1/4” then Score and fold at 5-1/2”
Cardstock #3: Basic White 3″ x 4″ for inside of card / Scrap of white for greeting and Highland Heather as a mat (Cut with the Layering Circle Dies)
Designer Paper #1: Hand Penned Petals (Mint Macaron) for Center Step 2″ x 5-1/4″ and Floral Design paper is 3″ x 4″ and 1″ x 4″.
I find it easiest to lay the card base out flat when attaching the designer paper, as shown in the video.
What a fun twist to the card … placing your “center step” either on the right or the left side of the card. It gives you a totally different look. For my card, I choose to put my center step to the right to balance out the greeting which I let “hang over” the left side … that gives it another dimension to the card.
As for that greeting … It comes from the Flowering Tulips stamp set and one of the main reasons I bought that set! I love the way this card turned out! Don’t you just love that feeling when you’re done creating something that turned out sooo cool!
I hope you enjoyed the quick coloring technique as well …. it was fun and easy to recreate the watercolor look. As for the designer paper … you can use any that coordinates with the colors you choose to color with.
Enjoy making this fun fold … it’s really easy, and I love the twist of placing the “step” off to the side.
TODAY’S STAMPIN’ SUPPLY LIST … If you liked the products used in today’s projects, I have links for you below. Just click on the item you would like more information on, or to begin your shopping. It will take you directly to my website. Thank you ❤
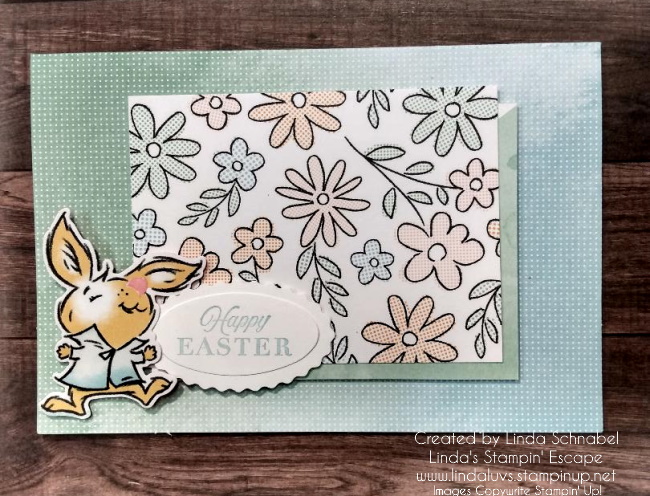
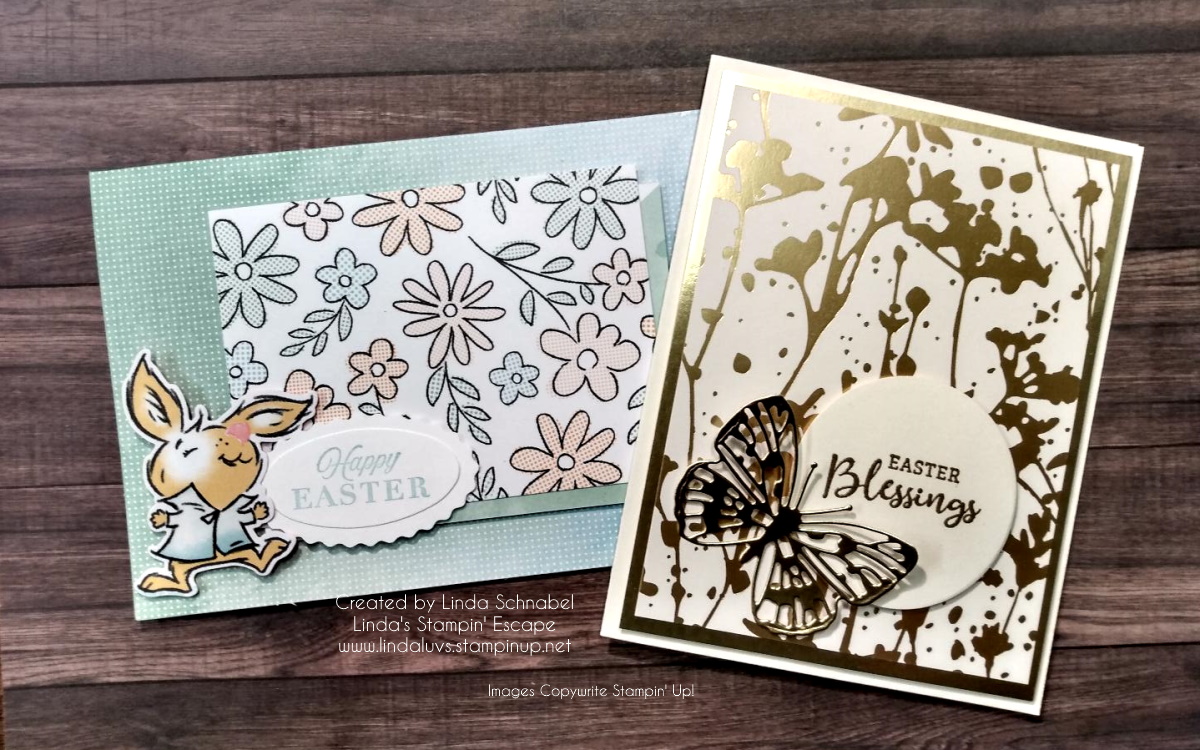
Today I’m sharing two quick & easy Easter Cards; a Cute and a Classy!! You can enjoy watching the replay of last nights Facebook LIVE and then I’ll share the cards close-up and personal!! lol
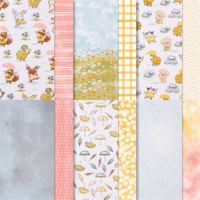
I started with the Quick & Cute Easter Card and the Enjoy the Adventure Memories and More card kit and envelopes and paired it up with the Rain or Shine Specialty Designer paper.
I did tuck a small Stampin’ Dimensional under my bunnies foot so he is popped up pretty good. There is a lot of texture and dimension on this card, even though it is a simple layout.
I forgot to mention in the video that the Rain or Shine is a “Specialty” paper, and it’s easy to see the embossed areas of my bunny. This paper is so cute and can be used for so much more than a “rainy” card … Easter!! Who knew!
If you would like to see more card samples from the Enjoy the Adventure then just CLICK HERE
Now let’s move on to our Quick -n- Classy card!
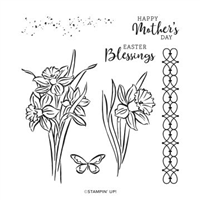
You have simplicity of this design and a great paper saving tip by cutting out your butterfly from the gold foil piece underneath the designer paper. I used the “Easter Blessings” stamp from the Daffodil Daydream stamp set … you can always use what you have in your stash!!
Another simple layout but with so much beautiful dimension and a bit of added texture from embossing our greeting in gold.
So glad you decided to stop on by today and take a look … hey, invite your friends to check out my blog as well. Love to share my creations and inspire as many as I can.
Hello Stampin’ Friends ~ Today I’m sharing the video replay of my Facebook LIVE and I’m highlighting the Hello, Irresistible suite and a FUN and Easy Embossing Technique. Then I’ll share an alternative design using Black Ink verses the White Embossed flowers you see in the video …
This suite is so fun to work with and the flowers … well, they are perfect for so many techniques. Embossing is one of my all time favorite techniques because it adds an elegance and texture to your cards, and when you combine it with a touch of ink … you get depth too.
I used the designer paper for the background and to cut out the leaves, so if you are used to embossing or die cutting, you will find this card pretty easy to recreate. Overall, I would give it a medium rating.
Now for the “Black” ink card. I used a lot of the same materials and the dauber technique as well. I cut the leaves out as I did on the first card but used the “other” awesome die in the bundle. Check this out …
The card base is Basic Black and cut 11″ x 4-1/4″, scored and folded at 5-1/2″, and the second black piece is cut to 3-3/4″ x 3-3/4″ and then die cut with the circular die. The card front is Petal Pink (same as the small flower) and measures 4″ x 5-1/4″.
And this time I added the “purple” adhesive dots for my purple fans! Both card were fun to make and somewhat similar but they really look different! I love it 🙂
Hope you enjoyed today’s cards, and thanks to those who came over to my blog from Facebook to check it out.
Today I’m sharing a fun “Faker Shaker” card … Last week I shared the cards from the Saying Thanks Card Kit and during my demonstration (will share the video replay below) that I would create a card using those left over hearts that came off of one of the cards in the kit.
If you’ve seen the video, just bypass it because you know exactly what I’m talking about … If you haven’t grab a cup of coffee, sit back and enjoy.
I really love this kit … as it states, it’s perfect for NEW Crafters / Cardmakers, Busy Moms or Grandmas! Great to craft with your kids (thanks Barb) and they are nice to have on hand when you need a quick card!!
OK … Let’s get to this cutie! I used a “clear” medium envelope to create my shaker card, and all those hearts you see below, they will now be “inside” as the “shaker” for my card.
I cut the front of the cardbase used for the “heart” card down to 4″ x 5-1/4″ … it’s so colorful and coordinates with the envelopes from the KIT perfectly. Then I tucked it inside the “CLEAR” envelope … make sure that the adhesive flap goes towards the back.
You can save the back that was cut off for another card. Next I tucked all them hearts inside the envelope “in front of” the card front. The fact that they are white, really makes them stand out from the watercolor background.
You will need to wrap the excess of the envelope to the back. I use the Stampin’ Seal Plus as it lays nicely on the clear envelope and really holds it in place. Now you can remove the backing from the adhesive flap and pull that around the back as well. This encloses your hearts.
I wanted to add a ribbon behind my greeting so I used the Fresh Freesia Open Weave Ribbon. I attached the ends to the back of my “shaker” and then tied a bow and attached it with a Mini Glue Dot. I chose the Merci as my “thank you” … the greetings in the “Saying Thanks” Kit come in four different languages so it’s fun to find a way to use them as well. I attached the greeting over my ribbon using the Stampin’ Dimensionals.
Then I stamped the “FOR ALL YOU DO” from the Happiness Abounds stamp set … I used my Stampin’ Write Marker to lay color only on those words as it is a larger sentiment. Once inked up, I stamped it on Basic White and cut it out myself. Using the edge of my stampin’ dimensionals I popped it up to match the greeting height.
Now that the “shaker” card front is done, you can mount it onto your card base … I used a Basic Black card base to pull the black out of the greeting and creating a focal point. It draws your eye to it even though it is mounted onto such a colorful background. Interesting!! To finish off my card, I added 3 Fresh Freesia embellishments from the Opaque Adhesive Backed Gems.
Even though the kits were designed for NEW stampers, those of us who are avid stampers also like to have quick & easy cards on hand … and if we want, we can JAZZ them up a bit!!
I have the links listed below so you may add these products to your stamp collection. We only have 1 week left to qualify for our FREE / Exclusive Sale-a-bration items, so if you need some adhesive, cardstock or embellishments now would be a good time to pick them up, and grab a FREEBIE!!
I want to “Thank You” for joining me today. I hope you have a wonderful day.
Here are those links that I promised …. Feel free to contact me if you have any questions.
Make sure to join me LIVE tonight (Tuesday, Feb.21st) on myFacebook Linda’s Stampin’ Escape Page… I will be showcasing the NEW Hello, Irresistible Suite Collection
Today I will be sharing the replay of my Facebook LIVE last night where I highlighted the Saying Thanks Card Kit and will show you making them is Easy Breezy! These kits include everything you need to create the cards and even include coordinating envelopes. Then I’m going to use one of the card bases and add some stamping to it!! Oh … I can’t wait to show this to you!
First, lets take a look at the video …
I really love this kit … as it states, it’s perfect for NEW Crafters / Cardmakers, Busy Moms or Grandmas! Great to craft with your kids (thanks Barb) and they are nice to have on hand when you need a quick card!!
As you look at these three cards, you could change up the “occasion” with just a little simple stamping! Turn the polka dots into a “birthday” or the hearts into “I Love You” or “I’m Here For You” card … anything you can imagine!
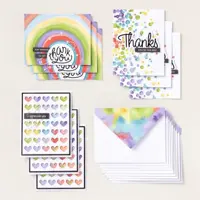
Now … let’s talk about that rainbow card. The minute I saw it, a stamp set came to mind and I know I had to try it out. I normally don’t really change up my “Kit” cards but I didn’t think swapping out a greeting / sentiment would hurt.
When I saw the Covered in Sunshine stamp set, well … I had to have it. Look at the samples in the Mini Catalog (page 37/ below) and you can see why I was tempted to purchase this one… It’s different! It’s happy and encouraging and fun! Stampin’ Up! did a great job on these samples.
So … look at the rainbow card above, and you’ll see where I got my inspiration from for my Saying Thanks Kit card. I thought it was the perfect time to do a “Mash Up” of products and see how it turns out.
Here you go ….
I love the way it turned out! It almost looks hand written, cool right, and perfect to send to a friend. And I told you in the video that I would be using up those hearts, and this is just the beginning. Let me share with you how I got the sentiment so perfect.
Oh, those of you who own the Stamparatus already knew where I was going with this ….
Using the Stamparatus allows you to align your sentiment perfectly and then “repeatedly” stamp it until you get the depth of color you want. I do believe I stamped my greeting 4 times to get it nice and dark so that it really showed up on such a colorful background.
They really do go together nicely … don’t they? Those cute little confetti embellishments that come in the kit are shiny so I thought I would add my Wink of Stella to my heart so that it sparkled too!!
I have the links listed below so you may add these products to your stamp collection. The Saying Thanks Kit, Covered in Sunshine Stamp Set and Wink of Stella “almost” gets you to a FREE Sale-a-bration item, so if you need some adhesive, cardstock or embellishments now would be a good time.
I want to “Thank You” for joining me today. I hope you have a wonderful day.
Here are those links that I promised …. Feel free to contact me if you have any questions.
Ready for Spring? I’m thrilled to revisit the No Line Watercolor Technique with you today. Daffodils always remind me of spring and with the temperature hitting 40 degrees today, it will feel like spring for many of us.
I love this watercoloring technique and it is much easier that you think. It’s not a quick card but it is very relaxing and you will fall in love with the No Line Watercolor technique as well.
I’m using the Daffodil Daydream stamp set, it is such a beautiful flower to illustrate and do this technique with.
I invite you to watch the video along with me … I can’t wait to show you the simple steps it takes to create such a gorgeous card. You are going to fall in love with this technique because it’s going to make you look like a real artist! I’m no paint pro, but I sure like the way this looks.
As simple tip is too keep your darker colors in the recesses of your image. I also kept my water painter on the dryer side … it still has water but it easier to control your color when it’s not over wet, and the results are amazing. The dimensions for this card are also simple; Old Olive Card base is 8-1/2″ x 5-1/2″ … the front is a piece of watercolor paper measuring 4-3/4″ x 3-1/2″. The watercolor piece I stamped on measures 3-1/2″ x 2-1/4″ so my Old Olive mat was 3-3/4″ x 2-1/2″. I just used scrap pieces for my greeting.
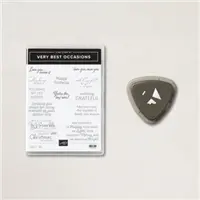
The greeting comes from a brand new bundle … the Very Best Occasions Bundle! That is also where the triple edge punch comes from that I decked out my daffodil with. It’s a great addition to my stamp & punch collection – I’ll be using them both many, many times.
I hope you enjoyed this beautiful card, and the video will inspire you to try out this No Line Watercoloring technique.
Have a wonderful day! Thank you
Here is a list of the supplies I used in creating this card …
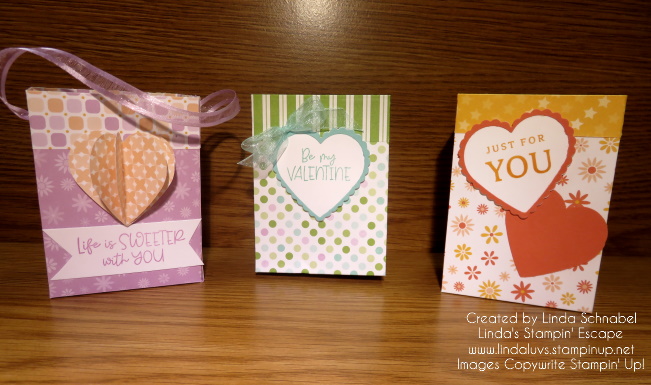
Happy Wednesday! Today I will be sharing the replay of my Facebook LIVE presentation from last night: Punchin’ with Heart: Creating Cute Valentine Treat Boxes I’m going to show you how quick & easy it is to make these cute boxes along with some fun tips for your Heart Punches. Did I mention cards too!!
Grab a beverage, sit back, relax and join me for my replay and the things that happen when your LIVE!
Hope you enjoyed and caught those tips! Here are the dimensions for the boxes. Start with a 12″ x 12″ – cut in half so you have a 12″ x 6″ sheet to start with.
Score at 2″ – 5″ – 7″ and 10″ at 11″ cut off end.
Turn paper 90 degrees and score at 1″
Turn 180 degrees and score at 1″
Burnish all score lines and cut and trim as shown in the video
Here is the card I created in the video too …
Thank you for hanging out with me today. I hope you enjoyed these cute boxes and were inspired to create some yourself.
Here is a list of ingredients used in today’s card. You can click on any one for more information about the product, or to begin shopping at my OnLine store. Thank you for your support.
Today I’m going to share the replay and the card from my Facebook LIVE last night. It was so much fun playing with the Playing in the Rain bundle, it actually just made me happy! The song Singing in the Rain just keeps playing over and over again in my head.
Let’s get right to the video …
So, what did you think? Cutest paper right! I have my two little granddaughters this weekend (for a princess party) while mama’s at work so we are going to be “Playing in the Rain”!
Let’s talk measurements again:
Card base = 8-1/2″ x 5-1/2″ Score at 4-1/4″ then Cut at 5-3/4″ … cut 1-1/2″ from the piece you cut off.
Window Sheet & Basic White Inside: 5-1/4″ x 4″
Mat: 5-1/4″ x 1-1/4″
Designer Paper: 5-1/8″ x 1-1/8″
And my greeting … Well, I pulled out my Stamparatus and the greeting was aligned perfectly. Ahhhh … the tools we have to make our cardmaking easier. Not sure why I didn’t think of that sooner.
I did a little addition to the inside as well …
I used some of the scraps left over from trimming my designer paper and added to the inside. Someone once told me it was not nice to have naked envelopes or insides!! lol
Thanks so much for stopping by my blog today. Hope you have all the information and instruction you need to create this quick & easy window card using the Playing in the Rain bundle and Rain or Shine Specialty Designer paper.
Have a sun shiny day … or have fun playing in the rain!
Here is the list of supplies that I used for today’s card ….
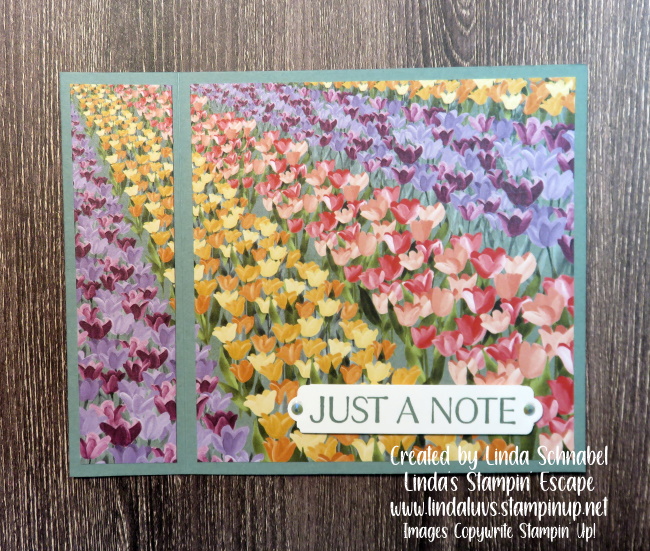
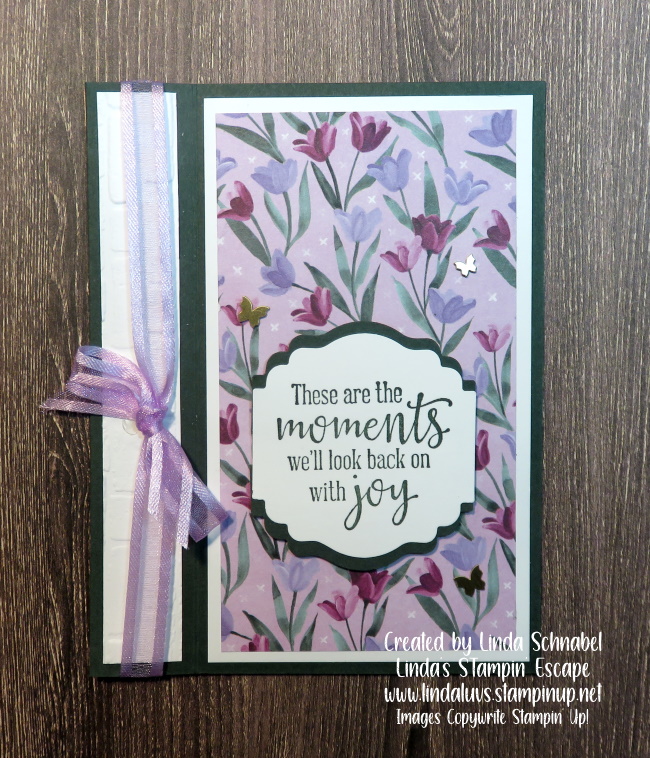
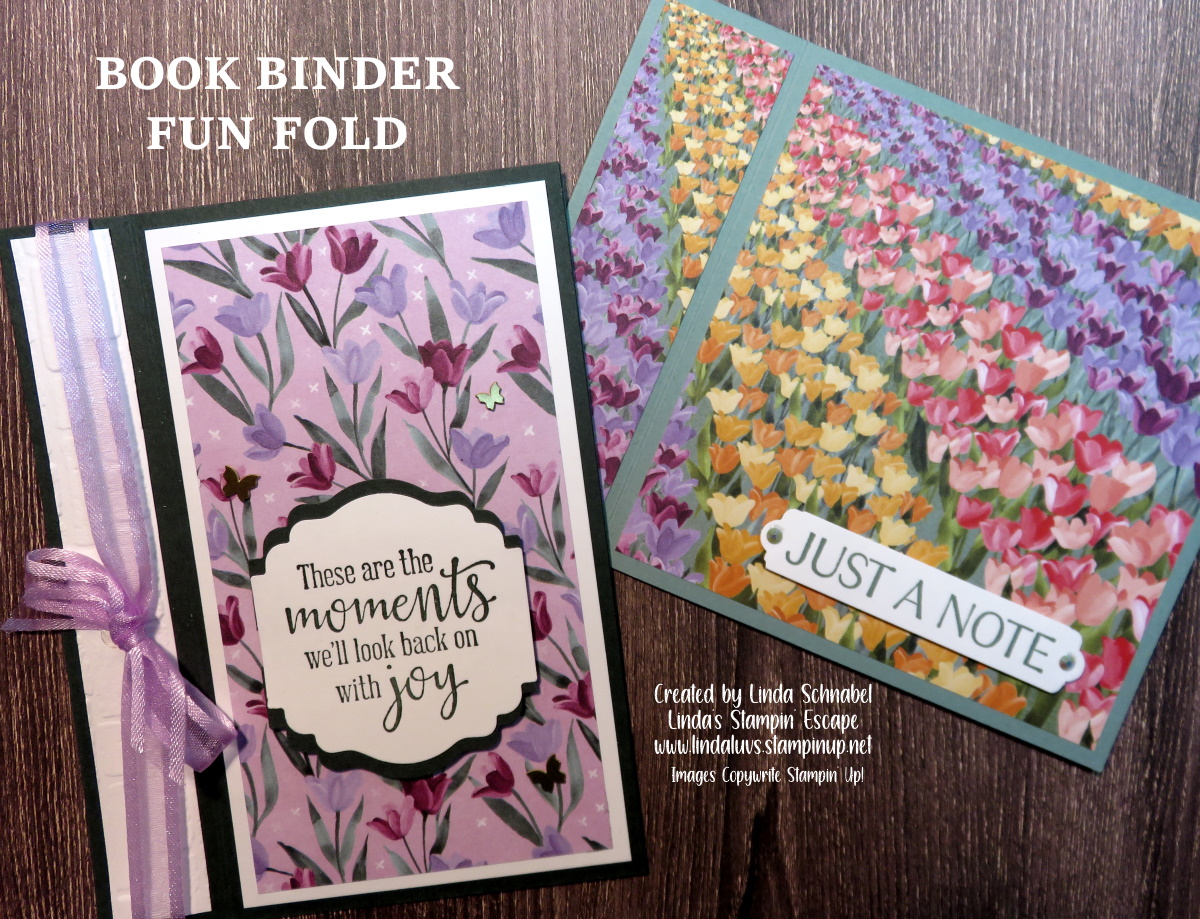
Today I’m going to share my replay of this Quick & Easy Fun Fold and all the dimensions and instructions with you because it highlights one of our beautiful designer papers that resurfaced in our Clearance Rack!! If you already have this pretty paper then here is a video and the two cards I made.
Let’s take a look at the video now …
Book Binder Fun Fold … Super Simple!
HORIZONTAL PROFILE (Above) How It’s Made
Cut a 4-1/4 x 11″ piece of Soft Succulent cardstock for the card base. Score at 5-1/2 and 4-1/4. Crease folds and add adhesive to the inside of the two scored lines. The 4-1/4″ score line should be facing out on the front of the card.
Cut a 4 x 4″ piece of Designer Paper (or cardstock) and adhere to card front.
Cut a 1″ x 4″ strip from the tulip design designer series paper and adhere to the left side margin on the card front.
PORTRAIT PROFILE (Above) How It’s Made
Cut a 5-1/2 x 8-1/2″ piece of Evening Evergreen cardstock for the card base. Score at 4-1/4” and 5-1/4”. Crease folds and add adhesive to the inside of the two scored lines… You can add your ribbon at this time.
To layer card front; cut Basic White 5-1/4” x 3” (Cut 2: one for inside and one for mat on front) Cut Designer paper to 5” x 2-3/4” to layer on top of white.
Binder area is cut in Basic White at 5-1/4” x 3/4” and I embossed with “Brick” embossing folder for some texture.
Cool … right! Now, let me share another layout you can use when creating the Book Binder Fun Fold. It’s another portrait however the card stock is cut at the usual 8-1/2″ x 5-1/2″ and it is scored at the 4-1/4″ and 5-1/4″ … now you will just position your “binder” to the “TOP” of your card.
The designer paper is cut at the same dimensions as well … however, you need to make sure you are “cutting” to the designer of the paper. On this card, my “binder” actually has the same designer paper, I just flipped it over. The greeting also comes from the Flowing Flowers stamp set, same as we used on our first card.
Enjoy making this fun fold … it’s really easy, and you’re going to have a blast creating with all your beautiful designer papers. Don’t forget, you can add in your embossing folders, die cuts or hand stamped items!
TODAY’S STAMPIN’ SUPPLY LIST … If you liked the products used in today’s projects, I have links for you below. Just click on the item you would like more information on, or to begin your shopping. It will take you directly to my website. Thank you ❤
On Tuesday I shared the Twisted Ribbon Technique with you which included a video replay of my LIVE presentation … TODAY I want to share how to use the left overs of that Pretty Paper to make quick cards.
I shared how I save 3″ x 3″ squared when cutting, now let’s see how those make simple and quick cards. Great way to get those Christmas cards done if you haven’t!! (I know that feeling). Simple does not mean that your cards can’t be pretty.
Here we have our 3″ x 3″ square in it’s simplest form ….
An easy way to step up your card is simply stamp a background … You could even use an embossing folder to add texture instead of ink. The greeting ends were punched to create a tag, and anchored with embellishments.
If you didn’t catch my LIVE presentation or did not take a look at the video yet, here it is ….
Sometimes it’s just nice to create cards with our scraps / leftovers that are easy, and simple … and pretty!
Thank you so much for joining me! Have a wonderful day.
I am so excited to share my cards and video with you today. Christmas is full of pretty paper and ribbons, and today I’m thrilled to show you the “Twisted Ribbon” Technique. In the video, you will also learn two different tips to creating this technique with ease.
Let’s watch the video and then I will share the cards with you …..
How fun is this technique!?? Oh my gosh …I am addicted!! And with the use of my template, it makes creating these cards fast and simple. Let’s talk “Core” dimensions / What you need to create the card. The punches or dies you can add for greetings and such are endless!! Just have fun with it.
Card Base: 8-1/2″ x 5-1/2″ then score at 4-1/4″.
Panel for ribbon technique: 5″ x 2″ … this allows you to add a mat and still layer!
Ribbons (Designer Paper): 3″ x 1/2″ (Sorry I said 1/4!)
I’ll begin with the card that I demonstrated in the video ….
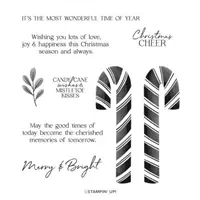
This card highlights the “Boughs of Holly” Designer Series paper. I complimented that with Real Red and Mossy Meadow cardstock. My greeting comes from the Sweet Candy Cane Stamp Set and Real Red ink.
On this card I used the Framed Florets bundle and the Framed & Festive Stamp Set. The designer paper to create the “Twisted Ribbon” is the Fitting Florets! I also used the Timeworn Type Embossing Folder to add some texture to the card.
I got a bit more creative with this card … I cut 2-1/4″ off the front flap of my card and placed my “Twisted Ribbon” on the right side of the card. Now it shows with the card is open or closed!! My designer paper of choice is the “Santa Express” full of fun and whimsy!
To create the texture on the front flap, I used the Wintery 3-D embossing folder. My greeting comes from the Very Best Occasion stamp set and was punched out using the “Label Me Lovely” punch. Cardstock colors are Poppy Parade and Shaded Spruce.
My last card I shared also used the Santa Express Designer paper ….
I also used the Wintry on this card but I embossed the beautiful White Glimmer paper! I centered my “Twisted Ribbon” to give it another different look. The greeting comes from the Sweet Candy Cane stamp set and fits this card perfectly.
I had so much fun making these cards and I hope I inspired you to grab some of your designer papers and try out this technique.
Thank you so much for joining me! Have a wonderful day.
Here are some of the supplies used to create my cards. Don’t forget that there are many beautiful designer papers on the Clearance rack at low, low prices!
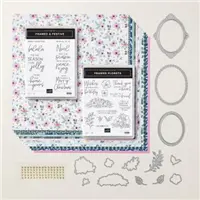
I am excited to share the Exclusive Framed Florets Collection with you today. I have a beautiful card that highlights the products and how they not only coordinate but “layer” together! I will also be sharing the video of my Facebook LIVE presentation last night.
So grab your favorite beverage and join me for my short video …
This collection of products is an extremely versatile bundle of seasonal, festive, and all-occasion designs, sentiments, and embellishments that you will love!
This promotion runs from 1 November 2022–4 January 2023 and includes a few exclusive items only available while supplies last:
Framed & Festive Cling Stamp Set
Fitting Florets 12″ x 12″ (30.5 x 30.5 cm) Designer Series Paper
Gold Adhesive-Backed Swirls
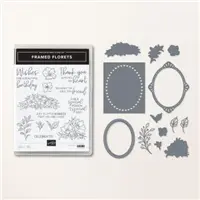
All these products have been designed to perfectly partner with the Framed Florets Bundle, which includes a Framed Florets Photopolymer Stamp Set and Framed Florets Dies.
I will post links below for your convenience.
Dimensions:
Card Base / Night of Navy = 8-1/2″ x 5-1/2″
Large Frame / Basic White = 5″ x 4″
Small Frame / Night of Navy = 4-1/4″ x 3-1/2″
Mat / Night of Navy = 5-1/4″ x 4″
Designer Paper = 5-1/8″ x 3-7/8″
I’m so happy that you joined me today. I will be sharing MORE samples from this amazing collection. In fact, if you aren’t following my blog, just click on the button in the upper right hand corner, and then you will receive an email each time I post.
Thank you and have a great day ~
Here is a list of the featured products and ingredients for my card …