Countdown to the Mini Catalog Party: A Week to Remember!

Hello Stampin’ Friends!

I know I’ve been little MIA lately, but there’s a perfectly good reason for it – I’ve been having a blast with many of you on my Linda’s Stampin’ Escape Facebook page for the Countdown to the Mini Catalog party! It’s been three incredible days filled with creativity, games, prizes, and live demonstrations, and I can’t wait to tell you all about it.

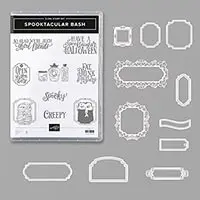
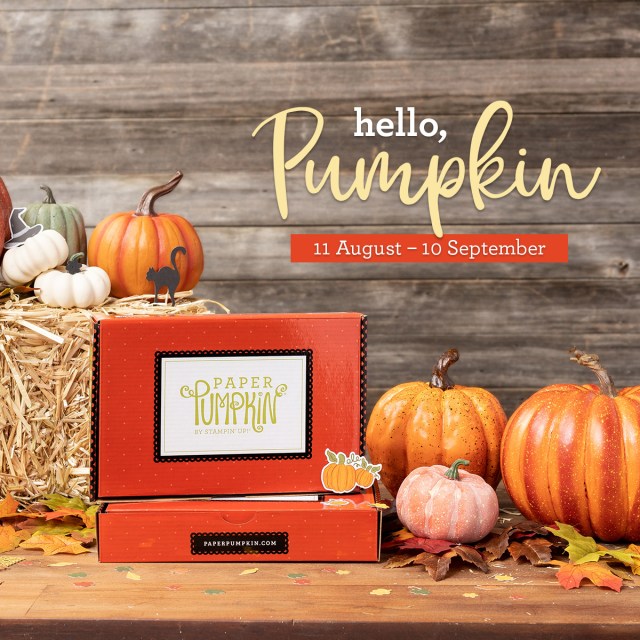
Our party kicked off with a bang, diving straight into the spooky spirit of Halloween. We explored the exciting new products in the Mini Catalog designed for this hauntingly delightful holiday. From whimsical ghosts to eerie pumpkins, there was something for everyone to fall in love with. The comment section was buzzing with ideas and inspiration as we shared our favorite picks and creative tips.

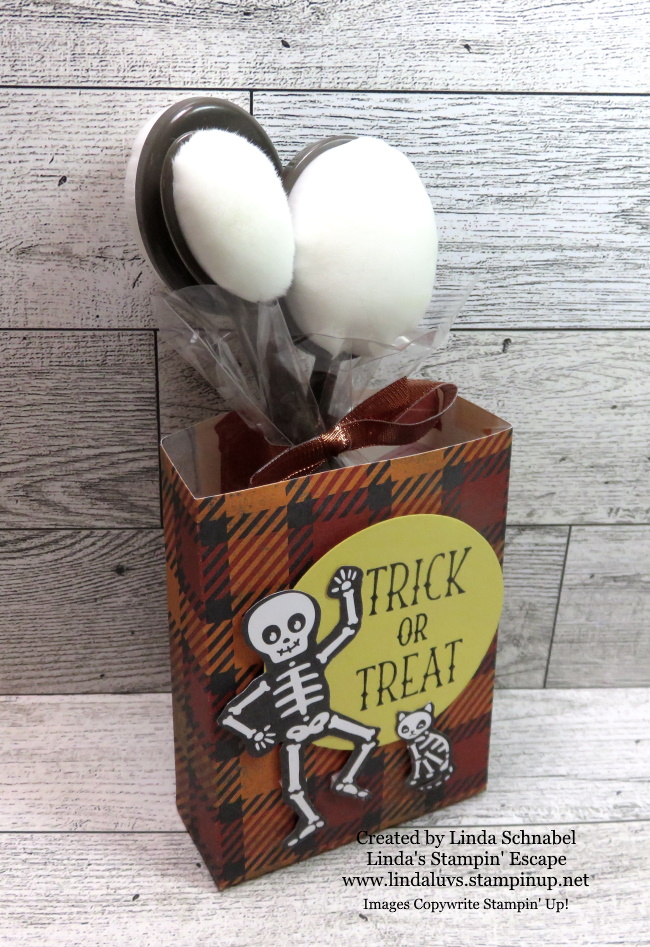
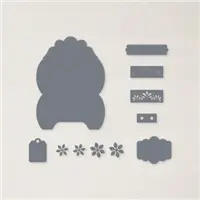
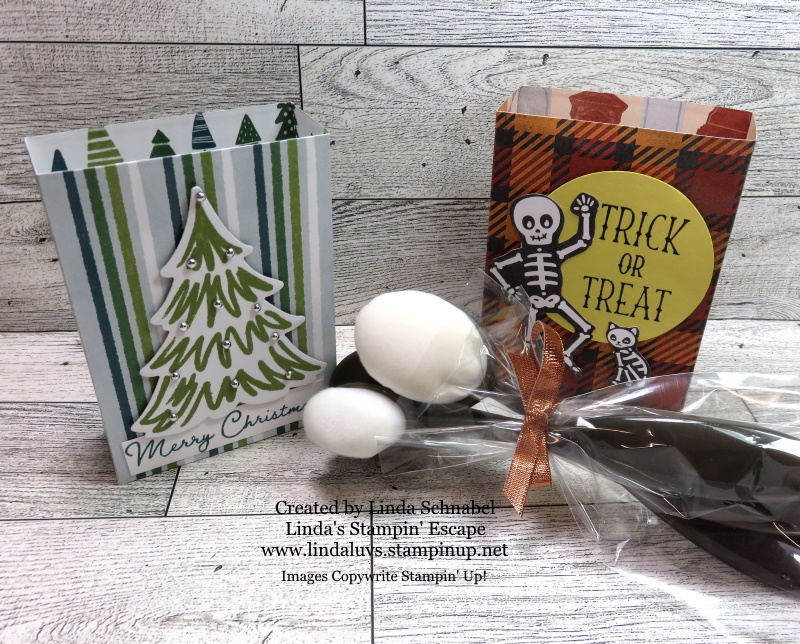
This cute little bag was just one of the products shared during a LIVE demonstration. It comes from the Tricks and Treat Bundle, and includes the die to cut your favorite designer paper. It’s so simple, just cut 2 pieces out, fold on the score lines and glue the small flaps to the sides … then don’t forget to glue the bottom flaps!! And yes, I fussy cut the skeleton and his scaredy cat!!

As we rolled into the second day of the party, our focus shifted from pumpkins to twinkling lights and ornaments. The Mini Catalog’s Christmas-themed products had us all giddy with excitement. We explored festive card designs, handmade gift ideas, and elegant decorations for the holiday season. The virtual party room was filled with the sound of joyful anticipation for the most wonderful time of the year. I have so much to share with you yet.

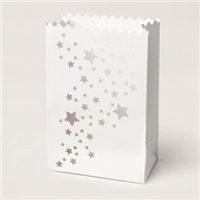
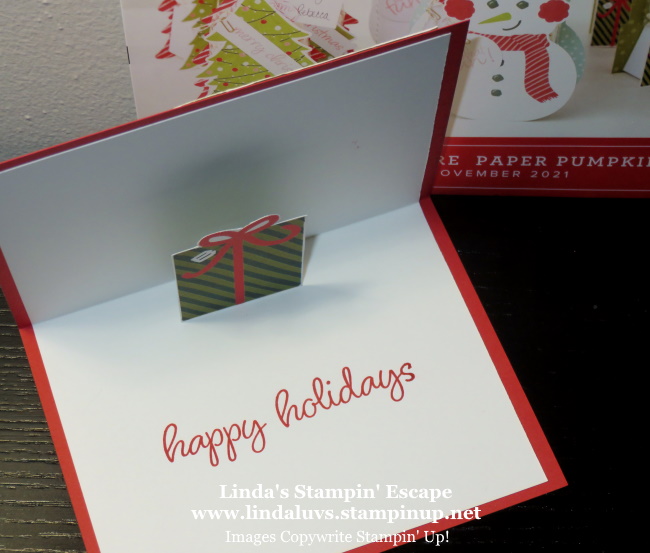
Till then, let me show you the cute Christmas bag we made using the same bag die …. I used “A Walk in the Forest” Designer paper. The tree is also from the designer paper and was die cut from the Merriest Tree’s Bundle.

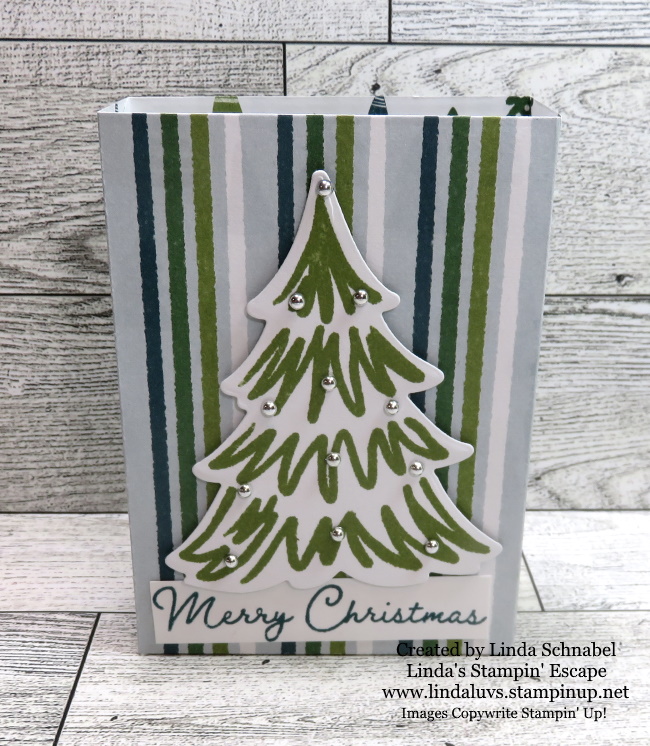
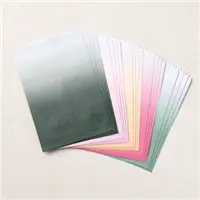
The “A Walk in the Forest” Designer paper… Is not just another designer paper, it’s a heartfelt contribution to Stampin’ Up!’s Making A Difference campaign. For every package of this beautiful paper sold, Stampin’ Up! is committed to donating $3 to Toys for Tots. It’s such a wonderful way to make a difference while indulging in our crafting passion. So, when you use this paper for your projects, know that you’re not only adding charm and creativity to your creation but also spreading joy to children in need during the holiday season. What could be more heartwarming than that?

Just when we thought the party couldn’t get any better, I had a little surprise up my sleeve. I announced that I would be turning this fantastic gathering into a Mystery Hostess Party! The excitement in the virtual room reached a fever pitch – what an incredible twist! One lucky participant will get to shop with the party rewards.

Throughout these three days, I was reminded of why I love what I do. Being able to share my passion for stamping and crafting with all of you, my Stampin’ Friends, is an absolute joy. I want to thank each and every one of you for making this Countdown to the Mini Catalog party so special.

But let me tell you a little secret – this won’t be the last surprise you’ll see from me at my parties, events, or retreats. I’m always looking for ways to make our stamping adventures even more memorable, so stay tuned for what’s coming next!

Thanks for joining me today ~

Here is a list of supplies used to create both of my Gift Boxes … All items are available as of this morning 9/7/2023

Punchin’ with Heart: Creating Cute Valentine Treat Boxes

Hello Stampin’ Friends ~

Happy Wednesday! Today I will be sharing the replay of my Facebook LIVE presentation from last night: Punchin’ with Heart: Creating Cute Valentine Treat Boxes I’m going to show you how quick & easy it is to make these cute boxes along with some fun tips for your Heart Punches. Did I mention cards too!!

Grab a beverage, sit back, relax and join me for my replay and the things that happen when your LIVE!

Hope you enjoyed and caught those tips! Here are the dimensions for the boxes. Start with a 12″ x 12″ – cut in half so you have a 12″ x 6″ sheet to start with.

  • Score at 2″ – 5″ – 7″ and 10″ at 11″ cut off end.
  • Turn paper 90 degrees and score at 1″
  • Turn 180 degrees and score at 1″

Burnish all score lines and cut and trim as shown in the video

Here is the card I created in the video too …

Thank you for hanging out with me today. I hope you enjoyed these cute boxes and were inspired to create some yourself.

Here is a list of ingredients used in today’s card. You can click on any one for more information about the product, or to begin shopping at my OnLine store. Thank you for your support.

Turn Your Pillow Box Die into a Gift Basket!

Hello Stampin’ Friends ~

Today I had a request to share how I created a cute little Gift Basket from the Pillow Box Die … You’ll be surprised at how easy this is to make! The designer paper being used is discontinued but if you have this die … you can create baskets for ANY occasion!

I have the dimensions for the inner box in the video but I thought I would share them again. Start with a 7-1/4″ x 5-1/2″ piece of cardstock and score at 2″ on all for sides. Then you will cut on the score lines on the 7-1/4″ length sides (ref. Video) You should have also seen the cute little baskets I made for the Mantle Gifts for my Holiday Stampin’ Retreat!

The ladies watching LIVE had plenty of ideas they could use these for … Baby Showers, Wedding Showers, Birthday Parties, on the table for the Holiday’s … a teachers Gift or a cute little gift for a co-worker. The possibilities are endless, and that cute little basket is priceless!

I have listed the ingredients below for your shopping convenience. Let me know if you have any questions.

Thank you so much for joining me today!

A Few of My Favorite Things ….

Hello Stampin’ Friends, Today I want to share a few of my favorite items that are included in the Sale right now. We only have a few days left but it’s a great value for the Gift Giving season. Today I’m sharing my favorite dies! I choose these dies for their versatility in my year round cardmaking!

Let’s begin with the Scallop Contour Dies ….

The Scallop Contour Dies are scalloped border dies that range in size, perfect for card fronts, accent pieces and sentiments! Here are a few examples ….

You can view the original post for both cards HERE!

Another one of my favorite die sets is the Stylish Shapes dies …. It has circles and squares and banners – Oh my!! Perfect for any season and any occasion. They are a must have in your stamping collection.

Check out these cuties using the Stylish Shapes Dies ….

View the Original Post HERE!

Here is another sample using the Stylish Shapes dies …

You can view the Original Post / It includes the “TIP” on how to cut the Mini Banner, Click Here!

And of course you cannot forget the Layering Circle dies and the Stitched Rectangle dies. All four of these die sets will add to your cardmaking ease … for backgrounds, layering, greetings and more. They are to me …. basic supplies to any collection.

If you don’t have them, you’ll want to get them while they are 20% Off. Grab one for your friends for the holiday season.

Thanks for joining me today. I’ve put the links below for your shopping ease.

Simply Sunday: Easy Gift Idea

Hello Stampin’ Friends ~

Today I have an easy breezy gift idea for you … it’s fun and inexpensive! Perfect for Birthday parties, Baby Showers, Office Gifts, Thank You gifts … even a Wedding! Let’s take a look at the cute Stars Treat bags ….

There are 10 bags per package which makes them very cost effective. They are stampable … dyeable … and food safe. I used mine as a “Thank You” gift ….

I simply slid a piece of the Starry Sky Designer paper into the bag … and then I sparkled them with Wink of Stella! My greeting comes from the Flowering Tulips stamp set and was die cut using the Layering Circle die, that is also how I cut my mat for behind the greeting.

There are so many ways you could use and decorate theses little cuties … I will be sharing more with you at a later time, so make sure you are “Following” my blog so you won’t miss a thing!

Thank you for joining me today!

Have a beautiful Sunday ~

Here is the supply list of items I used in today’s project. Click onto any image for more information or to grab some of those bags for yourself! I’ll send you a special “Hand Stamped” card with your order.

Turn Your Pillow Box Die into a Gift Basket!

Hello Stampin’ Friends ~

Today I’ll be sharing my Facebook LIVE replay for you. We created a cute little Gift Basket from the Pillow Box Die (Retiring) … You’ll be surprised at how easy this is to make!

I have the dimensions for the inner box in the video but I thought I would share them again. Start with a 7-1/4″ x 5-1/2″ piece of cardstock and score at 2″ on all for sides. Then you will cut on the score lines on the 7-1/4″ length sides (ref. Video) You should have also seen the cute little baskets I made for the Mantle Gifts for my Holiday Stampin’ Retreat!

The ladies watching LIVE had plenty of ideas they could use these for … Baby Showers, Wedding Showers, Birthday Parties, on the table for the Holiday’s … a teachers Gift or a cute little gift for a co-worker. The possibilities are endless, and that cute little basket is priceless!

I have listed the ingredients below for your shopping convenience. Let me know if you have any questions.

Stop back tomorrow … I have something interesting to show you using this die!! Thank you so much for joining me today!

TODAY’S STAMPIN’ SUPPLY LIST … If you liked the products used in today’s projects, I have links for you below. Just click on the item you would like more information on, or to begin your shopping. It will take you directly to my website. Thank you 

Creating Textured Gift Bags!

Hello Stampin’ Friends ~

Today I’d like to share how fun and easy it is to add texture to our Ombre Gift Bags. They come in the 5 New In-Colors and each one is embossed with a different folder and decorated differently. The Gift bags and many of the items used to create them are are the retiring list.

Please join me, sit back, relax and watch the video and then I’ll share each of the bags including the Soft Succulent which is not seen in the video!

Alright … the cover gives away my surprise! I embossed the Soft Succulent bag with the “Painted Texture 3D” Embossing Folder, it’s so versatile and can be used with so many different styles. I wanted to showcase the new Pansy Petals Designer Series paper as well …

The greeting comes from the Pansy Patch bundle and is stamped in Soft Succulent to coordinate with the bag (and the designer paper). I then punched it out using the Elegant Tag Punch and adorned it with the Soft Succulent Open Weave Ribbon. I completed this bag by adding the Silver Epoxy Essentials.

The Fresh Freesia bag is the first I demonstrated in the video and uses the Magnolia 3D embossing folder … It’s simple but pretty!

I used the folder “side-ways” for this one and decorated it with the Expressions in Ink Ephemera Pack, both the gold elements and the adhesive backed sequins come in the pack!! The gold piece you see here is actually the outer part of the piece I use on my Polished Pink bag …

My Polished Pink bag is embossed with the Tasteful Textile 3D embossing folder and embellished with the our stunning Shimmer Vellum punched from the Medium Daisy Punch which I highlighted with the Expressions in Ink Ephemera Pack!

If you do not like the space on the bottom … you can emboss from the bottom and then your un-textured area will be on the top, that is how Jan Farring did her bags… this means you will have texture on both sides, since I came in from the top, mine is only textured on the front.

My Pale Papaya card is textured on both sides because we embossed side-ways to give it a totally different look …

I used the Hammered Metal 3D embossing folder to texture this back … I really love it embossed sideways, it really gives definition to that area. I highlighted it even more by adding an oval from the Shimmer Vellum and another pretty daisy!! I added the Clear Epoxy Dots from the Silver & Clear Epoxy Essentials to finish off my Gift bag.

I thought I’d have a little fun with the Evening Evergreen Gift Bag …

so I made it into a Christmas Gift Bag!! I used the Tidings of Christmas 6 x 6 Designer Paper and tied it up nicely with the Evening Evergreen Chevron Weave Ribbon.

I hope you enjoyed watching how easy it is to emboss these beautiful Gift Bags to give them some texture and then add a few embellishment (or more if you wish) to get them ready to “Gift”!

Thank you for joining me and checking out my video today …

I hope your day is a good one!

TODAY’S STAMPIN’ SUPPLY LIST … If you liked the products used in today’s projects, I have links for you below. Just click on the item you would like more information on, or to begin your shopping. It will take you directly to my website. Thank you

Gift Boxes & Card Alternatives

Hello Stampin’ Friends ~

Today I’m sharing my Tuesday Night LIVE video replay of the fun November 2021 Paper Pumpkin. You’ll see how easy it is to put these little cuties together (they are not really little) and two Alternative Projects!! Grab a cup of coffee or hot chocolate and join me for this presentation …

This November kit is sooo much fun and easy to put together … remember, everything is included in the kits (you may need adhesive for some kits) but includes all the projects that are die cut for you, the exclusive stamp set and an ink spot … plus fun embellishments.

Here is a picture of the finished tree …

All you need for this kit is the goodies you tuck inside the bag! As a subscriber you can also purchase past kits and refills when available! How cool is that. Here is the link if you wish to be a monthly subscriber: CLICK HERE TO SUBSCRIBE When you subscribe through me, you will be invited to my Paper Pumpkin Pals Facebook Page where I’ll share more alternative projects with you.

If you subscribe on or before December 10th … you will receive the Lots of Pun Kit … You can activate your subscription after the 10th and receive the January Kit which will be announced on December 11th.

Now let’s get a close up of that cute snowman … he is adorable! This is the first of two alternative projects I have for you today!

The perfectionist in me had to change out the Real Red cardstock to Poppy Parade … I wanted to colors to coordinate as they should. He is adorable!!

Now I would like to share with you the second alternative project that I made using the third gift box pieces … the presents!

I cut apart the stack of presents so they would fit on the front of my card. The cute background you see is not designer paper but Wink of Stella just “dotted” onto Basic White cardstock!! I also added Stella to all the bows … oh, it sparkles so pretty! I try not to add other products to my first alternatives so you can really see what you can do with just this kit.

But, if you think the front is cute … wait till you see the inside!!

Oh yes I did … I took one of those presents and made a pop-up card. The pretty greeting comes from the exclusive stamp set that comes with your Paper Pumpkin Kit. The exclusive stamp sets are worth the price of the Paper Pumpkin alone!! I think that our Paper Pumpkin and Stamping Kits are the perfect “GIFT” for the crafters on your holiday shopping list.

Did you know you can give “Gift Subscriptions” … how fun to have one of these fun kits sent to your craftin’ friends each month. I will put links at the bottom for limited subscriptions.

Thank you for joining me today. Feel free to contact me if you have any questions about Paper Pumpkin or other “gifting” ideas. I’m here to help.

Don’t forget we have FREE SHIPPING today ONLY (Paper Pumpkin Subscriptions do not apply) and may be combined with the Clearance Rack and Retiring products! Great way to save.

Again, thanks for stopping by and I wish you a fabulous day!!

TODAY’S STAMPIN’ SUPPLY LIST … If you liked the products used in todays projects, I have links for you below. Just click on the item you would like more information on, or to begin your shopping. It will take you directly to my website. Thank you

Quick -n- Easy Gift Boxes: featuring Time of Giving Bundle!

Hello Stampin’ Friends ~

Today I’ll be sharing my Facebook LIVE replay for you. I created two cute little Gift Boxes featuring the Time of Giving Bundle … You’ll be surprised at how easy this is to make! Formally know as the 2-4-6-8 Boxes … I’ve done a little adjusting to make the box a little bigger so it could hold more goodies!!

And what would you put into these little cuties? Well … candy works great, or cookies!! But you could also put in little toys for a child, or how about a get well kit with hand sanitizer, tissues, maybe some tea … you could have so much fun with this.

Speaking of tea … grab a cup or some coffee and join me for the replay of my LIVE last night.

I have the dimensions for you so you can make some of these little cuties yourself! Let’s begin ….

  1. Start with an 11″ x 5-1/2″ piece of cardstock (on sale thru Nov.18th, 2021)
  2. On the 11″ lenght; Score at 2″ … 5″ … 7″ and 10″. Cut 1/2″ off end if prefered.
  3. Turn cardstock 90 degrees and on the 5-1/2″ length; score at 1-1/2″.
  4. Cut on score lines as shown in the video
  5. Designer Series Paper: 2 pieces: 1-3/4″ x 3-3/4″ and 2 pieces: 2-3/4/” x 3-3/4″
  6. Attach the designer paper onto box … except the front piece which you will cut to create window.
  7. Use the smaller of the two dies and cut through both the designer paper and cardstock. Make sure it is aligned.
  8. Remover designer paper and cut with larger of the two dies.
  9. Attach window sheet … either onto inside of box or between the box and designer paper
  10. Glue side flap (1/2″) and then bottom flaps as shown in video.

The first box was created with Shaded Spruce cardstock and the Tidings of Christmas Designer paper. The greeting comes from the Time of Giving Bundle and is stamped in Real Red … the box is embellished with the Red Rhinestones.

I used the Layering Oval dies to create window on both of the boxes …

The second box was created with Cajun Craze cardstock and the Pattern Party Designer Series paper from our exclusive Hostess Rewards. Greeting comes from the Time of Giving Bundle and is stamped with Cajun Craze!

I embellished this box using the die cut leaves from the bundle and the stunning Beauty of the Earth Designer Series paper. They are even cuter close up.

I hope I have inspired you to try these little cuties … it really is so simple to make, and you can fill it with anything you wish. A perfect gift for a friend, a co-worker, a child, someone who’s sick or anyone who you want to Thank you too.

I have listed the ingredients below for your shopping convenience…. just click on any item to begin. Let me know if you have any questions.

Thank you so much for joining me today!

TODAY’S STAMPIN’ SUPPLY LIST … If you liked the products used in today’s projects, I have links for you below. Just click on the item you would like more information on, or to begin your shopping. It will take you directly to my website. Thank you 

Turn Your Stampin’ Up! Pillow Box Die into a Gift Basket!

Hello Stampin’ Friends ~

Today I’ll be sharing my Facebook LIVE replay for you. We created a cute little Gift Basket from the Pillow Box Die … You’ll be surprised at how easy this is to make!

I have the dimensions for the inner box in the video but I thought I would share them again. Start with a 7-1/4″ x 5-1/2″ piece of cardstock and score at 2″ on all for sides. Then you will cut on the score lines on the 7-1/4″ length sides (ref. Video) You should have also seen the cute little baskets I made for the Mantle Gifts for my Holiday Stampin’ Retreat!

The ladies watching LIVE had plenty of ideas they could use these for … Baby Showers, Wedding Showers, Birthday Parties, on the table for the Holiday’s … a teachers Gift or a cute little gift for a co-worker. The possibilities are endless, and that cute little basket is priceless!

I have listed the ingredients below for your shopping convenience. Let me know if you have any questions.

Thank you so much for joining me today!

TODAY’S STAMPIN’ SUPPLY LIST … If you liked the products used in today’s projects, I have links for you below. Just click on the item you would like more information on, or to begin your shopping. It will take you directly to my website. Thank you 

Halloween Hand Sanitizer Gift Box

Hello Stampin’ Friends ~

I had a request to share my “Hand Sanitizer” Holder … I did not have time to re-create it, so I hope you don’t mind that I am sharing the original post.  It includes tips to make this cute Sanitizer Holder!!  Please not that the designer paper and stamp set are no longer available … however, the dies are!!

Let’s begin with the outer wrap.  Start with an 11″ x 3″ piece of cardstock.  Score the cardstock at 4-7/8″ and 6-1/8″ … these measurements will ensure the insert sits nicely in the wrap.  Then punch both ends, this will be used to for your ribbon and to close the top.

Attach a piece of 2-3/4″ x 3-1/2″ of designer paper… I used Monster Bash. We finished off the top edge of the designer paper by attaching a piece of ribbon over it and trimming off the edges.

Stamp your greeting and cut out with a favorite die or punch.  I used the coordinating die from the Spooktacular Bash Bundle and pop it up with the new black Stampin’ Dimensionals.

Set your outer wrap aside for now … it’s time to create your inner (inset) piece.  Cardstock should measure 4-1/2 x 2-7/8″ … score at 1″ – 2″ – 3″ and 4″.  Using the smallest of the scallop ovals, place it between the the two score lines closest to the 1/2″ flap. (See photo below).

Once the whole is cut out, you will need to glue the 1/2″ flap to the opposite side to create a box.  The hole needs to be facing up … add glue to the bottom (opposite side with the hole) and set it into the outer wrap between the score lines.  Now you can tuck your Hand Sanitizer into the scallop oval hole.  The Bath & Body Works small hand sanitizers fit perfectly into the oval.

This would make a cute teachers gift, thank you gifts, get well ? Any reason … flu season is coming and why not be prepared and be the cool mom on the block!  This is also a great way to use up some of that designer paper you’ve been hording … lol.

Have some fun creating these cute Halloween gifts for your ghoul friends and then make some more for just for the fun of it … Christmas is coming too!

Thanks so much for joining me today … Let me know if you liked this project, I’d love to hear what you think … just message below.

I also have a supply list below to make your shopping easy, just click on any image for more information or to begin shopping with me.

Have a great day!

TODAY’S STAMPING SUPPLY LIST …

.

Beautiful Dahlias Gift Bag …

Hello Stampin’ Friends ~

Yesterday I shared a post from Stampin’ Up! that showcased the beautiful Delicate Dahlias stamp set, so I wanted to share it with you too! It’s perfect for tucking that special little gift or card into …

The Delicate Dahlias Stamp Set adds a timeless touch to any paper project from tags to treat bags! Stamp a bold background with the set’s large dahlia stamp, then soften the look with a layered stack of die-cut elements, ribbon, and twine. Isn’t this bag breathtaking?

You can get the Delicate Dahlias stamp set for FREE during Sale-a-bration, and when you place your order through me … You will get a FREE class!

The Class Includes:

  • You will be sent an invitation to join a private Facebook Classroom where all of the information, tips and more will be posted.
  • A PDF for each of the projects in the class which includes pictures, instructions and a list of ingredients.
  • You will also have access to a video for each of the projects.

Hope you enjoyed today’s cards and all the tips shared in the video!! I thank you hanging out with me today.

Have a beautiful day ~

TODAY’S STAMPIN’ SUPPLY LIST … If you liked the products used in todays projects, I have links for you below. Just click on the item you would like more information on, or to begin your shopping. It will take you directly to my website. Thank you 

Emboss, Decorate and Gift!

Hello Stampin’ Friends ~

Today I’d like to share how fun and easy it is to add texture to our Ombre Gift Bags. They come in the 5 New In-Colors and each one is embossed with a different folder and decorated differently. Let me say that I was inspired by my fellow demonstrator Jan Farring who shared her embossed bags with all of us.

Please join me, sit back, relax and watch the video and then I’ll share each of the bags including the Soft Succulent which is not seen in the video!

Alright … the cover gives away my surprise! I embossed the Soft Succulent bag with the “Painted Texture 3D” Embossing Folder, it’s so versatile and can be used with so many different styles. I wanted to showcase the new Pansy Petals Designer Series paper as well …

The greeting comes from the Pansy Patch bundle and is stamped in Soft Succulent to coordinate with the bag (and the designer paper). I then punched it out using the Elegant Tag Punch and adorned it with the Soft Succulent Open Weave Ribbon. I completed this bag by adding the Silver Epoxy Essentials.

The Fresh Freesia bag is the first I demonstrated in the video and uses the Magnolia 3D embossing folder … It’s simple but pretty!

I used the folder “side-ways” for this one and decorated it with the Expressions in Ink Ephemera Pack, both the gold elements and the adhesive backed sequins come in the pack!! The gold piece you see here is actually the outer part of the piece I use on my Polished Pink bag …

My Polished Pink bag is embossed with the Tasteful Textile 3D embossing folder and embellished with the our stunning Shimmer Vellum punched from the Medium Daisy Punch which I highlighted with the Expressions in Ink Ephemera Pack!

If you do not like the space on the bottom … you can emboss from the bottom and then your un-textured area will be on the top, that is how Jan Farring did her bags… this means you will have texture on both sides, since I came in from the top, mine is only textured on the front.

My Pale Papaya card is textured on both sides because we embossed side-ways to give it a totally different look …

I used the Hammered Metal 3D embossing folder to texture this back … I really love it embossed sideways, it really gives definition to that area. I highlighted it even more by adding an oval from the Shimmer Vellum and another pretty daisy!! I added the Clear Epoxy Dots from the Silver & Clear Epoxy Essentials to finish off my Gift bag.

I thought I’d have a little fun with the Evening Evergreen Gift Bag …

so I made it into a Christmas Gift Bag!! I used the Tidings of Christmas 6 x 6 Designer Paper and tied it up nicely with the Evening Evergreen Chevron Weave Ribbon.

I hope you enjoyed watching how easy it is to emboss these beautiful Gift Bags to give them some texture and then add a few embellishment (or more if you wish) to get them ready to “Gift”!

Thank you for joining me and checking out my video today …

I hope your day is a good one!

TODAY’S STAMPIN’ SUPPLY LIST … If you liked the products used in today’s projects, I have links for you below. Just click on the item you would like more information on, or to begin your shopping. It will take you directly to my website. Thank you

Waiting for the Great Pumpkin …

Hello Stampin’ Friends ~

Change of plans, I was going to share some alternatives to this months Paper Pumpkin but I’ve had many questions about Paper Pumpkin so I’m here to answer some of those questions ….

What IS Paper Pumpkin? Paper Pumpkin is our monthly subscription service that offers fun ‘n’ easy papercrafting projects for crafters of any skill level! In these themed all-inclusive kits, subscribers receive pre-cut paper pieces, embellishments, ink, and an exclusive stamp set. As the subscription continues, subscribers will have a collection of cards and other creations for a variety of occasions, in addition to a stockpile of supplies!

Each month Paper Pumpkin announces their upcoming kit with lots of hints about what FUN you’ll find inside … the September’s kit is a must-have for those who love to celebrate all things spooky. But, for those who don’t enjoy the Halloween haunts, the multi-occasion stamp set combined with a variety of die-cut and reversible paper pieces offers many ways to customize your fall crafts!

The “Hello Pumpkin” Paper Pumpkin Kit includes enough supplies to create 20 cracker box treat packages celebrating Halloween, Thanksgiving, and the autumn season. Make them all the same, or mix ‘n’ match! What is a Cracker Box Treat package?

These are sooooo cute … I can’t wait to see what the treat packages look like in our “Hello Pumpkin” kit next month…. decorating them with the multi-occasion stamp set combined with a variety of die-cut and reversible paper pieces will be loads of fun!! Here are the Coordinating Colors in our Hello Pumpkin kit …

Autumn is my favorite season, decorating for Halloween is a blast, gathering with family for Thanksgiving is something I cherish each year … you can use this cute little treat holders for Halloween handouts or Thanksgiving place cards!!

I could not resist sharing this cute little graphic ….

You can subscribe to the Hello Pumpkin Paper Pumpkin Kit between August 11th and September 10th… you can also order additional kits once you are a subscriber! SUBSCRIBE HERE but don’t wait until the last minute … some kits have sold out before the deadline.

Let me know if you have any questions about our Paper Pumpkin crafting kit. I’d be happy to answer them. You can subscribe by clicking the link above or selecting a Pre-Paid Subscription below.

Thanks for hanging out with me today, I’ll meet you back here tomorrow!

Here are the links to the Pre-Paid Paper Pumpkin kits … just click on the image and it will take you to my online store, and you can continue with your purchase. The 12-month Subscription Qualifies YOU for Hostess Rewards ($22.00 Free Merchandise of your choice!!)

Hello, Pumpkin

Hello Stampin’ Friends ~

I’ve shared some Christmas with you to get you thinking about your Christmas card list, however, today I want to share something exciting coming for my favorite season …. Fall. The beautiful changing colors, the warm days and cool nights, the season of thanks, there is just so much to celebrate! I want to introduce you to Hello, Pumpkin … our September Paper Pumpkin kit.

What IS Paper Pumpkin? Paper Pumpkin is our monthly subscription service that offers fun ‘n’ easy papercrafting projects for crafters of any skill level! In these themed all-inclusive kits, subscribers receive pre-cut paper pieces, embellishments, ink, and an exclusive stamp set. As the subscription continues, subscribers will have a collection of cards and other creations for a variety of occasions, in addition to a stockpile of supplies!

September’s kit is a must-have for those who love to celebrate all things spooky. But, for those who don’t enjoy the Halloween haunts, the multi-occasion stamp set combined with a variety of die-cut and reversible paper pieces offers many ways to customize your fall crafts!

The Hello Pumpkin Paper Pumpkin Kit includes enough supplies to create 20 cracker box treat packages celebrating Halloween, Thanksgiving, and the autumn season. Make them all the same, or mix ‘n’ match!

Coordinating Colors in our Hello Pumpkin kit are …

Prepare to celebrate with the September Paper Pumpkin Kit! There’s so much to love about fall—some love the haunts of Halloween, many love the time to give thanks, and others love the changing colors and cooler temperatures….

Whatever you love most about fall, September’s kit has everything you need to celebrate the season your way! Between a multi-occasion stamp set and enough supplies to design 20 cracker box treat packages, you can create custom fall crafts to celebrate Halloween, Thanksgiving, pumpkins, and leaves. Whether you make them all the same or mix ‘n’ match your crafts, there’s something for everyone in this kit!

You can subscribe to the Hello Pumpkin Paper Pumpkin Kit between August 11th and September 10th. SUBSCRIBE HERE but don’t wait until the last minute … some kits have sold out before the deadline.

Let me know if you have any questions about our Paper Pumpkin crafting kit. I’d be happy to answer them. You can subscribe by clicking the link above or selecting a Pre-Paid Subscription below.

Thanks for hanging out with me today, I’ll meet you back here tomorrow!

Here are the links to the Pre-Paid Paper Pumpkin kits … just click on the image and it will take you to my online store, and you can continue with your purchase. The 12-month Subscription Qualifies YOU for Hostess Rewards ($22.00 Free Merchandise of your choice!!)