Hello Stampin’ Friends ~
Happy New Year!! Today I have four cards to share with you that I created using the Fancy Flora Designer paper … yes, it is the paper you’ve seen the past couple days. This pattern is bright and colorful and full of texture. I paired it with the Adorable Owls, Gnomes and Banners!
I began with one pattern from the Fancy Flora paper and cut it into 4 – 3″ x 3″ piece …. thus the start of your 4 cards. I chose Basic Gray as my mat behind each of the pieces for my cards. The cards are simple yet cute cards so you will fall in love with how cute they are and how easy they are to make.

By matting the Fancy Flora designer paper it reminds me of a “framed” picture and the pattern is so fun and whimsical I thought it was perfect to add our Adorable Owl that are in the Sale-a-bration catalog that goes LIVE on January 5th. I used our Stampin’ Blends to color my owl and picked the Fresh Freesia cardstock for my base…. It’s Your Day was stamped three times. Keepin’ it Simple.
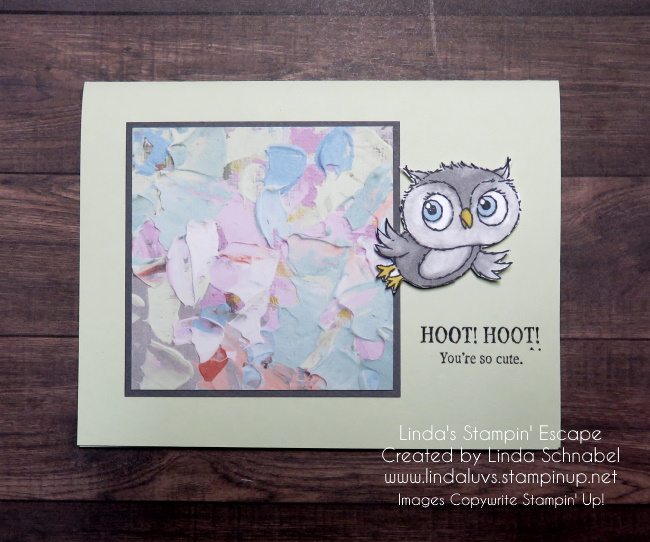
My second card has a different cards base … Soft Sea Foam. All of the colors I am using in todays cards coordinate with the designer paper. Again, using basic stamping and Stampin’ Blends for the owl.
Now we’re going to change it up a bit and use one of our gnomes ….
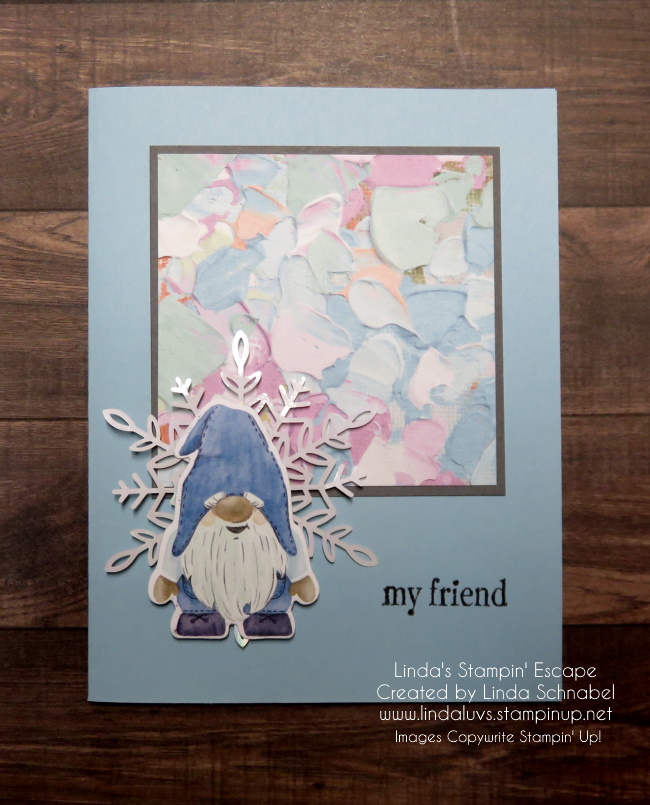
Isn’t it amazing how the same small piece of designer paper looks different when you add different elements. Owl little owls had a spring vibe and here you get a bit of winter … just like our weather! Snow one day … 40 degrees the next. Card base is Balmy Blue!
For my last card, I stepped it up a bit more …
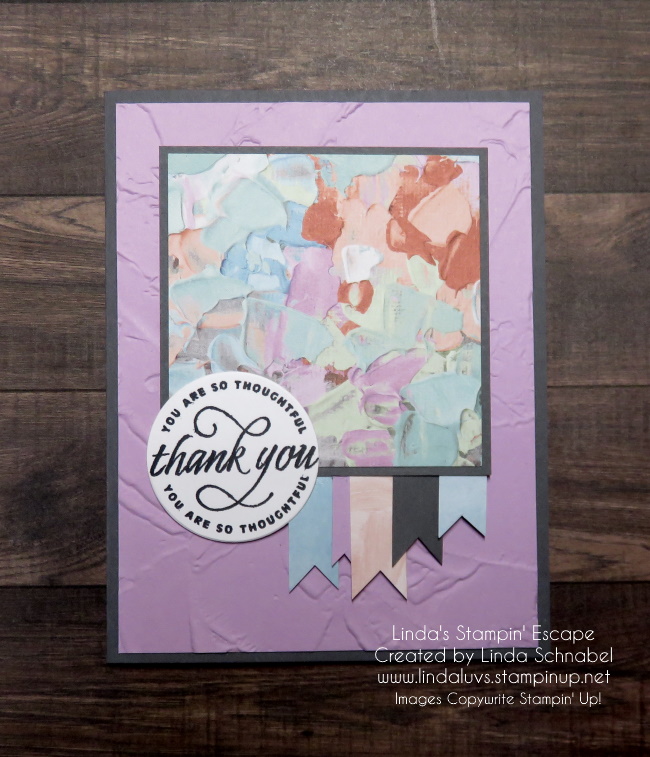
The card base is Basic Gray and the card front is Fresh Freesia and then embossed with the Textured Paint Embossing Folder. I used the Balmy Blue, Basic Gray, and Fresh Freesia scraps to make my banners and the greeting comes from the Tulip stamp set.
Hope you enjoyed taking a peek at my quickie cards! We only have a few more days until the new catalogs go LIVE. I just adore those Adorable Owls and now you have seen that you can go from “fancy” to “fun” with the Fancy Flora designer paper.
Have a Happy New Year and a great day ~