Hello my Stampin’ Friends ~ Just want to wish you a beautiful Christmas Day with family / friends or however you spend your day.

May Gods Blessings be with you!


Hello my Stampin’ Friends ~ Just want to wish you a beautiful Christmas Day with family / friends or however you spend your day.
May Gods Blessings be with you!
Merry Christmas Eve my Friends ~
I hope everyone is fairing well in this crazy weather … I’m not the biggest fan of snow and cold, but it’s crazy cold here! I had to take a little break to warm up so I made some “Christmas Poke” Cake and Deviled Eggs for the family get together.
Today I’m highlighting the “Perched in a Tree” bundle. Let’s get started 🙂 The first card was cased from Pinterest and I just loved the cool color and blue and paired with white.
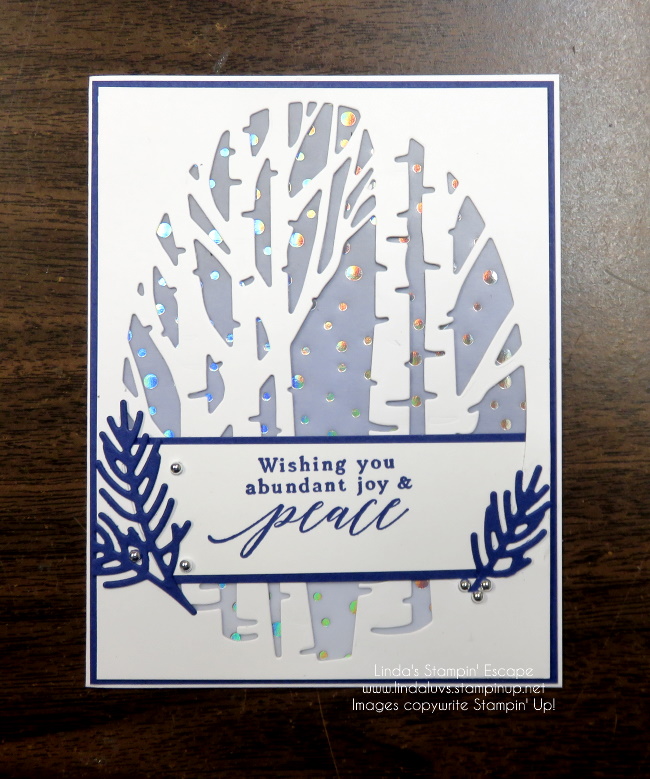
Cardbase is your A2 size (8-1/2″ x 11″) and the die cut piece was cut to 4″ x 5-1/4″ and so was the pretty Snowflake Specialty Vellum, which is also on the Last Chance List 😦 The blue is the Starry Sky … so pretty. This is a great card choice if you like layers but need something on the simple side to get your Christmas cards done quickly.
My next card I changed up to show this beautiful bundle can be kept in your stamp collection all year long ….

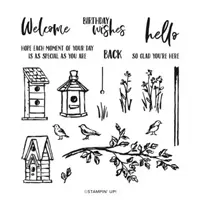
With a simple change of sentiment you can change the entire feel of your card, and easily turn this from a Christmas card to a Birthday Card!
Thank you for spending a part of your day with me, enjoy this holiday with your family and friends ~
Hello Stampin’ Friends ~
I was assembling my October kit and noticed a bag of “Gnomes” that I had pre-die cut so … I thought what more fun than a sleigh ride than invite my die cut gnomes to join Santa Claus!! lol Here are the original cards from the kit (upper left hand) and my Gnomes cards (lower right).
Let’s begin by sharing a little JOY ….
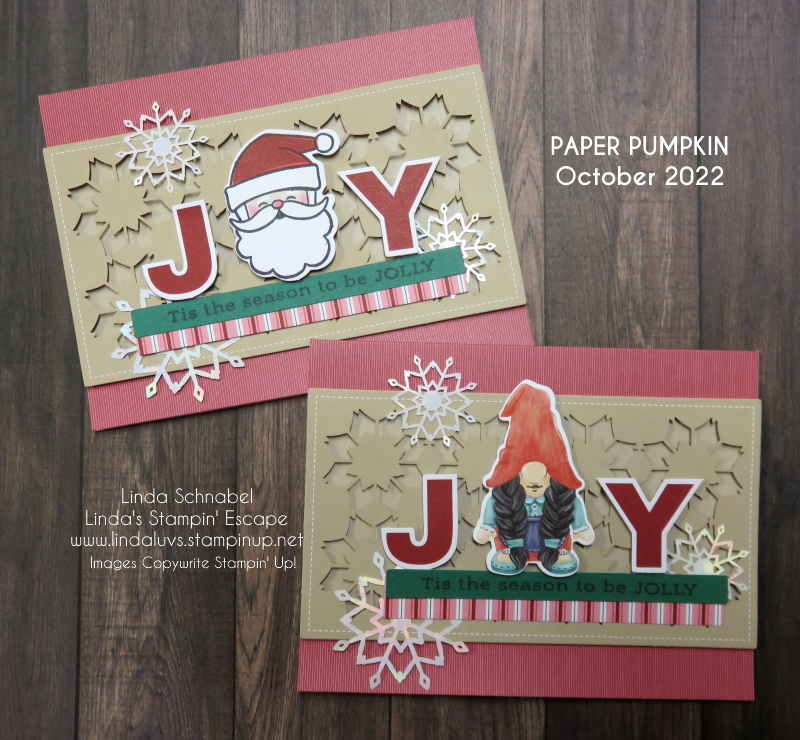
The kit had 3 different designs so on my next card “Santa Clause is Comeing to Town) I did change up the layout a little bit ….

Just a little change on the next card …. Have a Merry Christmas my friends!

Just in case you wanted to view the video … I added it for you to see ….
Thank you for the visit … I appreciate it.
Hello Stampin’ Friends ~
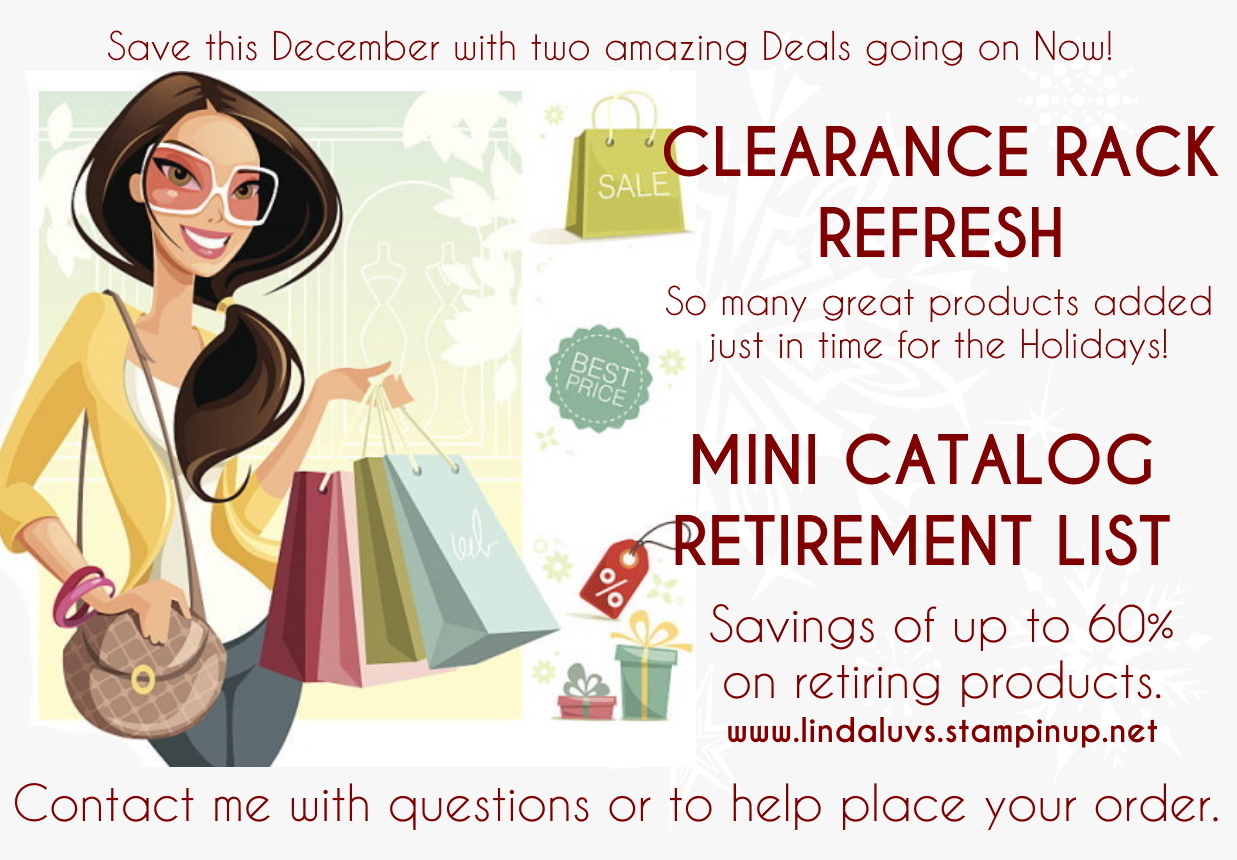
The clock is ticking—it’s your last chance to save up to 60% on retiring items! On 4 January 2023, the Last Chance Products promotion will come to an end.
Before then, be sure to stock up on your favorite products before they’re gone for good! Don’t delay—this selection of Last Chance Products is only available while supplies last.
For all the details about this steal of a deal—and the information you need to promote these products to your customers—visit My Page Here
I’d be happy to help you with any of your stamping needs … just message me below.
Thank you!
Hello Stampin’ Friends ~
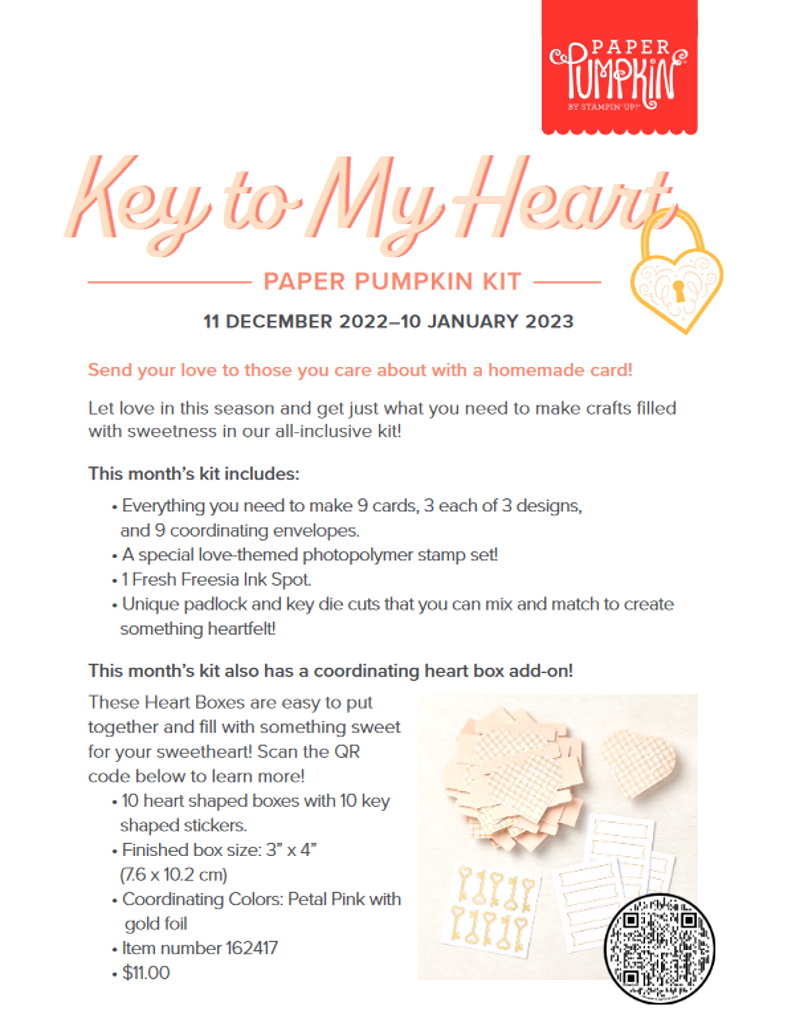
Today I have the December Paper Pumpkin …. Create fun gift card holders to help you celebrate your special occasions all year long! Personalize each gift with these reversible boxes and paper bands for a unique design every time. No matter what the occasion or who the recipient is, this is a coordinated paper craft that everyone will love and appreciate!
This kit includes:
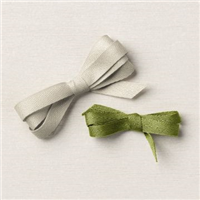
*Good Things Come in Small Packages Photopolymer Stamp Set *Garden Green Classic Stampin’ Spot *16 gift card holders: 2 each of 8 reversible designs *Precut paper pieces, twine, and belly bands to customize all your crafts. *Enough adhesive for each project! *Finished box size: 3-5/8″ x 2-1/2″ x 1/2″ (9.2 x 6.4 x 1.3 cm)
Coordinating Stampin’ Up! colors: Balmy Blue, Basic Gray, Blushing
Plus, this month you can take your crafting even further with a special add-on! Give a gift card and a personalized card with the Good Things Cards & Envelopes add-on. You get 20 cards (5 each of 4 designs) and 20 coordinating envelopes. Add-ons are only available while supplies last so make sure to get yours today.
Our January Paper Pumpkin kit and is available to subscribe to now …

Hello Stampin’ Friends ~
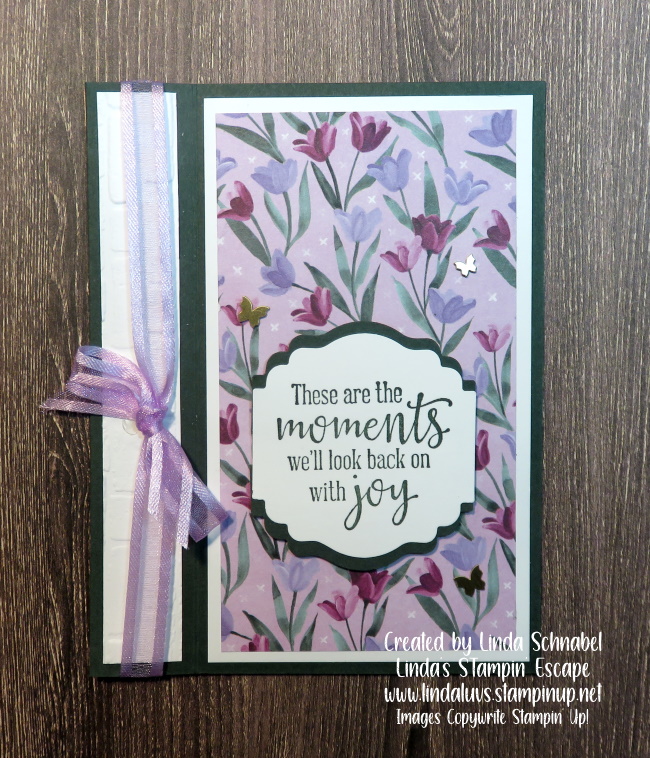
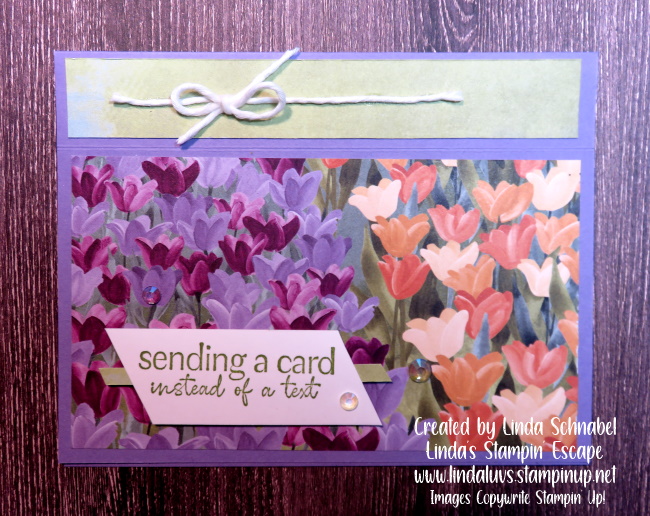
With the holidays upon us, are you ready for the Good Feelings and Peaceful Moments? Well … I’m combining these two stamp sets to create a fun and happy Birthday Card! I made this card for my Demonstrator Design Team this month.
The Tahitian Tide Designer Paper makes this card bright and fun! Check it out. I’ll be sharing instructions and the dimensions with you as well …

To create this card I am listing the measurements and instructions, plus the supplies needed … they are listed below and linked to my store so you can learn more about the product.
Measurements:
Instructions:
This sweet and fun card is sure to bring a smile to anyone’s face … young or old. And if you’re like me, you sure don’t mind a little sunshine when there is blizzard warnings lurking about!
Thanks for the visit today … I hope you feel inspired to create a little sunshine today!
Here is my supply list for you …. If you don’t have some of the supplies, you can click on them for more information or to add it to your shopping cart. Thank you.
Hello Stampin’ Friends and Happy Monday ~
Today I’m going to share my replay of this Quick & Easy Fun Fold and all the dimensions and instructions with you because it highlights one of our beautiful designer papers that resurfaced in our Clearance Rack!! If you already have this pretty paper then here is a video and the two cards I made.

Let’s take a look at the video now …
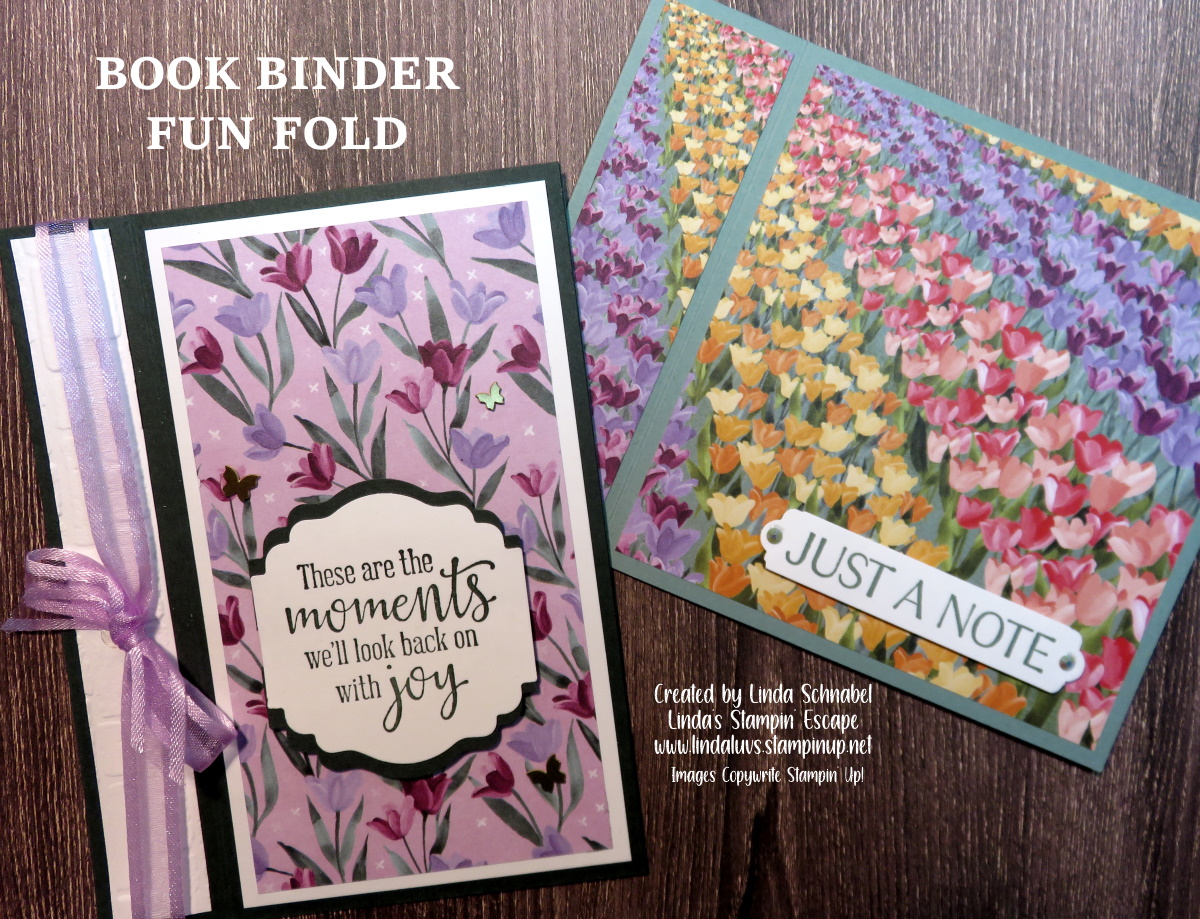
Book Binder Fun Fold … Super Simple!
HORIZONTAL PROFILE (Above) How It’s Made
PORTRAIT PROFILE (Above) How It’s Made
Cool … right! Now, let me share another layout you can use when creating the Book Binder Fun Fold. It’s another portrait however the card stock is cut at the usual 8-1/2″ x 5-1/2″ and it is scored at the 4-1/4″ and 5-1/4″ … now you will just position your “binder” to the “TOP” of your card.
The designer paper is cut at the same dimensions as well … however, you need to make sure you are “cutting” to the designer of the paper. On this card, my “binder” actually has the same designer paper, I just flipped it over. The greeting also comes from the Flowing Flowers stamp set, same as we used on our first card.
Enjoy making this fun fold … it’s really easy, and you’re going to have a blast creating with all your beautiful designer papers. Don’t forget, you can add in your embossing folders, die cuts or hand stamped items!

TODAY’S STAMPIN’ SUPPLY LIST … If you liked the products used in today’s projects, I have links for you below. Just click on the item you would like more information on, or to begin your shopping. It will take you directly to my website. Thank you ❤
Hello Stampin’ Friends ~
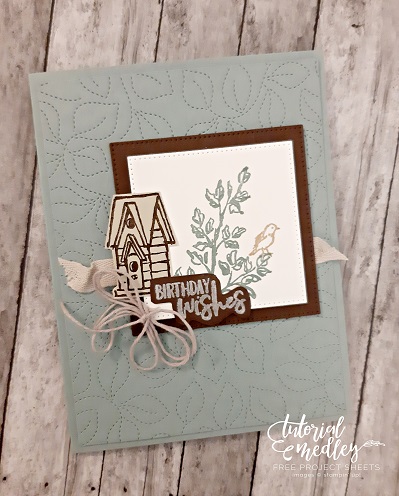
I’ve got the cutest card to share with you today along with a full set of dimensions and the step by step instructions!! If you don’t have the Garden Birdhouse stamp set, substitute it with something else because this is a “great layout”!
Measurements:
Instructions:
Thank you my friends for joining me today. Have a wonderful Sunday ~
Here is a list of the items used in today’s card ….
Hello Stampin’ Friends ~
I thought we’d step away from “Christmas” and I would share a nice Masculine card created by one of my Design Team members …. I’m also including the Step by Step instructions.

Instructions:
Thank You for stopping by ~
Hello Stampin’ Friends ~
I’m thrilled to share with you my “finished” cards from last nights Facebook LIVE presentation. I will not be sharing the video here today, not my best moment! Right before I went Live … I dropped all the parts to my card, so let’s just say “I had a few pieces missing” and I was a bit flustered BUT the cards turned out awesome and I can’t wait for you to see them!
Let’s begin with our first card … and I will include the measurements!
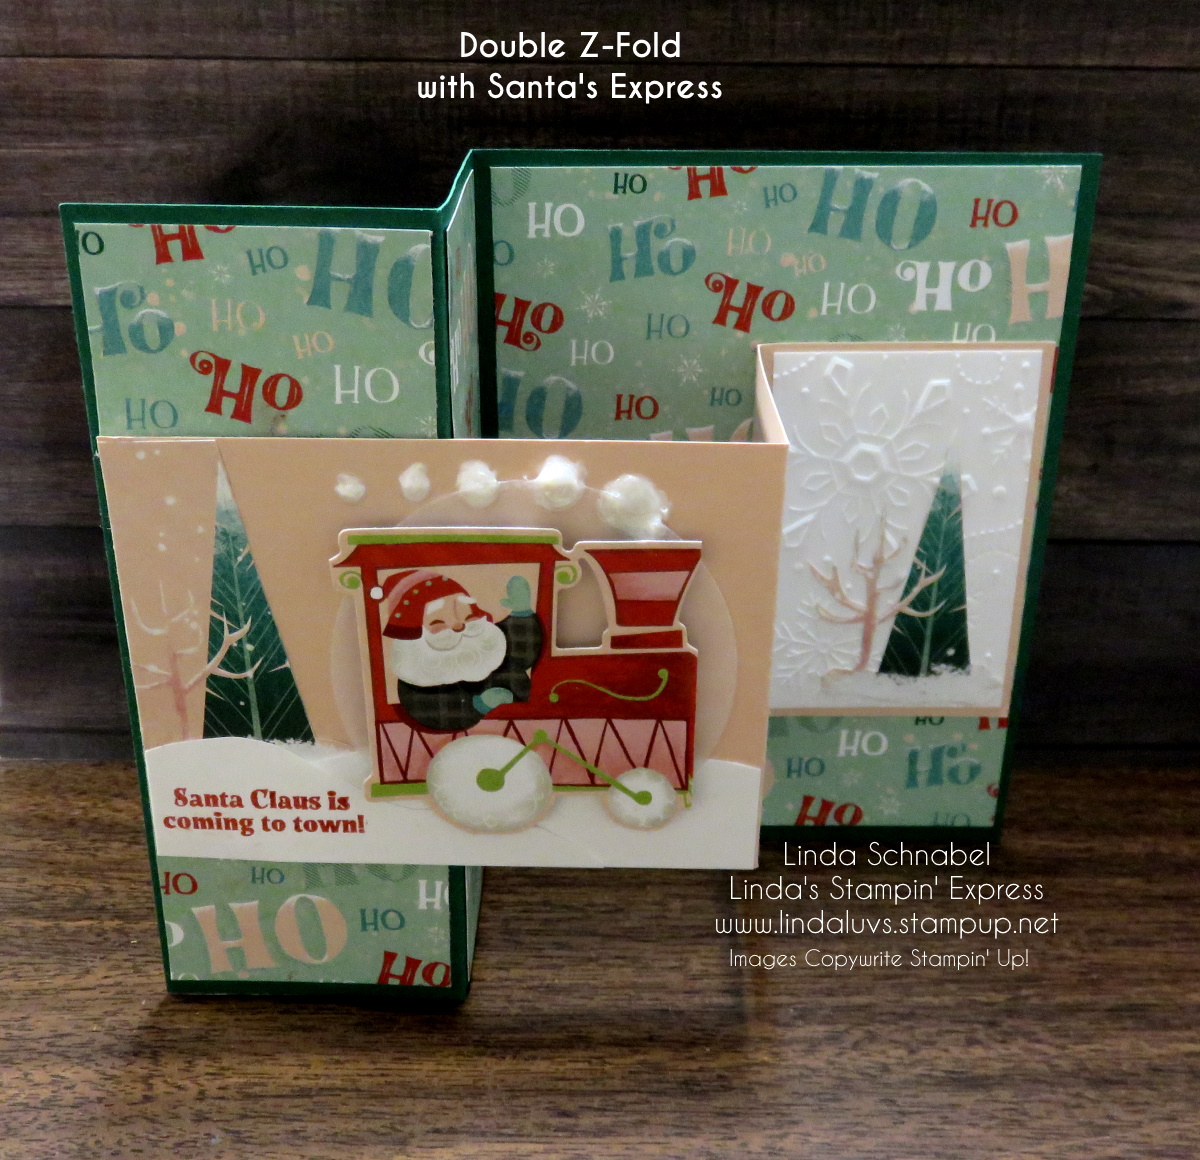
My card base is Shaded Spruce and is cut 8-1/2″ x 5-1/2″ … Score at 2-1/8″ and 4-1/4″. You will fold the card in half at the 4-1/4″ score and then fold the front “back onto itself” at the 2-1/8″ score line. The first two panels were cut to 2″ x 5-1/4″ and then cut your designer paper to 5-1/4″ x 4″ for the larger area.
Your second “Z” is Petal Pink and cut 8-1/2″ x 3″ and will be scored at 4-1/4″ and 6-3/8″ (or use the dimensions above … just flip it around). From a piece of scrap … I cut some snow on the bottom of my larger front panel and then glued a piece of the designer paper (with tree) into the upper left hand corner.
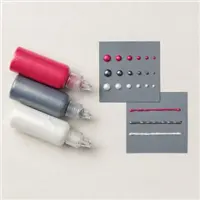
I die cut the Santa and the vellum circle behind him. Sink of Stella was added to the snow on the ground and on my trees. Then I stamped my greeting into the corner with Poppy Parade. My smoke puffs were created using the Pearlized Enamel Effects.
The two Basic White panels are cut to 2-7/8″ x 1-7/8″ for the smaller panels and the one of the far right is embossed with the Wintry Embossing Folder and I fussy cut a tree to match the one on the front panel. The center panel was left plain so you could write your sentiments in there.
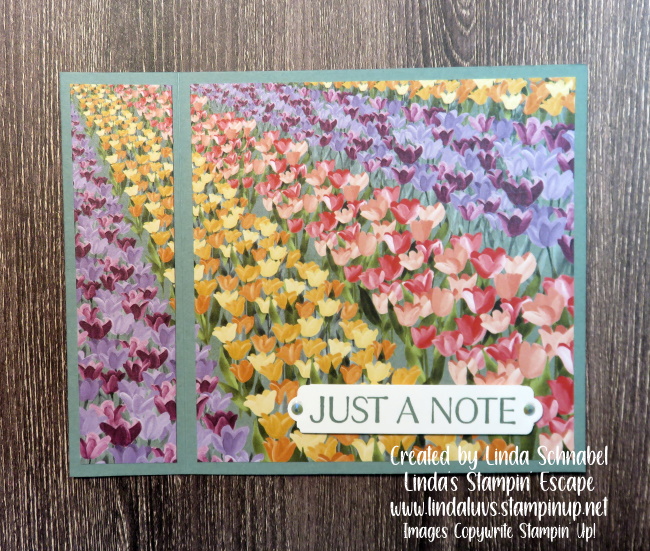
My second card has the card base cut lengthwise on the 11″ x 4-1/4″ ….

The card base is Shaded Spruce and scored at 2-3/4″ and 5-1/2″. I began with cutting panels for my card … two at 4″ x 2-1/2″ for the two smaller panels and the two at 4″ x 5-1/4″ … one for the front and one for the back if you’d like to write a note to the receiver.
I used the designer paper that has the four backgrounds … it cuts to 3″ x 12″. I cut it down starting from the “right” because I liked the pattern better!! With 3″ tall, I made my first cut at 4″, then the next two panels to 2-1/2″ Now you can secure them to the panels aligning from the top. The gap will be covered by your second “Z” which is placed near the bottom, where as our first card we centered the “Z”.
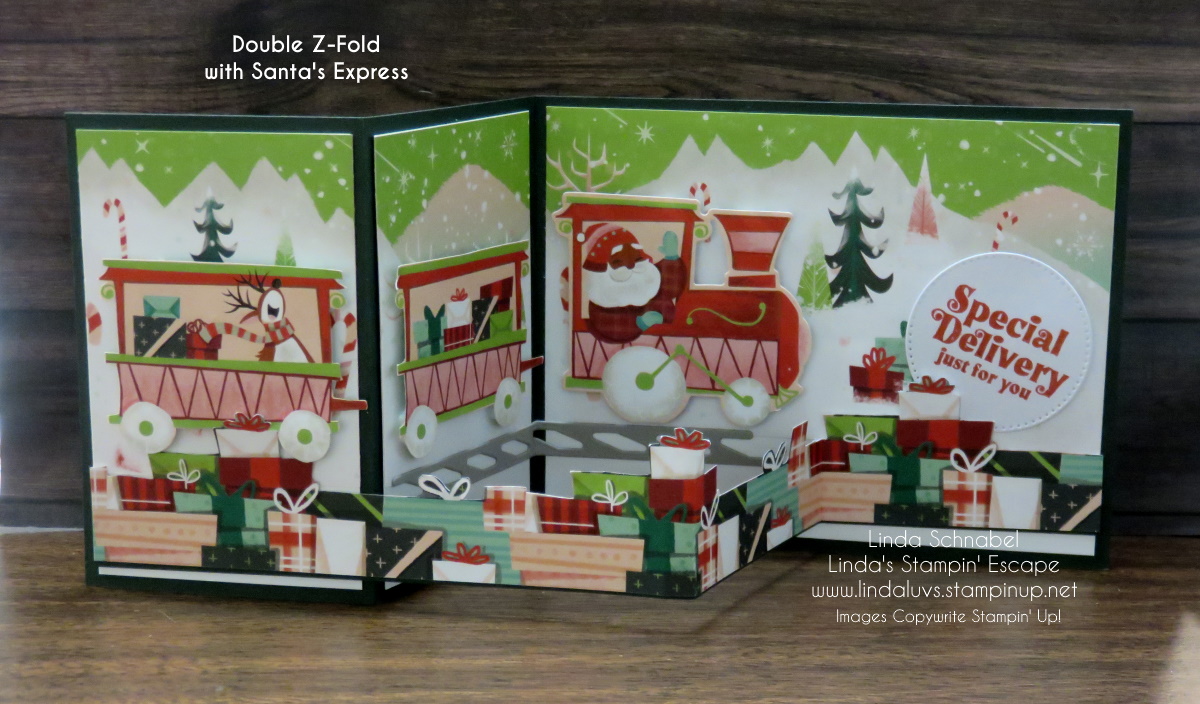
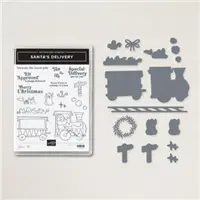
The second “Z” is cut to 11″ x 3/4″ … then our “Presents” Designer paper is fussy cut to about 1-1/4″. Then attach it to your second “Z”. I then die cut the 3 train parts from the Santa’s Express designer paper and the train tracks. The train cars are all popped up to give it some dimension and then I added the tracks.
I stamped my greeting Poppy Parade and die cut it and tucked it behind my “Z”. Looks like Santa has some fun coming down those tracks … even his reindeer is along for the ride!! The Santa Express Designer Paper is sooo fun to create with. It’s ON SALE for Only $7.20!! Don’t wait to get yours, it will be gone. Grab it now while we have FREE SHIPPING … Today Only.

I can’t promise it will arrive before Christmas but it’s a great time to enjoy some savings. Let me know if you would like some help.
Thank you for joining me today, I enjoyed sharing these cards with YOU!
Here is a list of supplies used to create today’s cards …. Click on the image for more information on that product or begin your purchase.
Hello Stampin’ Friends ~
I have two super cute cards to share with you today … Both from suites that I purchased from the Mini Catalog (retiring soon) because I just had to have them. With all my grands and greats they are just what my stampin’ stash needed … something for kids! Please not these cards were created by my stampin’ sisters from the Design Team I am on.
First up the amazing Santa’s Express ….

The adorable back ground comes from the Santa Express Designer paper … as does Santa! He was cut out using the coordinating dies. He is popped up on a layer Petal Pink and Evening Evergreen die cut from the Layering Circle dies.
The greeting comes from the Jingle Jingle Jingle stamp set (also in the mini pg.26) Stamp “tis the season to” with Evening Evergreen ink on Basic White layer masking off the word “be” with a post it note. Stamp the outline of “Believe” with Poppy Parade and the inside with Petal Pink.
Now this next card is for my Gnomies ….

Our second cute card was created with the Kindest Gnomes and Christmas to Remember stamp sets. The multi pattern designer paper makes for a fun background and comes from the Storybook Gnomes Designer paper.
Cut the largest circle from the Stylish Shapes Dies in Basic White cardstock and stamp the sentiment in Poppy Parade ink. The gnome is stamped in Memento ink and is colored using Stampin’ Blends then cut out.
Thanks for stopping by and checking out these little cuties … Don’t forget to LIKE my blog is you liked these cards as much as I did.
Have a great day ~

Here are the main supplies used to create these cards …. If the designer papers do not show, it’s because they have SOLD OUT already.
Hello Stampin’ Friends ~
Time for you to stock up and save on your favorite Stampin’ Up! products! What’s the occasion? Starting 15 December 2022 and for one day only, everyone is eligible for FREE shipping on orders subtotaling $75 or more. So don’t wait another minute! It’s just in time for Christmas …

Let’s not forget the amazing SALES going on right now too! We have our Retiring Products with some listed at up to 60% savings and our Clearance Rack that has just been updated. There are still fabulous items left including great designer papers, including one for Valentines Day.
With FREE SHIPPING … these items are really going to fly off the shelves now!
Please let me know if I can help you in any way! Thanks you for checking out this amazing deal.
Hello Stampin’ Friends ~
Today I had a request to share how I created a cute little Gift Basket from the Pillow Box Die … You’ll be surprised at how easy this is to make! The designer paper being used is discontinued but if you have this die … you can create baskets for ANY occasion!
I have the dimensions for the inner box in the video but I thought I would share them again. Start with a 7-1/4″ x 5-1/2″ piece of cardstock and score at 2″ on all for sides. Then you will cut on the score lines on the 7-1/4″ length sides (ref. Video) You should have also seen the cute little baskets I made for the Mantle Gifts for my Holiday Stampin’ Retreat!

The ladies watching LIVE had plenty of ideas they could use these for … Baby Showers, Wedding Showers, Birthday Parties, on the table for the Holiday’s … a teachers Gift or a cute little gift for a co-worker. The possibilities are endless, and that cute little basket is priceless!
I have listed the ingredients below for your shopping convenience. Let me know if you have any questions.
Thank you so much for joining me today!

Hello Stampin’ Friends ~
On Tuesday I shared the Twisted Ribbon Technique with you which included a video replay of my LIVE presentation … TODAY I want to share how to use the left overs of that Pretty Paper to make quick cards.
I shared how I save 3″ x 3″ squared when cutting, now let’s see how those make simple and quick cards. Great way to get those Christmas cards done if you haven’t!! (I know that feeling). Simple does not mean that your cards can’t be pretty.
Here we have our 3″ x 3″ square in it’s simplest form ….
An easy way to step up your card is simply stamp a background … You could even use an embossing folder to add texture instead of ink. The greeting ends were punched to create a tag, and anchored with embellishments.

If you didn’t catch my LIVE presentation or did not take a look at the video yet, here it is ….
Sometimes it’s just nice to create cards with our scraps / leftovers that are easy, and simple … and pretty!
Thank you so much for joining me! Have a wonderful day.
Hello Stampin’ Friends ~
I little change of plans today. Instead of the final holiday project, I’ve decided to share a “Masculine” Twisted Ribbon technique. Readership has been going down with the 12 days so I thought you might find this more appealing.
This is one of the cards that we made at our December Stamp Club …

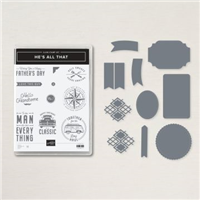
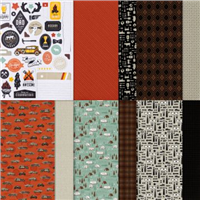
I used the He’s All That bundle and the He’s the Man Specialty Designer Series paper. This patterned paper is packed with bold patterns in neutral colors. Choose from antique cars, camping gear, suits and ties, and more. You’ll also find versatile patterns such as diamonds, stripes, and plaids. Mix and match the patterns with the coordinating die-cut images.
This papercrafting staple is great scrapbook paper, card making paper, and more! Ask your demonstrator about coordinating products.
I hope you enjoyed a different version of this fun technique. If you missed the video, you can see it HERE.
Here are the links to the products that I used in today’s card ….